
ORH 450 X - Refrigerator Orima - Free user manual and instructions
Find the device manual for free ORH 450 X Orima in PDF.


| Product Type | Freestanding Fridge-Freezer Combi, No Frost |
| Model | ORH 450 X |
| Brand | Orima |
| Total Net Volume | 362 L (Fridge 237 L, Freezer 125 L) |
| Dimensions (H x W x D) | 1800 x 790 x 620 mm |
| Energy Class | F (EU 2019/2016) |
| Annual Energy Consumption | 328 kWh/year |
| Climate Class | SN, N, ST (extended temperate, temperate, subtropical) |
| Noise Level | 40 dB(A) - Class C |
| Defrost Type | Auto-defrost (No Frost) for both compartments |
| Control Type | Electronic with LED display |
| Temperature Range (Fridge) | 2°C to 8°C (adjustable) |
| Temperature Range (Freezer) | -14°C to -22°C (adjustable) |
| Special Modes | ECO mode, Super mode, Fast Freeze, Fast Cool |
| Fresh Zone | Adjustable temperature control (crisper or chill) |
| Door Open Alarm | Yes, after 90 seconds |
| Leveling | Adjustable feet and C-type washers for door alignment |
| Freezing Capacity | 10 kg/24h |
| Light Source Class | G (if present) |
| Guarantee | 24 months (manufacturer) |
| Recommended Settings | Fridge: +4°C, Freezer: -18°C |
Frequently Asked Questions - ORH 450 X Orima
User questions about ORH 450 X Orima
0 question about this device. Answer the ones you know or ask your own.
Ask a new question about this device
Download the instructions for your Refrigerator in PDF format for free! Find your manual ORH 450 X - Orima and take your electronic device back in hand. On this page are published all the documents necessary for the use of your device. ORH 450 X by Orima.
USER MANUAL ORH 450 X Orima
MANUAL DE INSTRUÇÕES
INSTRUCTION MANUAL LIVRE D'INSTRUCTIONS LIBRO DE INSTRUCCIONES
www.orima.pt
facebook.com/orima.pt
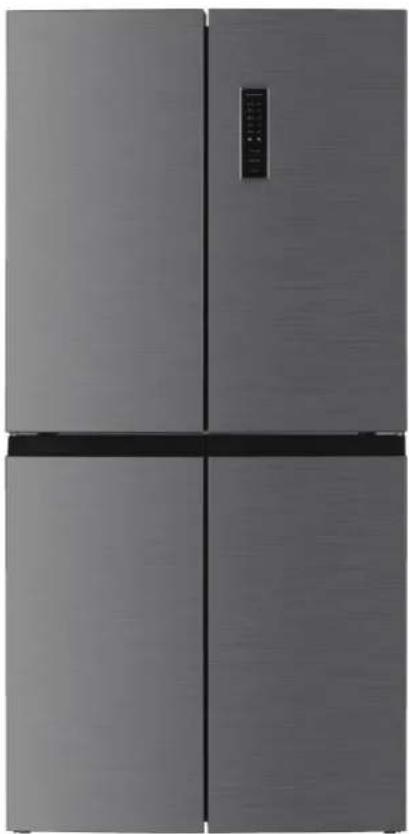
natural_image
Exterior view of a modern stainless steel refrigerator with four doors and a control panel (no visible text or symbols)
FRIGORÍFICO
natural_image
3D diagram of a cabinet inside a room with an upward arrow indicating direction (no text or symbols)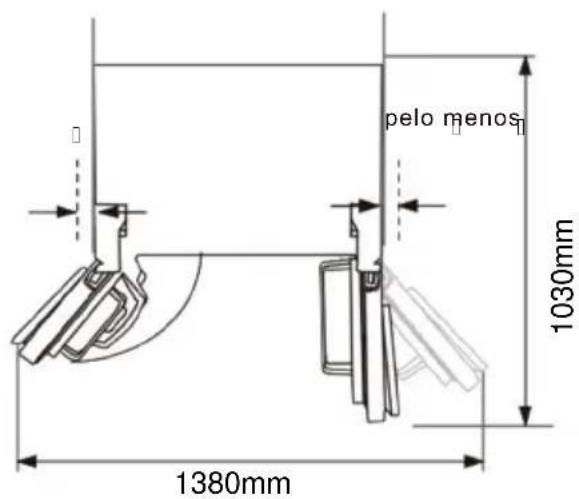
natural_image
Technical line drawing of a rectangular device with internal channels and an oval-sectional view showing internal components (no text or symbols)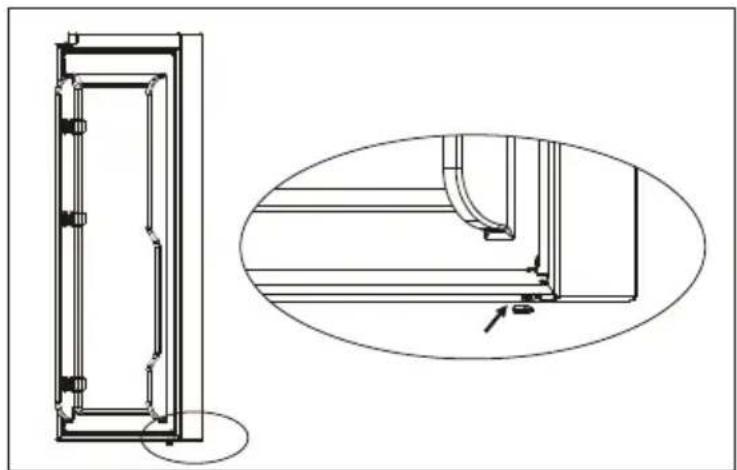
natural_image
Technical line drawing of a door frame and its side view, showing internal components and mounting points (no text or symbols)natural_image
Simple line drawing of a funnel shape with food items (steamed fish, apple, carrot) below, no text or symbols present.Limpeza
Combi Fridge Freezer No-Frost
ORH 450 X
| Content | |
| 1. Safety Information Page 1~9 | |
| 2. Overview Page 10 | |
| 3. Installation | Page 11~14 |
| 4. Daily Use | Page15~20 |
• □
□ □
• • • •
•
•
!
!
process, other
!
!
!


•
•
•
•
•
!
CE
!
!
• •
•
•
•
•
•
•
•
•
•
recommendations


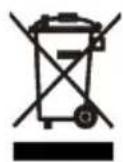

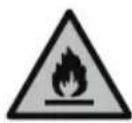
!
During using, service and disposal the appliance, please pay attention to symbol similar as left side, which is located on rear of appliance (rear panel or compressor) and with yellow or orange color.
It's risk of fire warning symbol. There are flammable materials in refrigerant pipes and compressor.
Please be far away fire source during using, service and disposal.
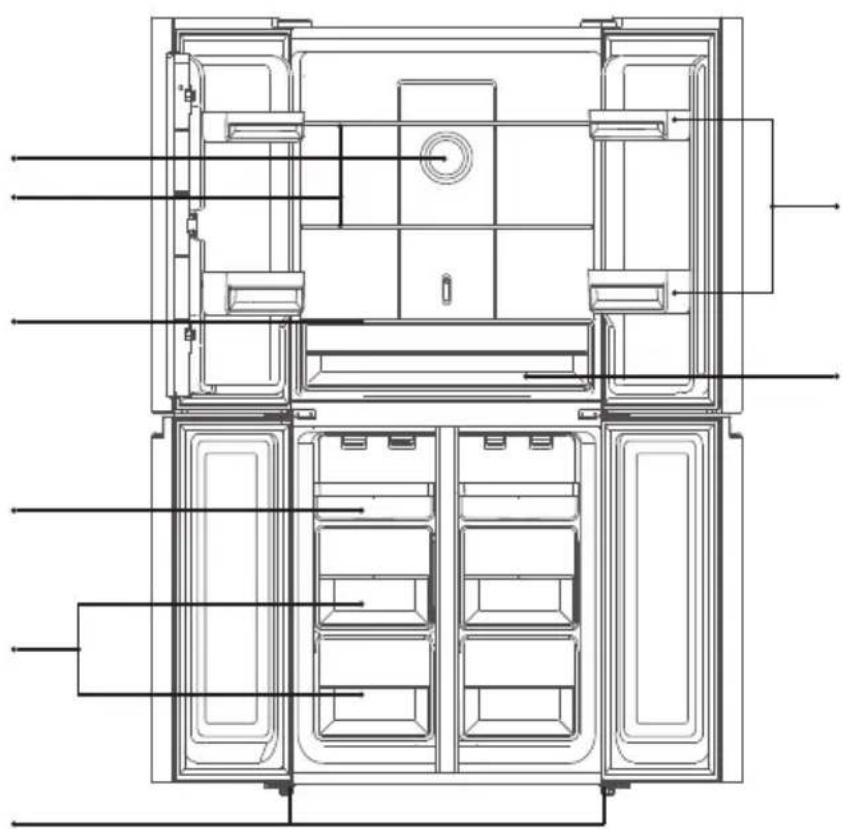
natural_image
Technical line drawing of a multi-level refrigerator or oven unit with internal compartments and doorways (no text or labels)Note: Above picture is for reference only. Real appliance probably is different.
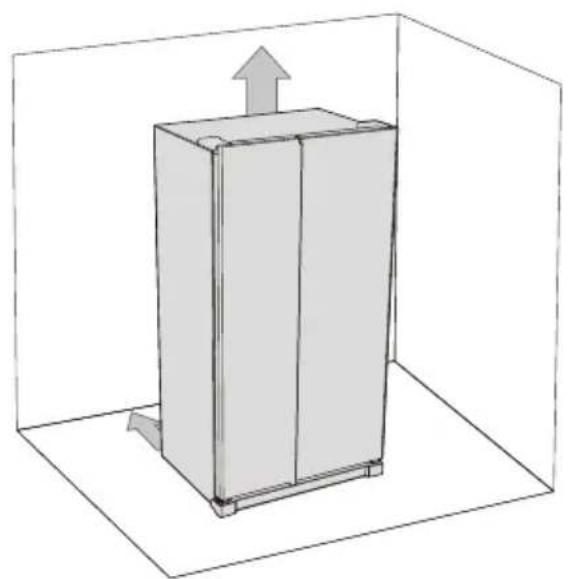
natural_image
3D diagram of a rectangular cabinet inside a transparent enclosure, with an upward arrow indicating motion or force (no text or symbols)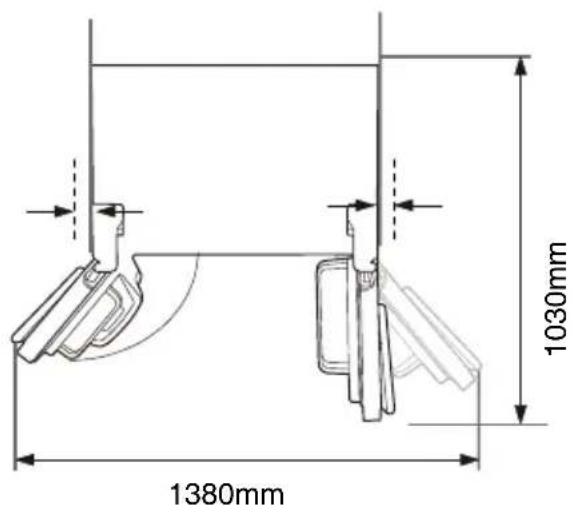
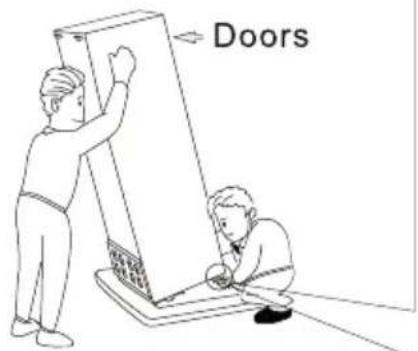
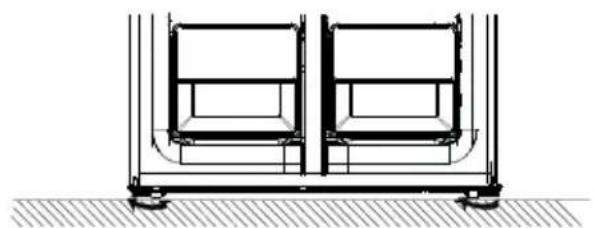
natural_image
Technical line drawing of a mechanical frame assembly with two vertical supports and a base, showing no text or symbols.- Leveling and anchor the refrigerator by adjust the feet.
- Clockwise rotate feet to heighten them by hand.
-Anticlockwise rotate feet to lower them by hand.
Level doors
After transportation or door balconies are loaded by food or beverage, upper two doors may not be aligned. There are 3 C type washers which are used to adjust doors. Please follow below process to level doors.
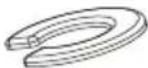
- If top of upper two doors looks not in a line, please slightly lift lower door and insert a pieces of C type washer by a clip between bottom of door and middle hinge.
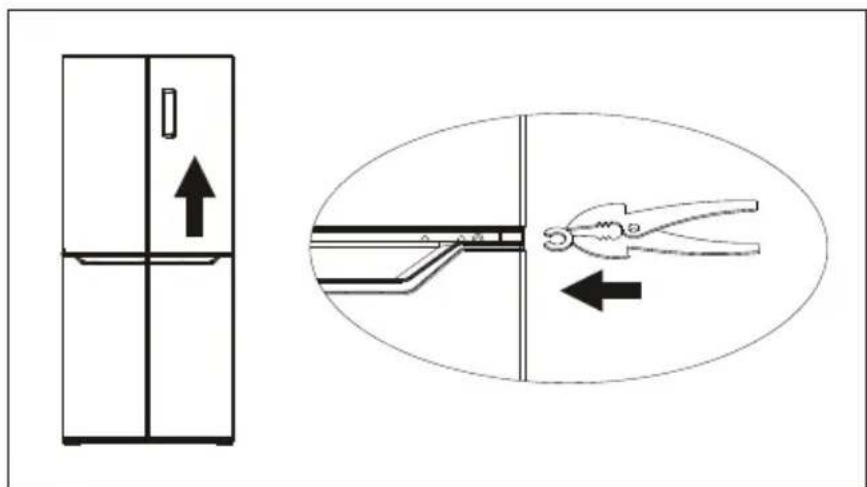
⚠ WARNING! Please be careful to avoid fingers are clipped by door. Please use tool.
⚠ WARNING! Please keep C type washers far away children to avoid them are swallowed by children. They are small parts.
Rubber blocks
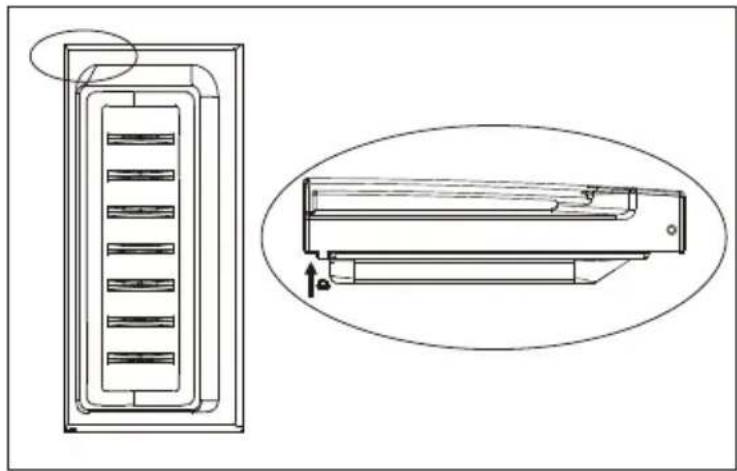
There is one rubber block on each door. They function as spring to relieve impact when door closes.
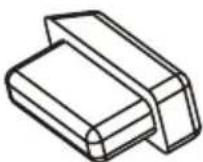
Please not pull the rubber blocks. If they absent from the doors, please take one from accessory bag and insert it to the hole of door.
natural_image
Technical line drawing of a mechanical component with an inset view showing internal structure (no text or symbols)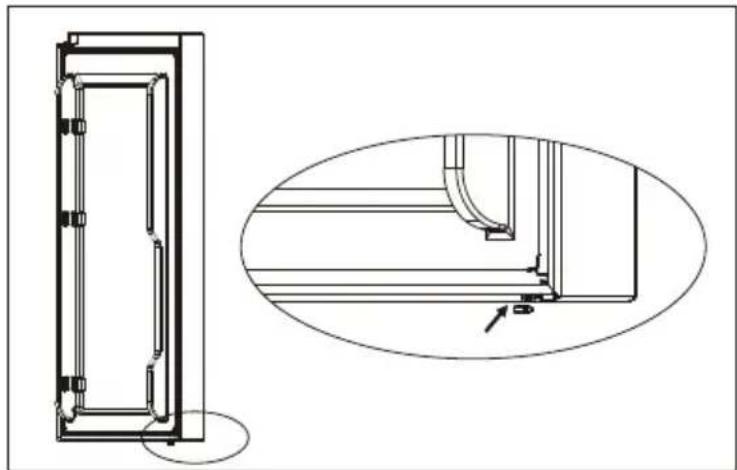
natural_image
Technical line drawing of a door frame and a corner bracket assembly (no text or symbols)WARNING! Please keep rubber blocks far away children to avoid them are swallowed by children. They are small parts.
natural_image
Two vertical grayscale horizontal bands with no text or symbols
Using the Control Panel
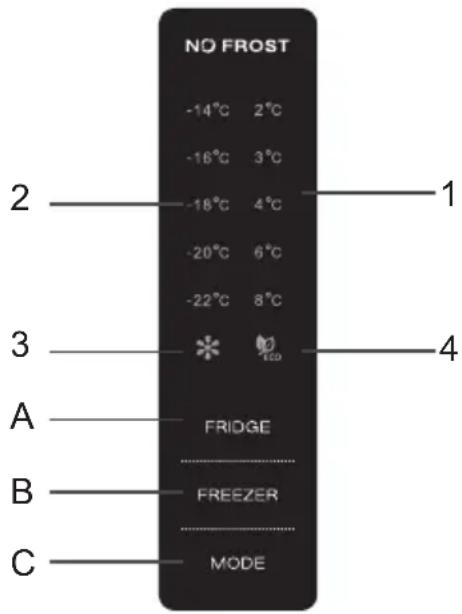
A. Temperature Control of Fridge Compartment
B. Temperature Control of Freezer Compartment
C.Mode
1.2 LED DISPLAY
- Temperature of Fridge Comparment
- Temperature of Freezer Comparment
- Super Mode
4.ECO Mode
The control panel will be 100% lit up for 3 seconds after power on, and then show previous setting temperature or running mode before power off. After that, you can adjust temperature of freezer or fridge compartments or running mode.
2.1 DISPLAY
2.1.1 The panel will be lit up for 2 minutes once the door of fridge compartment is opened.
2.1.2 The panel will be lit up by any button operation whereas the light would be out 2 minutes after the last operation.
2.1.3 Display during normal operation
Temperature Display of the Fridge Compartment: Indicating the temperature of the current setting.
Temperature Display of the Freezer Compartment: Indicating the temperature of the current setting.
3.0 BUTTONS
3.1 FRIDGE
Press FRIDGE button to adjust temperature of fridge compartment in user mode or SUPER mode. Touch the button consecutively, the temperature will change in a circle of “2°C, 3°C, 4°C, 6°C, 8°C, the selection will be confirmed after 5 seconds of flash of fridge temperature icons. In ECO mode, this button is not react.
3.2 FREEZER
Press FREEZER button to adjust temperature of freezer compartment in user mode. Touch the button consecutively, the temperature will change in a circle of “-14°C, -16°C, -18°C, -20°C, -22°C, the selection will be confirmed after 5 seconds of flash of freezer temperature icons. In ECO and SUPER modes, this button is not react.
3.3 MODE
Press MODE button to select running mode: ECO, SUPER and user mode. Once select ECO mode, ECO icon will be lit and other icons will be switched off. Once select SUPER mode, SUPER icon and Fridge temperature icon will be lit, other icons will be switch off. Once select user mode, you can adjust temperature of fridge and freezer compartments by press FRIDGE and FREEZER button.
4.0 ECO MODE
Press MODE button to select ECO mode, ECO icon will flash 5 seconds and then ECO mode is confirmed. In ECO mode, the appliance will automatically set temperature of freezer and fridge compartments according to ambient temperature. Press MODE button to select other running mode to exit ECO mode.
5.0 Super mode
Press MODE button to select Super mode. And it will be confirmed after 5 seconds of flash of Super icon.
In Super mode, "FREEZER" button will not response any press.
To exit Super mode,
- Adjust mode by MODE button,
- Or after 50 hours of Super mode, the refrigerator will automatically stop it and enter to previous setting.
Helpful hint:
If you plan to freeze a large number food in one time, please set Super mode 24 hours ahead.
Warning:
In Super mode, the refrigerator will work hard. So the noise of refrigerator will be slightly higher than normal running.
6.0 Door Open Alarm
If fridge (upper) door keeps open for 90 seconds, periodical alarm will be arisen until the door is closed.
First use
Cleaning the Interior
Before using the appliance for the first time, wash the interior and all internal accessories with lukewarm water and some neutral soap so as to remove the typical smell of a brand new product, then dry thoroughly.
Important! Do not use detergents or abrasive powders, as these will damage the finish.
Daily use
| Refrigerator compartments | Type of food |
| Door or balconies of fndge compartment | ·Foods with natural preservatives, such as jams, juices, drinks, condiments·Do not store perishable foods. |
| Crisper drawer (salad drawer) | ·Fruits, herbs and vegetables should be placed separately in the crisper bin.·Do not store bananas, onions, potatoes, garlic in the refrigerator. |
| Fridge shelf – Fresh box | Raw meat, poultry, fish (for short-term slorage) |
| Fridge shelf – middle | Dairy products, eggs |
| Fridge shelf – top | Foods that do not need cooking, such as ready-to-eat foods, deli meats, leftovers. |
| Freezer drawer(s)/shelf | ·Foods for long-term storage·Bottom drawer/shelf for raw meat, poultry, fish·Middle drawer/shelf for frozen vegetables, chips·Top drawer/shelf for ice cream, frozen fruit, frozen baked goods. |
Freezing fresh food
- The freezer compartment is suitable for freezing fresh food and storing frozen and deep-frozen food for a long time.
- Place the fresh food to be frozen in the bottom compartment.
- The maximum amount of food that can be frozen in 24 hours is specified on the rating plate.
• The freezing process lasts 24 hours: during this period do not add other food to be frozen.
Storing frozen food
When first starting-up or after a period out of use. Before putting the product in the compartment let the appliance run at least 2 hours on the higher settings.
Important! In the event of accidental defrosting, for example the power has been off for longer than the value shown in the technical characteristics chart under "rising time", the defrosted food must be consumed quickly or cooked immediately and then re-frozen (after cooked).
Thawing
Deep-frozen or frozen food, prior to be used, can be thawed in the freezer compartment or at room temperature, depending on the time available for this operation. Small pieces may even be cooked still frozen, directly from the freezer. In this case, cooking will take longer.
Defrost Description (No Frost)
It is a total no frost refrigerator-freezer which will be defrosted automatically.
Helpful hints and tips
Hints for freezing
To help you make the most of the freezing process, here are some important hints:
- the maximum quantity of food which can be frozen in 24 hrs. is shown on the rating plate;
• the freezing process takes 24 hours. No further food to be frozen should be added during this period; - only freeze top quality, fresh and thoroughly cleaned, foodstuffs;
- prepare food in small portions to enable it to be rapidly and completely frozen and to make it possible subsequently to thaw only the quantity required;
- wrap up the food in aluminium foil or polythene and make sure that the packages are airtight;
- do not allow fresh, unfrozen food to touch food which is already frozen, thus avoiding a rise in temperature of the latter;
- lean foods store better and longer than fatty ones; salt reduces the storage life of food;
- water ices, if consumed immediately after removal from the freezer compartment, can possibly cause the skin to be freeze burnt;
- it is advisable to show the freezing in date on each individual pack to enable you removal from the freezer compartment, can possibly cause the skin to be freeze burnt;
- it is advisable to show the freezing in date on each individual pack to enable you to keep tab of the storage time.
Hints for storage of frozen food
To obtain the best performance from this appliance, you should:
make sure that the commercially frozen foodstuffs were adequately stored by the retailer;
be sure that frozen foodstuffs are transferred from the food store to the freezer in the shortest possible time;
not open the door frequently or leave it open longer than absolutely necessary.
Once defrosted, food deteriorates rapidly and cannot be refrozen.
Do not exceed the storage period indicated by the food manufacture.
Hints for fresh food refrigeration
To obtain the best performance:
- Do not store warm food or evaporating liquids in the refrigerator
- Do cover or wrap the food, particularly if it has a strong flavour
Hints for refrigeration
Useful hints:
- Make (all types): wrap in polythene bags and place on the glass shelves above the vegetable drawer.
- For safety, store in this way only one or two days at the most.
- Cooked foods, cold dishes, etc...: these should be covered and may be placed on any shelf.
- Fruit and vegetables: these should be thoroughly cleaned and placed in the special drawer(s) provided.
- butter and cheese: these should be placed in special airtight containers or wrapped in aluminum foil or polythene bags to exclude as much air as possible.
- Milk bottle: these should have a cap and should be stored in the balconies on the door.
- Bananas, potatoes, onions and garlic, if not packed, must not be kept in the fridge.
Fresh Zone Temperature Control
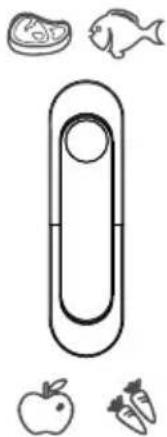
• Temperature of the fresh can be adjusted according to the type of storage food.
- Push the knob upward from the bottom, temperature in the fresh zone will be gradually decreased.
- When the knob is placed at the " 🔍 🔍 " position, the fresh zone can be functioned as a crisper zone and maintain the appropriate temperature and humidity for fruits and vegetable.
- When the knob is placed at the " 🔍 🔒 " position, it is suitable for short-term storage of fish or other fresh food. The food will keep fresh but not frozen which makes it the best choice for storing fresh food.
- Tips: When you choose " 🔍 🔍 🔍" function, it is recommended to set the refrigerator temperature below 4°C. and preserved lead-time no more than 3 days, in order to keep the best freshness.
FRESH
CONVERTER
natural_image
Simple line drawing of a fish inside a rectangular shape, with food items including a plate, fish, apple, and carrot below (no text or symbols)Cleaning
For hygienic reasons the appliance interior, including interior accessories, should be cleaned regularly.

Caution! The appliance may not be connected to the mains during cleaning. Danger of electrical shock! Before cleaning switch the appliance off and remove the plug from the mains, or switch off or turn out the circuit breaker or fuse. Never clean the appliance with a steam cleaner. Moisture could accumulate in electrical components, danger of electrical shock! Hot vapors can lead to the damage of plastic parts. The appliance must be dry before it is placed back into service.
Important! Ethereal oils and organic solvents can attack plastic parts, e.g. lemon juice or the juice form orange peel, butyric acid, cleanser that contain acetic acid.
- Do not allow such substances to come into contact the appliance parts.
- Do not use any abrasive cleaners
- Remove the food from the freezer. Store them in a cool place, well covered.
- Switch the appliance off and remove the plug from the mains, or switch off or turn out the circuit breaker of fuse.
- Clean the appliance and the interior accessories with a cloth and lukewarm water. After cleaning wipe with fresh water and rub dry.
• After everything is dry place appliance back into service.
Troubleshooting

Caution! Before troubleshooting, disconnect the power supply. Only a qualified electrician of competent person must do the troubleshooting that is not in this manual.
Important! There are some sounds during normal use (compressor, refrigerant circulation).
| Problem | Possible cause | Solution |
| Appliance dose not work | Mains plug is not plugged in or is loose | Insert mains plug. |
| Fuse has blown or is defective | Check fuse, replace if necessary. | |
| Socket is defective | Mains malfunctions are to be corrected by an electrician. | |
| Appliance freezes or cools too much | Temperature is set too cold or the appliance runs at SUPER modes. | Turn the temperature regulator to a warmer setting temporarily. |
| The food is not frozen enough. | Temperature is not properly adjusted. | Please look in the initial Temperature Setting section. |
| Door was open for an extended period. | Open the door only as long as necessary. | |
| A large quantity of warm food was placed in the appliance within the last 24 hours. | Turn the temperature regulation to a colder setting temporarily. | |
| The appliance is near a heat source. | Please look in the installation location section. | |
| Heavy build up of frost on the door seal. | Door seal is not air tight. | Carefully warm the leaking sections of the door seal with a hair dryer (on a coo setting). At the same time shape the warmed door seal by hand such that it sits correctly. |
| Unusual noises | Appliance is not level. | Re-adjust the feet. |
| The appliance is touching the wall or other objects. | Move the appliance slightly. | |
| A component, e.g. a pipe, on the rear of the appliance is touching another part of the appliance or the wall. | If necessary, carefully bend the component out of the way. | |
If the malfunction shows again, contact the Service Center.
These data are necessary to help you quickly and correctly. Write the necessary data here, refer to the rating plate.
This list provides all Eco-design requirements (following the (EU)2019/2019 Eco-design and (EU)2019/2016 Energy labelling), if the requirement is applicable to your product.
The refrigerating appliance is not intended to be used as a built-in appliance, unless specifically shown as such into its instruction manual.
The drawers, baskets and shelves should be kept in their current position unless otherwise specified in this document.
Doors and lids of the refrigeration appliance should be removed before disposal in the landfill, to avoid children or animals getting trapped inside.
Recommended setting:
Refrigerator compartment: +4°C
Freezer compartment: -18°C
FAST FREEZE
The use of this function is recommended when placing a very high quantity of food to be frozen in the freezer compartment. 24 hours before freezing fresh food, press the Fast Freeze button to activate the Fast Freeze function. When activated, the Fast Freeze indicator turns on. After 24 hours place the food to be frozen in the freezing zone of freezer compartment. The function is automatically disabled after 72 hours, or can be manually disabled by pressing Fast Freeze button.
FAST COOL
Using Fast Cool function it is possible to increase the cooling capacity in the refrigerator compartment. The use of this function is recommended when placing a very high quantity of food in the refrigerator compartment. Press the Fast Cool button to activate Fast Cool function. When activated, the Fast Cool indicator turns on. The function is automatically disabled after 6 hours, or can be manually disabled by pressing Fast Cool button again.
How to store foodstuffs:
To avoid food waste, please refer to the recommended setting and storage times:
Fridge compartment: Different food, especially vegetable and fruit, have different storage temperature. The storage time is 1 to 3 days (temp setting: middle)
Freezer compartment: 1 week (temp setting: Min) and 1 month (temp setting: Max)
To optimize freezing speed and get more storage space, the freezer compartment can be used without the freezer drawers.
The quantity of fresh food that can be frozen in a specific time period is indicated on the rating plate. Load limits are determined by baskets, flaps, drawers, shelves etc. Make sure that these components can still close easily after loading.
To avoid food waste, please refer to the recommended setting and storage times found in the user manual.
The model information can be retrieved using the QR-Code reported in the energy label.
The label also includes the model identifier that can be used to consult the portal of the registry at
https://eprel.ec.europa.eu
This product contains a light source of energy efficiency class G (if present).
| Model | ORH 450 X |
| Total Net Volume, L | 362 |
| Refrigerator Net Volume, L 237 | |
| Freezer net volume, L 125 | |
| Actual consumption depends on how the device is used and the location | |
| Energy Class based on EU 2019/2016 | F |
| Power Consumption: kWh/year 328 | |
| Climate class SN,N, ST_h /year | |
| Dimensions (A x L x P), mm 1800*795*630 | |
| Noise level, db(A) re 1pw 40 | |
| Electrical Information See in the product rating label | |
| Note: The manufacturer reserves the right to make future changes to the Specifications and technical parameters. | |
IMPORTADO POR: MÁRIO MIRANDA DE ALMEIDA, SA APARTADO 1, 3060-752 CORTICEIRO DE CIMA, PORTUGAL
COMMISSION DELEGATED REGULATION (EU) 2019/2016 with regard to energy labelling of refrigerating appliances
Supplier's name or trade mark: ORIMA
Supplier's address: MARIO MIRANDA ALMEIDA, SA, RUA PADRE BASILIO COSTA MORGADO 23/25, 3060-752 CORTICEIRO DE CIMA, PT
Model identifier: ORH 450 X
Type of refrigerating appliance:
| Low-noise appliance: No | Design type: | freestanding |
| Wine storage appliance:aNo | Other arefrigerating aappliance: | Yes |
General product parameters:
| ParameteraValueaParameteraValue | |||
| Overall dimensions (millimetre) | Heighta1 800 | Total volume (dm3 or l)a362 | |
| Widtha790 | |||
| Deptha620 | |||
| EEI | 125 | Energy efficiency class | F |
| Airborne acoustical noise emissions (dB(A) re 1 pW) | 40 | Airborne acoustical noise emission class | C |
| Annual energy consumption (kWh/a) | 328aClimate class: | extended temperate, temperate, subtropical | |
| Minimum ambient temperature (oC), for which the refrigerating appliance is suitable | 10 | Maximum ambient temperature (oC), for which the refrigerating appliance is suitable | 38 |
| Winter setting | Noa | ||
Compartment Parameters:
Compartment parameters and values
Compartment type
Compartment Volume (dm ^3 or l)
Recommended temperature setting for optimised food storage (°C)
These set- tings shall not con- tradict the storage conditions set out in
Freezing capacity (kg/24h)
Defrosting type (auto-defrost=A, manual defrost=M)
| Annex IV, Table 3 | |||
| PantryaNoa-a-a-a- | |||
| Wine storageaNoa-a-a-a- | |||
| CellaraNoa-a-a-a- | |||
| Fresh foodaYesa237,0a4a-aA | |||
| ChillaNoa-a-a-a- | |||
| 0-star or ice-makingaNoa-a-a-a- | |||
| 1-staraNoa-a-a-a- | |||
| 2-staraNoa-a-a-a- | |||
| 3-staraNoa-a-a-a- | |||
| 4-star | Yes 125,0 | -18 10,0 | A |
| 2-star section | Noa-a-a-a- | ||
| Variable temperature compartment | - -a-a-a- | ||
| For 4-star compartments | |||
| Fast freeze facility | No | ||
| Light source parameters: | |||
| Type of light source | - | ||
| Energy efficiency class | - | ||
| Minimum duration of the guarantee offered by the manufacturer: 24 months | |||
| Additional information: | |||
| Weblink to the manufacturer's website, where the information in point4(a) Annex of Commission Regulation (EU) 2019/2019 is found: www.orima.pt | |||
- MANUAL DE INSTRUÇÕES
- FRIGORÍFICO
- Limpeza
- Combi Fridge Freezer No-Frost
- ORH 450 X
- !
- Level doors
- Rubber blocks
- Using the Control Panel
- LED DISPLAY
- DISPLAY
- BUTTONS
- FRIDGE
- FREEZER
- MODE
- ECO MODE
- Super mode
- Door Open Alarm
- First use
- Cleaning the Interior
- Daily use
- Freezing fresh food
- Storing frozen food
- Thawing
- Defrost Description (No Frost)
- Helpful hints and tips
- Hints for freezing
- Hints for storage of frozen food
- Hints for fresh food refrigeration
- Hints for refrigeration
- Fresh Zone Temperature Control
- Cleaning
- Troubleshooting
- FAST FREEZE
- FAST COOL
Brand : Orima
Model : ORH 450 X
Category : Refrigerator