Swift - Smartwatch Stenlille - Free user manual and instructions
Find the device manual for free Swift Stenlille in PDF.

| Product Type | Connected watch (smartwatch) |
| Brand | Stenlille |
| Model | Swift |
| Screen | Color touchscreen |
| Connectivity | Bluetooth |
| Application | FitcloudPro (iOS and Android) |
| Sensors | Heart rate, blood pressure, SpO2, ECG, accelerometer |
| Main functions | Activity tracking (steps, distance, calories), sleep, notifications, music control, phone calls, weather, alarms, stopwatch, timer, find my phone |
| Water resistance | Splash resistant (not waterproof) |
| Power | Rechargeable battery via magnetic USB cable, charging time up to 3 hours |
| Battery life | About 5 to 7 days (estimate, depending on usage) |
| Compatibility | iOS and Android |
| Customization | 30 watch faces via the app, 5 on the watch |
| Sports tracking | Multiple built-in exercise modes |
| Maintenance | Clean with a soft cloth and mild cleaning product, avoid household cleaners |
| Safety | Non-medical, indicative data, consult a doctor |
| Warranty | 12 months motherboard, 6 months battery and charger |
| Repairability | Contact the manufacturer for any repair, do not disassemble |
| Included accessories | USB charging cable, user manual |
| Support | Email: info@stenlille.nl, WhatsApp: +31 6 30037271 |
Frequently Asked Questions - Swift Stenlille
User questions about Swift Stenlille
0 question about this device. Answer the ones you know or ask your own.
Ask a new question about this device
Download the instructions for your Smartwatch in PDF format for free! Find your manual Swift - Stenlille and take your electronic device back in hand. On this page are published all the documents necessary for the use of your device. Swift by Stenlille.
USER MANUAL Swift Stenlille
natural_image
Smartwatch displaying colorful abstract bubble graphics on a black background (no readable text or symbols)THE INSPIRATION IS ON YOUR WRIST. DON'T LOSE THE OPPORTUNITY AND GET INSPIRED FROM YOUR STENLILLE
ONZE MISSIE
natural_image
Abstract colorful swirl design with no text or symbolsINHOUDSOPGAVE
English 50
Français 99
1. STARTEN
1.2 Inschakelen
Apple Store

FitCloudPro
Android

Google Play
1. STARTEN
1.4 App instellen
natural_image
Abstract colorful swirl design with no text or symbols1. STARTEN
1.6 Verbinding maken
natural_image
Abstract colorful swirl design with no text or symbols1. STARTEN
natural_image
Abstract colorful swirl design with no text or symbols2. GOED OM TE WETEN!
natural_image
Abstract artistic illustration of a stylized animal or creature with flowing colors (no text or symbols)2. GOED OM TE WETEN!
2.2 Personaliseer jouw herinneringen
natural_image
Close-up of a dark blue analog clock face showing time, hour, and minute hands (no readable text or symbols)
natural_image
Close-up of a black analog clock face showing time, hour, and minute hands (no readable text or symbols)
natural_image
Close-up of a black analog clock face showing time, hour, and minute hands (no readable text or symbols)
natural_image
Colorful abstract bubble-like shapes on black background, no text or symbols visible
natural_image
Color gradient bar with no text or symbols2. GOED OM TE WETEN!
2.4 Powermode
4. INTERFACES
4.1 Menu's (uitleg over de Smartwatch menu's)
Startscherm
natural_image
Four colored elongated bars (orange, green, blue, lime) arranged in a cross pattern on a black background, with no visible text or symbols.

4. INTERFACES
Menu onderin (Berichten Menu)


natural_image
Abstract artistic design with flowing, curved shapes in pastel tones (no text or symbols)4. INTERFACES
Menu links (App Menu)
Smart Style List Style
4.2 Menu wijzigen
natural_image
Abstract colorful swirl design with no text or symbols4. INTERFACES
4.3 Recente berichten
natural_image
Abstract colorful swirl design with no text or symbols5. FUNCTIES (FUNCTIE MENU)
5.1 Telefoongesprekken (Call records)
natural_image
Abstract colorful swirl design with no text or symbols5. FUNCTIES (FUNCTIE MENU)
5.4 Muziek (Music)
Local Music / Watch music
natural_image
Abstract colorful swirl design with no text or symbols5. FUNCTIONS (FUNCTION MENU)
Music Control
natural_image
Abstract colorful swirl design with no text or symbols5. FUNCTIES (FUNCTIE MENU)
5.5 Activiteiten tracker (Workout/Sport)

natural_image
Abstract colorful swirl design with no text or symbols5. FUNCTIES (FUNCTIE MENU)
5.6 Data
natural_image
Abstract colorful swirl design with no text or symbols5. FUNCTIONS (FUNCTION MENU)
5.9 Bloeddruk (BP)
5.10 Saturatie (BO)
5. FUNCTIES (FUNCTIE MENU)
5.11 ECG
natural_image
Abstract colorful swirl design with no text or symbols5. FUNCTIES (FUNCTIE MENU)
5. FUNCTIONS (FUNCTION MENU)
Taal (language)
Vibraties (vibration intensity)
6.2 Apparaat (Device)
6.2.9 Continue monitoring
natural_image
Abstract colorful swirl design with no text or symbols6. DE FITCLOUDPRO APP
6.3 Mijn
6.3.1 Registratie/Login
natural_image
Abstract colorful swirl design with no text or symbols7. SCHOONMAAK EN ONDERHOUD
natural_image
Abstract colorful swirl design with no text or symbols8. VEILIGHEID
natural_image
Abstract colorful swirl design with no text or symbols8. VEILIGHEID
natural_image
Abstract artistic swirl design with soft gradient colors (no text or symbols)9. FAQ
natural_image
Abstract colorful swirl design with no text or symbols9. FAQ
natural_image
Abstract colorful swirl design with no text or symbols10. GARANTIE
natural_image
Abstract artistic illustration of a stylized animal or creature with flowing curves (no text or symbols)11. SERVICE
natural_image
Smartwatch displaying colorful abstract bubble graphics on a black background (no readable text or symbols)THE INSPIRATION IS ON YOUR WRIST. DON'T LOSE THE OPPORTUNITY AND GET INSPIRED FROM YOUR STENLILLE
OUR MISSION
The stylish smartwatches from Stenlille include all functions that allow you to live healthier, move more, sleep better and be always available. With this, Stenlille contributes to a happier life with more relaxation and better health.
OUR VISION
Stenlille wants to help as many people as possible to be aware of their health on a daily basis and to encourage them to adopt a more active lifestyle with more exercise.
The health measurements make people more aware of their health so that they feel better about themselves and can get more out of their day.

natural_image
Abstract colorful swirl design with no text or symbolsCONTENTS
Nederlands 1
Français 99
- Start 4
- Good to know! 9
- User Manual 13
- Interfaces 14
- Functions (function menu) 20
- The FitCloudPro App 33
- Cleaning & Maintenance 40
-
Safety 41
-
FAQ: Frequently Asked Questions 43
-
Guarantee 48
-
Service 49
1. START
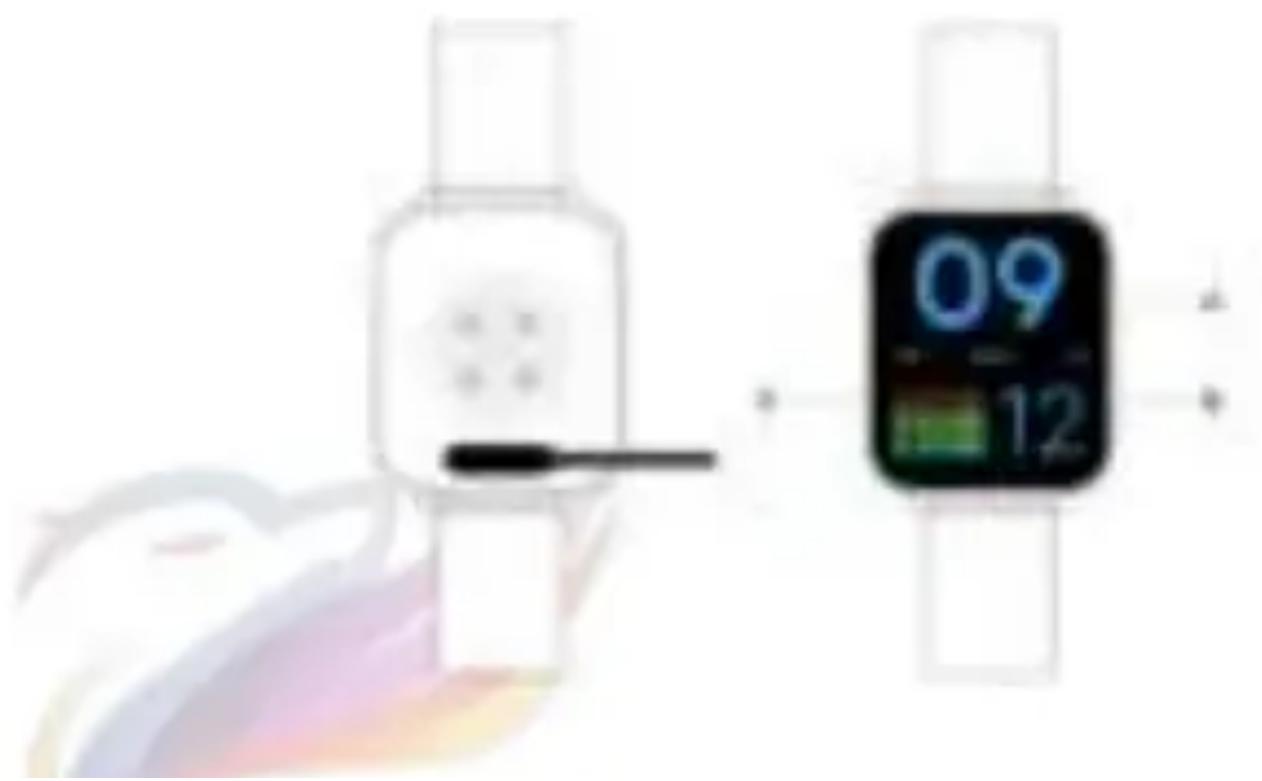
1.1 Charging
Use the added USB cable to charge the smartwatch to a full 100% before the first use.
An adapter is not needed, you can use the cable with any available USB port. The other end of the cable has contact points with magnets. This allows you to easily attach the cable to the smartwatch.
Tip: Carefully put the smartwatch upside down. Make sure the contact points are connected when charging. A full charge will take about 3 hours.
Be aware: If the smartwatch is not used for a longer period of time please make sure to keep charging it every month to keep battery life healthy. Turn off the smartwatch after it is fully charged.
1. START
1.2 Turning on the device
After the smartwatch is fully charged hold the B button (bottom right corner) for at least 5 seconds until the device will turn on. In the same way you can turn off the device.
1.3 Installing the app
To connect the device to your smartphone or tablet, you must first install an app. You can download this app from the App Store (Apple) or Google Play Store (Android). Search for "FitcloudPro" and download the app.
You can also scan the QR code below.

FitCloudPro
Apple

Apple Store

FitCloudPro
Android

Google Play
1. START
1.4 Setting up the app
Give the app permission for permissions on your device when the app requests it. Failure to do this may result in you not being able to use all functionalities. When you open the app for the first time, you can select "Sign in" to create an account. You can then log in with your e-mail and password. If you want to remain anonymous, you can also select "No use of account".
1.5 Setting the profile
- You can upload profile picture and specify username.
- Enter your personal details to get the most out of your smartwatch: Date of Birth, Gender, Height and Weight.
- Indicate your daily physical goals: Number of steps, total distance and number of kcal.
- The device will then perform a scan to detect the smartwatch. Make sure your bluet turned on and the smartwatch is close to your smartphone or tablet.

natural_image
Abstract colorful swirl design with no text or symbols1. START
1.6 Making connection
- The app can now connect to your smartwatch via bluetooth.
- Make sure bluetooth is turned on.
- Apple IOS: Click "device" in the "home" screen, Android: Continue with step 4,
- Press "search",
- Hold the device close so it can connect.
- Select your smartwatch by pressing "connection".
- The device is now connected. Check in the bluetooth settings to see if the device shows connectivity to your smartwatch.
- The device may ask for a 'firmware update'. Select 'upgrade' to install the update.
Need help?
Contact us through info@stenlille.nl

natural_image
Abstract colorful swirl design with no text or symbols1. START
1.7 Problems connecting or synchronizing?
- Make sure the smartwatch is not connected to another device
- Keep a short distance between your device and the smartwatch.
- Make sure your bluetooth is turned on.
- Check if the app has permissions permissions on your device.
1.8 Synchronizing
To manually sync your device, open the app and drag the screen down from the "home" screen. The device will synchronize and you will see the synchronization status appear at the top of the screen.

natural_image
Abstract colorful swirl design with no text or symbols2. GOOD TO KNOW!
The smartwatch is truly ‘smart’ so it is of importance to make sure the settings are right for you. Carefully read on to get the maximum potential out of your smartwatch experience!
2.1 Setting maximum screen time
To help save battery life, the smartwatch screen will automatically turn dark after a few seconds. To get used to your smartwatch it is advised to lengthen the screen time so you will have enough time to browse and explore all the options.
How to set the screen time:
- Swipe to the left menu
- Scroll down
- Open 'Settings'
- Select 'Screen display'
- Select 'Screen time'
- Set inbetween 5 - 9 sec.

natural_image
Abstract artistic swirl design with soft gradient colors (no text or symbols)2. GOOD TO KNOW!
2.2 Personalise your push notifications
Decide what push notifications you would like to receive and set memories to help you build and maintain healthy habits.
- Open 'Device'
- Select 'push notifications'
- Selecteer the apps you would like to receive notifications from.
- Go back to 'Device'
- Set your activity reminders and/or drink reminder
- Turn weather reports on or off.
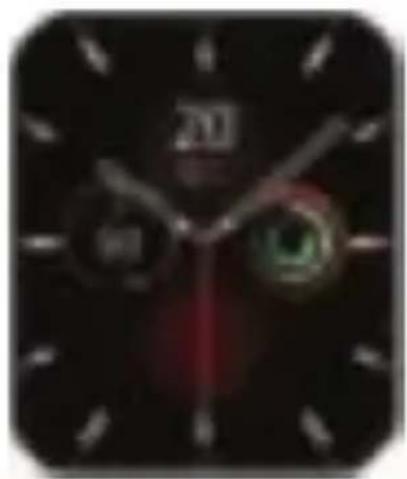
2.3 Personalise your clock dial
Through the smartwatch
(5 dial options and 1 customized option)
- Press and hold the clock dial
- Select between 5 clock dials by swiping from left to right.

natural_image
Abstract artistic illustration of a stylized animal or creature with flowing, gradient-colored lines (no text or symbols)2. GOOD TO KNOW!
2.3 Personalise your push notifications
Through the App
(30 clock dials and 1 customized option)
- Go to the FitCloudPro app
- Select Device
- Select 'Dial library'
- Select your favorite out of the 30 clock dials.
- Do you want a custom dial? Select the first dial and create your own design by using images from your photo album!
natural_image
Close-up of a dark blue analog clock face showing time, hour, and minute hands (no readable text or symbols)

natural_image
Close-up of a black analog clock face showing time, hour, and minute hands (no readable text or symbols)
natural_image
Close-up of a black analog clock face showing time, hour, and minute hands (no readable text or symbols)
natural_image
Colorful abstract bubble-like shapes on black background, no text or symbols visible
natural_image
Color gradient bar with no text or symbols2. GOOD TO KNOW!
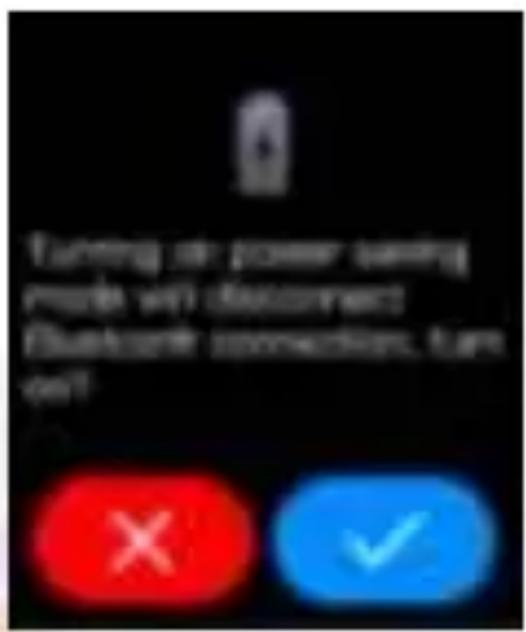
2.4 Powermode
If the battery is almost empty you will receive a push notification to turn on powermode. This will save battery usage by adjusting the brightness and turning off bluetooth. This will disable receiving any notifications from your phone or device.
After charging, you need to turn power mode off manually before being able to receive notifications again.
Turning powermode off:
- Swipe down from the start-menu to get to the quick access menu.
- Select the battery icon
- Turn powermode off
3. USER MANUAL
3.1 Unlock
- Briefly press the B button on the side to unlock the device.
- Long press the B button on the side to switch the device on or off.
- Briefly press the A button to activate the sport mode. You can read more about this later in this manual.
3.2 General Operation
- You can swipe in four directions to navigate the menus.
- If you want to select an option, you can tap the touchscreen.
3.3 Navigating to the previous menu
Do you want to go back a menu?
Swipe from left to right.
4. INTERFACES
4.1 Menu's (about the Smartwatch menu's)
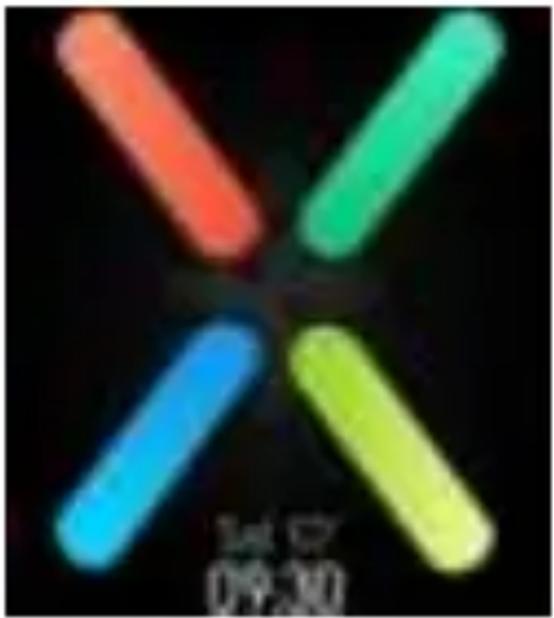
Home screen

natural_image
Four colored elongated bars (orange, green, blue, lime) arranged in a cross pattern on a black background, with no visible text or symbols.The clock is the home screen of your smartwatch. You can see the time here and can navigate to different options from here:
Top Menu (Quick Access)

4. INTERFACES
Bottom menu (Messages)

Right menu (lifestyle)


natural_image
Abstract colorful swirl design with no text or symbols4. INTERFACES
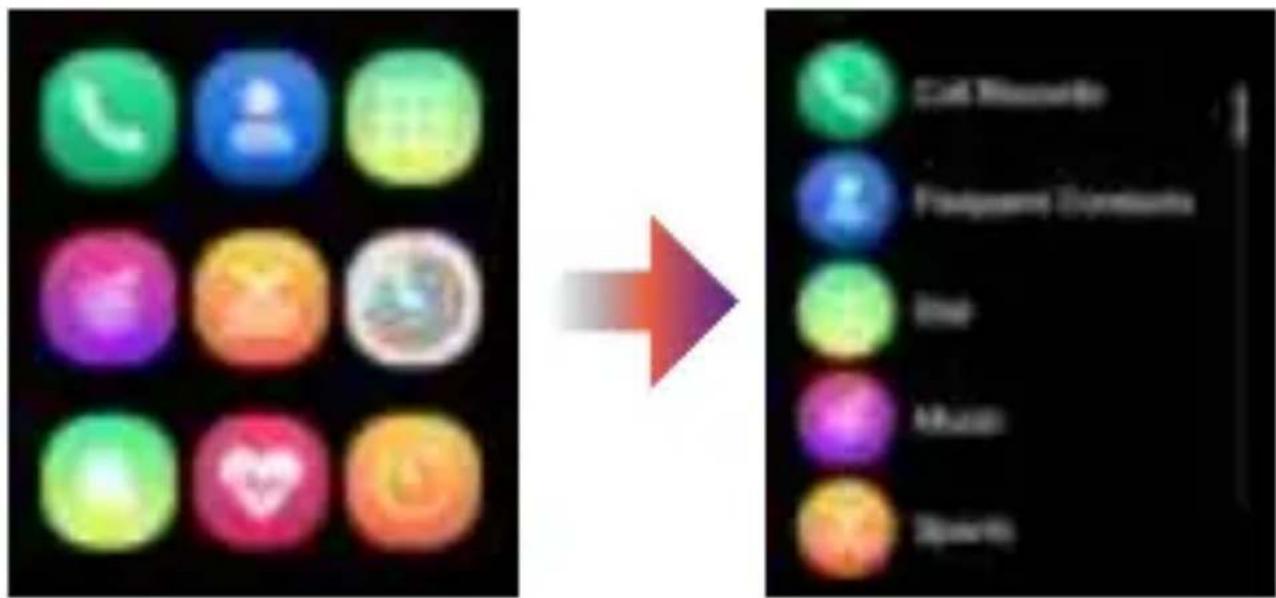
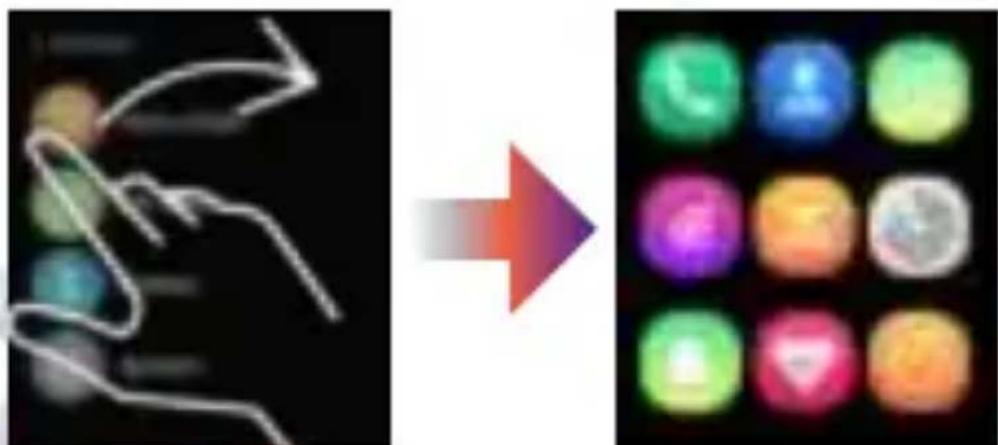
Left menu (Apps)
Smart Style List Style
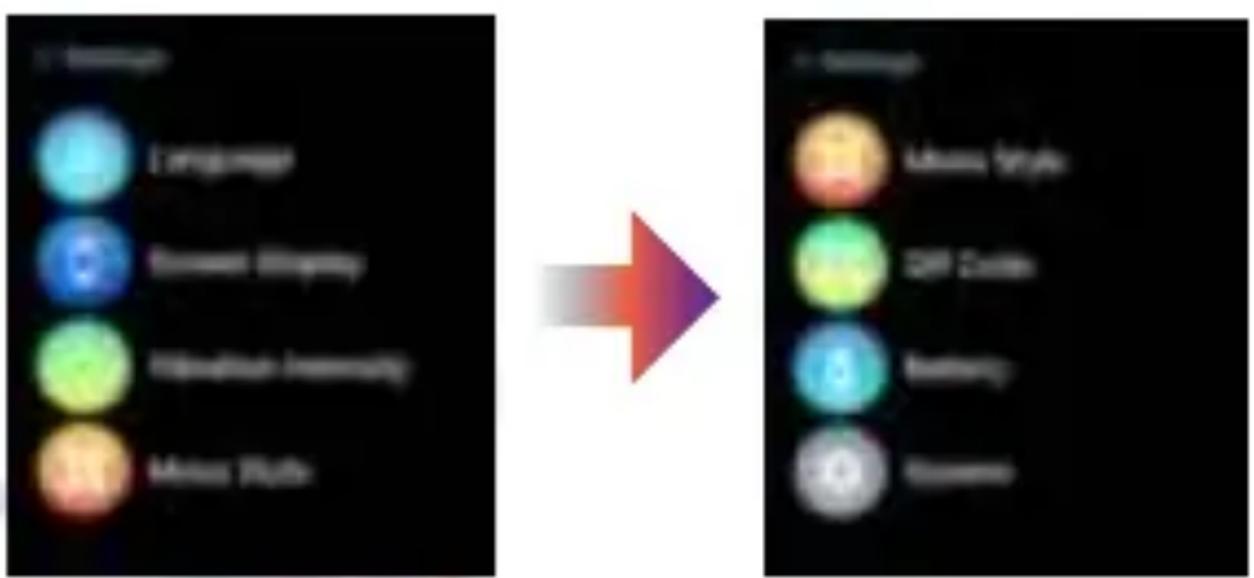
4.2 Changing the menu
The basic settings are advised but if you wish to change the menu theme you can follow these steps:
- Swipe up and select the settings icon
- Open 'Menu style'
- Select your desired menu style (list style or smart style).

natural_image
Abstract colorful swirl design with no text or symbols4. INTERFACES
4.3 Recent messages
Swipe up to view your recent messages. Here you can find your notifications that you will receive on your smartphone or tablet. A total of 15 message notifications can be stored. In case of multiple notifications, the new notifications will overwrite the old ones.
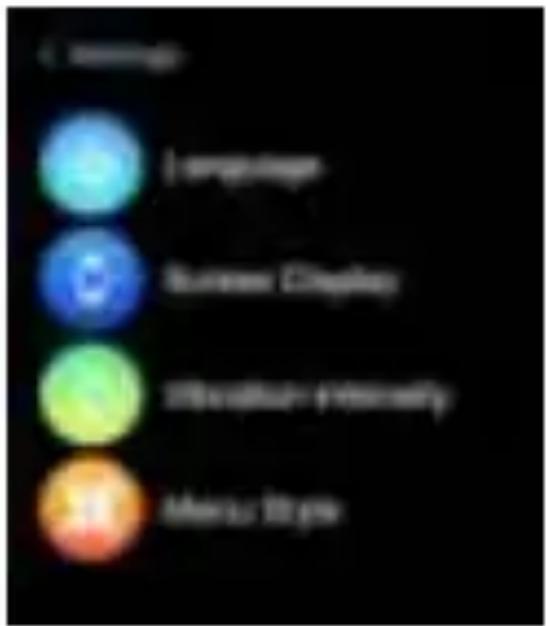
4.4 System menu
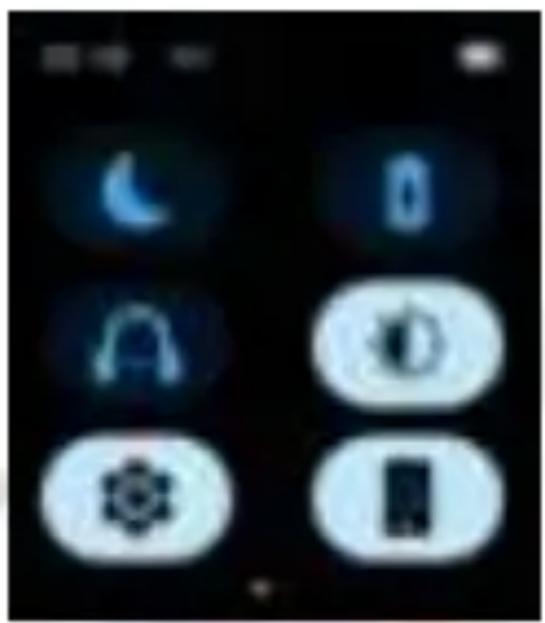
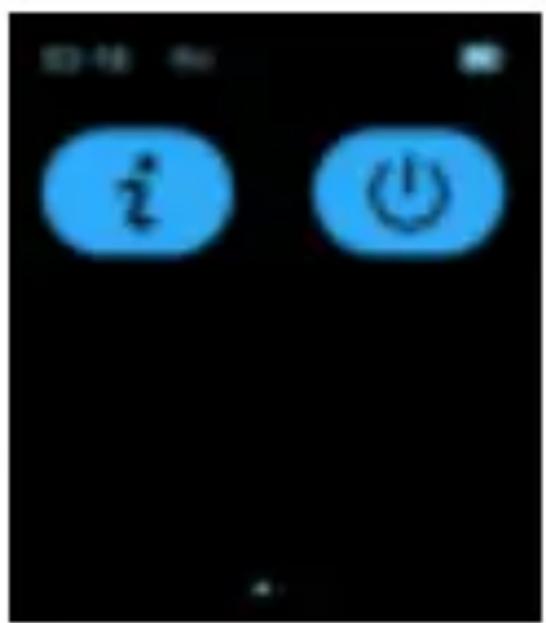
Swipe down to enter the system menu. Here you will find the status of your bluetooth connection and your battery. Below that, you will see keyboard shortcuts for the following options:
- Enable or disable do not disturb
- Power saving mode
- Audio mode
- Settings menu
- Language (language)
- Brightness (bright screen display)
- Vibrations (vibration intensity)
- Menu style (menu style)
- System settings (system)
- Find phone
- Information about your smartwatch
- Power off

natural_image
Abstract colorful swirl design with no text or symbols4. INTERFACES
4.5 Function screens
Swipe left (repeatedly) to navigate through the feature screens:
Data
Counts your steps, distance (km) and kcal.
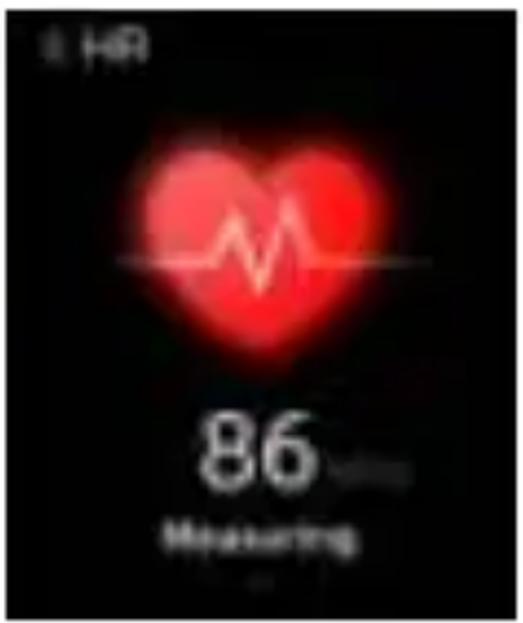
Heart rate
Measure your heart rate
Sleep
Falling asleep can be registered between 21:00 and 09:00 the next day. At other time, tracker is switched off to save battery. The sleep tracker provides insight into your sleep duration, deep sleep and light sleep.
4.6 Weather reports
See weather reports. Turn on location get the highest accuracy on the weat settings to her forecast.
4. INTERFACES
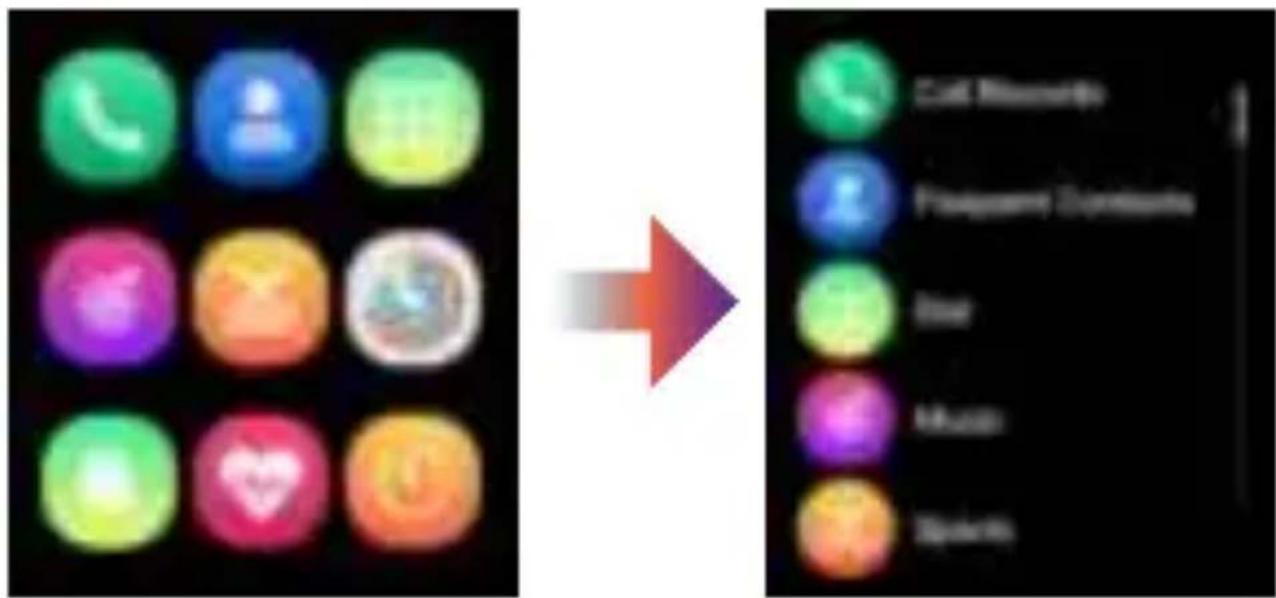
4.7 Function menu
Swipe right to access the function menu, then swipe up / down to navigate the menu. You will find several functions here:
- Telephone (Call records)
- Frequent contacts
- Dial
- Music
- Activity tracker (Sports)
- Data
- Workout records
- Heart rate (HR)
- Blood pressure (BP)
- Saturation (BO)
- Sleep
- Alarm
- Stopwatch
- Timer
- Messages
- Find my phone
- Settings
Read on to learn more about the function menu.

natural_image
Abstract artistic illustration of a stylized animal face with flowing curves (no text or symbols)5. FUNCTIONS (FUNCTION MENU)
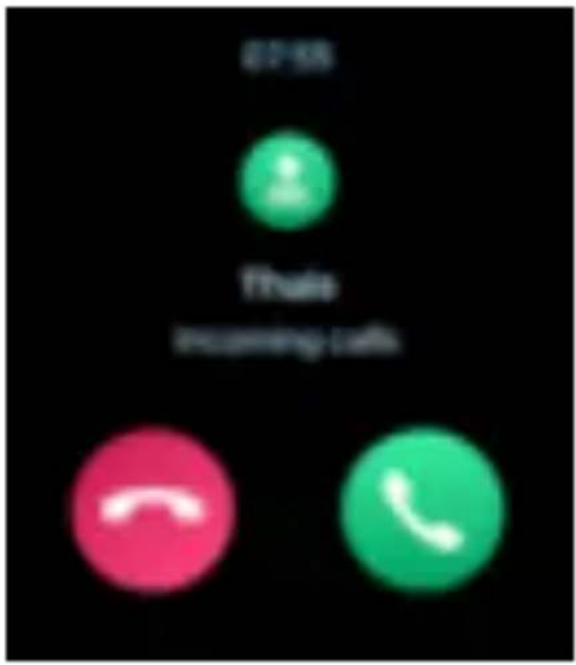
5.1 Telephone (Call records)
This option allows you to see your recent calls or call records.
You can choose to:
A. only receive incoming calls
B. receive incoming calls and receive push notifications.
Read the next page for dial instructions.
5.2 Frequent contacts
Reach your favorite contacts under the is option. Add your contacts to this list through the app:
- Open the app FitCloudPro
- Go to Device and hit 'Favorite Contacts'
- Selecteer your favorite contacts to add.
5. FUNCTIONS (FUNCTION MENU)
5.3 Dial
It is not only possible to receive incoming calls but also to dial a call. This is done as follows:
- Make sure Bluetooth is connected so you can receive a notification when you are being called.
- Turn 'Low Power mode' off (if turned on)
- Make sure both Bluetooth devices are on.
- Use the Smartwatch to go to the quick access menu
- Turn audio mode 'on' and check the name of the bluetooth device.
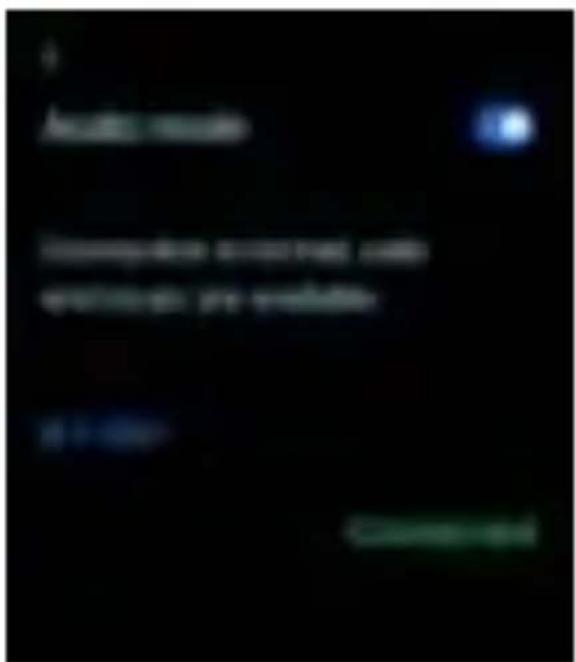
- Connect to this bluetooth device through your smartphone or device.
- Check in the quick access menu if the connection has been successful.
- If the status is 'connected' in green, the connection has been made successfully.
5. FUNCTIONS (FUNCTION MENU)
If you want to select a number to call you can use the dial option. Press the call icon on your bottom left to start the call.
Good to know:
During a call the speaker and microphone of the smartwatch will be active. This means the call will fully run over your smartwatch's audio. Always do a test call before use to check if the settings are right.
Would you like to call over your smartphone again?
Turn-off 'audio mode' from the quick access menu and disable the bluetooth connection.
Is the status not 'connected' and green?
- Open the app 'FitcloudPro'
- Turn audio mode off and on.
- Reconnect tot bluetooth

natural_image
Abstract colorful swirl design with no text or symbols5. FUNCTIONS (FUNCTION MENU)
5.4 Music
When the watch is paired with your smartphone or tablet, you can control music from your smartwatch. Turn on the music player on your device. Here you can play / pause the music, change the volume and change songs. There are two options to play music.
Local Music / Watch music
With the Swift you can also play music directly from your smartwatch. To do so you have to connect the Swift to your computer and drag music files into the music folder. You can then play music directly from your smartwatch!
- Go to 'Music' on the Smartwatch
- Select the 3 dots in the bottom right and open 'Settings'
- Select 'Watch music'
- You can now use the controls to play the music from your smartwatch.

natural_image
Abstract artistic design with flowing gradient colors (no text or symbols)5. FUNCTIONS (FUNCTION MENU)
Music Control
- Go to the quick access menu.
- Select the headphones symbol.
- Select 'audio mode' and check the extra bluetooth device name
- Go to bluetooth settings on your smartphone and connect to the new bluetooth device name.
- Go to ‘Music’ on your Smartwatch
- Select the 3 dots in the bottom right and open 'Settings'
- Select 'Control phone music'
- You can now play a song and control the music from your smartphone.
- Select the next or previous song, pause/play or volume up/down.
- Swipe back to the previous menu by swiping from left to right.
- Done with music control? Turn it off in the quick access menu.
- If you want to use it again turn audio mode on and reconnect to the bluetooth device name

natural_image
Abstract colorful swirl design with no text or symbols5. FUNCTIONS (FUNCTION MENU)
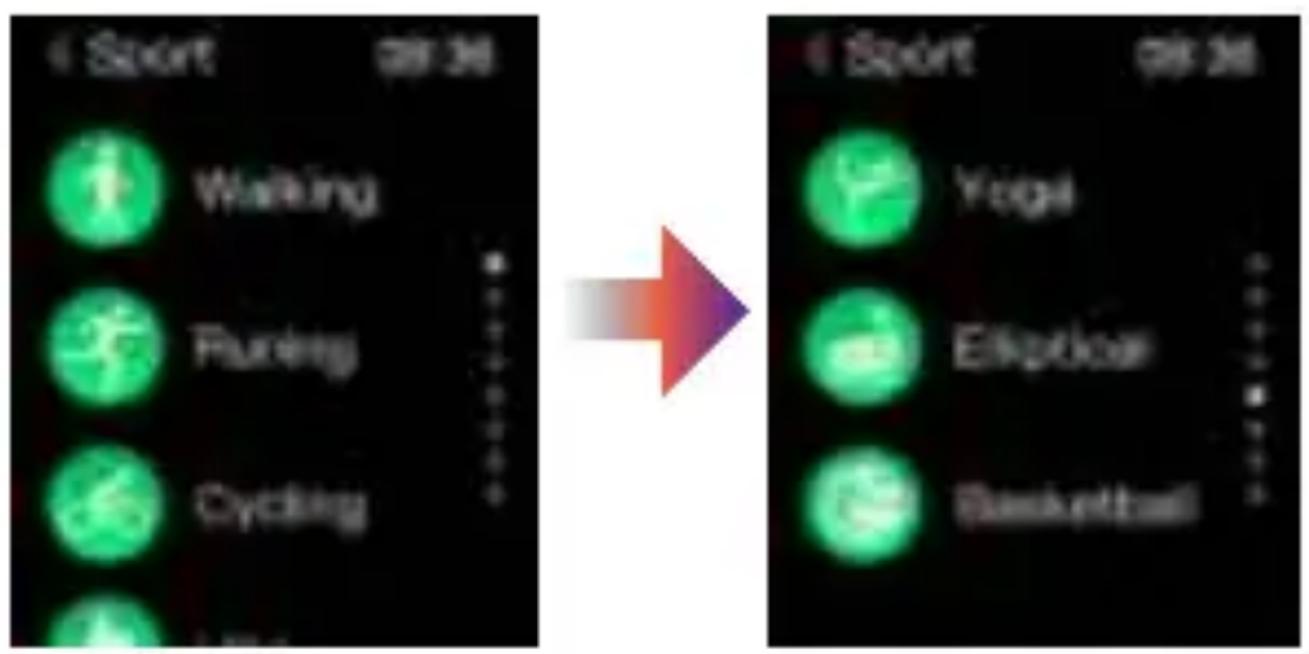
5.5 Activity tracker (Workout/Sport)
Open this function if you want to register or start physical activities. By swiping up or down you can select the option that fits your activity type the most. The device will count down to start with the activity registration. If you are done working out or want to pause you can swipe right and hit 'return' or 'end'. You can also use one of the side buttons to do this. Activities are being registered after the first 200 meters of distance or 5 minutes of continuous strain.

natural_image
Abstract colorful swirl design with no text or symbols5. FUNCTIONS (FUNCTION MENU)
5.6 Data
This is the activity overview for insight into your daily steps, distance (km) and calories. The data is synchronized with your device and reset daily at midnight.
5.7 Reports
Besides the daily data you can see your reports under this option. This gives insight in your recent performances.
5.8 Heart rate (HR)
Measure your heart rate. To ensure the accuracy of the blood pressure data, keep the smartwatch at the same level as your heart after opening the blood pressure monitor. A full heart rate measurement takes 45 seconds. Relax, calm down and do not speak while the monitor is working.

natural_image
Abstract colorful swirl design with no text or symbols5. FUNCTIONS (FUNCTION MENU)
5.9 Blood pressure (BP)
Measure your blood pressure. The same guidelines apply for this as for measuring the heart rate.

5.10 Saturation (BO)
Measure your saturation (oxygen content). The same guidelines apply for this as for measuring the heart rate.

5. FUNCTIONS (FUNCTION MENU)
5.11 ECG
A visual representation of your heartbeat.
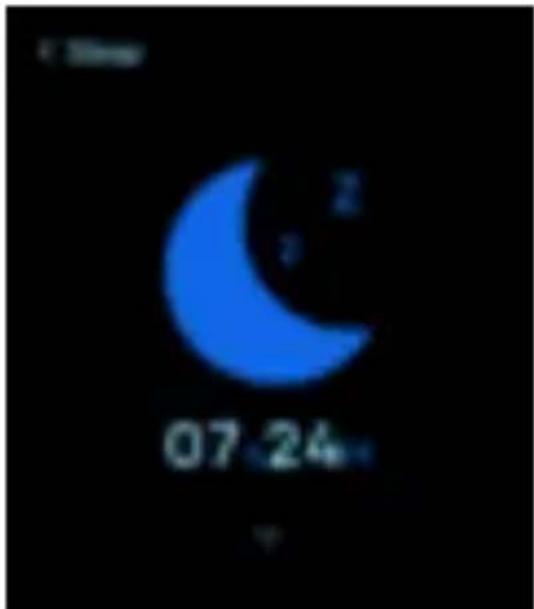
5.12 Sleep
Falling asleep can be registered between 21:00 and 09:00 the next day. At other times the sleep tracker is switched off to save battery. The sleep tracker provides insight into your sleep duration, deep sleep and light sleep.
5.13 Alarm
Set an alarm through the FitCloudPro app. Go to 'device' and select 'alarm' to set the alarm.
5. FUNCTIONS (FUNCTION MENU)
5.14 Stopwatch
Press the "play" symbol to start. The button changes to a "stop" symbol so that you can stop the measurement. If you press it again, the measurement will continue. Press the "reset" symbol to restart the stopwatch from 0.
5.15 Timer
Here you will find different timers. Varying from 1 minute up-to two hours in total. Select your preferred timer to start.
5.16 Messages
Here you can find your notifications that you receive on your smartphone or tablet. A total of 15 message notifications can be stored. In case of multiple notifications, the new notifications will overwrite the old ones.

natural_image
Abstract artistic illustration of a stylized cloud or wing-like shape with flowing gradients (no text or symbols)5. FUNCTIONS (FUNCTION MENU)
5.17 Find phone
Don't know where you left your phone? Then select this function and your phone will notify and your device will make a sound. You must first have a connection with your telephone.
5.18 Settings
Tip: Set the screen display time higher so you have more time to browse and explore all settings.
Tip: Go to the previous page by swiping from left to right.
These are the settings menu options:
5. FUNCTIONS (FUNCTION MENU)
Language
Select your language here
Bright screen display
- Watch face switch / Clock dial
Here you can change the clock dial.
- Brightness
To set the screen brightness
- Screen time
To set the screen display time
- Raise to wake
To set the screen wake time
5. FUNCTIONS (FUNCTION MENU)
Vibration intensity
Select the intensity of vibration.
Menu style
Here you can change the menu style. We advise you to stick to Style 1: 'List style'
QR Code
Here you can find the QR code to install the app.
Battery
Battery status and option to enable 'power saving mode'
System (settings)
Information on your device. Turn your device off or reset.
6. FITCLOUDPRO APP
De FitcloudPro App

6.1 At home
After installing the application, opening the app will take you to the "home" page. Here you will find an overview of all your measurement data. You can select the data to see more information and share your achievements.
6.1.1 Health measurement
When you swipe down you can take a health measurement. The data is then measured automatically.
6.1.2 Activity measurement
From the "home" screen you will see an icon of a moving figure at the top left. You can correct activity and register your move GPS. At "settings" at the top right of the screen you can adjust your goals for this activity.
Do you want to pause or stop? Then keep the "pause" button pressed now "continue" or stop "end". When you can stop, your data will be saved.
6. FITCLOUDPRO APP
6.2 Device
Under this option you will find many setting options for your smartwatch:
6.2.1 Message Reminder
Here you can indicate from which apps you wish to receive message notifications. - You can turn the apps on and off.
6.2.2 Alarm clock bracelet
Here you can set alarms for your smartwatch.
6.2.3 Sedentary reminder
Indicate the time period and interval at which you want to be reminded to move.
6.2.4 Drink water reminder
Specify the time period and interval at which you want to be reminded to drink water.
6. FITCLOUDPRO APP
6.2.5 Dial library
Select your unique design to show on the clock dial.
6.2.6 Weather reports
Enable or disable the display of weather reports.
6.2.7 Rotate the wrist shield
Specify the time slot you want the smartwatch to automatically display the clock when you bring your wrist towards your face.
6.2.8 Improve measurements
Here you can indicate whether the s should improve its measurement dat your previous measurement data.
6.2.9 Continuous monitoring
If you want to measure the heart rate regularly, you can indicate here the period during which these measurements may take place.
6. FITCLOUDPRO APP
6.2.10 Find the bracelet
Pressing this option will cause the bracelet to vibrate for easy retrieval. Make sure you do not have the vibration settings of your smartwatch set to 0, otherwise you will not hear anything.
6.2.11 Device location
Indicate whether you wear the smartwatch left-handed or right-handed.
6.2.12 Hour style
ndicate whether you want to use a 24-hour or 12-hour clock (AM / PM)
6.2.13 Shake to take pictures
Select this setting to take photos with your smartphone or tablet and control your camera by shaking your smartwatch.

natural_image
Abstract colorful swirl design with no text or symbols6. FITCLOUDPRO APP
6.2.14 Device version
Here you will find information about the most recent version of the app.
6.2.15 Factory reset
Warning!
This will disconnect the connection with your bracelet and all stored data will be deleted.
6.2.16 Untie
Terminates the connection and allows you to disconnect the device.

natural_image
Abstract artistic swirl design with soft gradient colors (no text or symbols)6. FITCLOUDPRO APP
5.3 My
5.3.1 Registration / Login
Here you can log in or register. If you are logged in, you will see your account information here.
5.3.2 Google Fit
Connect to the "Google Fit App" to sync your data with google.
6.3.3 Activity goal
Set your healthy habit targets for amount of steps, distance and calories.
6.3.4 Unit
Here you can adjust the metrics (kg / lbs, km / miles, centigrade / farenheit).

natural_image
Abstract artistic illustration of a stylized animal face with flowing curves (no text or symbols)6. FITCLOUDPRO APP
6.3.5 FAQ
Here you will find an answer to the most frequently asked questions.
6.3.6 Settings
Here you can manage your account and manage the system settings of the app.
5.3.7 Feedback
Do you have any questions, comments, complaints or tips about the app? Please notify us via this option. This way we can continuously improve the app.

natural_image
Abstract colorful swirl design with no text or symbols7. CLEANING & MAINTENANCE
It is recommended to wear and maintain the smartwatch according to the following guidelines:
- Keep the product clean;
- Keep the product dry
-
Do not wear the product too tightly
-
Do not use household cleaning products.
- Only clean the smartwatch with a strongly diluted and mild cleaning agent.
- If stains are not easy to remove, you can use alcohol to brush these stains away.

natural_image
Abstract colorful swirl design with no text or symbols8. SAFETY
-
Because the smartwatch is not a professional medical device, it can only offer reference data to the users.
-
The blood pressure is calculated by the heart tracker chip. The algorithm is 80-85% accurate.
-
The steps counter option is calculated by a G-sensor. The result has an accuracy deviation of about 10%.
-
When a user goes to bed at night, it is possible that the steps counter does not reset.
-
When a user wakes up this is almost always registered. Upon this registration, the steps counter will reset.
-
Take care of the battery. Avoid extreme cold or heat and charge the smartwatch regularly all the way full to 100%. Also make sure the smartwatch will run out of charge completely once in a while.
-
The data is for reference only to check the difference before, during and after exercise. This product is not a medical device.

natural_image
Abstract colorful swirl design with no text or symbols8. SAFETY
- The smartwatch and its applications must not be used for the diagnosis, treatment or preventive treatment of diseases and conditions.
- Consult a medical professional before changing your exercise habits or sleeping habits to avoid serious injury.
- The manufacturer reserves the right to change and improve the description of functions in this user manual without further notice.
- Always contact the manufacturer in case of damage to the electrical components.
- Never disassemble the product and avoid extreme pressure, heat and fire.
- This product has been tested for toxic substances but cannot rule out an individual specific allergy. Allegations based on allergic reactions are excluded. Therefore always be careful if you are prone to allergic reactions.

natural_image
Abstract colorful swirl design with no text or symbols9. FAQ
9.1 Why can't I wear the watch while taking a hot bath or shower?
The SmartWatch is 'splash proof' and is not meant to go under water.
The temperature of a warm bath is relatively hot, which creates a lot of water vapor. The small water vapor particles can easily penetrate the housing. This will cause deposits on the inside of the device. The moisture droplets can cause a short circuit, which can corrode the electronic parts and cause your smartwatch to stop functioning. Because of this we advise you not to wear it during bathing or showering.
9.2 Why can't I switch on the device?
If the battery is too empty, or if the watch has not been used for a long time, connect the charging cable and charge the watch for more than half an hour. You can now switch the device on again.

natural_image
Abstract colorful swirl design with no text or symbols9. FAQ
9.3 Should I charge the smartwatch before the first use?
Yes, it is advised to charge the smartwatch fully to 100% on the first charge. This will promote longevity and maximum performance of the battery. Keep reading to learn more about battery health.
9.4 How can I maintain optimal battery life?
An optimal battery life is of importance to ensure a long term enjoyment of the device. You can compare the battery use of that of a smartphone. You can protect and optimize performance the use using a few simple and important tips!
-
Adjust the brightness to a lower setting.
-
Turn off unnecessary notifications.
-
Turn 'low power mode' on
-
Turn on 'do not disturb' mode.
-
Turn down the screen display time.
-
Limit usage to the necessary options only

natural_image
Abstract colorful swirl design with no text or symbols9. FAQ
9.5 How long is the guarantee?
You have 12 months guarantee on the motherboard and 6 months on the charger
9.6 How long will the charging take?
Once charge will take no more than 3 hours.

natural_image
Abstract artistic design with flowing gradient colors (no text or symbols)9. FAQ
9.7 I don't have a bluetooth connection.
Check the bluetooth settings to see if you are connected to the smartwatch device name.
Check the FitCloudPro app and select 'bind immediately' next to 'no device'. Follow the steps to establish a new connection.
No success?
Go to the FitcloudPro app, select 'Device', scroll down to 'Unbind device' if needed and go to bluetooth settings. Select the device and unlink the connection. Follow the next steps:
- Turn off the smartwatch
- Delete the app
- Reset the smartwatch through the settings menu.
- Re-download the app
- Turn on the smartwatch
- Log-in on the app
- Follow the connection steps.

natural_image
Abstract artistic illustration of a stylized cloud or wing with flowing color gradients (no text or symbols)9. FAQ
9.8 I am not receiving any notifications on my smartwatch. What should I do?
Check the general settings of your smartphone to make sure the notifications are turned on on your phone. Make sure 'fitcloudpro' has notifications allowed.
- Break the bluetooth connection of all phones and watches and delete the app.
- Delete the app and download/install it again on the latest version.
- Log-in to your account and reconnect to bluetooth.
- After logging in go through the notification settings of the app to confirm you want to receive notifications.
- Test if you can receive and send messages now.
Still no success? Contact us through info@stenlille.nl

natural_image
Abstract artistic illustration of a stylized animal face with flowing curves (no text or symbols)10. GUARANTEE
Guarantee
- You have a warranty on the parts if they show defects or have become defective due to manufacturing or design faults.
- You have a 1-year warranty on the motherboard.
- You have a 6-month warranty on the battery and the charger.
- In case of damage to the electrical components, always contact the manufacturer.
Exceptions to Warranty
You are not entitled to a warranty on the product in the following situations:
- If you have disassembled or tinkered with the device yourself.
- In case of damage caused by a fall or accident.
- Damage that you or someone else has caused yourself.
- Water damage from misuse or abuse of the device.

natural_image
Abstract colorful swirl design with no text or symbols11. SERVICE
Do you have any questions, comments, complaints or tips?
We are always there for you!
You can contact us via:
E-mail: info@stenlille.nl
Whatsapp: +31 6 30037271
www.stenlille.nl
Stenlille, AV-Business
Partner of Bol.com
Assembled in China, developed in the Netherlands


natural_image
Smartwatch displaying colorful abstract bubble graphics on a black background (no readable text or symbols)L'INSPIRATION EST À VOTRE POIGNET. NE PERDEZ PAS L'OCCASION ET LAISSEZ-VOUS INSPIRER DE VOTRE STENLILLE.
MISSION
natural_image
Abstract colorful swirl design with no text or symbolsCONTENU
Nederlands 1
English 50
1. DÉMARRER
1.2 Mise en marche
Apple Store

FitCloudPro
Android

Google Play
1. DÉMARRER
1.4 Configuration de l'application
natural_image
Abstract artistic swirl design with soft gradient colors (no text or symbols)1. DÉMARRER
1.6 Connexion
natural_image
Abstract colorful swirl design with no text or symbols1. DÉMARRER
natural_image
Abstract colorful swirl design with no text or symbols2. BON À SAVOIR!
natural_image
Abstract colorful swirl design with no text or symbols2. BON À SAVOIR!
2.2 Personnalisez vos notifications
natural_image
Abstract colorful swirl design with no text or symbols2. BON À SAVOIR!
natural_image
Close-up of a dark blue analog clock face showing time, hour, and minute hands (no readable text or symbols)
natural_image
Close-up of a black analog wall clock face showing time, minute, and second hands (no readable text or symbols)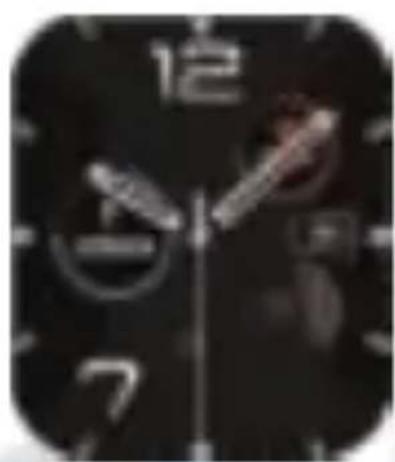
natural_image
Close-up of a black analog clock face showing time, hour, and minute hands (no readable text or symbols)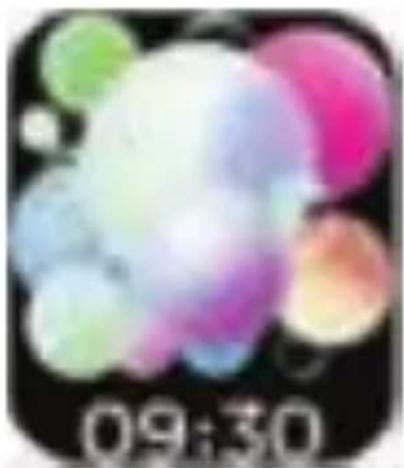
natural_image
Colorful abstract bubble-like shapes on black background, no text or symbols visible
natural_image
Color gradient bar with no text or symbols2. BON À SAVOIR!
3. INSTRUCTIONS D'UTILISATION
3.1 Déverrouiller
4. INTERFACES
4.1 Menus (explication des menus de la Smartwatch)
Écran d'accueil

natural_image
Five colored elongated bars arranged in a cross pattern on a black background (no text or symbols)
4. INTERFACES

natural_image
Abstract artistic design with flowing, curved shapes in pastel tones (no text or symbols)4. INTERFACES
natural_image
Abstract colorful swirl design with no text or symbols4. INTERFACES
natural_image
Abstract colorful swirl design with no text or symbols5. FONCTIONS (MENU DE FONCTIONS)