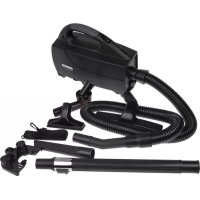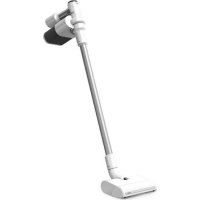
POD BK51702PC - Vacuum Cleaner Oreck - Free user manual and instructions
Find the device manual for free POD BK51702PC Oreck in PDF.


User questions about POD BK51702PC Oreck
0 question about this device. Answer the ones you know or ask your own.
Ask a new question about this device
Download the instructions for your Vacuum Cleaner in PDF format for free! Find your manual POD BK51702PC - Oreck and take your electronic device back in hand. On this page are published all the documents necessary for the use of your device. POD BK51702PC by Oreck.
USER MANUAL POD BK51702PC Oreck
POD™ TECHNOLOGY CORDLESS VACUUMS | USER GUIDE
ORECK pod™
TECHNOLOGY
IMPORTANT: READ CAREFULLY BEFORE ASSEMBLY AND USE.
THIS PRODUCT IS INTENDED FOR HOUSEHOLD USE ONLY.
IF USED COMMERCIALLY, THE WARRANTY IS VOID.
©2018 Techtronic Floor Care Technology Limited. All Rights Reserved.
natural_image
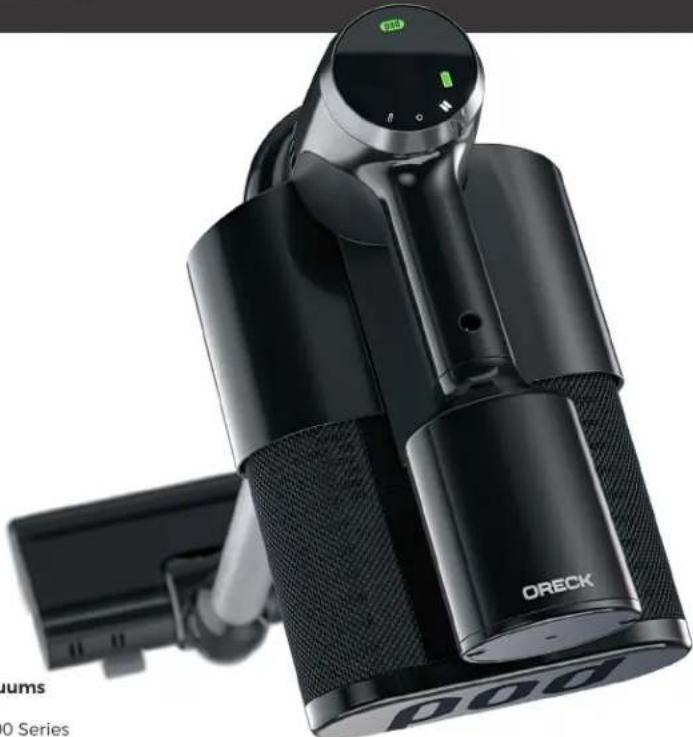
Black ORECK 30 Series charging station with digital display and external support (no visible text or symbols on device body)Cordless Captura™ Vacuums
BK51700 Series. BK11700 Series
REGISTER
Thank you for purchasing an Oreck® product.
Please register your product to initiate warranty, and access expert cleaning advice.
Register your vacuum:

Visit Oreck.com

Call 877-533-2019
TABLE OF CONTENTS
natural_image
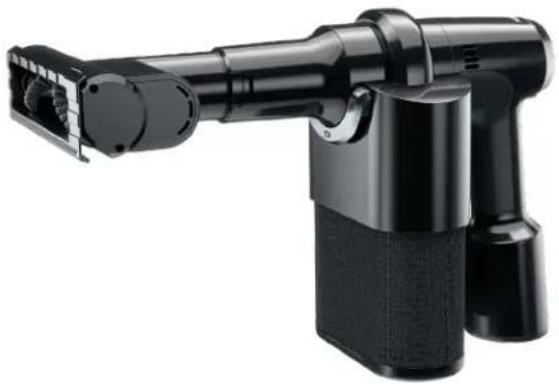
Black industrial robotic arm with articulated joints and textured grip (no visible text or symbols)Important Safety Instructions....3
Vacuum Introduction....5
Assembly 9
Operation....12
Maintenance....13
Certified Parts....14
IMPORTANT SAFETY INSTRUCTIONS
SAVE THESE INSTRUCTIONS
When using an electrical appliance, basic precautions should always be followed, including the following: READ ALL INSTRUCTIONS BEFORE USING THIS APPLIANCE.
WARNING: TO REDUCE THE RISK OF FIRE, ELECTRIC SHOCK, DAMAGE, OR INJURY:
• Fully assemble before operating.
- Do not use appliance on wet surfaces or outdoors. Do not expose appliance to rain. Store appliances indoors.
- The charger is for indoor use only. Be sure to always keep the battery and charger indoors in a dry place.
- Do not allow to be used as a toy. Not intended for use by children age 12 and under. Close supervision is necessary when used near children. To avoid injury or damage, keep children away from product and do not allow children to place fingers or other objects into any openings.
- Use only as described in this manual. Use only Oreck certified refills, parts, tools, attachments and products.
- Do not use charger with damaged cord or plug. If appliance or charger is not working as it should, has been dropped, damaged, left outdoors, or dropped into water, take it to a service center prior to continuing use.
- Do not pull or carry charger by cord, use cord as a handle, close a door on cord, or pull cord around sharp edges or corners. Do not place product on cord. Do not run appliance over cord. Keep cord away from heated surfaces.
- Do not unplug charger by pulling on cord. To unplug charger, grasp the plug, not the cord.
- Do not handle charger including charger plug and charger terminals, or appliance with wet hands.
- Do not put any object into openings. Do not use with any opening blocked; keep free of dust, lint, hair, and anything that may reduce air flow.
- Keep hair, loose clothing, fingers, and all parts of body away from openings and moving parts.
- Use extra care when cleaning on stairs. To avoid personal injury or damage, and to prevent the cleaner from falling, always place cleaner at bottom of stairs on floor. Do not place cleaner on stairs or furniture, as it may result in injury or damage.
- Do not use to pick up flammable or combustible liquids, such as gasoline, or fine wood shavings, or use in areas where they may be present.
- Do not pick up anything that is burning or smoking, such as cigarettes, matches, or hot ashes.
IMPORTANT SAFETY INSTRUCTIONS
- Do not use without Oreck refill filters in place.
- Always turn off this appliance before connecting or disconnecting AirPower™ motorized tools and/or any other tool.
- Do not incinerate the charger, battery, or appliance even if it is severely damaged. The batteries can explode in a fire.
- This product includes rechargeable lithium-ion batteries. Do not expose batteries to high temperatures, as they may catch fire and/or explode.
- Do not expose battery to crushing, incineration, or similar actions.
- Do not dispose of battery in a fire or trash compactor. See battery disposal section for directions.
- Do not attempt to disassemble battery.
- Unplug the charger from the outlet before any routine cleaning or maintenance.
- Leaks from battery cells can occur under extreme conditions. If any liquid gets on the skin, wash quickly with soap and water. If any liquid gets into the eyes, do not rub eyes, immediately flush them with clean water continuously for a minimum of 15 minutes. Seek medical attention immediately.
- Use only the certified Oreck charger supplied to recharge. Use of non-certified parts may void warranty.
- Do not touch or insert objects into battery or its assembly.
- Do not attempt to short circuit the battery or charger terminals.
- To avoid injury, particularly to face and head, keep hair, loose clothing, fingers, and all parts of the body away from revolving brush.
WARNING: This product contains chemicals known to the State of California to cause cancer, birth defects or reproductive harm. WASH HANDS AFTER HANDLING.
VACUUM INTRODUCTION
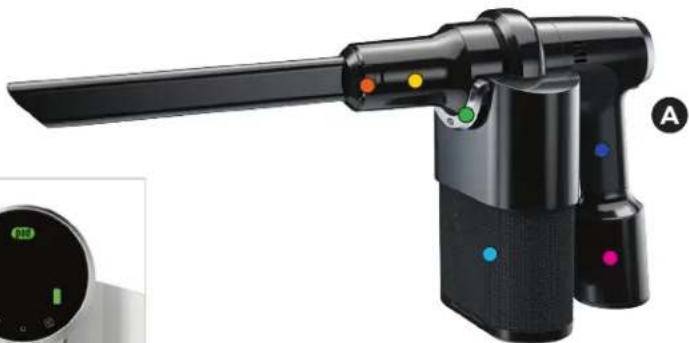
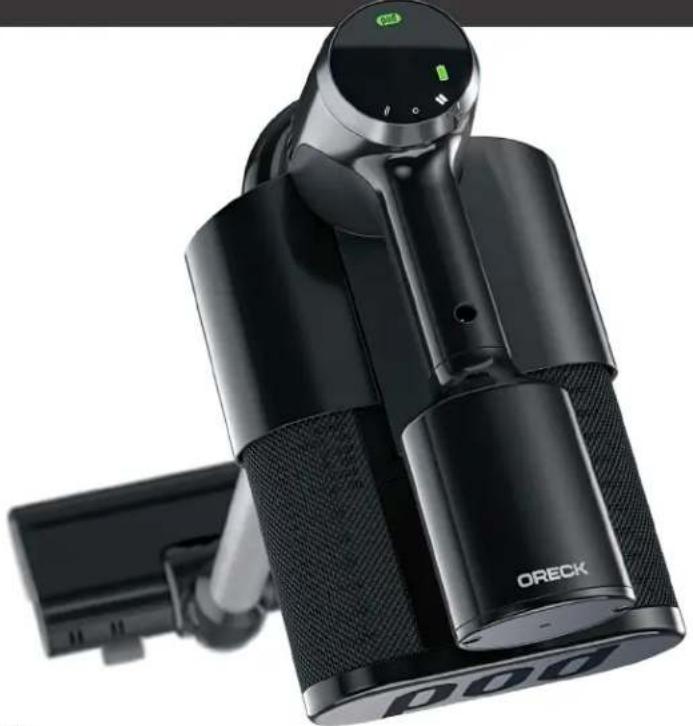
A Cordless Captura™ Vacuum
POD™ Case
Bottery Assembly
Nozzle Opening
Case Release Bar
Snap-Fit Tool Buttons
Charging Port
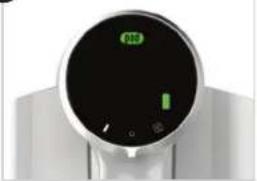
B POD™ Tech Power Dial
C Oreck Refill: Type P1
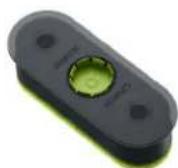
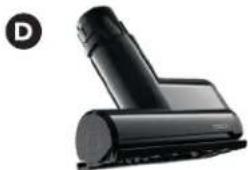
D AirPower™ Pivoting Brushroll Tool
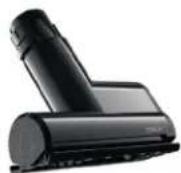
E Soft-Bristle Dust Brush Tool
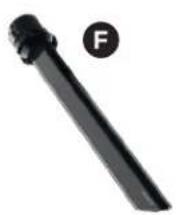
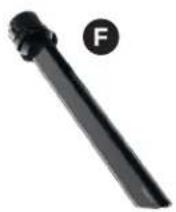
F Wide Path Crevice Tool
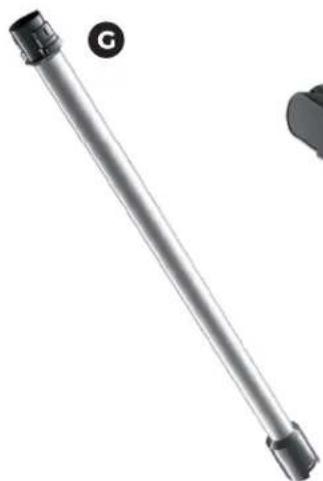
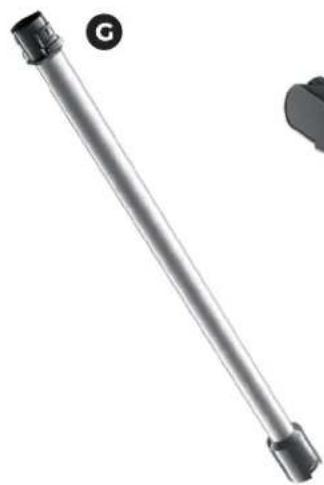
G Long-reach Wand*
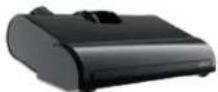
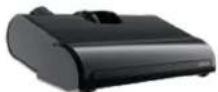
H AirPower™ Floor Nozzle*
I Wall Mount Charger ^**
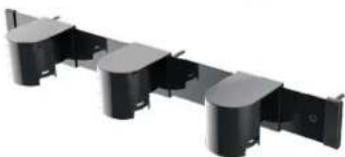
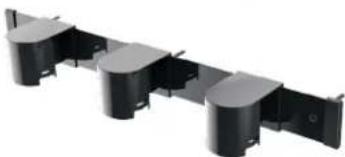
J Tool Rack ^+
NOT SHOWN
RapidCharger:
2.5-hour charge (Included with B×51700 Series)
StandardCharger:
5-hour charge (Included with BK11700 Series)
* Included with BK51700 Series and also sold separately.
"Included with some BK51700 Series and also sold separately.
natural_image
Black handheld device with orange and yellow lights, shown with a small circular display panel (no readable text or symbols)B
natural_image
Close-up of a medical imaging scanner (no visible text or symbols)C
D
E

VACUUM INTRODUCTION
natural_image
Metal rod with black connectors and a small circular mark labeled 'G' (no text or symbols on the object itself)H
The specialized brushroll has alternating hard & soft bristles, with hard bristles activating on carpet and soft bristles engaging on hard floors, simultaneously protecting your surfaces while delivering precision performance.

natural_image
3D rendering of a black cylindrical device with a circular lens and side port, no visible text or symbols
natural_image
Pure mechanical assembly diagram with no text, numbers, or symbolsVACUUM INTRODUCTION: POWER DIAL
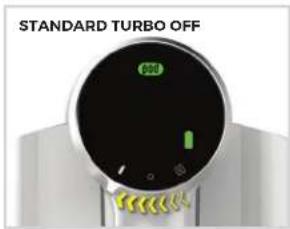
2-SPEED CLEANING
text_image
STANDARD TURBO OFFTurn dial clockwise for standard cleaning speed.
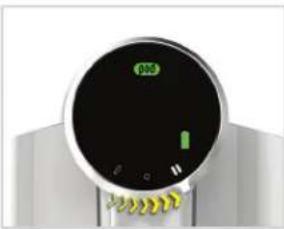
natural_image
Close-up of a circular electronic device with a green indicator light and control buttons (no readable text or symbols)Turn dial counterclockwise for turbo cleaning speed.
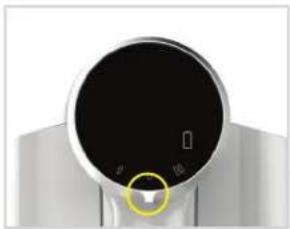
natural_image
Close-up of a medical device's circular dial with a yellow circle highlighting the center (no text or symbols visible)Turn dial to center.
WARNING! This vacuum cleaner has a constantly rotating brush roll. Never leave the vacuum cleaner in one spot for an extended period of time as this may damage the floor surface.
WARNING! Risk of personal injury – the brushroll may suddenly restart. Turn unit OFF, unplug from charging source, and remove tool before cleaning or servicing the brushroll.
VACUUM INTRODUCTION: POWER DIAL
BATTERY CHARGE
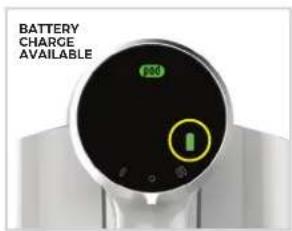
text_image
BATTERY CHARGE AVAILABLE
text_image
DEPLETED CHARGEWhen plugged in, all lights on unit will pulse once. Battery indicator will pulse during charge period. When full charge is reached, battery indicator will read continuous green.
CAPACITY FILL
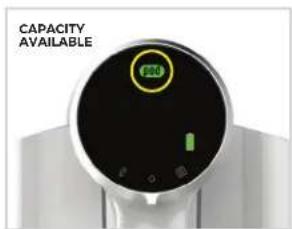
text_image
CAPACITY AVAILABLE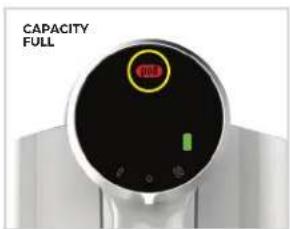
text_image
CAPACITY FULLPOD™ Technology is measuring vacuum cleaning performance and capacity fill as you clean. POD indicator flashes red when it's time to replace.
NOTE: DO NOT OVERFILL. Refill should be replaced when indicator flashes red otherwise unit may become damaged. If overfilled, POD indicator will flash orange and unit will shut down.
ASSEMBLY: INSTALL ORECK REFILL
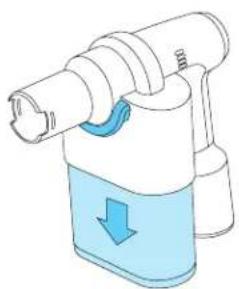
1 Press bar to release case. Insert refill. Reinsert case until you hear a click.
Pull down on case to ensure it is fully engaged before vacuuming.
natural_image
Illustration of a handheld device with a blue arrow indicating downward motion (no text or symbols)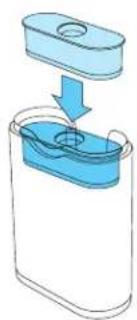
natural_image
Illustration of a container with liquid being poured into a larger container (no text or symbols)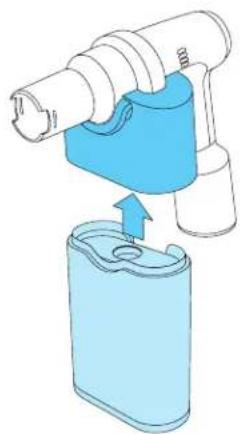
natural_image
Illustration of a hand holding a white cylindrical device with blue handle, partially submerged in a light blue container (no text or symbols)NOTE: Ensure that a tool is installed prior to operating vacuum.
ASSEMBLY: REMOVE ORECK REFILL

Press bar to release case.
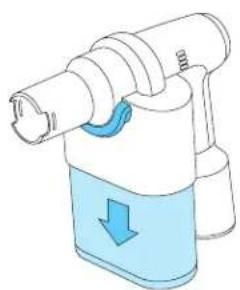
natural_image
Illustration of a handheld device with a blue downward arrow indicating fluid flow (no text or symbols)
Tip over trash, and gently shake for refill to fall into the bin.
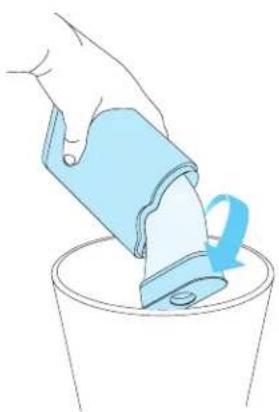
natural_image
Illustration of a hand pouring liquid into a bucket with a blue arrow indicating flow (no text or symbols)
Insert a fresh refill. Reinsert case until you hear a click/ Pull down on case to ensure it is fully engaged before vacuuming.
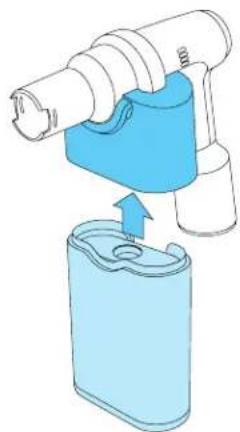
natural_image
Illustration of a handheld device with blue casing and mechanical components, showing a blue arrow indicating rotation or movement (no text or symbols)ASSEMBLY: ATTACH TOOLS
ASSEMBLY: ATTACH WAND & FLOOR NOZZLE
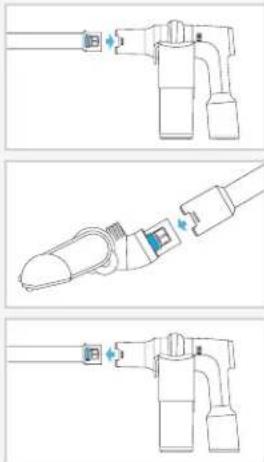
Tools will "snap" into place when properly installed.
Ensure that a tool is installed prior to operating vacuum.
Press snap-fit tool buttons.
Slide tool into nozzle opening with snap-fit tool buttons still pressed.
Both buttons should click into place before use.
To remove press snap-fit tool buttons and pull tool out of nozzle opening.
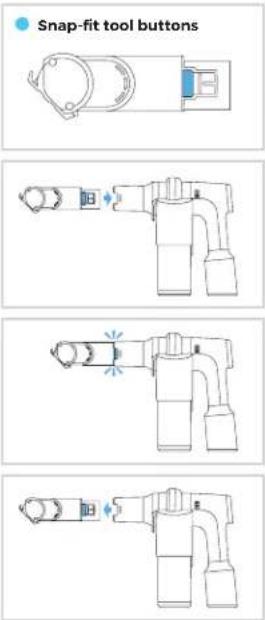
Press snap-fit tool buttons on wand and insert into Handheld unit.
Line up the wand with the AirPower ^IV floor nozzle. Slide wand into nozzle opening with snap-fit tool buttons pressed to attach. Ensure that wand end with large cap joins with floor nozzle.
To remove, press snap-fit tool buttons and pull tool out.
IMPORTANT! Not to be used for grooming a pet.
IMPORTANT! This vacuum cleaner is not free standing. In between uses or when carrying out any maintenance, always lay flat on the floor in a suitable location so it does not become a trip hazard or can be stepped on.
OPERATION: CHARGING
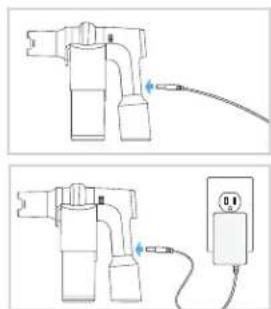
Insert the charging cord into the charging port located on the back of the handle.
Plug the charger plug into the outlet.
Once fully charged, battery indicator will read continuous green.
natural_image
Two technical diagrams showing electrical connections: top shows a device with cable and plug, bottom shows a power outlet connected to a plug (no text or symbols present)NOTE: Due to federal regulations, the battery does not come fully charged.
If charging for the first time, the initial charge time may require the full charge time indicated by unit.
Charge time: 2.5 hours (Rapid Charger included with BK51700 Series)
Charge time: 5 hours (Standard Charger Included with BK11700 Series)
MAINTENANCE
For maintenance, service or warranty questions, please contact an Oreck Customer Care Specialist at 877-533-2019, visit Oreck.com or your local Oreck Dealer.
| PROBLEM | POSSIBLE CAUSE | SOLUTION | |
| pod | POD indicator flashes red. | Capacity is full. | Turn power dial to OFF position. Insert a fresh refill into case and restart unit.NOTE: DO NOT OVERFILL. Refill should be replaced when indicator flashes red otherwise until may become damaged. If overfilled, POD indicator will flash orange and unit will shut down. |
| / / | Speed indicators are both flashing. | Brushroll has a stall. | Turn dial to OFF position. Remove obstruction from brushrol, if any.Wait 15 seconds and restart unit. Visit Oreck.com for detailed instructions. |
| pod | POD indicator flashes orange and motor stops. | Unit has a clog | Turn Dial to OFF position.1. Remove tool & check for clog in nozzle. Clear clog, replace tool, and restart unit.2. Check POD Refill. Replace if full.3. Visit Oreck.com for detailed instructions. |
| Battery indicator flashes red.Motor does not start when turned to an ON position. | Battery has run out of charge. | Turn dial to OFF position. Plug unit in to charge. Time to full charge is ≤2.5 hours for rapid charger and ≤5 hours for standard charger. | |
| Battery indicator flashes red & green | Battery temperature is abnormal. | Ensure unit is in the OFF position and unplug unit from the charger.Wail 30 minutes and then plug unit back into charger | |
CERTIFIED PARTS
NOTE: If appliance is not working as it should, has been dropped, damaged, left outdoors, or dropped into water, take it to a service center prior to continuing use.
NOTE: The motor and brushroll are equipped with bearings which contain sufficient lubrication for their lifetime. The addition of lubricant could cause damage. Do not add lubricant to motor or brushroll.
NOTE: Any other servicing should be done by an authorized service representative.
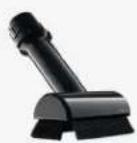
Dusting Brush
Part #
White, AK8B10
Black, AK8B102
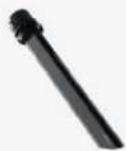
Crevice Tool
Parc #
White, AK8CT03
Black, AK8CT02
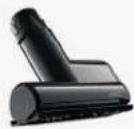
AirPower™ Pivoting Brushroll Tool
Part # White, AK8MT03 Black, AK8MT02
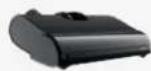
AirPower™ Floor Nozzle
Part 4
White, AK8FN03
Black, AK8FN02

Wand
Part #
Black, AK8WT02
White, AK8WT03
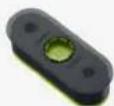
Refill Type P1
Item #
AK6B15A
*Pack of 5 Refills
NOT SHOWN
NOT SHOWN
Rapid Power Charge Cord
Part # White, BKORCO3 Black, BKORCO2 Included with BK51700 Series
Standard Power Charge Cord
Part # White, BK0SC03 Black, BK0SC02
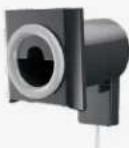
Wall Mount Charger
Part #
White, 521A00144
521A00156
Black, 521A00123,
521A00151
Included with some
models
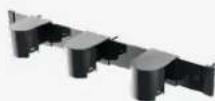
Tool Rack
Part # White, 521A00145 Black, 521A00124 Included with some models
Contact an Oreck Customer Care Specialist at 877 533 2019 for replacement details, or visit Oreck.com or your local Oreck Dealer.
REGISTER YOUR VACUUM

Visit Oreck.com

Call 877-533-2019
ORECKpod
TECHNOLOGY
Techtronic Floor Care Technology Limited
Distributed by Royal Appliance Mfg. Co. Glenwillow, OH 44139
964A00190
©2018 Techtronic Floor Care Technology Limited
ASPIRATEURS SANS FIL DOTÉ DE LA TECHNOLOGIE POD ^MD | MANUEL D'UTILISATION
ORECK pod™
TECHNOLOGY
IMPORTANT : LISEZ ATTENTIVEMENT AVANT L'ASSEMBLAGE
ET L'UTILISATION. CE PRODUIT EST DESTINÉ À UN USAGE
DOMESTIQUE SEULEMENT. LA GARANTIE EST NULLE SI
natural_image
Black ORECK handheld device with charging button and power cord (no visible text or symbols on body)ENREGISTRER
natural_image
Black industrial robotic arm with attached grip and base (no visible text or symbols)natural_image
Medical device with black handle and orange-yellow sensor, shown with close-up of circular dial (no text or symbols visible)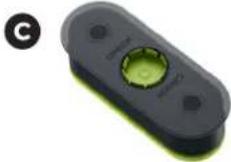
natural_image
Black industrial vacuum cleaner with a cylindrical body and attached housing (no visible text or symbols)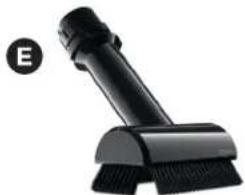
natural_image
Black handheld device with textured base and circular label 'E' in top-left corner (no text or symbols on device body)CARACTÉRISTIQUES DE VOTRE ASPIRATEUR
natural_image
Metal rod with black connectors and a small circular icon labeled 'G' (no text or symbols on the object itself)H
natural_image
3D rendering of a mechanical component with a circular opening and rectangular body (no text or symbols visible)J
natural_image
Pure mechanical assembly diagram showing four cylindrical components connected by rods (no text or symbols)natural_image
Close-up of a circular electronic device with a green indicator light and yellow waveform, no readable text or symbols.natural_image
Close-up of a medical device's circular dial with a yellow circle highlighting the center (no visible text or symbols)text_image
CAPACITÉ DISPOBNIBLE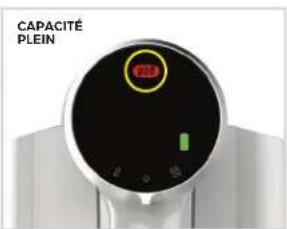
text_image
CAPACITÉ PLEINnatural_image
Illustration of a handheld industrial device with a blue downward arrow indicating compression or reduction (no text or symbols)natural_image
Illustration of a container with liquid being poured into a plastic housing (no text or symbols)natural_image
Illustration of a medical device being inserted into a blue container (no text or symbols)ASSEMBLAGE RETIREZ LA CARTOUCHE FILTRANTE ORECK

natural_image
Illustration of a handheld device with a blue arrow indicating downward motion (no text or symbols)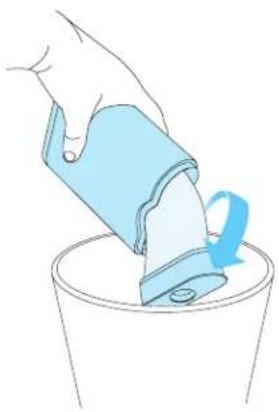
natural_image
Illustration of a hand pouring liquid into a bucket with a blue arrow indicating direction (no text or symbols)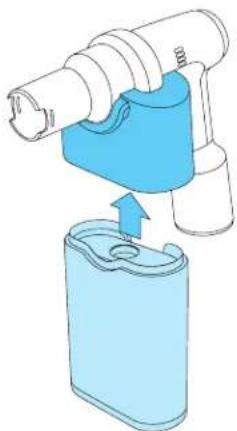
natural_image
Illustration of a hairdryer with blue brush and orange handle, partially submerged in a light blue container (no text or symbols)ASSEMBLAGE INSTALLATION DES OUTILS
natural_image
Pure diagram of a mechanical or electrical component with no text, numbers, or symbols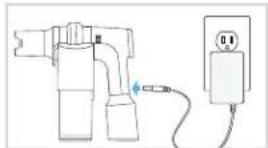
natural_image
Simple line drawing of a hand pump connected to a power outlet (no text or symbols)Techtronic Floor Care Technology Limited
Techtronic Floor Care Technology Limited 2018
ASPIRADORAS INALÁMBRICAS CON POD™ TECHNOLOGY | GUÍA DEL USUARIO
ORECK pod™
TECHNOLOGY
natural_image
Black ORECK medical device with adjustable grip and digital display (no visible text or symbols on body)Series BK51700, Series BK11700
REGISTRAR
natural_image
Black industrial robotic arm with articulated joints and textured base (no visible text or symbols)natural_image
Medical device with green and orange buttons, labeled A, showing a device with a circular display (no text or symbols on main body)C
D
E

natural_image
Metal cylindrical mechanical component with black connectors, no visible text or symbolsH
natural_image
Close-up of a black mechanical component with a circular opening and mounting bracket (no visible text or symbols)J
natural_image
Pure mechanical assembly diagram showing four cylindrical components connected by rods (no text or symbols)natural_image
Close-up of a medical imaging device with a circular dial and green indicator lights (no readable text or symbols)natural_image
Close-up of a camera lens with a circular dial and a highlighted circular area (no text or symbols visible)Posición de apagado
natural_image
Illustration of a handheld device with a blue arrow indicating downward motion (no text or symbols)natural_image
Illustration of a container with a lid and a side panel, showing liquid level (no text or symbols)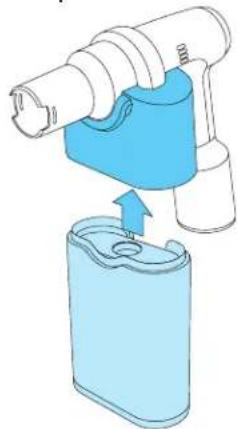
natural_image
Illustration of a medical device being inserted into a blue container (no text or symbols)natural_image
Illustration of a handheld device with a blue downward arrow, no text or symbols presentnatural_image
Illustration of a hand pouring liquid into a bucket with a blue arrow indicating flow (no text or symbols)natural_image
Illustration of a medical or laboratory device with a blue cap and arrow indicating assembly (no text or symbols)natural_image
Line drawing of a mechanical device with a lever and cylindrical components (no text or symbols)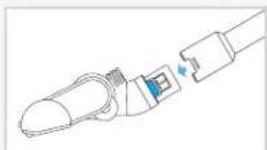
natural_image
Diagram of a connector with a blue arrow indicating direction (no text or symbols)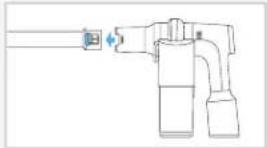
natural_image
Pure diagram of a spray gun assembly without any text, numbers, or symbolsnatural_image
Pure diagram of a mechanical or electrical component with no text, numbers, or symbols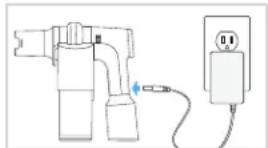
natural_image
Simple line drawing of a mechanical device connected to a power outlet (no text or symbols)Techtronic Floor Care Technology Limited
Distribuido por Royal Appliance Mfg. Co. Glenwillow, OH 44139
964A00190
©2018 Techtronic Floor Care Technology Limited