LS 1800 - Garden vacuum EINHELL - Free user manual and instructions
Find the device manual for free LS 1800 EINHELL in PDF.

| Product type | Garden vacuum / Leaf blower |
| Brand | Einhell |
| Model | LS 1800 |
| Power supply | 230 V ~ 50 Hz |
| Power | 1800 W |
| Air speed | 28.9 m/s |
| Suction power | 680 m³/h |
| Collection bag volume | 50 L |
| Sound power level | 97 dB(A) |
| Sound pressure level | 85 dB(A) |
| Vibration | < 2.5 m/s² |
| Operating modes | Vacuum and blow |
| Safety | Safety switch, strain relief, short-circuit protection (max 30 mA) |
| Maintenance | Clean with damp cloth; do not use high-pressure cleaner; empty collection bag regularly |
| Warranty | 2 years from date of purchase |
Frequently Asked Questions - LS 1800 EINHELL
User questions about LS 1800 EINHELL
0 question about this device. Answer the ones you know or ask your own.
Ask a new question about this device
Download the instructions for your Garden vacuum in PDF format for free! Find your manual LS 1800 - EINHELL and take your electronic device back in hand. On this page are published all the documents necessary for the use of your device. LS 1800 by EINHELL.
USER MANUAL LS 1800 EINHELL
natural_image
Illustration of three open book spines with different cover patterns (no text or symbols)© Bitte Seite 2-5 ausklappen
⑤ Veuillez déplier les pages 2-5
GB Please fold out page 2-5.
NL Gelieve blz. 2-5 uit te vouwen
① Aprire le pagine dalla 2 alla 5
cz Prosím nalistujte stranu 2-5


natural_image
Close-up of a hand pressing down on a car body component, labeled with number 4 (no text or symbols on the object itself)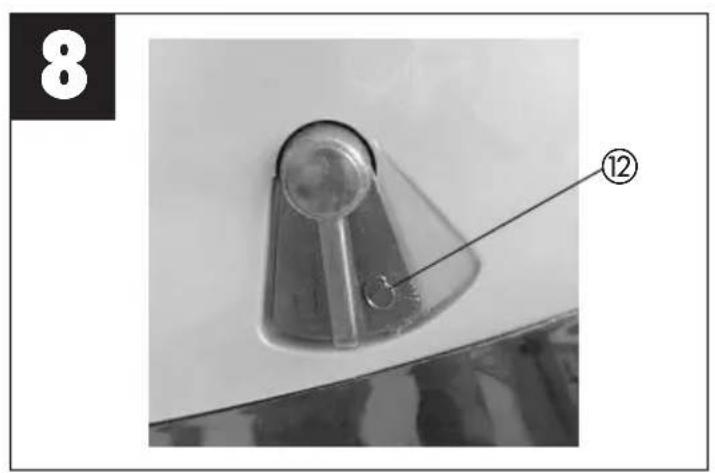

D
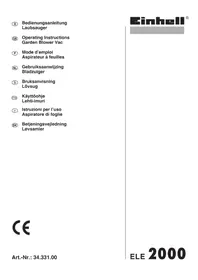
- Suction tube
- Additional handle
- Carrying strap
- On/Off switch
- Debris bag frame
- Debris bag
2.0 Proper use
- The garden blower vac is only designed to handle foliage and garden refuse such as grass clippings, twigs and small branches, paper. Uses beyond those mentioned above are prohibited.
- This tool is only intended for use around the home and should only be operated within its design limitations. Tools of this category which are designed for home and garden use should only be operated in such settings. Tools of this category are not suitable for use in public facilities, parks and sports centers, on farms or in the forestry sector.
3.0 Important information
Please read the directions for use carefully and observe the information provided. It is important to consult these instructions in order to acquaint yourself with the tool, its proper use and safety precautions.
Please observe the general maximum operating times as well as local regulations for tool operation.
Safety information
- Persons who are not acquainted with the directions for use as well as children, adolescents under 16 years of age, and those under the influence of alcohol, drugs and/or medication may not operate the tool.
-
The operator of the tool must ensure that all persons and animals are kept at a safe distance of 3 meters surrounding the work area while the tool is in operation. The operator is responsible for the safety of third parties present in the work area.
● Always wear suitable working clothes to avoid the risk of injuries to the head, hands and ears. Put on suitable safety goggles or safety visor, work gloves and ear plugs. -
Ensure that you have a safe and secure footing while working. Wear only non-slip shoes and long trousers.
- Before starting up the tool, visually inspect it for any loose screws or other loose connections.
- Inspect the tool regularly to ensure it operates the way it should and that it is in sound condition. Tools that are damaged in any way must not be used.
● Never use the tool without a debris bag in place. - Do not remove any protective guards.
● Vacuum and blow only those materials for which the tool was intended. - Never vacuum/blow liquids (e.g. water) or scalding, flammable or explosive substances. Do not vacuum objects that are smoldering (e.g. cigarette butts, glowing material) - risk of burn injury!
- Do not vacuum damp, wet piles.
- Never use your hand to feed objects into the vacuum tube.
● Always point the vacuum tube toward the ground when switching on the tool. - Never direct the vacuum/blow hole at persons or animals.
- Keep children away from the tool when it is hooked up to a power supply.
- Do not use the power cord as a weight-bearing support with which to transport the tool. Instead, use only the sturdy handle which is designed for this task.
- Do not clean the tool with running water - and particularly with high pressure.
● Neither use the tool in the rain nor leave it outside during such weather. - When not being used, keep the tool in a safe and dry location.
- The tool can be plugged into any 10 A and higher socket-outlet (230 V alternating current) that is equipped with a fuse and is grounded. Secure the socket-outlet with a residual current circuit breaker. Do not exceed an operating current of 30 mA.
- Never use a damaged power cord - lethal hazard.
● Always trail the power cord behind the tool, not out in front. - When hooking up an extension cord (to the standard-length tool power cord), be sure to use the cord grip provided specially for this purpose.
● The total length of the power cord should not exceed 50 meters; going beyond this distance will reduce the power output of the electric motor.
● The power cord must at the minimum be of type HO5RN-F and be of 3-core design. The power
GB
cord must have a cross-section width of 3 × 1.5 mm^2 and be designed for outdoor use.
- Avoid pinching the power cord at all costs when dragging under doors and guiding through windows. Avoid kinking the power cord, which can occur through improper placement or guidance. Replace all power cords at the first sign of splitting (which normally results from age).
Safety pictograms on the tool (Fig. 10)
- Read the directions for use before operating the tool.
- Wear ear plugs, a visor and safety goggles.
- Do not use the tool in rain or snow. Do not expose the tool to wet conditions.
- Unplug the power cord if it starts to coil.
- Maintain a safe distance from other persons.
4.0 Technical data
AC motor 230V \~ / 50 Hz
| Output 1800 watts |
| Air velocity 28.9 m/s |
| Suction rate 680 m3/h |
| Volume of debris bag approx. 50 l |
| Sound volume level LWA 97 dB (A) |
| Sound pressure level LPA 85 dB (A) |
| Vibration ah < 2.5 m/s |
5.0 Assembly
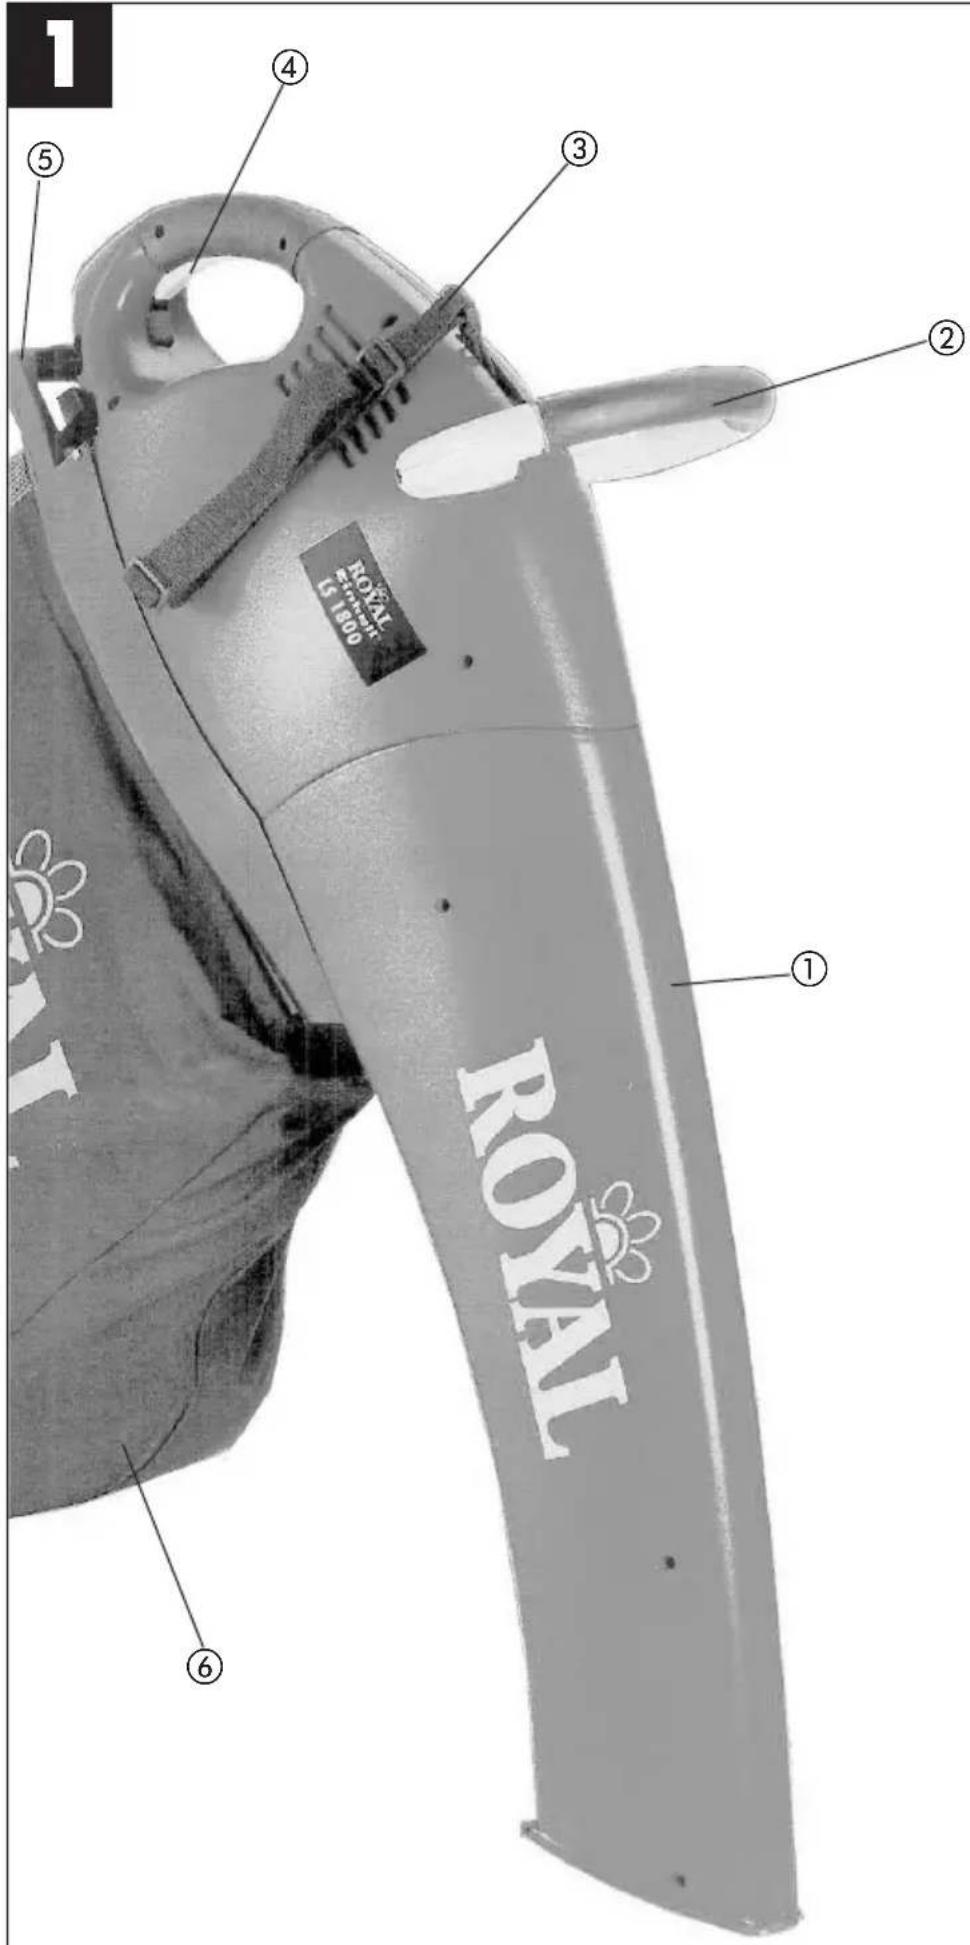
5.1 Mounting the additional handle (Fig. 2)
- Push the additional handle (2) onto the housing and tighten it with a fastening screw (7). We advise that you mount the additional handle at a right angle to the blower/vacuum tube.
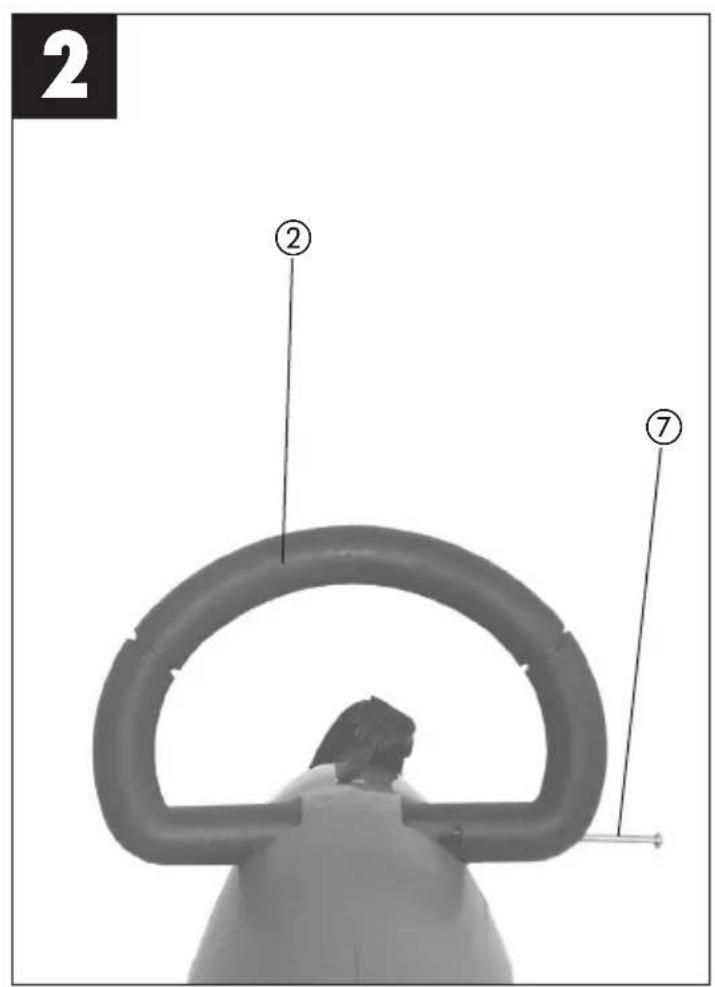
5.2 Installing the pre-screen (Fig. 3)
- Install the pre-screen (8) by placing it inside the debris bag frame (5).
5.3 Mounting the debris bag frame (Figs. 4, 5)
- Hang the inserted pre-screen (8) on the nose (9) of the vacuum tube (1), then slowly pull the debris bag (5) upward.
- Clip the debris bag frame (5) onto the housing hook (10).
The garden blower vac is equipped with a safety lock-off switch which only works when the debris bag (5) has been properly mounted to the garden blower vac.
6.0 Prior to starting up
- Start up the tool only after it is fully assembled. Always inspect the tool power cord for damage before starting up. The tool may only be used if the cord is in flawless condition.
7.0 Starting up
7.1 Sizing the strap (Fig. 1)
- Size the length of the carrying strap (3) so that the vacuum tube just clears the ground.
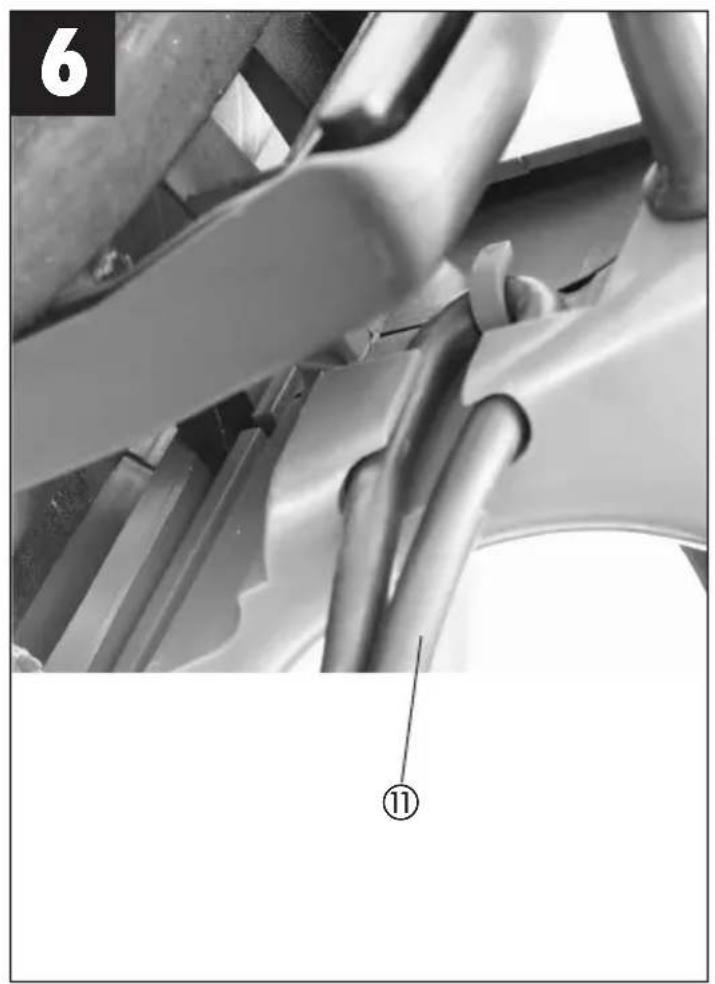
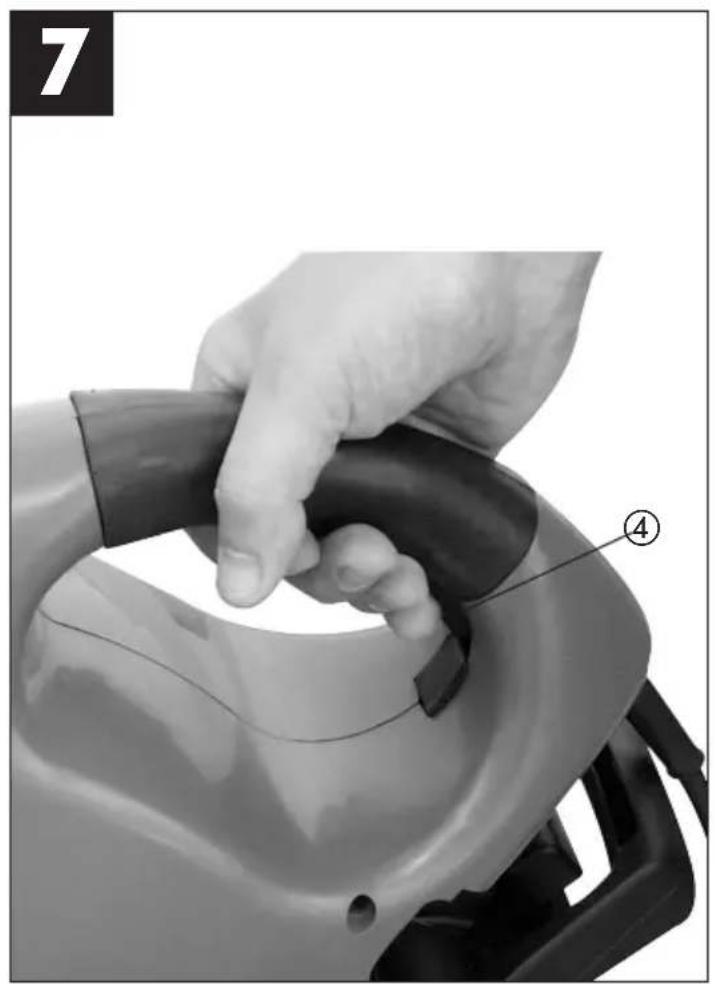
7.2 Connecting the tool to the power supply and switching on (Figs. 6, 7)
- Plug the tool plug into the power cord coupling (extension).
- Secure the power cord (11) with the sleeve found on the tool as shown.
● To switch on, hold down the On/Off switch (4). Release to switch off.
7.3 Selecting the mode of operation
7.3.1 Vacuum (Fig. 8)
- Turn the switch (12) all the way left to „Vacuum“. You can do this regardless of whether the tool is running or not.
- Swing the vacuum tube in a steady movement above the debris you want to pick up, keeping the tube approximately 3 cm above the material.
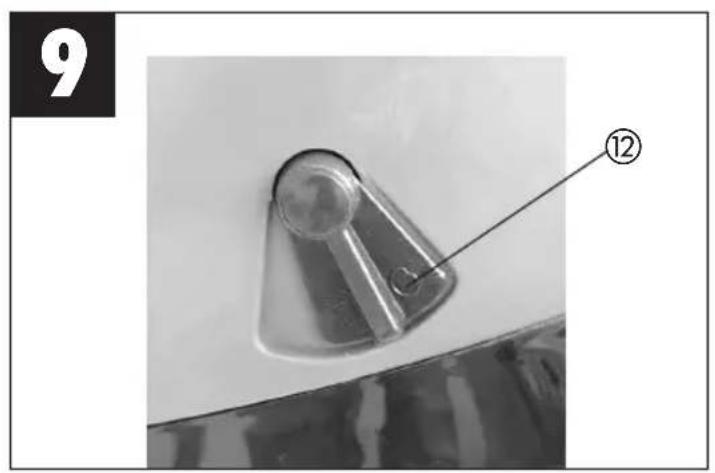
7.3.2 Blowing (Fig. 9)
- Turn the switch (12) all the way right to „Blower“. You can do this regardless of whether the tool is running or not.
- Channel the air stream forward and walk slowly to blow foliage or garden refuse into a pile or clear out hard-to-reach places.
Important!
Empty the debris bag and the pre-screen before blowing. Otherwise, material that has been vacuumed up could drop out.
7.3.3 Emptying the debris bag and pre-screen (Figs. 1, 3 - 5)
Empty the debris bag (6) in good time. When the bag is heavily loaded with material, vacuum power is considerably reduced. Deposit organic refuse at a compost site.
- Switch off the tool and pull out the plug.
- Open the zipper on the debris bag (6) and shake out the material.
- For more coarse material, the pre-screen (8) must also be emptied frequently. To do this, remove the debris bag (5) in reverse order to the instructions listed under assembly points 5.2 and 5.3, then empty the pre-screen (8).
8.0 Maintenance and cleaning
IMPORTANT!
All maintenance, service and cleaning work must be performed after the power cord has been pulled out.
- Do not use high-pressure cleaners or running water to clean the tool.
- Do not use any aggressive cleaning agents.
● After shaking out the debris bag, turn it inside out and thoroughly clean it in order to prevent mould and unpleasant odors from forming. - You can use soap and water to clean out a heavily soiled debris bag.
- Rub a bar of dry soap across the zipper teeth if the zipper becomes difficult to pull.
● Always keep the tool and ventilation slats clean. - Use a damp rag to wipe dirt marks off of the tool. Clean the vacuum/blower tube with a brush upon evidence of dirt and grime.
- Dirt and grime can make the switch (blower/vacuum) more difficult to operate as a result of the material that swirls up off the ground. When this occurs, simply flip the switch back and forth a few times, which should bring it back to the normal feel.
9.0 Repair
Should the tool experience problems beyond those mentioned above, let only an authorized professional or a customer service shop perform an inspection.
10.0 Disposal
The tool, accessories and packaging should be disposed of in an environmentally-friendly fashion. Plastic parts are coded for purposes of separation when recycling.
F
Eschenstraße 6 · D-94405 Landau/Isar (Germany)
Technical changes subject to change
The guarantee period begins on the sales date and is valid for 2 years.
Responsibility is assumed for faulty construction or material or functional defects.
Any necessary replacement parts an necessary repair work are free of charge.
We do not assume responsibility for consequential damage.
Your customer service partner
F GARANTIE EINHELL
Brook House, Brookway
North Chesire Trading Estate
Prenton, Wirral, Chesire
CH 43 3DS
Tel. 0151 6084802, Fax 0151 6086339
F V.B.P. Distribution Service Après Vente 5, allée Joseph Cugnot, Z.I. du Phare F-33700 Merignac
Tel. 05 56479483, Fax 05 56479525
NL Einhell Benelux
Weberstraat 3
S.C. A Ap. 9 Sector 1
RO 75 121 Bucharest
Tel. 01 4104800, Fax 01 4103568
© Marimex cz
Libusská 264
CZ-14200 Praha 4
Tel. 02 4727740, Fax 02 61711056