Babyline 7.1 - Baby monitors Lionelo - Free user manual and instructions
Find the device manual for free Babyline 7.1 Lionelo in PDF.

| Product Type | Audio/video baby monitor with color LCD screen |
| Brand | Lionelo |
| Model | Babyline 7.1 |
| Screen dimensions (receiver) | Approximately 15 x 10 x 3 cm (estimate) |
| Camera dimensions (transmitter) | Approximately 8 x 6 x 6 cm (estimate) |
| Receiver weight | Approximately 200 g (estimate) |
| Camera weight | Approximately 150 g (estimate) |
| Camera power supply | 5V power adapter (included); battery not specified |
| Receiver power supply | Built-in rechargeable battery + 5V power adapter (included) |
| Screen type | Color LCD |
| Night vision | Yes, automatic IR LEDs |
| Temperature sensor | Yes, built into camera |
| VOX function | Yes, automatic screen activation on sound detection |
| Two-way communication | Yes, dedicated button to speak through camera speaker |
| Lullaby player | Yes, with on/off button |
| Nightlight | Yes, built into camera, adjustable brightness |
| Alarm | Yes, programmable in menu (once, daily, selected days) |
| Range | Up to 300 m in open field (standard estimate) |
| Wall mount possible | Yes, camera has holes for wall plugs |
| Cleaning and maintenance | Wipe with a dry cloth; do not use abrasive products or immerse |
| Spare parts and repairability | Contact Lionelo after-sales service (help@lionelo.com) |
| General information | CE, RoHS certifications; declaration of conformity available online |
Frequently Asked Questions - Babyline 7.1 Lionelo
User questions about Babyline 7.1 Lionelo
0 question about this device. Answer the ones you know or ask your own.
Ask a new question about this device
Download the instructions for your Baby monitors in PDF format for free! Find your manual Babyline 7.1 - Lionelo and take your electronic device back in hand. On this page are published all the documents necessary for the use of your device. Babyline 7.1 by Lionelo.
USER MANUAL Babyline 7.1 Lionelo
natural_image
White portable electronic device with control buttons and a small antenna (no visible text or symbols)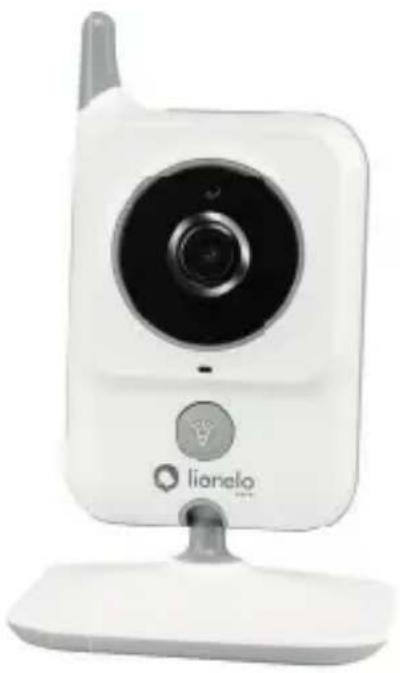
natural_image
White digital camera with a spire and lionalo logo, mounted on a stand (no text or symbols on device body)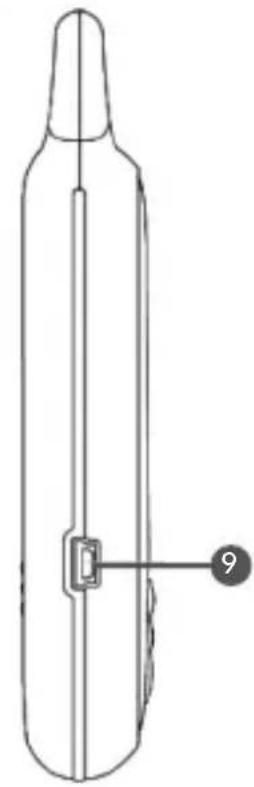
natural_image
Line drawing of a laboratory bottle with a central connector and a numbered label (9) pointing to it, no text or symbols present.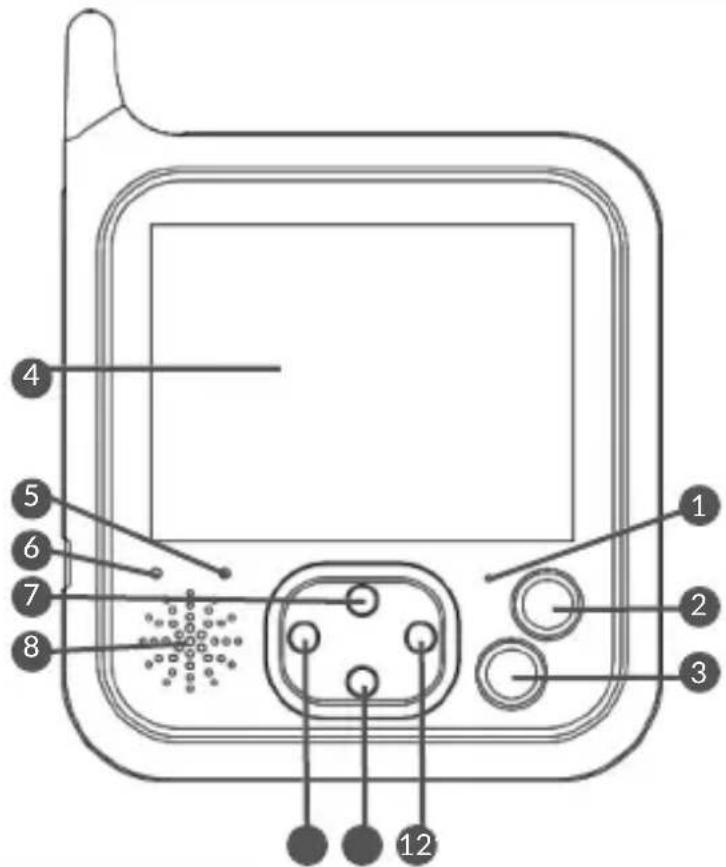
text_image
4 5 6 7 8 1 2 3 121
text_image
Diagram of a digital camera with numbered parts labeled 1 through 6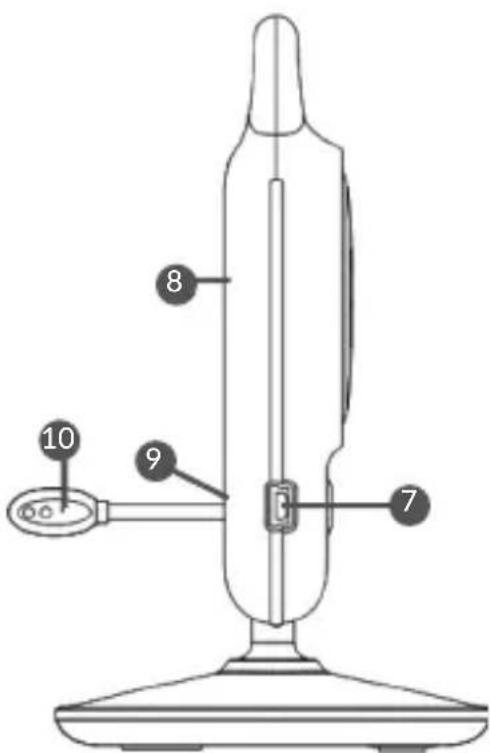
text_image
8 10 9 6 72

natural_image
Line drawing of a remote control device with cable and antenna (no text or symbols)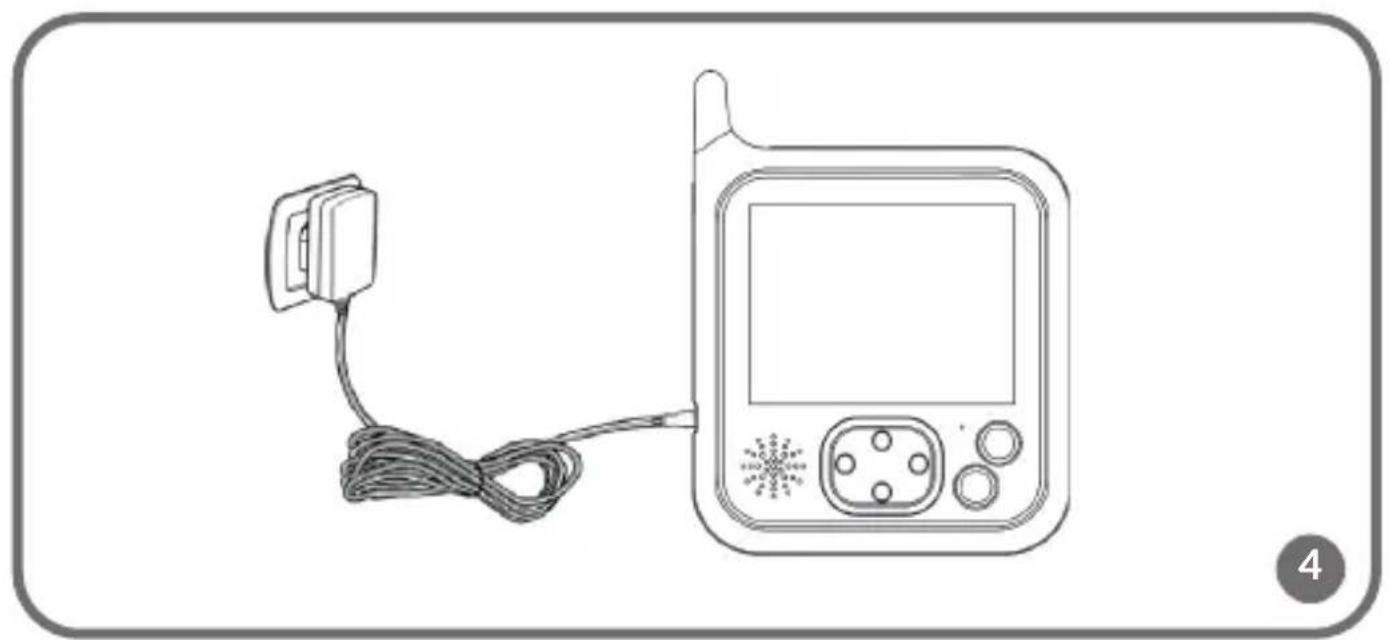
natural_image
Line drawing of a blood glucose meter device with attached cable and connector (no text or symbols)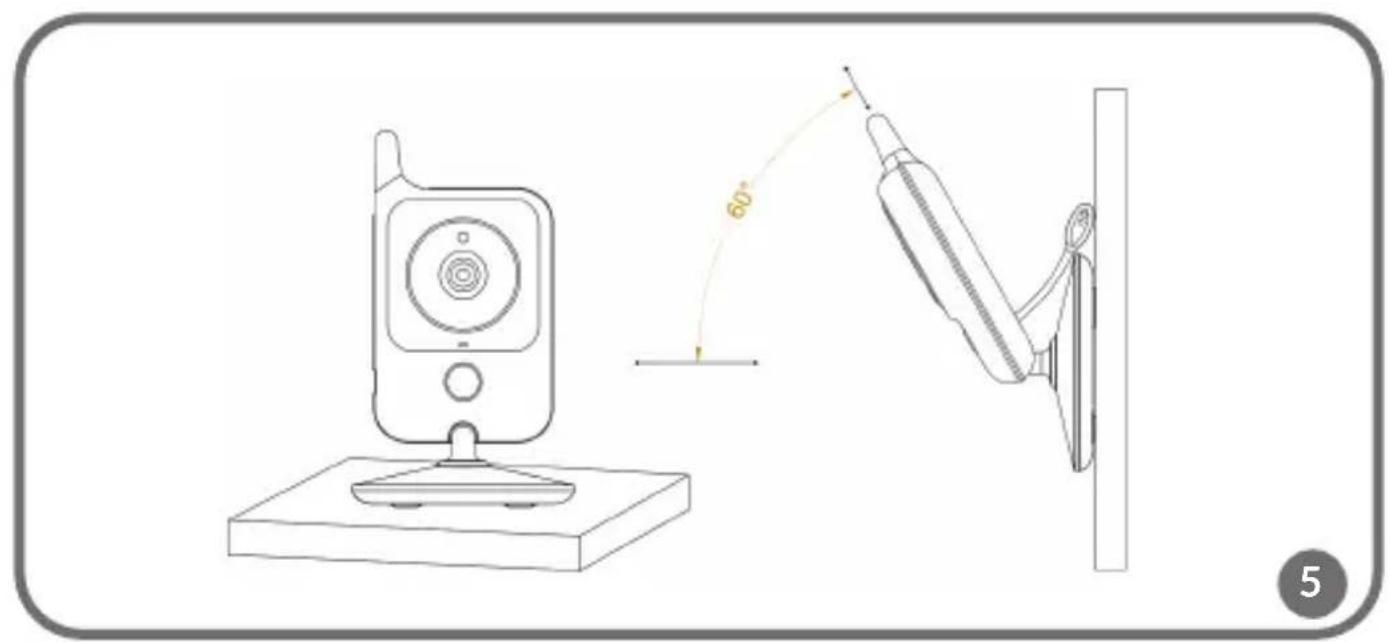
natural_image
Line drawing of a remote control device mounted on a base with a wall-mounted cable, showing a 60-degree angle measurement (no text or symbols)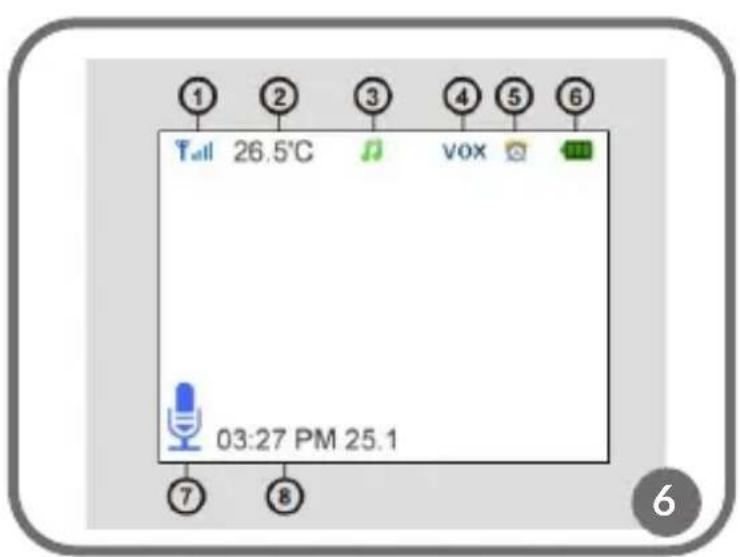
text_image
1 26.5°C 3 4 5 6 03:27 PM 25.1 7 8 vox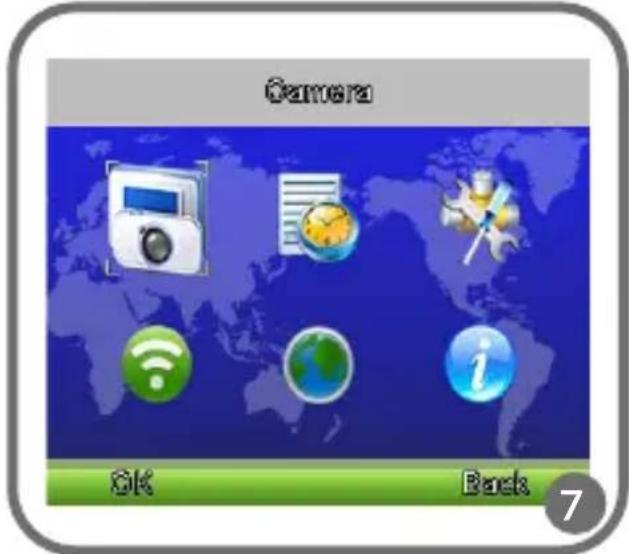
text_image
Camera OK Back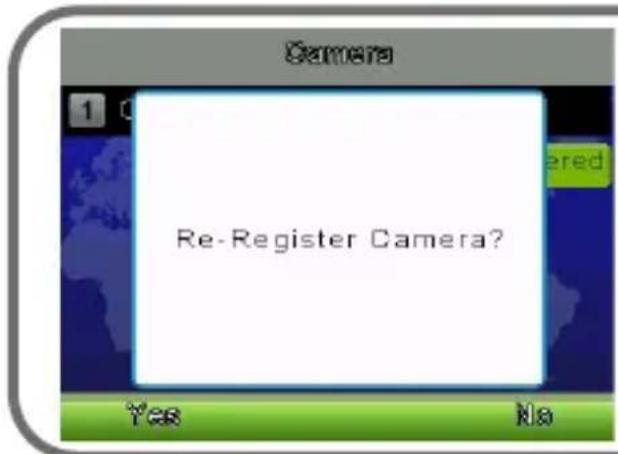
text_image
Camera 1 0 Re-Register Camera? Yes No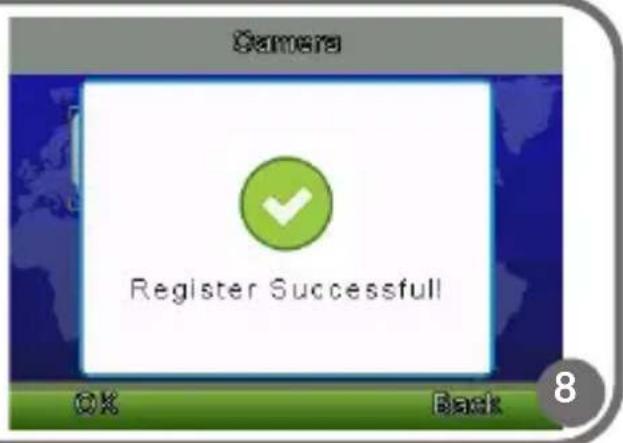
text_image
Camera Register Successful OK Back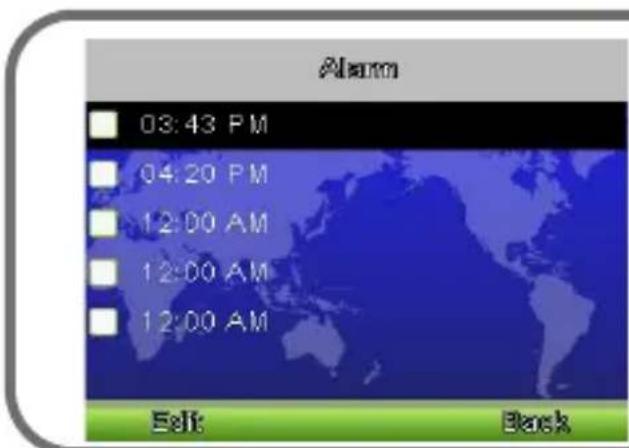
text_image
Alarm 03:43 PM 04:20 PM 12:00 AM 12:00 AM 12:00 AM Edit Back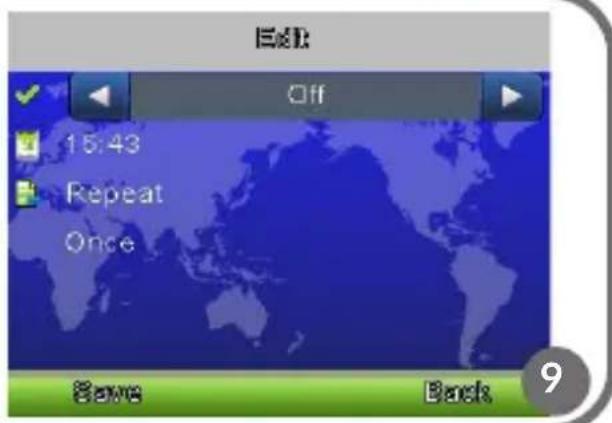
text_image
Exit Off 15:43 Repeat Once Save Back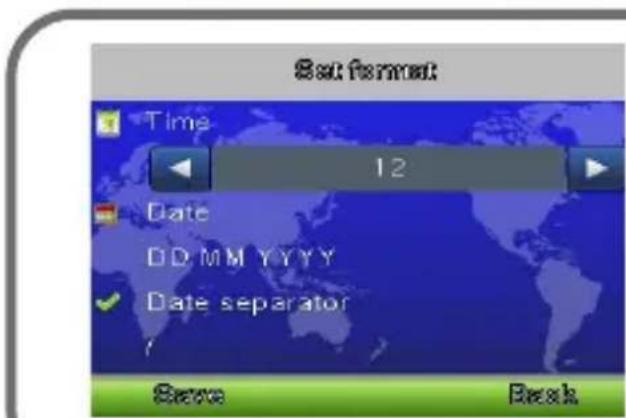
text_image
Set Format Time 12 Date DD MM YYYY Date separator Save Back
text_image
Set time/date HH:MM 13:59 YYYY/MM/DD 2017/11/01 Daylight saving Off Base Back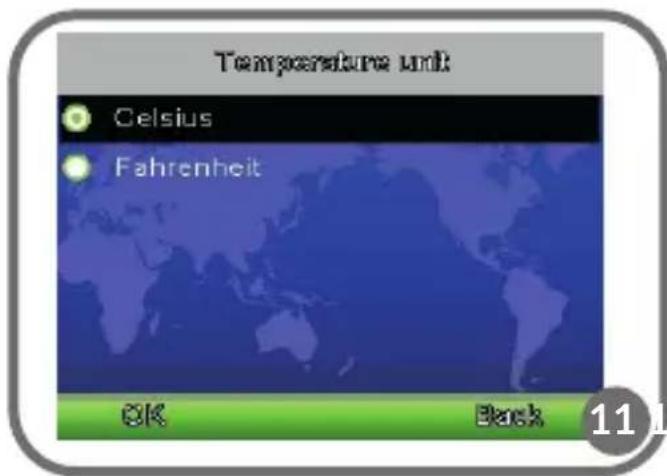
text_image
Temperature unit Celsius Fahrenheit OK Back 11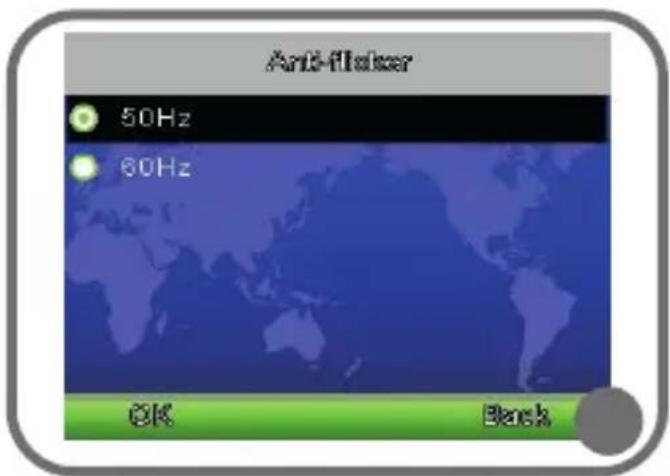
text_image
Anti-flicker 50Hz 60Hz OK Back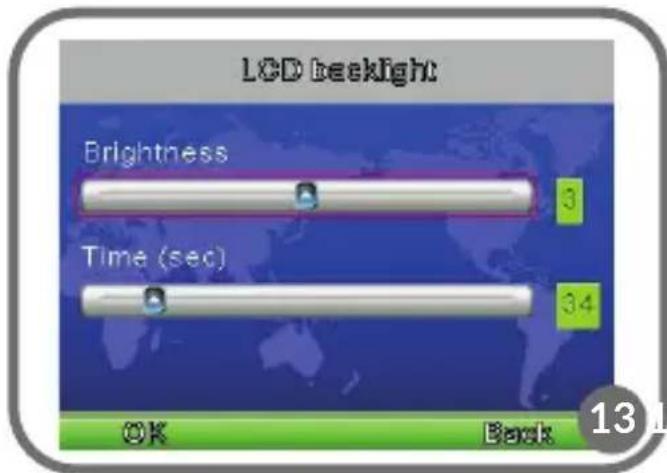
text_image
LCD backlight Brightness 3 Time (sec) 34 OK Back 13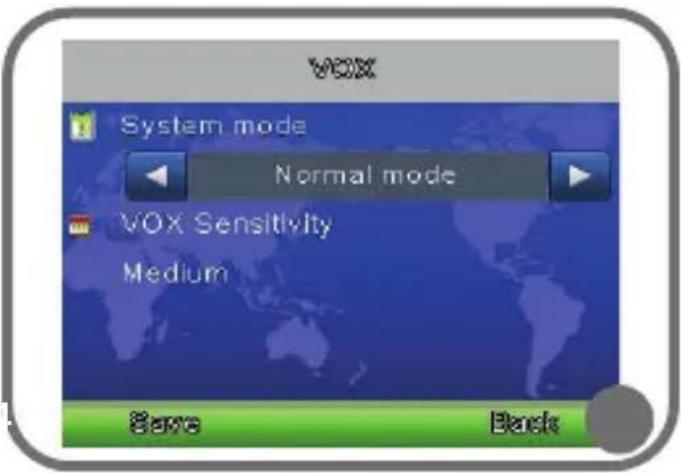
text_image
VOX System mode Normal mode VOX Sensitivity Medium Save Back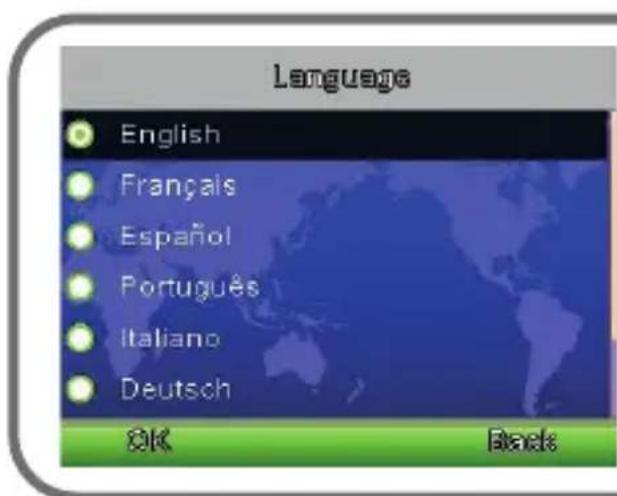
text_image
Language English Français Español Português Italiano Deutsch OK Black
text_image
Language Español Português Italiano Deutsch Türkçe Русский язык OK Back 15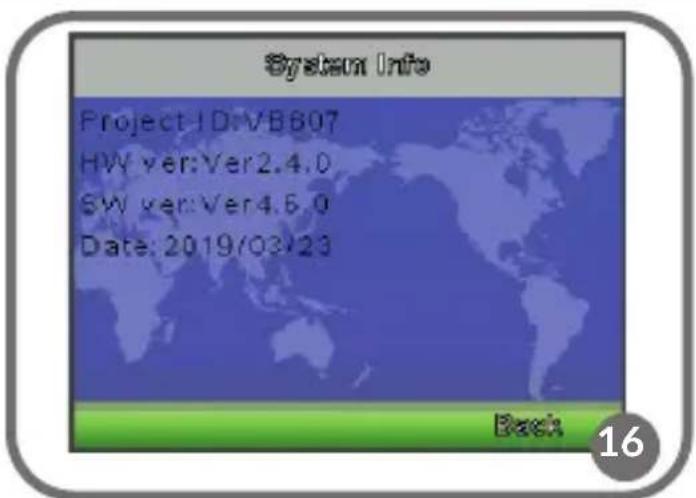
text_image
System Info Project ID:VB807 HW ver:Ver2.4.0 SW ver:Ver4.6.0 Date: 2019/03/23 Back 16Dear Customer!
In case of any questions or comments on the purchased product, please contact us: help@lionelo.com
Producer:
BrandLine Group Sp. z o. o.
The product complies with requirements of EU directives.
Pursuant to the Directive 2012/19/EU, this product is subject to selective collection. The product must not be disposed of along with domestic waste since it may pose a threat to the environment and human health. Worn-out product must be handed over to the electrics and electronics recycling point.
Product description
Set contains:
- Transmitter + charger
- Receiver + charger
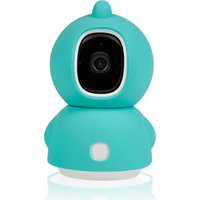
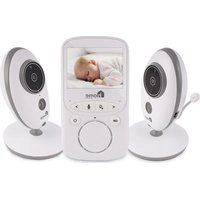
Receiver (Fig. 1)
- Microphone
- Off / back button
- OK / enter the menu
- LCD monitor
- LED power / charge indicator
-
LED signal indicator
-
Up button / increase the volume
- Speaker
- Power connector
- Music on / off button
- Down button / volume down
- Two-way communication button
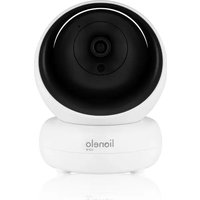
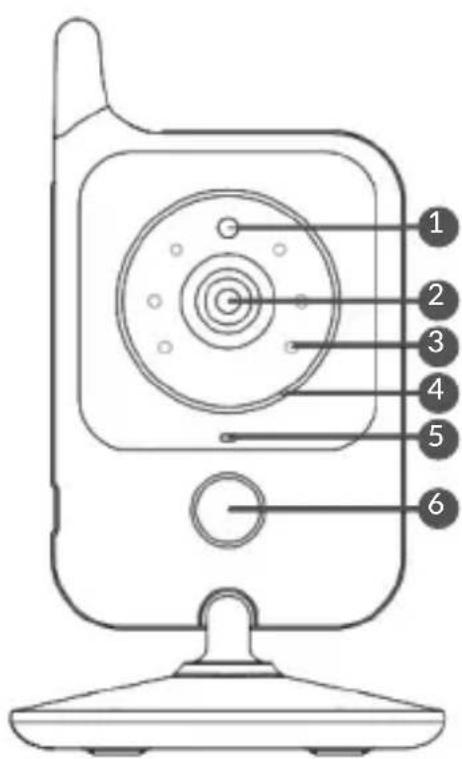
Transmitter (Fig. 2)
- Light sensor
- Camera lens
- Infrared LEDs
- LED power indicator
-
Microphone
-
Bedside lamp
- Power connector
- Speaker
- Pairing button
- Temperature sensor
Warnings
- Installation may only be carried out by an adult. Keep smaller parts of the set out of reach of children.
- This product is not a toy. Don't let children play with it.
- An electronic nanny is not a substitute for proper care and parental care.
- Do not place the baby monitor and its cords in the playpen or at your fingertips. Place them at least a meter apart.
- Keep all cables out of the reach of children.
- Do not place the nanny near water or a source of fire.
- Use only the adapters included in the kit.
- Do not touch the plug contacts with sharp or metal objects.
Introduction
Camera power supply (fig. 3).
Connect the charger cable to the camera's power connector (7). Connect the battery to the power supply.
Attention! Use only the adapters provided in the kit.
The LED on the camera will light white.
Monitor power supply (fig. 4).
The product is equipped with a battery, thanks to which it is possible to operate without access to the network.
Connect the charger cable to the monitor's power connector (9), then connect the battery to a power outlet. The charging LED (5) will light up, which means that charging has started.
Attention! Use only the adapters provided in the kit.
Use
To turn on the product, press the power button on the monitor (2).
Position the camera in a convenient location and tilt it towards the place you
want to monitor. Adjust the camera so that the monitor image gives you the right view. The camera has a night mode useful in difficult lighting conditions. It is possible to mount the camera to the wall using mounting pins (stand equipped with appropriate holes)
Attention! Do not put the camera within the reach of a child!
Attention! If there is noise in the image or sound received, try moving the camcorder to another location. Make sure the camera is not positioned on other electronic devices.
Pairing a camera with a monitor
The kit you received is already paired and ready to use. However, if the camcorder loses connection with the monitor, you will need to perform the pairing process again. See chapter: Pairing a camera.
VOX function
Thanks to it, the monitor screen will automatically go into standby mode to save battery. The monitor activates automatically when the transmitter detects sound.
Music player
Press the music on / off button to play the lullaby. Press again to turn off the melody.
Two-way communication
Press and hold the two-way communication button (12) on the monitor to talk to your child using the camera's speaker. The two-way communication symbol will appear at the bottom of the screen.
Change the volume
When the monitor is playing video from the camera, press the volume down or volume up button (buttons 7 and 11 in fig. 1). The current volume level will appear on the monitor for 5 seconds.
Night lamp function
Press the lamp activation button (6) on the camera to turn it on. Press again to change the lighting intensity. Press the button again to turn off the light.
Screen icon markings (fig. 6)
- Signal strength indicator
- Temperature at the transmitter
- Playing lullabies
- VOX mode active
-
Active alarm
-
Battery charge indicator
- Two-way communication function active
- Date and time
Options in the menu
To enter the menu, press the button (3) on the monitor. There are 6 option icons in the menu (Fig. 7):
-
Camera
-
Settings
-
Alarm
-
languages
-
VOX
-
System Information
Use the direction buttons to select the option you are interested in. Pressing the OK button (3) will enter the menu, while the return (2) will take you back to the previous module.
With detailed parameter selection, the two-way communication button is used to select the parameter, while the up and down arrows are used to modify it.
VOX (fig. 14)
Here you can change the operating mode of the device between:
Normal: backlit monitor
VOX: notification and energy saving mode
You can select the sensitivity of sound detection by the device in VOX mode - lowest, medium or high.
Pairing a camera (Fig. 8)
Enter the main menu and select the „camera” function (1), hold down the pairing button on the camera (9) for 10 seconds.
Alarm settings (Fig. 9)
To set or modify an alarm, select an item from the list. You will be able to choose if the alarm is active, modify the alarm time, and modify the repeat mode (once, daily or on selected days of the week)
Settings
Time and date (Fig. 10)
Here you can change the date and time, as well as the date format.
Temperature unit (Fig. 11)
Available temperature formats: Celsius or Fahrenheit.
Image noise reduction (Fig. 12)
Two options to choose from: 50/60 HZ.
Monitor brightness (fig. 13)
In this tab you have the option of adjusting the brightness of the LCD monitor to your needs, you can also change the time after which the monitor will go into standby mode.
Language (Fig. 15)
The option allows you to select a language.
System information (Fig. 16)
In the tab you will find additional information, such as production date and software version.
Pictures are for reference only. The real design of products may differ from pictures presented.
PL
Drogi Kliencie!
EN: Simplified EU declaration of conformity
BrandLine Group Sp. z o. o. hereby declares that the “BABYLINE 7.1” product complies with the directive: 2014/53/EU - RED Directive, 2014/30/EU - EMC Directive, 2014/35/EU - LVD Directive, 2011/65/EU - RoHS Directive.
Full content of EU declaration of conformity is available on the following website:
Detailed warranty conditions are available on the website:
Thank you for purchasing our product