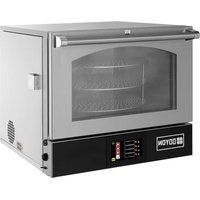
SRO1G - Oven Doyon - Free user manual and instructions
Find the device manual for free SRO1G Doyon in PDF.

| Brand | Doyon |
| Model | SRO1G |
| Product Type | Convection gas oven |
| Power Supply | Gas (natural or propane) and electricity (120 V) |
| Thermal Power | 175,000 BTU/h (natural gas) / 75,000 BTU/h (propane) |
| Convection System | Jet Air for uniform cooking |
| Control Type | Programmable Ebake |
| Cooking Modes | Manual and programmed (up to 99 recipes, 8 steps per recipe) |
| Special Functions | Single and pulsed steam, fan delay, fan speed (STD/HIGH), timer, rotating rack (optional) |
| Preheating | Yes, programmable |
| Capacity | 1 oven section (single chamber) |
| Connections | Exhaust to hood (10-inch diameter, min. flow 900 cfm), gas and cold water supply (1/2 NPT) |
| Installation | By a specialized gas and electricity technician |
| Maintenance and Cleaning | Clean interior with water and detergent, use silicone protector (ref. EXS400), clean windows with Brasso (ref. EXC300), exterior with stainless steel cleaner (ref. NES201) |
| Burner Maintenance | Every 3 months: clean air inlet; once a year: check by qualified technician |
| Safety | Automatic shutdown in case of failure, door switch, burner locking system |
| Spare Parts | Available on request from Équipement Doyon service department |
| Warranty | 1 year parts and labor (F.O.B. Linière, Quebec) |
| Serial Number | Indicated on the nameplate (right side of the oven) |
Frequently Asked Questions - SRO1G Doyon
User questions about SRO1G Doyon
0 question about this device. Answer the ones you know or ask your own.
Ask a new question about this device
Download the instructions for your Oven in PDF format for free! Find your manual SRO1G - Doyon and take your electronic device back in hand. On this page are published all the documents necessary for the use of your device. SRO1G by Doyon.
USER MANUAL SRO1G Doyon
natural_image
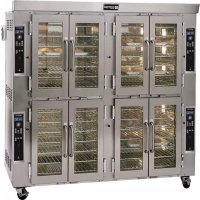
Exterior view of a modern industrial oven or processing unit (no signage visible)SRO1G & SRO2G

Intertek
Product / Produit:
IMPORTANT SAFETY INSTRUCTIONS SAVE THESE INSTRUCTIONS
CAUTION
In case of strong gas odours, shut off the gas input valve and contact a specialised gas technician
TABLE OF CONTENTS
Installation warnings A-3
Distances to respect A-4
Power failure A-4
Installation A-7
Ebake control key fonction description ____ A-11
Ebake Programmable control - Operating modes A-12
Manual mode A-13
Programmed cooking mode ____ A-15
Troubleshooting A-23
Oven maintenance and cleaning ____ A-27
Maintenance of the burner A-27
WARANTY
FOR YOUR SAFETY
DO NOT STORE OR USE GASOLINE OR OTHER FLAMMABLE VAPORS OR LIQUIDS IN THE VICINITY OF THIS OR ANY OTHER APPLIANCE.
WARNING
IMPROPER INSTALLATION, ADJUSTMENT, ALTERATION, SERVICE OR MAINTENANCE CAN CAUSE PROPERTY DAMAGE, INJURY OR DEATH. READ THE INSTALLATION, OPERATING AND MAINTENANCE INSTRUCTIONS THOROUGHLY BEFORE INSTALLING OR SERVICING THIS EQUIPMENT.
IMPORTANT INSTRUCTIONS DE SÉCURITÉ
CONSERVEZ CE MANUEL D'INSTRUCTIONS
AVERTISSEMENT
The manufacturer suggests to read this manual carefully.
This Jet Air oven is manufactured with first quality material by experienced technicians. Proper installation and maintenance will guarantee a reliable service for years to come.
A nameplate fixed to the front or right side of the oven specifies the model number, type of combustible, BTU rating, operating pressures, serial number, voltage and amperage.
Drawings and replacement parts numbers are available from Service Dept. of Doyon Equipment. The electrical diagram is affixed in the control panel/compartment of the oven.
ATTENTION
DOYON is not responsible for damages to the property or the equipment caused by personnel who is not certified by known organisations. The customer is responsible for finding qualified technicians in gas, electricity and plumbing for the installation of the oven.
CONSTRUCTION
You just bought the most advanced gas fired oven in the world, "DOYON" technology at its best. This gas fired oven is manufactured using the highest quality components and material.
The oven gives a perfect uniform baking with its unique Jet Air convection system. The DOYON oven is designed with parts that are easy to find.
SHIPPING
For your safety, this equipment has been verified by qualified technicians and carefully crated before shipment. The freight company assumes full responsibility concerning the delivery in good condition of the equipment in accepting to transport it.
IMPORTANT
RECEPTION OF THE MERCHANDISE
Take care to verify that the received equipment is not damaged before signing the delivery receipt. If a damage or a lost part is noticed, write it clearly on the receipt. If it is noticed after the carrier has left, contact immediately the freight company in order that they do their inspection.
We do not assume the responsibility for damages or losses that may occur during transportation.
INTRODUCTION
RÉCEPTION DE LA MARCHANDISE
The DOYON gas fired ovens are designed to be used with the gas specified on the descriptive nameplate. The installation must conform with local codes, or in the absence of local codes, with the National Fuel Gas Code, ANSI Z223.1/NFPA 54-XX, or the Natural Gas and Propane Installation Code, CSA B149.1-XX. Refer to last edition year for XX. Copies of these are available at:
American Gas Association, 1515 Wilson Boulevard, Arlington, Virginia, 22209. Canadian Gas Association, 55 rue Scarsdale, Don Mills, Ontario, Canada, M3B 2R3.
The appliance and its individual shutoff valve must be disconnected from the gas supply piping system during any pressure testing of that system at test pressures in excess of 1/2 psi (3.5 kPa).
For your convenience, this appliance has an automatic direct ignition burner. Follow Operating instructions included in this manual and specified on the appliance.
Keep the appliance area free and clear from combustibles. Do not obstruct the flow of combustion and ventilation air.
INSTALLATION AND SERVICE
Installation and service must be done by specialised technicians. Contact a certified gas technician, electrician and plumber for set up.
The oven must be connected to the utility and electrically grounded in conformity to the effective local regulations. If these are not established, the oven must be connected according to the Canadian Electrical Code (CSA-C22.1-XX) or National Electrical Code (ANSI/NFPA 70-XX), as applicable. Refer to last edition year for XX. Installation must also allow proper access for service (18 inches from top).
The ovens must be installed with proper ventilation:
- Single connection point on top of Eyebrow Hood: Flue gas are vented through Eyebrow hood supplied with the oven. The 10"diameter connection collar requires a 900 CFM at 0.6inW.C. pressure drop through hood. Customer to supply duct and ventilator fan per local code. Airflow proving switch is factory installed and integrated with burner system operation. Oven provided relay with max. 10.0 amp 1/2H.P. @ 120V output for fan operation. Ventilator fan is required. Consult local authorities to determine whether Type 1 (grease) or Type 2 (vapor) duct will be required. Hood connection suitable for Type B vent, except when products of baking are grease laden.
Make sure that provision for adequate air supply is provided for the operation of the oven.
A-4
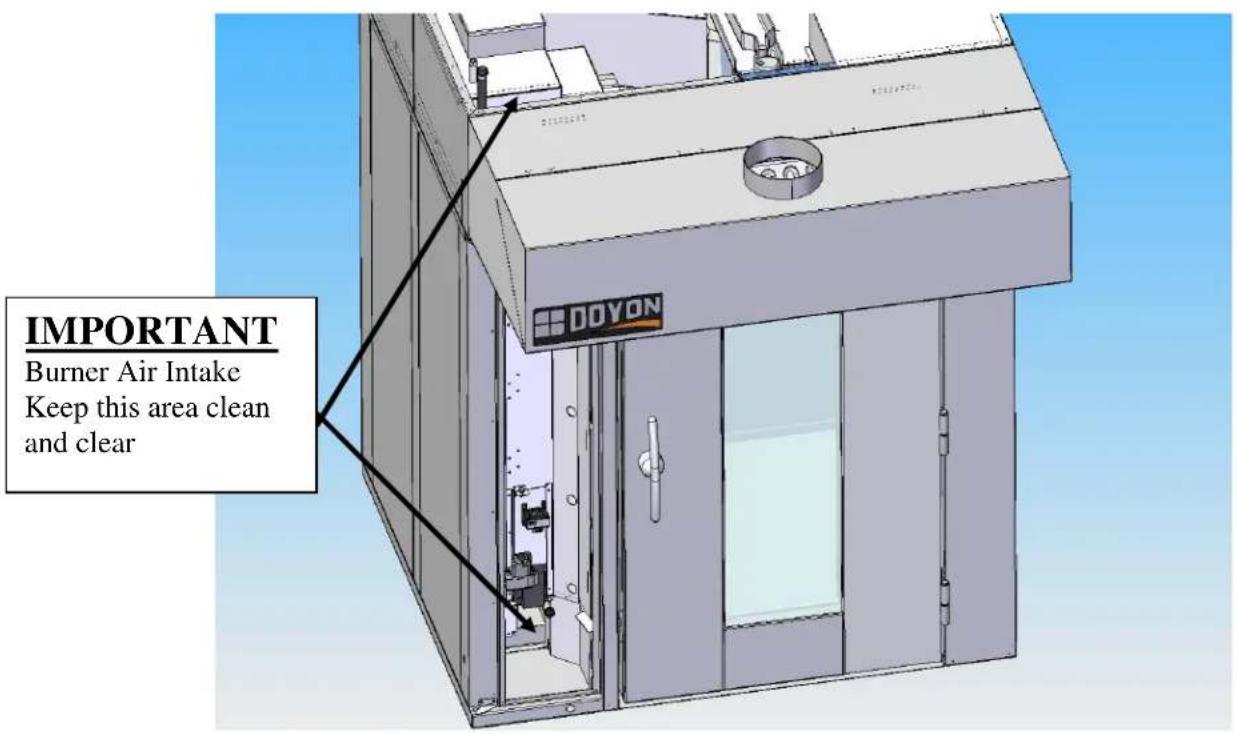
text_image
IMPORTANT Burner Air Intake Keep this area clean and clearDISTANCES TO RESPECT
For the installation near combustible materials
A) Back and sides of the oven: 0 inch.
B) Top of the oven: a clearance of 18 inches to the ceiling must exist to permit adequate venting of the exhaust pipe and hot parts and to give a proper access to a technician.
C) Floor: The oven must be installed on a non-combustible floor.
D) you must have at least 18 inches when you evacuate through a hood canopy.
POWER FAILURE
No attempt should be made to operate the appliance during power failure.
The burner, the electric gas valve and the regulator are all designed to be failed safe. There is no special action to take in case of electrical power failure.
If the main switch in ON when the power comes back, the oven will remain OFF and the oven control will be energised. It is nevertheless recommended to turn OFF the main switch to protect the electronic components.
AVERTISSEMENT LORS DE L'INSTALLATION
American Gas Association, 1515 Wilson Boulevard, Arlington, Virginia, 22209.
Association Canadienne du Gaz, 55 rue Scarsdale, Don Mills, Ontario, Canada, M3B 2R3.
Take off the packaging material with care. Take off all the material used for packing and accessories. Seal the unit on the floor with silicone. Verify every adjustments and correct it if necessary. Install the hood covering the top front of the oven.
Each unit is set up to be used with the type of gas and electrical supply specified on the nameplate fixed on the oven.
The installation must be conform with National fuel gas code ANSI Z223.1-XX and CAN/CGA-B149-XX, Gas installation Code and local Codes where applicable. Refer to last edition year for XX.
The oven's combustion system consists of a very safe gas burner certified in accordance to the American Gas Association Standard in USA and with the Canadian Gas Association in Canada.
1. To the certified gas technician
The burner installed on DOYON gas fired ovens is set up and adjusted at the plant for a first class operation. It is nevertheless necessary to verify on site the pressure at the burner input. The following table indicates the pressures that must be set up to remain conform to the AGA standards or CGA.
SRO1G
| GAS TYPE | ALTITUDE (FT) | INPUT (BTU) EACH OVEN SECTION | REGULATOR INPUT PRESSURE (Water column inches) | REGULATOR OUTPUT PRESSURE (Water column inches) | MANIFOLD PRESSURE (Water column inches) | BURNER ORIFICE SIZE (DMS) QTY=26) |
| Propane | 0-2000 17 | 5 000 11.0 | 8.6 8.5 | # 66 drill | ||
| Propane | 2000-4500 | 175 000 | 1.0 8.6 8.5 | # 66 drill | ||
| Natural | 0-2000 | 175 000 | 7.0 | 3.4 | 3.3 | # 53 drill |
| Natural | 2000-4500 | 175 000 | 7.0 | 3.4 | 3.3 | # 53 drill |
SRO2G
| GAS TYPE | ALTITUDE (FT) | INPUT (BTU) EACH OVEN SECTION | REGULATOR INPUT PRESSURE (Water column inches) | REGULATOR OUTPUT PRESSURE (Water column inches) | MANIFOLD PRESSURE (Water column inches) | BURNER ORIFICE SIZE (DMS) QTY=26) |
| Propane | 0-2000 | 275,000 | 11.0 | 7.6 | 7.3 | # 60 drill |
| Propane | 2000-4500 | 275,000 | 11.0 | 7.6 | 7.3 | # 60 drill |
| Natural | 0-2000 | 275,000 | 7.0 | 3.4 | 2.75 | # 52 drill |
| Natural | 2000-4500 | 275,000 | 7.0 | 3.4 | 2.75 | # 52 drill |
The burner used is adjusted for use with the gas indicated on the nameplate. It is nevertheless possible to convert the burner to another gas by doing the modifications indicated in the CONVERSION PROCEDURE provided with the oven. These modifications must be done carefully and completely under the company's instruction to remain conform to A.G.A. or C.G.A standards. Refer to Doyon Equipment to get the right CONVERSION KIT.
FAM SROxG rev 07-13.doc 10/13
A-8
The pipe fittings compound must be certified for gas.
The customer must install a manual shut off valve at the end of the gas supply pipe near the appliance which is approved by the American Gas Association Standard in the United States and with the Canadian Gas Association in Canada.
Clean the air contained in the gas supply pipe at the installation to insure a successful firing on the first try. The gas pipe sealing compound tightness must be verified using a solution of water and soap prior to firing the unit.
WARNING
Make sure not to obstruct the overpressure opening on the gas regulator.
NOTE: If there's any modification done to the system or change of the type of gas used, make sure that the regulator pressure of the burner is adjusted as recommended in this manual.
2. To the electrician
Electrical supply installation must be in accordance with the electrical rating on the nameplate.
A phase sequence and loss of phase relay is installed on 3 phases models to avoid wrong rotation direction of the blowers. If the oven does not light up, swap two phases conductors in the supply box and try again. Be sure that the power is really on the 3 phases wires next to the fuses in the control compartment on the front of the oven. Check also if the control fuse located near the main switch is not blown.
WARNING
The electrician must make sure that the supply cable does not come in contact with the oven top which becomes hot.
3. To the plumber
This equipment is to be installed to comply with the applicable federal, state or local plumbing codes.
Connect the water supply pipe to the oven using good quality sealing compound. Take care that combustible water pipes do not come in contact with hot parts on the top of the oven.
Connect the steam system (1/2 NPT) to the cold water distribution network. Minimum Water Flow required is 4.5 USGPM (0.29 l/sec).@ 50psi
We highly recommend a water softener to eliminate minerals in the water. We suggest you to use Doyon installation kit number 50-1530 and replacement cartridges 50-1531 to achieve minimum flow requirement.
INSTALLATION
The Doyon Ebake controller has two operation modes Manual and Programmable.
MANUAL: to use all functions without using a recipe program.
PROGRAMMABLE : to use with a recipe program.
Program capacity
☐ Program #1 is always used as the default Manual Cooking mode setting (single stage).
☐ Programs #2 to #99 can have up to 8 stages each recipe.
OVEN START UP
Turn on the main power switch. The controller will power up and display:
☐ OFF, PRESS POWER KEY TO START.
Press the red POWER key, the oven will go ON. The display will read PREHEAT and the oven will heat to reach the MANUAL preset temperature. Then, the oven will display READY and the alarm will beep 5 times. This will mean that the oven is at the desired temperature.
To turn the oven OFF, press the red POWER key and hold it for 3 seconds. The oven will run on COOL DOWN mode until it reaches 250^ F and then, it will automatically turn OFF. At this moment, the display will show : OFF, PRESS POWER KEY TO START.
DOOR SWITCH
□ If the door is opened :
○ Display scrolls recipe NAME and DOOR OPEN.
○ All functions are turned OFF (unless in Cool Down mode, then the fan remains on).
- All timers pause until the door is closed.
MANUAL MODE
This mode is used to work in a single stage.
Turn the dial until MANUAL is highlighted, press the dial to confirm
COOL DOWN FUNCTION
For fast cool down, press on the COOL DOWN key, the fan will remain ON while the door is open.
Note : if the oven reaches 200^ F, it will turn OFF automatically. Display will show : OFF, PRESS POWER KEY TO START.
TEMPERATURE FUNCTION
To change the temperature set point, press on 🔒. Display will show actual temperature set point. Turn the dial to select the desired temperature set point (by increments of 5 degrees) and press ← to confirm and exit the setting mode. Also, note that the new set point will automatically be saved after exiting if the dial is not pressed after changing the setting. If the dial is not pressed or turned within 3 seconds, the last set temperature will be saved.
TIMER FUNCTION
To change the time setting, press on 📄 Display will show time setting. Turn the dial to select the desired timer setting (by increments of 15 sec.) and press ← to confirm and exit setting. If the dial is not pressed or turned within 3 seconds, the last set time will be saved.
Press on timer START/STOP key to start the timer countdown. At the end of the countdown, display will show BAKE DONE. If needed, you can add 1 minute by pressing the ADD TIME key. It will automatically add 1 minute without changing the original time setting. If more then one minutes is needed turn the dial to desired add time and press When the countdown is finished, the display will show BAKE DONE.
Also, at any time during the countdown, the time can be paused by pressing on the TIMER START/STOP key or cancelled by pressing and holding the START/STOP key for 3 seconds.
When the door is open, the timer pauses and the display indicates DOOR OPEN until the door is closed.
☐ If the remaining time is less than 60 minutes, it will be displayed as MM:SS
☐ If the remaining time is 60 minutes or more, it will be displayed as HH:MM
Note : Timer in MANUAL mode is only a reminder.
FAN OFF DELAY FUNCTION
By pressing on the FAN OFF DELAY key, the fan remains OFF for a period of time before starting working in normal fan mode. After pressing FAN OFF DELAY key, the display will show NONE. Turn the dial to select HIGH (3 minutes) or LOW (2 minutes) fan off delay and press If the dial is not pressed or turned within 3 seconds, the last set FAN OFF DELAY will be saved.
To cancel fan off delay, press the FAN OFF DELAY key, turn the dial to NONE and press
Note : during FAN OFF DELAY the oven heating system is not functional. A higher set point temperature preheat is recommended if use more then 3 minutes FAN OFF DELAY.
FAM SROxG rev 07-13.doc 10/13
A-14
FAN SPEED
You can change the fan speed. There are 2 different fan speed setting available STD & HIGH available. Default speed is STD. To select a different fan speed then STD press on the FAN SPEED key, turn the dial to desire fan speed and
press
This function will change the fan speed of the fan, creating a different air flow.
STEAM FUNCTION
Steam output can be turned ON only if oven temperature is ≥slant (250°F /121°C).
- Pressing SHOT STEAM key : A single steam injection will inject for duration of preset time. The display will toggles the recipe name and the steam. following the steam injection you will have automatically a FAN OFF DELAY for the period of steam after steam period, the vent system will automatically evacuate steam out of the oven and go on normal baking cycle.
□ Note: When pressing the SHOT STEAM key, it will force the fan OFF. - Pressing PULSE STEAM key : It will create continuous steam injections. If pressed again, it will cancel the pulse steam function. When active, the display scrolls recipe name and pulse steam.
☐ Note: When pressing the PULSE STEAM key, the fan will stay ON to create continuous moisture during the baking cycle.
VENT KEY FUNCTION
During Manual mode Only at any time vent can be open or close by pressing the vent key.
☐ Note: When the SHOT STEAM sequence the vent will operate automatically.
RACK KEY FUNCTION
Rack is always rotated when oven is powered, when door are opening the rack will automatically index with the door opening and drop down to load or unload the rack. If desired Rack can be stop and index during baking by pressing the RACK key.
To restart the rack press again on the RACK key or after opening the door and closed back the rack will start rotating in normal mode.
PROGRAMMED COOKING MODE
This mode is used to work with 1 to 8 stages recipe programs.
To select a programmed recipe, turn the dial until name or number of product is highlighted. Press to select product program. The oven will preheat to the programmed temperature. Display will show READY and the alarm will beep 5 times when the oven is at the desired temperature.
Press on START/STOP key to start the programmed recipe. The timer will countdown. At the end of the recipe, display will show BAKE DONE. If needed, you can add time pressing the BAKE MORE TIME key. It will automatically add 1 minute without changing the original time setting. If more then one minutes is needed after pressing the BAKE MORE TIME key, turn the dial to desire add time and press ← When the countdown is finished, the display will show BAKE DONE. Press on START/STOP key to stop the recipe.
Also, at any time during the countdown, the recipe can be paused by pressing on the START/STOP timer key or canceled by pressing and holding the key for 3 seconds.
When the door is open, the timer pauses Rack will index and drop down to floor, the display shows DOOR OPEN until the door is closed.
To see current stage information during baking process, press on the TIMER key. It will display recipe name, stage number, stage status and time reminder.
Note : During a programmed recipe, the keys SHOT & PULSE STEAM, FAN OFF DELAY are not functional. All those functions need to be set in the recipe program.
RACK FUNCTION
Rack is always rotated when oven is powered, when door are opening the rack will automatically index with the door opening and drop down to load or unload the rack. If desired Rack can be stop and index during baking by pressing the RACK key.
To restart the rack press again on the RACK key or after opening the door and closed back the rack will start rotating in normal mode.
Cook Program Structure
Each recipe name can have maximum of 15 character. Up to 10 characters will show a fixe recipe name on the display. If more then 10, the recipe name will scroll on the display and when timer is activate the recipe name will be fixe and show only the 10 first characters.
Each recipe can have preheat temps, core probe, cook stage, cook & hold function. Each stage has the following programmable parameters:
Time: the time duration of the current stage.
Oven temperature: the oven set point for current stage.
Steam: shot or pulse steam injected into the oven chamber.
Fan off delay: 0 to 3 minutes can be programmed after the shot steam injection.
Fan off delay: duration of the fan OFF
Fan speed: STD/HIGH
Vent opening: vent opening delay during stage.
Entering the Programming mode
Press the PROGRAM KEY. If the control is protected by a password. The display reads ENTER CODE. Use the
dial to enter the 4 digits code. Select the number and press to go to the next number. After the last number confirmation, you will enter program mode.
A-16
Programming a product recipe
Note : the control can hold up to 99 recipes. Each recipe can have up to 8 stages.
Rotate the dial to the desired recipe and press
To edit a new or existing name:
Turn the dial to the edit name or option name and press -EDIT NAME: Use dial to select each letter and press to step to the next letter. -OPTION NAME: Select one of the library listed product name. After product name is edited, you will enter to the following recipe programming mode.
1-PREHEAT
If no preheat needed: Use the dial to step on next programming function.
If preheat needed: Turn the dial to select preheat and press .Use the dial to select YES and press . Rotate the dial to set the desire preheat temperature and press to exit and save preheat function.

2-STAGE PROGRAMMING
Turn the dial to the product stage 1 and press 📊 display will show the following programming process.
a) Set stage timer: Turn the dial to select desired current stage cooking time and press ⏻. Note if core probe is set to cooking the cook time function will be disabled and you will start with set temperature instead of set Time.
b) Set temperature: Turn the dial to set the current stage temperature and press ⏻
c) Steam: If no steam is needed, press 📊 to skip steam function and go to FAN speed.
If steam is needed, rotate the dial to select YES and press. Use the dial to select SHOT or PULSE and press IF SHOT is selected, rotate the dial to select LOW(+/- 0.67 us gallon/2.6 liters) or HIGH(+/- 1 Usgallon/4 liters) steam and press
If after steam SHOT fan delay is needed, set the fan off delay time (0 to 3min) and press. If no fan delay needed set the time to 00:00. To exhaust excess of steam after steam process, add desired time (0 to 3min) to activate and press. If no need set the time to 00:00
If pulse is selected, rotate the dial to select STD(steam every 2 minutes), HI(steam every 1 minute) or MED(steam every 1.5 minutes) pulse and press
d) Fan delay: If no fan delay is needed, press of the dial to skip to fan cycle. If fan delay is needed, rotate the dial to select LOW (1 minutes) or HIGH (3 minutes) and press if a fan off delay is needed, press to step to fan cycle.
e) Fan Speed: If fan speed STD is ok, press if HIGH fan speed, is desired, Turn the dial to select HIGH and press
f) Vent opening: If Vent need to be open during the stage set desired time you want the vent open, exp: if after 15 min baking you want vent open set 15:00min, vent will open after 15 min for the balance of the stage time. normally use to exhaust excess of product vapor before end of baking process or prevent excess of vapor coming out during opening door.
You have now completed 1 stage program. If another stage is needed, select stage 2 and follow same process as stage 1. If a 2nd stage is not needed, turn the dial to exit and the recipe will be registered.
MODE D'OPÉRATION DU CONTRÔLE PROGRAMMABLE EBAKE
WARNING: Always disconnect the power supply to the appliance before cleaning, doing preventive maintenance or servicing.
WARNING: Contact the factory, the factory representative or a local service company to perform maintenance and repair.
Convection blower, draft inducer motor, vent motor and rack lift/rotating system are on the top of the oven. These components are sealed and don't require lubrication.
Electric Control parts, gas manual shut off valve, water manual shut off valve are behind the control panel door.
BEFORE CALLING FOR SERVICE ANSWERS TO MOST FREQUENT QUESTIONS
| Questions Solutions | |
| The oven temperature drops when loading and needs a certain amount of time before it stabilizes. | This is normal. The opening of the door produces an important loss of heat. The rack loaded with cold pastries need a large amount of heat to get back to its original temperature. The same thing happens with domestic ovens. You will realize that your new SRO oven can provide an excellent baking quality for any kind of products you want to bake. |
| The oven does not turn on. | Check the breakers of the building.Check the breaker on the front panel.Check if the door is tightly closed.Inside the control compartment, check if the breaker of the convection blower is ON |
| The oven does not produce heat. | Make sure the thermostat is adjusted to a temperature high enough to turn on the heat.Check that the gas manual shut-off valve is open1. If the Hood Vent Blower is not onCheck its power supply.2. If the oven blower is not on Check the breaker behind the control door.3. Check burner draft inducer if work and draft inducer damper if open.4. If the control display gas system fault press on the dial to reset system and restart oven.5. Check the LED blinking sequence on the ignition module.Steady ON : replace module1 blink: Air flow pressures switches issue, refer to point 1 & 3.2 blink: flame ON without heat demand shut off gas valve call gas technician.3 blink: module Lockout shut off oven power for 10 second to reset.If it does not start up again, contact our company or a certified gas technician. |
| The burner goes to lock-out because of:a) Flame failure:b) The spark is irregular or not present:c) The air pressure switch does not close its contact. | The burner is equipped with multiple interlocked safety devices.In the event of a failure of the flame or any blockage of the combustion air supply or exhaust, the burner will "lock out" in the safety condition.Air has not been bled from the gas line.Porcelain insulators cracked (very little crack is enough).Spark probe grounded.It may be disconnected, incorrectly set or defective or maybe the blower is not running. |
| Uneven baking. | Verify that hot air diffuser and convection air intake is not block.Do not use foil on the grills.Verify the temperature of the oven by using an oven thermometer and make sure that it is even with the thermostat setting. |
| If steam device of the oven does not work properly. | Check if the water supply valve (of the building) is open.Verify if water manual shut off valve located behind the control panel is open.Steam injection is not permitted if actual oven temperature is below 250FThe oven must be idling at temperature over 350F for at least 15 minutes to get a good amount of steamVerify if “Y” filter is clean (First, turn the water manual shut off valve OFF and bleed the line by having the appliance injecting water.)Check the solenoid valve. |
DÉPANNAGE
WARNING: Always disconnect the power supply to the appliance before cleaning, doing preventive maintenance or servicing.
| Questions Solutions | |
| Clean the inside of the oven proofer with water and soap. | We recommend to use Stainless steel oven cleaner |
| After cleaning the inside of the oven, apply a silicone base oven protector. It avoids food from sticking to the metal. | We recommend and sell:316 Silicone base protector and lubricant for ovenDow CorningPart number: EXS400 |
| Clean the oven windows with products like Brasso or equivalents. They are copper cleaners but good for this use | We recommend and sell:Wright's: Cream copper cleanerJ.A. Wright & Co.Part number: EXC300 |
| Clean the oven exterior with a stainless steel cleaner. | We recommend and sell:Stainless steel cleanerSANY or CURTIS (comestible)Part number: NES201 |
MAINTENANCE OF THE BURNER
Every three months verify and clean the burner air inlet in order to remove dust and particles. (Refer to page A-4)
Once a year, you should ask a certified technician to make a tune up. Make sure everything works properly, verify and clean especially:
- Clean the air inlet of the control and burner compartment
- The in-shot burner.
- Inspect and clean both burners electrodes
- Verify the burner input and output pressure.
- Verify proper operation of flue gas damper and draft inducer.
- Verify Steam Generator bars, distribution pan and drain pan for scale build up. If needed, let them soak in a descaler solution or vinegar. Then rinse prior to installation.
ENTRETIEN ET NETTOYAGE DU FOUR
(Continental United States Of America And Canada Only)
Doyon Equipment Inc. guarantees to the original purchaser only that its product are free of defects in material and workmanship, under normal use.
This warranty does not cover any light bulbs, thermostat calibration or defects due to or resulting from handling, abuse, misuse, nor shall it extend to any unit from which the serial number has been removed or altered, or modifications made by unauthorised service personnel or damage by flood, fire or other acts of God. Nor will this warranty apply as regards to the immersion element damaged by hard water.
The extent of the manufacturer's obligation under this warranty shall be limited to the replacement or repair of defective parts within the warranty period. The decision of the acceptance of the warranty will be made by Doyon Equipment service department, which decision will be final.
The purchaser is responsible for having the equipment properly installed, operated under normal conditions with proper supervision and to perform periodic preventive maintenance.
If any parts are proven defective during the period of one year from date of purchase, Doyon Equipment Inc. hereby guarantees to replace, without charge, F.O.B. Linière, Quebec, Canada, such part or parts.
Doyon Equipment Inc will pay the reasonable labour charges in connection with the replacement parts occurring within one year from purchase date. Travel over 50 miles, holiday or overtime charges are not covered. After one year from purchase date, all labour and transportation charges in connection with replacement parts will be the purchaser's responsibility.
Doyon Equipment Inc. does hereby exclude and shall not be liable to purchaser for any consequential or incidental damages including, but not limited to, damages to property, damages for loss of use, loss of time, loss of profits or income, resulting from any breach or warranty.
In no case, shall this warranty apply outside Canada and continental United States unless the purchaser has a written agreement from Doyon Equipment Inc.