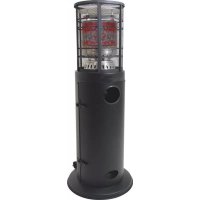
21687 - Heating MaxxGarden - Free user manual and instructions
Find the device manual for free 21687 MaxxGarden in PDF.


User questions about 21687 MaxxGarden
0 question about this device. Answer the ones you know or ask your own.
Ask a new question about this device
Download the instructions for your Heating in PDF format for free! Find your manual 21687 - MaxxGarden and take your electronic device back in hand. On this page are published all the documents necessary for the use of your device. 21687 by MaxxGarden.
USER MANUAL 21687 MaxxGarden
For outdoor use only!
Only for use in Belgium.
Keep this manual for future reference.
NOTICE
This appliance is adjusted to work with gases G30/G31 (Butane/Propane) or mix of them,
at 28-30/37/50mbar. Do not use other type of gases!
NL: GEBRUIKERSHANDLEIDING LET OP
APPARAAT STANDAARD EN LOCATIE
-
The use of this appliance in enclosed areas can be dangerous and is PROHIBITED.
-
The appliance must be installed in accordance with the instructions and National Rules in force.
-
Do not store or use gasoline or other flammable vapors or liquids into the appliance unit.
-
Installation and repair should be done by a qualified service person only.
-
This appliance must be installed according to National rules in force and the LPG Gas Cylinder, stored in LPG Gas Cylinder housing, should be of proper shape and in accordance with National Rules as above.
-
Improper installation, adjustment and alteration, can cause personal injury or property damage.
-
Do not attempt to alter the unit in any manner, it is very dangerous.
-
The gas governor and flexible rubber pipe must be according to National Rules in force and changed within the prescribed intervals, of each component.
-
Use only the type of gases and the LPG Gas Cylinder specified by the manufacturer (Butane, Propane or mix of them and specified supply pressure reported on point "B - Specification").
-
In case of violent wind particular attention must be taken against tilting of the appliance.
-
Check that the gas governor seal is fitted and that it is in good condition.
-
All leak tests should be done with a soap solution. Never use an open flame to check for leaks!
-
The whole gas circuit, flexible rubber pipe, gas governor, pilot and burner, should be inspected for leaks or damage before use and at least one time a month.
-
Do not use the appliance until all connections have been leak tested.
-
Do not paint the radiant screen, control panel or top canopy reflector.
-
Turn off the gas tap immediately, if smell of gas is detected.
-
Do not obstruct the ventilation holes of the LPG Gas Cylinder housing.
-
Never transport or move the appliance while it is operating.
-
Close the valve of the LPG Gas Cylinder, or gas governor one if any, all the time after use.
-
Shut off the valve at the LPG Gas Cylinder or the gas governor before moving the appliance.
-
Do not move the appliance after it has been turned off until the temperature has cooled down.
-
Control compartment, burner and circulation air passageways of the appliance must be kept clean.
-
Frequent cleaning may be required as necessary.
-
The LPG Gas Cylinder valve should be turned off when the heater is not in use.
-
The gas governor/flexible rubber pipe assembly must be located out of pathways where people may trip over it or in area where the flexible rubber pipe will not be subjected to accidental damage.
-
Any guard or other protective device removed for servicing the heater must be replaced before operating the appliance. Adults and children should stay away from high temperature surface to avoid burns or clothing ignition.
-
Children should be carefully supervised when they are in the area of the appliance.
Clothing or other flammable materials should not be hung on the appliance or placed on or near the appliance.

ATTENTION! SURFACE VERY HOT. DO NOT TOUCH!!!
-
Keep the ventilation opening of the LPG Gas Cylinder housing free and clears of debris.
-
Do not obstruct the ventilation holes of the LPG Gas Cylinder housing.
-
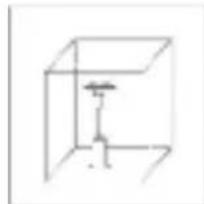
For use outdoors and in well ventilated areas.
-
A well ventilated area must have a minimum of 25% of the surface open area.
-
The surface area is sum of the walls surface.
-
In case of violent wind particular attention must be taken against tilting of the appliance.
-
Turn off the appliance immediately if any of the following occurs:
-
The appliance does not reach temperature.
-
The burner makes popping noise during use (a slight noise is normal when the burner is extinguished).
-
Smell of gas in conjunction with extreme yellow tipping of the burner flames.
-
Keep the instructions for future references.
WARNING: Improper installation, adjustment, alteration, service or maintenance can cause injury or property damage. Read the installation, operating and maintenance instructions thoroughly before installing or servicing this appliance. If the user cannot read or fully understand the instruction manual, please contact your dealer. Supplier will not be responsible for user's negligence.
APPLIANCE STAND AND LOCATION
The appliance is for outdoor use only. Do not use it for indoor or in an enclosed area. Always ensure that adequate fresh air ventilation is provided.
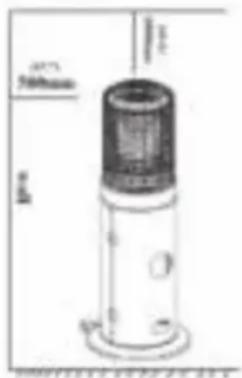
- Always maintain proper clearance from combustible materials, i.e.
top 1000mm and sides 500mm minimum.
- Never operate appliance in an explosive atmosphe where gasoline or other flammable liquids or vapors are stored.
CAUTION - Some parts of this product can become very hot and cause burns. Particular attention should be paid to the presence of children and vulnerable people.
GAS REQUIREMENTS
- The gas governor, flexible gas rubber pipe and clamps, are not supplied with this appliance; buy them according to National Rules in force and replace both taking into consideration expire date, warnings of this Instruction Manual and National Rules in force.
- Supply pressures to appliance:
- Nominal inlet pressure is 28-30/37/50 mbar
- Min inlet pressure: 20 mbar
- Max inlet pressure is: 50 mbar
- Gases to be supply: Butane, Propane or mixture of them
- Use gas governor approved according to Standard EN 12864, according to National Rules in force; make sure it is in good condition and substitute it not over 10 years, as properly.
- Check the flexible gas rubber pipe and other gas connections, at least once per month and each time the LPG Gas Cylinder is changed. If it shows signs of cracking, splitting or other deterioration, it shall be exchanged with a new flexible gas rubber pipe according to National Rules in force of same length (but not over 1.5m ) and of the equivalent quality.
- The installation must be done according to National Rules in force.
- A dented, rusted or damaged LPG Gas Cylinder, maybe hazardous and should be checked by your LPG Gas Cylinder supplier. Never use a LPG Gas Cylinder with a damaged valve connection.
- The LPG Gas Cylinder must be arranged to provide for vapor withdrawal from the operating cylinder.
- Never connect a LPG Gas Cylinder without a gas governor, to the appliance.
- Disconnect the LPG Gas Cylinder when the appliance is not use.
LEAKAGE TEST
Gas connections on the appliance are leak tested at the factory prior to shipment. Possible mishandling of the appliance during the shipment might contribute to product integrity as a whole.
A complete gas leakage test must be performed again at the installation site. Please follow the procedure below for leakage test.
- Make a soap solution of one part liquid detergent and one part water. The soap solution can be applied with spray bottle, brush or rag. Soap bubbles will appear where a leak is present.
- Make sure the control tap is in the "OFF" position on the control panel.
- Turn on the gas supply and check for bubbles from the hoses and connections. Presents of bubble means that a leak path is present.
- If a leak is present, turn OFF the gas supply immediately, tighten any leaking fitting carefully, turn gas again and recheck.
- Never leak test while smoking.
A. Turn the knob to OFF.
B. Slowly open the valve of the gas bottle.
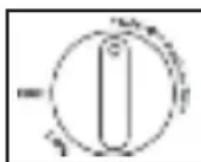
C. Push the control knob in and turn it counterclockwise.
D. Hold down the control knob and press the ignition button (Ignitor) several times. When the pilot ignites, keep the control knob pressed for another 10-20 seconds.
E. If the pilot does not continue to burn, repeat steps C and D.
F. Turn the control knob to LOW and wait 5 minutes or more before moving the knob to the desired position.
G. If the heater turns off unintentionally or is blown out by the wind, turn off the patio burner and wait 5 minutes before re-igniting.
TURNING OFF THE PATIO HEATER
A. Turn the control knob to the OFF position.
Close the valve on the gas bottle completely.
NOTE
- If a new tank has just been connected, please allow at least one minute or more for the air in the gas pipeline to purge out through the pilot hole when lighting the pilot flame make sure that the control knob is continuously depressed While pressing the igniter button. Variable control knob can be released after the pilot flame lit for 20~30 seconds.
- Pilot flame can be watched and checked from the peephole located on the base of burner.
- If the pilot flame does not light or it goes out, repeat step 3.
- If the burner flame goes out accidentally or it is blown out by wind, turn off the heater and wait at least 5 minutes or more to let the gas dissipate before relighting to avoid possible gas explosion. Repeat steps 2 to 4.
- Failure to follow this lighting procedure may result in flame roll out beyond the emitter grid.
TO TURN OFF THE HEATER.
Press and turn the control knob to OFF position.
Turn off the valve on the gas cylinder and disconnect the cylinder.
STORAGE
- Always close the gas valve of the LPG Gas Cylinder, after use or in case of a disturbance.
- Remove the pressure controller and the hose.
- Check the tightness of the gas valve and tor damage. If you suspect damage, have it changed by your gas dealer.
- Never store LPG Gas Cylinder in a sub-terrain, or at places without adequate air ventilation.
CLEANING AND CARE
- Wipe off exterior surfaces with soft, moist rag and soap water. Do not clean heater with cleaners that are combustible or corrosive.
- Remove debris, spider and insect nests from ventilation opening of the LPG Gas Cylinder enclose, control compartment, burner and circulation air passageways of the appliance with heavy-duty pipe cleaner or compressed air to keep appliance clean and safe for use. Never clear ports or other openings with toothpicks or other article that will break and block the ports.
- Do not paint the flame screen, control panel or reflector.
- Cover the burner unit with the supplied protective cover when the heater is not in the appliance is cool before covering.
- In a salt-air environment, such as near an ocean, corrosion occurs more quickly than Check frequently for corroded areas and repair them promptly.
CONNECTING GAS LINE TO LPG GAS CYLINDER
CAUTION: The gas governor, flexible rubber pipe and clamps are not supplied with this appliance and must be used proper ones, according to National Rules in force. The gas governor has to be set for 28-30/37/50 mbar. Connect appliance pipe holder with proper flexible gas rubber pipe and fix it using proper clamps. If some gasket is needed, it must be according to Standard EN 549. If other material to guarantee tightness could be used, they must be in line with Standard EN 751 only. Check the gas tightness with soap water each time you connect the pipe according to "Leakage Test".
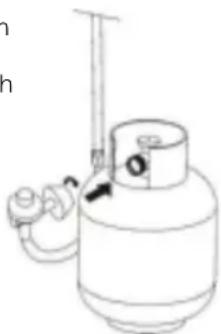
Warning:
Change the LPG Gas Cylinder only in a well ventilated area, away from any inflammation source (candle, cigarettes, other flame producing appliances ...).
Check that gas governor sealed and that it is in good condition.
AREA HEATER ASSEMBLY
Tools Required
Phillips head screwdriver
2 adjustable spanners
Note: Remove any transit protection material
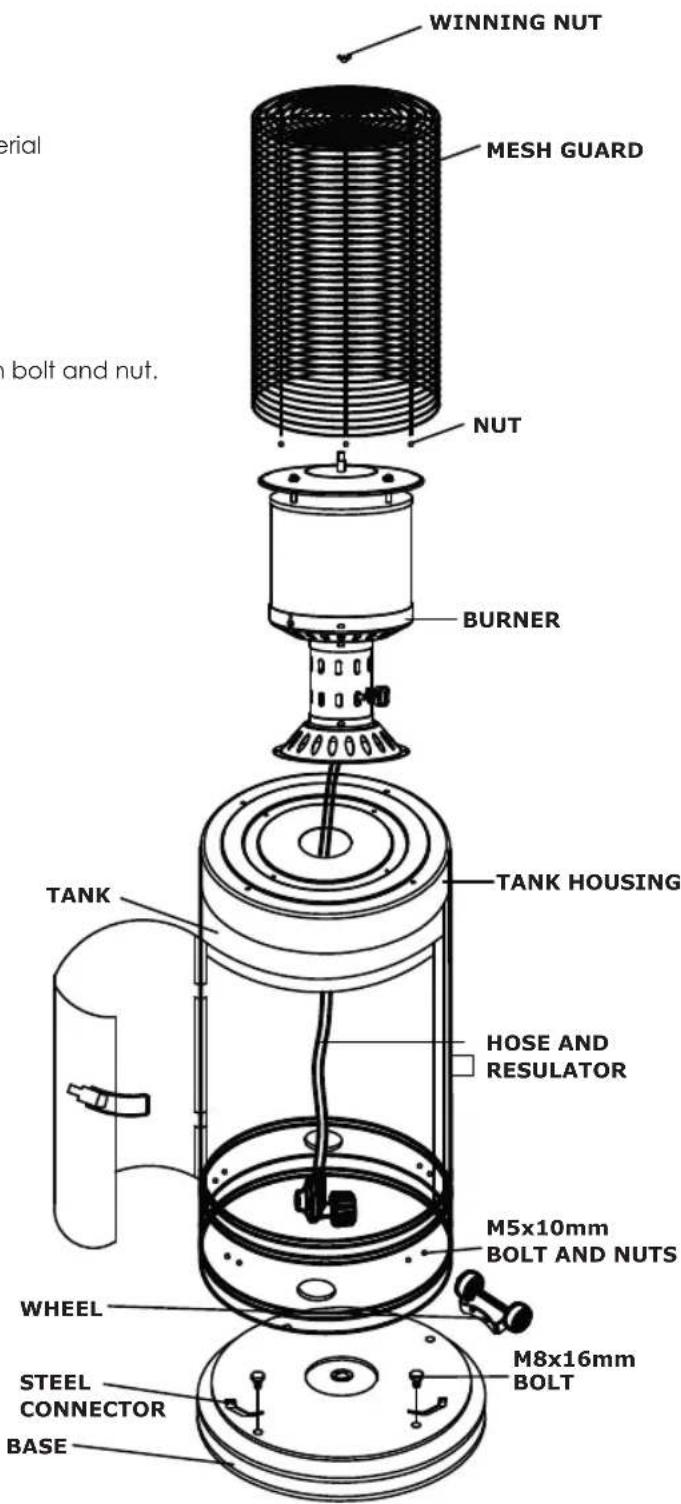
STEP1
1 Attach wheel assembly to base with two M8X16mm bolt and nut.
STEP2
Assemble the tank on the base with four M8 x 16mm and eight M5X10mm bolt and nut.
STEP3
Put the burner on the tank, assemble the burner on the tank with four M4X8mm bolt and nut.
STEP4
Put the mesh guard around the burner, the side with door should be face with the ignite. Fix the mesh guard in the hole on the tank with M4 nut.
STEP5
Assemble the handle on the same side with wheel, use two M6 bolt and nut.
STEP6
Screw the butterfly nut on the top of mesh guard.
OUTDOOR HEATER PARTS LIST
| PARTS NAME QUANTITY | |
| WINNING NUT 1 | |
| MESH GUARD 1 | |
| NUT | 4 |
| BURNER | 1 |
| TANK HOUSING 1 | |
| HOSE and REGULATOR 1 | |
| M5X10MM BOLT and NUT 8 | |
| WHEEL | 1 |
| M8X16 BOLT 4 | |
| BASE | 1 |
| STEEL CONNECTOR 1 |
Specifications
- For outdoor use only.
- Uses propane, butane or mixture of them.
| Models | Gas categories | Pressure (mbar) | Country/ies of destination | Qn (HS) | Maximum consumption (g/h) | ||
| Nominal Heat input | Reduced Heat input | ||||||
| 21687 | 13+ | Gases (Propane Butane or their mixtures) | G30: 28-30 mbar G31: 37 mbar | BE - CH - ES - FR - GB - GR - IE - IT - PT - LU - PL | 13kW 5kW 945 gr/h | ||
| 13B/P | G30/G31: 30mbar | CY - CZ - DK - EE - FI - LT - LV - MT - NL - NO -SE - SI - SK - BG - RO - TR | 13kW 5kW 945 gr/h | ||||
| 13P (50) 13B/P (50) | G30/G31:5 0mbar | AT — DE 13kW | 5kW 945 gr/h | ||||
| Gas Category | Usable gases G | gas adjustment Injeetor By-pass Piot | |||
| 13+ G30/G31 28-30/37 mbar | 1.9(100/mm) 120(100/mm) 18(100/mm) | ||||
| 13B/P | 30/30 mbar | ||||
| 13B/P(50) | 50/50 mbar | ||||
| 13P(50) | |||||
ASSEMBLY PARTS
Tools needed:
Screwdriver wide/medium blade
Spray battle of soap solution for leakage test Parts supplied:
Parts supplied:
Open end wrench 10 & 12 mm
Outer mesh guard
Burner assembly
5pcs M4X10 bolts and 5pcs M4 screws
Front panel
Back panel
Spcs M8X16 bolts
Base
Wheels
PROBLEM CHECKLIST TERRACE THEATRES
| PROBLEM | POSSIBLE CAUSE | SOLUTION |
| Pilot flame does not ignite | -Gas tap closed?-Gas bottle empty?-Air supply blocked? -Air in the supply system? -Loose/leaking connections? -Gas pressure too low? | -Gas tap closed?-Gas bottle empty? -Air supply blocked? -Air in the supply system? -Loose/leaking connections? -Gas pressure too low? |
| Pilot flame does not stay on | -Precipitation around the pilot light? -Loose/leaking connections? -Thermocouple not working? -Gas leak in the supply? -Gas pressure too low? -Temperature is too low | -Clean dirty places -Seal the connections securely -Have thermocouple replaced -Check supply hose and connections and replace/seal them if necessary -Gas bottle almost empty; replace it -Place the appliance in a warm room for a while so that the gas bottle and the appliance are no longer frozen |
| Burner does not ignite | -Gas pressure too low? -Openings blocked? -Control button not on 'Low'? -Thermocouple mal-functioning? Confirmation pilot light faulty? -Burner not properly in place? | -Gas bottle almost empty; replace it -Remove blockage and/or clean openings -Turn control knob to 'Low -Have thermocouple replaced -Fix pilot light correctly -Attach burner correctly and try again |
| Low flame | -Gas hose bent or twisted? | -Straighten the hose and perform a leakage test |
| Uneven glow | -Gas pressure too low? -Foot is not flat, firm and/or level? | -Replace the gas bottle -Place the foot on a flat, firm and horizontal surface |
| Thick black smoke | -Burner blocked? | -Turn off the heater, let it cool down and remove the blockage. Clean the burner internally and externally. |
Rating Label
| Model 21687 | Lounge Terrasverwarmer op gas | Chauffe-terrasse lounge au gaz Lounge Terrassenhezung auf Gas Area Lounge heater | |
| P - Druk / Pression / Druck / Pressure 37 mbar | |||
| Categorie / Catégorie / Kategorie / Category 13B/P(37) | |||
| Land / Pays / Land / Country BE | |||
| Qn. 13kW - 945 gr/h | |||
| Batch. 0521 PIN 0359CL1008 | |||
| CE | |||
CE-verklaring
EN The above symbol and the symbol on the product indicate that the product is classified as electrical or electronic equipment and may not be disposed of with the (household) waste. The WEEE directive (Directive on Waste or Electrical and Electronic Equipment) requires that products must be recycled using the best available repair and recycling techniques to minimize the burden on the environment, to treat hazardous substances and to increase the amount of waste. appearance. Contact the locally responsible authorities for information about the correct disposal of electrical or electronic equipment.

UNSER MAXXTOOLS TEAM HILFT IHNEN GERNE BEI:
The biggest online selection of home, garden, pet & toys.

ONS MAXXTOOLS TEAM HELPT JE MET:
Questions about your order
Complaints
Parts and manuals
If you have any questions or complaints, please contact us and we will be happy to help you.
support@maxxtools.be www.maxxtools.be

TELEFOONSERVICE:
+32 (0) 11 191391
Monday to friday - 9 am - 5 pm
Phone charges may vary depending on your mobile subscription.
MaxxTools
The biggest online selection of home, garden, pet & toys.