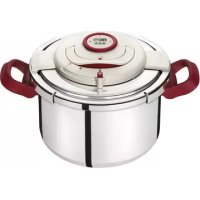
Clipso + Precision P44115 - Saucepan TEFAL - Free user manual and instructions
Find the device manual for free Clipso + Precision P44115 TEFAL in PDF.



| Product type | Pressure cooker (stovetop) |
| Brand | Tefal |
| Model | Clipso + Precision P44115 |
| Capacity | 10 liters |
| Pot diameter | 25 cm |
| Bottom diameter | 20 cm |
| Pot and lid material | Stainless steel (inox) |
| Upper operating pressure | 85 kPa |
| Maximum safety pressure | 120 kPa |
| Compatible heat sources | Gas, electric, ceramic glass, halogen, induction |
| Cooking functions | Two positions: vegetables (delicate) and meat/fish/frozen foods |
| Built-in timer | Yes, electronic with automatic countdown and audible signal |
| Included accessories | Steamer basket and tripod |
| Handles | Folding with unlock button |
| Cleaning pot and lid | Dishwasher safe (after removing module, seal and timer) |
| Cleaning module and timer | Module hand washable, timer clean with dry cloth (do not immerse) |
| Safety | Pressure presence indicator, operating valve, safety valve, automatic locking under pressure |
| Pot warranty | 10 years against metal structure defects |
| Other parts warranty | 1 year (parts and labor) |
| Spare parts available | Seal, steamer basket, tripod, timer (ref. X1060005) |
| Instructions in French | Yes, 126 pages |
Frequently Asked Questions - Clipso + Precision P44115 TEFAL
User questions about Clipso + Precision P44115 TEFAL
0 question about this device. Answer the ones you know or ask your own.
Ask a new question about this device
Download the instructions for your Saucepan in PDF format for free! Find your manual Clipso + Precision P44115 - TEFAL and take your electronic device back in hand. On this page are published all the documents necessary for the use of your device. Clipso + Precision P44115 by TEFAL.
USER MANUAL Clipso + Precision P44115 TEFAL
natural_image
Exterior view of a stainless steel cooking pot with dual handles and digital display (no text or symbols visible)User's Guide - Guide de l'utilisateur Kullanım kılavuzu - Οδηγίες χρήσης
Important safety information
For your safety, this appliance complies with the applicable standards and regulations:
- Pressure vessel directive
- Materials in contact with food
- Environment
- This appliance is designed for domestic household use only. In case of professional use, inappropriate use or failure to comply with the instructions, the manufacturer accepts no responsibility and the guarantee will not apply.
- Take time to read all of the instructions and always refer back to the "User Guide."
- Just like for any other cooking appliance, always pay close attention to it, especially when using your pressure cooker near children.
- Never place your pressure cooker in a hot oven.
- Always be very careful when moving your pressure cooker. Never touch the hot surfaces (in particular metal parts). Use the handles and knobs. Use gloves where necessary.
- Check that the handles of the cooker are fitted correctly. Tighten them if necessary.
- Never use the pressure cooker for any purpose other than the one it was designed for.
- Your pressure cooker cooks using pressure. Scalding injuries may result from incorrect use. Always make sure that your pressure cooker is properly locked before starting it. Refer to the section headed "Locking".
- Always make sure that the selector is in the steam release position before unlocking your pressure cooker and the pressure indicator is lowered.
- Never force your pressure cooker open. Always make sure that the pressure inside it has dropped. Refer to the section headed "Safety".
- Never use your pressure cooker without any liquid in it as this will seriously damage it. Always make sure there is enough liquid in it during cooking.
- Use heat source(s) that are in line with the instructions for use.
- Never make milk-based recipes (such as rice pudding, semolina pudding, ...) in the pressure cooker.
- Do not use sea salt in your pressure cooker, add table salt at the end of the cooking time.
- Do not fill the pressure cooker more than two thirds full (maximum filling level).
- For food that expands during cooking, like rice or dried vegetables or stewed fruit, never you're your pressure cooker more than half full. For some soups made with pumpkin or courgette, let the pressure cooker cool for a few minutes then cool it in cold water.
- After cooking meat with a superficial outer skin (e.g. tongue...) that may expand with the pressure, never stab the meat while the skin looks swollen for you may be scalded. We recommend that you pierce the meat before cooking.
- When cooking soft food (split peas, rhubarb...), your pressure cooker should be lightly shaken before unlocking so that the food does not spurt out.
- Always make sure that the valves are not blocked before use. Refer to the section headed "Before cooking".
- Never user your pressure cooker to deep fry oil under pressure.
- Never take any action on the safety systems other than that which is described in the instructions for cleaning and maintenance.
- Only use TEFAL genuine spares designed for your model of appliance. This especially means using a TEFAL cooker pan and lid.
- Alcohol vapor is flammable. Bring alcohol to the boil for 2 minutes before putting the lid on. Watch over your appliance when making alcohol based recipes.
- Never use your pressure cooker to store acidic or salty foods prior to and after cooking as this can damage your pressure cooker pan.
- Never put your pressure cooker on a heat source with the handles folded.*
- You can use the pan to cook food in without the lid. Do not use the lid if you do not intend the food to be cooked under pressure.
Keep these instructions.
Control module
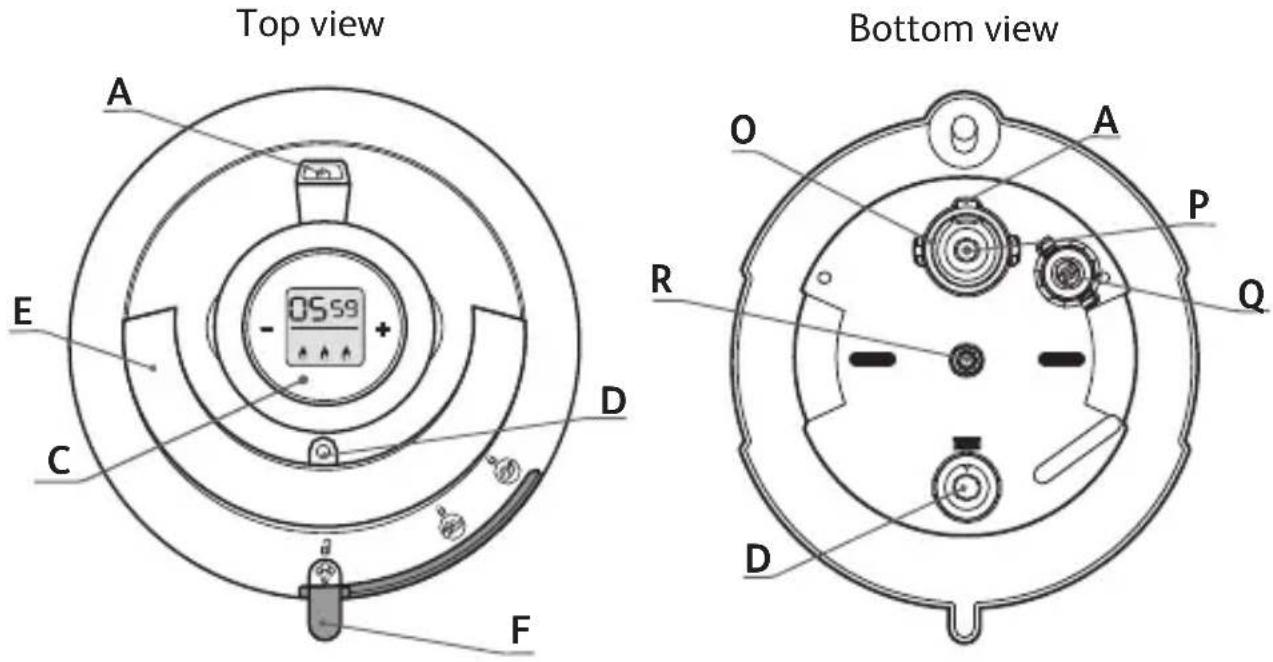
Description
A. Steam release outlet
B. Automatic air removal system
C. Timer
D. Pressure indicator
E. Handle for unlocking/locking lid
F. Cooking programme selector
G. Seal
H. Steaming basket*
I. Trivet
J. Handle unlocking button*
K. Folding pan handles*
L. Fixed pan handles*
M. Maximum fill line
N. Pan
O. Steam release outlet seal
P. Operating valve
Q. Safety valve
R. Control module attachment point
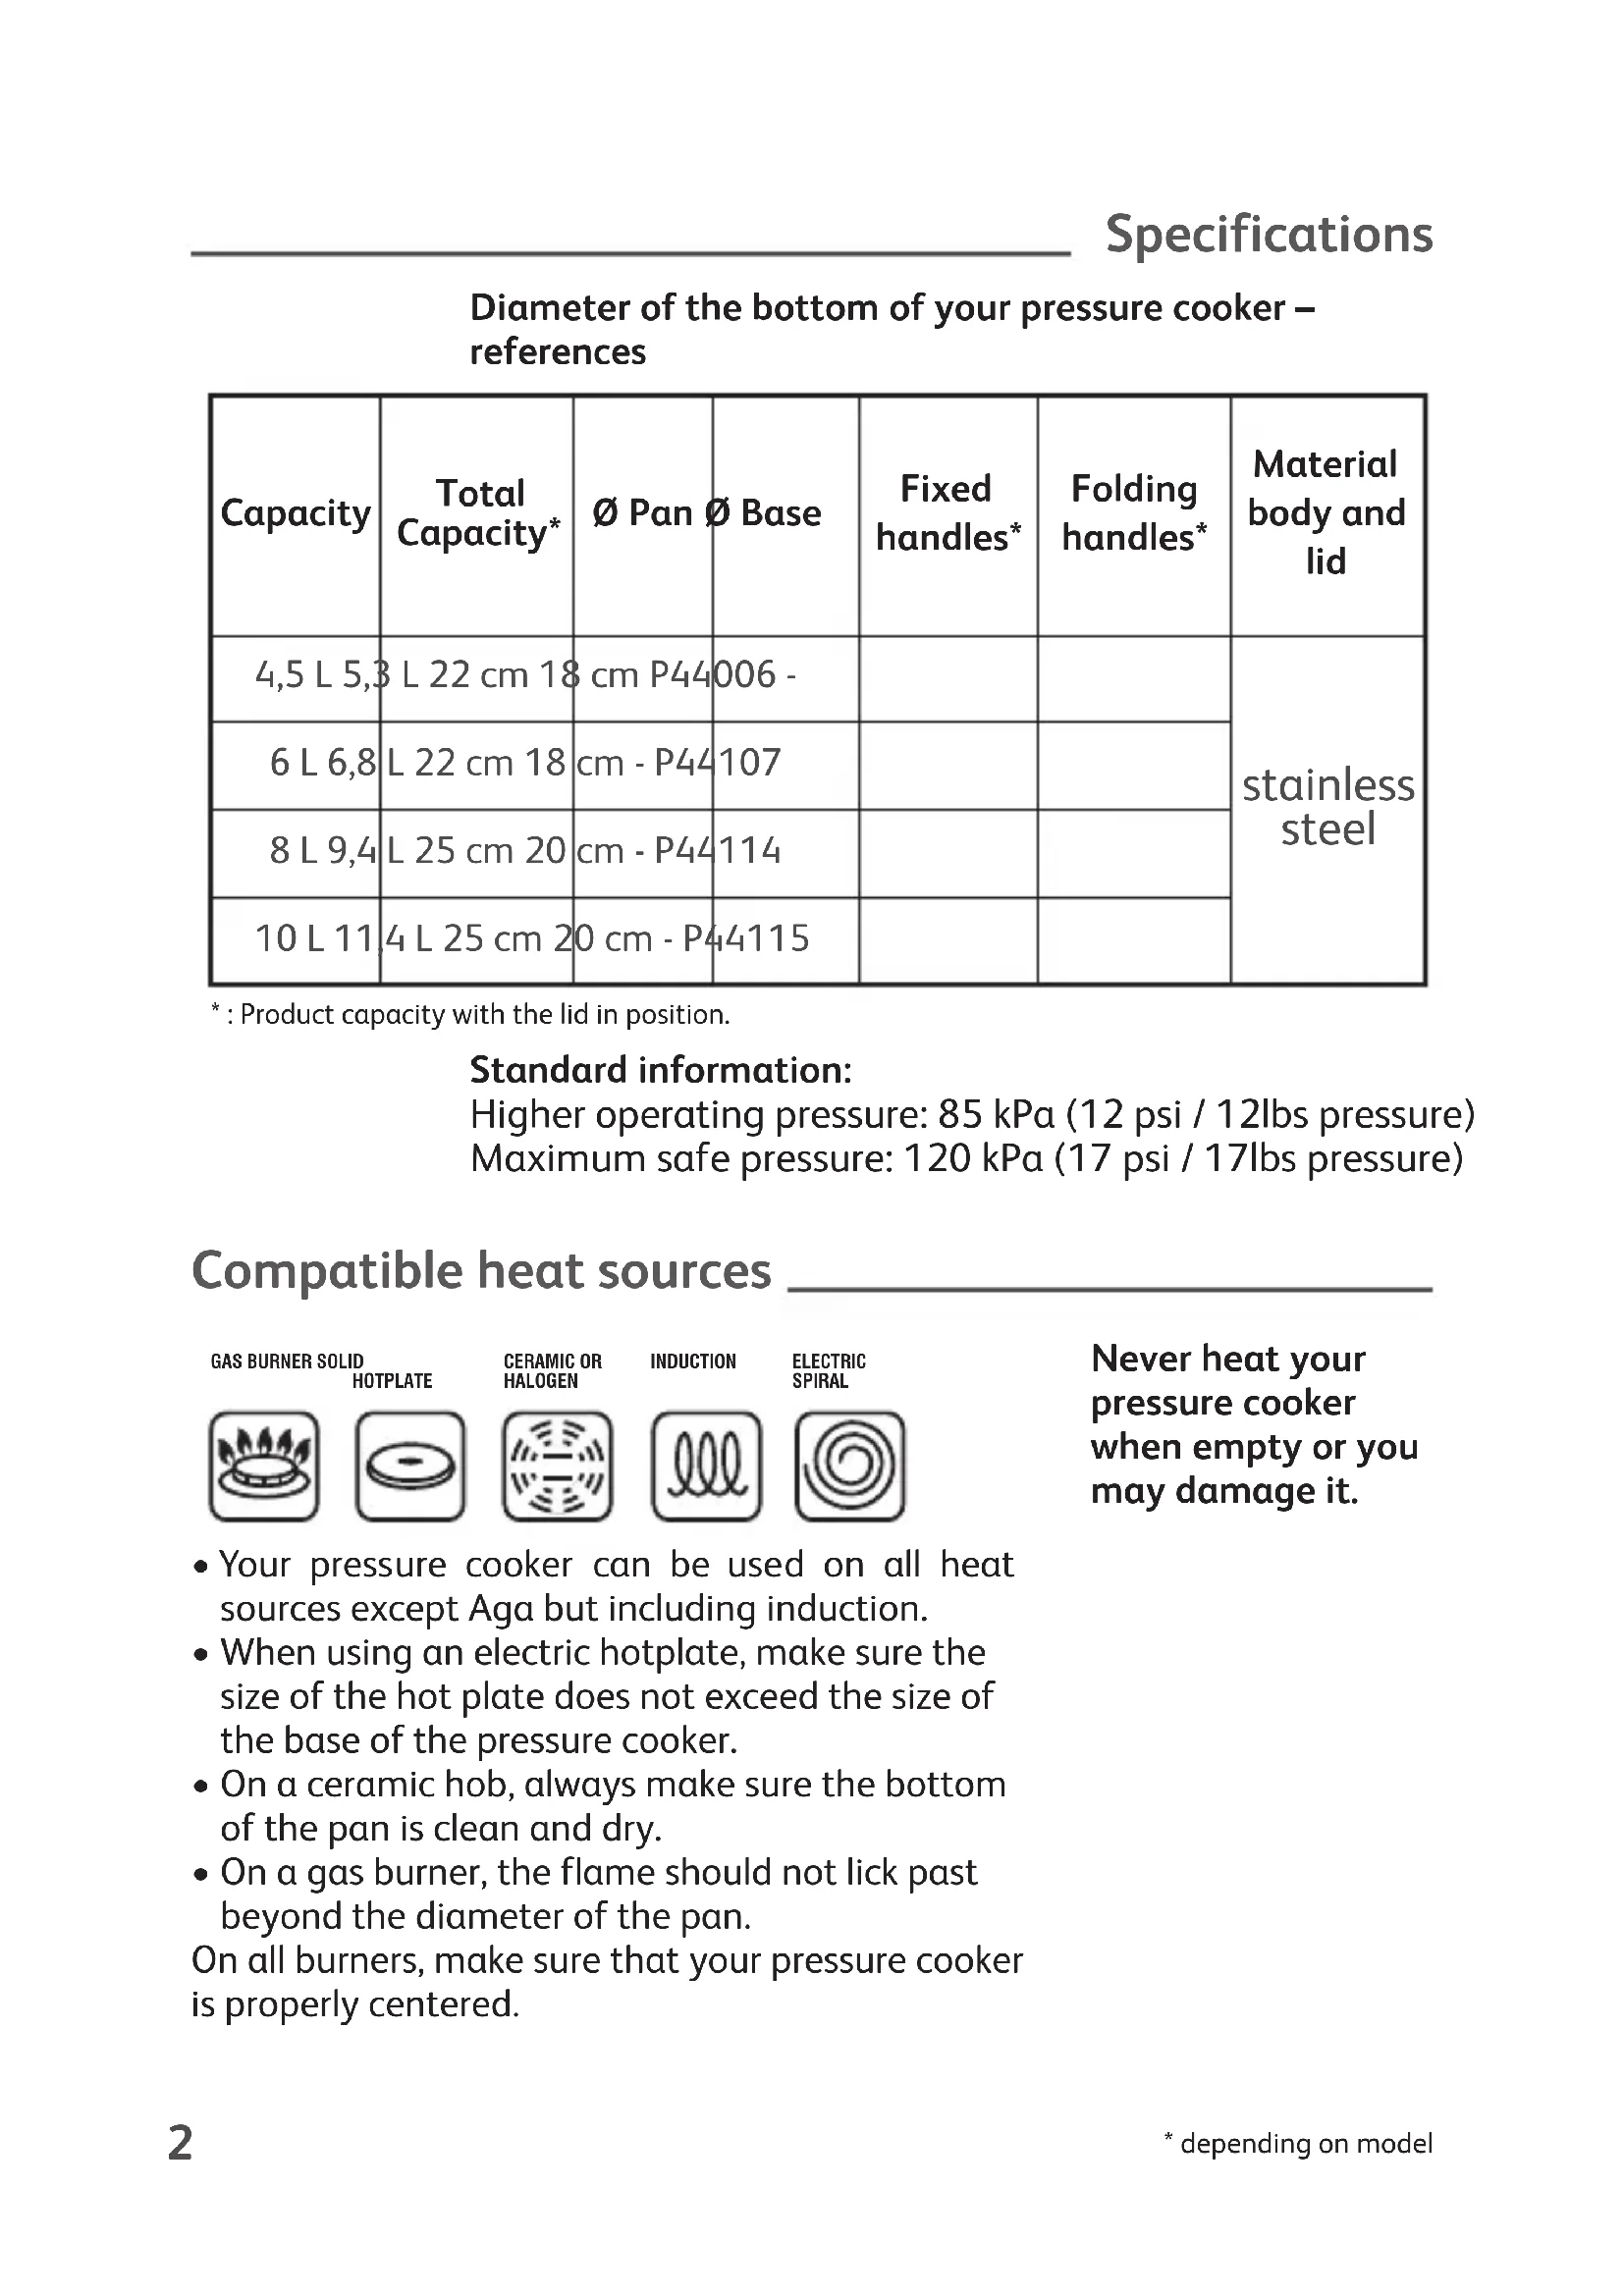
Diameter of the bottom of your pressure cooker – references
| Capacity | Total Capacity* | ∅ Pan | ∅ Base | Fixed handles* | Folding handles* | Material body and lid |
| 4,5 L 5,3 | L 22 cm 18 | cm P44 | 006 - | stainless steel | ||
| 6 L 6,8 | L 22 cm 18 | cm - P44 | 107 | |||
| 8 L 9,4 | L 25 cm 20 | cm - P44 | 114 | |||
| 10 L 11 | 4 L 25 cm 20 | cm - P44 | 4115 |
* : Product capacity with the lid in position.
Standard information:
Higher operating pressure: 85 kPa (12 psi / 12lbs pressure)
Maximum safe pressure: 120 kPa (17 psi / 17lbs pressure)
Compatible heat sources
GAS BURNER SOLID
HOTPLATE


CERAMIC OR
HALOGEN

INDUCTION

ELECTRIC
SPIRAL

Never heat your pressure cooker when empty or you may damage it.
- Your pressure cooker can be used on all heat sources except Aga but including induction.
- When using an electric hotplate, make sure the size of the hot plate does not exceed the size of the base of the pressure cooker.
- On a ceramic hob, always make sure the bottom of the pan is clean and dry.
- On a gas burner, the flame should not lick past beyond the diameter of the pan.
On all burners, make sure that your pressure cooker is properly centered.
- The following pressure cooker accessories are available via our Customer Relations Helpline or consult our website www.tefal.com
| Accessories Reference | ||
| Seal | 4,5/6L X1010004 | |
| 8/10L X1010003 | ||
| Steaming basket* | 4,5/6L 792185 | |
| 8/10L 980513 | ||
| Trivet X1030007 | ||
| Timer X1060005 | ||
- For replacement parts and accessories or for repairs, please contact our Customer Relations Helpline.
- Only use TEFAL genuine parts designed for your product model.
Opening
- Make sure that the cooking programme selector (F) is in the position and the pressure indicator (D) is lowered.
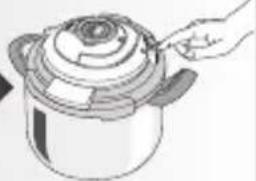
- Move the lid open/close handle (E) from the horizontal to the vertical position (the jaws open) - Fig.1.
- Lift the lid.
During opening/closing operations, the control module must be in place on the lid.
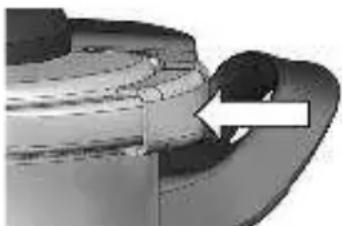
Make sure the jaws of the lid are properly closed below the rim of the pan.
natural_image
Close-up of a mechanical component with curved surfaces and a white arrow pointing to a feature (no text or symbols visible)Closing
- Make sure the handle is in a vertical position and the jaws are open.
- Place the lid vertically on the pan, making sure it is positioned correctly.
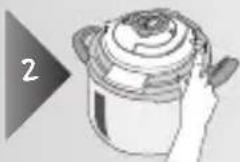
- Move the open/close handle from the vertical to the horizontal position - Fig. 2.
- Apply a little force at the end when closing to trigger the locking mechanism.
- Once in the closed position, it is normal that the lid can turn freely on the pan.
If you cannot close the lid:
- Check that the open/close handle is in the vertical position.
- Check that the jaws are opened.
- Check that the seal is in place properly.
Control module
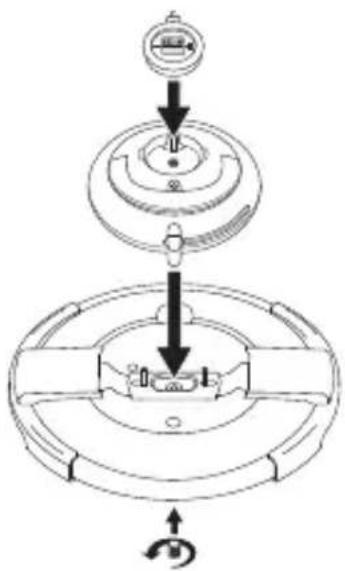
- The control module comprises all of the components needed for your pressure cooker to operate. Once mounted on the lid, your pressure cooker can be used normally.
- Once you remove the timer, the pan and lid are dishwasher safe.
- The control module is designed to make it easier to clean your pressure cooker.
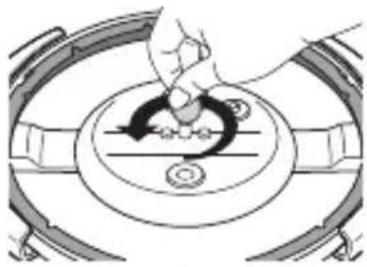
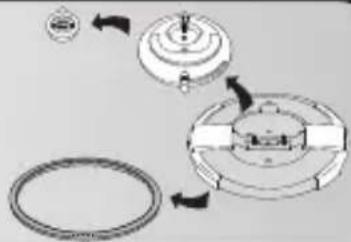
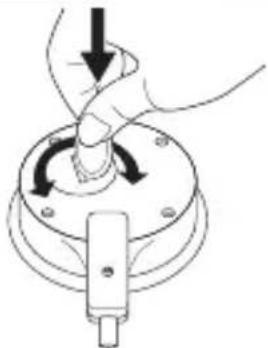
To remove the control module from the lid:
- Turn the lid over.
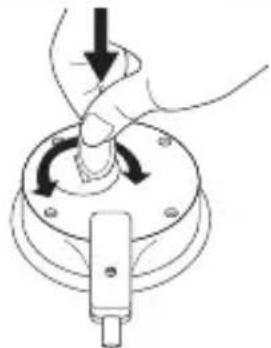
- Unscrew the module retaining nut using a coin, while holding the module in the other hand.
- Turn the lid over and remove the control module.
To fit the control module on the lid:
- Position the module, with the handle down, on the lid.
- Turn the complete assembly over while holding the module against the lid and tighten down the retaining nut using a coin.
The control module will only fit one way.
natural_image
Diagram of a hand turning a circular component with arrows indicating rotation (no text or symbols)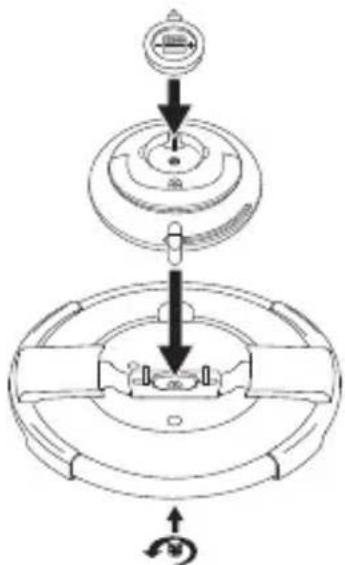
Minimum and maximum
filling levels
• Minimum 250 ml (2 glasses) of liquid - Fig. 3.
• Maximum 2/3 of the height of the pan - Fig. 4.
For some foods:
- For food that expand during cooking, like rice or stews or soup or stewed fruit, do not fill the pressure cooker more than half full.
Using the steaming basket\*
- Pour 750 ml of water into the cooker (N).
- Clip the trivet (I) in the steaming basket (H^*) - Fig. 5-6.
- Place the steaming basket* in the bottom of the cooker - Fig. 7.
The food placed in the steaming basket* should not touch the lid of your pressure cooker.
EN
Using the programme selector
The programme selector is for:
- Closing and blocking the opening of the pressure cooker when it is pressurised.
- Opening the pressure cooker when it is no longer pressurised.
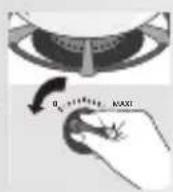
- Releasing steam after cooking by aligning the programme selector (F) with the symbol - Fig. 8
- Choosing your cooking setting:
For cooking delicate foods and vegetables:
Turn the setting (F) to the symbol (55 kPa / (8 psi / 8lbs pressure) Fig. 10.
To cook meat, fish and frozen food:
Turn the setting (F) to the symbol (85 kpa / (12 psi / 12lbs pressure)- Fig. 11.
Timer
Your pressure cooker has a timer that automatically counts down the cooking time from when it reaches the temperature level corresponding to the selected cooking setting 📄 or Ⓗ.
* depending on model
Fitting and removing the timer
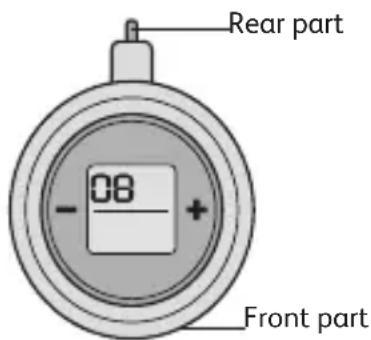
- To fit the timer (C), first insert the rear part into the control module - Fig. 9a then clip down the front part - Fig. 9b.
- To remove the timer (C), press the tab and lift it.
Using the timer
The timer has been designed to help you ensure the best the cooking result by allowing you to fine-tune the power consumption.

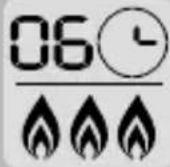
The flame flickers when you start using the appliance and recommends when to start cooking with the heat source set to full power.

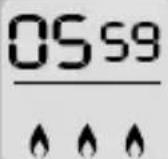
When the cooking time countdown begins, this symbol indicates that the heat source can be reduced by about a third.
- To turn on the timer: Press the + or - keys.
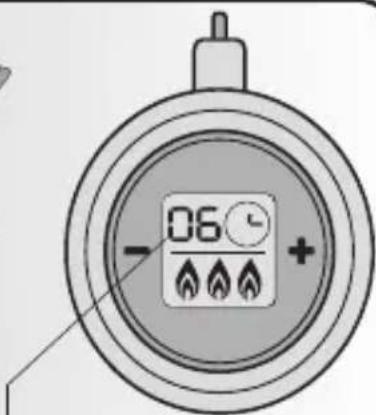
- Set the cooking time - Fig. 12.
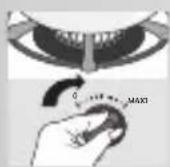
- Turn the heat source to maximum power.
- You can change the cooking time at any time by pressing the+ or - keys.
- When your pressure cooker has reached cooking temperature, the timer rings and the countdown starts.
- Reduce the power of the heat source.
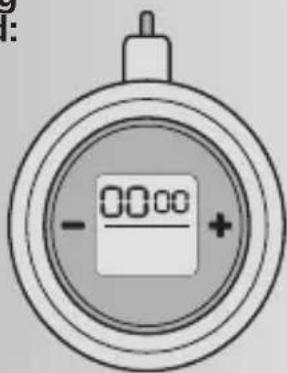
- When cooking is finished the timer rings.
- To stop the timer ringing press the + or - keys.
- Turn off the heat source.
The timer must be clipped onto the unit in order to function.
Ensure that during cooking the valve hisses regularly. If there is not enough steam, increase the heat source slightly, if there is too much, reduce it.
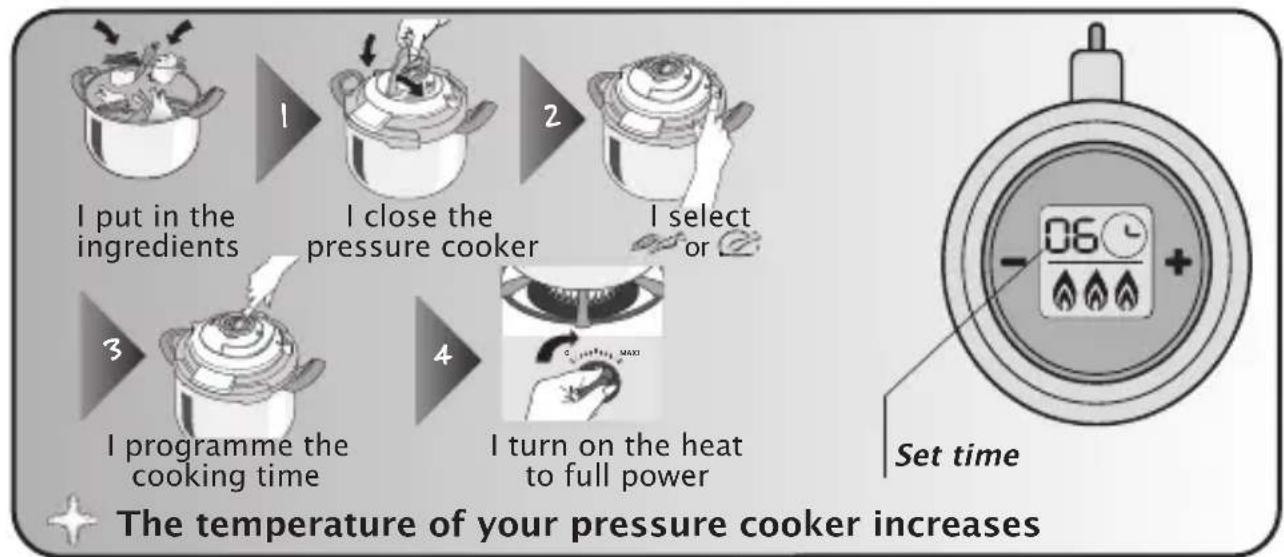
flowchart
graph TD
    A["I put in the ingredients"] --> B["I close the pressure cooker"]
    B --> C["I select or re-<br>    2"]
    C --> D["I programme the cooking time"]
    D --> E["I turn on the heat to full power"]
    E --> F["Set time: 06"]
    style A fill:#f9f,stroke:#333
    style B fill:#f9f,stroke:#333
    style C fill:#f9f,stroke:#333
    style D fill:#f9f,stroke:#333
    style E fill:#f9f,stroke:#333
    style F fill:#ccf,stroke:#333

Steam is released:
the timer beeps to show that pressure cooking is starting.

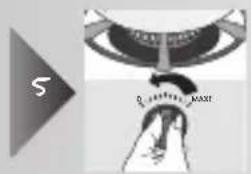
I reduce the heat.
IMPORTANT

The timer counts down
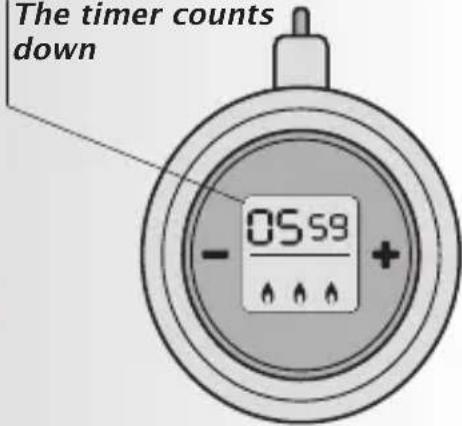
For optimum use of your pressure cooker and energy savings reduce the power of the heat source.

Pressure cooking has just finished:
The timer sounds


I press + or - to stop the timer beeping
7
I turn off the heat
[Non-Text]
natural_image
Illustration of a hand holding a cooking pot with lid and side handles (no text or symbols)I turn the selector to the setting

(if this steam release method is suitable for the food cooked)
IMPORTANT
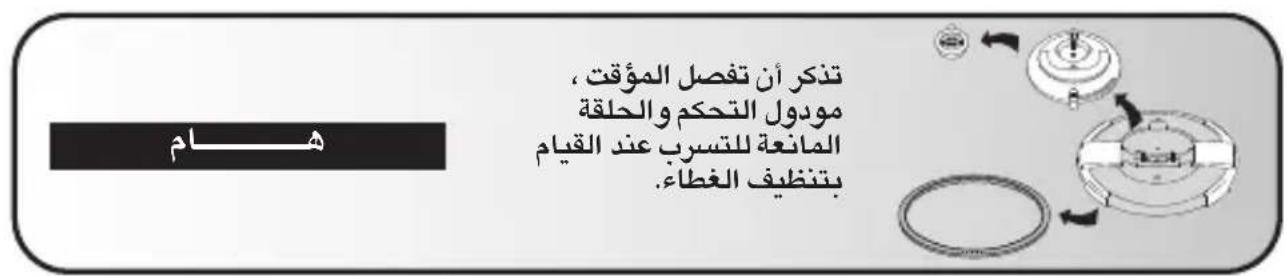
Remember to remove the timer, the control module and the seal when cleaning the lid.
flowchart
graph TD
    A["Top Ring"] --> B["Top Circular Component"]
    B --> C["Bottom Ring with Rotation Arrow"]
    C --> D["Bottom Circular Component with Rotation Arrow"]
Replacing the batteries

- The battery life depends on how often you use the timer. However, when you note that the display is completely or partially lost you should remove the battery.
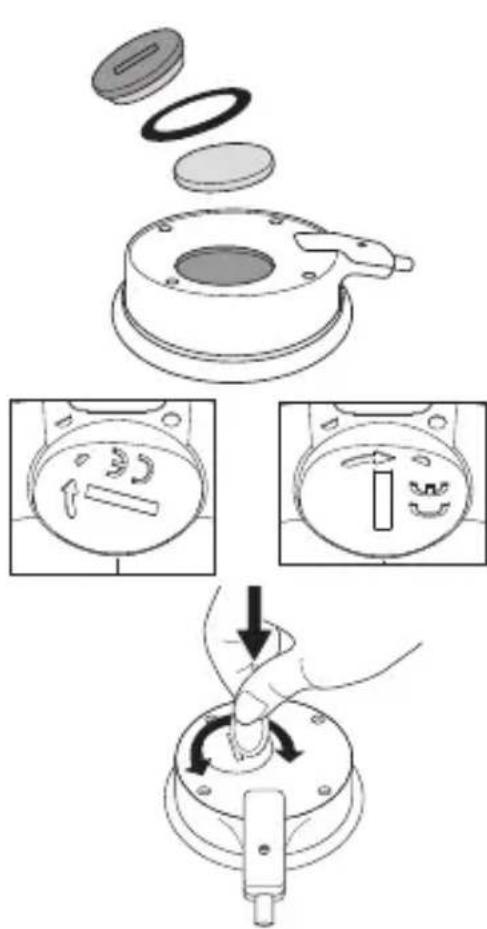
Never put the timer in water or in the dishwasher.
- To contribute to protection of the environment, remove the used battery. Do not throw it away with the household waste but dispose of it at a specialist collection centre. The timer battery is a lithium manganese battery CR2032. It complies with European regulations.
- To remove the battery from your timer, open the battery compartment.
- Replace your battery.
- Place the seal back in its housing (if it is misshapen, roll it between your fingers to restore its original shape).
- Position the half-moon of the battery compartment in front of the half-moon of the timer.
- Turn the half-moon, the rounded side should face down.
- Close the battery compartment gently, while pressing slightly, aligning the half-moon of the battery compartment with the moon of the timer.
- Carry out this process on a flat work surface so that the cap is correctly positioned horizontally.
- Do not force the battery compartment when locking it. Do not force beyond its limits.
- In case of loss, you can obtain another timer from all our TEFAL Approved Customer Service Centres.
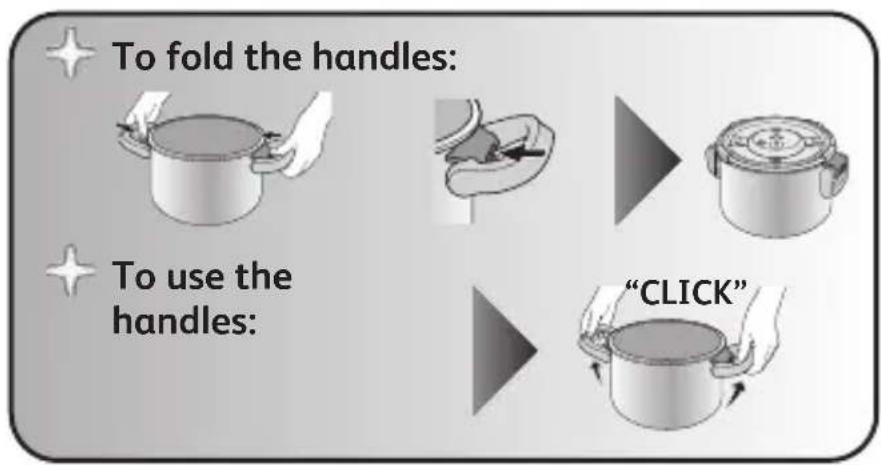
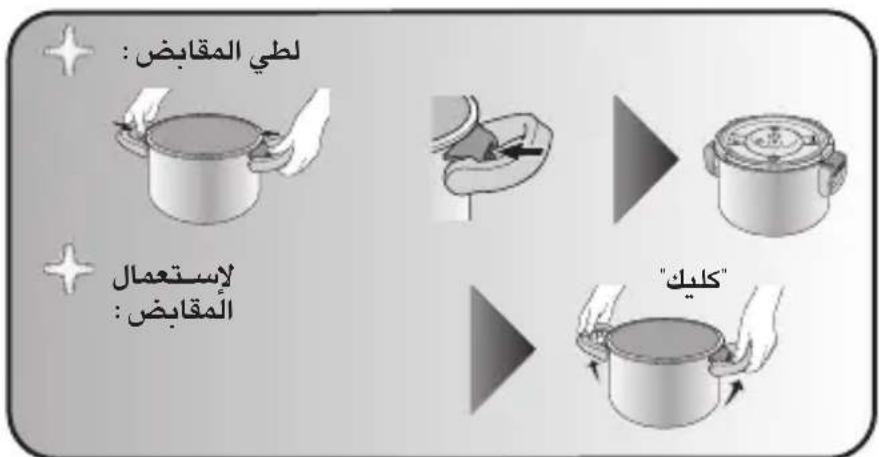
Folding handles\*
Before use, make sure you remove the labels from each handle.
Do not try to fold the handles without pressing the release buttons.
flowchart
graph LR
    A["To fold the handles:"] --> B["To use the handles:"]
    B --> C["CLICK"]
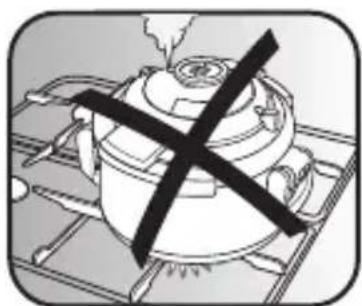
Never put your pressure cooker on a heat source with the handles down.
natural_image
Simple line drawing of a cooking pot on a stove with a crossed black X mark (no text or symbols)Position your pressure cooker so that the programme selector is facing you.
natural_image
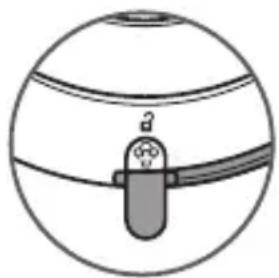
Simple line drawing of a test tube inside a spherical container (no text or symbols)Never force the pressure cooker open, make sure the pressure indicator (D) is down in the normal position.
- Clip the trivet (I) to the steaming basket (H^*) - Fig. 5 - 6.
- Place the steaming basket (H*) at the bottom of the cooker (N) - Fig. 7.
- Fill two thirds of the cooker with water (M) - Fig. 4.
- Close your pressure cooker - Fig. 2.
- Move the programme selector to Fig. 11.
- Set the timer for 20 min. Place your pressure cooker on a heat source set to maximum power.
- When steam starts to be released through the valve, the timer beeps, reduce the heat source.
- After 20 minutes, press the + or - keys to stop the timer beeping. Then turn off the heat.
- Move the programme selector to Fig. 8.
- When the pressure indicator (D) lowers, the pressure cooker is no longer pressurized.
- Open the pressure cooker - Fig. 1.
- Clean it.
Use
Before cooking
- Every time you use your cooker, first check that the control module is correctly fitted and tightened (using a coin) and check that the operating valve (P) located inside the lid can move by moving the programme selector to and pressing the decompression valve with your finger.
- Visually check that the steam release outlet (A) is not obstructed- Fig. 14.
- Also check that the safety valve (Q) can move see - Fig. 16 and refer to the "Cleaning and Maintenance" heading.
- Determine the necessary amount of water for cooking, see "Minimum and maximum fill" section.
- Close your pressure cooker.
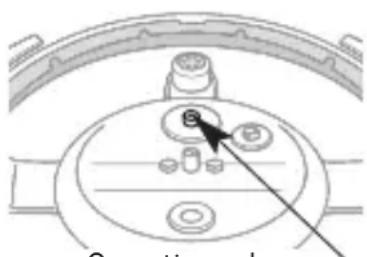
Operating valve
- Move the selector to the chosen cooking setting 🎨 or Ⓞ - Fig. 10 or 11.
- Programme the timer for the desired cooking time - Fig. 12.
- Make sure that your cooker is properly locked before heating it - Fig. 2.
- Place the pressure cooker on a heat source, then set it to maximum power and refer to the section headed "closing".
Position your pressure cooker so that the cooking programme selector is facing you.
During cooking
The pressure indicator (D) prevents the pressure cooker from increasing in pressure if it is not properly closed.
As with any cooking appliance, watch over it carefully especially if you are using your pressure cooker around children.
Steam is very hot as it exits the steam release outlet.
- When steam is released through the release outlet it continuously emits a steady sound (pschhht), the cooking time countdown starts automatically and beeps.
- Make sure that during cooking the valve hisses regularly. If there is not enough steam, increase the heat source slightly, if there is too much, reduce it.
Finishing cooking
- At the end of the cooking time the timer sounds to indicate that cooking is completed.
- Turn off the heat.
• To release the steam:
Slow pressure release: gradually turn the cooking programme selector (F) to align with the symbol
- Fig. 8. Make sure that the cooker is positioned so that the steam is directed away from you. Slow pressure steam release is recommended for stews, vegetables, meat joints and fish dishes.
Fast pressure release: remove the timer and place your pressure cooker under cold running water, directing the flow onto the metal part of the lid. Fast pressure steam release is
The pressure indicator (D) prevents you from opening the pressure cooker if it still under pressure.
Beware of steam. If you notice abnormal emissions during decompression, put the selector back to its original cooking setting or wait a few minutes, then decompress again making sure there are no more emissions.
recommended for soups, rice, pasta, egg custards, cake and pudding mixes, recipes containing rice or pasta and recipes with a high liquid content.
- If in doubt on which method to use, choose fast pressure release.
- Check that the pressure indicator (D) is lowered.
- Open the pressure cooker.
To move your pressure cooker, use the handles of the pan.
EN
Cleaning and Maintenance
For best operation, be sure to follow these cleaning and maintenance recommendations every time the pressure cooker is used:
- After each use always wash your pressure cooker with water and washing-up liquid. Do the same for the basket*.
- Never use bleach or chlorine products as these could permanently damage the stainless steel.
- Do not overheat your pan when it is empty.
Never leave food in your pressure cooker.
It is not a problem if browning and scratches occur after prolonged use.
To clean the inside of the pan
- Clean it with a scouring pad and washing-up liquid.
- If the inside of the stainless steel cooker has iridescent reflections or white spots, clean with white vinegar.
• The pan is dishwasher safe.
You can put the pan and the basket* in the dishwasher.
To clean the outside of the cooker
- Clean with a sponge and washing-up liquid.
To clean the lid
- Remove the timer.
- After each use, remove the unit and wash with a sponge, warm water and washing-up liquid.
- You can put the lid in the dishwasher after removing the timer, the seal and the control unit.
- If you accidentally remove the base of the automatic air removal system, refit it by pressing and turning it simultaneously.
Never place the timer under running water or in the dishwasher.
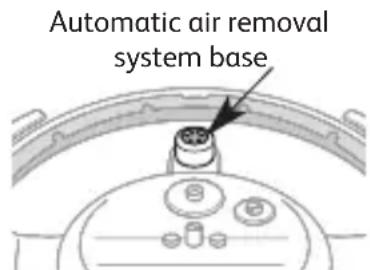

Never wash the seal in the dishwasher.
• After each use, always clean the seal (G) and its groove.
- Wash the seal using a sponge, warm water and washing-up liquid.
- To refit the seal, refer to Fig. 13 and make sure that the words "face côté couvercle" are against the lid.
To clean the control module and valves
- Remove the control module from the lid: see "Control module."
- Wash the module with washing-up liquid and then rinse under running water.
- Visually check that the steam release outlet (A) is not obstructed - Fig.14. If it is not, run it under water.
- Check that the operating valve (P) located inside the unit can move by moving the programme selector to and pressing with your finger Fig. 15.
- You can clean this valve under running water.
- Also check that the safety valve (Q) works by pressing hard with a cotton bud in the central part of the valve, which should be moveable - Fig. 16. You can clean this valve under running water.
- Check that the unit seal (O) is properly in place. If the seal is missing or damaged, leaks can occur in the unit when your pressure cooker is in use. The shape of the seal allows it to be removed and replaced easily. If necessary to replace, this part is available via our Customer Relations Helpline or on our website www.tefal.com
- Check the cleanliness of the pressure indicator (D), you can clean it under running water.
Never dismantle the control module
Do not forget to remove the timer.
Never put the control module in the dishwasher.
Do not use sharp or pointed objects when checking the safety valve (Q).
- Use a clean, dry cloth.
- Do not use solvent.
- Never put the timer in water or in the dishwasher.
To store your pressure cooker
- Turn the lid upside down on the pan - Fig. 17.
If your cooker has folding handles*: - Press the release buttons (J) on the handles. See "Folding handles" section.
Do not try to fold the handles* without pressing the release buttons.
To change your pressure cooker seal
You must have your pressure cooker checked at a TEFAL Approved Service Centre after 10 years of use.
- Change the pressure cooker seal every year.
- Change the pressure cooker seal if it is damaged.
- Always use an original TEFAL seal which corresponds to your model.
Safety
Your pressure cooker is provided with a number of safety mechanisms:
Closing safely
- The jaws should close under the rim of the pan (N). If this is not the case, there is steam leakage on the pressure indicator and your pressure cooker will not build up pressure (refer to the section headed "Locking").
- If your pressure cooker is pressurised, the opening/closing (E) handle cannot be operated because the mechanism is locked by the pressure indicator.
- Never try to force open your pressure cooker.
- Do not interfere with the pressure indicator (D).
- Make sure that the internal pressure has fallen.
- If you move the open/close handle (E) to a vertical position, while the pressure cooker is still pressurized you cannot open it.
- Check that the pressure setting (F) is set to and wait until the pressure indicator (D) is at the low setting.
Two high pressure safety systems
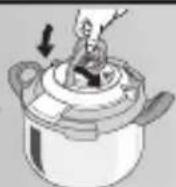
- First device: the safety valve (Q) releases the pressure and steam escapes under the control module - Fig. 18.
- Second device: the seal releases steam between the lid and the pan - Fig. 19.
If one of the high pressure safety systems is triggered:
- Turn off the heat source.
- Let your pressure cooker cool completely.
- Open it.
- Check and clean the operating valve (P), the steam release outlet (A), the safety valve (Q) and the seal (G).
- If, after checking and cleaning, your product leaks or does not work, call our Customer Relations Helpline.
1 - The steam is very hot when it leaves the operating valve.
2 - Do not try to force it open, make sure that the pressure indicator (D) is at the low position.
3 - As with any cooking appliance, always pay close attention during use in the presence of children.
4 - Beware of the steam jet.
5 - To move your pressure cooker, use the two handles of the pan.
6 - Do not leave food in your pressure cooker.
7 - Never use bleach or chlorine products as they may affect the quality of stainless steel.
8 - Never leave the lid to soak in water.
9 - Replace the seal every year or if it is damaged.
10 - You must only clean your pressure cooker when it is cold and the appliance is empty.
11 - You must have your pressure cooker checked at a TEFAL Approved Customer Service Centre after 10 years of use.
12 - Never carry your pressure cooker using the handles.
Guarantee
TEFAL pressure cookers have a 10 year guarantee from the date of purchase against any faulty materials or workmanship related to the pot or any premature damage of the metal base provided the product is used in accordance with the manufacturer's recommended product instructions. This guarantee does not include any damage due to inappropriate use or resulting from knocks, falls or by placing the product in the oven.
It should be noted that the normal life of the gasket, pressure control, valves, handles or locking indicator seal is limited. These parts are excluded from the guarantee and will require periodic renewal. It should also be noted that for models with an electronic timer, the timer is guaranteed for the first year only. Accessories such as the basket, trivet and steam basket are also guaranteed for 12 months only.
- Only TEFAL approved service centres are authorised to provide service under guarantee.
Regulatory markings
| Marking Location | |
| Manufacturer's identification or trademark | Decorative crown |
| Year and batch of manufactureModel referenceMaximum safe pressure (PS)Highest operating pressure (PF) | On the upper edge of the lid, visible when it is in the "open" position |
| Capacity On the outside of the pan |
TEFAL answers your questions
| Problems Recommendations | |
| If you cannot close the lid: | Check that the open/close (E) handle is in a vertical position.Check that the seal is properly in place. Refer to the section headed "Cleaning and maintenance".Ensure that the jaws are properly closed below the rim of the pan (N).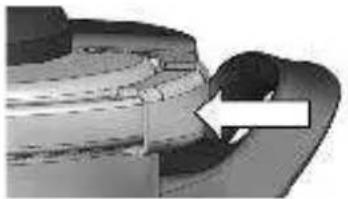 If opening/closing during cooking, apply slight pressure to the centre of the lid to close your pressure cooker. If opening/closing during cooking, apply slight pressure to the centre of the lid to close your pressure cooker. |
| If the pressure indicator is not showing: | This is normal during the first few minutes. If the problem persists:Move the programme selector (F) to one of the coo-king iconsOf@If the problem persists, call our Customer Relations Helpline. |
| If the pressure indicator is showing and nothing comes out of the value during cooking: | This is normal for the first few minutes. If this persists, check that:The heat source is strong enough, if not increase itThe amount of liquid in the pan is sufficient.The cooking programme selector (F) is set toor@Your cooker is correctly locked.The seal or edge of the pan are not damaged.The seal is correctly placed in the lid, See "Cleaning and maintenance" section.If this persists:Turn off the heat source.Move the programme selector (F) toWait for the pressure indicator (D) to go down.Open your pressure cooker. |
| Problems | Recommendations |
| If steam is escaping around the lid accompanied by a loud noise: | Make sure the seal is not caught between the pan and the lid. |
| If steam is escaping around the lid, check: | The lid is correctly locked.The position of the seal in the lid.The condition of the seal, if necessary replace it.The cleanliness of the lid, seal and its housing in the lid.The condition of the edge of the pan. |
| If one of the safety systems is triggered: | Turn off the heat source.Let the pressure cooker cool completely.Check the selector (F) is set toWait for the pressure indicator (D) to go down and open.Check and clean the steam release outlet, the safety valve and the seal.If the problem persists, call our Customer Relations Helpline. |
| If you cannot open the lid: | Check the selector is set toCheck the pressure indicator (D) is at the low positionIf not, release the steam.Never interfere with this pressure indicator |
| If food is not cooked or burnt, check: | Cooking timeThe power of the heat sourceThe operating valve is in the correct positionThe quantity of liquid |
| If your pressure cooker has heated without liquid inside: | If the problem persists, call our Customer Relations Helpline. |
| Problems Recommendations | |
| If you are unable to put the folding handles* in the right position: | Check that:The release button* can move.If the problem persists, call our Customer Relations Helpline. |
| If you are unable to fold the folding handles*: | Do not force themMake sure you press the release buttons* of the handles. |
| If the timer has a partial or total loss of the display: | Change the battery |
| If the timer displays « [O]»: | You need to replace the timer (part reference X1060005). |

Précautions importantes
FR
Description
natural_image
Close-up of a mechanical component with a white arrow pointing to a curved surface (no visible text or symbols)natural_image
Diagram of a hand pressing down on a circular mechanical component with arrows indicating motion (no text or symbols)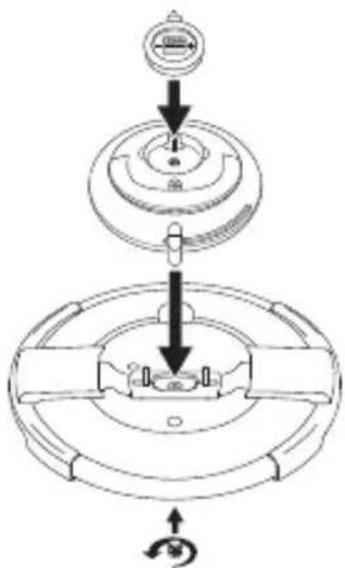
natural_image
Illustration of a cooking pot with a lid and handle, no text or symbols presentnatural_image
Simple line drawing of a trash bin with crossed x-axes and no text or symbolsnatural_image
Simple line drawing of a cooking pot on a stove with a crossed-out black X mark (no text or symbols)natural_image
Simple line drawing of a test tube inside a sphere (no text or symbols)natural_image
Diagram of a mechanical component with a circular dial and labeled parts (no text or symbols)
Ürünün tanıtımı
natural_image
Close-up of a mechanical component with a white arrow pointing to a feature (no visible text or symbols)natural_image
Diagram of a hand turning a circular component with arrows indicating rotation (no text or symbols)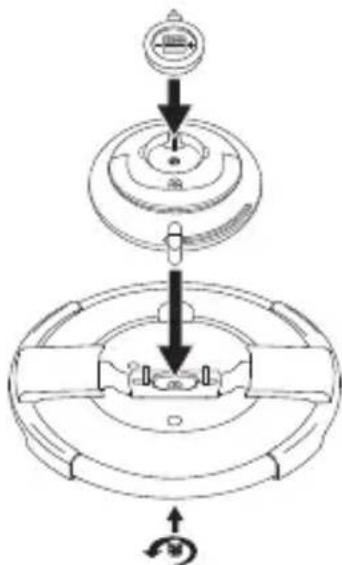
natural_image
Illustration of a hand stirring a cooking pot with a lid (no text or symbols visible)natural_image
Simple line drawing of a cooking pot with a crossed-out black X mark on a stove (no text or symbols)natural_image
Simple line drawing of a test tube inside a spherical container (no text or symbols)natural_image
Diagram of a mechanical component with a circular dial and labeled ports (no text or symbols)Çalışma supabı
natural_image
Technical diagram of a mechanical component with a central hub and mounting holes (no text or symbols)
Περιγραφή
natural_image
Close-up of a mechanical component with a white arrow pointing to a curved section (no visible text or symbols)natural_image
Diagram of a hand turning a circular component with arrows indicating rotation (no text or symbols)natural_image
Illustration of a cooking pot with a lid and handle, no text or symbols presentflowchart
graph TD
    A["Valve Indicator"] --> B["Rotating Wheel"]
    B --> C["Ring Assembly"]
    C --> D["Arrow Up/Down"]
natural_image
Simple line drawing of a cooking pot with a crossed black X mark on a stove (no text or symbols)natural_image
Simple line drawing of a test tube inside a spherical container (no text or symbols)natural_image
Technical diagram of a mechanical component with labeled parts (no text or symbols)βαλβίδα λειτουργίας
natural_image
Diagram of a mechanical component with a central pin and circular ports, no text or symbols presentnatural_image
Diagram of a mechanical component with a central pin and surrounding circular components (no text or symbols)• افصل المؤقت.
natural_image
Simple line drawing of a bulb with a small object inside, no text or symbols presentnatural_image
Illustration of a mechanical component with layered parts (no text or symbols)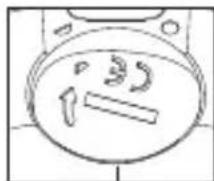
natural_image
Simple line drawing of a bowl with a spoon inside, no text or symbols present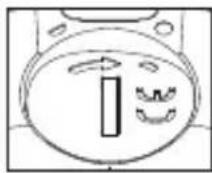
natural_image
Diagram of a hand turning a mechanical component with arrows indicating rotation (no text or symbols)natural_image
Simple line drawing of a pot on a stove with a crossed black X mark (no text or symbols)* حسب الموديل
flowchart
graph LR
    A["Start: 00:00 timer with icon"] --> B["7: Manual temperature measurement"]
    B --> C["8: Product inspection with hand, hand, and pot"]
    D["6: Inade: Add to temp, temp is about 12.5°C; temp is about 12.5°C"] --> E["7: Manual temperature measurement with hand, hand, and pot"]
    E --> F["8: Product inspection with hand, hand, and pot"]
natural_image
Symbol of a trash bin with crossed lines indicating no waste or restriction, and a solid black rectangle below (no text or labels)natural_image
Illustration of a cooking pot with a handle and lid, no text or symbols presentشغّل برنامج الطهي

اختر البرنامج أو
ضبط الوقت

natural_image
Diagram of a hand pressing down on a circular mechanical component with a valve (no text or symbols)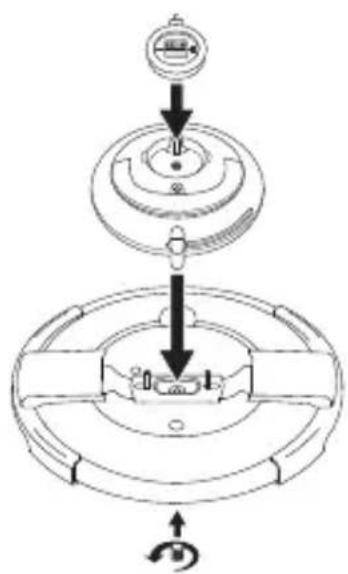
natural_image
Close-up of a mechanical component with a white arrow pointing to a curved feature (no visible text or symbols)natural_image
Diagram of a mechanical component with a central pin and surrounding circular components (no text or symbols)• تايمرا بردارید.
natural_image
Simple line drawing of a bulb with a small object inside, no text or symbols presentnatural_image
Illustration of a mechanical component with layered parts and a handle (no text or symbols)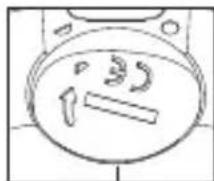
natural_image
Simple line drawing of a bowl with a spoon inside, no text or symbols present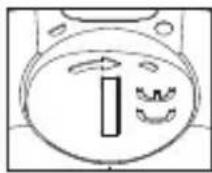
natural_image
Hand operating a mechanical switch mechanism with arrows indicating rotation (no text or symbols)natural_image
Illustration of a cooking pot with a crossed black X mark on a stove (no text or symbols)* بسته به مدل
natural_image
Symbol of a trash bin with crossed lines indicating no waste or restriction, and a solid black rectangle below (no text or labels)natural_image
Diagram of a hand pressing down on a circular mechanical component with arrows indicating motion (no text or symbols)