
FMY 45 MW BK - Oven FRANKE - Free user manual and instructions
Find the device manual for free FMY 45 MW BK FRANKE in PDF.
| Product type | Combined microwave oven (grill, convection) |
| Brand | Franke |
| Model | FMY 45 MW BK |
| Microwave power | 900 W (max 1000 W) |
| Main functions | Microwave, Grill, Grill + microwave, Hot air, Hot air + microwave, Turbo grill + microwave, Automatic steam, Automatic defrost, Automatic reheat, Auto Cook |
| Supplied accessories | Glass turntable, turntable support, metal grid, steam basket with lid, rectangular cooking tray |
| Control type | Push buttons and rotary knob |
| Safety lock | Automatic lock activated when door closes |
| Cleaning and maintenance | Clean surfaces with a damp microfiber cloth; do not use steam cleaner, steel wool or abrasive products. Accessories dishwasher safe. |
| Control panel | Digital display, STOP, BACK, OK, START buttons, selection knob and adjustment knob |
| Interior lighting | Yes |
| Turntable | Glass, diameter not specified |
| Timer | Yes, independent of cooking cycles |
| Automatic programs | Defrost (5 categories), Reheat, Steam cooking, Auto Cook (potatoes, vegetables, popcorn, etc.) |
| Quick preheat | Yes |
| Eco mode | Yes (screen brightness reduction) |
| After-sales service | Contact a Franke technical service center (do not call unauthorized technicians) |
| Rating plate information | Model (art./code), serial number (S.N.) located on the left edge of the cavity |
Frequently Asked Questions - FMY 45 MW BK FRANKE
User questions about FMY 45 MW BK FRANKE
0 question about this device. Answer the ones you know or ask your own.
Ask a new question about this device
Download the instructions for your Oven in PDF format for free! Find your manual FMY 45 MW BK - FRANKE and take your electronic device back in hand. On this page are published all the documents necessary for the use of your device. FMY 45 MW BK by FRANKE.
USER MANUAL FMY 45 MW BK FRANKE
natural_image
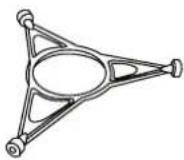
Technical line drawing of a mechanical or architectural component with no visible text, numbers, or symbols.FMY 45 MW
EN User manual Compact Combi Oven with Microwave
DE Bedienungsanleitung Kompakter Kombi-Backofen mit Mikrowelle
FR Manuel de l'utilisateur Four Combi compact avec micro-ondes
IT Manuale d'uso Forno combinato compatto con microonde
ES Manual de usuario Horno microondas combi compacto
PT Manual do utilizador Forno Compacto Combi com Micro-ondas
PL Podręcznik użytkownika Kompaktowy piekarnik połączony z funkcją kuchenki mikrofalowej
NL Gebruikershandleiding Compacte combi-oven met magnetron
CLEANING AND MAINTENANCE....13
TROUBLESHOOTING 13
SUPPORT 13
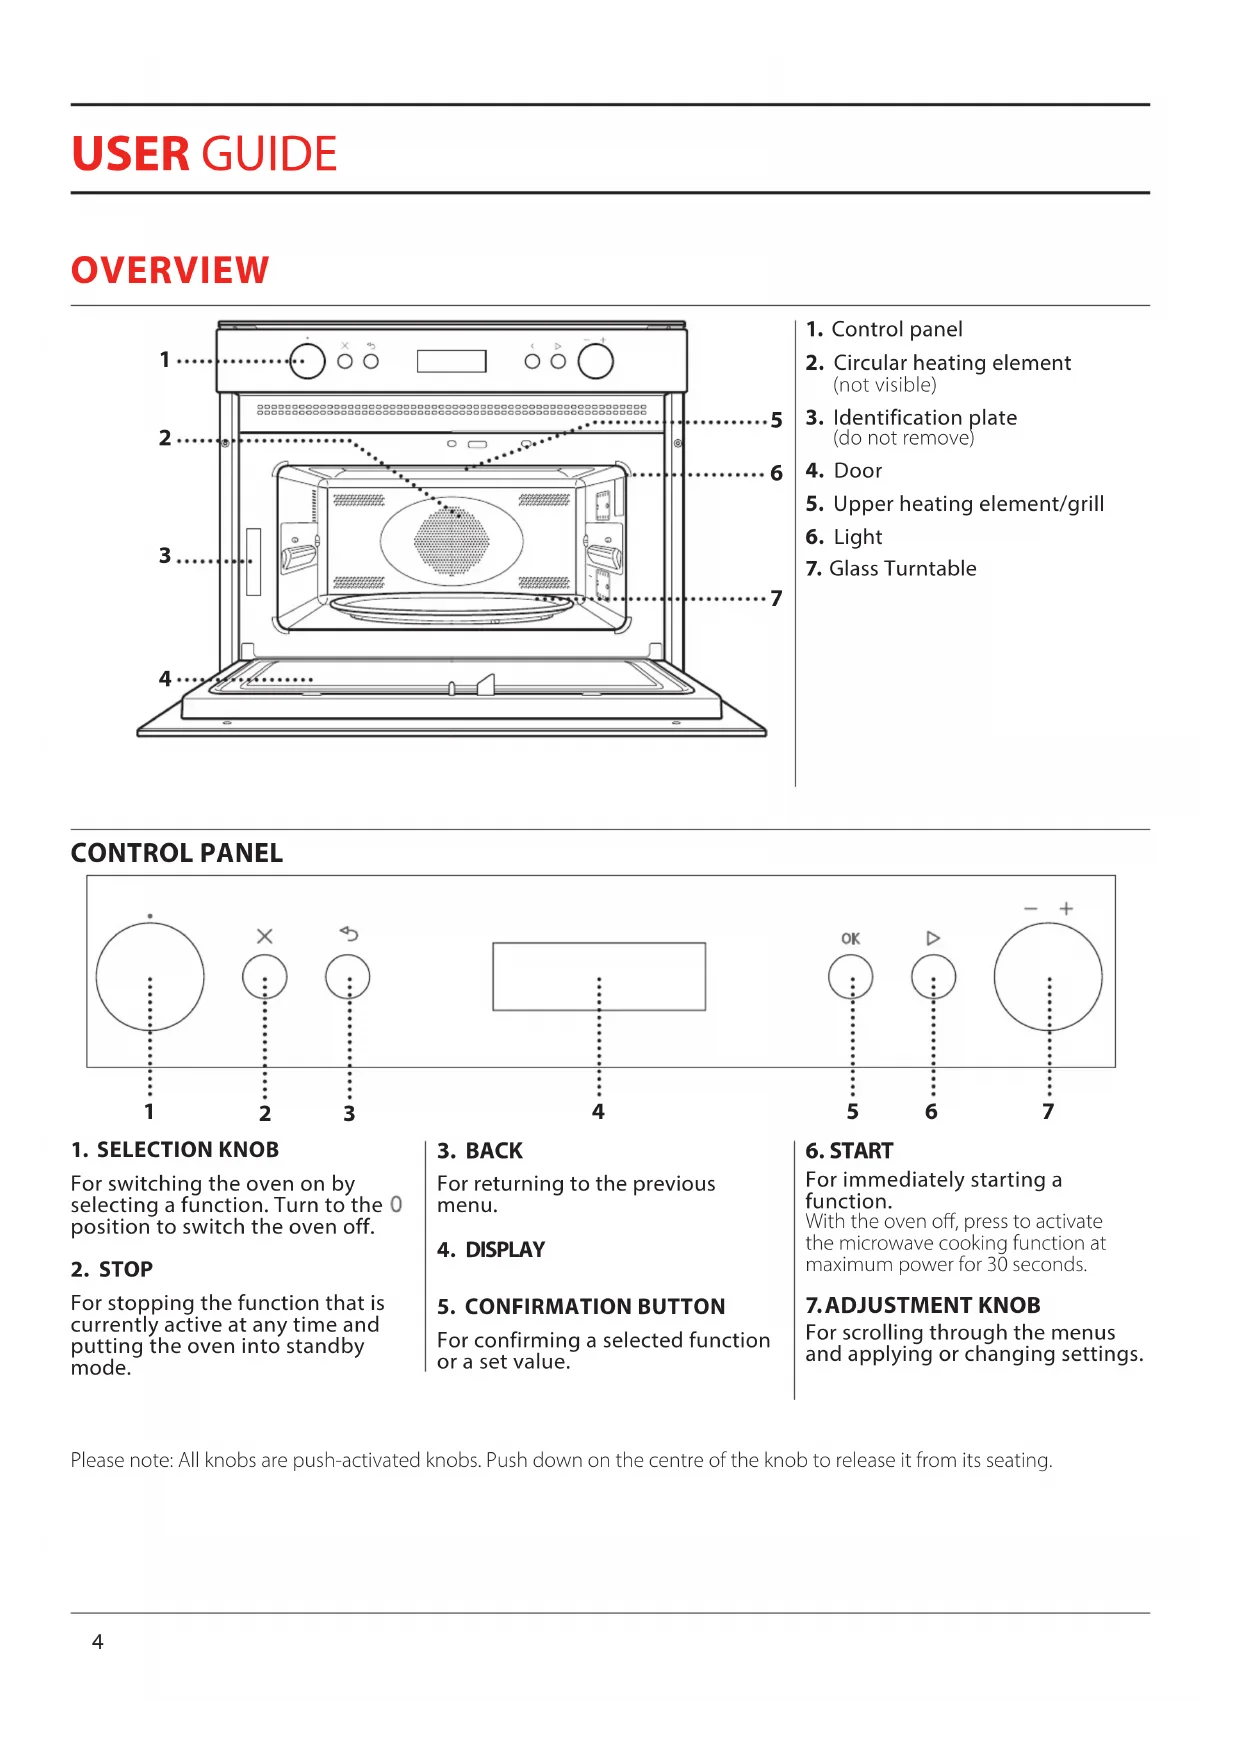
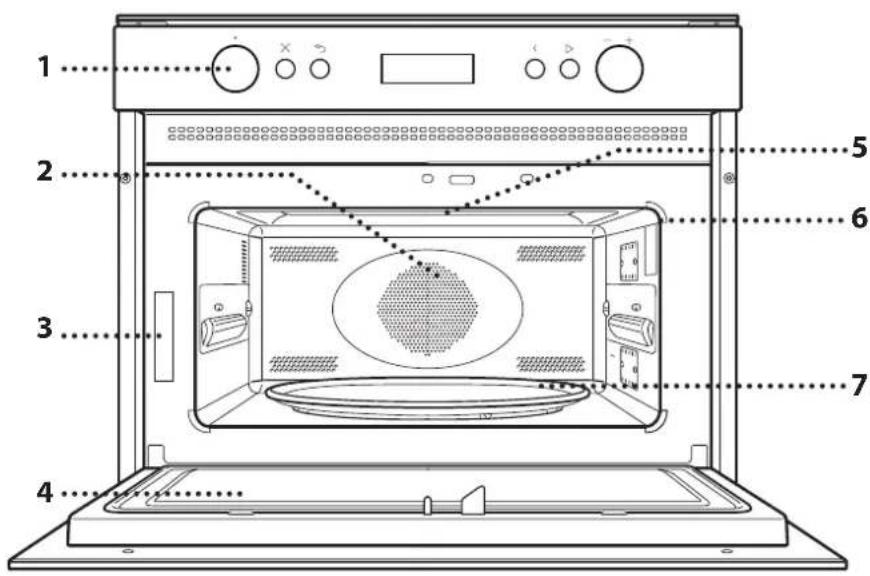
OVERVIEW
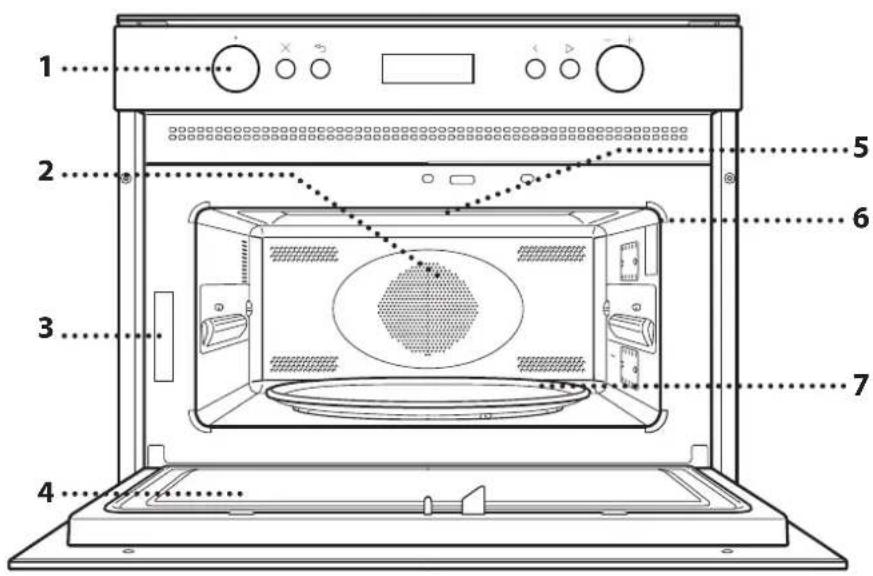
- Control panel
- Circular heating element (not visible)
- Identification plate (do not remove)
- Door
- Upper heating element/grill
- Light
- Glass Turntable
CONTROL PANEL
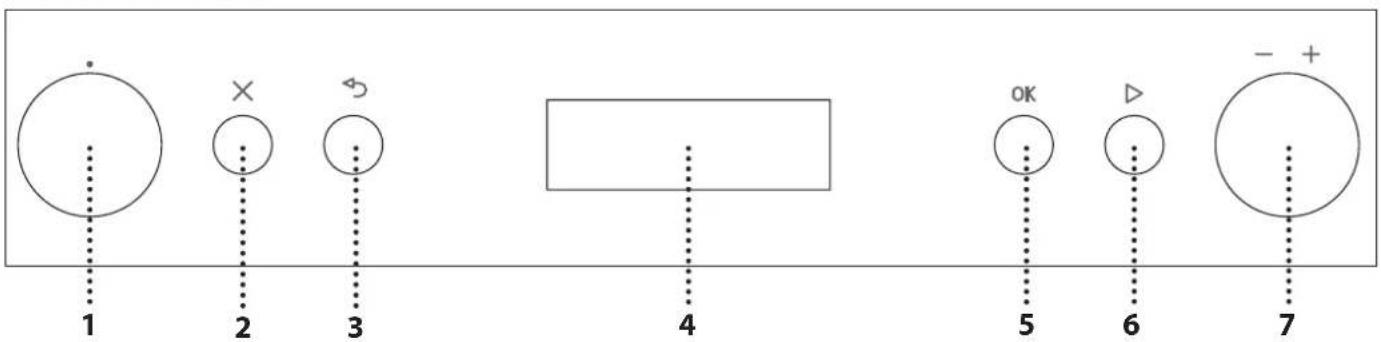
1. SELECTION KNOB
For switching the oven on by selecting a function. Turn to the 0 position to switch the oven off.
2. STOP
For stopping the function that is currently active at any time and putting the oven into standby mode.
3. BACK
For returning to the previous menu.
4. DISPLAY
5. CONFIRMATION BUTTON
For confirming a selected function or a set value.
6. START
For immediately starting a function.
With the oven off, press to activate the microwave cooking function at maximum power for 30 seconds.
7.ADJUSTMENT KNOB
For scrolling through the menus and applying or changing settings.
Please note: All knobs are push-activated knobs. Push down on the centre of the knob to release it from its seating.
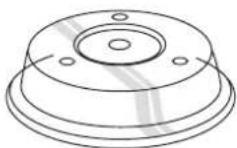
GLASS TURNTABLE
Placed on its support, the glass turntable can be used with all cooking methods. The turntable must always be used as a base for other containers or accessories, with the exception of the
rectangular baking tray.
TURNTABLE SUPPORT
Only use the support for the glass turntable. Do not rest other accessories on the support.
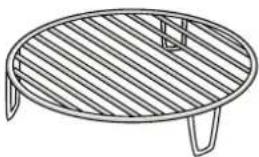
WIRE RACK
natural_image
Line drawing of a circular metal grate with slatted edges and two legs (no text or symbols)This allows you to place food closer to the grill, for perfectly browning your dish and for optimal hot air circulation. Place the wire shelf on the turntable, making sure that it does not
come into contact with other surfaces.
STEAMER
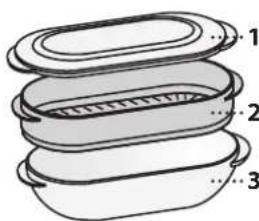
To steam foods such as fish or vegetables, place these in the basket (2) and pour drinking water (100 ml) into the bottom of the steamer (3) to achieve the right amount of steam.
To boil foods such as pasta, rice or potatoes, place these directly on the bottom of the steamer
(the basket is not required) and add an appropriate amount of drinking water for the amount you are cooking. For best results, cover the steamer with the cover (1) provided.
Always place the steamer on the glass turntable and only use it with the appropriate cooking functions, or with microwave functions.
COVER
Useful for covering food while it is cooking or heating in the microwave.
The cover reduces splashes, keeps foods moist and can also be used to create two cooking levels.
It is not suitable for use in convection cooking or with any of the grill functions.
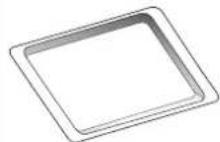
RECTANGULAR BAKING TRAY
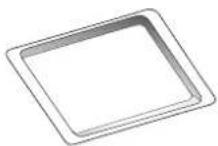
Only use the baking tray with functions that allow for convection cooking; it must never be used in combination with microwaves. Insert the tray horizontally, resting it on the rack in the cooking
compartment.
Please note: You do not need to remove the turntable and its support when using the rectangular baking tray.
The number of accessories may vary according to which model is purchased. Other accessories can be purchased separately from the fter-sales Service.
There are a number of accessories available on the market. Before you buy, ensure they are suitable for microwave use and resistant to oven temperatures.
Metallic containers for food or drink should never be used during microwave cooking.
Always ensure that foods and accessories do not come into contact with the inside walls of the oven.
Always ensure that the turntable is able to turn freely before starting the oven. Take care not to unseat the turntable whilst inserting or removing other accessories.

MICROWAVE
For quickly cooking and reheating food or s.
POWER SUGGESTED USE
| 900 W | Quickly reheating drinks or other foods with a high water content |
| 750 W | Cooking vegetables |
| 650 W | Cooking meat and fish |
| 500 W | Cooking meaty sauces, or sauces containing cheese or egg. Finishing off meat pies or pasta bakes |
| 350 W | Slow, gently cooking. Perfect for melting butter or chocolate |
| 160 W | Defrosting frozen foods or softening butter and cheese |
| 90 W | Softening ice cream |

GRILL
For browning, grilling and gratins. We
recommend turning the food during cooking. For best results, preheat the grill for 3-5 minutes.
Recommended accessories: Wire rack

GRILL + MICROWAVE
For quickly cooking and gratinating dishes, joining the microwave and grill functions.
Recommended accessories: Wire rack

TURBO GRILL
For perfect results, combining the grill and ection functions. We recommend turning the during cooking.
Recommended accessories: High wire rack

TURBO GRILL + MICROWAVE
For quickly cooking and browning your food, joining the microwave, grill and convection functions.
Recommended accessories: Wire rack

FORCED AIR
For cooking dishes in a way that achieves a result to using a conventional oven.
Recommended accessories: Wire rack / rectangular baking tray

FORCED AIR + MICROWAVE
To prepare oven dishes in a short time.
Recommended accessories: Wire rack

QUICK HEAT
For quickly reheating the oven before a cooking cycle. Wait for the function to finish before placing food inside the oven.
COOKASSIST
With the automatic functions, simply select the type and weight or quantity of food to achieve the best results. The oven will automatically calculate the optimum settings and continue to change them as cooking progresses. The total time does not include preparation or preheating phases.


AUTO DEFROST
For quickly defrosting various
different types of food simply by specifying their weight.
Food should be placed directly onto the glass turntable. Turn the food when prompted.
CATEGORY RECOMMENDED FOODS WEIGHT
 1* 1* | MEAT(mince, cutlets, steaks, roasting joints) | 100 g - 2 kg |
 2* 2* | POULTRY(whole chicken, pieces, fillets) | 100 g - 3 kg |
 3* 3* | FISH(whole, steaks, fillets) | 100 g - 2 kg |
 4* 4* | VEGETABLES(mixed vegetables, peas, broccoli, etc.) | 100 g - 2 kg |
 5* 5* | BREAD(loaves, buns, rolls) | 100 g - 2 kg |
1*
2*
3*
4*
5*


AUTO REHEAT
For reheating ready-made food
that is either frozen or at room temperature. The oven automatically calculates the settings required to achieve the best results in the shortest amount of time. Place food on a microwave-safe and heatproof dinner plate or dish.

AUTO STEAM

For steam-cooking foods
such as vegetables or fish, using the steamer provided. An initial preparation phase automatically generates steam, bringing the water poured into the bottom of the steamer to the boil. Timings for this phase may vary. The oven then proceeds with steam-cooking the food, according to the time set.
Some indicative cooking times are as follows:
• FRESH VEGETABLES (250-500 g): 4-6 minutes;
• FROZEN VEGETABLES (250-500 g): 5-7 minutes;
• FISH FILLETS (250-500 g): 4-6 minutes.
Required accessory: Steamer


AUTO FORCED AIR + MICROWAVE
For oven-cooking foods quickly and achieving optimal results. Use cookware that is suitable for oven cooking and resistant to microwaves, too.
| CATEGORY | RECOMMENDED FOODS, SUGGESTED QUANTITY and TIPS | |
| 1 | CHICKEN (poultry, fish, gratins) | 800 g - 1,5 kg |
| 2 | FROZEN LASAGNA | 400 g - 1 kg |
| 3 | COOKIES Place on the lightly greased baking plate. Put the plate in the oven when prompted. | 9 - 12 pcs. |
| 4 | CANNED BREAD DOUGH For pressure-canned brioche and crescent dough. Put the baking plate in the oven when prompted. | |
| 5 | FROZEN ROLLS (loaves, buns, rolls) To be used for ready baked frozen rolls. Put the baking plate in the oven when prompted. | |
Preheating required before you start cooking, on programs 3 - 4 - 5. When the correct temperature is reached, the oven will prompt you to put the food in.

AUTO COOK
For oven-cooking foods quickly and achieving optimal results. Use cookware that is suitable for oven cooking and resistant to microwaves.
CATEGORY FOOD WEIGHT
| 1 | BAKED POTATOES(Turn when prompted) | 200 g - 1 kg |
 2 2 | FRESH VEGETABLES(Cut uniformly and add 2 to 4 tablespoons of water. Cover) | 200 g - 800 g |
 3 3 | FROZEN VEGETABLES(Turn when prompted. Cover) | 200 g - 800 g |
| [5DZS]4 | CANNED VEGETABLES | 200 g - 600 g |
 5 5 | POP CORN | 100 g |
SETTI
SETTINGS
For changing the oven settings (language, Eco mode, brightness, audible signal volume, clock).
Please note: When Eco mode is active, the brightness of the display will be reduced after a few seconds to save energy. The display is reactivated automatically whenever any of the buttons are pressed, etc.
FIRST TIME USE
1. SELECT THE LANGUAGE
You will need to set the language and the time when you switch on the appliance for the first time. ENGLISH will scroll along the display: Turn the adjustment knob to scroll through the list of available languages and select the one you require.

Press to confirm your selection.
Please note: The language can subsequently be changed from the "Settings" menu.
2. SET THE TIME
After selecting the language, you will need to set the current time: The two digits for the hour will flash on the display.

Turn the adjustment knob to set the correct hour and press OK: the minutes will flash on the display.
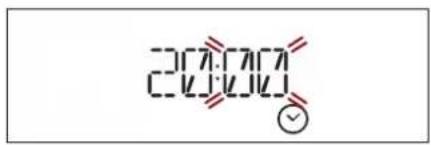
Turn the adjustment knob to set the minutes and press OK to confirm.
Please note: You may need to set the time again following lengthy power outages.
DAILY USE
JET START
With the oven off, press ▷ to activate the microwave cooking function at maximum power (1000W) for 30 seconds.
1. SELECT A FUNCTION
Turn the selection knob until the function you require is shown on the display: the display will show the icon for the function and its basic settings.
![[〃 〃] 07:30 650](/content/2026/04/611085/images/093cdda70cb120d32805beadbaed2735ae7553c5e312e0eb19f88722f4b171bd.jpg)
Where available, to select an item from the menu (the display will show the first available item), turn the adjustment knob until the item you require is shown.
![[〃 〃]* DEFRO AUTO](/content/2026/04/611085/images/a20e713c78780b18c592b7eb85afaae7b6bfa8bfb6c60f9c6ba55f62a401892c.jpg)
Press 0 to confirm your selection: the display will show the basic settings.
2. SET THE FUNCTION
After having selected the function you require, you can change its settings.
The display will show the settings that can be changed in sequence.
![[〃 〃] 07:30 =650*](/content/2026/04/611085/images/d7a701246e5820313a206036b900f4a1499b56448b593222a39e24d2865c8f49.jpg)
With the setting flashing on the display, turn the adjustment knob to change the setting, then press OK to confirm and continue with the settings that follow.
![[〃 〃] 07:30 650w](/content/2026/04/611085/images/35bf3521480250d6f925c86b9aa0676f49e9d705464614d0100159f2d49918a0.jpg)
Please note: Pressing allows you to change the previous setting again.
3. ACTIVATE THE FUNCTION
Once you have applied the settings you require, press ▷ to activate the function.

You can press at any time to pause the function that is currently active.
SAFETY LOCK
This function is automatically activated to prevent the oven from being switched on accidentally.
![[〃 ≡]DOOR 650_w](/content/2026/04/611085/images/6552f520605fc95a8980e51ad70c1886ebc3becc4db41d2198ae1e40e2b87efb.jpg)
Open and close the door, then press ▶ to start the function.
.PAUSE
To pause an active function, for example to stir or turn the food, simply open the door.
To start it up again, close the door and press ▷.
. AUTOMATIC FUNCTIONS
CATEGORIES
When using certain automatic functions, you will need to select a category for the food you are cooking in order to achieve the best results. The reference category corresponds to the number indicated at the top right of the display.
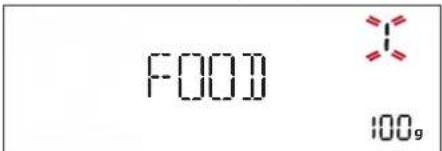
Refer to the table containing descriptions of the functions for information on all of the categories.
DEGREE OF DONENESS
Most of the automatic functions will prompt you to select how well done you require the food to be. The degree of doneness can be altered during the first 20 seconds of operation after activating the function: activate the function, then turn the adjustment knob to select the setting you require.
![[\m\n]MID 0 AUTO](/content/2026/04/611085/images/a14015d8064185e70f10334d890870bc757a2e8832f71ecf1c98a1981d0ec1be.jpg)
ACTIONS (STIR OR TURN FOOD)
Certain automatic functions require you to turn or stir the food, for example, and will pause in order for you to do so.
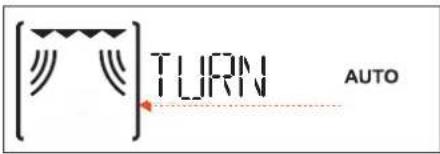
Once the oven has paused cooking, open the door and carry out the action you are prompted to perform before closing the door again and pressing ▷ to continue with cooking.
Please note: When using the "Defrost" function, the function will start again automatically after two minutes, even if you have not turned or stirred the food.
. RESIDUAL HEAT
In many cases, when food has been cooked, the oven will activate an automatic cooling process, which will be indicated on the display.

To view the clock during this process, press ↩ .
Please note: Opening the door temporarily interrupts the process.
. TIMER
When the oven is switched off, the display can be used as a timer. To activate the function and set the length of time you require, turn the adjustment knob.

Press Q6 activate the timer: An audible signal will sound and the display will indicate once the timer has finished counting down the selected time.
Please note: The timer does not activate any of the cooking cycles.
To change the time set for the timer, press <to pause it, turn the adjustment knob to set the new time, then press OK to restart the count.
To go back to the current time, press again.
Please note: Activating any function (i.e. turning the selection knob) will cancel the timer count; this is indicated by a buzzer.
USEFUL TIPS
HOW TO READ THE COOKING TABLE
The table indicates the best functions to use for any given food.
The cooking times refer to the cooking cycle for the food inside the oven, excluding the preheating phase (where required).
The settings and cooking times are approximate and depend on the amount of food and the type of accessory/ies used.
Always cook food for the minimum cooking time given and check that it is cooked through.
For best results, follow the recommendations in the cooking table carefully when selecting accessories.
Microwaves only penetrate food to a certain depth; you should therefore space the food out as much as possible when cooking multiple items at the same time.
Smaller items cook more quickly than larger items: To ensure uniform cooking, cut food into pieces of equal size.
Moisture evaporates during the microwave cooking process: Using a microwave-resistant cover helps to reduce moisture loss.
When you remove food from a microwave, it will often continue cooking for some time afterwards. We therefore recommend always allowing a couple of minutes of standing time once the cooking cycle has finished.
It is a good idea to stir food when cooking it in the microwave, as this brings the more well-cooked parts at the outside edges towards the middle and vice versa.
Place thin slices of meat one on top of the other or overlapping. Thicker slices, such as meat loaf and sausage, should be placed next to one another.
CLING FILM AND PACKAGING
Remove any twist ties from paper or plastic bags before placing them in the oven for microwave cooking.
Plastic film should be scored or perforated with a fork in order to relieve the pressure and prevent bursting due to the steam building up during cooking.
LIQUIDS
Liquids may overheat beyond boiling point without visibly bubbling.
This could cause hot liquids to suddenly boil over. To prevent this possibility:
. Avoid using containers with narrow necks.
. Stir the liquid before placing the container in the microwave oven and leave the teaspoon in the container.
. After heating, stir again before carefully removing the container from the microwave oven.
FROZEN FOOD
For best results, we recommend defrosting food directly on the glass turntable. You can also use a lightweight, microwave-safe plastic container if needed.
Boiled foods, stews and meat-based sauces will defrost better if stirred occasionally while defrosting. Separate food once it starts to defrost: the separated portions will defrost more quickly.
FOOD FOR INFANTS
When heating food or liquids in a baby bottle or a baby food jar, always stir and check the temperature before serving.
This will ensure that the heat is evenly distributed and avoid the risk of scalding or burns.
Make sure the lid and the teat are removed before heating.
MEAT AND FISH
To obtain perfect surface browning quickly while keeping the inside of the meat or fish soft and juicy, we recommend using the "Grill + MW" function. For best results, set the microwave power to between 160 and 350 W.
COOKING TABLE
| FOOD | FUNCTION | TEMP. (°C) | POWER (W) | DURATION (MIN) | ACCESSORIES |
| Leavened cakes | 160 - 180 - 30-60 |  | |||
| 160 - 180 90 25-50 |  | ||||
| Filled pies(cheesecake, strudel, apple tart) | 160 - 190 - 35-70 |  | |||
| Sponge cakes | 160 - | 30 - 40 |  | ||
| Cookies | 160 | - | 20 - 30 | ||
| Savoury pies(vegetable pie, quiche Lorraine 1 - 1.2 kg) | 180 - 190 | - | 40-55 |  | |
| Ready meals (250 - 500 g) | - | 750 | 4 - 7 | ||
| Lasagna/baked pasta | - | 350 - 500 | 15 - 25 |  | |
| Frozen lasagna (500 - 700 g) | - 500 - 750 | 14 - 20 | |||
| Pizza (400 - 500 g) | - | - | 10 - 12 | ||
| Meat (chops, steak) | - | 500 | 10 - 15 |  | |
| Poultry (whole, 800 g - 1.5 kg) | - | 350 - 500 | 30 - 45 * |  | |
| Chicken (fillets or pieces) | - | 350 - 500 | 10 -17 |  | |
| Roasts (800 g - 1.2 kg) | - | 350 - 500 | 25 - 40 * |  | |
| Roast lamb/Veal/Roast beef(1.3-1.5 Kg) | 170 - 180 | - | 70-80* | 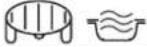 | |
| 160 - 180 | 160 | 50-70* |  | ||
| Sausages/kebabs | - | - | 20 - 40 * |  | |
| Fish (steaks or fillets) | - 160 - 350 | 15 - 20 * | 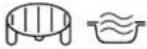 | ||
| Whole fish (800 g - 1.2 kg) | - | 160 - 350 | 20 - 30 * |  | |
| Baked potatoes (600 g - 1 kg) | - | 350 - 500 30 - 50 * |  | ||
| Baked apples | - | 160 - 350 | 15 -25 |  |
* Turn the food halfway through cooking.
| FUNCTIONS | Forced Air | Forced Air + Microwave | Grill | Grill + Microwave |
 |  |  |  | |
| ACCESSORIES | Heatproof plate/container suitable for use in microwaves | Wire rack | Rectangular Baking Tray | |
 |  |  |
TESTED RECIPES
Compiled for the certification authorities in accordance with the standards IEC 60705 and IEC 60350-1.
| FOOD FUNCTION | WEIGHT (g) | COOKING TIME (min:sec) | TEMP./ GRILL LEVEL | POWER (W) | PREHEAT. | ACCESSORIES | |
| Pastry cream |  | 1000 12:00 - 13:00 - 650 - | Microwave-safe container (Pyrex 3.227) | ||||
| Sponge cake |  | 475 8:00 - 10:00 - 750 - | Microwave-safe container (Pyrex 3.827) | ||||
| Meat loaf |  | 900 13:00 - 14:00 - 750 - | Microwave-safe container (Pyrex 3.838) | ||||
| Potato gratin |  | 1100 | 28:00 - 30:00 | 190 | 350 | - | Microwave-safe container (Pyrex 3.827) |
| Chicken |  | 1200 | 35:00 - 40:00 | 210 | 350 | - | Microwave-safe container (Pyrex 3.220) |
| Defrosting meat (turn halfway through the defrosting process) |  | 500 | 10:30 | - | 160 | - | Turntable |
| Toast |  | - | 4:00 - 6:00 | 3 | - | Yes | Wire shelf |
| FUNCTIONS | Microwave | Grill + Microwave | Grill |
 |  |  |
CLEANING AND MAINTENANCE
Make sure that the appliance has cooled down before carrying out any maintenance or cleaning. Do not use steam cleaners.
Do not use wire wool, abrasive scourers or abrasive/corrosive cleaning agents, as these could damage the surfaces of the appliance.
INTERIOR AND EXTERIOR SURFACES
- Clean the surfaces with a damp microfibre cloth. If they are very dirty, add a few drops of pH-neutral detergent. Finish off with a dry cloth.
- Clean the door glass with a suitable liquid detergent.
- At regular intervals or in case of spills, remove the turntable and its support to clean the bottom of the oven, removing all food residue.
- The grill does not need to be cleaned as the intense heat burns away any dirt: Use this function on a regular basis.
ACCESSORIES
All accessories are dishwasher safe. For stubborn dirt, rub gently with a cloth. Always leave the accessories to cool down before cleaning.
TROUBLESHOOTING
| Problem Possible cause Solution | ||
| The oven is not working. | Power cut.Disconnection from the mains. | Check for the presence of mains electrical power and whether the oven is connected to the electricity supply. Turn off the oven and restart it to see if the fault persists. |
| The oven makes noises, even when it is switched off. | Cooling fan active. Open the door or wait until the cooling process has finished. | |
| The display shows the letter “ERR” followed by a number. | Software fault. Contact you nearest Client After-sales ServiceCentre and state the number following the letter “ERR”. | |
WWW.FRANKE.COM
© Franke Technology and Trademark Ltd, Switzerland
SUPPORT
In the event of any operation problems, contact a Franke Technical Service Centre.
Never use the services of unauthorized technicians. Specify:
- the type of fault
- the appliance model (art./Code)
- the serial number (S.N.) on the rating plate, located on the left hand edge of the oven cavity (visible when the oven door is open).
When contacting our Service Centre, please state the codes provided on your product's identification plate.

INHALT
ÜBERSICHT....15
BEDIENFELD 15
ZUBEHÖRTEILE....16
FUNKTIONEN 17
ERSTER GEBRAUCH 19
natural_image
Line drawing of a circular metal grate with slatted edges and two legs (no text or symbols)AKTIONEN (GARGUT RÜHREN ODER WENDEN)
© Franke Technology and Trademark Ltd, Switzerland
SUPPORT
SOMMAIRE
APERÇU....26
PANNEAU DE COMMANDE 26
ACCESSOIRES 27
FONCTIONS 28
PREMIÈRE UTILISATION....30
USAGE QUOTIDIEN....30
CONSEILS UTILES 32
TABLEAU DE CUISSON....33
RECETTES TESTÉES....34
NETTOYAGE ET ENTRETIEN....35
GUIDE DE DÉPANNAGE....35
ASSISTANCE....35
APERÇU

natural_image
Line drawing of a circular metal grate with slatted edges and three legs (no text or symbols)natural_image
Line drawing of a three-tiered food container with lids, no text or symbols presentACTION (AGITER OU RETOURNER ALIMENT)
© Franke Technology and Trademark Ltd, Switzerland
ASSISTANCE


SOMMARIO
USO QUOTIDIANO....41
CONSIGLI UTILI....43
natural_image
Line drawing of a circular metal grate with slatted top and two side supports (no text or symbols)natural_image
Illustration of a multi-tiered food storage container with three labeled parts (no text or symbols on the diagram itself)© Franke Technology and Trademark Ltd, Switzerland
ASSISTENZA
natural_image
Simple line drawing of an oval-shaped object with diagonal stripes and three legs (no text or symbols)natural_image
Simple line drawing of a three-tiered rectangular object (no text or symbols)© Franke Technology and Trademark Ltd, Switzerland
ASISTENCIA
natural_image
Simple line drawing of an oval-shaped table with diagonal stripes and three side handles (no text or symbols)© Franke Technology and Trademark Ltd, Switzerland
SUPORTE
SPIS TREŚCI
INFORMACJE OGÓLNE....70
PULPIT STERUJACY....70
AKCESORIA 71
FUNKCJE 72
PIERWSZE UŻYCIE....74
CODZIENNA EKSPLOATACJA....74
PRAKTYCZNE PORADY....76
TABELA GOTOWANIA....77
SPRAWDZONE PRZEPISY 78
CZYSZCZENIE I KONSERWACJA....79
ROZWIAZYWANIE PROBLEMÓW....79
WSPARCIE TECHNICZNE 79
INFORMACJE OGÓLNE

natural_image
Line drawing of a circular metal grate with slatted edges and three legs (no text or symbols)natural_image
Illustration of a multi-tiered container or food storage unit (no text or symbols)© Franke Technology and Trademark Ltd, Switzerland
WSPARCIE TECHNICZNE
INHOUDSOPGAVE
OVERZICHT 81
BEDIENINGSPANEEEL 81
ACCESSOIRES 82
FUNCTIES 83
EERSTE GEBRUIK 85
DAGELIJKS GEBRUIK 85
NUTTIGE TIPS....87
BEREIDINGSTABEL 88
GETESTE RECEPTEN 89
REINIGEN EN ONDERHOUD....90
PROBLEEMOPLOSSING....90
ONDERSTEUNING 90
GEBRUIKERSHANDLEIDING
OVERZICHT
5. BEVESTIGINGSTOETS
natural_image
Line drawing of a circular metal grate with slatted top and two side legs (no text or symbols)natural_image
Illustration of three stacked food containers with lids, no text or symbols presentRECHTHOEKIGE BAKPLAAT
• VISFILETS (250-500 g): 4-6 minuten.
Benodigd accessoire: Stomer
[〃]COMBI AUTO HETELUCHT + MG
© Franke Technology and Trademark Ltd, Switzerland
ONDERSTEUNING
Technical Service Center.
- FMY 45 MW
- OVERVIEW
- CONTROL PANEL
- SELECTION KNOB
- STOP
- BACK
- DISPLAY
- CONFIRMATION BUTTON
- START
- 7.ADJUSTMENT KNOB
- GLASS TURNTABLE
- TURNTABLE SUPPORT
- WIRE RACK
- STEAMER
- COVER
- RECTANGULAR BAKING TRAY
- MICROWAVE
- GRILL
- GRILL + MICROWAVE
- TURBO GRILL
- TURBO GRILL + MICROWAVE
- FORCED AIR
- FORCED AIR + MICROWAVE
- QUICK HEAT
- COOKASSIST
- AUTO DEFROST
- AUTO REHEAT
- AUTO STEAM
- AUTO FORCED AIR + MICROWAVE
- AUTO COOK
- SETTI
- SETTINGS
- FIRST TIME USE
- SELECT THE LANGUAGE
- SET THE TIME
- DAILY USE
- JET START
- SELECT A FUNCTION
- SET THE FUNCTION
- ACTIVATE THE FUNCTION
- SAFETY LOCK
- .PAUSE
- AUTOMATIC FUNCTIONS
- CATEGORIES
- DEGREE OF DONENESS
- ACTIONS (STIR OR TURN FOOD)
- RESIDUAL HEAT
- TIMER
- USEFUL TIPS
- HOW TO READ THE COOKING TABLE
- MEAT AND FISH
- TESTED RECIPES
- CLEANING AND MAINTENANCE
- INTERIOR AND EXTERIOR SURFACES
- ACCESSORIES
- SUPPORT
- INHALT
- AKTIONEN (GARGUT RÜHREN ODER WENDEN)
- SOMMAIRE
- APERÇU
- ACTION (AGITER OU RETOURNER ALIMENT)
- ASSISTANCE
- SOMMARIO
- ASSISTENZA
- ASISTENCIA
- SUPORTE
- SPIS TREŚCI
- INFORMACJE OGÓLNE
- WSPARCIE TECHNICZNE
- INHOUDSOPGAVE
- GEBRUIKERSHANDLEIDING
- OVERZICHT
- BEVESTIGINGSTOETS
- RECHTHOEKIGE BAKPLAAT
- [〃]COMBI AUTO HETELUCHT + MG
- ONDERSTEUNING
Brand : FRANKE
Model : FMY 45 MW BK
Category : Oven