CHXTHDDW - Basket THERMADOR - Free user manual and instructions
Find the device manual for free CHXTHDDW THERMADOR in PDF.

User questions about CHXTHDDW THERMADOR
0 question about this device. Answer the ones you know or ask your own.
Ask a new question about this device
Download the instructions for your Basket in PDF format for free! Find your manual CHXTHDDW - THERMADOR and take your electronic device back in hand. On this page are published all the documents necessary for the use of your device. CHXTHDDW by THERMADOR.
USER MANUAL CHXTHDDW THERMADOR
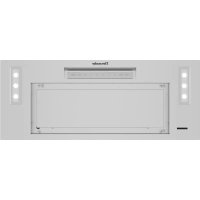
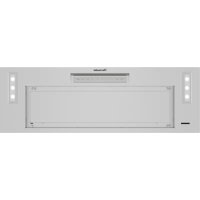
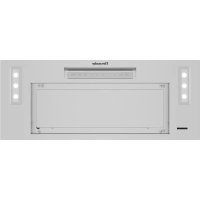
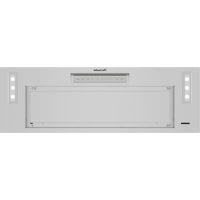
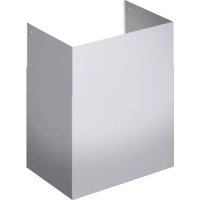
Duct Cover Telescopic Extension
CHXTHDDW

natural_image
Plated dish of cooked lobster with garnish, lemon slices, and herbs (no text or symbols visible)THERMADOR.COM
Table of CONTENTS
Safety Definitions 3
IMPORTANT SAFETY INSTRUCTIONS .... 4
GROUNDING INSTRUCTIONS 4
Safety Codes and Standards 5
Proper Installation and Maintenance 5
Proposition 65 Warning 5
Before you begin 6
Parts Included 6
Installation Procedure 6
Telescopic duct cover installation 6
This THERMADOR Appliance is made by
BSH Home Appliances Corporation
1901 Main Street, Suite 600
Irvine, CA 92614
Questions?
1-800-735-4328
www.thermador.com
We look forward to hearing from you!
Safety Definitions
WARNING
This indicates that death or serious injuries may occur as a result of non-observance of this warning.
CAUTION
This indicates that minor or moderate injuries may occur as a result of non-observance of this warning.
NOTICE: This indicates that damage to the appliance or property may occur as a result of non-compliance with this advisory.
Note: This alerts you to important information and/or tips.
IMPORTANT SAFETY INSTRUCTIONS READ AND SAVE THESE INSTRUCTIONS
INSTALLER: Save these instructions for the local electrical inspector's use. Please leave these instructions with this unit for the owner. Show the owner the location of the circuit breaker or fuse. Mark it for easy reference.
OWNER: Please retain these instructions for future reference.
WARNING
If the information in this manual is not followed exactly, fire or shock may result causing property damage or personal injury.
WARNING
If the information in this manual is not followed exactly, fire or shock may result causing property damage, personal injury or death.
- DO NOT store or use gasoline or other flammable vapors and liquids in the vicinity of this or any other appliance.
- WHAT TO DO IF YOU SMELL GAS
DO NOT try to light any appliance.
DO NOT touch any electrical switch.
DO NOT use any phone in your building.
Immediately call your gas supplier from a neighbor's phone. Follow the gas supplier's instructions.
If you cannot reach your gas supplier, call the fire department.
- Installation and service must be performed by an authorized service provider, service agency or the gas supplier.
WARNING
Turn off power circuit at service panel and lock out panel before wiring this appliance. Requirement: 120 VAC, 60 Hz 15 A. Allow the appliance to cool after the power has been turned off before servicing the appliance.
WARNING
AUTOMATICALLY OPERATED DEVICE
To reduce the risk of injury disconnect from power supply before servicing.
WARNING
TO REDUCE THE RISK OF FIRE, ELECTRIC SHOCK, OR INJURY TO PERSONS, OBSERVE THE FOLLOWING:
- Use this unit only in the manner intended by the manufacturer. If you have questions, contact the manufacturer.
- Before servicing or cleaning unit, switch power off at service panel and lock the service disconnecting means to prevent power from being switched on accidentally.
When the service disconnecting means cannot be locked, securely fasten a prominent warning device, such as a tag, to the service panel.
WARNING
Do not repair, replace or remove any part of the appliance unless specifically recommended in the manuals. Improper installation, service or maintenance can cause injury or property damage. Refer to this manual for guidance. All other servicing should be done by an authorized service provider.
WARNING
ELECTRICAL SHOCK HAZARD
DO NOT remove connections.
DO NOT use an extension cord.
Failure to follow these instructions can result in death, fire, or electrical shock.
GROUNDING INSTRUCTIONS
WARNING
Improper grounding can result in a risk of electric shock.
This appliance must be grounded. Grounding reduces the risk of electric shock by providing a safe pathway for electric current in the event of a short circuit.
Be sure your appliance is properly installed and grounded by a qualified technician. Installation, electrical connections and grounding must comply with all applicable codes.
If required by the National Electrical Code (or Canadian Electrical Code), this appliance must be installed on a separate branch circuit.
WARNING
WARNING: To reduce the risk of fire or electric shock, do not use this fan with any solid-state speed control device.
IMPORTANT SAFETY INSTRUCTIONS
READ AND SAVE THESE INSTRUCTIONS
Safety Codes and Standards
This appliance complies with the latest version of one or more of the following standards:
• UL 507 - Electric Fans
- CAN/CSA C22.2 No. 113 - Fans and Ventilators
It is the responsibility of the owner and the installer to determine if additional requirements and/or standards apply to specific installations.
Proper Installation and Maintenance
CAUTION

- Unit is heavy and requires at least two people or proper equipment to move and install.
- Hidden surfaces may have sharp edges. Use caution when handling the appliance. Failure to do so may result in property damage or personal injury.
Never modify or alter the construction of the appliance. For example, do not remove leveling legs, panels, wire covers or anti-tip brackets/screws.
CAUTION
For general ventilating use only. Do not use to exhaust hazardous or explosive materials and vapors.
WARNING
To reduce the risk of fire, use only metal ductwork.
Use a qualified installer.
Remove all tape and packaging before using the appliance. Destroy the packaging after unpacking the appliance. Never allow children to play with packaging material.
WARNING
WARNING – TO REDUCE THE RISK OF FIRE, ELECTRIC SHOCK, OR INJURY TO PERSONS, OBSERVE THE FOLLOWING:
- Installation work and electrical wiring must be done by qualified person(s) in accordance with all applicable codes and standards, including fire-rated construction.
-
Sufficient air is needed for proper combustion and exhausting of gases through the flue (chimney) of fuel burning equipment to prevent back drafting. Follow the heating equipment manufacturer's guideline and safety standards such as those published by the National Fire Protection Association (NFPA), and the American Society for Heating, Refrigeration and Air Conditioning Engineers (ASHRAE), and the local code authorities.
-
When cutting or drilling into wall or ceiling, do not damage electrical wiring and other hidden utilities.
- Ducted fans must always be vented to the outdoors.
WARNING
TO REDUCE THE RISK OF A RANGE TOP GREASE FIRE:
a. Never leave surface units unattended at high settings. Boilovers cause smoking and greasy spillovers that may ignite. Heat oils slowly on low or medium settings.
b. Always turn hood ON when cooking at high heat.
c. Clean ventilating fans frequently. Grease should not be allowed to accumulate on fan or filter.
d. Use proper pan size. Always use cookware appropriate for the size of the surface element.
Do not flambé under the extractor hood or work with a naked flame. When switched on, the extractor hood draws flames into the filter. There is a risk of fire due to deposits on the grease filter!
WARNING
TO REDUCE THE RISK OF INJURY TO PERSONS IN THE EVENT OF A RANGE TOP GREASE FIRE, OBSERVE THE FOLLOWING:
- SMOTHER FLAMES with a close-fitting lid, cookie sheet, or metal tray, then turn off the burner. BE CAREFUL TO PREVENT BURNS. If the flames do not go out immediately, EVACUATE AND CALL THE FIRE DEPARTMENT.
- NEVER PICK UP A FLAMING PAN – You may be burned.
- DO NOT USE WATER, including wet dishcloths or towels – a violent steam explosion will result.
• Use an extinguisher ONLY if: - You know you have a Class ABC extinguisher, and you already know how to operate it.
- The fire is small and contained in the area where it started.
- The fire department is being called.
- You can fight the fire with your back to an exit.
Proposition 65 Warning:
This product may contain a chemical known to the State of California, which can cause cancer or reproductive harm. Therefore, the packaging of your product may bear the following label as required by California:
STATE OF CALIFORNIA PROPOSITION 65 WARNING:
WARNING
Cancer and Reproductive Harm - www.P65Warnings.ca.gov
Before you begin
The CHXTHDDW Telescopic Duct Cover Extension can only be used with the Hood models HDDB30WS and HDDB36WS.
Parts Included
- Hardware bag (1):
- 3.5 x 9.5 mm installation screws (2)
- Torx adapter 10 (1)
• Upper duct cover (1)
- Lower duct cover (1)
Installation Procedure
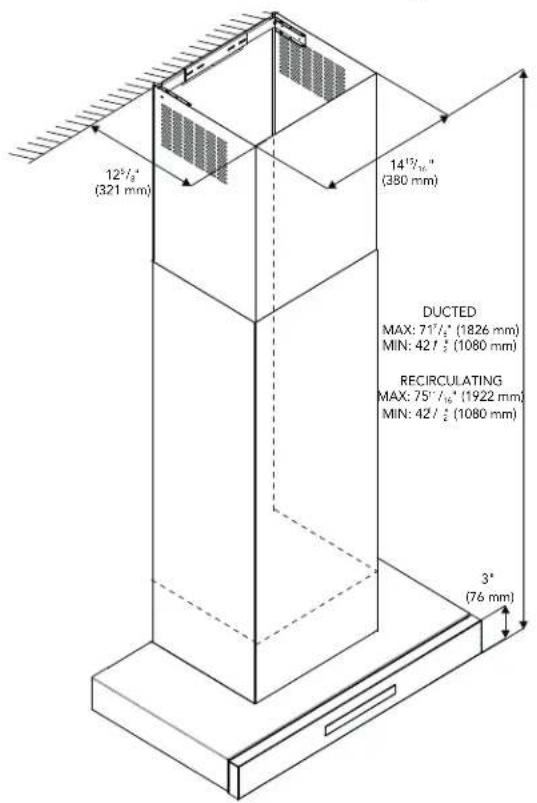
On some models, optional duct covers and telescoping extensions may be used to fill the space between the hood and ceiling in wall mount installations. Chimney duct cover included with the range hood fill the space between the hood and ceiling of 8 feet (2.4 m) ceilings. Telescoping extensions accommodate 12 feet (3.6 m) ceilings.
Telescopic duct cover installation
IMPORTANT: Secure the hood to the wall after installing the duct cover mounting bracket, but before installing the telescoping duct cover extension.
Securing the telescoping duct cover extension bracket
- Ensure that the minimum height of 30" (762 mm) from the bottom of the hood to the cooking surface will be maintained.
- Locate two studs at the mounting location.
text_image
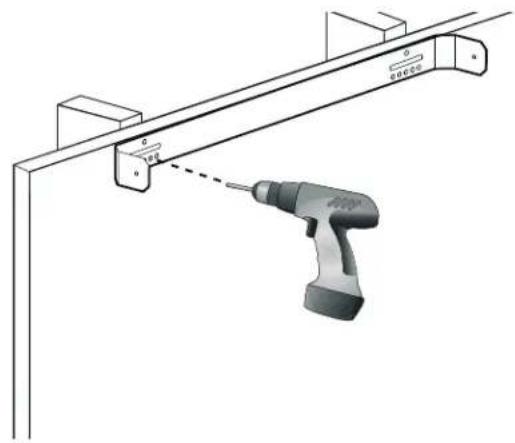
12½" (321 mm) 14½" (380 mm) DUCTED MAX: 7½" (1826 mm) MIN: 42½" (1080 mm) RECIRCULATING MAX: 75½" (1922 mm) MIN: 42½" (1080 mm) 3" (76 mm)- Mount the duct cover bracket on the top of the ceiling using 2 - 1½" (38 mm) screws. Ensure that the bracket is level.
Note: The duct cover bracket is included with the range hood.
natural_image
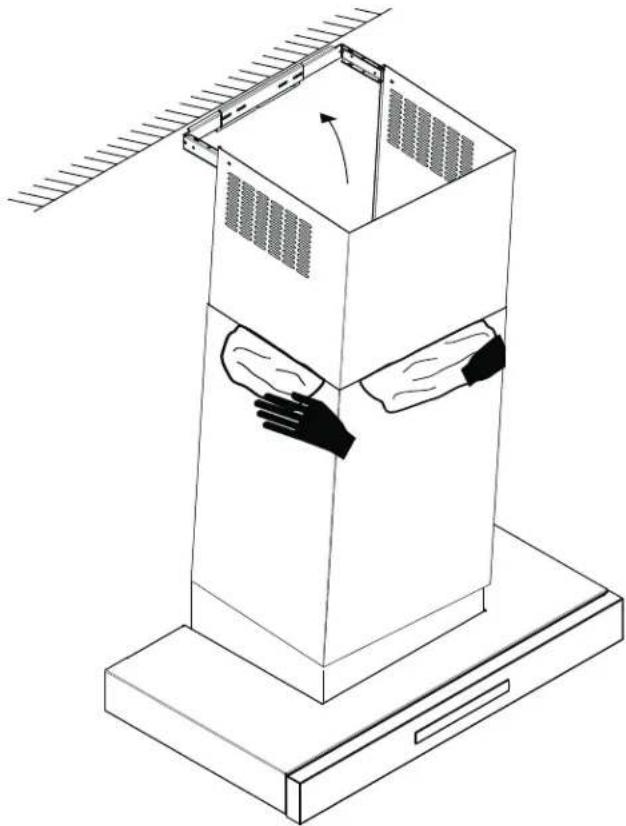
Diagram of a handheld tool inserted into a bracket, showing no text or symbols on the object itself.- Insert the complete duct cover at an angle and swivel toward the wall.
natural_image
Isometric line drawing of a mechanical device with a base and wall, showing internal components and motion arrows (no text or symbols)- Carefully pull the top part of the extension upwards. Screw the left and right sides of the extension to the mounting bracket with the supplied installation screws.
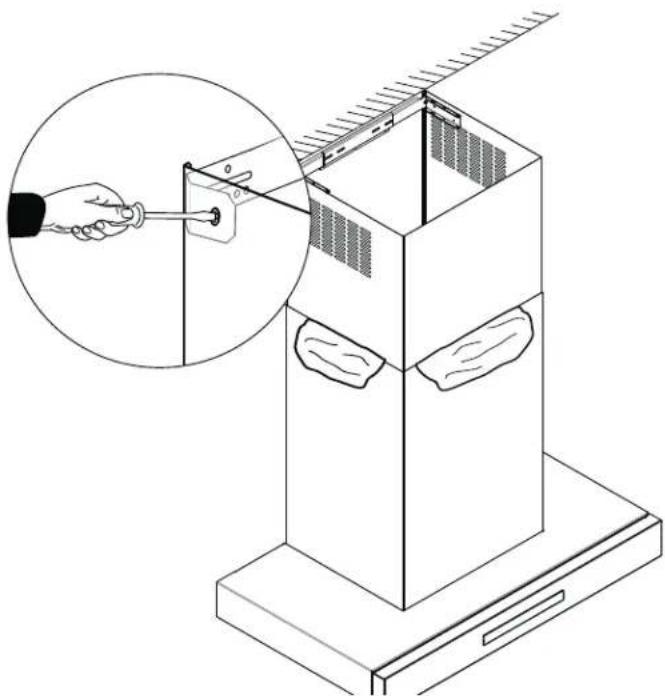
natural_image
Technical line drawing of a mechanical assembly with a hand holding a tool, showing internal components and a magnified inset (no text or symbols)Table de MATIÈRES
NE PAS enlever les raccords.
www.P65Warnings.ca.gov
Avant de commencer
natural_image
Technical line drawing of a tool on a metal bracket with a power drill, no text or symbols presentnatural_image
Isometric line drawing of a mechanical device with a hand operating the base and a curved arrow indicating rotation (no text or symbols)natural_image
Technical line drawing of a mechanical assembly with a hand holding a tool, showing internal components and a magnified inset (no text or symbols)ÍNDICE
1901 Main Street, Suite 600
Irvine, CA 92614
¿Preguntas?
1-800-735-4328
www.thermador.com
natural_image
Technical line drawing of a tool on a metal bracket with a power drill, no text or symbols presentnatural_image
Isometric line drawing of a mechanical device with a hand operating the base panel and a curved arrow indicating rotation (no text or symbols)natural_image
Technical line drawing of a mechanical assembly with a hand holding a tool, showing internal components and a magnified inset (no text or symbols)
Thermador