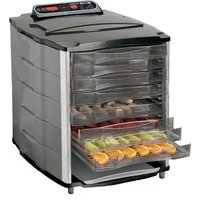
750450W - Food Dehydrator Weston - Free user manual and instructions
Find the device manual for free 750450W Weston in PDF.
| Product Type | Food Dehydrator |
| Brand | Weston |
| Model | 750450W |
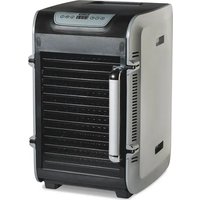
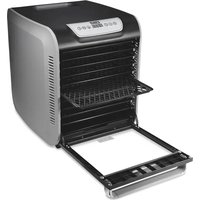
| Number of Trays | 5 or 6 (depending on version) |
| Temperature Range | 100°F to 160°F (38°C to 71°C) |
| Maximum Timer | 48 hours |
| Display | Digital |
| Settings | Time and Temperature |
| Pause Function | Yes (START/PAUSE button) |
| Reset Function | Yes (hold START/PAUSE 2 seconds) |
| Fahrenheit/Celsius Conversion | Yes (hold TIME/TEMP 2 seconds) |
| Power Supply | 120V, 60Hz |
| Polarized Plug | Yes |
| Tray Material | Food-safe Plastic |
| Included Accessories | Fruit Roll Sheet, Mesh Screen |
| Cleaning Trays | Dishwasher (except SANI cycle) or warm soapy water |
| Cleaning the Base | Damp soapy cloth |
| Warranty | 1 year |
| Customer Service (USA) | 1-800-814-4895 |
| Intended Use | Home, food dehydration |
Frequently Asked Questions - 750450W Weston
User questions about 750450W Weston
0 question about this device. Answer the ones you know or ask your own.
Ask a new question about this device
Download the instructions for your Food Dehydrator in PDF format for free! Find your manual 750450W - Weston and take your electronic device back in hand. On this page are published all the documents necessary for the use of your device. 750450W by Weston.
USER MANUAL 750450W Weston
text_image
WESTON RECONNECT WITH REAL FOOD6 TRAY DIGITAL
FOOD DEHYDRATOR
75-0401-W 6 TRAY / 75-0501-W 5 TRAY
DUE TO CONSTANT FACTORY IMPROVEMENTS, THE PRODUCT PICTURED MIGHT DIFFER SLIGHTLY FROM THE PRODUCT IN THIS BOX. 081015
GENERAL SAFETY RULES 3
COMPONENT LIST 4
HOW TO LOAD TRAYS AND SCREENS 5
HOW TO USE THE DEHYDRATOR 6-7
FOOD SAFETY TIPS 8
DEHYDRATING FRUITS AND VEGETABLES 8-9
STORING DEHYDRATED FOOD 10
DEHYDRATING CHART FOR FRUITS AT 135°F (60°C) 11
DEHYDRATING CHART FOR VEGETABLES AT 125°F (55°C) 12
DEHYDRATING FRESH HERBS 13
DEHYDRATING CHART FOR HERBS AT 100°F (40°C) 13
DEHYDRATING JERKY 13
CARE AND CLEANING 14
TROUBLESHOOTING 15
WARRANTY 16
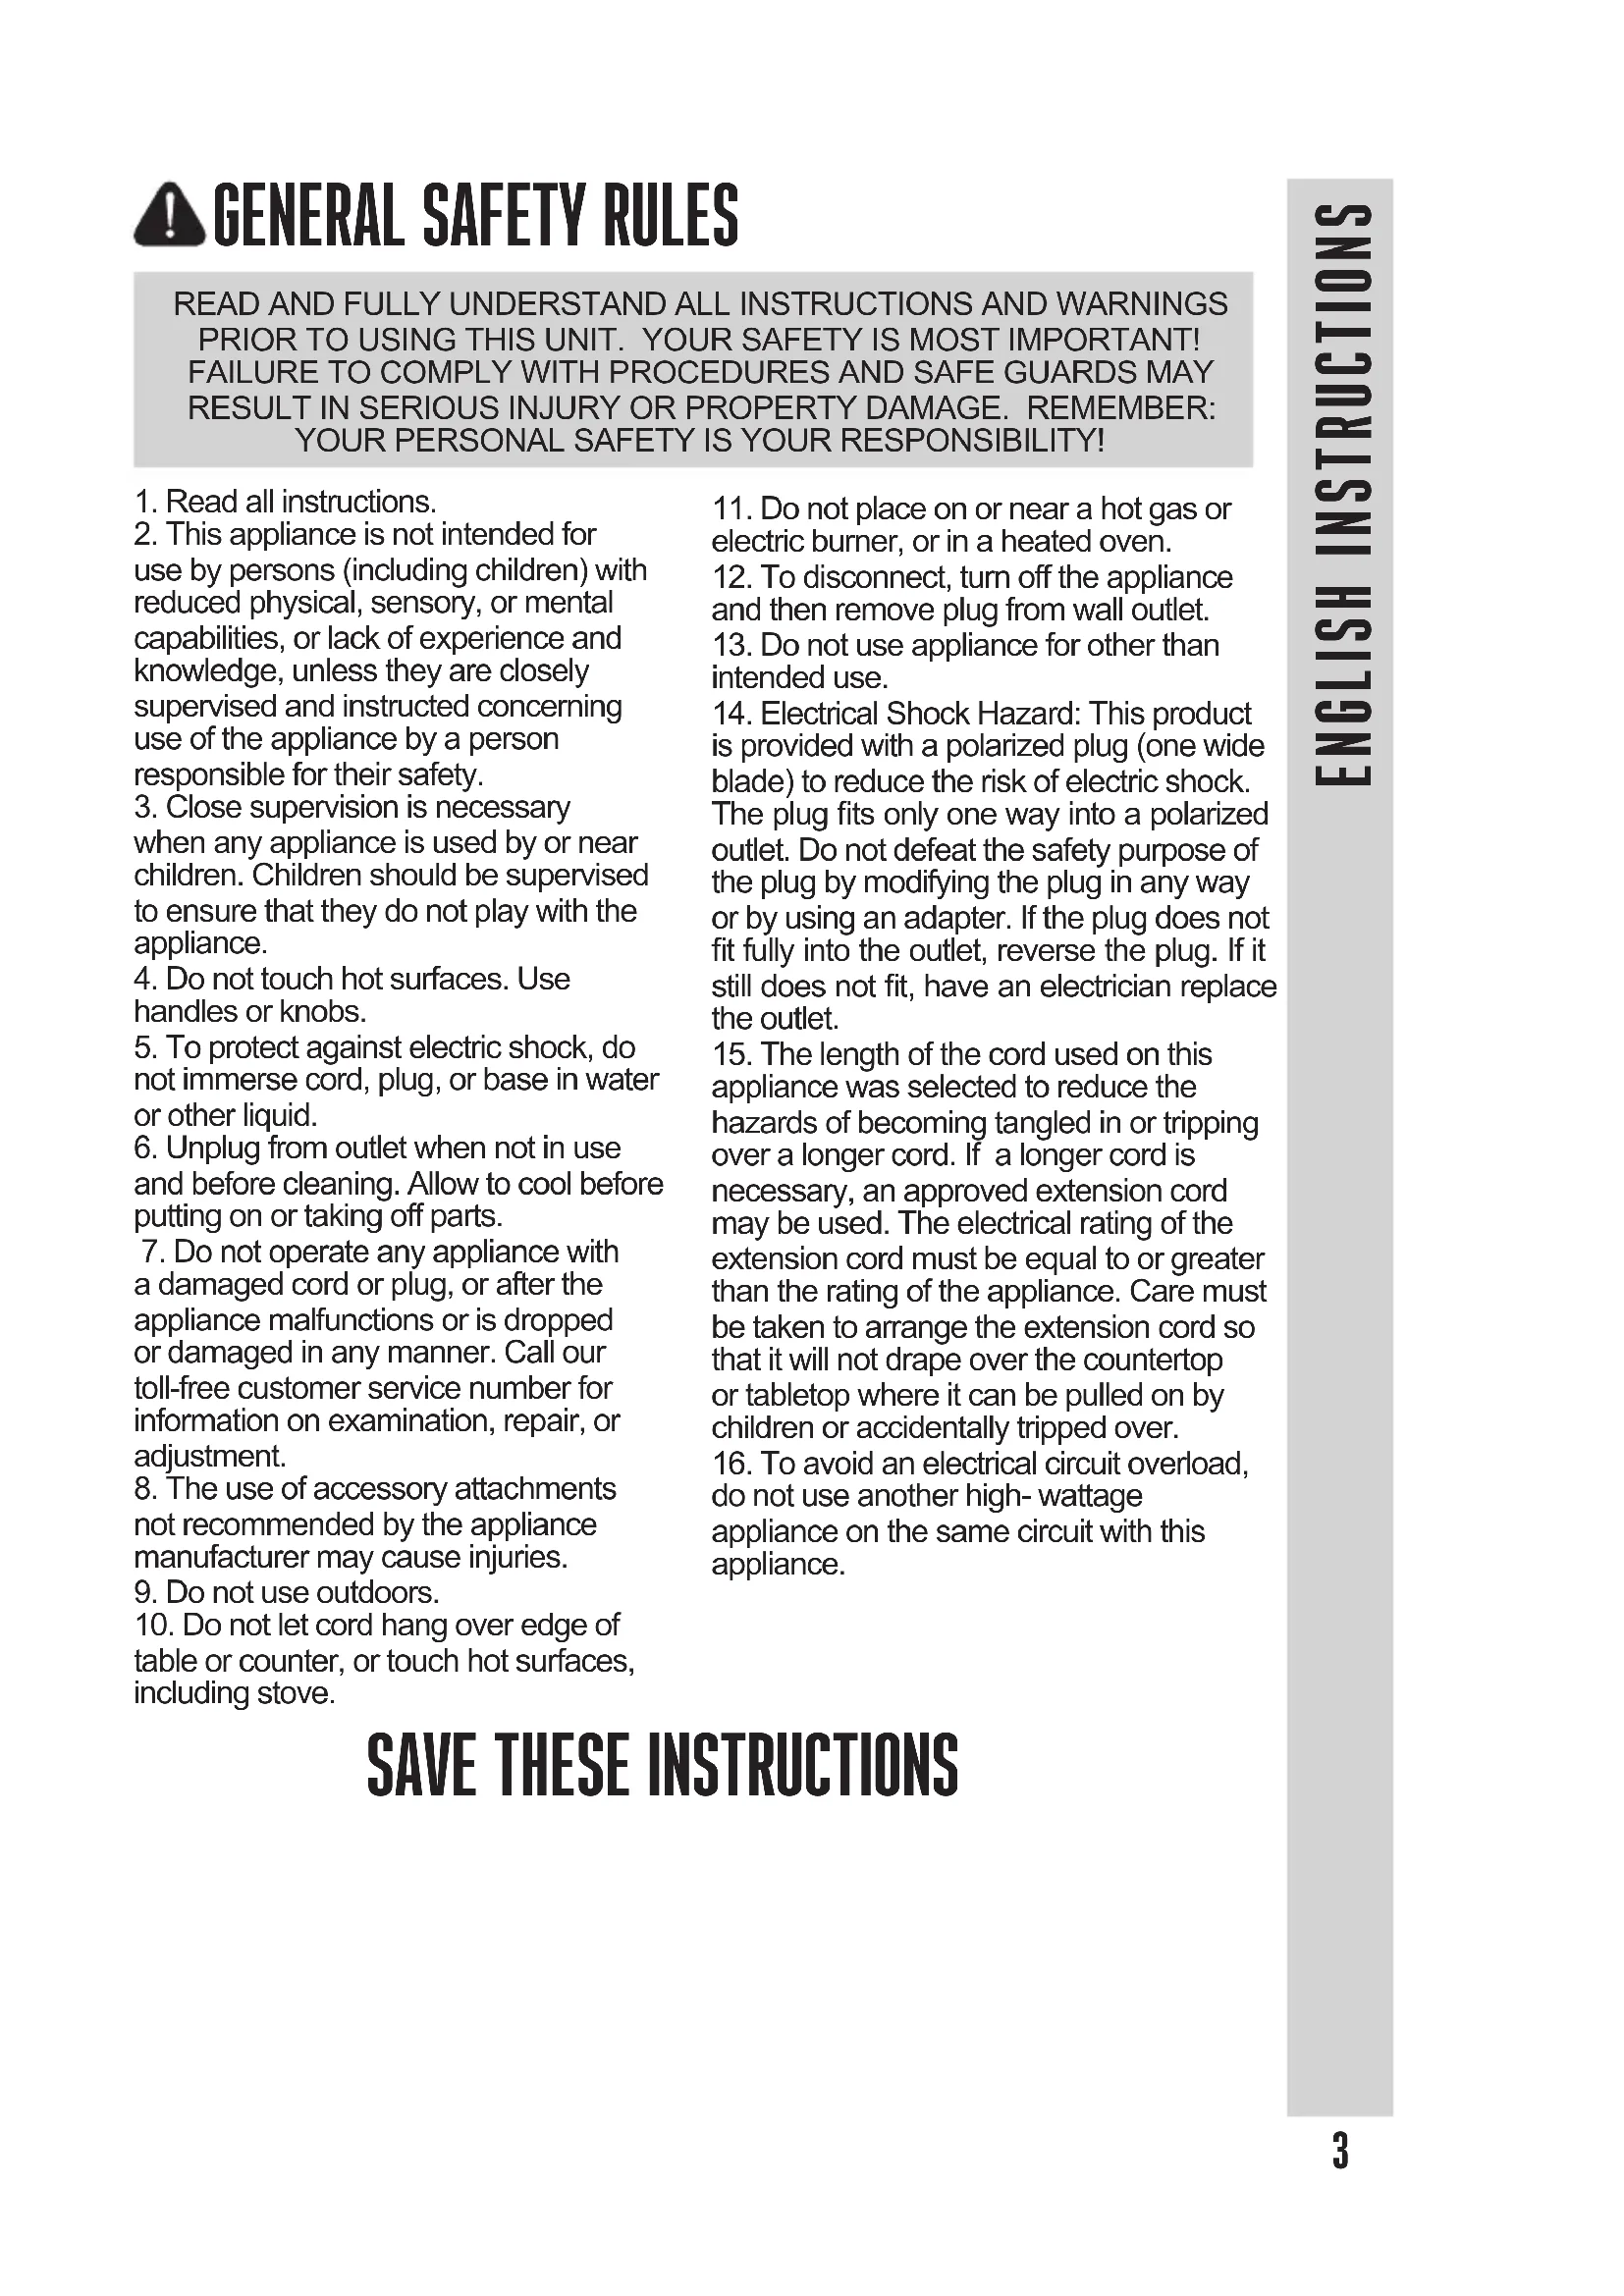
- Read all instructions.
- This appliance is not intended for use by persons (including children) with reduced physical, sensory, or mental capabilities, or lack of experience and knowledge, unless they are closely supervised and instructed concerning use of the appliance by a person responsible for their safety.
- Close supervision is necessary when any appliance is used by or near children. Children should be supervised to ensure that they do not play with the appliance.
- Do not touch hot surfaces. Use handles or knobs.
- To protect against electric shock, do not immerse cord, plug, or base in water or other liquid.
- Unplug from outlet when not in use and before cleaning. Allow to cool before putting on or taking off parts.
- Do not operate any appliance with a damaged cord or plug, or after the appliance malfunctions or is dropped or damaged in any manner. Call our toll-free customer service number for information on examination, repair, or adjustment.
- The use of accessory attachments not recommended by the appliance manufacturer may cause injuries.
- Do not use outdoors.
-
Do not let cord hang over edge of table or counter, or touch hot surfaces, including stove.
-
Do not place on or near a hot gas or electric burner, or in a heated oven.
- To disconnect, turn off the appliance and then remove plug from wall outlet.
- Do not use appliance for other than intended use.
- Electrical Shock Hazard: This product is provided with a polarized plug (one wide blade) to reduce the risk of electric shock.
The plug fits only one way into a polarized outlet. Do not defeat the safety purpose of the plug by modifying the plug in any way or by using an adapter. If the plug does not fit fully into the outlet, reverse the plug. If it still does not fit, have an electrician replace the outlet. - The length of the cord used on this appliance was selected to reduce the hazards of becoming tangled in or tripping over a longer cord. If a longer cord is necessary, an approved extension cord may be used. The electrical rating of the extension cord must be equal to or greater than the rating of the appliance. Care must be taken to arrange the extension cord so that it will not drape over the countertop or tabletop where it can be pulled on by children or accidentally tripped over.
- To avoid an electrical circuit overload, do not use another high-wattage appliance on the same circuit with this appliance.
SAVE THESE INSTRUCTIONS
text_image
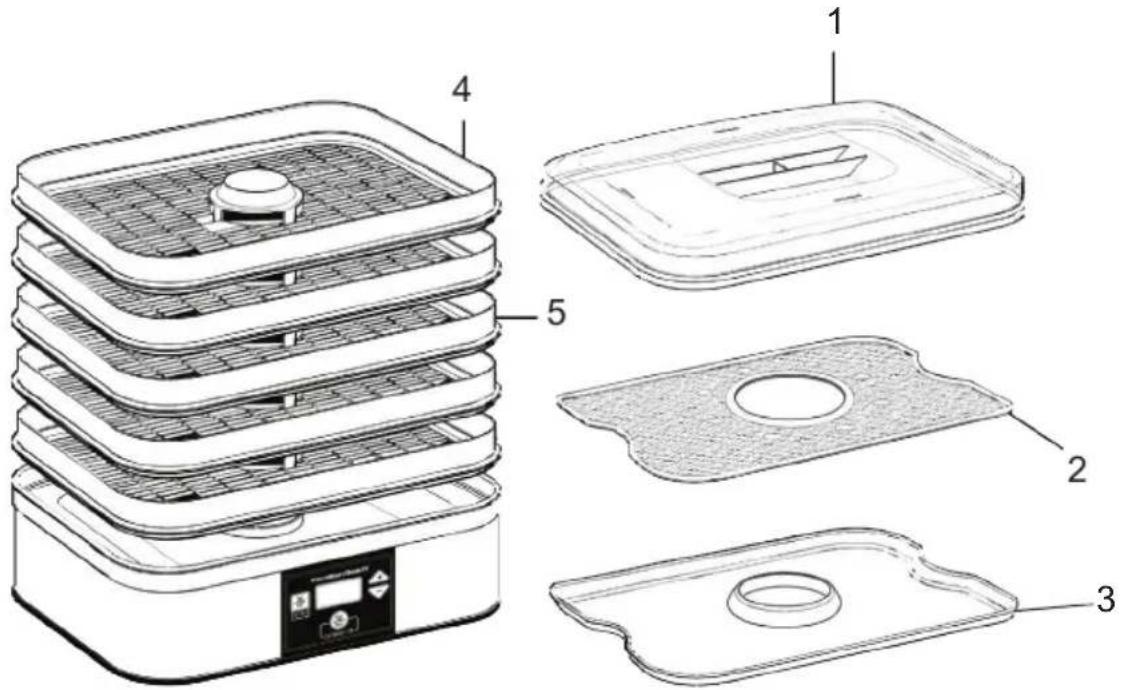
Exploded view diagram of a multi-tiered food heater with labeled componentsCOMPONENT LIST
| DIAGRAM NUMBER PART DESCRIPTION PART NUMBER | ||
| 1 LID 75-0402 | ||
| 2 MESH SCREEN 75-0403 | ||
| 3 FRUIT ROLL SHEET 75-0404 | ||
| 4 TOP TRAY WITH VENT COVER 75-0405 | ||
| 5 TRAY WTH VENT HOLE 75-0406 | ||
If any components of this unit are broken, the unit does not operate properly or you need a replacement instruction manual, visit us on the web at
WestonProducts.com
Or call Weston Brands LLC Toll Free at 1-800-814-4895
Monday thru Friday 8:00am-5:00pm ET. Outside the U.S. call 001-440-638-3131
HOW TO LOAD TRAYS AND SCREENS
Dehydrator Preparation
- The top tray must always be in the top position for proper drying.
- All (5) or (6) trays should be used during each drying, even if some are empty.
-
It is best to dry one type of similar food at a time; for example, all fruits or all vegetables.
• Always leave trays in place until drying is complete. You may remove food from trays when desired dryness is achieved. -
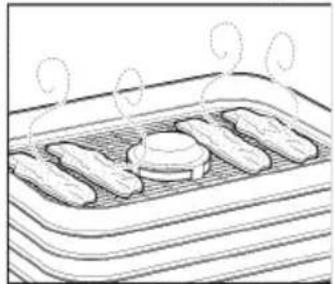
Always place food in a single layer on each tray for even drying. Do not overlap fruits, vegetables, or meats. Do not crowd product on trays. FIGURE 1
-
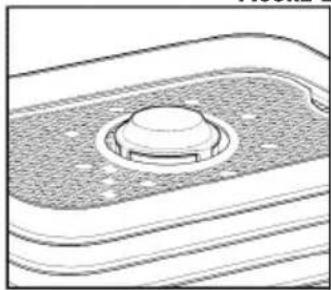
Use the mesh screen for drying herbs and small pieces of fruits or vegetables. FIGURE 2
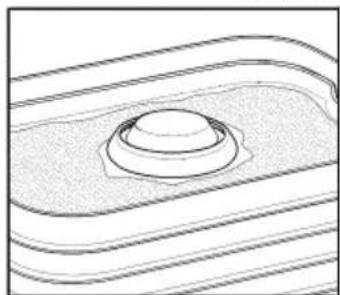
-
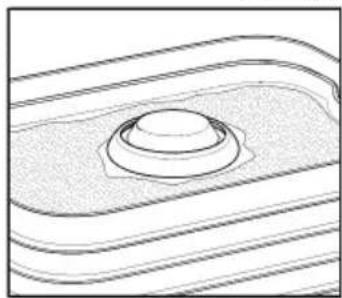
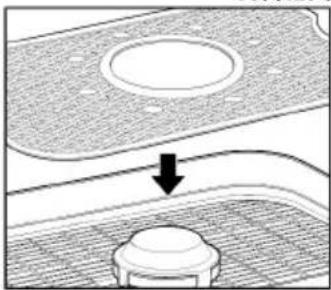
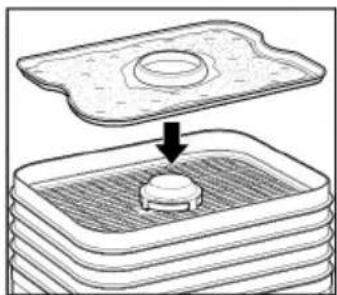
If using a mesh screen, place screen in tray before adding food. For best results, only use mesh screens in the top two trays. FIGURE 3
-
Use the fruit roll sheet for drying purees from fruits. FIGURE 4
-
If using the fruit roll sheet, place sheet in the top tray. For best results, do not use more than two fruit roll sheets and place in the top two trays. Always stack the top tray last, before the lid, for proper drying. FIGURE 5
FIGURE 1
natural_image
Line drawing of a griddle with five pieces of food and steam rising (no text or symbols)FIGURE 2

natural_image
Technical line drawing of a mechanical component with a central circular feature (no text or symbols)FIGURE 3

natural_image
Diagram showing a mechanical component with a circular feature and a downward arrow indicating motion (no text or symbols)FIGURE 4
natural_image
Technical line drawing of a mechanical component with a central circular feature (no text or symbols)FIGURE 5

natural_image
Diagram showing a mechanical component being inserted into a stack of layers (no text or symbols)HOW TO USE THE DEHYDRATOR
NOTES:
- Food should be stored in an airtight container once properly cooled.
• To START, PAUSE, or RESET: Press the START/PAUSE button. -
To Change Time or Temperature During Drying Without Pausing or Resetting: Press the TIME/TEMP button once for time or twice for temperature. The last setting will flash. Use arrows to adjust. Unit will continue drying automatically at the new setting.
-
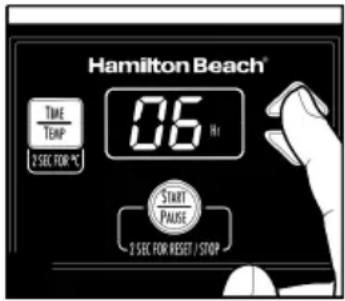
Plug in unit. Default time "00" will flash on the display. FIGURE 7
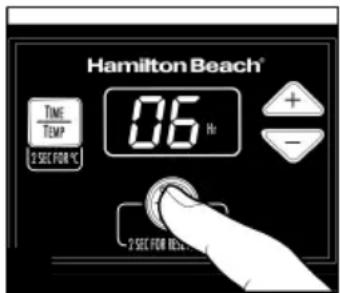
- Press the + arrow to set the drying time. Maximum drying time is 48 hours, which can be set in 1-hour increments. FIGURE 8
-
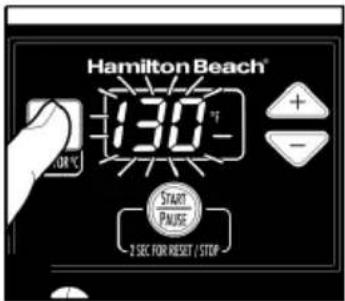
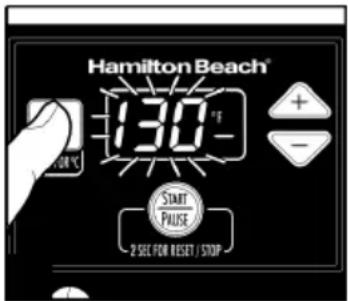
Press the TIME/TEMP button to set the temperature. Default temperature "130" will flash on the display. FIGURE 9
-
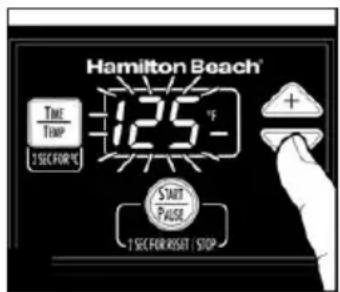
Press the + or – arrow to set the drying temperature. Press the TIME/TEMP button to adjust the temperature for Fahrenheit. Press and hold the TIME/TEMP button for 2 seconds while TEMP is displayed to change from °F to °C. Temperature can be set from 100°F to 160°F in 5° increments. NOTE: Default setting is Fahrenheit. If you reset this unit or unplug it while it is set for Celsius, it will go back to Fahrenheit. FIGURE 10
-
Press the START/PAUSE button to start drying. The display will alternate from showing TIME and TEMP over the drying period. lid, for proper drying. FIGURE 11
FIGURE 7

text_image
Hamilton Beach 0.0 TEMP 2 SED FOR °C START EasterFIGURE 8

text_image
Hamilton Beach® TIME TEMP 2 SET FOR °C 06 Hr START PULSE 2 SET FOR RESET / STOPFIGURE 9
text_image
Hamilton Beach® 130°F START PAUSE 2 SEC FOR RESET / STOPFIGURE 10

text_image
Hamilton Beach® 125-0 Time TIME 1 SET FOR 40% START PAUSE 1 SET FOR RESET / STOPFIGURE 11

text_image
Hamilton Beach® 06 fr + - 2 SEC FOR RESCHOW TO USE THE DEHYDRATOR
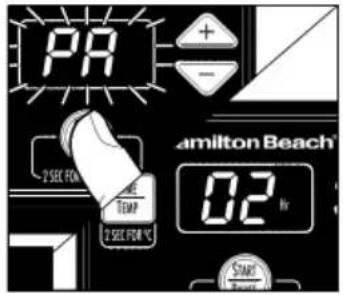
- To PAUSE to Check Food: Press the START/PAUSE button and unit will pause. Display will flash "PA." Press the START/PAUSE button again to resume drying. FIGURE 12
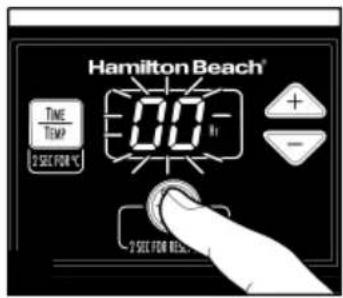
- To RESET: Press and hold the START/ PAUSE button for 2 seconds; "00" will flash in display. To continue drying, press TIME/TEMP button to set a new time and temperature. FIGURE 13
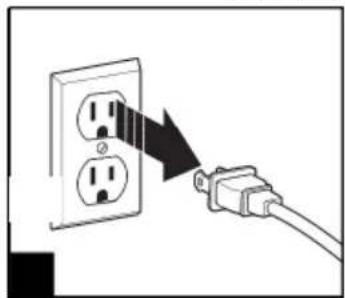
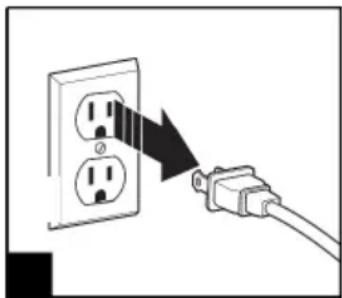
- To STOP "00" flashing: Press and hold the START/PAUSE button again for an additional 2 seconds. "00" will still appear in display and not flash. If drying is complete, unplug the unit. FIGURE 14
- If drying is complete before programmed time has ended, PAUSE or STOP unit and then unplug. Let food cool completely on trays or wire rack before storing. FIGURE 15
FIGURE 12
text_image
PR + - 2 SEE FLOW TEMP 2 SEE FLOW 1°C Hamilton Beach® 02 hr START BASFFIGURE 13
text_image
Hamilton Beach® TIME TEMP 2 SET FOR °C 00 V + - 2 SET FOR REACHFIGURE 14

text_image
Hamilton Beach® TIME TEMP 2 SEC FOR °C 0.0 V + - 2 SEC FOR RESC UFIGURE 15
natural_image
Diagram showing a cable being inserted into an electrical outlet (no text or symbols present)FOOD SAFETY TIPS
- For food safety, to help ensure any bacteria present are destroyed, choose pretreatment or post treatment from below:
- Pretreatment of Meat Prior to Dehydrating – Heat oven to 350°F (177°C). Drain and discard marinade from meat. Pat dry with paper towels and place meat in a single layer, leaving a space around each piece on baking sheet. Bake 5 to 10 minutes or until internal temperature reaches 160°F (72°C).
Poultry must reach 165^ F ( 74^ C). NOTE: This method may reduce drying time and may result in a drier texture. - Post Treatment of Meat After Dehydrating – Heat oven to 275°F (135°C). Line a large baking sheet with foil. Place jerky in a single layer, leaving a small space around each piece. Bake for 10 to 12 minutes. Cool completely on a wire rack. Pat jerky dry with paper towels to remove any surface fats before storing.
- Marinating meats helps with the flavor and texture of jerky. Do not marinate meat longer than recipe or package directions call for.
TIP: Post treatment of meat after dehydrating may result in a more desirable jerky texture. Try each treatment to determine which jerky you like best. - Visit www.usda.gov for any questions on meat and food safety.
- Never dehydrate meats with fruits and vegetables, due to cross-contamination of foods. Meats dry at a different temperature from fruits or vegetables.
- All dehydrated foods must be cooled completely before storing.
- For food safety, complete the food drying process. Do not start and stop the process for longer than 5 minutes. You may pause the process to check on the food's dryness or to remove dehydrated pieces.
- Label and date all containers of dried foods.
DEHYDRATING FRUITS AND VEGETABLES
A. Food Preparation
• Always wash hands before starting food preparation.
- Wash all fruits and vegetables before preparation.
- Choose fruits and vegetables that are in season for the best flavor.
- Discard any fruits and vegetables that have bruises or mold.
- Cut foods the same thickness, size, or shape before drying to ensure even drying.
- Some foods, like garlic, onions, cauliflower, and broccoli, have a strong smell when drying.
B. Pre-treatment
- Some fruits and vegetables require pretreatment before drying. Blanch or add color protectors to preserve natural color.
How to Blanch
Blanching is recommended for some vegetables to help prevent color and flavor loss during drying and storage. Blanching is used to break the skins on some fruits to help shorten the drying process.
- Bring a large stockpot filled with cold water to a rolling boil.
- Place cleaned fruits or vegetables in a strainer with a handle.
- Dip strainer into the boiling water for the recommended time.
- Make sure that all the fruits or vegetables are covered with water for even blanching.
• After blanching is complete, plunge into a large bowl filled with ice water to stop the blanching process.
- Drain and completely pat dry the fruits or vegetables before dehydrating.
How to Protect Color
Some fruits and potatoes may discolor during the drying process. To protect the color, follow these steps.
- Prepare a solution of equal parts lemon juice and water.
- Dip pieces into the solution; drain.
- If using a commercial fruit preservative, follow package directions.
C. Determining Dryness
- Many things influence drying time, including moisture content, type and amount of food, shape and evenness of food slices, air temperature, humidity, and your personal preference in texture of your food.
- Drying charts are a guideline. Drying times and temperatures vary for different types of foods; start checking food at the minimum recommended time referenced on the chart. If the food is not listed on the chart, pick a similar food.
- Combine any remaining food to upper trays for ease of checking doneness.
- Check all trays for doneness at the minimum recommended time on the chart.
- All fruits should be able to bend and be slightly soft but not be tacky, except for apples and bananas which should be crisp.
- All vegetables should be crisp and easily broken.
D. Drying Fruit Rolls
- Fruit rolls can be made with peeled and pitted pureed fresh fruits; canned fruit that has been well drained and pureed; defrosted frozen fruit, drained and pureed; or with store-bought applesauce.
- Fruits that are higher in pectin (apples, apricots, blueberries, grapes, peaches, pears, pineapples, and plums) will make a fruit roll with a nice leatherlike texture.
- When using a low-pectin fruit (grapefruits, lemons, limes, oranges, raspberries, and strawberries), combine with a higher-pectin fruit for an easy peelable fruit roll.
- Lightly spray the fruit roll sheet with nonstick cooking spray or lightly grease with vegetable oil before adding your pureed fruit.
- Evenly spread about 3/4 cup to 1 cup (177 ml to 237 ml) puree on the prepared fruit roll sheet about 1/4 inch (0.6 cm) thick.
- Add the fruit roll sheet to one of the top two trays for drying.
- Fruit rolls should be checked for doneness starting at 4 hours.
- Fruit rolls will be slightly tacky when dried.
• Always remove the fruit roll from the sheet after cooling for 15 minutes. - The fruit roll should be slightly warm to easily remove from the fruit roll sheet.
- Once rolled up, cool completely before storing in an airtight container.
STORING DEHYDRATED FOOD
- Dehydrated foods have to be cooled completely before packaging.
- Properly dried foods need to be stored in a clean, dry, airtight container, such as resealable plastic bags, plastic containers, or glass canning jars with a tight-fitting lid, to keep foods from rehydrating.
- Store all packages in a cool, dry place.
- Dried fruits stored at 60^ (16°C) may keep up to 1 year, while vegetables stored at 60^ (16°C) may keep up to 6 months.
- Fruit rolls stored at room temperature may keep up to 1 month, if stored properly.
• If jerky has been properly dried, cooled, and packaged, it may be stored up to 2 months in an airtight container at room temperature.
- Storing at higher temperature locations will shorten the storing time. Place packaged foods in the freezer for a longer storing time.
- It is a good practice to check dehydrated foods daily. Dehydrate again if you see fruits and vegetables getting soft or if they have condensation on them. Check frequently during the additional drying, since this process will be much shorter.
- Always check the condition of your food prior to consumption. When in doubt, throw it out.
DEHYDRATING CHART FOR FRUITS AT 135°F (60°C)
*B = Blanching #C = Color Protector
(See "How to Blanch" and "How to Protect Color" on page 8)
| FRUIT HOW TO | PREPARE | PRE-TREATMENT/TIME | DEHYDRATING TIME** | HIGH PECTIN FRUIT |
| Apples Peeled, sliced 1/4 inch (0.6 cm) thick | #C 8 to 12 hours | Yes | ||
| Apricots Pitted, peeled, sliced 1/4 inch (0.6 cm) thick | #C 15 to 19 hours | Yes | ||
| Bananas Sliced 1/4 inch (0.6 cm) thick | #C 6 to 10 hours | No | ||
| Blueberries Whole *B/1 minute 14 to 18 hours Yes | ||||
| Cherries Pitted, halved – 22 to 26 hours No | ||||
| Cranberries Whole *B/1 minute 17 to 21 hours Yes | ||||
| Green or Red Seedless Grapes | Halved – 19 to 23 hours Yes | |||
| Kiwi Sliced 1/4 inch (0.6 cm) thick | – 8 to 12 hours | Yes | ||
| Lemons, Limes, or Oranges | Sliced 1/4 inch (0.6 cm) thick | – 17 to 21 hours | No | |
| Mangoes Peeled, pitted, sliced 1/4 inch (0.6 cm) thick | – 13 to 17 hours | No | ||
| Nectarines | Peeled, pitted, sliced 1/4 inch (0.6 cm) thick | #C 11 to 15 hours | Yes | |
| Peaches | Peeled, sliced 1/4 inch (0.6 cm) thick | #C 11 to 15 hours | Yes | |
| Pears | Peeled, sliced 1/4 inch (0.6 cm) thick | #C 10 to 14 hours | Yes | |
| Pineapples | Peeled, cored, sliced 1/4 inch (0.6 cm) thick | – 12 to 16 hours | Yes | |
| Plums | Pitted, sliced in eighths | – 23 to 27 hours | Yes | |
| Strawberries | Sliced 1/4 inch (0.6 cm) thick | – 6 to 10 hours | No | |
**Times may vary depending on the ripeness of your fruits and amount per tray. See “Dehydrating Fruits and Vegetables” on pages 8 and 9.
DEHYDRATING CHART FOR VEGETABLES AT 125°F (55°C)
*B = Blanching (See "How to Blanch" on page 8)
| VEGETABLE HOW | TO PREPARE PRE- | TREATMENT/ TIME | DEHYDRATING TIME** |
| Bell Peppers Sliced | 1/4 inch (0.6 cm) thick | -9 to 13 hours | |
| Broccoli Small florets | *B/2 minutes 9 to 13 hours | ||
| Carrots Sliced diagonally | 1/4 inch (0.6 cm) thick | *B/2 minutes 11 to 15 hours | |
| Cauliflower Small florets | *B/2 minutes 8 to 12 hours | ||
| Celery Sliced diagonally | 1/4 inch (0.6 cm) thick | -5 to 9 hours | |
| Grape Tomatoes | Halved - 13 to 17 hours | ||
| Green Beans Sliced | 1/4 inch (0.6 cm) thick | *B/2 minutes 12 to 16 hours | |
| Mushrooms Sliced | 1/4 inch (0.6 cm) thick | -8 to 12 hours | |
| Onions Sliced 1/4 | inch (0.6 cm) thick | -14 to 18 hours | |
| Squash, Yellow or Zucchini | Sliced 1/4 inch (0.6 cm) thick | -7 to 11 hours | |
| Tomatoes Sliced | 1/4 inch (0.6 cm) thick | -10 to 13 hours |
**Times may vary depending on the water content of your vegetables.
DEHYDRATING FRESH HERBS
- Herb leaves that are larger such as basil, bay leaves, mint, sage, or sorrel should be picked from the stems before drying.
- Herbs such as cilantro, dill, parsley, or rosemary should be kept on the stem for drying. It is easier to remove the herbs after drying.
• Always rinse herbs with cold water and carefully remove any remaining water with a salad spinner or paper towels. Herbs must be completely dried before dehydrating begins. - Small herbs should be placed on the mesh screen for the best drying.
- Herbs are fast-drying when compared to fruits, vegetables, and marinated meats.
• Herbs crumble easily when dried. - Herbs must be cooled completely before storing in an airtight container.
DEHYDRATING CHART FOR HERBS AT 100°F (40°C)
*B = Blanching (See "How to Blanch" on page 8)
| FRESH HERB DEH | YDRATING TIME** |
| Basil 4 to 6 hours | |
| Chives | 5 to 7 hours |
| Cilantro | 4 to 6 hours |
| Mint | 5 to 7 hours |
| Parsley | 4 to 6 hours |
| Rosemary | 5 to 7 hours |
DEHYDRATING JERKY
- Wash your hands with soap and warm water before preparation of jerky.
- Choose lean cuts of meat for jerky.
- Trim any fat from meat before marinating.
- Wrap meat in plastic wrap and freeze for a minimum of 1 hour for easy slicing before marinating.
- Marinate in a heavy-duty resealable plastic zipper bag or a glass dish. Do not use a metal pan for marinating, since it causes a flavor change and a possible reaction of the marinade to the metal of the pan.
• Always marinate meats for jerky in a refrigerator; drain and discard marinade before drying. - Dehydrate jerky according to the recipe or follow jerky preparation according to package directions.
- Check jerky after 4 hours and every 30 minutes after.
- Jerky is dry when it cracks without breaking when bent.
- Pat jerky dry with a paper towel to remove any surface fats and cool completely before storing in an airtight container.
- If jerky has been properly dried, cooled, and packaged, it may be stored up to 2 months in an airtight container at room temperature.
• Always slice meats against the grain for a more tender jerky. - Meat slices should be no more than 1/4 inch (0.6 cm) thick, 4 inches (10.2 cm) long and 2 inches (5.1 cm) wide.
- Never marinate meat at room temperature. Always refrigerate meat when marinating.
• Always follow the recipe directions. - Label and date all containers of jerky.
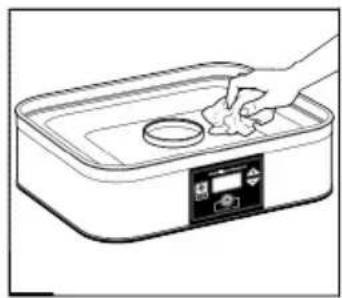
CARE AND CLEANING
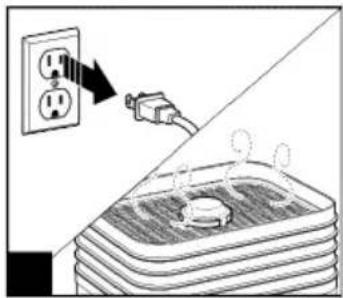
- Unplug unit when through drying. Let cool. FIGURE 16
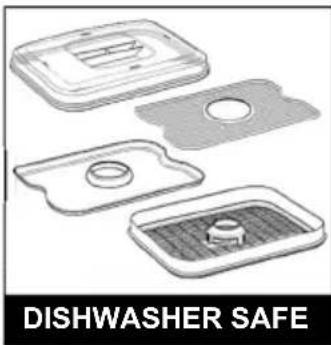
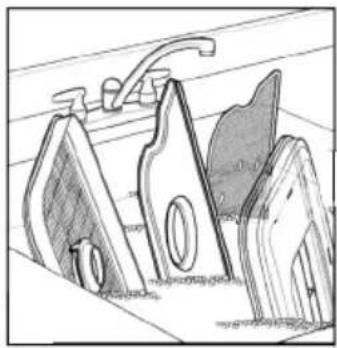
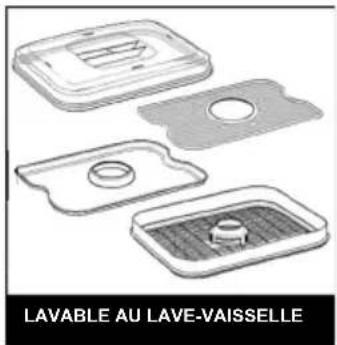
- Wash in warm, soapy water. FIGURE 17
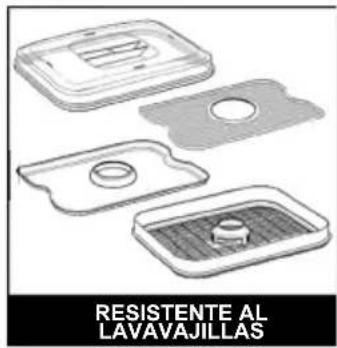
- DO NOT use the "SANI" setting when washing in the dishwasher. "SANI" cycle temperatures could damage your product. FIGURE 18
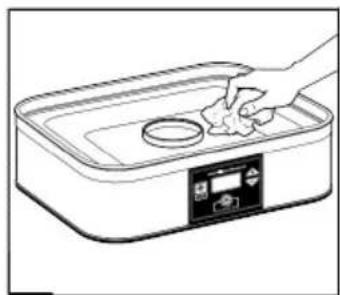
- Wipe the base with a damp, soapy cloth. FIGURE 19
FIGURE 16
text_image
Diagram showing a power outlet connected to a stack of electrical plugs, with an arrow indicating the outlet's direction.FIGURE 16

natural_image
Line drawing of three abstract geometric shapes with curved surfaces, no text or symbols presentFIGURE 18
text_image
DISHWASHER SAFEFIGURE 19

natural_image
Line drawing of a hand cleaning a kitchen appliance with a digital control panel (no text or symbols)TROUBLESHOOTING
| PROBLEM PROBABLE | CAUSE/SOLUTION |
| Food not drying. Food could be cut too thick or peel could have been left on. Follow recommendations in charts on pages 10, 11, or 12, or according to the recipe.Too much food on each tray. Remove some foods and dehydrate for a longer time. | |
| Food drying unevenly. Foods need to be cut uniformly.Foods with uneven pieces can be rotated during the drying process. | |
| Fruits or vegetables become soft during storage. | Too much moisture was left in the food. Dry further to remove excess moisture. |
WESTON WARRANTY INFORMATION
SAVE THIS WARRANTY INFORMATION FOR YOUR RECORDS!
Weston Brands LLC warrants to the ORIGINAL RETAIL PURCHASER of this product that if operated in accordance with the printed instruction accompanying it, then for a period of 1 year from the date of purchase, the product shall be free from defects in material and workmanship.
The Warranty Card, along with a copy of the original receipt, must be received by Weston Brands LLC within 30 days from purchase date for the warranty to apply. Failure to send the completely filled out Warranty Card, along with a copy of the original receipt, will void the warranty.
The product must be delivered to or shipped freight prepaid to Weston Brands LLC for warranty services, in either its original packaging or similar packaging affording an equal degree of protection. Damage due to shipping is not the responsibility of the company. Weston Brands LLC charges a \$35.00 per hour bench charge. NOTE: No repairs will be started without the authorization of the customer. The return shipping cost to the customer will be added to the repair invoice.
Prior to returning the product for Warranty Repair, the product must be thoroughly cleaned and free from any food particles or other debris. Failure of the purchaser to comply with this standard will result in the unit being returned without repair. In some cases, a \$50 cleaning surcharge may apply.
Weston Brands LLC will repair (or at its discretion, replace) the product free of charge, if in the judgment of the company, it has been proven to be defective as to seller's labor and material, within the warranty period.
New or rebuilt replacements for factory defective parts will be supplied for one (1) year from the date of purchase. Replacement parts are warranted for the remainder of the original warranty period.
For non-warranty repairs, contact Weston Brands LLC's Customer Service at 1-800-814-4895 M-F 8am-5pm ET (outside of the United States 001-440-638-3131) to obtain a Return Merchandise Authorization Number (RMA Number).
Weston Brands LLC will refuse all returns that do not contain this number. DO NOT RETURN THE UNIT WITHOUT PROPER AUTHORIZATION FROM WESTON BRANDS LLC.
LIMITATIONS: The warranty is void if the product is used for any purpose other than that for which it is designed.
The product must not have been previously altered, repaired, or serviced by anyone else other than Weston Brands LLC. If applicable, the serial number must not have been altered or removed. The product must not have been subjected to accident in transit or while in the customer's possession, misused, abused, or operated contrary to the instructions contained in the instruction manual. This includes failure caused by neglect of reasonable and necessary maintenance, improper line voltage and acts of nature. This warranty is not transferable and applies only to U.S. and Canadian sales. Except to the extent prohibited by applicable law, no other warranties whether expressed or implied, including warranty merchantability and fitness for a particular purpose, shall apply to this product. Under no circumstances shall Weston Brands LLC be liable for consequential damages sustained in connection with said product and Weston Brands LLC neither assumes nor authorizes any representative or other person to assume for it any obligation or liability other than such as is expressly set forth herein. Any applicable implied warranties are also limited to the one (1) year period of the limited warranty.
This warranty covers only the product and its specific parts, not the food or other products processed in it. Weston is not responsible for missing or damaged parts on discounted/clearance, resale or final sale items where the seller may not be able to guarantee full functionality or completeness of the unit.
CUT ALONG THE DOTTED LINE AND SEND THE WARRANTY CARD ALONG WITH A COPY OF YOUR ORIGINAL PURCHASE RECEIPT TO:
Weston Brands LLC / WARRANTY
20365 Progress Drive, Strongsville, OH 44149 USA
WESTON WARRANTY CARD
SEND THIS CARD ALONG WITH A COPY OF YOUR ORIGINAL PURCHASE RECEIPT TO: WESTON BRANDS LLC / WARRANTY, 20365 PROGRESS DRIVE, STRONGSVILLE, OH 44149 USA
Customer Name:
Address:
City/State/Zip/Country:
Telephone Number:
E-Mail Address:
Original Date of Purchase:
Product Model #:
Serial # (if applicable):
I have read the warranty information. Initial here:
Copy of Receipt Included
The image contains a single, solid horizontal line, which is a stylistic or background element (like a rule line on paper). According to Rule 2, such lines must be ignored by the OCR result. Therefore, the corrected OCR text is:
[Empty]

WESTON
RECONNECT WITH REAL FOOD
text_image
WESTON RECONNECT WITH REAL FOOD WESTON LEARNY THE BREADSDESHIDRATADOR DE
ALIMENTOS
DIGITAL CON 6 BANDEJAS
75-0401-W 6 TRAY / 75-0501-W 5 TRAY
DEBIDO A CONSTANTES MEJORAS EN LA FÁBRICA, EL PRODUCTO QUE SE MUESTRA PUEDE SER LIGERAMENTE DIFERENTE DEL PRODUCTO EN ESTA CAJA. 081015
text_image
Exploded view diagram of a multi-tiered food heater with labeled componentsnatural_image
Line drawing of a griddle with five pieces and steam rising (no text or symbols)FIGURA 2

natural_image
Technical line drawing of a mechanical component with a central circular feature (no text or symbols)FIGURA 3
natural_image
Diagram showing a mechanical component with a circular feature and an arrow indicating direction (no text or symbols)FIGURA 4

natural_image
Technical line drawing of a mechanical component with a central circular feature (no text or symbols)FIGURA 5
natural_image
Diagram showing a mechanical component being inserted into a stack of stacked plates (no text or symbols)CÓMO USAR EL DESHIDRATADOR
NOTAS:
text_image
Hamilton Beach 0.0 Hi TEMP 3 SECT FOR °C START DukeFIGURE 8

text_image
Hamilton Beach® TIME TEMP 2 SEC FOR °C 06 Hi START PULSE 3 SEC FOR RESET / STOPFIGURE 9

text_image
Hamilton Beach® 130°F START PAUSE 2 SEC FOR RESET / STOPFIGURE 10
text_image
Hamilton Beach® 125°F TIME TEMP 1 SECFOR + SUIT PULSE 1 SECFOR RESET | STOPFIGURE 11

text_image
Hamilton Beach® TIME TEMP 0 SECT FOR °C 06 Hr + - 2 SECT FOR REACÓMO USAR EL DESHIDRATADOR
natural_image
Diagram showing a cable being inserted into an electrical outlet (no text or symbols present)text_image
Diagram showing a power outlet connected to a wall-mounted appliance, with an arrow pointing to the outlet.FIGURA 17
natural_image
Technical line drawing of mechanical components or tools (no text or symbols)FIGURA 18
text_image
RESISTENTE AL LAVAVAJILLASFIGURA 19
natural_image
Line drawing of a hand cleaning a rectangular appliance with a circular lid and control panel (no text or symbols)RESOLVIENDO PROBLEMAS
natural_image
Black-and-white photo of a kitchen setup with stacked evaporators, kiwif, and dried fruit on a table (no visible text or symbols)Weston Brands LLC / WARRANTY
20365 Progress Drive, Strongsville, OH 44149 USA
TARJETA DE GARANTÍA WESTON
ENVÍE ESTA TARJETA JUNTO CON UNA COPIA DE SU RECIBO DE COMPRA ORIGINAL A:
WESTON BRANDS LLC/WARRANTY, 20365 PROGRESS DRIVE. STRONGSVILLE, OH 44149 USA
RECONNECT WITH REAL FOOD
DÉSHYDRATEUR D'ALIMENTS
NUMÉRIQUE À 6 PLATEAUX
75-0401-W 6 TRAY / 75-0501-W 5 TRAY
PARCE QUE NOS PRODUITS BÉNÉFICIENT DE PERFECTIONNEMENTS CONSTANTS APPORTÉS EN USINE, LES ILLUSTRATIONS PRÉSENTES PEUVENT ÊTRE LÉGÈREMENT DIFFÉRENTES DU PRODUIT REÇU. 081015
⚠️ IMPORTANTES RÈGLES DE SÉCURITÉ
LIRE ET COMPRENDRE COMPLÈTEMENT TOUTES LES DIRECTIVES ET AVERTISSEMENTS AVANT D'UTILISER CE PRODUIT. LE PLUS IMPORTANT EST VOTRE SÉCURITÉ! LE DÉFAUT D'OBSERVER LES PROCÉDURES ET MISES EN GARDE PEUT ENTRAINER DES BLESSURES GRAVES OU DES DOMMAGES MATÉRIELS. N'OUBLIEZ PAS : VOTRE SECURITÉ PERSONNELLE EST VOTRE RESPONSABILITE!
text_image
Exploded view diagram of a multi-tiered food heater with labeled componentsDESCRIPTION DE LA PIÈCE
NUMÉRO DE SCHÉMA DESCRIPTION DE LA PIÉCE NUMÉRO DE LA PIÉCE
| 1 COUVERCLE 75-0402 | |
| 2 TAMIS À MAILLES 75-0403 | |
| 3 TAPIS POUR ROULEAU DE FRUITS 75-0404 | |
| 4 HAUT PLATEAU AVEC COUVRE-ÉVENT 75-0405 | |
| 5 PLATEAU AVEC TROU 75-0406 |
natural_image
Line drawing of a griddle with five pieces and steam rising (no text or symbols)FIGURE 2
natural_image
Technical line drawing of a mechanical component with a central circular feature (no text or symbols)FIGURE 3

natural_image
Diagram showing a mechanical component with a circular feature and a downward arrow, no text or symbols present.FIGURE 4
natural_image
Technical line drawing of a mechanical component with a central circular feature (no text or symbols)FIGURE 5

natural_image
Diagram showing a mechanical component being inserted into a stack of stacked containers (no text or symbols)UTILISATION DU DÉSHYDRATEUR D'ALIMENTS
REMARQUES :
text_image
Hamilton Beach 0.0 Hi TEMP 3 SECT FOR °C START DukeFIGURE 8
text_image
Hamilton Beach® TIME TEMP 2 SEC FOR °C 06 Hi START PULSE 3 SEC FOR RESET / STOPFIGURE 9
text_image
Hamilton Beach® 130°F START PAUSE 2 SEC FOR RESET / STOPFIGURE 10

text_image
Hamilton Beach® 125°F TIME TEMP 1 SECFOR + SUIT PULSE 1 SECFOR RESET | STOPFIGURE 11
text_image
Hamilton Beach® TIME TEMP 2 SET FOR °C 06 Hr + - 2 SET FOR REAUTILISATION DU DÉSHYDRATEUR D'ALIMENTS
text_image
PR + - Hamilton Beach 2 SEE FLOW TIME TEMP 2 SEE FLOW 1°C 0.2 hr START BayerFIGURE 13

text_image
Hamilton Beach® TIME TEMP 2 SET FOR 10% 0.0°F + - 2 SET FOR 20%FIGURE 14

text_image
Hamilton Beach® TIME TEMP 2.5C FOR °C 00 Fc + - 2.5C FOR RESUFIGURE 15
natural_image
Diagram showing a cable being inserted into an electrical outlet (no text or symbols present)CONSEILS POUR L'INNOCUITÉ DES ALIMENTS
natural_image
Diagram showing a plug inserted into a wall socket with power outlets, no text or symbols presentFIGURE 16

natural_image
Hand-drawn sketch of three abstract geometric shapes with curved surfaces, no text or symbols presentFIGURE 18
text_image
LAVABLE AU LAVE-VAISSELLEFIGURE 19
natural_image
Line drawing of a hand cleaning a rectangular appliance with a lid and control panel (no text or symbols)DÉPANNAGE
Province/Code postal/Région: ____
PLEASE INSPECT THIS PACKAGE THOROUGHLY FOR MISSING PARTS OR ANY PRODUCT DAMAGE. IF YOUR PRODUCT CONTAINS SHIPPING DAMAGE, PLEASE CONTACT RETAILER FOR ASSISTANCE.
For all other questions regarding product usage, missing parts, product damage, difficulty or warranty activation, please contact the Weston Brands Customer Service Team: 8:00 am to 5:00 pm ET, Monday thru Friday
CustomerService@WestonProducts.com
U.S. Residents Customer Service Line: 1-800-814-4895 (Outside U.S. Call: 001-440-638-3131)
Weston Brands LLC, Cleveland, Ohio 44149
WestonProducts.com
Please DO NOT return this item to the retailer before contacting Weston Brands Customer Service.
SAVE THESE INSTRUCTIONS!
Refer to them often and use them to instruct others.
ATTENTION!
VEUILLEZ INSPECTER CET EMBALLAGE AVEC SOIN POUR Y DÉTECTER TOUTE PIÈCE MANQUANTE OU ENDOMMAGÉE. SI DES PIÈCES ONT ÉTÉ ENDOMMAGÉES PENDANT LE TRANSPORT, VEUILLEZ COMMUNIQUER AVEC LE DÉTAILLANT POUR OBTENIR DE L'AIDE.
Weston Brands LLC, Cleveland, Ohio 44149
WestonProducts.com