5000 - Blender WestBend - Free user manual and instructions
Find the device manual for free 5000 WestBend in PDF.


| Product Type | Blender with food processor attachment |
| Brand | WestBend |
| Model | 5000 |
| Speeds | Low (LOW), Medium (MED), High (HIGH), Pulse (PULSE) |
| Pulse function | Yes, powerful pulses for ice and hard ingredients |
| Jug capacity | Approximately 1.5 L (2 and 4 portion markings) |
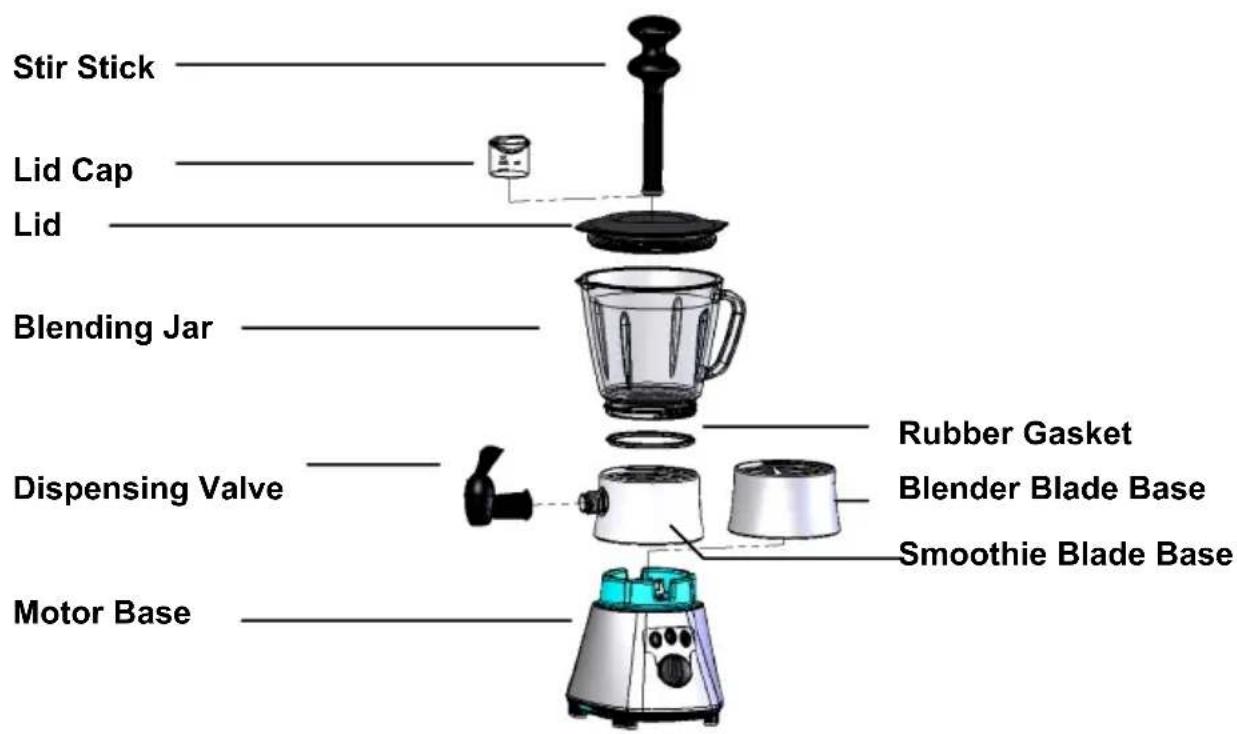
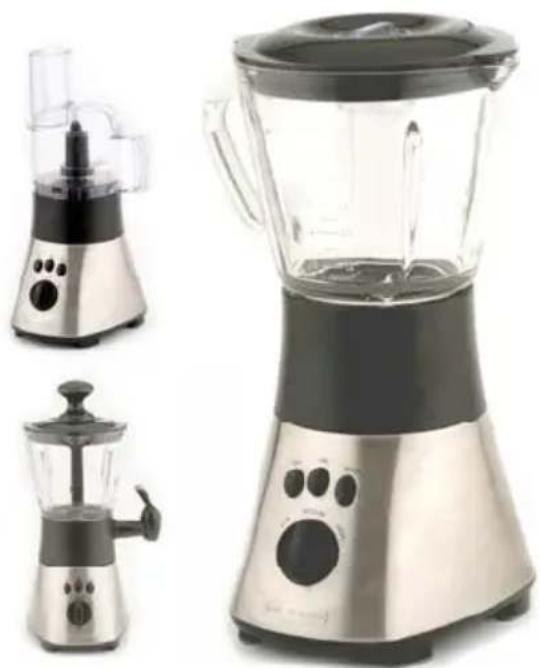
| Included parts | Blender jug, lid with cap, blade base (blender), smoothie blade base (with tap), rubber gasket, stirrer, food processor (bowl, lid, blade, pusher), motor base |
| Food processor use | Chop, puree, emulsify with dedicated blade and bowl (medium speed recommended) |
| Smoothie function | Smoothie blade base with serving tap, allows continuous pouring |
| Power supply | Polarized mains plug (asymmetric blades) |
| Power | Not specified in instructions, estimated 500-700 W (household use) |
| Dimensions (approx.) | Height ~40 cm, width ~20 cm, depth ~20 cm (estimate) |
| Weight | Approximately 2.5 kg (estimate) |
| Safety feature | Stop if jug incorrectly fixed, motor lock if overload, lockable lid for food processor |
| Maintenance and cleaning | Hand wash all parts (except motor base), do not put in dishwasher. Removable tap cleaning possible |
| Important precautions | Do not immerse the base, use with lid, avoid boiling liquids, unplug before cleaning |
| Usage cycle | 90 seconds max continuous operation, 3 minutes minimum pause |
| Warranty | 1 year (parts and labor) with proof of purchase, household use only |
| Customer service | Focus Electrics : (866) 290-1851, service@focuselectrics.com |
| Spare parts | Available at www.focuselectrics.com or through customer service (paid) |
Frequently Asked Questions - 5000 WestBend
User questions about 5000 WestBend
0 question about this device. Answer the ones you know or ask your own.
Ask a new question about this device
Download the instructions for your Blender in PDF format for free! Find your manual 5000 - WestBend and take your electronic device back in hand. On this page are published all the documents necessary for the use of your device. 5000 by WestBend.
USER MANUAL 5000 WestBend
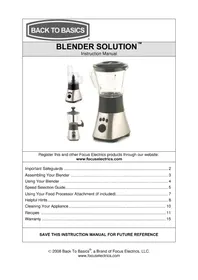
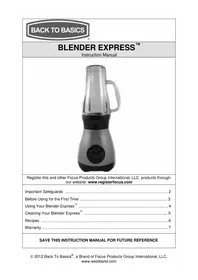
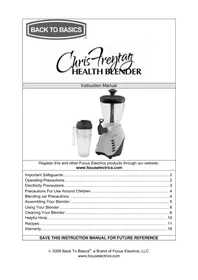
BLENDER SOLUTION™
Instruction Manual
natural_image
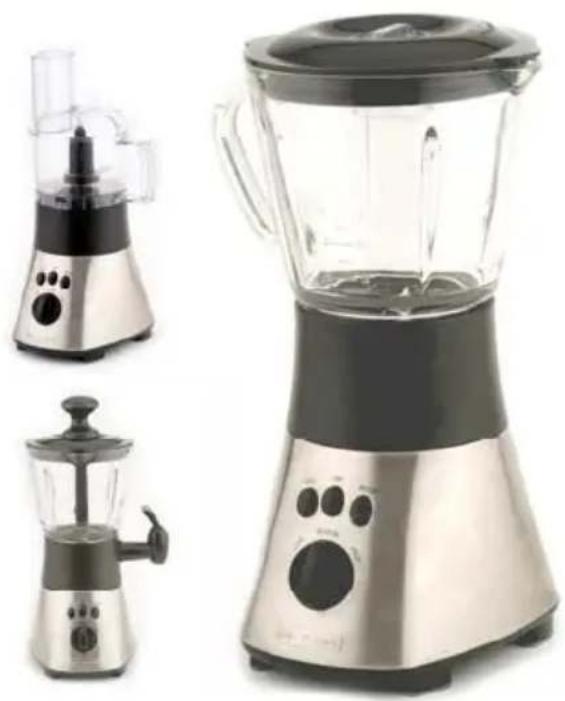
Three kitchen appliances: a blender with a side-mounted blender, a black blender with a side-mounted blender, and a clear blender with a side-mounted blender (no visible text or labels)Register this and other Focus Electrics products through our website: www.focuselectrics.com
Important Safeguards 2
Assembling Your Blender .... 3
Using Your Blender 4
Speed Selection Guide....5
Using Your Food Processor Attachment (if included)....7
Helpful Hints....8
Cleaning Your Appliance.... 10
Recipes 11
Warranty 15
SAVE THIS INSTRUCTION MANUAL FOR FUTURE REFERENCE
IMPORTANT SAFEGUARDS

CAUTION
To prevent personal injury or property damage, read and follow all instructions and warnings.
When using electrical appliances, basic safety precautions should always be followed including the following:
- Read all instructions, including these important safeguards and the care and use instructions in this manual.
- To protect against electrical shock, do not put the cord, plug or the motor assembly in water or other liquid.
- Close supervision is necessary when this appliance is used by or near children.
- Unplug the appliance from outlet when not in use, before putting on or taking off parts and before cleaning.
- Avoid contact with moving parts.
- Do not operate this appliance with a damaged cord or plug, after the appliance malfunctions or if the appliance is dropped or damaged in any manner. If you experience any problems with your machine, unplug it immediately from the electrical outlet. For service information see warranty page.
- The use of accessory attachments, including canning jars, not recommended or sold by Focus Electrics may cause fire, electric shock or injury.
- Do not use outdoors.
- Do not let the cord hang over the edge of a table or counter.
- Do not let the cord come into contact with hot surfaces, including a stove.
- Do not place on or near a hot gas or electrical burner or in a heated oven.
- Do not use this appliance for other than its intended use.
- Turn off the machine before removing the blending jar from the base and before placing the blending jar on the base.
- Do not run motor without blending jar properly attached to motor base or when blending jar is empty.
- Keep hands and utensils (other than included stir stick) out of blending jar while mixing ingredients to reduce risk of severe injury to persons or damage to the machine.
- Blades are sharp; handle carefully.
• Always operate the appliance with the lid in place. - Do not blend excessively hot liquids. Never pour boiling water into the blending jar.
- Be sure to turn switch to "OFF" position after each use.
- To disconnect, grip plug and pull from wall outlet. Never pull on cord to disconnect.

CAUTION
To prevent personal injury or property damage, read and follow all instructions and warnings.
- Never leave the house while the appliance is on.
- A short power-supply cord is provided to reduce risks resulting from becoming entangled in or tripping over a longer cord.
- Longer, detachable power-supply cords or extension cords are available and may be used if care is exercised in their use. While use of an extension cord is not recommended, if you must use one, the marked electrical rating of the detachable power-supply cord or extension cord should be at least as great as the electrical rating of the appliance. If the appliance is of the grounded type, the extension cord should be a grounding-type 3-wire cord. The cord should be arranged so that it will not hang over the counter top or tabletop where it can be pulled by children or tripped over.
- After running the motor continuously for ninety seconds, wait at least three minutes before running the motor again.
- This appliance has a polarized plug (one blade is wider than the other). To reduce the risk of electric shock, this plug is intended to fit into a polarized outlet only one way. If the plug does not fit fully into the outlet, reverse the plug. If it still does not fit, contact a qualified electrician. Do not attempt to modify the plug in any way.
- To reduce the risk of injury, never place cutter-assembly blades on base without blending jar properly attached.
• For household use only.
SAVE THESE INSTRUCTIONS
ASSEMBLING YOUR BLENDER
Before assembling your blender, wash all parts, except for the motor base in warm, soapy water, rinse thoroughly and dry. Unscrew and disassemble the valve for cleaning (see Cleaning Your Appliance section). To prolong the life of your appliance, do not wash parts in the dishwasher.
- Position the rubber gasket down onto the circular flat surface in the blender or smoothie blade base.
-
Screw the blade base onto the bottom of the blending jar by twisting the blade base clockwise until tightened. Make sure that the blade base is tightly fastened to the blending jar and that the rubber gasket is properly compressed between the blending jar and the blade base.
-
Press the lid onto the top of the blending jar. Press the clear lid cap in the center of the lid or place the stir stick through the center of the lid if blending liquids or frozen drinks.
- Place the blending jar onto the motor base so that the bottom of the blade base is sitting flat on the motor base.
- Plug in the cord. Your blender is now ready to use.
USING YOUR BLENDER
CONTROL BUTTONS:
PULSE - gives short bursts of power at high speed. Use "PULSE" to begin the mixing of ice and other hard ingredients.
HIGH – runs the appliance at high speed. Use this speed for the final stages of mixing. Do not use this speed for dispensing.
MED – runs the appliance at medium speed. Use this speed for the majority of blending tasks.
LOW - runs the appliance at low speed. Use this speed for the initial 30 seconds of mixing as well as for dispensing.
OFF - turns the appliance off.
BLENDER OPERATION
- Assemble the blender blade base onto the blending jar.
-
Add ingredients to the blending jar and replace the lid. You may add more ingredients through the hole in the center of the lid. Cover the hole with the clear lid cap or stir stick during operation. Note: Add liquid ingredients first then add frozen or solid ingredients. This will prevent excessive wear and stress on the motor.
-
To start blending, choose a speed for blending the ingredients on the dial switch and then press the "ON" button.
-
To stop blending press the "OFF" button.
-
The "PULSE" button allows you to create short bursts of power. To use the "PULSE" function, repeatedly press and release the "PULSE" button. The "PULSE" function should be used in the initial stage of blending ice and frozen ingredients for smoothies and other frozen drinks. The "PULSE" function should also be used to break apart larger pieces of food or to control the texture of food when chunkier results are desired.
SPEED SELECTION GUIDE
| INGREDIENTS | SPEED | RESULT |
| Salsa | Low | Chunky |
| Nuts | Low | Coarse |
| Bread, Cookies, Crackers Low | Coarse | |
| Heavy Whipping Cream Low | Thick | |
| Mayonnaise | Medium | Creamy |
| Salad Dressing Medium Creamy | ||
| Hard Cheese Pulse and then Medium Coarse | ||
| Grating/Chopping Citrus Zest Medium Fine | ||
| Smoothies, Cocktails, Shakes Pulse and then High | Thick and Smooth | |
| Baby Foods/Fruit & Vegetable Purees | High | Smooth and Creamy |
| Spices | High | Fine |
To make your favorite frozen drinks, follow the steps below.
- Assemble the smoothie blade base, with dispensing valve, onto the blending jar.
- ADD LIQUIDS – Add any combination of liquid ingredients up to the LIQUIDS mark under SERVES 2 or SERVES 4 located on the blending jar. Liquids include any soft ingredients such as fruit, milk, fruit juice, herbal supplements, or yogurt in any combination you think would be tasty.
We are, of course, partial to the Back to Basics ^® smoothie mixes, which quickly and easily make three delicious 8-ounce smoothies.
-
ADD ICE – Add ice or frozen ingredients until the total level reaches the FROZEN INGREDIENTS line on the side of the blending jar. Frozen ingredients include ice, frozen fruit, frozen yogurt, ice cream, etc.
-
SMOOTH IT – With the lid on and the stir stick (use as directed below) set in the hole on the lid, pulse the mixture 3 to 5 times by pressing the "PULSE" button. Move the switch to "LOW" and press the "ON" button for about 30 seconds. Move the switch to the "HIGH" position and wait until the ingredients are completely mixed.
STIR STICK OPERATION – When in use and while the machine is running, stir or rotate the Stir Stick in a counterclockwise direction so that the Stir Stick scrapes or contacts the sides of the blending jar. This stirring operation will aid in mixing the contents of the blending jar by forcing the ingredients into the mixing blades.
natural_image
Illustration of a kitchen blender with a glass cup and lid (no text or symbols)-
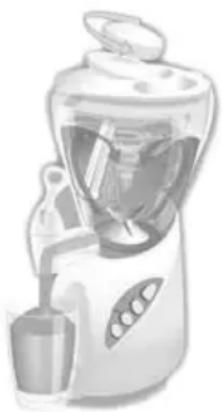
SERVE IT – To serve the smoothie, turn the appliance “ON”, move the dial to “LOW”, place a cup under the valve and press down on the valve lever. Stir the contents in the blending jar with the stir stick while dispensing thick smoothies. As the smoothie level reaches the bottom of the blending jar, a thick mix may stop dispensing. Add a few tablespoons of liquid to increase flow. When the blending jar is empty, turn the machine “OFF” and enjoy. You can continue making smoothies one after another, but be sure to give the smoothie maker a 3-minute break after 90 seconds of continuous use.
-
To make a thicker smoothie, add more frozen ingredients.
- To make a thinner smoothie, add more liquid ingredients.
USING YOUR FOOD PROCESSOR (if included)
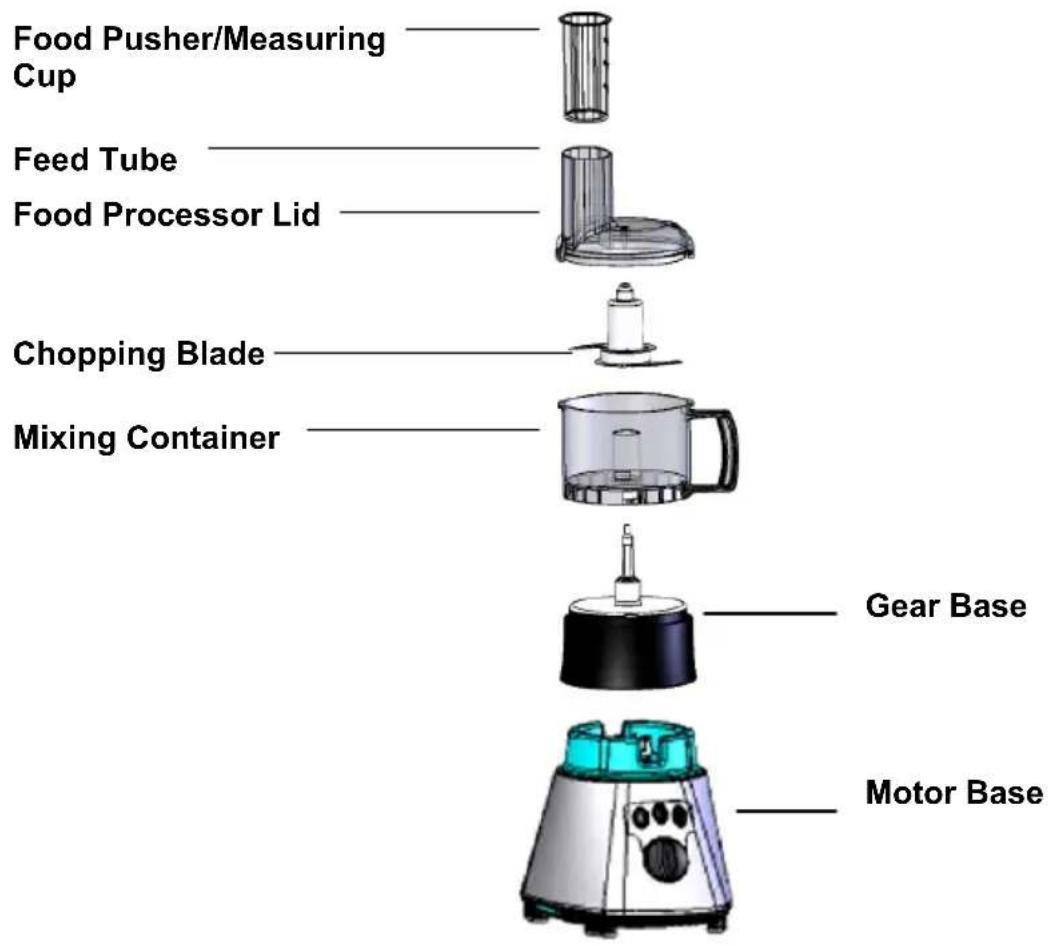
To use your Food Processor Attachment, the mixing container must be assembled properly and the blade and lid must be locked into place. Begin assembling by following the simple steps below.
- Hold the gear base in one hand and the mixing container in the other hand. Twist the mixing container clockwise onto the gear base.
- Place the gear base with the attached mixing container onto the motor base.
- Place the chopping blade over the shaft in the mixing container. The chopping blade should slide easily to the bottom of the mixing container. The lower blade will almost touch the bottom.
-
Place the food to be processed into the mixing container. To attach the lid onto the mixing container, turn the lid clockwise until it fits into position. The lid lock must click into the locked position prior to use. Note: The chopping blade will not turn until the gear base, mixing container, and lid are locked into place. If you have trouble fitting the lid onto the mixing container, turn the chopping blade slightly and replace the lid.
-
Plug the appliance into an electrical outlet. Push the "ON" button to start chopping or pureeing. While the food processor can be used at "LOW", "MED" or "HIGH" speeds, the "MED" speed is recommended for all food processing jobs. It is recommended that one hand be placed on the food processor lid while in use to provide more stability. CAUTION: Always use the food pusher to guide food through the feed tube. Never use your fingers or other utensils because damage to the appliance or injury could occur.
-
To stop chopping or pureeing, press the "OFF" button. When the blades have stopped spinning unplug the appliance from the electrical outlet.
Note: For pulse-chopping, press and release the "PULSE" button until the ingredients reach the desired consistency. The motor will run as long as you hold the "PULSE" button down. The motor stops when you release the "PULSE" button. For best results, allow enough time between pulses for the food to fall back to the bottom of the mixing container.
-
Remove the lid by turning it counter-clockwise. Note: Never try to remove the lid and the mixing container together as this can damage the appliance.
-
Be careful not to let the chopping blade fall out of the mixing container as you empty it. To prevent this from happening, carefully remove the chopping blade by lifting up on the plastic hub before attempting to pour out the processed food, or hold the top of the plastic hub in place with your finger while pouring.
-
To remove the mixing container from the motor base, turn the handle of the mixing container counter-clockwise and lift the mixing container straight up.
Note: Occasionally, a piece of food may become wedged between the chopping blade and the mixing container. If this happens, unplug the appliance, remove the lid, carefully lift the chopping blade out and remove the wedged piece.
HELPFUL HINTS
- Cut food into approximately 34 ” pieces. You will get a more even chop if you start with pieces that are all the same size.
- The chopping blade should be in place before adding food into the mixing container.
- You can put up to 1 cup of food in the mixing container at a time. Chop food in batches if you want to process more.
- Watch the food closely. With the pulse/chopping technique you can get an even chop without over-processing the food.
- For a coarse chop, pulse only a few times.
- For a finer chop or puree, press the "ON" button and let the food processor run continuously at "MED" speed until the food is chopped to desired consistency. Do not operate motor base for longer than 90 seconds at a time.
-
Unplug the appliance and use a plastic spatula to scrape down any pieces that stick to the inside of the mixing container.
-
You may add liquid or small pieces of food to the mixing container while the appliance is operating by dropping them through the feed tube located on the food processor lid.
- When chopping dry ingredients such as bread crumbs, nuts, spices, etc., make sure that the blending jar, or mixing container, and blade bases are completely dry.
- The "PULSE" button should be operated in short bursts. As the "PULSE" button is pressed and released, the blades should stop rotating between pulses.
- Do not attempt to mix or knead heavy dough, mash potatoes, or beat egg whites.
- Do not over-blend foods. Most ingredients should be properly blended or chopped in seconds. Do not operate the motor base for longer than 90 seconds at a time.
- If the motor stalls, turn off and unplug the appliance. Remove a portion of the ingredients before attempting to continue.
- Do not add boiling liquids to the blending jar or mixing container.
| FOOD | PREPARATION |
| Fruits and vegetables Peel and core if necessary. Remove large, hard pits and seeds. Cut into 3⁄4-inch pieces and process up to 2 cups at a time. | |
| Meat, poultry and fish Meat should be cold but not frozen.First, cut into 3⁄4-inch pieces. Put up to 1⁄2 pound of meat in mixing container.Pulse or run the motor continuously until the desired consistency is reached.Check texture every 2 or 3 seconds to avoid over-processing. | |
| Bread, crackers or cookies Break into 1-inch pieces and process continuously until the desired texture is reached. | |
| Hard cheese If cheese is too hard to cut with a knife,don't try to chop it in the food processor as it may damage the chopping blade.(Do not attempt to chop parmesan cheese in the food processor). Cut cheese into 1⁄2-inch pieces. Pulse the motor until the desired consistency is reached. Do not attempt to process more than 3 ounces of cheese at one time. | |
| Whipping cream Cream must be at refrigerator temperature. Whip up to 1 cup at a time. | |
CLEANING YOUR APPLIANCE
- Switch to "OFF" and unplug from electrical outlet.
- Wipe the motor base with a damp cloth or sponge. To remove stubborn spots, use a mild, non-abrasive cleanser.
- Remove blade base and rubber gasket from the blending jar. Unscrew and disassemble the dispensing valve. Carefully wash all parts except the motor base in warm, soapy water, rinse and dry thoroughly. To prolong the life of your appliance, do not wash parts in the dishwasher.
CLEANING THE DISPENSING VALVE
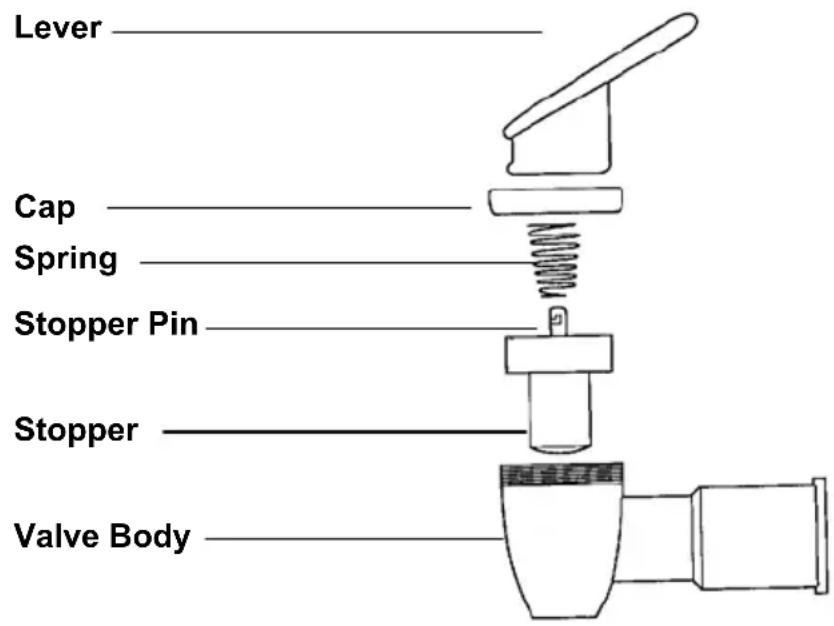
- Remove the valve from the smoothie blade base by unscrewing the entire valve counter-clockwise.
- Remove the cap from the valve body by unscrewing it counter-clockwise.
- Squeeze cap and stopper together and slide the lever off the stopper pin.
- Remove the spring.
- Remove the stopper and stopper pin by pulling the rubber rim of the stopper. The stopper and pin are tightly fit and need not be separated.
- Clean all parts in warm, soapy water, allow to dry thoroughly and reassemble in the order shown.
RECIPES
Directions for all recipes: Pour liquid ingredients into the blending jar. Add all frozen ingredients. Blend at "PULSE" setting for 30 seconds; then blend at "ON" setting until smooth. While the appliance is running, move the stir stick around counterclockwise to aid mixing. Serve immediately. Makes 3-5 servings; approximately 32 oz.
| STRAWBERRY BANANA SUPREME SMOOTHIE | |
| 1 cup Strawberry nectar or apple juice | |
| 1 cup Milk | |
| 1 Frozen banana (chunks) | |
| 2 12 cups Frozen strawberries | |
| 1 cup Strawberry yogurt | |
| MANGO TANGO SMOOTHIE | |
| 1 cup Pineapple juice | |
| 1 cup Orange juice | |
| 12 Frozen banana (chunks) | |
| 1 cup Pineapple sherbet | |
| 112 cups Frozen mango slices |
| BERRY SWIRL SMOOTHIE | |
| 1 cup Apple juice | |
| 112 cups Lemonade | |
| 1 cup Frozen raspberries | |
| 12 cup Frozen strawberries | |
| 1 cup Raspberry sherbet |
| RASPBERRY CREAM SMOOTHIE | |
| 1 cup Orange juice | |
| 1 cup Raspberry yogurt | |
| 1 cup Vanilla frozen yogurt | |
| 12 Frozen banana (chunks) | |
| 112 cups Frozen raspberries | |
| ORANGE BANANA CREAM SMOOTHIE | |
| 1 cup Milk | |
| 112 cups Orange juice | |
| 12 tsp. Vanilla | |
| 12 Frozen banana (chunks) | |
| 1 cup Vanilla frozen yogurt | |
| 12 cup Orange yogurt | |
| 3 tbs. Orange juice concentrate | |
| RASPBERRY SUNRISE SMOOTHIE | |
| 2^1/2 cups Orange juice | |
| 1^1/2 cups Frozen raspberries | |
| 1 cup Raspberry sherbet | |
| 1 cup Ice | |
| LEMON LOUIE SMOOTHIE | |
| 2 cups Lemonade | |
| 1 cup Lemon yogurt | |
| 112 cups Frozen pineapple chunks | |
| 1 cup Pineapple sherbet | |
| 1 cup Ice | |
| PEACH REFRESHER SMOOTHIE | |
| 2 cups Peach | nectar or apple juice |
| 1 cup Vanilla | frozen yogurt |
| 12 | Banana |
| 1 cup Peach | yogurt |
| 112 cups Frozen peach slices | |
| BANANA LIME SUBLIME SMOOTHIE | |
| 2 cups Limeade | |
| 1 | Banana |
| 1 cup Lime sherbet | |
| 3 tbs. Coconut milk | |
| 1 cup Ice | |
| PIÑA COLADA SMOOTHIE | |
| 5 tbs. Coconut milk | |
| 21⁄2 cups Pineapple juice | |
| 1⁄2 cup Vanilla ice cream | |
| 1⁄2 Frozen banana (chunks) | |
| 11⁄2 cups Frozen pineapple chunks |
| STRAWBERRY LEMON SURPRISE SMOOTHIE | |
| 2 cups Lemonade | |
| 2 cups Frozen strawberries | |
| 1 cup Strawberry yogurt |
| HAWAIIAN HOLIDAY SMOOTHIE | |
| 1 cup Passion fruit nectar | |
| 1 cup Guava nectar | |
| 1 cup Orange sherbet | |
| 12 cup Frozen strawberries | |
| 12 cup Frozen mango slices | |
| 4 tbs. Coconut milk | |
| 1 cup Strawberry yogurt | |
| 12 cup Frozen banana (chunks) | |
| LOW-FAT STRAWBERRY ORANGE SMOOTHIE | |
| 2 cups Strawberries | |
| 12 cup Orange juice | |
| 1 cup Skim milk | |
| 1 cup Plain nonfat yogurt | |
| 1 cup Ice | |
| LEMONADE WATERMELON SOOTHER | |
| 2 cups Water | melon (pulp, not rind) |
| 3 oz. Frozen | lemonade concentrate ( 12 of a 6 oz. can) |
| 1 cup Lemon | /lime soda |
| 1 tsp. Grenadine | syrup |
| 1-2 cups Ice, | to desired consistency |
| *Add water if necessary | |
| CHOCOLATE TREAT | |
| 3.5 oz. Package of instant chocolate pudding mix | |
| 112 cups Milk | |
| 112 cups Ice | |
| 1 | Banana |
PRODUCT WARRANTY
Appliance 1 Year Limited Warranty
Focus Electrics, LLC (“Focus Electrics”) warrants this appliance from failures in the material and workmanship for one (1) year from the date of original purchase with proof of purchase, provided the appliance is operated and maintained in conformity with the provided Instruction Manual. Any failed part of the appliance will be repaired or replaced without charge at Focus Electrics’ discretion. This warranty applies to indoor household use only.
This warranty does not cover any damage, including discoloration, to any non-stick surface of the appliance. This warranty is null and void, as determined solely by Focus Electrics if the appliance is damaged through accident, misuse, abuse, negligence, scratching, or if the appliance is altered in any way.
THIS WARRANTY IS IN LIEU OF ALL IMPLIED WARRANTIES, INCLUDING WARRANTIES OF MERCHANTABILITY, FITNESS FOR A PARTICULAR PURPOSE, PERFORMANCE, OR OTHERWISE, WHICH ARE HEREBY EXCLUDED. IN NO EVENT SHALL FOCUS ELECTRICS BE LIABLE FOR ANY DAMAGES, WHETHER DIRECT, INDIRECT, INCIDENTAL, FORSEEABLE, CONSEQUENTIAL, OR SPECIAL, ARISING OUT OF OR IN CONNECTION WITH THIS APPLIANCE.
If you think the appliance has failed or requires service within its warranty period, please contact the Focus Electrics Customer Service Department at (866) 290 –1851 or e-mail us at service@focuselectrics.com. Return shipping fees are non-refundable. A receipt proving original purchase date will be required for all warranty claims. Hand-written receipts are not accepted. Focus Electrics is not responsible for returns lost in transit.
Valid only in USA and Canada
REPLACEMENT PARTS
Replacement parts, if available, may be ordered directly from Focus Electrics online at www.focuselectrics.com, or you may call or e-mail the service department at the number/e-mail address listed above, or by writing to us at:
Focus Electrics, LLC
Attn: Customer Service
P. O. Box 2780
West Bend, WI 53095
Be sure to include the catalog/model number of your appliance (located on the bottom/back of the unit) and a description and quantity of the part you wish to order. Along with this include your name, mailing address, Visa/MasterCard number, expiration date and the name as it appears on the card. Checks can be made payable to Focus Electrics, LLC. Call Customer Service to obtain purchase amount. Your state's sales tax and a shipping/processing fee will be added to your total charge. Please allow two (2) weeks for delivery.
This manual contains important and helpful information regarding the safe use and care of your new Focus Electrics product. For future reference, attach dated sales receipt for warranty proof of purchase and record the following information:
Date purchased or received as gift: ____
Where purchased and price, if known: ____
Item number and Date Code (shown bottom/back of product): ____

BLENDER SOLUTION™
Mode d'emploi
natural_image
Three kitchen appliances: a blender with a plastic lid, a black blender with a glass lid, and a digital blender with a black handle (no visible text or symbols)natural_image
Illustration of a modern blender with a glass cup and lid (no text or symbols)Focus Electrics, LLC
Attn: Customer Service
P. O. Box 2780
West Bend, WI 53095
natural_image
Three kitchen appliances: a blender with a side-mounted blender, a black-and-white blender, and a clear plastic blender (no visible text or labels)natural_image
Illustration of a blender with a glass lid and control panel (no text or symbols)Focus Electrics, LLC
Attn: Customer Service
P. O. Box 2780
West Bend, WI 53095
- BLENDER SOLUTION™
- SAVE THIS INSTRUCTION MANUAL FOR FUTURE REFERENCE
- IMPORTANT SAFEGUARDS
- CAUTION
- To prevent personal injury or property damage, read and follow all instructions and warnings.
- SAVE THESE INSTRUCTIONS
- ASSEMBLING YOUR BLENDER
- USING YOUR BLENDER
- CONTROL BUTTONS:
- BLENDER OPERATION
- USING YOUR FOOD PROCESSOR (if included)
- HELPFUL HINTS
- CLEANING YOUR APPLIANCE
- CLEANING THE DISPENSING VALVE
- RECIPES
- PRODUCT WARRANTY
- Appliance 1 Year Limited Warranty
- Valid only in USA and Canada
- REPLACEMENT PARTS
Brand : WestBend
Model : 5000
Category : Blender