Soyabella SB130 - Soy milk machine Tribest - Free user manual and instructions
Find the device manual for free Soyabella SB130 Tribest in PDF.

User questions about Soyabella SB130 Tribest
0 question about this device. Answer the ones you know or ask your own.
Ask a new question about this device
Download the instructions for your Soy milk machine in PDF format for free! Find your manual Soyabella SB130 - Tribest and take your electronic device back in hand. On this page are published all the documents necessary for the use of your device. Soyabella SB130 by Tribest.
USER MANUAL Soyabella SB130 Tribest
Plant-Based Beverage Maker
SB-130 / SB-132
OPERATION MANUAL / MANUEL DE FONCTIONNEMENT BEDIENUNGSANLEITUNG / MANUAL DE FUNCIONAMIENTO

natural_image
Black and white photo of a Tribest water heater, a glass of milk, and scattered nuts (no text or symbols on main objects)Please read this manual carefully before using.
Raw Beverages 9
Heated Beverages 10
Heated Soups 11
Chunky Blends 12
Teas and Tonics 13
Soft Tofu with SB-132 14
Grinding Dry Foods 15
- Cleaning & Support 16
- Troubleshooting.... 17
- Recipes for Soyabella .... R1-R41
PRODUCT SPECIFICATIONS
| Product | Soyabella Plant-Based Beverage Maker (SB-130) |
| Soyabella Plant-Based Beverage Maker with Tofu Kit (SB-132) | |
| Model SB-130 / SB-132 | |
| Power Rating 120V, 200W / 220V, 220W | |
| Capacity Up to 5 1⁄2 cups / 1.3 L | |
| Size (W x D x H) 8.5 x 6.5 x 10.5 in | / 216 x 165 x 267 mm |
| Weight 3.7 lbs / 1.7 kg | |
| Made in China | |
1. INTRODUCTION
CONGRATULATIONS & WELCOME TO THE TRIBEST FAMILY!
Your purchase of the Tribest Soyabella Plant-Based Beverage Maker is backed by our committed customer service team and world-class warranty. As with every Tribest product, the Soyabella's versatile features are the result of intentional choices that were made to help you do one thing—Make Healthy Living Easy.
EN
Choose between 7 simple and easy functions for all your health food creations. Make unheated, raw vegan milks from nuts and seeds in as little as 30 seconds. Create bean and grain milks, soups, nut and seed creams, and much more in just 15 minutes.
EASY TO CLEAN
Soyabella's heating element is enclosed within its stainless steel carafe for added safety and easier cleanups. Built-in safety features prevent messes that can be caused by overflows, dry heating, or overheating. Keep your countertop clean by using the included accessories like the Soyabella drip cup between batches to prevent spills.
FOOD-SAFE STAINLESS STEEL
The stainless steel carafe, lid (SB-132 only), fine screen, coarse screen, and grinding blade plus the BPA-free motor head ensure your beverages do not ever come into contact with harmful chemicals. Follow three easy steps: Place ingredients inside your screen, fill carafe with water, and select a function!
VERSATILE GRINDING FUNCTION
Grind your coffee beans, flax seeds, spices, and other dry ingredients inside the grinding cup. The blade grinds dry ingredients to a smooth, light consistency with its patented helical structure and serrated edge.
LET'S GET STARTED!
Before using the Soyabella, we recommend washing all the parts with a simple sponge, warm water, and mild soap. You are now ready to begin making delicious, fresh vegan milks for you and your family. Please take the time to read through the entire operation manual for proper use and care instructions before starting.
2. IMPORTANT SAFEGUARDS
When using electrical appliances, basic safety precautions should always be followed, including the following:
- Read all instructions carefully before first use.
- To protect against risk of electrical shock, do not immerse the electric cord, plug, motor head, or stainless steel carafe in water or other liquids.
- Unplug from outlet when not in use, before putting on or taking off parts, and before cleaning. Remove the plug by gripping the plug body and pulling out of the outlet. Never yank or twist cord to unplug the unit.
- Close supervision is necessary when any appliance is used by or near children.
- Avoid contact with moving parts.
- Do not operate any appliance with a damaged cord or plug, after the appliance malfunctions, or is dropped or damaged in any manner. Return appliance to authorized service facility for examination, repair, or electrical or mechanical adjustment.
- The use of attachments not recommended or sold by the manufacturer may cause fire, electric shock, or injury.
- Do not use outdoors.
- Do not let cord hang over the edge of table or counter, or touch hot surfaces.
- To disconnect, wait until motor stops before removing plug from the electrical outlet.
- Do not operate unattended. Make sure the motor stops completely before disassembling. Unplug after each use.
Precautions:
- Do not use Soyabella to reheat cold porridge.
- Do not submerge the MOTOR HEAD into water or pour water over the electrical components. Do not let water enter the MOISTURE EVAPORATING HOLE. (Use wet cloth to clean the head unit)
- Do not submerge the STAINLESS STEEL CARAFE into water or get the underside of the base or the HANDLE area wet.
- Be sure the UPPER PLUG and POWER CORD RECEPTACLE are dry before connecting.
- Unauthorized disassembly of the head unit will void the warranty.
- Be careful with the GRINDING BLADE components when cleaning.
- Do not touch the stainless steel parts until they have cooled completely.
- The STAINLESS STEEL CARAFE can get very hot during operation. Avoid touching it while machine is in use. (Pay particular attention when children are present).
- Do not operate with a damaged power cable.
- Always use a grounded outlet with the POWER CORD.
- Be sure to remove all three rubber plug covers before plugging the power cord into the electrical outlet.

text_image
CAUTION: Do not let water enter the Moisture Evaporating Hole.3. PARTS
text_image
Labeled diagram of a Tribest coffee maker with numbered parts including blender, cup holder, brush, and power cord.
natural_image
Three white plastic containers with numbered labels (19, 20) showing different types of packaging or cleaning items (no text or symbols on the containers themselves)Included with SB-132 model. Can also be purchased separately.
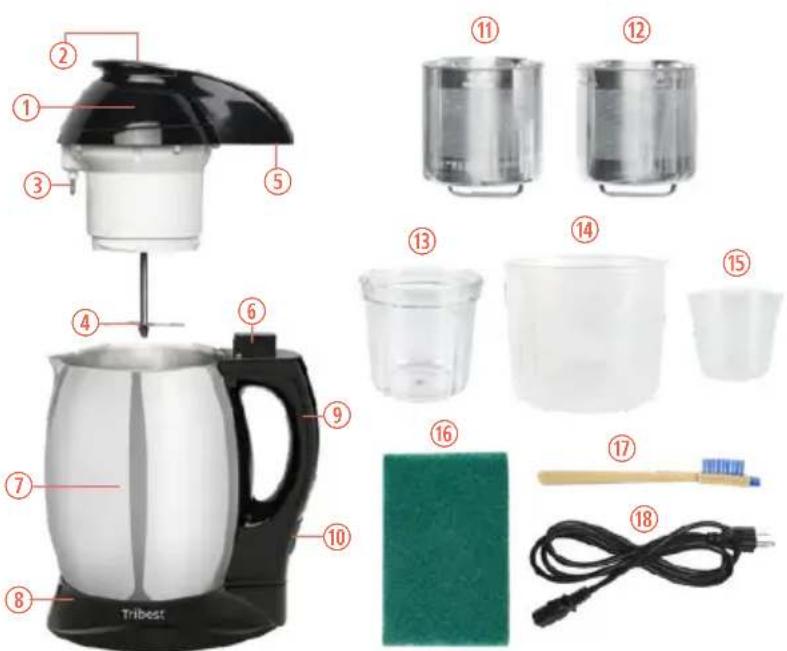
① MOTOR HEAD
Powerful 200/220 watt motor blends your ingredients
② CONTROL PAD
One-Touch Buttons
Simple & quick to use

Grind and heat cycles

Grinds only, no heat

Heats first, then grinds / Cancels current cycle
Indicator Light
Indicates cycle status

Blinking red = On

Solid red = Cycle in progress

Blinking (pale) green = Finished
③ OVERFLOW SENSOR
Prevents overflow of beverages
④ GRINDING BLADE
Patented helical blade with serrated edge quickly blends diverse ingredients for optimal rich, smooth results
⑤ UPPER PLUG
Connects to UPPER PLUG RECEPTACLE
⑥ UPPER PLUG RECEPTACLE
Connects to UPPER PLUG
⑦ STAINLESS STEEL CARAFE
Easy to clean, food-safe materials for healthy blends
⑧ HEATING ELEMENT
Enclosed within the CARAFE for heat protection and easy-to-clean, smooth surfaces
⑨ HANDLE
⑩ POWER PLUG RECEPTACLE
Connects the POWER CORD
⑪ FINE SCREEN
Make vegan milks and strain at the same time
⑫ COARSE SCREEN
Make thicker beverages and other culinary creations like creams and soups
⑬ GRINDING CUP
Grind dry ingredients in seconds using this included accessory
⑭ DRIP CUP
Easily remove your SCREEN and enjoy your recipe. Plus, it catches any drips to keep your countertop clean.
⑮ MEASURING CUP ACCESSORY
⑯ SCOURING PAD
⑰ CLEANING BRUSH
⑱ POWER CORD
⑲ STAINLESS STEEL LID (SB-132)
⑳ TOFU KIT (SB-132)
Includes Tofu Box, Tofu Press, and Cheesecloth
4. OPERATING INSTRUCTIONS
Follow the guide below to get started or choose from the 7 variety of functions:
★ Quick Start Guide....8
Raw Beverages....9
Heated Beverages.... 10
Heated Soups.... 11
Chunky Blends.... 12
Teas and Tonics.... 13
Soft Tofu with SB-132.... 14
Grinding Dry Foods.... 15
QUICK START GUIDE FOR SOYABELLA
Make vegan milks from commonly used nuts, seeds, grains, and beans in as quick as 30 seconds! Here are some simple steps to getting your first batch of vegan milk going. Refer to the pages following this quick start for in depth instructions on a variety of ways to use your Soyabella.

natural_image
Close-up of a metallic container with a black arrow pointing to the interior (no text or symbols visible)Fill the CARAFE with water to the MIN (0.8 L) fill line (\~4 cups). For a larger batch, simply add more water by filling up to the MAX (1.3 L) fill line and add more ingredients in STEP 2.
natural_image
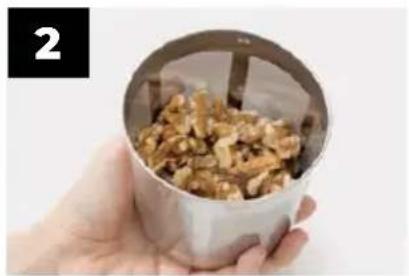
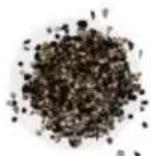
Hand holding a metal container filled with chopped nuts, no text or symbols visibleAdd 1 cup (250 mL) of raw or soaked nuts, seeds, grains or beans to your SCREEN. Use the FINE SCREEN for best results with vegan milks.
natural_image
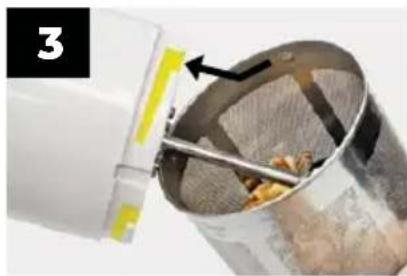
Close-up of a metal sieve with a yellow label and black arrow pointing to the interior (no text or symbols visible)Attach the SCREEN to the MOTOR HEAD by lining up the tabs inside the SCREEN with the grooves on the MOTOR HEAD highlighted in the picture above. Then twist into place until you feel the SCREEN lock securely. Place the MOTOR HEAD over the CARAFE.

text_image
4 HOT RAWPlug in the POWER CORD. Choose which cycle you'd like to run. Simply press the button on the CONTROL PAD to make vegan milk!

natural_image
Hand holding a transparent cylindrical device with black lid and arrows indicating rotation (no text or symbols)After the cycle has finished, lift up the MOTOR HEAD and remove the SCREEN using the DRIP CUP.

natural_image
Hand pouring liquid from a black kettle into a glass (no text or symbols visible)Place the MOTOR HEAD back onto the unit, pour out your vegan milk, and enjoy!
For raw vegan milks from nuts and seeds, press RAW
For heated vegan milks from beans, grains, nuts, and seeds, press HOT
4. OPERATING INSTRUCTIONS
RAW BEVERAGES - STEP BY STEP
Make raw vegan milks from nuts, seeds, and sprouted grains in seconds using the RAW function of your Soyabella.
STEP 1 STEP 2 STEP 3 STEP 4 STEP 5

natural_image
Hand pouring liquid into a stainless steel kettle (no text or symbols visible)
natural_image
Hand pouring chopped nuts into a white container (no text or symbols visible)
natural_image
Close-up of hands holding a metallic cylindrical object with a curved arrow indicating rotation (no text or symbols visible)
natural_image
Close-up of a stainless steel kettle with a glass lid and black handle (no visible text or symbols)
text_image
HOT RAWFor best results, soak your ingredients for 4-6 hours or overnight before making vegan milk with the Soyabella.
STEP 1: Fill your CARAFE with 4 cups (1 L) of water.
STEP 2: Use the FINE SCREEN and fill it with 1 cup (250 mL) of soaked nuts, seeds, or sprouted grains. For more recipes, see page R5 in the recipe section.
STEP 3: Attach the SCREEN to the MOTOR HEAD. MAKE SURE THE SCREEN IS PROPERLY LOCKED IN PLACE! If the SCREEN becomes loose during operation, the spinning blade could damage the SCREEN.
STEP 4: Securely place the MOTOR HEAD over the CARAFE. Attach the POWER CORD and ensure it is properly plugged into an outlet. When completely attached, the machine will beep.
STEP 5: Press the RAW button. The indicator light will turn solid red. You will hear your machine begin to blend your ingredients. After 15 seconds, the machine will beep and the indicator light will turn green to indicate that the cycle has finished. After the first RAW cycle, check your vegan milk by lifting up the top of the MOTOR HEAD with the SCREEN still attached. Depending on the type of ingredient you are blending, you may wish to run the RAW cycle 2-3 more times to make a creamier, richer vegan milk.
Pour out and enjoy your vegan milk!
CHEF TIPS:
- If you prefer more texture in your vegan milk, you can try using the COARSE SCREEN. This will allow some particles through the SCREEN depending on how fine you blend your ingredients using the RAW cycle.
- Many people love to spice up their raw vegan milks by adding natural sweetener, cinnamon, and sea salt. Try this or any other natural spice add-ins by first adding the spices to the vegan milk you have created in the CARAFE. Use the DRIP CUP to remove the SCREEN. Then place the MOTOR HEAD back on without the SCREEN and press the RAW cycle button once more. Once finished, you can pour out a perfectly spiced raw vegan milk!
4. OPERATING INSTRUCTIONS
HEATED BEVERAGES - STEP BY STEP
Make vegan milk from soaked nuts, seeds, grains, or beans in minutes using the HOT function of your Soyabella.

natural_image
Hand pouring liquid into a stainless steel kettle (no text or symbols visible)
natural_image
Hand holding chopped nuts into a white container (no text or symbols visible)
natural_image
Close-up of hands holding a metallic cylindrical container with a curved arrow indicating rotation (no text or symbols visible)
natural_image
Close-up of a metallic kettle with a glass lid, no visible text or symbols
text_image
HOT RAWFor best results, soak your ingredients for 4-6 hours or overnight before making vegan milk with the Soyabella.
STEP 1: Fill your CARAFE with 4 cups (1 L) of water.
STEP 2: Use the FINE SCREEN and fill it with 1 cup (250 mL) of nuts, seeds, grains, or beans. For more recipes, see page R11 in the recipe section.
STEP 3: Attach the SCREEN to the MOTOR HEAD. MAKE SURE THE SCREEN IS PROPERLY LOCKED IN PLACE! If the SCREEN becomes loose during operation, the spinning blade could damage the SCREEN.
STEP 4: Securely place the MOTOR HEAD over the CARAFE. Attach the POWER CORD and ensure it is properly plugged into an outlet. When completely attached, the machine will beep.
STEP 5: Press the HOT button. The indicator light will turn solid red. Your machine will now cycle through heating and blending for approximately 20 minutes to turn your ingredients into vegan milk. Once this cycle is finished, your machine will beep and the indicator light will turn green to indicate that the cycle has finished.
Pour out and enjoy your vegan milk!
CAUTION:
The STAINLESS STEEL CARAFE and the SCREEN will heat up during the HOT cycle, so please protect your hands by waiting for the machine to cool down and using the insulated HANDLE when pouring your hot beverages.
CHEF TIPS:
- Many people love to spice up their raw vegan milks by adding natural sweetener, cinnamon, and sea salt. Try this or any other natural spice add-ins by first adding the spices to the vegan milk you have created in the CARAFE. Use the DRIP CUP to remove the SCREEN. Then place the MOTOR HEAD back on without the SCREEN and press the RAW cycle button. Once finished, you can pour out a perfectly spiced raw vegan milk!
4. OPERATING INSTRUCTIONS
HEATED SOUPS - STEP BY STEP
STEP 1 STEP 2 STEP 3 STEP 4 STEP 5

natural_image
Hand pouring liquid into a stainless steel kettle (no text or symbols visible)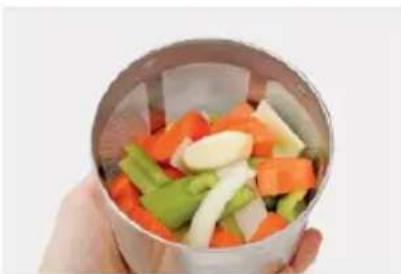
natural_image
Hand holding a metal bowl containing a mixed vegetable salad with carrots, green beans, and garlic (no text or symbols visible)
natural_image
Close-up of hands holding a metallic cylindrical object with a curved arrow indicating rotation (no text or symbols visible)
natural_image
Close-up of a stainless steel kettle with a glass lid and black handle (no visible text or symbols)
text_image
HOT RAWSTEP 1: Fill your CARAFE with 4 cups (1 L) of water.
STEP 2: Fill the COARSE SCREEN with 1 12 cups (375 mL) of fresh vegetables to create soup (Try celery, carrots, onion, and garlic). For more recipes, see page R17 in the recipe section.
STEP 3: Attach the SCREEN to the MOTOR HEAD. MAKE SURE THE SCREEN IS PROPERLY LOCKED IN PLACE! If the SCREEN becomes loose during operation, the spinning blade could damage the SCREEN.
STEP 4: Securely place the MOTOR HEAD over the CARAFE. Attach the POWER CORD and ensure it is properly plugged into an outlet. When completely attached, the machine will beep.
STEP 5: Press the HOT button. The indicator light will turn solid red. Your machine will now cycle through heating and blending for approximately 20 minutes to turn your ingredients into soup. Once this cycle is finished, your machine will beep and the indicator light will turn green to indicate that the cycle has finished.
Pour out and enjoy your soup!
CAUTION:
The STAINLESS STEEL CARAFE and the SCREEN will heat up during the HOT cycle, so please protect your hands by waiting for the machine to cool down and using the insulated HANDLE when pouring your hot soups.
CHEF TIPS:
- Add additional ingredients like fresh herbs and spices to your soup to create endless recipes! Simply add them to your soup in the CARAFE. Use the DRIP CUP to remove the SCREEN. Then place the MOTOR HEAD back on without the SCREEN and press the RAW cycle button. Once finished, pour out your delicious soup and enjoy!
4. OPERATING INSTRUCTIONS
CHUNKY BLENDS - STEP BY STEP
STEP 1 STEP 2 STEP 3 STEP 4 ENJOY

natural_image
Hand pouring liquid into a stainless steel kettle (no text or symbols visible)
natural_image
Top-down view of a cooking pot containing mixed vegetables and meat (no text or symbols visible)
natural_image
Close-up of a white ceramic cup pouring liquid into a stainless steel kettle (no text or symbols visible)
text_image
HOT RAW
natural_image
White ceramic bowl with liquid being poured into a metal kettle next to a spoon (no text or symbols visible)STEP 1: Fill your CARAFE with 4 cups (1 L) of water.
STEP 2: Add all your ingredients to the CARAFE. Commonly used are 1 cup (250 mL) of lentils, split peas, fresh herbs and spices, plus other vegetables like carrots, celery, and onion. For more recipes, see page R23 in the recipe section.
STEP 3: Securely place the MOTOR HEAD over the CARAFE. Attach the POWER CORD and ensure it is properly plugged into an outlet. When completely attached, the machine will beep.
STEP 4: Press the HOT button. The indicator light will turn solid red. Your machine will now cycle through heating and blending for approximately 20 minutes to turn your ingredients into a chunky blend. Once this cycle is finished, your machine will beep and the indicator light will turn green to indicate that the cycle has finished.
You should now have a complete and chunky heated soup to scoop or pour out! This same process may be completed with less water for thicker chutneys, fruit purées like applesauce, and thicker soups. NOTE: The MIN (0.8 L) fill line must be reached in order for your machine to engage and work properly.
CAUTION:
The STAINLESS STEEL CARAFE and the SCREEN will heat up during the HOT cycle, so please protect your hands by waiting for the machine to cool down and using the insulated HANDLE when pouring your chunky blends.
CHEF TIPS:
- When using the Soyabella without a SCREEN, it is easier to use thicker ingredients. For best results during the blending process, we recommend cutting these ingredients down to 12 inch (1 cm) pieces.
- If you wish for your chunky blend to become more puréed, simply reattach the MOTOR HEAD to the machine and press the RAW cycle button 1-2 times to blend your mixture further.
4. OPERATING INSTRUCTIONS
TEAS AND TONICS - STEP BY STEP
STEP 1 STEP 2 STEP 3 STEP 4 ENJOY

natural_image
Hand pouring liquid into a stainless steel kettle (no text or symbols visible)
natural_image
Hand pouring a small orange spoon into a stainless steel kettle (no text or symbols visible)
natural_image
Close-up of a white kettle being stirred with a hand mixer (no text or symbols visible)
text_image
HOT RAW
natural_image
Hand pouring tea from a black kettle into a small glass cup (no text or symbols visible)STEP 1: Fill your CARAFE with 4 cups (1 L) of liquid depending on your desired recipe.
STEP 2: Add your ingredients to the CARAFE. Commonly used are turmeric, chai spices, superfoods, or mushroom blends. For more recipes, see page R29 in the recipe section.
STEP 3: Securely place the MOTOR HEAD over the CARAFE. Attach the POWER CORD and ensure it is properly plugged into an outlet. When completely attached, the machine will beep.
STEP 4: Press the 🎨. The indicator light will turn solid red. Your machine will now cycle through heating and blending for 5-10 minutes to turn your ingredients into a finished tonic. Once this cycle is finished, your machine will beep and the indicator light will turn green to indicate that the cycle has finished.
Pour out and enjoy your tonic!
CAUTION:
The STAINLESS STEEL CARAFE and the SCREEN will heat up during the cycle, so please protect your hands by waiting for the machine to cool down and using the insulated HANDLE when pouring your hot beverages.
CHEF TIPS:
- When making Golden Vegan Milk, Chai Tea, or other tonics that require a 2-step process (first using the ⏻ cycle and then RAW cycle), you may wish to add additional ingredients between the steps to protect those ingredients from heating. One example could be raw superfoods. If doing this, we recommend letting your product cool between cycles.

4. OPERATING INSTRUCTIONS
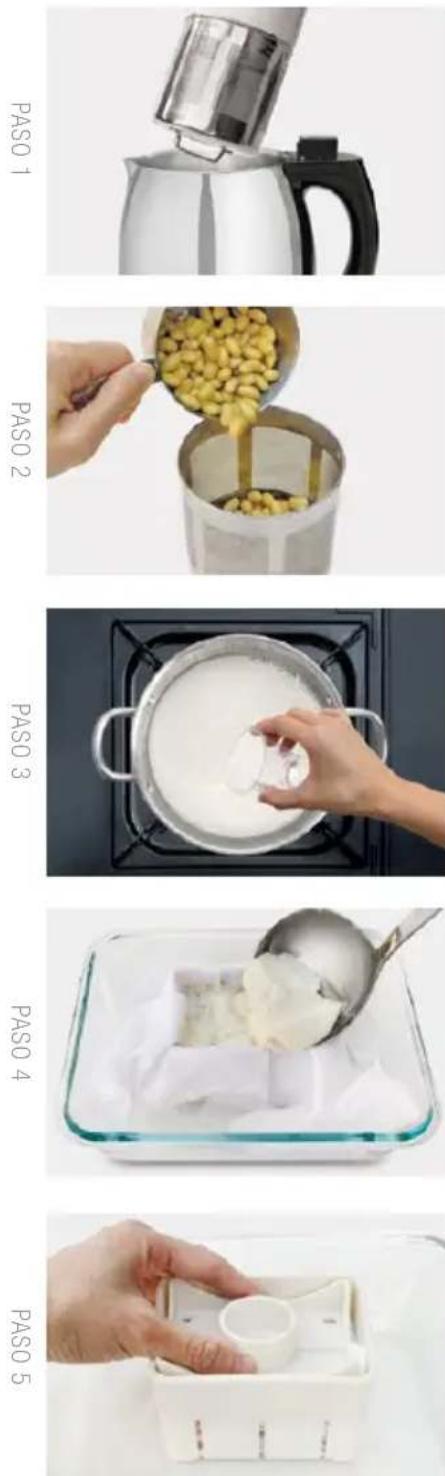
SOFT TOFU - STEP BY STEP FOR SB-132
STEP 1 STEP 2 STEP 3 STEP 4 STEP 5

natural_image
Close-up of a stainless steel kettle with a glass lid, no visible text or symbols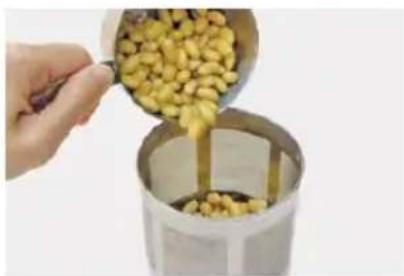
natural_image
Hand pouring yellow beans into a container (no text or symbols visible)
natural_image
Person pouring liquid into a pan on a stovetop (no text or symbols visible)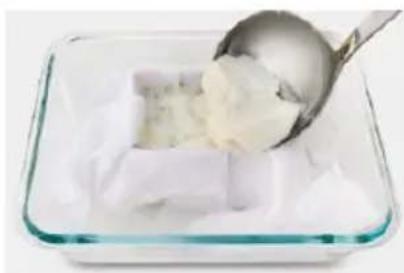
natural_image
Close-up of a glass container containing white food being stirred with a metal spoon (no text or symbols visible)
natural_image
Hand holding a white plastic container with a small cylindrical object inside, placed in a white rectangular box (no text or symbols visible)Soak 1 cup of dried soybeans for at least 4 hours. You should get about 2 cups of soybeans after soaking them. For more tofu recipes, see page R33 in the recipe section.
STEP 1: Fill your CARAFE with 4 cups (1 L) of water. Fill the FINE SCREEN with the first half of soybeans (\~1 cup / 250 mL). Attach the SCREEN to the MOTOR HEAD and make sure it is locked in place. Place the MOTOR HEAD over the CARAFE. Attach the POWER CORD and ensure it is properly plugged into an outlet. When completely attached, the machine will beep. Press the RAW button 3-5 times, allowing the machine to fully grind the first half of soybeans.
STEP 2: Lift the MOTOR HEAD, remove the ground soybeans from the SCREEN, and then insert the remaining whole soybeans (\~1 cup / 250 mL) into the SCREEN. Attach the SCREEN to the MOTOR HEAD and place it back on top of the CARAFE, keeping the same soymilk created from the previous steps inside the CARAFE. This time, press the HOT button.
STEP 3: After the cycle has finished, strain your soymilk with the CHEESECLOTH. Heat your strained soymilk on medium until it reaches about 165^ F ( 73^ C). Create a solution with your tofu coagulant by following its package instructions. Slowly pour the solution into the soymilk and stir in slow motions for about 40 seconds. Cover your mixture and let it sit for 10-15 minutes.
STEP 4: Your tofu mixture should now be solidified. Place your TOFU BOX on a plate. Line the TOFU BOX with the CHEESECLOTH so that there's enough cloth to fold over and cover the top opening of the box. Scoop the tofu mixture into the CHEESECLOTH.
STEP 5: Cover the tofu by folding the CHEESECLOTH over the top of the mixture and place the TOFU PRESS on top of the CHEESECLOTH. Place a weight on top of the TOFU PRESS and let it sit for 10-30 minutes—the longer it's pressed, the firmer it will become.
Unwrap the CHEESECLOTH, remove your fresh tofu from the TOFU BOX, and enjoy! You may soak the tofu in cold water and store in the refrigerator for 3-5 days.
4. OPERATING INSTRUCTIONS
GRINDING DRY FOODS - STEP BY STEP
Grind flax seeds, coffee beans, grains, nuts, and other seeds into fine powders by using the Grind Function.
STEP 1 STEP 2 STEP 3 STEP 4 ENJOY
natural_image
Clear glass container filled with granular material, no visible text or symbols
natural_image
Person holding a white spray can with a black lid, showing a rotating arrow indicating rotation (no text or symbols visible)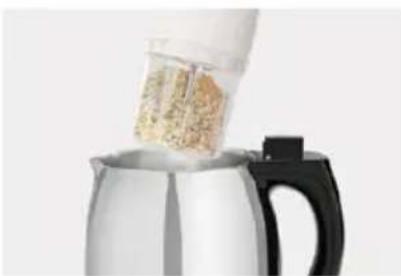
natural_image
Close-up of a metal kettle with a glass container filled with granular material, no visible text or symbols
text_image
HOT RAW
natural_image
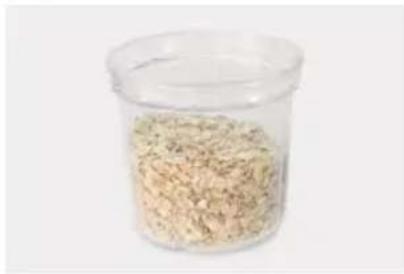
Close-up of hands using a white blender to lift a small glass, with a black handle and arrow indicating rotation (no text or symbols visible)STEP 1: Fill the clear GRINDING CUP with 1 cup (250 mL) of ingredients. For more recipes, see page R37 in the recipe section.
STEP 2: Attach the GRINDING CUP to the MOTOR HEAD. MAKE SURE THE CUP IS PROPERLY LOCKED IN PLACE! If the CUP becomes loose during operation, the spinning blade could damage the CUP and the BLADES.
STEP 3: Securely place the MOTOR HEAD over the CARAFE. Attach the POWER CORD and ensure it is properly plugged into an outlet. When completely attached, the machine will beep.
STEP 4: Press the RAW button. The indicator light will turn solid red, and you will hear the machine grinding your ingredients. Once the cycle has finished, you may check your ingredients by lifting the MOTOR HEAD to view the product. Repeat this step until you have reached your desired consistency.
Remove the GRINDING CUP and store your dry ingredients. Enjoy in smoothies, salads, and more!
CHEF TIPS:
- Try creating easy add-ons to salads and soups by combining a variety of nuts and seeds in the cup.
- When grinding ingredients with high-fat content, over-grinding will result in a paste being formed. For ingredients including flax, almond, and sunflower seeds, it is recommended to use the RAW cycle only up to 3 times. See recipes on page R37 for additional information.
5. CLEANING & SUPPORT
CLEANING
Be sure to clean your Soyabella thoroughly after every use. Proper cleaning ensures that your Soyabella will produce great results for years to come. NOTE: To avoid any build-up that may block the holes of the SCREENS, be sure to clean the SCREENS immediately after use.
- Unplug the unit.
- Place the MOTOR HEAD, with the FINE OR COARSE SCREEN still attached, into the DRIP CUP to cool. Make sure that the handle under the SCREEN fits within one of the corresponding grooves inside the DRIP CUP.
TIP: For faster cleanup, add cold water to the DRIP CUP to soak the SCREEN.

natural_image
Close-up of a hand holding a white plastic container with a metal handle and a black arrow pointing to a dotted line (no text or symbols visible)
natural_image
Close-up of hands holding a white plastic blender with black lid and black arrow indicating rotation (no text or symbols)-
In order to let the SCREEN cool quickly enough to allow quicker cleanup, use the DRIP CUP to detach the SCREEN from the MOTOR HEAD by grasping the top of the MOTOR HEAD with one hand and using your other hand to get a solid grip on the DRIP CUP. Then twist the DRIP CUP in the direction indicated on the SCREEN until the SCREEN is unscrewed from the MOTOR HEAD.
-
CAUTION—The SCREEN will be hot! Please protect your hands while transferring the pulp to any container for cooking or while throwing it away. After removing the pulp from the SCREEN, place the DRIP CUP (with the SCREEN still inside) under running water until it cools.
-
When the SCREEN is cool enough, use the SCOURING PAD and CLEANING BRUSH to scrub the SCREEN clean with hot, soapy water—this will prevent protein deposits from clogging the holes in the SCREEN. Ensure that the SCREEN is thoroughly cleaned, making sure all holes are open, as a blocked SCREEN can affect the consistency of your beverages in future operations. Once protein deposits clog the holes in the SCREEN, it can be extremely difficult to remove them.
Tribest®
CUSTOMER SUPPORT
In the event that you have any questions concerning the use, care, or service for this product, please feel free to call us or send us an email. If you purchased your product outside of the United States, please refer to your warranty card for your nearest service center.
United States
Tribest Corporation
1143 N. Patt St.
Anaheim, CA 92801
Toll-Free: 1-888-254-7336
service@tribest.com
International
Tribest Corporation
1143 N. Patt St.
Anaheim, CA 92801
Telephone: 1-714-879-7150
service@tribest.com
6. TROUBLESHOOTING
| Problem Possible Cause Solution | ||
| SCREEN slips off MOTOR HEAD | · SCREEN is improperly fitted over the threads | · Twist the SCREEN into the “CLOSE” position as indicated by the arrow |
| Ingredients are not fully ground | · Too much or not enough in the SCREEN· Not enough water in the CARAFE· SCREEN is clogged | · Refill the SCREEN to recommended amount· Fill the CARAFE to a level between the two inscribed MIN (0.8 L) and MAX (1.3 L) fill lines· Clean with the CLEANING BRUSH |
| Overflows | · Too much water in the CARAFE· SCREEN is clogged | · Adjust the water to a level between the two inscribed MIN (0.8 L) and MAX (1.3 L) fill lines· Clean with the CLEANING BRUSH and hot, soapy water |
| No beeping sound | · Water level is too low· Water temperature is too cold· Motor or shaft is clogged | · Fill the CARAFE to a level between the two inscribed MIN (0.8 L) and MAX (1.3 L) fill lines· Use warm water between 50-104°F (10-40°C)· Rinse the CARAFE and BLADES attached to MOTOR HEAD. Wash SCREENS and DRIP CUP. Wipe exterior with a damp towel. |
| Beverage scorches | · Not enough ingredients are inside the SCREEN· Too much ingredients and not enough water | · Try again by using the MEASURING CUP when filling the SCREEN· Try again by adding the water to a level between the two inscribed MIN (0.8 L) and MAX (1.3 L) fill lines. Use the MEASURING CUP when filling the SCREEN. |
| Beverage consistency is too thin | · SCREEN is clogged· Not enough ingredients are inside the SCREEN· Ingredients did not soaked long enough | · Clean with the CLEANING BRUSH and hot, soapy water· Try again by using the MEASURING CUP when filling the SCREEN· Refer to the steps in Operating Instructions |
| Heats, but motor does not operate | · Check for clogs and operating errors | · Power off and restart. Refer to the steps in Operating Instructions. |
| Does not activate after pressing buttons | · The MIN (0.8 L) fill line has not been reached· Water has entered inside the MOTOR HEAD | · Fill up to at least the MIN (0.8 L) fill line (4 cups)· Wait 4-5 days for the MOTOR HEAD to dry before trying again |
TABLE DES MATIÈRES
CARACTÉRISTIQUES DU PRODUIT
natural_image
Close-up of a black and white electronic device with a metallic stand (no visible text or symbols)3. PIÈCES DU PRODUIT

text_image
Labeled diagram of a coffee maker with numbered parts including blender, cup holder, and power cord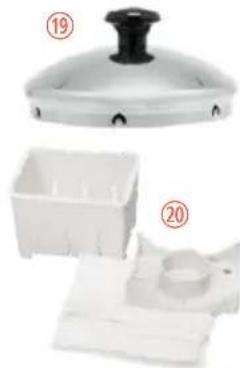
natural_image
Three white plastic kitchen utensils: a lid with black knob, a plastic container, and a tray with a circular opening (no text or symbols visible)natural_image
Close-up of a metallic container with a black arrow pointing to a circular opening, no visible text or symbols.natural_image
Hand holding a metal container filled with chopped nuts, no visible text or symbolsnatural_image
Close-up of a metal sieve with a yellow label and black arrow pointing to the interior (no text or symbols visible)natural_image
Hand holding a cylindrical device with black arrows indicating rotational motion (no text or symbols)natural_image
Hand pouring liquid from a black and white container into a glass (no text or symbols visible)natural_image
Hand pouring liquid into a stainless steel kettle (no text or symbols visible)
natural_image
Hand holding a pile of roasted almonds into a white container (no text or symbols visible)
natural_image
Close-up of hands holding a metallic cylindrical container with a curved arrow indicating rotation (no text or symbols visible)
natural_image
Close-up of a metallic kettle with a glass lid, no visible text or symbols
text_image
HOT RAWnatural_image
Hand pouring liquid into a stainless steel kettle (no text or symbols visible)
natural_image
Hand pouring chopped nuts into a white container (no text or symbols visible)
natural_image
Close-up of hands holding a metallic cylindrical object with a curved arrow indicating rotation (no text or symbols visible)
natural_image
Close-up of a metallic kettle with a glass lid, no visible text or symbols
text_image
HOT RAWnatural_image
Hand pouring liquid into a stainless steel kettle (no text or symbols visible)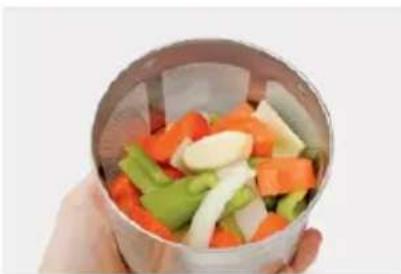
natural_image
Hand holding a metal bowl containing a mixed vegetable salad including carrots, peppers, and garlic (no text or symbols visible)
natural_image
Close-up of hands holding a metallic cylindrical container with a curved arrow indicating rotation (no text or symbols visible)
natural_image
Close-up of a stainless steel kettle with a glass lid and black handle (no visible text or symbols)
text_image
HOT RAWnatural_image
Hand pouring liquid into a stainless steel kettle (no text or symbols visible)
natural_image
Top-down view of a cooking pot containing mixed vegetables and meat (no text or symbols visible)
natural_image
Close-up of a hand pouring liquid into a white ceramic kettle (no text or symbols visible)
text_image
HOT RAW
natural_image
White ceramic kettle with a spoon pouring liquid into a bowl of sauce next to a black and silver stand (no text or symbols visible)natural_image
Hand pouring liquid into a stainless steel kettle (no text or symbols visible)
natural_image
Hand pouring a small orange spoon into a stainless steel kettle (no text or symbols visible)
natural_image
Close-up of a white hand mixer blending liquid into a stainless steel kettle (no text or symbols visible)
text_image
HOT RAW
natural_image
Hand pouring tea from a black and silver kettle into a small glass cup (no text or symbols visible)natural_image
Close-up of a metallic kettle with a glass lid, no visible text or symbols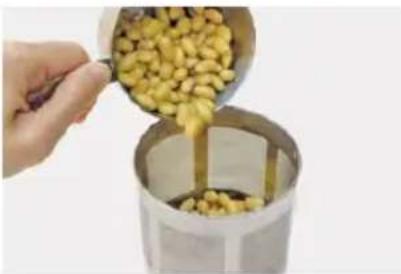
natural_image
Hand pouring yellow beans into a metal container (no text or symbols visible)
natural_image
Hand pouring liquid into a pan on a stovetop (no text or symbols visible)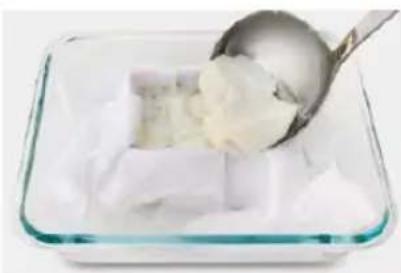
natural_image
Close-up of a metal spoon lifting a piece of white cheese into a glass container (no text or symbols visible)
natural_image
Hand holding a white plastic container with a small cup, placed inside a white rectangular container (no text or symbols visible)natural_image
Clear glass container filled with granular material, no visible text or symbols
natural_image
Person holding a white blender with a black lid, partially open the lid and being inserted by a tool (no visible text or symbols)
natural_image
Close-up of a metal kettle holding a glass container filled with granular material (no text or symbols visible)
text_image
HOT RAW
natural_image
Close-up of hands using a white and black handheld device to lift a glass container with a curved arrow indicating rotation (no text or symbols visible)natural_image
Close-up of a hand holding a white plastic cup with a metal container, showing a dotted line and arrow (no text or symbols visible)
natural_image
Close-up of hands holding a white cylindrical device with black lid and black arrow indicating rotation (no text or symbols)text_image
Labeled diagram of a coffee maker with numbered parts including blender, cup holder, and cleaning tool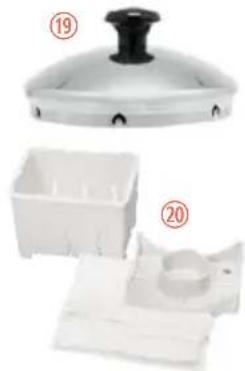
natural_image
Three white plastic containers with numbered labels (19 and 20) showing different shapes, no text or symbols present.Tees and Tonics.... 41
natural_image
Close-up of a metallic container with a black arrow pointing to the interior (no text or symbols visible)natural_image
Hand holding a metal container filled with chopped nuts, no visible text or symbolsnatural_image
Close-up of a metal sieve with a yellow label and black arrow pointing to the interior (no text or symbols visible)natural_image
Hand holding a cylindrical device with black and white components, showing rotational motion arrows (no text or symbols)natural_image
Hand pouring liquid from a black and white container into a glass (no text or symbols visible)natural_image
Hand pouring liquid into a stainless steel kettle (no text or symbols visible)natural_image
Hand holding a pile of roasted almonds into a white container (no text or symbols visible)natural_image
Close-up of hands holding a cylindrical container with an arrow indicating rotation (no text or symbols visible)natural_image
Close-up of a metallic kettle with a glass lid, no visible text or symbolsnatural_image
Hand pouring liquid into a stainless steel kettle (no text or symbols visible)natural_image
Hand holding chopped nuts into a white container (no text or symbols visible)natural_image
Close-up of hands holding a metallic cylindrical container with a curved arrow indicating rotation (no text or symbols visible)natural_image
Close-up of a metallic kettle with a glass lid and black handle (no text or symbols visible)VORSICHT:
natural_image
Hand pouring liquid into a stainless steel kettle (no text or symbols visible)natural_image
Hand holding a metal bowl containing a mixed vegetable salad including carrots, green beans, and garlic (no text or symbols visible)natural_image
Close-up of hands holding a metallic cylindrical container with a curved arrow indicating rotation (no text or symbols visible)natural_image
Close-up of a metallic kettle with a glass lid and black handle (no text or symbols visible)VORSICHT:
natural_image
Hand pouring liquid into a stainless steel kettle (no text or symbols visible)natural_image
Top-down view of a hot pot containing mixed vegetables and meat, with no visible text or symbols.natural_image
Close-up of a white hand mixer blending liquid into a stainless steel kettle (no text or symbols visible)natural_image
A white bowl of sauce being poured into a metal kettle, with a spoon above it (no text or symbols visible)PROFI-TIPPS:
natural_image
Hand pouring liquid into a stainless steel kettle (no text or symbols visible)natural_image
Hand pouring orange liquid from a spoon into a stainless steel kettle (no text or symbols visible)natural_image
Close-up of a white kettle being stirred with a hand mixer (no text or symbols visible)natural_image
Hand pouring tea from a black kettle into a small cup (no text or symbols visible)natural_image
Close-up of a stainless steel kettle with a black handle and lid, no visible text or symbolsnatural_image
Hand pouring chopped nuts into a container with a spoon (no text or symbols visible)natural_image
Hand pouring liquid into a pan on a stovetop (no text or symbols visible)natural_image
Close-up of a metal spoon scooping white cheese into a glass container (no text or symbols visible)natural_image
Hand holding a white ceramic cup and container on a plain surface (no text or symbols visible)natural_image
Clear glass container filled with granular material, no visible text or symbolsnatural_image
Close-up of hands holding a small container with granular material, being twisted with an arrow (no text or symbols visible)natural_image
Close-up of a metal kettle with a glass container filled with granular material, no visible text or symbols.natural_image
Close-up of hands using a handheld device to lift a white plastic component with a black handle (no text or symbols visible)natural_image
Close-up of a hand holding a white plastic container with a hand holding a metal container, showing a dotted line and arrow (no text or symbols visible)
natural_image
Close-up of hands holding a white cylindrical device with black lid and black handle, showing rotational arrows (no text or symbols)natural_image
3D rendering of a black and white industrial device with a metallic stand (no visible text or symbols)3. PARTES

text_image
Labeled diagram of a coffee maker with numbered parts including blender, cup holder, and cleaning tool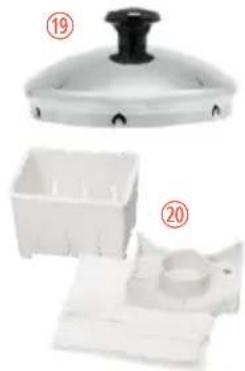
natural_image
Three white plastic containers with different sizes and top features, no visible text or symbolsnatural_image
Close-up of a metallic container with a black arrow pointing to a circular opening, no visible text or symbols.natural_image
Hand holding a metal container filled with chopped nuts, no text or symbols visiblenatural_image
Close-up of a white kitchen grater with a yellow handle, showing a mesh interior and a black arrow pointing to a textured surface (no text or symbols visible)natural_image
Hand holding a cylindrical device with black and white components, showing rotational motion arrows (no text or symbols)natural_image
Hand pouring liquid from a black and white container into a glass (no text or symbols visible)natural_image
Hand pouring liquid into a stainless steel kettle (no text or symbols visible)
natural_image
Hand holding a cup of chopped nuts, no text or symbols visible
natural_image
Close-up of hands holding a metallic cylindrical object with a curved arrow indicating rotation (no text or symbols visible)
natural_image
Close-up of a metallic kettle with a glass lid, no visible text or symbols
text_image
HOT RAWnatural_image
Hand pouring liquid into a stainless steel kettle (no text or symbols visible)natural_image
Hand holding a metal bowl containing a mixed vegetable salad with carrots, green beans, and garlic (no text or symbols visible)natural_image
Close-up of hands holding a metallic cylindrical object with a curved arrow indicating rotation (no text or symbols visible)natural_image
Close-up of a stainless steel kettle being poured into a glass container (no text or symbols visible)CONSEJOS DEL CHEF:
MEZCLAS GRUESAS - PASO A PASO
PASO 1

natural_image
Hand pouring liquid into a stainless steel kettle (no text or symbols visible)natural_image
Top-down view of a cooking pot containing mixed vegetables and meat (no text or symbols visible)natural_image
Close-up of a white kettle being stirred with a hand mixer (no text or symbols visible)natural_image
A white ceramic kettle with a spoon pouring liquid into a bowl of sauce next to a silver teapot (no text or symbols visible)CONSEJOS DEL CHEF:
natural_image
Hand pouring liquid into a stainless steel kettle (no text or symbols visible)natural_image
Hand pouring a small orange spoon into a stainless steel kettle (no text or symbols visible)natural_image
Close-up of a white hand mixer blending liquid into a stainless steel kettle (no text or symbols visible)natural_image
Hand pouring tea from a black kettle into a small cup (no text or symbols visible)
4. INSTRUCCIONES DE USO
TOFU SUAVE CON SB-132 - PASO A PASO
natural_image
Close-up of a hand holding a white plastic container with a black arrow pointing to a dotted line (no text or symbols visible)
natural_image
Close-up of hands holding a transparent plastic blender with black and white casing, showing black and white rotation arrows (no text or symbols)natural_image
Top-down view of a kitchen setup with plates, bowls, and dried fruit on a white surface (no text or symbols visible)Connect with the
#healthtribe
Post & share your favorite Soyabella recipes and learn from other Soyabella fans worldwide on our social channels.
Follow us @tribestlife

text_image
QR code with central Facebook logo, likely for digital link or paymentScan or visit: facebook.com/tribestlife

text_image
QR code with a central logo, likely linking to a social media or digital content platform.Scan or visit: instagram.com/tribestlife

text_image
QR code with a red YouTube logo in the center, likely linking to a digital service or website.Scan or visit: youtube.com/tribestlife

natural_image
Bowl of purevegan food with colorfulberries and a red-rimmed fruit, no visible text or symbols on the main subject.
text_image
@thehealthyhaff @jonny_juicerFind easy, delicious recipes for your Soyabella!
Use your phone's camera to scan the QR codes below.

text_image
QR code image containing encoded data, no visible human-readable textCreate Plant-Based Beverages from a variety of nuts, seeds, and grains.
Scan or visit:
tribest.com/plant-milk

text_image
QR code image containing encoded data, no visible human-readable textCheck out Chef Jenny Ross' favorite recipes, featuring Tribest Tools for Living.
Scan or visit:
tribest.com/recipes
natural_image
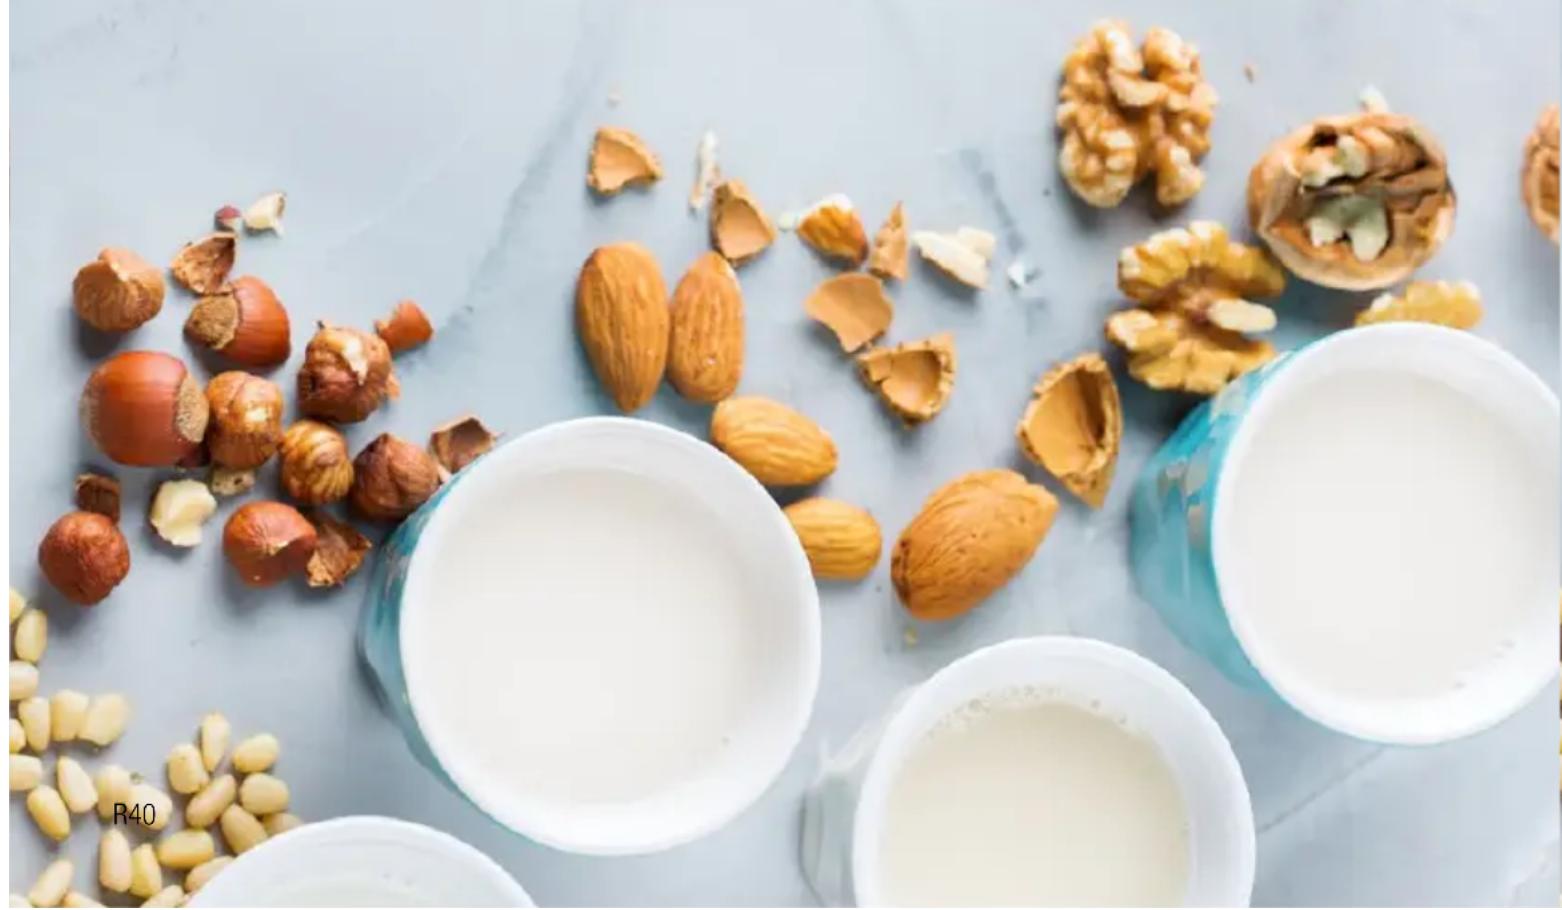
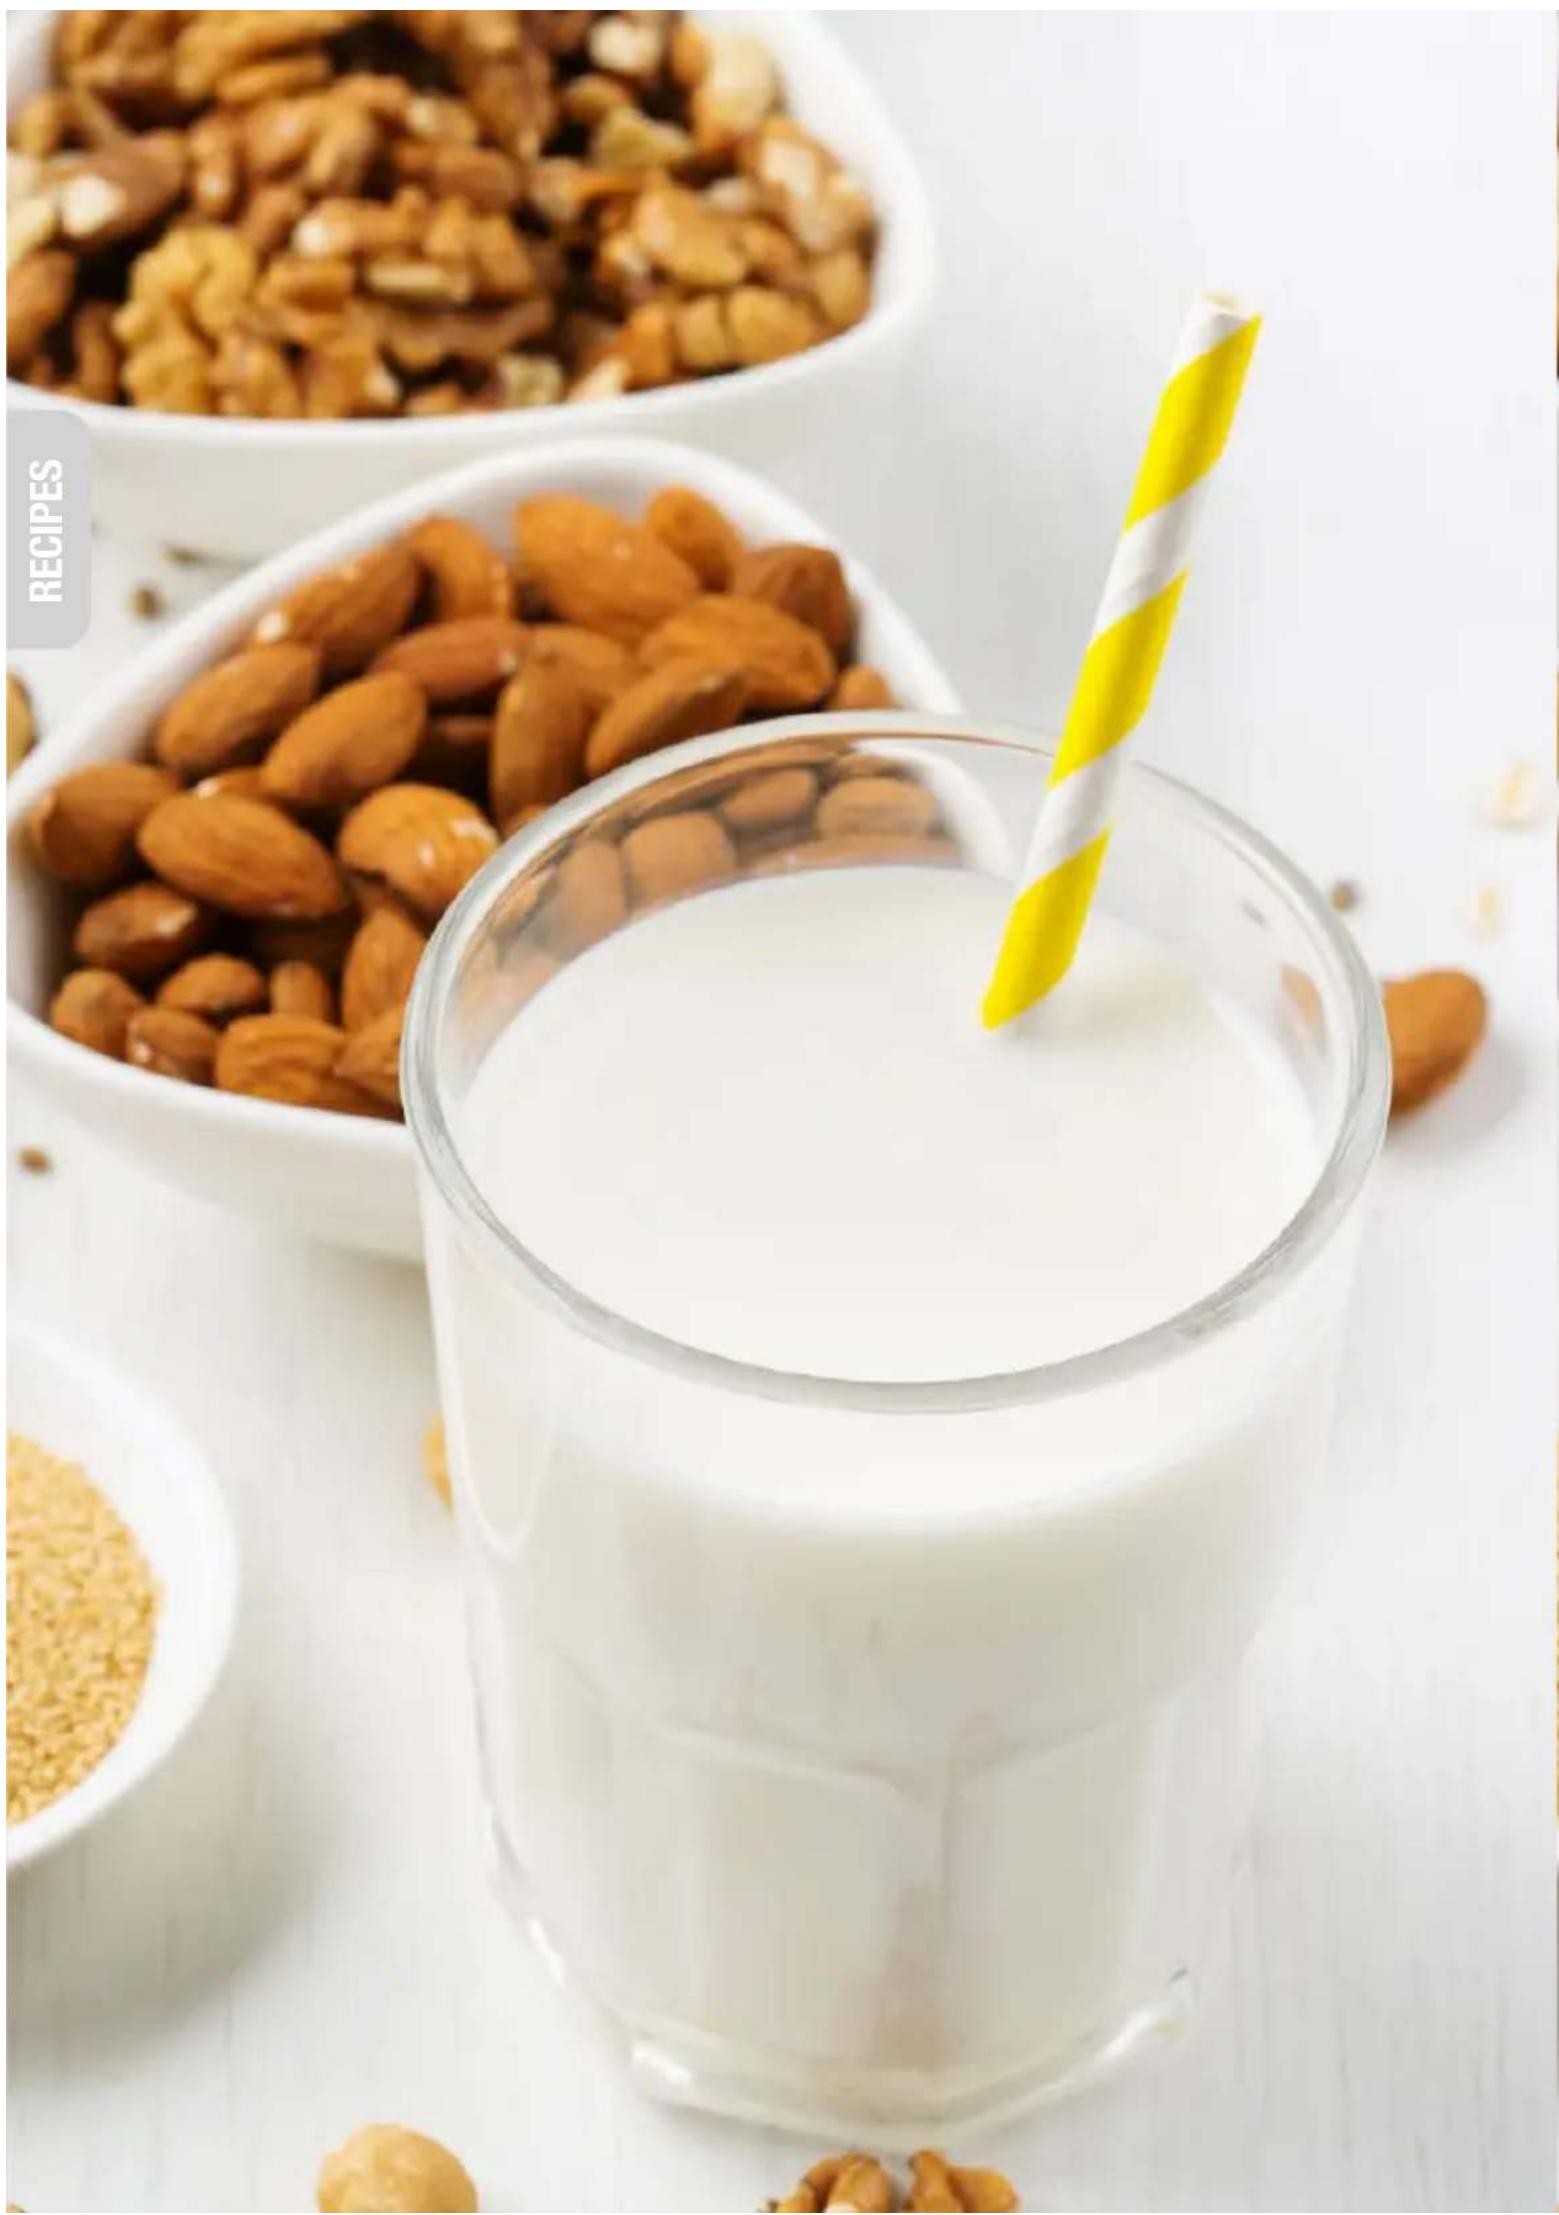
Top-down view of scattered nuts and halved fruits on a white surface, with two cups filled with milk (no text or symbols visible)Tribest®
Soyabella
Plant-Based Beverage Maker
40+ Recipes

natural_image
Close-up of a bowl of soup with vegetables and herbs in broth (no text or symbols visible)
natural_image
Bowl of orange creamy soup garnished with chopped green herbs and chili oil, with a bowl of raw vegetables in the background (no text or symbols visible)
natural_image
A bowl of fresh salad with lettuce, tofu cubes, and carrots, served with chopsticks and a small bowl of diced tofu (no text or symbols visible)
natural_image
Top-down view of various colorful powders and spices in white bowls on a textured surface (no text or labels visible)
natural_image
Glass of milk with a yellow straw, surrounded by scattered nuts and bowls of beans (no text or symbols visible)
natural_image
Top-down view of a tea set with pink flower petals, two cups of milk and a yellow teapot, surrounded by dried flowers and herbs (no text or symbols visible)Tribest Soyabella
Plant-Based Beverage Maker
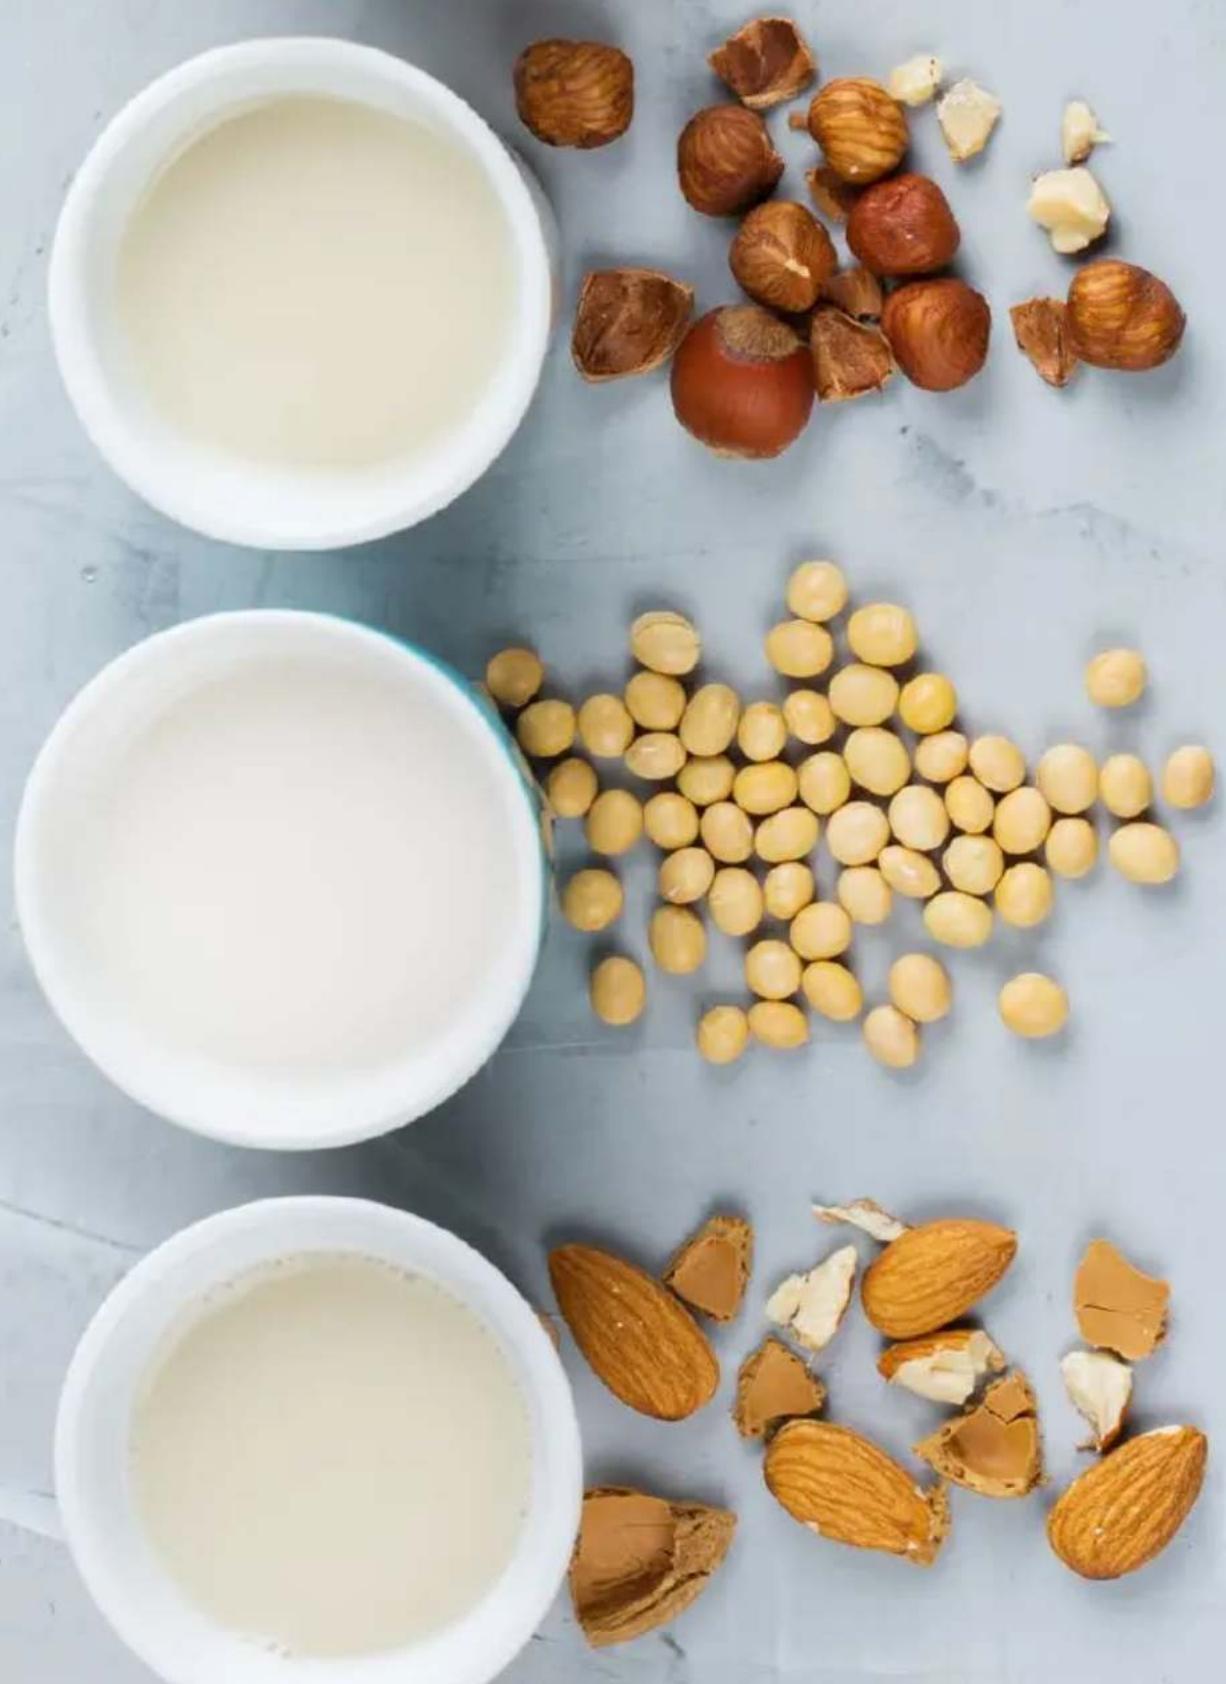
natural_image
Top-down view of various fruits and dairy products on a white surface, including nuts, halos, and beans (no text or labels visible)TABLE OF CONTENTS
RAW BEVERAGES
R4 - R9
Almond Milk / p. R6
Macadamia Coconut Milk / p. R6
Cinnamon Brazil Nut Milk / p. R7
Plant Milk Kefir / p. R7
Superfood Milk / p. R8
Raw Sprouted Grain Milk / p. R8
Pumpkin Seed Milk / p. R9
Chocolate Mint Milk / p. R9
HEATED BEVERAGES
R10 - R15
Soymilk / p. R12
Rice Milk / p. R12
Buckwheat Milk / p. R13
Oat Milk / p. R13
Quinoa Milk / p. R14
Chocolate Milk / p.R14
Sweet Horchata Milk / p. R15
Tiger Nut Milk / p. R15
HEATED SOUPS
R16 - R21
Miso Soup / p. R18
Ramen Broth / p. R18
Vegetable Stock / p. R19
Kale and White Bean Soup / p. R19
Tomato Soup / p. R20
Energy Soup / p. R20
Seaweed Soup / p. R21
Shiitake Soup / p. R21
CHUNKY BLENDS
R22 - R27
Split Pea Soup / p. R24
Lentil Soup / p. R24
Butternut Squash Soup / p. R25
5 Vegetable Soup / p. R25
Broccoli and Potato Soup / p. R26
Baby Food / p. R26
Berry Pie Filling / p. R27
Apple Sauce / p. R27
TEAS AND TONICS
R28 - R32
Golden Milk / p. R30
Chai Tea / p. R30
Mushroom Tonic / p. R31
Mint Tea Tonic / p. R31
Energy Tonic / p. R32
Rose Milk Tonic / p. R32
SOFT TOFU
R33 - R35
Herbed Tofu / p. R34
Almond Tofu / p. R34
Garbanzo Tofu / p. R35
Protein Plus Tofu / p. R35
DRY FOODS
R36 - R39
Superfood Smoothie Mix / p. R38
Juice Pulp Leftovers / p. R38
Citrus / p. R39
Omega Pulse / p. R39
natural_image
Glass of milk with a yellow straw, surrounded by scattered nuts and bowls of beans (no text or symbols visible)Follow these steps for making raw vegan milks:
- Add nuts, grains, or seeds to the FINE SCREEN and attach to the MOTOR HEAD securely. Ensure the fitting is secure to prevent machine damage while blending.
- Add water to the CARAFE.
- Press RAW button and allow to process. Check the milk to see if the desired consistency has been reached by lifting the MOTOR HEAD to look inside the carafe. Run the RAW cycle up to 2 more times to achieve creamier milk per your own preference.
- Remove SCREEN and pulp.
- Optional: Add additional ingredients.
- Replace MOTOR HEAD and press RAW button to mix in additional ingredients.
- Pour out milk and enjoy fresh!
- Store remaining milk in the refrigerator for up to 5 days.
Turn this milk into a creamer:
Reduce the amount of water by half. Add water to the DRIP CUP and place CUP inside the CARAFE. Follow the remaining steps on this page. When making creamer using this method, it is common for some of the liquid to splash into the CARAFE.
natural_image
Glass jar of milk with nut and walnuts, no text or symbols visible on the main subjectMakes 3 cups
Additional optional ingredients:
The following ingredients are nice flavor additions and can also be added for different results in STEP 5: 1-2 Tbsp raw cacao powder, 2 drops mint essential oil (food-grade), 1 tsp cinnamon, 1 tsp pumpkin pie spice, 1 tsp spirulina
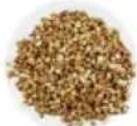
ALMOND MILK

3 cups water

1 cup soaked almonds

1 Tbsp raw agave nectar, coconut nectar, or other sweetener

14 tsp sea salt
natural_image
Two glass bottles of milk and a plate of nuts on a white plate (no text or symbols visible)Makes 3 cups
MACADAMIA COCONUT MILK

3 cups water

1 cup soaked macadamia nuts

12 cup soaked coconut shreds

1 Tbsp raw agave nectar, coconut nectar, or other sweetener

14 tsp sea salt
natural_image
Glass of light-colored beverage with cinnamon stick in a straw (no text or symbols visible)Makes 3 cups
CINNAMON BRAZIL NUT MILK

3 cups water

1 cup soaked
brazil nuts

1 Tbsp raw agave nectar, coconut nectar, or other sweetener

1 tsp cinnamon

14 tsp sea salt
natural_image
Glass jar with a straw and tied rope, no visible text or symbolsMakes 2 ½ cups
PLANT MILK KEFIR

2 cups
coconut water

1 cup soaked
nut, seed or grain
of choice

1 cup water with kefir grains added (do this before beginning this recipe)*

4 Tbsp raw agave nectar, coconut nectar, or other sweetener

14 tsp sea salt
* Water kefir grains commonly must be added to 1 cup of water with 14 cup cane sugar to begin the fermentation. Follow the instructions for this portion that accompany your grains and then move into the steps for making vegan kefir in the Soyabella.
Allow to ferment for up to 3 days following the instructions on your kefir grains before refrigeration.
natural_image
Glass of light blue beverage with a straw, no text or symbols visibleMakes 3 cups
SUPERFOOD MILK

3 cups water

1 cup soaked nut of choice like cashews, almonds, pili nuts, or pistachios
14 cup
hemp seeds

2 Tbsp raw agave nectar, coconut nectar, or other sweetener
1 tsp
spirulina
1 tsp maca powder or lucama*

14 tsp sea salt

4 drops mint
essential oil (optional)
*Do not use maca when serving to children
natural_image
Glass of milk against a plain background (no text or symbols visible)Makes 3 cups
RAW SPROUTED GRAIN MILK

3 cups water
1 cup soaked grains like buckwheat groats, oats, rice, or rye

2 Tbsp raw agave nectar, coconut nectar, or other sweetener

1 tsp vanilla flavoring

14 tsp sea salt
natural_image
Glass of light green beverage with a wooden straw, no visible text or symbolsMakes 3 cups
PUMPKIN SEED MILK

3 cups water
1 ¼ cups
soaked pumpkin
seeds

1 Tbsp raw agave nectar, coconut nectar, or other sweetener

14 tsp sea salt
natural_image
Glass jar filled with chocolate and a red-and-white striped straw (no text or symbols visible)Makes 3 cups
CHOCOLATE MINT MILK

3 cups water

1 cup soaked almonds, cashews, or macadamia nuts

3 Tbsp
cacao
powder


2 Tbsp raw agave nectar, coconut nectar, or other sweetener
1 tsp vanilla flavoring

12 tsp cinnamon

½ tsp mint flavoring or 4 drops mint essential oil

14 tsp sea salt
2 tsp spirulina
(optional)
• 750 ml d'eau
natural_image
Bowl of white creamy dessert with cinnamon stick and star anise, placed on a wooden table with a spoon (no text or symbols visible)Follow these steps for making heated vegan milks:
- Add nuts, grains, beans, seeds, or other base ingredients depending on the recipe to the FINE SCREEN. Attach to the MOTOR HEAD securely. Ensure the fitting is secure to prevent machine damage while blending.
- Add 4 cups of water + any sweetener, flavoring, or spices to the CARAFE. Place the MOTOR HEAD over the CARAFE.
- Press 🔥 button and allow to process. The cycle can take up to 25 minutes to heat, blend, and finish.
- Remove MOTOR HEAD to check consistency. Press RAW button 1-2 more times to blend your milk more.
- Wait at least 15 minutes for the machine to cool.
- Use the DRIP CUP to remove the SCREEN.
- Add any additional ingredients for flavor to the CARAFE and place the MOTOR HEAD back on the CARAFE. (Skip to STEP 9 if you have no additional ingredients.)
- Press RAW button to combine any additional ingredients.
- Pour out the milk and enjoy fresh.
-
Store remaining milk in the refrigerator for up to 7 days.
-
Ajoutez les fruits à coques, les céréales, les haricots, les graines et tous les autres ingrédients de base selon la recette choisie dans le FILTRE FIN et fixez-le bien sur la TÊTE MOTORISÉE. Vérifiez que les deux éléments sont bien assemblés pour éviter d'endommager l'appareil pendant le mixage.
- Ajoutez 1 l d'eau et l'édulcorant choisi, les arômes et les épices dans le CARAFE. Placez la TÊTE MOTORISÉE sur le CARAFE.
- Appuyez sur le bouton HOT et attendez jusqu'à la fin du cycle. Celui-ci peut durer jusqu'à 25 minutes (chauffage, mixage et fin).
- Retirez la TÊTE MOTORISÉE pour vérifier la consistance. Appuyez sur le bouton RAW 1 ou 2 fois supplémentaires pour mixer un peu plus la boisson.
- Patientez au moins 15 minutes pour laisser l'appareil refroidir.
- Utilisez le COUPELLE D'ÉGOUTTEMENT pour retirer le FILTRE.
- Ajoutez les ingrédients aromatisants supplémentaires dans le CARAFE et replacez la TÊTE MOTORISÉE sur le CARAFE. (Passez à l'ÉTAPE 9 si vous ne souhaitez pas ajouter d'ingrédients supplémentaires)
- Appuyez sur le bouton RAW pour incorporer les ingrédients supplémentaires.
- Versez la boisson dans un verre et dégustez-la immédiatement.
-
Conservez la boisson restante au réfrigérateur pendant 7 jours maximum.
-
Geben Sie Nüsse, Körner oder Samen in das FEINSIEB und befestigen Sie es sicher am MOTORKOPF. Vergewissern Sie sich, dass das Sieb korrekt eingesetzt ist, um eventuelle Geräteschäden beim Mixen zu vermeiden.
- Füllen Sie 1 L Wasser und Süßstoff, Aromen oder Gewürze in die KANNE. Setzen Sie den MOTORKOPF auf die KANNE.
- Drücken Sie die Taste HOT und beginnen Sie den Verarbeitungsvorgang. Der Vorgang kann für das Erhitzen, die Mischung und die Fertigstellung bis zu 25 Minuten dauern.
- Entfernen Sie den MOTORKOPF, um die Konsistenz zu überprüfen. Betätigen Sie die RAW-Taste weitere 1-2 Mal, damit Ihre Milch zusätzlich vermischt wird.
- Lassen Sie das Gerät mindestens 15 Minuten abkühlen.
- Verwenden Sie die ABTROPFSCHALE, um das SIEB zu entfernen.
- Fügen Sie der KANNE eventuell ergänzende Zutaten zum Verfeinern hinzu und setzen Sie den MOTORKOPF wieder auf die KANNE. (Fahren Sie mit SCHRITT 9 fort, wenn Sie keine weiteren Zutaten haben.)
- Drücken Sie die Taste RAW, um alle weiteren Zutaten zu vermischen.
- Servieren und genießen Sie die Milch ganz frisch.
-
Die restliche Milch kann bis zu 7 Tage im Kühlschrank aufbewahrt werden.
-
Añada al TAMIZ FINO nueces, granos, semillas u otros ingredientes básicos dependiendo de la receta. Ac óplelo bien al CABEZAL DEL MOTOR. Asegúrese de que esté bien acoplado para evitar daños en el aparato al batir.
- Añada 1 l de agua con cualquier edulcorante, aroma o especias en la JARRA. Coloque el CABEZAL DEL MOTOR sobre la JARRA.
- Oprima el botón HOT y ponga el ciclo en marcha. El ciclo puede tardar hasta 25 minutos en calentar, batir y finalizar.
- Retire el CABEZAL DEL MOTOR para controlar la consistencia. Oprima el botón RAW 1 o 2 veces más para batir más la leche.
- Espere como mínimo 15 minutos hasta que se enfríe el aparato.
- Utilice la TAZA DE GOTEO para retirar el TAMIZ.
- Añada en la JARRA cualquier ingrediente adicional para dar sabor y coloque de nuevo el CABEZAL DEL MOTOR en la JARRA. (Pase al PASO 9 si no va a añadir ningún otro ingrediente)
- Oprima el botón RAW para mezclar cualquier ingrediente adicional.
- Vierta la leche y disfrute de la frescura.
- Guarde la leche restante en el frigorífico por un máximo de 7 días.

natural_image
Glass of soy milk with scattered soybeans on a wooden scoop, labeled 'RECIPIES' in the top-left corner (no other text or symbols)Makes 4 cups
SOYMILK

12 cup raw soybeans

4 cups water

1 tsp vanilla extract (optional)

1 tsp cinnamon (optional)

14 tsp sea salt (optional)
natural_image
Glass of milk on a plain background (no text or symbols visible)Makes 4 cups
*Depending on the type of rice, the texture and density of your milk may vary. Many people enjoy running the RAW cycle 2-3 times to create a thinner consistency for their rice milk before refrigeration.
RICE MILK
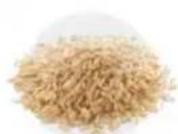
3/4 cup raw rice like brown rice, basmati rice, red rice, or other long grain rices*

4 cups
water

1 tsp vanilla extract (optional)

1 tsp
cinnamon
(optional)

14 tsp sea salt (optional)
natural_image
Glass bottle of soy milk with scattered grains and a wooden spoon in the background (no text or symbols visible)Makes 4 cups
BUCKWHEAT MILK
1 cup raw
buckwheat groats,
skin removed
(dehulled)

4 cups water

1 tsp vanilla extract (optional)

1 tsp
cinnamon
(optional)
14 tsp pumpkin pie spice (optional)

14 tsp sea salt (optional)
natural_image
Glass jar filled with milk and a wooden spoon holding rolled oats, labeled 'Makes 4 cups' (no other text or symbols)OAT MILK

1 cup raw
organic steel
cut oats

4 cups water

1 tsp vanilla extract (optional)

1 tsp
cinnamon
(optional)

14 tsp sea salt (optional)
natural_image
Glass jar filled with light-colored beverage, tied with a string of brown twine (no text or symbols visible)Makes 4 cups
QUINOA MILK

1 cup
pre-soaked
quinoa

4 cups water

1 tsp
cinnamon
(optional)

14 tsp sea salt (optional)

1 cup
buckwheat,
quinoa or oats

4 cups water

½ cup raw agave nectar, honey, or maple syrup
2-4 Tbsp
raw cocoa
powder

1 tsp
cinnamon
(optional)

14 tsp sea salt (optional)
natural_image
Glass of light-colored beverage with ice cubes and a mint leaf on top (no text or symbols visible)Makes 4 cups
SWEET HORCHATA
12 cup
pre-soaked long
grain white rice
12 cup almonds

14 cup
coconut shreds

4 cups
water

14 cup raw
sweetener of choice
like agave, coconut,
or maple syrup

1 tsp
cinnamon

14 tsp sea salt
1 cup
tiger nuts, raw

4 cups water

1 tsp cinnamon

14 tsp sea salt
natural_image
Close-up of a bowl of soup with vegetables and herbs, served in a white square dish (no text or symbols visible)Follow these steps for making heated soups:
- Place all ingredients into the SCREEN designated in the recipe and attach the SCREEN securely to the MOTOR HEAD.
- Add water into the CARAFE and place the MOTOR HEAD over the CARAFE. Press ⏻ button. Allow the recipe to process.
- Pour out soup into a cup while hot and enjoy fresh. Be careful to touch only the handle when transferring hot broths. Some soups will be nice with the initial ingredients added into the broth and processes. Each recipe will have this added suggestion. When this is suggested follow the steps below.
- Skip STEP 3 and instead let cool for at least 15 minutes.
- Using the DRIP CUP remove the SCREEN and empty the ingredients back into the CARAFE.
- Press RAW button 2 times.
- Pour out soup into a bowl and enjoy. Be careful to touch only the handle when transferring hot broths.
-
Follow each recipe for ideas and suggestions on how to garnish each soup before serving!
-
Placez dans le FILTRE tous les ingrédients listés dans la recette et fixez bien le FILTRE sur la TÊTE MOTORISÉE.
- Versez l'eau dans le CARAFE et placez la TÊTE MOTORISÉE sur le CARAFE. Appuyez sur le bouton 🔊. Laissez l'appareil suivre son cycle.
- Versez la soupe dans une tasse pendant qu'elle est encore chaude et dégustez-la immédiatement. Veillez à ne toucher que la poignée lorsque vous transférez des liquides chauds. Pour certaines soupes, vous obtiendrez un meilleur goût si vous ajoutez les ingrédients de base dans le bouillon avant de lancer le cycle. Cette suggestion concerne toutes les recettes. Si votre recette comporte cette suggestion, suivez les étapes ci-dessous.
- Passez l'ÉTAPE 3 et laissez refroidir pendant au moins 15 minutes.
- Utilisez le COUPELLE D'ÉGOUTTEMENT pour retirer le FILTRE et replacez les ingrédients dans le CARAFE.
- Appuyez sur le bouton RAW 2 fois.
- Versez la soupe dans un bol et dégustez-la. Veillez à ne toucher que la poignée lorsque vous transférez des liquides chauds.
-
Suivez chaque recette pour y trouver des idées et des suggestions sur la manière de garnir vos soupes avant de les servir !
-
Geben Sie alle Zutaten in das im Rezept vorgegebene SIEB und befestigen Sie das SIEB sicher am MOTORKOPF.
- Füllen Sie Wasser in die KANNE und setzen Sie den MOTORKOPF auf die KANNE. Drücken Sie die Taste 🔊. Beginnen Sie nun mit der Verarbeitung des Rezepts.
- Die Suppe noch heiß in eine Tasse servieren und ganz frisch genießen. Achten Sie darauf, dass Sie beim Umfüllen von heißen Brühen nur den Griff berühren. Einige Suppen werden mit den Anfangszutaten, die in die Brühe hinzugefügt und verarbeitet werden, richtig lecker sein. Jedes Rezept enthält diese zusätzliche Anregung. Wenn dies empfohlen wird, folgen Sie den nachstehenden Anweisungen.
- Überspringen Sie SCHRITT 3 und kühlen Sie sie stattdessen für mindestens 15 Minuten ab.
- Entfernen Sie mithilfe der ABTROPFSCHALE das SIEB und geben Sie die Zutaten wieder in die KANNE.
- Drücken Sie 2 Mal die Taste RAW
- Servieren Sie die Suppe in eine Schüssel und genießen Sie diese. Achten Sie darauf, dass Sie beim Umfüllen von heißen Brühen nur den Griff berühren.
-
Sie finden in jedem Rezept Anregungen und Empfehlungen, wie Sie jede Suppe vor dem Servieren noch zusätzlich garnieren können!
-
Coloque todos los ingredientes en el TAMIZ designado en la receta y acóplelo bien al CABEZAL DEL MOTOR.
- Añada el agua en la JARRA y coloque el CABEZAL DEL MOTOR sobre la JARRA. Oprima el botón 🔊. Deje batir la mezcla.
- Sirva sopa caliente en una taza y disfrute de la frescura. Tenga cuidado de tocar únicamente el mango al servir caldo caliente. Algunas sopas saldrán bien con los ingredientes añadidos al caldo y batidos. Esta sugerencia adicional sirve para cualquier receta. Si va a seguir esta sugerencia, siga los siguientes pasos.
- Omita el PASO 3 y en su lugar deje enfriar por un mínimo de 15 minutos.
- Utilice la TAZA DE GOTEO para retirar el TAMIZ y vacíe los ingredientes de nuevo en la JARRA.
- Oprima el botón RAW 2 veces.
- Vierta la copa en un bol y disfrute. Tenga cuidado y toque solo el mango al servir caldo caliente.
- ¡Siga cada receta para obtener ideas y sugerencias sobre cómo adornar cada sopa antes de servirla!

natural_image
Bowl of tofu and green peas soup, no visible text or symbolsMakes 3 cups
You may wish to garnish this bowl of miso with cubed tofu, green onions or other sea vegetables.

natural_image
Bowl of noodle soup with vegetables and meat pieces, no visible text or symbolsMakes 4 cups
MISO SOUP
See instructions on p. R17. Use the COARSE SCREEN.
natural_image
Bowl of creamy soup with herbs and fresh vegetables in the background (no text or symbols visible)Makes 4 cups
VEGETABLE STOCK
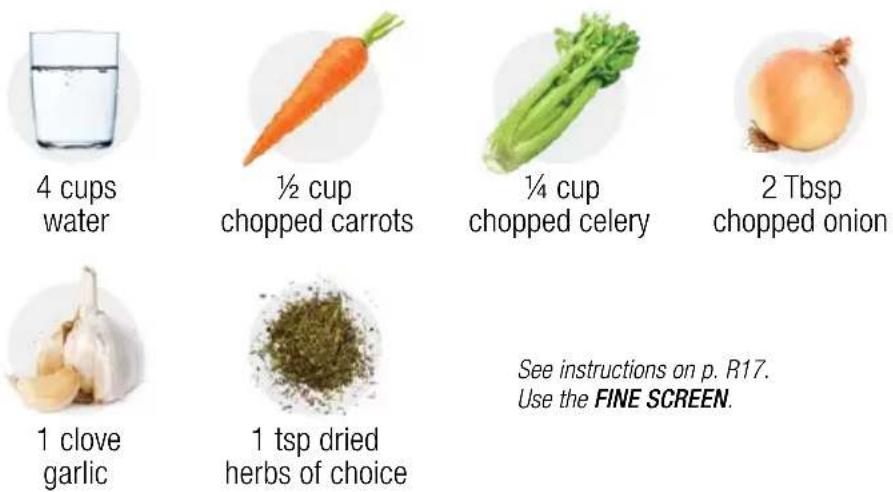
natural_image
Close-up of a colorful vegetable soup dish in broth, garnished with herbs and tofu (no visible text or symbols)Makes 6 cups
See instructions on p. R17. Place celery, carrots, onion, garlic, and salt into the FINE SCREEN. Add water, kale, and beans to the CARAFE.
natural_image
Close-up of a bowl of orange sauce with white drizzle and rosemary garnish, no visible text or symbolsMakes 3 cups
See instructions on p. R17.
Use the FINE SCREEN.
natural_image
Close-up of a glass jar filled with amber-colored tea, showing clear broth and yellowish liquid (no text or symbols visible)Makes 3 cups
See instructions on p. R17.
Use the COARSE SCREEN.
*This recipe is a broth style soup. If you wish to enjoy a thicker broth, try using 2 cups unsweetened rice, almond, or soy milk + 2 cups water.

2 Tbsp diced yellow onion

1 Tbsp
grated ginger

12 tsp sea salt
*This recipe is a broth style soup. If you wish to enjoy a thicker broth, try using 2 cups water + 1 cup coconut milk.
natural_image
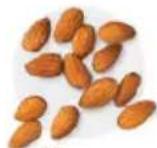
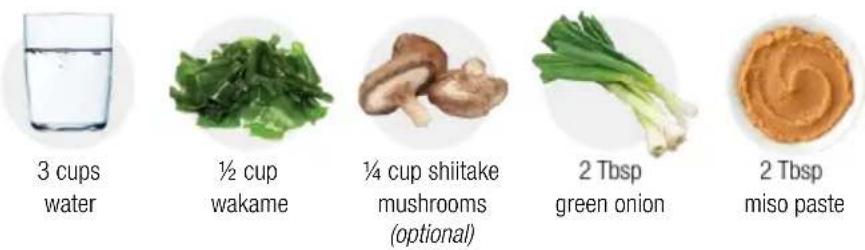
Close-up of a bowl of soup with seaweed, tofu, and mushrooms (no text or symbols visible)Makes 4 cups
See instructions on p. R17.
Place celery, dried mushrooms, garlic, and ginger into the FINE SCREEN.
Add water and sea vegetables to the CARAFE.
natural_image
Close-up of a stewed dish with sliced mushrooms, green vegetables, and broth (no text or symbols visible)Makes 4 cups
See instructions on p. R17.
Use the FINE SCREEN.

12 cup fresh cremini mushrooms, diced
2 cloves
garlic
*This recipe is a broth style soup. If you wish to enjoy a thicker broth, try using 2 cups unsweetened rice or soymilk + 2 cups water.
natural_image
Bowl of orange creamy soup with swirl cream and herbs, accompanied by a bowl of saquins and small white food items (no text or symbols visible)CHUNKY BLENDS
Follow these steps for making chunky blends:
- Add all ingredients to the CARAFE. Place the MOTOR HEAD over the carafe securely.
- Press the ⏻ button and allow the cycle to process.
-
Once finished, remove the MOTOR HEAD and pour out your hot soup. Remember to use the handle of the CARAFE with care. The rest of the machine will still be hot.
-
Placez tous les ingrédients dans le CARAFE. Fixez bien la TÊTE MOTORISÉE sur le CARAFE.
- Appuyez sur le bouton et laissez l'appareil suivre son cycle.
-
Une fois qu'il a terminé, retirez la TÊTE MOTORISÉE et versez votre soupe chaude dans une tasse. Pensez à utiliser la poignée du CARAFE avec précaution, car le reste de l'appareil sera encore très chaud.
-
1Geben Sie alle Zutaten in die KANNE. Setzen Sie den MOTORKOPF sicher auf die KANNE.
- Drücken Sie die Taste und beginnen Sie den Verarbeitungsvorgang.
-
Sobald der Vorgang beendet ist, entfernen Sie den MOTORKOPF und servieren Sie Ihre heiße Suppe. Achten Sie darauf, den Griff der KANNE vorsichtig anzufassen. Die restlichen Komponenten der Maschine könnten noch heiß sein.
-
Añada todos los ingredientes a la JARRA. Coloque el CABEZAL DEL MOTOR sobre la JARRA con firmeza.
- Oprima el botón 🔒 para poner en funcionamiento el proceso.
- Una vez acabado, retire el CABEZAL DEL MOTOR y sirva la sopa caliente. Recuerde que debe utilizar el mango de la JARRA con cuidado. El resto del aparato seguirá estando caliente.
natural_image
Bowl of yellow soup garnished with green herbs, placed on a white surface with scattered green beans in the background (no text or symbols visible)Makes 4 cups
SPLIT PEA SOUP

2 ½ cups water

1 cup green
split peas, dried

12 cup
diced carrots

2 Tbsp chopped onions
1 Tbsp minced garlic

1 tsp
sea salt
12 tsp black pepper
- 600 ml d'eau
• 250 ml de pois cassés verts, secs
• 125 ml de carottes coupées en morceaux
• 30 ml d'oignon émincé
• 15 ml d'ail émincé - 5 ml de sel de mer
-
2 ml de poivre noir
-
600 ml Wasser
• 250 ml grüne Spalterbsen, getrocknet
• 125 ml gewürfelte Karotten
• 30 ml gehackte Zwiebeln
• 15 ml fein gehackter Knoblauch -
5 ml Meersalz
• 2 ml schwarzer Pfeffer -
600 ml de agua
- 250 ml de guisantes verdes deshidratados
• 125 ml de zanahorias troceadas
• 2 cucharadas soperas de cebolla picada - 1 cucharada sopera de ajo triturado
• 1 cucharadita de sal gruesa - ½ cucharada sopera de pimienta negra

natural_image
Bowl of creamy orange soup garnished with chopped green herbs, placed on a wooden table with scattered beans and herbs in the background (no text or symbols visible)Makes 4 cups
LENTIL SOUP

2 ½ cups water
1 ½ cups
brown lentils

12 cup
diced carrots

2 Tbsp
chopped onions
1 Tbsp minced garlic

1 tsp
sea salt

12 tsp black pepper
- 600 ml d'eau
• 375 ml de lentilles - 125 ml de carottes coupées en morceaux
• 30 ml d'oignon émincé
• 15 ml d'ail émincé - 5 ml de sel de mer
-
2 ml de poivre noir
-
600 ml Wasser
• 375 ml braune Linsen
• 125 ml gewürfelte Karotten
• 30 ml gehackte Zwiebeln
• 15 ml gehackter Knoblauch -
5 ml Meersalz
• 2 ml schwarzer Pfeffer -
600 ml de agua
• 375 ml de lentejas integrales
• 125 ml de zanahorias troceadas
• 2 cucharadas soperas de cebolla picada - 1 cucharada sopera de ajo picado
• 1 cucharadita de sal gruesa - ½ cucharada sopera de pimienta negra

natural_image
Bowl of creamy orange soup garnished with parsley and cream, served on a textured surface (no text or symbols visible)Makes 4 cups
Check the texture after recipe has finished. If you prefer a more blended texture, press RAW button up to 2 times to further emulsify the soup.

natural_image
Close-up of a bowl of creamy soup with visible vegetable pieces and a spoon (no text or symbols)Makes 4 cups
BUTTERNUT SQUASH SOUP

2 cups water

1 ½ cups cubed
butternut squash

2 Tbsp raw sweetener

2 Tbsp olive oil
1 Tbsp dried
rosemary
2 cloves garlic,
chopped

1 tsp
sea salt
- 500 ml d'eau
• 375 ml de doubeurre/butternut coupé en morceaux - 30 ml de l'édulcorant cru de votre choix
• 30 ml d'huile d'olive
• 15 ml de romarin séché
• 2 gousses d'ail émincées -
5 ml de sel de mer
-
500 ml Wasser
• 375 ml gewürfelter Butter- nusskürbis
• 30 ml roher Süßstoff nach Wahl
• 30 ml Olivenöl
• 15 ml getrockneter Rosmarin - 2 fein gehackte Knoblauchzehen
-
5 ml Meersalz
-
500 ml de agua
• 375 ml de calabaza troceada
• 2 cucharadas soperas de
edulcorante crudo a elegir - 2 cucharadas soperas de aceite de oliva
- 1 cucharada sopera de romero deshidratado
- 2 dientes de ajo triturados
• 1 cucharadita de sal gruesa
5 VEGETABLE SOUP

2 cups water

1 cup
chopped celery

1 cup
diced carrots

12 cup diced tomato

12 cup chopped mushrooms

12 cup diced onions
2 cloves
garlic
2 Tbsp dried
herbs of choice
1 tsp
sea salt

2 Tbsp olive oil (optional)
- 500 ml d'eau
• 250 ml de céleri coupé en morceaux - 250 ml de carottes coupées en morceaux
- 125 ml de tomates coupées en morceaux
• 125 ml de champignons coupés en morceaux
• 125 ml d'oignon coupé en morceaux
• 2 gousses d'ail -
30 ml des herbes séchées de votre choix
• 5 ml de sel de mer
• 30 ml d'huile d'olive (facultatif) -
500 ml Wasser
• 250 ml gehackter Sellerie
• 250 ml gewürfelte Karotten
• 125 ml gewürfelte Tomate
• 125 ml gehackte Speisepilze
• 125 ml gewürfelte Zwiebeln
• 2 Knoblauchzehen - 30 ml getrocknete Kräuter nach Wahl
-
5 ml Meersalz
• 30 ml Olivenöl (wahlweise) -
500 ml de agua
• 250 ml de apio troceado - 250 ml de zananorlas
troceadas
• 125 ml de tomates troceados - 125 ml de champinones troceados
- 125 ml de cebolla troceada
- 2 dientes de ajo
- 2 cucharadas soperas de hier- bas deshidratadas a elegir
- 1 cucharada sopera de sal gruesa
• 2 cucharadas soperas de aceite de oliva (opcional)

natural_image
Bowl of creamy soup with broccoli and green onions, patterned ceramic bowl (no text or symbols visible)Makes 4 cups
BROCCOLI AND POTATO SOUP

1 ½ cups
water

1 cup almond or other unsweetened vegan milk

1 cup broccoli,
chopped

1 cup cooked
diced potatoes
1 Tbsp dried
spices of your
choice

1 tsp
sea salt
12 tsp black pepper
natural_image
Close-up of a bowl of orange-colored food with a spoon, no visible text or symbolsMakes 3 cups
For a creamier blend let cool, then press RAW button for 3-4 cycles.
BABY FOOD

2 cups water

2 cups diced food of choice (sweet potato-skinned, zucchini, yellow squash, butternut squash, peas, or a combination of each)

12 tsp sea salt
- 500 ml d'eau
- 500 ml de l'aliment de votre choix coupé en morceaux (patate douce épluchée, courgette, courge jaune, doubeurre/butternut, pois ou un mélange de tous ces aliments)
-
2 ml de sel de mer
-
500 ml Wasser
- 500 ml gewürfelte Nahrungsmittel Ihrer Wahl (Süßkartoffeln mit Schale, Zucchini, gelber Kürbis, Butternusskürbis, Erbsen oder eine Kombination aus allen)
-
2 ml Meersalz
-
500 ml de agua
- 500 ml de alimentos a elegir troceados (boniatos pelados, calabacín, calabaza amarilla, calabacín, guisantes o una mezcla de cada uno)
- ½ cucharada sopera de sal gruesa

natural_image
Close-up of a slice of red fruit and chocolate chip on a white plate with a fork, garnished with mint leaves (no text or symbols visible)Makes 3-4 cups
BERRY PIE FILLING

2 cups
boysenberries,
strawberries,
raspberries, or
other berries

1 cup water

12 cup raw sweetener of choice
1 tsp
sea salt
natural_image
Close-up of a bowl of creamy food porridge with visible chunks of yellowish fruit (no text or symbols)Makes 3-4 cups
For a creamier blend let cool, then press RAW button for 3-4 cycles.
APPLE SAUCE

3 cups diced apples, skin removed

1 cup water

3 Tbsp raw
sweetener of
choice
1 tsp sea salt
natural_image
Top-down view of a tea set with colorful toppings including a pink flower bowl, yellow liquid, and a glass of milk, surrounded by herbs and decorative elements (no text or symbols visible)TEAS AND TONICS
Follow these steps for making teas and tonics:
- Add all ingredients to the CARAFE, unless otherwise specified in the recipe.
- Place the MOTOR HEAD over the CARAFE securely.
- Press the ⏻ button and allow the cycle to process.
-
Pour out the beverage and enjoy! Remember to touch only the CARAFE HANDLE as the machine itself will still be hot.
-
Placez tous les ingrédients dans le CARAFE, sauf indication contraire dans la recette.
- Fixez bien la TÊTE MOTORISÉE sur le CARAFE.
- Appuyez sur le bouton et laissez l'appareil suivre son cycle.
-
Versez la boisson dans une tasse et dégustez-la ! Pensez à ne toucher que la poignée du CARAFE, car le reste de l'appareil sera encore très chaud.
-
Geben Sie alle Zutaten in die KANNE, sofern im Rezept nicht anders angegeben.
- Setzen Sie den MOTORKOPF sicher auf die KANNE.
- Drücken Sie die Taste und beginnen Sie den Verarbeitungsvorgang.
-
Servieren Sie das Getränk und genießen Sie es! Achten Sie darauf, nur den Griff der Kanne zu berühren, da die Maschine noch heiß sein könnte.
-
Añada todos los ingredientes a la JARRA, salvo que la receta indique lo contrario.
- Coloque el CABEZAL DEL MOTOR sobre la JARRA.
- Oprima el botón de para poner el ciclo en funcionamiento.
- Vierta la bebida ¡y disfrute! Recuerde que solo debe tocar el mango de la jarra pues el resto del aparato seguirá estando caliente.

text_image
RECIPIESMakes 3 cups
GOLDEN MILK

2 cups
almond milk

1 cup
coconut milk

2 Tbsp
turmeric powder

1 Tbsp
coconut oil

1 tsp cinnamon powder
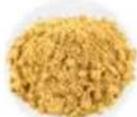
½ tsp
ginger powder
14 tsp black pepper

1 pinch
sea salt
natural_image
Cup of steamed bunsen with star anise and cinnamon sticks on a saucer (no text or symbols visible)Makes 3 cups
CHAI TEA

2 cups water

1 cup
coconut, oat, or
almond milk

3 Tbsp
raw sweetener
of choice

1 Tbsp
cinnamon
powder
1 tsp ginger powder
1 tsp nutmeg

12 tsp vanilla extract

1 pinch
sea salt
3 Tbsp loose leaf green or black tea
natural_image
White ceramic cup filled with light brown tea, placed on a wooden surface (no text or symbols visible)Makes 3 cups
MUSHROOM TONIC

2 cups water

1 cup coconut, oat, or almond milk

1 Tbsp chaga mushrooms

1 tsp reishi mushroom

1 tsp
cordyceps

1 tsp cinnamon

1 pinch
sea salt
3 Tbsp loose leaf green or black tea
natural_image
Glass of light green beverage with straw, surrounded by mint leaves and a wooden stick (no text or symbols visible)Makes 3 cups
MINT TEA TONIC

2 cups water 1 cup coconut,
oat, or almond
milk


3 Tbsp
raw sweetener of
choice

1 pinch sea salt
2 Tbsp
loose leaf mint tea

1 cup coconut, oat, or almond milk

3 Tbsp raw
sweetener of choice

1 Tbsp moringa powder or leaves
1 Tbsp matcha powder or leaves
1 tsp
ginger powder

1 pinch sea salt
natural_image
Top-down view of a glass cup filled with pink liquid and scattered pink rose petals, placed on a white plate with dried flowers in the background (no text or symbols visible)Makes 3 cups
ROSE MILK TONIC

2 cups water

1 cup coconut,
oat, or almond
milk

3 Tbsp
raw sweetener of
choice

1 pinch sea salt

2 Tbsp
rose tea
Follow these steps for making tofu with the Tofu Kit (SB-132):
- Prepare 2 cups of soaked ingredients before starting.
- Fill your CARAFE with 4 cups (1 L) of water. Fill the FINE SCREEN with the first half of ingredients (\~1 cup / 250 mL). Attach the SCREEN to the MOTOR HEAD and make sure it is locked in place. Place the MOTOR HEAD over the CARAFE. Attach the POWER CORD and ensure it is properly plugged into an outlet. When completely attached, the machine will beep. Press the RAW button 3-5 times, allowing the machine to fully grind the first half of ingredients.
- Lift the MOTOR HEAD, remove the ground ingredients from the SCREEN, and then insert the remaining ingredients (\~1 cup / 250 mL) back into the SCREEN. Attach the SCREEN to the MOTOR HEAD and place it back on top of the CARAFE, keeping the same milk created from the previous steps inside the CARAFE. This time, press the HOT button.
- After the cycle has finished, strain your vegan milk with the CHEESECLOTH. Heat your strained milk on medium until it reaches about 165°F (73°C). You may add herbs, seaweed, or superfoods for flavor. Create a solution with your tofu coagulant by following its package instructions. Slowly pour the solution into the milk and stir in slow motions for about 40 seconds. Cover your mixture and let it sit for 10-15 minutes.
- Your tofu mixture should now be solidified. Place your TOFU BOX on a plate. Line the TOFU BOX with the CHEESECLOTH so that there's enough cloth to fold over and cover the top opening of the box. Scoop the tofu mixture into the CHEESECLOTH.
- Cover the tofu by folding the CHEESECLOTH over the top of the mixture and place the TOFU PRESS on top of the CHEESECLOTH. Place a weight on top of the TOFU PRESS and let it sit for 10-30 minutes—the longer it's pressed, the firmer it will become.
-
Unwrap the CHEESECLOTH and remove your fresh tofu from the TOFU BOX and enjoy! You may soak the tofu in cold water and store in the refrigerator for 3-5 days.
-
Préparez 2 tasses d'ingrédients imbibés avant de commencer.
- Mettre quatre tasses (1 l) d'eau dans votre CARAFE. Passez la première moitié des ingrédients au FILTRE (1 tasse/250 ml). Fixez le FILTRE à la TÊTE MOTORISÉE et assurez-vous qu'il est bien en place et verrouillée. Placez la TÊTE MOTORISÉE sur la CARAFE. Branchez le CORDON D'ALIMENTATION en veillant à ce qu'il soit correctement branché dans une prise de courant. La machine émettra un « bip » quand elle sera sous tension. Appuyez 3 à 5 fois sur le bouton RAW pour que la machine broie la première moitié des ingrédients.
- Soulevez la TÊTE MOTORISÉE, retirez tous les ingrédients moulus du FILTRE, puis insérez les ingrédients restants (1 tasse/250 ml) dans le FILTRE. Fixez le FILTRE à la TÊTE MOTORISÉE et remettez-le sur la CARAFE, en laissant le même type de lait créé lors de la dernière étape dans la CARAFE. Appuyez maintenant sur la touche HOT.
- À la fin du cycle, filtrez votre lait végane à l'aide du ETAMINE. Réchauffez le lait tamisé à feu moyen jusqu'à ce qu'il atteigne une température d'environ 165° F (73° C). Vous pouvez aromatiser en ajoutant des herbes, des algues marines ou des superaliments. Créez une préparation avec la présure de tofu en suivant les indications figurant sur le paquet. Versez-la ensuite lentement sur le lait et remuez doucement pendant 40 secondes environ. Couvrez le mélange et laissez-le reposer pendant 10 à 15 minutes.
- La préparation de tofu devrait s'être solidifiée. Placez la BOÎTE À TOFU dans un plat. Couvrez la BOÎTE À TOFU avec le ÉTAMINE en veillant à ce que le linge soit assez grand pour être replié et couvrir l'ouverture supérieure de la boîte. Placez le mélange de tofu dans le ÉTAMINE à l'aide d'une cuillère.
- Couvrez le tofu en plaçant le ÉTAMINE sur le mélange et placez la PRESSE à TOFU par-dessus. Posez un poids sur la PRESSE à TOFU et laissez reposer pendant 10 à 30 minutes. Plus le temps de pause est long, plus le mélange sera compact.
-
Dépliez le ÉTAMINE, sortez le tofu frais de la BOÎTE À TOFU et dégustez ! Vous pouvez couvrir le tofu avec de l'eau froide et le conserver au réfrigérateur pendant 3 à 5 jours.
-
Stellen Sie vor Beginn der Zubereitung 2 Tassen eingewechter Zutaten bereit.
- Füllen Sie Ihre KANNE mit 4 Tassen (1 L) Wasser. Geben Sie die erste Hälfte der Zutaten in das FEINSIEB (\~1 Tasse / 250 ml). Befestigen Sie das SIEB am MOTORKOPF und stellen Sie sicher, dass es richtig einrastet. Selzen Sie den MOTORKOPF auf die KANNE. Bringen Sie das NETZKABEL an und vergewissern Sie sich, dass es ordnungsgemäß in eine Steckdose eingesteckt ist. Wenn das Gerät richtig angeschlossen und betriebsbereit ist, gibt es einen Signalton ab. Drücken Sie 3 5 Mal die RAW Taste, damit die Maschine die erste Hälfte der Zutaten vollständig mahlen kann.
- Heben Sie den MOTORKOPF an, entfernen Sie die gemahlenen Zutaten aus dem SIEB und geben Sie dann die restlichen Zutaten (\~1 Tasse / 250 ml) ebenfalls in das SIEB. Befestigen Sie das SIEB am MOTORKOPF und setzen Sie es wieder auf die KANNE, wobei die in den vorherigen Schritten gewonnene Milch in der KANNE verbleibt. Drücken Sie nun die HOT Taste.
- Nachdem der Vorgang beendet ist, seihen Sie Ihre pflanzliche Milch mit dem KÄSETUCH ab. Erhitzen Sie die abgeseihte Milch auf mittlerer Stufe, bis sie ca. 165 °F (73 °C) erreicht. Sie können, um den Geschmack abzurunden, Kräuter, Algen oder Superfoods hinzufügen. Stellen Sie unter Beachtung der Packungsanleitung eine Lösung mit Ihrem Tofu Gerinnungsmittel her. Geben Sie die Lösung langsam in die Milch und rühren Sie etwa 40 Sekunden lang in langsamen Bewegungen. Decken Sie die Mischung ab und lassen Sie sie 10 15 Minuten lang ruhen.
- Ihre Tofu Mischung sollte jetzt fest sein. Stellen Sie Ihre TOFU-BOX auf einen Teller. Legen Sie die TOFU-BOX mit dem KÄSETUCH so aus, dass genügend Tuch übrigbleibt, um die zobere Öffnung der Box zu überdecken. Füllen Sie die Tofu Mischung mit einem Löffel in das KÄSETUCH.
- Decken Sie den Tofu ab, indem Sie das KÄSETUCH über die Mischung falten und die TOFU-PRESSE auf das KÄSETUCH legen. Stellen Sie ein Gewicht auf die TOFU-PRESSE und lassen Sie es 10 30 Minuten lang stehen je länger der Tofu gepresst wird, desto fester wird er.
-
Wickeln Sie das KÄSETUCH wieder auf, nehmen Sie den frischen Tofu aus der TOFUBOX und genießen Sie ihn! Sie können den Tofu in kaltem Wasser einweichen und für 3 5 Tage im Kühlschrank aufbewahren.
-
Prepare 2 tazas de ingredientes remojados antes de comenzar.
- Rellene la JARRA con 4 tazas (1 L) de agua. Rellene el TAMIZ FINO con la primera mitad de los ingredientes (\~1 taza / 250 ml). Fije el TAMIZ al CABEZAL DE MOTOR y asegúrese de que esté bloqueado en posición. Coloque el CABEZAL DE MOTOR sobre la JARRA. Conecte el CABLE DE ALIMENTACIÓN y asegúrese de tenerlo correctamente conectado a una toma de corriente. Cuando esté completamente montada, la máqui-na pitará. Pulse el botón RAW 3-5 veces para que la máquina pueda moler completamente la primera mitad de los ingredientes.
- Levante el CABEZAL DE MOTOR, retire los ingredientes molidos del TAMIZ y después, introduzca los ingredientes restantes (\~1 taza / 250 ml) en el TAMIZ. Acople el TAMIZ al CABEZAL DE MOTOR y colóquelo de nuevo en la parte superior de la JARRA, manteniendo la leche creada a partir de los pasos anteriores dentro de la JARRA. Esta vez, presione el botón HOT.
- Una vez finalizado el ciclo, cuele la leche vegana con la ESTOPILLA. Caliente la leche colada a medio fuego hasta que alcance unos 165°F (73°C). Puede agregar hierbas, algas o superalimentos para darle sabor. Cree una solución con el coagulante de tofu siguiendo las instrucciones del paquete. Vierta lentamente la solución en la leche y agite suavemen-te durante unos 40 segundos. Cubra la mezcla y déjela reposar 10-15 minutos.
- Ahora, la mezcla de tofu debe solidificarse. Coloque la CAJA TOFU en un plato. Forre la CAJA TOFU con la ESTOPILLA para que haya sufi-ciente tela para doblar y cubrir la abertura superior de la caja. Ponga la mezcla de tofu en la ESTOPILLA.
- Cubra el tofu doblando la ESTOPILLA en la parte superior de la mezcla y coloque la PRENSA TOFU en la parte superior de la ESTOPILLA. Colo-que un peso en la parte superior de la PRENSA TOFU y déjelo durante 10-30 minutos (cuanto más tiempo quede prensado, más firme quedará).
- Desembale la ESTOPILLA, retire el tofu fresco de la CAJA TOFU y ¡dis-frute! Puede remojar el tofu en el agua fría y almacenarlo en el frigorífico durante 3-5 días

natural_image
Close-up of fresh vegetables and a bowl on a dark surface, with parsley and chopsticks nearby (no text or symbols visible)HERBED TOFU
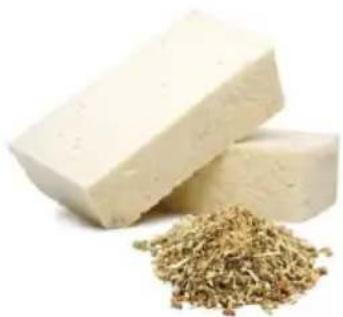
natural_image
Two rectangular tofu pieces with loose brown shavings on a white background (no text or symbols)Makes 12 oz tofu

2 cups
unsweetened
soymilk
2 Tbsp
dried herbs

1 pinch
sea salt
1 serving of tofu coagulant
natural_image
Two rectangular tofu pieces and scattered nuts on a white background (no text or symbols)Makes 12 oz tofu
ALMOND TOFU

2 cups
unsweetened
almond milk

1 pinch
sea salt

1 serving of tofu coagulant
-
500 ml de lait d'amande non sucré
• 1 pincée de sel de mer
• 1 portion de coagulant pour tofu -
500 ml ungesüßte Mandelmilch
• 1 Prise Meersalz
• 1 Portion Tofu-Gerinnungsmittel -
500 ml de leche de almendras sin azúcar
• 1 pizca de sal gruesa - 1 ración de coagulante para preparar tofu

natural_image
Close-up of a fresh salad with tofu, sesame seeds, and lettuce leaves (no text or symbols visible)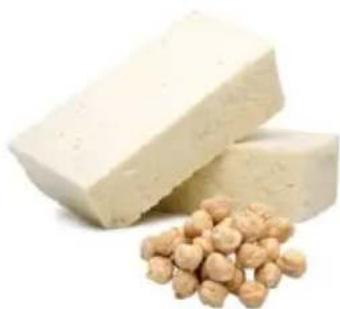
natural_image
Two rectangular tofu pieces with nuts, one larger and one smaller, against a white background (no text or symbols)Makes 12 oz tofu
GARBANZO TOFU

2 cups
unsweetened
garbanzo milk

1 pinch
sea salt
1 serving of tofu coagulant
natural_image
Two rectangular tofu pieces with a pile of small brown granular substance on the right (no text or symbols visible)Makes 12 oz tofu
PROTEIN PLUS TOFU

1 cup
hemp milk

1 cup
soymilk
2 Tbsp
hemp seeds
1 pinch sea salt

1 serving of tofu coagulant
natural_image
Top-down view of various types of dried herbs and spices in white bowls, arranged on a wooden surface (no text or labels visible)GRINDING DRY FOODS
Follow these steps for grinding dry ingredients:
- Add dry ingredients to the GRINDING CUP and attach it to the MOTOR HEAD.
- Place the MOTOR HEAD over the CARAFE.
- Press the RAW button and allow the cycle to process. Press RAW up to 3 additional times for a finer texture or when turning into powder.
-
When finished, lift the MOTOR HEAD and remove the GRINDING CUP. Transfer the mix to an airtight container and save for your next smoothie or salad.
-
Placez les ingrédients secs dans le COUPELLE DE BROYAGE et fixez-le bien à la TÊTE MOTORISÉE.
- Placez la TÊTE MOTORISÉE sur le CARAFE.
- Appuyez sur le bouton RAW et laissez l'appareil suivre son cycle. Appuyez sur le bouton RAW jusqu'à 3 fois supplémentaires pour obtenir une texture plus fine ou pour transformer les ingrédients en poudre.
-
Lorsque le cycle est terminé, relevez la TÊTE MOTORISÉE et retirez le COUPELLE DE BROYAGE. Versez le mélange dans un récipient hermétique et conservez-le pour votre prochain smoothie ou salade.
-
Geben Sie die trockenen Zutaten in den MAHLBECHER und befestigen Sie ihn am MOTORKOPF.
- Setzen Sie den MOTORKOPF auf die KANNE.
- Drücken Sie die Taste RAW und beginnen Sie den Verarbeitungsvorgang. Drücken Sie die Taste RAW weitere 3 Mal, um eine feinere Textur zu erhalten bzw. in Pulver zu verarbeiten.
-
Sobald Sie fertig sind, heben Sie den MOTORKOPF an und entfernen Sie den MAHLBECHER. Füllen Sie die Mischung in einen luftdichten Behälter und bewahren Sie diese für Ihren nächsten Smoothie oder Salat auf.
-
Añada los ingredientes secos en la TAZA TRITURADORA y acóplela al CABEZAL DEL MOTOR.
- Coloque el CABEZAL DEL MOTOR sobre la JARRA.
- Oprima el botón RAW para iniciar el proceso. Oprima RAW hasta 3 veces más para conseguir una textura más fina o para transformar en polvo.
- Una vez haya terminado, levante el CABEZAL DEL MOTOR y retire la TAZA TRITURADORA. Pase la mezcla a un recipiente hermético y guárdelo para su próximo batido o ensalada.
natural_image
Top-down view of a bowl filled with light green powder, likely mint or mint-salmon, with no visible text or symbols.Makes 1 cup
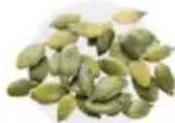
4 Tbsp
pumpkin seeds

1 Tbsp
spirulina
- 60 ml de graines de chanvre
- 60 ml de graines de chia
- 60 ml de fèves de cacao
- 60 ml de graines de potiron
-
15 ml de spiruline
-
60 ml Hanfsamen
- 60 ml Chiasamen
- 60 ml Kakaobohnen
- 60 ml Kürbiskerne
• 15 ml Spirulina
natural_image
Top-down view of a bowl filled with red granular substance (no text or symbols visible)Makes 1 cup
* To dry juice pulp, place in the dehydrator at 118°F for 12-18 hours until completely dry.
Chef Tip:
- Try dried citrus combination: grapefruit and lemon for a delicious addition to your next smoothie bowl or a powder you can add to salad dressing combinations.
- Try dried carrot combinations for a powder you can mix with nut butters for quick high-protein nut butter bites.
- Try greens combinations for a powder you can use to add to soups and salads for additional fibers and minerals.
- Adding the spices or seeds when grinding will create a functional food mix you can add to vegetable blends. Take the final product and add to soups or blended smoothies for an added nutrition boost.
natural_image
Close-up of a pile of shredded orange-brown food, possibly dried herbs or chili, with a dark spoon partially visible (no text or symbols)Makes 12 cup
CITRUS
1 cup dried citrus peels*
* To dry citrus peels, place in the dehydrator at 118°F for 12-18 hours until completely dry.
natural_image
Close-up of a brown ceramic bowl filled with fine white powder, likely a salt or powdered substance (no text or symbols visible)Makes 1 cup
OMEGA PULSE
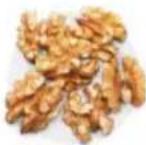
14 cup walnuts
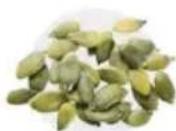
14 cup pumpkin seeds
2 Tbsp
hemp seeds
2 Tbsp
chia seeds

2 Tbsp
coconut shreds
Chef Tip:
- This pulse is especially nice on parfaits. You can also use it to sprinkle on top of dessert blends like cacao pudding. Blending it into a smoothie will boost your healthy fats, it's recommended to use 2 Tbsp per smoothie for a healthy dose of omegas!
- 60 ml de noix
- 60 ml de graines de potiron
• 30 ml de graines de chanvre -
30 ml de graines de chia
• 30 ml de copeaux de noix de coco -
60 ml Walnüsse
-
60 ml Kürbiskerne
• 30 ml Hanfsamen
• 30 ml Chiasamen
• 30 ml Kokosraspeln -
60 ml de nueces
- 60 ml de semillas de calabaza
- 2 cucharadas soperas de semillas de cáñamo
• 2 cucharadas soperas de semillas de chía - 2 cucharadas soperas de tiras de coco