Solostar 4 SS4250 - Juicer Tribest - Free user manual and instructions
Find the device manual for free Solostar 4 SS4250 Tribest in PDF.

User questions about Solostar 4 SS4250 Tribest
0 question about this device. Answer the ones you know or ask your own.
Ask a new question about this device
Download the instructions for your Juicer in PDF format for free! Find your manual Solostar 4 SS4250 - Tribest and take your electronic device back in hand. On this page are published all the documents necessary for the use of your device. Solostar 4 SS4250 by Tribest.
USER MANUAL Solostar 4 SS4250 Tribest
natural_image
White Tribest Solastary 4 electric juice maker with orange logo (no text or symbols on device body)SAVE THIS MANUAL-KEEP IT HANDY FOR QUICK REFERENCE / CONSERVEZ CE MODE D'EMPLOI GARDEZ-LE À PORTÉE DE MAIN POUR POUVOIR Y FAIRE RÉFÉRENCE / BEWAHREN SIE DIESE AN-LEITUNG AUF – HALTEN SIE SIE ZUM SCHNELLEN NACHSCHLAGEN GRIFFBEREIT / GUARDE ESTE MANUAL EN UN LUGAR ACCESIBLE POR SI NECESITA CONSULTARLO
READ INSTRUCTIONS BEFORE USING / LISEZ LES INSTRUCTIONS AVANT UTILISATION / LESEN SIE VOR GEBRAUCH DIE ANWEISUNGEN DURCH / ANTES DE USAR EL PRODUCTO, LEA LAS INSTRUCCIONES
LANGUAGES
EN
- English....5
- Français......25
• Deutsch....45 - Español....65
WELCOME
Congratulations and welcome to the Tribest family! Your purchase of the Tribest® Solostar® 4 represents a decision that you made to live a healthier lifestyle. As with every Tribest product, the Solostar 4's sleek design and rich features are the result of smart choices that were made to achieve one thing: Making Healthy Living Easy.
Due to its smart design, the Solostar 4 produces up to 33% more torque while using up to 20% less electricity. More torque means less jamming and less electricity means savings on your monthly utility bill all while reducing your carbon footprint. The sleek, modern design takes up less space while looking beautiful on your kitchen countertop. The optional Vegetable Slicer and Spiralizer attachments add the versatility you need to reduce the clutter you get from having too many machines. The Solostar 4 is compatible with the ZStar Manual Conversion Kit, so you are free to take your juicer with you when you are on the go. And, like every Tribest product, all food contact parts are made from BPA- and BPS-free materials.
The Solostar 4's single auger cold press juicing system operates as slow as 47 RPM to ensure the gentlest juice extraction process possible. The slow and gentle process preserves more nutrients and enzymes, resulting in healthier juice. The Dual-Stage Extraction Process crushes and presses produce for maximum juice yields. The Ultem auger is 8x stronger than other types of plastic, which allows for an aggressive auger design that makes it easy to feed your produce into the juicer. So, you get better juice, more of it, and it is easier to use.
Please carefully unpack your Solostar 4 and check to see that all the parts were included. Take the time to assemble and disassemble you Solostar 4 a few times to become familiar with the process and wash the juicing parts before using it for the first time. Please take the time to read through the entire operation manual for proper use and care instructions. If you have any questions, comments, or need any tips, please do not hesitate to contact us at 1-888-254-7336, or via email at service@tribest.com.
We graciously ask that you rate the Solostar 4 at www.tribestlife.com. We appreciate your feedback.
TABLE OF CONTENTS
- Welcome....5
- Important Safety Instructions....8
- Juicer Part Description....9
- Solostar 4 Assembly and Operation....10
- Disassembling the Solostar 4....13
- Cleaning the Solostar 4....13
- Troubleshooting....15
- When You Need Service....16
- Recipe Index....17
- Product Specifications....24
IMPORTANT SAFETY INSTRUCTIONS
- Please read all instructions carefully.
- Do not submerge Main Body in water or other liquids to protect against the risk of electric shock.
- Do not touch the electric plug or outlet with wet hands to avoid electric shock.
- While the Solostar 4 is in operation, avoid contact with its moving parts.
- Unplug the Solostar 4 from the electrical outlet and be sure to switch the Solostar 4 off before assembling or disassembling and when not in use.
- Do not operate any appliance with a damaged cord or plug, or if the Solostar 4 malfunctions, is dropped, or is damaged in any manner. Return the Solostar 4 to the nearest authorized service center for examination and possible repair to prevent injury.
- Close supervision is necessary when any appliances are used by or near children.
- Use only included accessories. Do not put any articles such as spoons, forks or knives into the Feeding Chute.
- It is very dangerous to place fingers into the Feeding Chute while the Solostar 4 is in operation. Make sure to always use the provided Plastic Plunger to push down ingredients.
- Use of attachments not recommended or sold by the manufacturer may cause fire, electrical shock, or injury.
11.Do not let the cord hang over the edge of a table or counter. - Do not let the cord contact any hot surface, such as the stove.
- Please refer to "When You Need Service" in case your juicer is functioning abnormally.
- Do not disassemble any parts other than those necessary for normal operation or cleaning of your Solostar 4.
- Continuous operation of the Solostar 4 (more than 30 min. of straight use) may cause the motor to overheat. The motor will automatically shut down when over-heated or overloaded. When this occurs, turn the machine off and let the motor cool off for about 30 min before resuming operation.
- Do not use hot or boiling water (above 104^ F or 40^ C) to clean the unit and parts. Deformation or other damage may result.
- Do not use any bleach or harsh chemicals.
- Do not use outdoors.
- This machine is made for household use only.
- Please refer to the "Assembly and Operation" before operation.
- Your Solostar 4 Juice Extractor should be grounded electrically for proper and safe operation. Use only the 3-prong plug provided, the proper plug or the adapter complying with the electrical safety code in your country.
- Do not use the appliance for any other than its intended use.
SAVE THESE INSTRUCTIONS
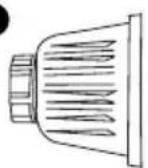
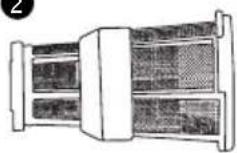
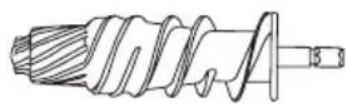
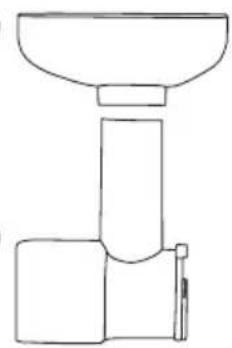
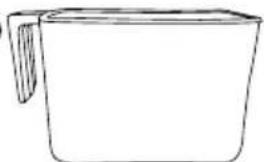
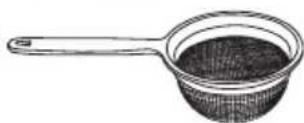
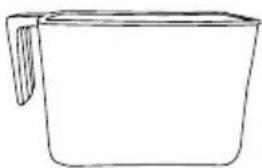
JUICER PART DESCRIPTION
1
2
3
5
natural_image
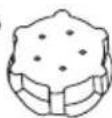
Simple line drawing of a mechanical component with a funnel and base (no text or symbols)8

9
natural_image
Simple line drawing of a container with handle (no text or symbols)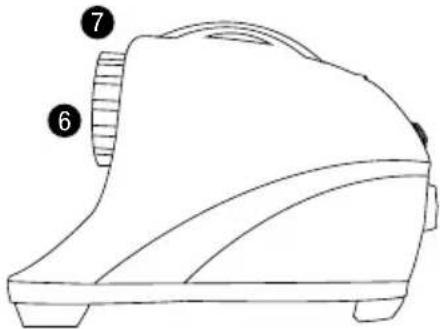
natural_image
Line drawing of a mechanical device with numbered callouts (6 and 7), no text or symbols present.11

10

natural_image
Simple line drawing of a container with a handle (no text or symbols)12
13

20
natural_image
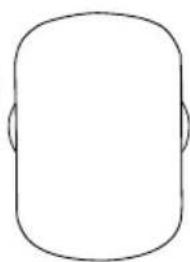
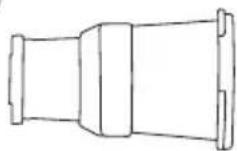
Simple line drawing of a rounded rectangular shape with two side protrusions (no text or symbols)14

15
16

●

18

19

- Screen Locking Cap
- Juicing Screen
- Auger
- Auger Housing/Feeding Chute
- Funnel
- Auger Housing Retaining Ring
- Main Body
- Homogenizing Screen
- Juice Container
-
Pulp Container
-
Juice Container Strainer
- Hand-held Strainer
- Power Cord
- Fettuccini Nozzle
- Spagetti Nozzle
- Juicing Nozzle
- Homogenizing Nozzle
- Plastic Plunger
- Cleaning Brush
- Funnel Lid
SOLOSTAR 4 ASSEMBLY AND OPERATION
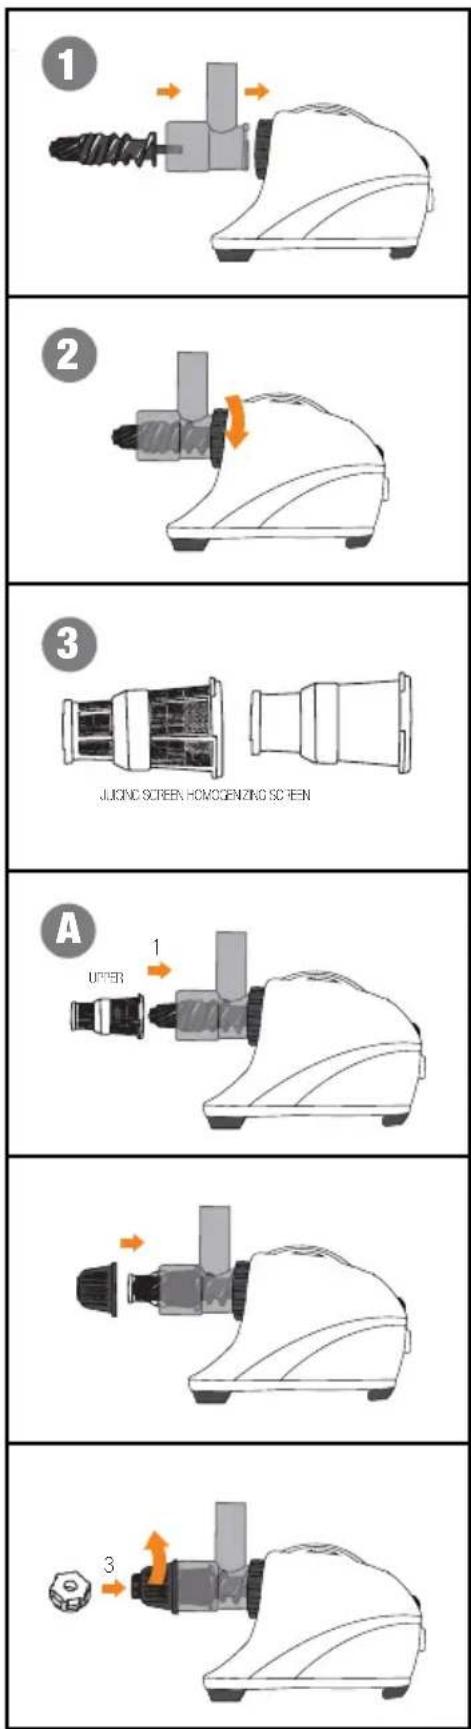
- Insert the Auger into the Auger Housing and attach to the front of the Main Body.
- While holding the Auger Housing stable, turn the Auger Housing Retaining Ring clockwise (right) to lock the Auger Housing in place.
- Pick the desired screen according to the foods being used. Do not turn the screen.
Assemble as follows:
A. Juicing Screen: for juicing leafy greens, vegetables and fruits.
(1) Place the Juicing Screen into the front end of the Auger Housing. Make sure that the side labeled 'UPPER' is facing upwards when inserted.
(2) Put the Screen Locking Cap over the screen and turn it counter-clockwise (left) to lock in position.
(3) Attach the Juicing Nozzle to the Screen Locking Cap by turning it counter-clockwise.
B. Homogenizing Screen: for making rice cake/breadstick, grinding (tomato, garlic, coffee beans, etc.), pasta noodles (spaghetti or fettuccini), or tofu.
(1) Attach the Homogenizing Screen into the Auger Housing. Fasten and turn the Screen Locking Cap counter-clockwise to lock in position.
(2) Place the desired nozzle into the Screen Locking Cap and
(3) turn it counter- clockwise.
- Use the Homogenizing Nozzle for homogenizing and grinding fresh garlic, onion, ginger or peppers.
-
Do not use the Homogenizing Nozzle for dried pepper, coffee beans, etc.
-
Place the Funnel over the Feeding Chute of Auger Housing. Place the Juice Container underneath the specified Juice Outlet and the Pulp Container underneath the Nozzle. Attach the Power Cord to the rear of the machine and plug the other end into an electrical outlet.
-
Turn the Solostar 4 on and feed fruits and vegetables in small amounts, into the Funnel. Use the Plastic Plunger for assistance in pushing the food down.
-
Food needs to be cut into smaller lengthwise pieces before juicing.
-
There may be some squeaking noises while operating, this is normal.
-
If any hard or foreign objects are put into the Solostar 4 and results in the motor stopping, use the Reverse Switch 2-3 times for about 2 to 3 seconds.
- When you need to use the Reverse Switch during normal operation, press the Stop Switch first then the Reverse Switch.
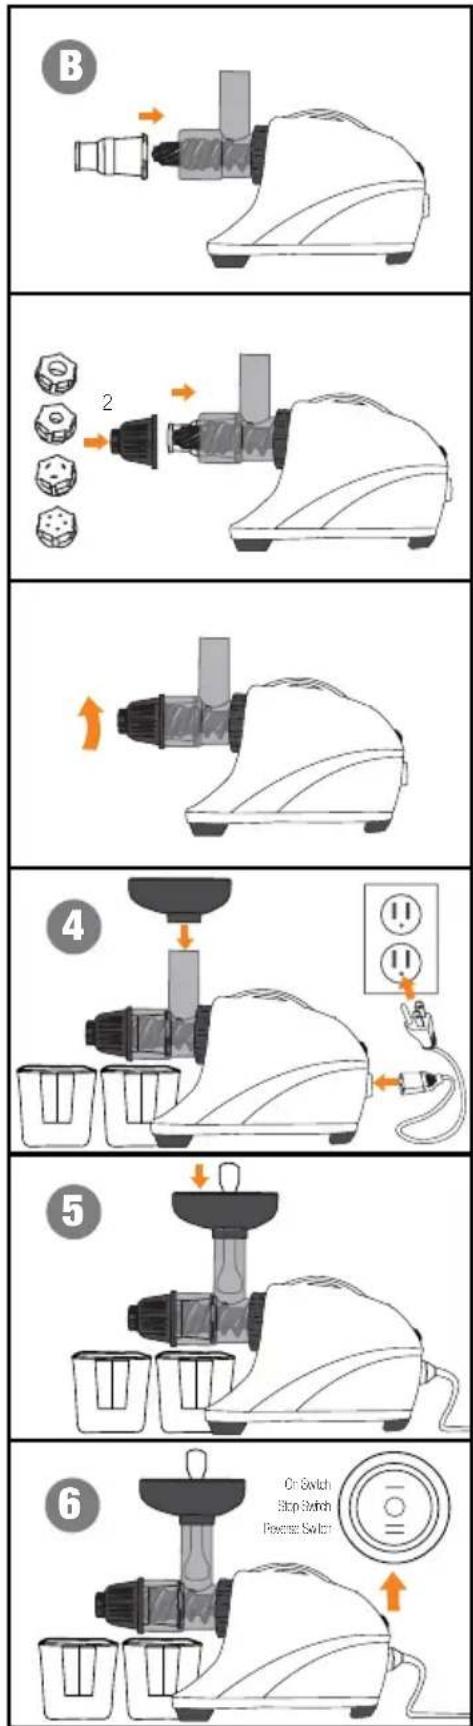
flowchart
graph TD
    A["Green nut"] --> B["2"]
    B --> C["1"]
    C --> D["4"]
    D --> E["5"]
    E --> F["6"]
    F --> G["On Switch Stop Stitch, Reverse Switch"]
NOTE:
- Fibrous vegetables or fruits with seeds can be juiced by using the Homogenizing Nozzle instead of Juicing Nozzle.
- Small amounts of pulp can be in juices depending on the produce used.
DISASSEMBLING AND CLEANING THE SOLOSTAR 4
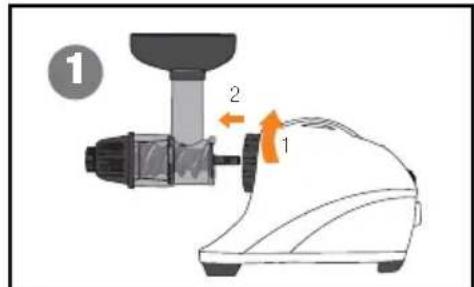
- (1) Unlock the Auger Housing Retaining Ring by turning it counter-clockwise and (2) pull the Auger Housing to separate from the Main Body.
- For easier cleaning, take the Auger Housing to your sink and disassemble the parts under running water.
- (1) Separate the Screen Locking Cap and (2) Nozzle from the Solostar 4 by turning clockwise.
- Pull to remove the Screen and wash thoroughly using the included Cleaning Brush.
- Remove Auger from the Auger Housing.
- Use lukewarm water with mild detergent to wash all parts.
text_image
1 2 1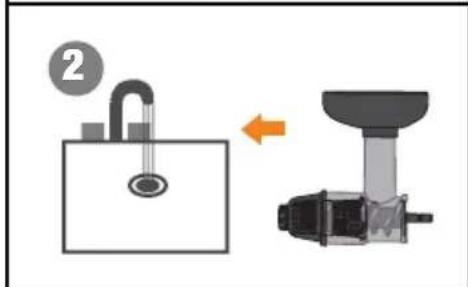
text_image
Diagram showing a padlock and a mechanical device with an arrow indicating rotation or change.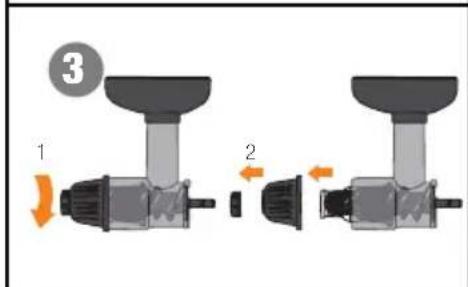
text_image
3 1 2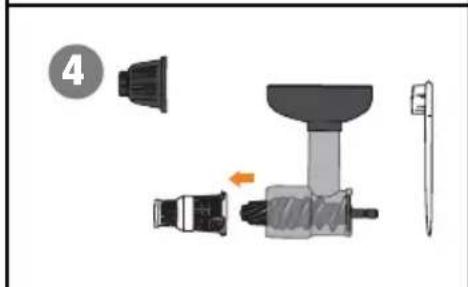
text_image
Diagram showing a mechanical assembly with labeled parts and directional arrows, including a numbered circle and arrow indicator.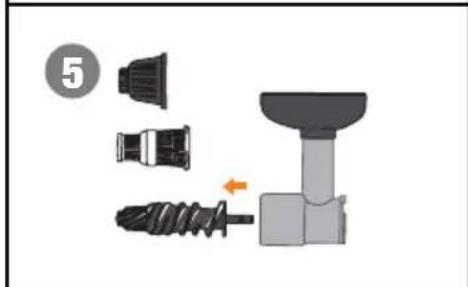
natural_image
Mechanical assembly diagram showing a drill bit and drill bit with a hammer handle (no text or symbols)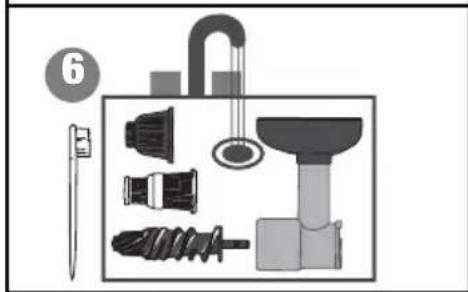
text_image
6NOTE:
- For easier disassembly, run the Reverse Switch on for 2-3 seconds, then turn off and unplug the Solostar 4 before disassembly.
- Be sure to clean and properly store the parts of the Solostar 4 after every use. When the Screens are not cleaned after use, the residue can dry, blocking the holes from filtering and juicing.
- Do not use hot water or any harsh chemicals such as bleach to clean the Solostar 4. It can result in the deformation of parts.
- To remove colored stains, soak parts in 70% White Wine Vinegar and 30% Water.
TROUBLESHOOTING
SYMPTOM
SOLUTION
| There is no power. | Make sure the electrical cord is properly put into the outlet. |
| Loud Noise | Make sure the Solostar 4 is leveled on a flat surface.Make sure that the unit corresponds to the voltage in your country. |
| Difficulty in feeding foods into the machine | Produce needs to be cut into smaller lengthwise pieces.The Solostar 4 may be operating in reverse. |
| The motor has stopped | You may have overloaded the Solostar 4; reduce the volume of produce in half.Foreign substances may have been inserted. |
| The Auger Housing is stuck or hard to take out. | The Auger Housing Retaining Ring is not moving or is too tight.Try pressing the reverse switch 2 –3 times. |
| The Auger Housing does not fit onto the Main Body | There may be foreign materials inside. |
| Juice leaks from the back of the Auger Housing | You may have overloaded the unit; reduce the amount of produce being put in. |
WHEN YOU NEED SERVICE
In the unlikely event that you do need service on your Solostar 4 Juice Extractor, or if it fails to function properly while within the warranty period (normal household operation only) - contact the nearest authorized Solostar 4 Service Center. PLEASE FOLLOW THE INSTRUCTIONS BELOW:
If You Need Service:
- Call to obtain a Return Authorization Number to send your Solostar 4 or part back to the service center. Explain the problem you are experiencing.
- Pack your Solostar 4 or part securely in the original shipping box. Make sure all necessary parts are enclosed. Fill out the Service Request Form and enclose it in the shipping box.
- Securely seal the shipping box.
- Address the box to the service center. Be sure to put your return address and the Return Authorization Number on the outside of the package.
- It is always wise to insure the package against possible damages or loss in transit. Ship prepaid.
RECIPE INDEX
JUICE AND DRINKS
Citrus Blend....18
Apple Lemonade....18
Wheatgrass Delight....18
Watermelon Quench....18
Ambrosia Nectar....19
Mellow Melon Punch....19
Snappy Apple....19
Dr. Walker's Choice (#61)....20
Green Tang....20
Oriental Express....20
RYE BREAD STICKS AND MOCHI (RICE CAKE)
Rye Raw Breadstick....21
Mochi (Rice Cake)....21
PASTA AND NOODLES....21
PÂTÉ AND CROQUETTE
Cashew-Curry Croquettes....22
Pecan Pleasers....22
DESSERT
Cashew Poppy....23
Banana-Blueberry Ice Cream Pie (Uncooked)....23
JUICE AND DRINKS
Citrus Blend
2 small grapefruit (peeled and cut into 4 to 6 pieces)
3 medium sized oranges (peeled and cut into 4 pieces)
12 small lemon (peeled and cut into 2 pieces)
12 small lime (peeled and cut into 2 pieces)
NOTE: 1) For sweeter taste use less lemon and lime. 2) It is not necessary to peel the lemon or lime.
Method: Juice all together and enjoy.
Apple Lemonade
3 farm apples (Yellow Delicious, Pippin, or Granny Smith)
3 medium sized oranges (peeled and cut into 4 pieces)
12 lemon (peel is optional for sweeter flavor)
Method: Juice all together and enjoy.
Wheatgrass Delight
4 handfuls Wheatgrass
4 carrots (cut in 2 to 4 pieces)
1 firm apple (cut into 6 pieces)
Thin slice Ginger
Method: Juice all together and enjoy.
Watermelon Quench
1 Watermelon (with seeds, if organically grown, add rind also)
Method:
- Slice watermelon into pieces that fit easily into the feeding chute of the juicer.
- Juice and enjoy on a hot summer day.
Ambrosia Nectar
2 bunches of grapes
3 apples (Yellow Delicious, Granny Smith or Pippin - cut into 6 pieces)
1 kiwi (peeled and cut into 2 pieces)
1 slice honeydew (cut into cubes)
1 slice pineapple (cut into cubes)
1 whole lemon (peeled and cut into 4 pieces)
12 cup cranberries
Method:
- Alternate juicing grapes, kiwi pieces, melon cubes, pineapple cubes, apple pieces, and cranberries.
- Juice lemon separately and add to taste.
NOTE: Quantities of ingredients may be varied with good results. Do not be afraid to experiment according to your own taste
Mellow Melon Punch
14 cantaloupe (cut into cubes)
14 honeydew (cut into cubes)
2 slices of watermelon (cut into cubes)
Method: Juice all together and enjoy.
Snappy Apple
7 apples (Fuji, Granny Smith, Yellow Delicious - cut into 4 to 6 pieces)
12 jalapeno pepper
14 lime
1 kiwi
Method:
- Juice kiwi and lime first.
- Next juice jalapeno.
- Finish by juicing the apples.
Dr. Walkers Choice (#61)
10 oz. carrots (cut into 4 pieces)
6 oz. spinach (fresh)
Method:
- Juice spinach first.
- Juice carrots.
Green Tang
2 pineapple wedges (cut into smaller pieces)
1 sprig of mint
3 handfuls of wheatgrass
14 lemon
1 slice of ginger for flavor
Method:
- Juice wheatgrass.
- Juice the mint.
- Juice lemon.
- Juice pineapple cubes.
NOTE: Pineapple wedge is a 1 round slice of whole pineapple cut into quarter pieces). If pineapple is not organically grown, remove the outer skin before juicing.
Oriental Express
3 leaves of Napa cabbage (cut lengthwise)
4 stalks of Bok Choy with leaves (cut lengthwise)
2 stalks of anise (Fennel - with green stem and leaves)
6 medium carrots (cut into 4 pieces)
2 apples (Yellow Delicious, Fuji or Granny - cut into 4 to 6 pieces)
Method:
- Juice napa, Bok Choy and fennel first.
- Juice apples second.
- Juice carrots into the rest of the juice.
RYE RAW BREADSTICKS AND MOCHI (RICE CAKE)
Rye Raw Breadsticks
2 cups of rye (soak overnight)
12 cup of sunflower seeds (soak overnight)
2 Tbsp. of caraway seed
12 tsp of sea salt
Method (use homogenizing screen):
- Mix all ingredients together in a bowl.
- Feed into machine a little at a time.
- Collect bread sticks as they emerge from the Homogenizing Screen.
- Before drying, these sticks can be shaped into pretzels, braided together, etc. for a variety of shapes.
- Dry in the dehydrator until crisp. Can be served with dips, soups, etc.
Mochi (rice cake)
2 cups of steamed rice (medium grain Calrose rice recommended)
1 Tbsp. of extra virgin olive oil
Method:
- Prepare steamed rice.
- Add olive oil into the feeding chute while running the machine.
- Feed your steamed rice into the feeding chute.
- Collect rice cake coming out of the homogenizing screen.
NOTE: Before processing, mix spices such as minced garlic or onion with the rice to flavor your rice cake. Slice the rice cake into diagonal slices. Dehydrate them and add to your soup.
PASTA AND NOODLES
1 package of Ready Mix pasta dough
1 tsp of extra virgin olive oil
Method:
- Prepare pasta dough according to the instructions on the package of the pasta dough mix.
- Put a few drops of olive oil into the Feeding Chute while running the machine
- Feed your pasta dough into Feeding Chute.
- Collect your pasta noodles onto a plate.
PÂTÉ AND CROQUETTE
Cashew-Curry Croquettes
2 cups of cashew
1 cup of sprouted wheat berries
3 Tbsp. of curry paste (available at Gourmet Food Shops)
1 tsp of vege-salt
Method:
-
Put the cashews and sprouted wheat berries into the Feeding Chute
-
Add curry paste and vege-salt a little at a time while texturizing.
-
Collect the texturized mixture.
-
Mix together by hand or with a wooden spoon.
-
Form into croquettes and garnish with tomatoes, radish, and cucumber
Pecan Pleasers
2 cups of pecan
1 cup of sprouted wheat berries
14 cup of Spanish onion
1 tsp of poultry seasoning
12 tsp of vege-salt
Method:
-
Put pecans, wheat berries, and onion into the Feeding Chute.
-
Collect mixture in a bowl.
-
Add the poultry seasoning and vege-salt.
-
Mix thoroughly by hand or with a wooden spoon.
-
Shape into small wafers and serve on cucumber slices with tomato or avocado on top.
DESSERT
Cashew Poppy
1 cup sprouted wheat berries (soaked)
14 cup of poppy seeds
14 cup of sunflower seeds (soaked)
1 cup of cashew
12 tsp of vanilla
4 tsp of honey
Method:
- Soak wheat berries for 12 hours for the sprout tips to emerge.
- Soak sunflower seeds for 6 hours.
- Homogenize the wheat berries, sunflower seeds, cashews, and poppy seeds by inserting them into the feeding chute.
- Collect the mixture into a bowl.
- Add vanilla and honey and mix together.
- Roll into balls and place on a plate.
Uncooked Banana- Blueberry Ice Cream Pie
1 cup of almonds (soaked)
12 cup of sesame seeds
1 cup of cashews
12 cup of raisins
12 cup of dates
12 cup of pecans
1 tsp of vanilla
2 tsp of honey
7 frozen bananas (without skin)
1½ cup of blueberries (frozen)
1 kiwi
2 large strawberries (sliced)
Method:
- Grind almonds, cashews, sesame, pecans, dates, and raisins together.
- Mix in the vanilla and honey; knead to form a dough: them press into a 9" pie dish to form a crust. Let crust sit for 3 to 4 hours or place in a food dehydrator for about 45 minutes.
- Grind frozen bananas and frozen blueberries together to make an ice cream
- Put ice cream into the crust, top with slices of strawberries and kiwi.
- Slice and serve.
PRODUCT SPECIFICATIONS
| ITEM | HORIZ | ONTAL SLOW MASTICATING JUICER |
| MODEL | SOLOST | TAR 4 (SS-4200) |
| ELECTRICITY RATING | USA: | AC 120V~, 60Hz |
| EUROPE/ASIA: | AC 230V~, 50/60Hz | |
| ELECTRICAL POWER | USA: | 135W |
| EUROPE/ASIA: 120W | ||
| SIZE | 19" (W) x 10" (H) x | 8" (D) |
| WEIGHT | 15.5 lbs |
BIENVENUE
flowchart
graph TD
    A["1: Washing Machine"] --> B["2: Screwed Plate"]
    B --> C["3: Washer"]
    C --> D["4: Washer with Button ⑪"]
    D --> E["5: Washer with Switch"]
    E --> F["6: Reverse Switch with On Switch and Stop Statin"]
REMARQUE:
flowchart
graph TD
    A["Step 1: Brushener"] --> B["Step 2: Lock"]
    B --> C["Step 3: Screwdriver"]
    C --> D["Step 4: Screwdriver with tool"]
    D --> E["Step 5: Screwdriver with tool"]
    E --> F["Step 6: Screwdriver with tool"]

text_image
FRREMARQUE:
Oriental Express....40
GRESSIN AU SEIGLE ET MOCHI (GÂTEAU DE RIZ)
PÂTES ET NOUILLES....41
PÂTÉ ET CROQUETTE
CARACTÉRISTIQUES DU PRODUIT
| ARTICLE | CENTRIFUGEUSE À MASTICATION LENTE HORIZONTALE |
| MODÈLE SOLOSTAR 4 (SS-4200) | |
| RÉGIME ÉLECTRIQUE ÉTATS-UNIS: 120V CA~, 60HzNOMINAL EUROPE/ASIE: 230V CA~, 50/60Hz | |
| COURANT ÉLECTRIQUE ÉTATS-UNIS: 135WEUROPE/ASIE: 120W | |
| TAILLE 19 (L) x 10 (P) x | 8 (H) po |
| POIDS 7 kg (15.5 lb) | |
HERZLICH WILLKOMMEN
natural_image
Simple line drawing of a mechanical component with a funnel and base (no text or symbols)8
9

natural_image
Simple line drawing of a container with handle (no text or symbols)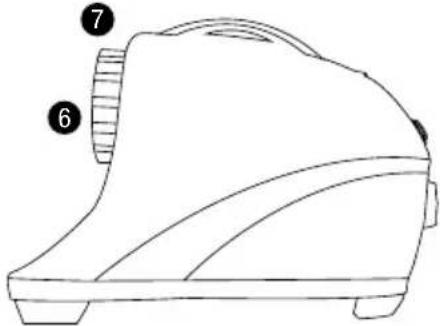
natural_image
Line drawing of a mechanical device with numbered callouts (6 and 7), no text or symbols present.11

10
natural_image
Simple line drawing of a container with a handle (no text or symbols)12

13

20
natural_image
Simple line drawing of a rounded rectangular shape with two side protrusions (no text or symbols)14

15
16

●

18
19

flowchart
graph TD
    A["Step 1: Pressing"] --> B["Step 2: Pressing with nuts"]
    B --> C["Step 3: Cleaner"]
    C --> D["Step 4: Pressing with outlets and switches"]
    D --> E["Step 5: Handwashing"]
    E --> F["Step 6: Switch, Stop Switch, Reverse Switch"]
HINWEIS:
flowchart
graph TD
    A["Step 1: Brushener"] --> B["Step 2: Lock"]
    B --> C["Step 3: Screwdriver"]
    C --> D["Step 4: Screwdriver with tool"]
    D --> E["Step 5: Screwdriver with tool"]
    E --> F["Step 6: Screwdriver with tool"]
HINWEIS:
© 2016 Tribest Corp.
No copies, transmission, or translation into other languages of this manual by any means without written permission of Tribest Corp. is allowed. All rights are reserved.
Tribest® making healthy living easy
Tribest Corporation
P.O. Box 4089, Cerritos, CA 90703
toll free: 888-254-7336 | fax: 714-879-7140
www.tribest.com | service@tribest.com