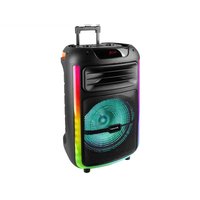
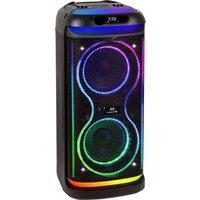
XF 1250 KB - Speaker Trevi - Free user manual and instructions
Find the device manual for free XF 1250 KB Trevi in PDF.
User questions about XF 1250 KB Trevi
0 question about this device. Answer the ones you know or ask your own.
Ask a new question about this device
Download the instructions for your Speaker in PDF format for free! Find your manual XF 1250 KB - Trevi and take your electronic device back in hand. On this page are published all the documents necessary for the use of your device. XF 1250 KB by Trevi.
USER MANUAL XF 1250 KB Trevi
Connection and Operation Manual
HAUT-PARLEUR PORTABLE AMPLIFIE
natural_image
Black XFEST portable electronic device with speaker grille and control panel (no visible text or symbols on body)NOTE D'USO
Francia: LIMITED IMPLEMENTATION, for professional users.
Danimarca: LIMITED IMPLEMENTATION, tuning range.
Malta: LIMITED IMPLEMENTATION, individual license required
Irlanda: NOT IMPLEMENTED
REGISTRAZIONE
REGISTRAZIONE DA INGRESSI MIC SU MEMORIA USB
Listening at high volume for a long time may damage your hearing.
This is a precision electronic appliance; avoid using it in the following cases:
• Near magnetic fields.
• Near heat sources such as heaters and stoves.
• In very humid places such as bathrooms, swimming pools, etc...
• In very dusty places.
• In places subject to strong vibrations.
- Do not bring your ear close to the speaker during the setting and volume adjustment phases, and in particular to keep the volume to a minimum in the ignition phase.
• Position the appliance so that there is always enough space on its sides for the free circulation of air (at least 5 cm).
- If liquids penetrate inside the appliance, immediately disconnect the plug from the socket and take the appliance to the nearest authorized TREVI service center.
- Before Switch On/Recharging the appliance, always check that the power and connection cables are installed correctly.
- The power adapter must be connected to an outlet near the device and must be easily accessible.
- If you notice excessive heat on the device or on the power adapter, immediately disconnect the plug from the main power socket.
- Do not pull on the power cable.
• No naked flame sources, such as lighted candles, should be placed on the appliance.
- The appliance must not be exposed to dripping or splashing water and no objects filled with liquid, such as vases, must be placed on the appliance.
- Instruct children and people with little knowledge of the product to use it correctly.
- Keep this manual for future reference.
CARE AND MAINTENANCE
Use a slightly damp soft cloth for cleaning. Do not use solvents and abrasive substances.
IMPORTANT
This device is designed for non-professional home use. The good construction of this device guarantees its perfect functioning for a long time. If, however, a problem should arise, it is advisable to consult the nearest TREVI Authorized Service Center. TREVI follows a policy of ongoing research and development. Therefore products may have different features from those described.
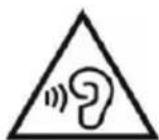
To avoid possible hearing damage, limit the listening time to high volumes
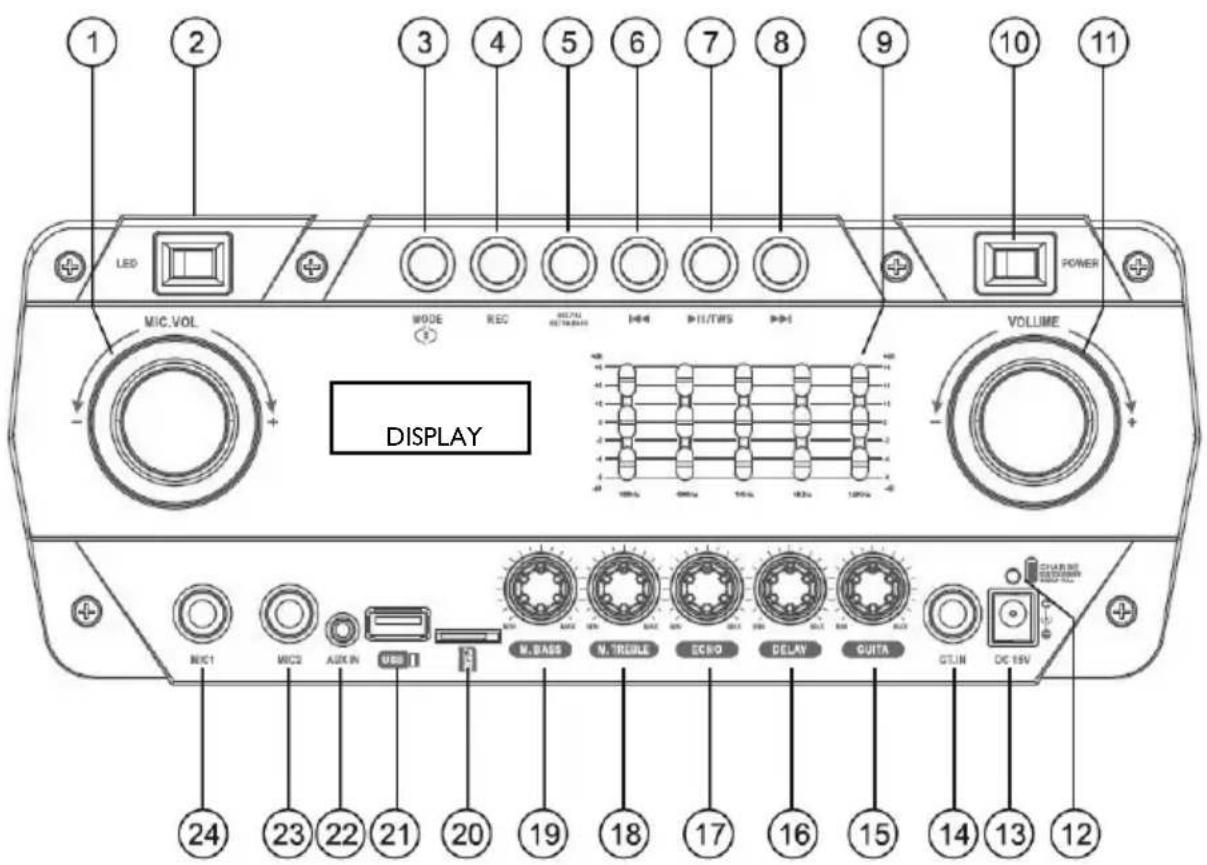
FRONT PANEL FUNCTIONS
text_image
1 2 3 4 5 6 7 8 9 10 11 LED MIC.VOL MODE REC VOLUME DISPLAY M.C1 M.C2 AUX IN USB T M. BASS M. TRULLE ECHO DELAY QUTA CT.IN DC 15V 24 23 22 21 20 19 18 17 16 15 14 13 12I. Microphone volume
2. Activation of Disco Light LED
3. MODE button, function selection
4. REC button, recording function
5. MIC.PRI/ExtraBASS button
6. Button ◀◀, previous track
7. ▶ II, Play/Pause / TWS button
8. Button▶, next track
9. 5 band equalizer
10. On/off switch
II. Volume control
12. Charge indicator
- Charging socket
- GUITAR input
- GUITAR input volume control
- DELAY effect control
- ECHO effect control
- M. TREBLE, high tone adjustment on the microphones.
- M. BASS, bass tone adjustment on the microphones.
- MicroSD card input
- USB memory input
- AUX IN input.
- MIC2 input, input for wired microphone
- MICI input, input for wired microphone
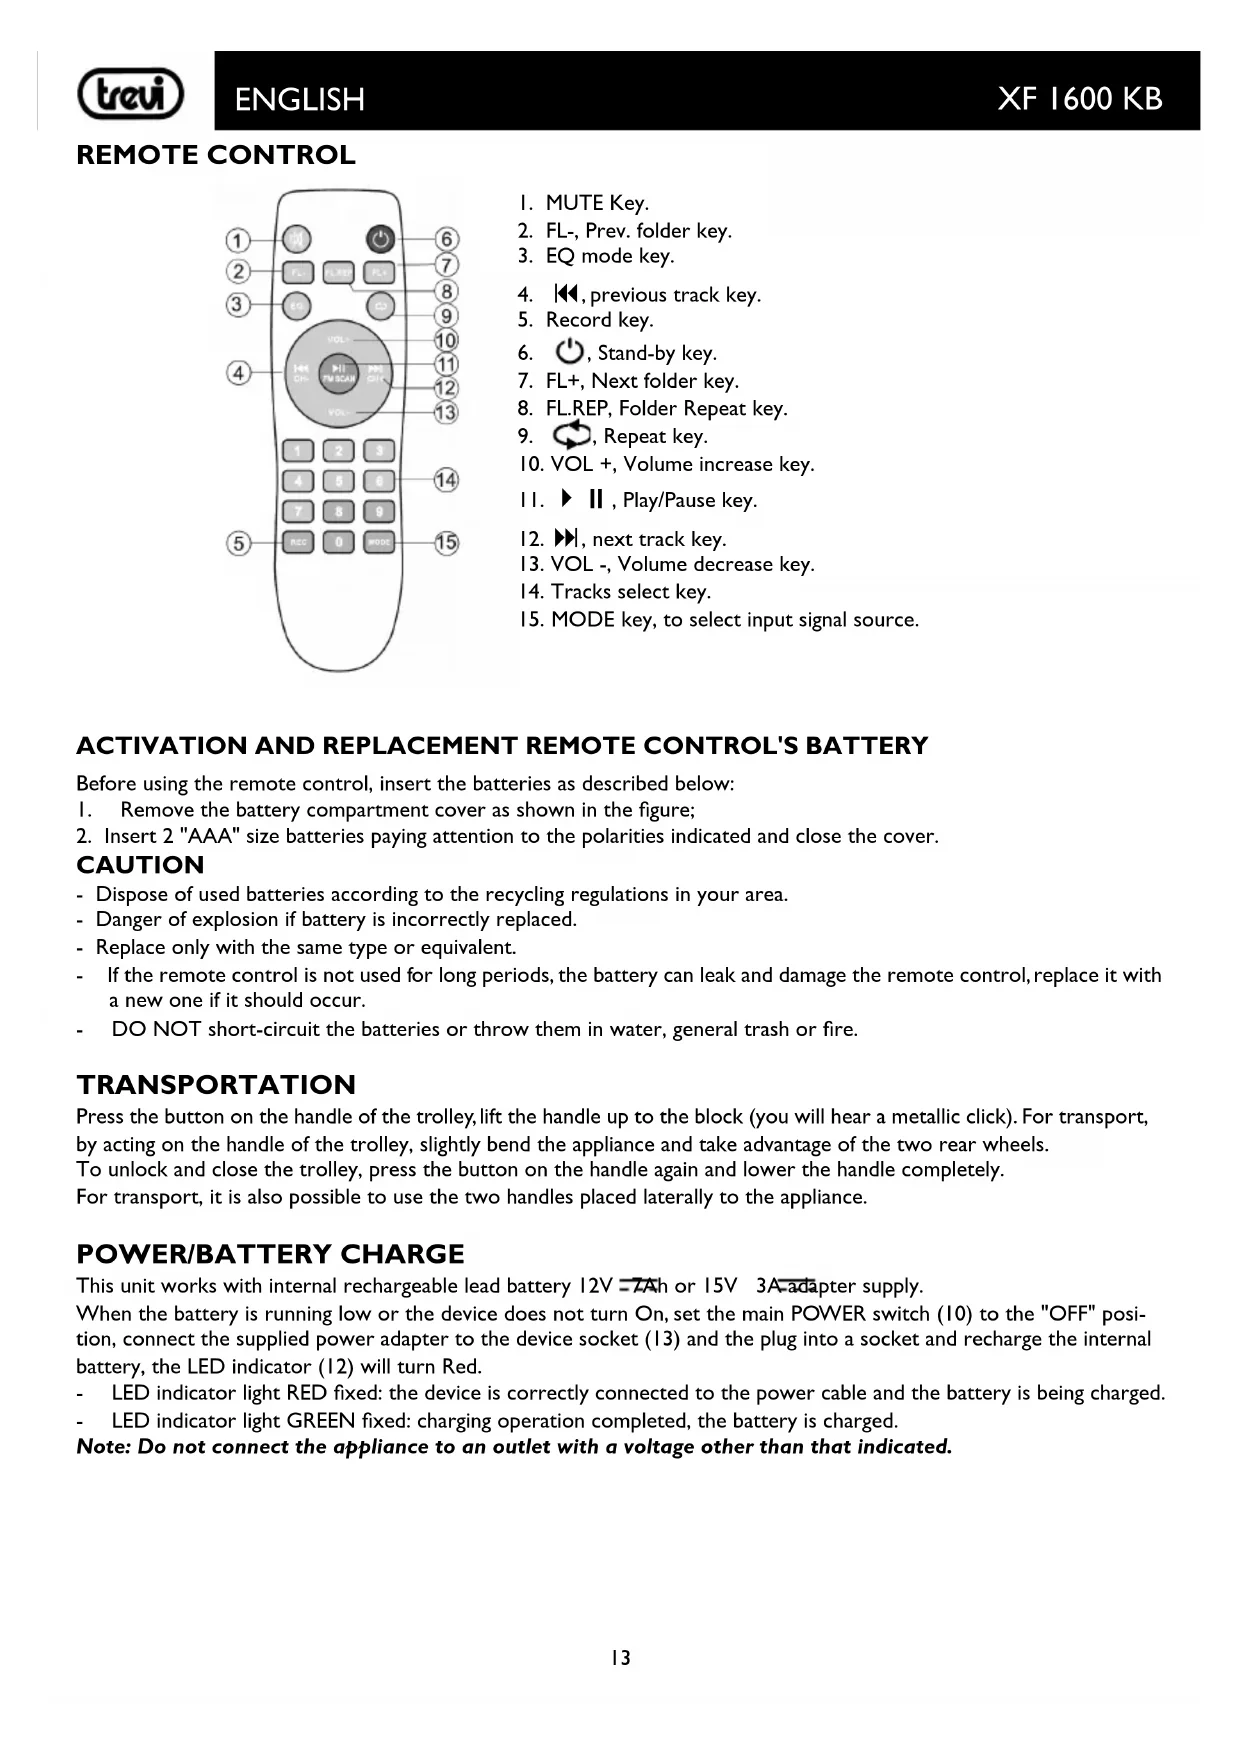
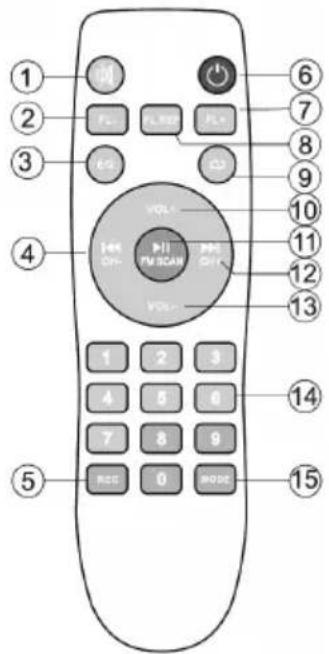
REMOTE CONTROL
text_image
① ② ③ ④ ⑤ ⑥ ⑦ ⑧ ⑨ ⑩ ⑪ ⑫ ⑬ ⑭ ⑮ ⑯ ⑰ ⑱ ⑲ ⑳ ⑴ ⑵ ⑶ VOL- 144 OFF- FM SCAN VOL- VOL- 12 13 14 7 8 9 REC 0 MODEI. MUTE Key.
2. FL-, Prev. folder key.
3. EQ mode key.
4. ◀◀, previous track key.
5. Record key.
6. ⏻, Stand-by key.
7. FL+, Next folder key.
8. FL.REP, Folder Repeat key.
9. , Repeat key.
10. VOL +, Volume increase key.
II. ▶ II, Play/Pause key.
12. ▶▶, next track key.
13. VOL -, Volume decrease key.
14. Tracks select key.
- MODE key, to select input signal source.
ACTIVATION AND REPLACEMENT REMOTE CONTROL'S BATTERY
Before using the remote control, insert the batteries as described below:
I. Remove the battery compartment cover as shown in the figure;
2. Insert 2 "AAA" size batteries paying attention to the polarities indicated and close the cover.
CAUTION
- Dispose of used batteries according to the recycling regulations in your area.
- Danger of explosion if battery is incorrectly replaced.
- Replace only with the same type or equivalent.
- If the remote control is not used for long periods, the battery can leak and damage the remote control, replace it with a new one if it should occur.
- DO NOT short-circuit the batteries or throw them in water, general trash or fire.
TRANSPORTATION
Press the button on the handle of the trolley, lift the handle up to the block (you will hear a metallic click). For transport, by acting on the handle of the trolley, slightly bend the appliance and take advantage of the two rear wheels.
To unlock and close the trolley, press the button on the handle again and lower the handle completely.
For transport, it is also possible to use the two handles placed laterally to the appliance.
POWER/BATTERY CHARGE
This unit works with internal rechargeable lead battery 12V -7Ah or 15V 3A adapter supply.
When the battery is running low or the device does not turn On, set the main POWER switch (10) to the "OFF" position, connect the supplied power adapter to the device socket (13) and the plug into a socket and recharge the internal battery, the LED indicator (12) will turn Red.
- LED indicator light RED fixed: the device is correctly connected to the power cable and the battery is being charged.
- LED indicator light GREEN fixed: charging operation completed, the battery is charged.
Note: Do not connect the appliance to an outlet with a voltage other than that indicated.
BASIC FUNCTIONS
POWER ON/ OFF
Press the main POWER switch (10) to switch on and use the device with its internal battery.
Press the main POWER switch (10) again to switch off the device completely or to recharge the battery.
STAND-BY
It is possible to bring the appliance into Stand-by mode using the button (6) on the remote;
Caution:
- In Stand-by mode, the blue LED lighting of the knobs remains On to indicate the activation of the Stand-by function.
- Leaving the device in Stand-by, the battery tends to discharge faster than using the main POWER switch (10).
MODE FUNCTION
To change the mode function, press more times the MODE (4) key on the unit or press MODE button (15) on the remote control to select: BLUETOOTH (on display "BLUE"), USB/Micro SD (only if the socket USB (16)/Micro SD socket (17) is connected to a memory, a small writing "USB" or "SD" appears on the display), AUX-IN (on display "AUX").
ADJUSTING THE VOLUME
I. Turn the VOLUME knob (11) to increase or decrease the general playback volume or use the Vol+ (10) and Vol- (13) buttons on the remote control;
2. Turn the MIC.VOL knob (I) to adjust the volume of the signal at the MIC1 (24) and MIC2 (23) input.
EQUALIZER
This unit has a built-in audio equalizer system. Adjust the frequencies of the 5-band equalizer (9) to set the sound and adapt it to the sound reproduction in progress. In addition, the unit has a pre-set audio equalization system.
Press the EQ button (3) on the remote control several times and select one of the 6 audio equalizations available.
SETTING TREBLE AND BASS TONE (MICROPHONE)
Turn the M. TREBLE knob (18) to adjust the high tones.
Turn the M. BASS knob (19) to adjust the bass tones.
ECHO EFFECT (MICROPHONE AND GUIT.)
Turn the ECHO knob (17) to increase or decrease the echo effect on the input MIC/ GUIT.
DELAY EFFECT (MICROPHONE AND GUIT.)
Turn the DELAY knob (16) to increase or decrease the delay effect on the input MIC/ GUIT.
DISCO-LIGHT EFFECTS
Press the LED switch (2) to activate the Disco-Light effect on the speaker.
Press again the LED switch (2) to deactivate the Disco-Light effect.
BLUETOOTH FUNCTION
I. Switch on the appliance and select the bluetooth function, the word "BLUE" appears on the display;
2. In Bluetooth mode the word "BLUE" on the display will flash and the system will automatically go into search mode;
3. Activate the Bluetooth feature on the external device to be coupled;
4. Initiate a search for devices. After select the "XF 1600 KB";
5. Enter the password "0000" if required;
6. Press the ▶ || (7) button on the unit or the key (11) on remote control, to start playing and the buttons ▶▶|(8) o |◀(6) on the unit, or the keys ▶▶|(12) and |◀(4) for selection of songs.
True wireless stereo (TWS) technology
TWS technology enables user to make wireless connection between two speakers which are same model and compatible with TWS. In TWS connection, two speakers will be automatically grouped to be a Stereo- Speaker System which outputs the left and right channel.
CONNECTION
Notice: Two speakers must be same model and both compatible with TWS.
I. Please switch on both speakers and select "Bluetooth" mode;
2. Press "TWS" button (7) of one of the speakers until hearing a "beep". It becomes the main speaker (left channel), which will automatically search and connect with another speaker (right channel). After connection, you will hear a "beep";
3. Connect mobile phone or Bluetooth player to the speaker by Bluetooth. After connection, you can play music with the TWS Stereo- Speaker System.
TWS function operates in TWS mode, manipulations to the main speaker will be simultaneously effected in another speaker. For example, volume adjustment, previous and next song selection, play and pause, power on and off.
Note:
- If the 2 loudspeakers are not paired, switch off both devices and repeat steps 1, 2 and 3.
- The TWS function only works between equal speakers or with other speakers that use the same micro processor or solution.
USB/ MICRO SD INPUT
I. Switch On the appliance;
2. Insert a USB memory or an Micro SD card in the corresponding entries (21/20). Playback starts automatically;
3. To pause playback, press the ▶ II (7) button on the unit or the key ▶ II (11) on remote control, the display will show "PAUS":
4. To resume playback, press the ▶ II (7) on the unit or on the remote control (II);
-
Press ▶▶(8) button on unit or ▶▶(12) button on remote control while listening to switch to the next track. Press the ◀◀(6) button on unit or ◀◀(4) button on remote to go to the previous tracks;
-
Using the numeric keypad (14) on remote control you can directly enter the number of the song you want to play;
-
Press ➕ button (8) on remote control, the display will show "ONE" (to reproduce the same track continuously); press it a second time, the word "ALL" will appear on the display (to continuously play all the tracks contained in the USB/Micro SD device);
-
Use the FL- (2) and FL + (7) buttons on the remote control to select the folder (if any) containing the desired tracks.
Note:
- The player may not support some USB/Micro SD devices, this is due to the incompatibility of some processors.
- To avoid harmful interference, always connect USB devices directly to the unit, do not use extension cords.
- From the computer to format the USB memory/SD FAT (16 or 32).
AUX-IN
I. Switch on the unit and select the "AUX" function;
2. Connect any unit equipped with audio output, through a cable 3.5mm jack to the AUX IN (22);
3. Use the external device from their commands.
FM RADIO
Press ▶ II button (7) to search FM channels automatically.
This operation will scan all FM stations and Pre-record them to memory.
The scan procedure will take several minutes and cannot be interrupted.
Once completed, press ▶ button (8) or ◀ button (6) to be previous stored radio or next stored radio.
I. Remove the cover on the back of the Microphones, insert 2 "AA" batteries into each microphone paying attention to the polarities indicated and close the cover again;
2. Turn on the microphone by moving the center switch upward. If the power indicator flashes or does not light up, check if the batteries are charged and if they have been inserted with the correct polarity;
3. Adjust the volume by turning the MIC VOL knob (I);
4. If the power indicator flashes after the microphone is turned on, the batteries are exhausted, replace them immediately.
Note:
- The effective range of the wireless microphone is 15m. Do not use over that range.
- Do not use two microphones working on the same frequency or crosstalk and interference will occur.
- If you use more wireless microphones at the same time, they must be set to different frequencies and should be kept away at least at 30m.
- Don't put the device too close to a DVD/CD/VCD player as they have strong frequencies and might affect the microphone.
POSSIBLE LIMITATIONS OF USE
- This device may operate on unauthorized frequencies in the region where the user is located. We recommend that you contact the competent authorities and request the necessary information relating to the frequencies authorized in your region for wireless microphone systems. In some cases, a ministerial license may be required for the use of this appliance. For possible requirements, contact the competent authorities. The user assumes exclusive responsibility for the acquisition of the license for radio-microphones and licensability depends on the classification and application of the user and on the frequency selected. (Legislative Decree 269/2001 art.6 paragraph 3). The frequencies used by this product are authorized only on Italian territory and may not be usable in other countries. It is recommended to contact the competent authorities and request the relevant information.
European countries for which the product has restrictions:
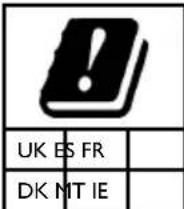
text_image
UK ES FR DK MT IEUnited Kingdom: IMPLEMENTED.
Spain: LIMITED IMPLEMENTATION.
France: LIMITED IMPLEMENTATION, for professional users.
Denmark: LIMITED IMPLEMENTATION, tuning range.
Malta: LIMITED IMPLEMENTATION, individual license required.
Ireland: NOT IMPLEMENTED
Recording from Microphone to USB flash drive
I. Switch on the appliance;
2. Insert a USB memory into the socket (21);
3. Switch On the microphone;
4. Press the REC (4) button on the unit and speak using the microphone;
5. Press again the REC (4) button to end recording; the recorded file will be saved in the USB memory.
TROUBLESHOOTING
If a problem occurs, follow the steps in the table below.
If the problem still can't be solved, please contact your retailer.
| Problem Possible cause Solution | ||
| No sound when power is turned ON | 1. No input sound source comes2. Volume knob in the lowest position3. Voice switch off4. USB/Micro SD card not plugged | 1. Input AUX signal2. Adjust volume3. Turn on voice switch4. Plug USB/Micro SD card, play MP3 |
| Distorted sound I. Volume is too loud2. Audio file error | 1. Turn the volume down2. Check and change the audio file | |
| No sound from the microphone | 1. Microphone socket may not be plugged properly.2. Microphone switch may not be on.3. Microphone volume is on lowest mode. | 1. Ensure the microphone is correctly plugged into the socket.2. Turn on the microphone3. Adjust the microphone volume as per users wish |
| No sound comes after inserting USB/ Micro SD Card | 1. Incorrect file format2. USB/Micro SD may not be plugged properly | 1. File format should be MP32. Plug USB/Micro SD card correctly |
| Unable to charge or the battery works only for short duration | 1. Connect with power cord to charge2. Battery not fully charged3. Battery life may have ended | 1. Check if power cord connected properly2. Extend charging time;normally it takes 6-8 hour to fully charge3. Replace old batteries with the same specification as the old batteries. |
| Speaker makes loud noises | 1. Microphone switched on but may too close to the speaker2. Microphone switched on but is not being used3. Microphone volume may be too loud4. Mobile phone is being used too close to the speaker5. Other wireless equipment may be placed very close to the speaker | 1. Keep the microphone 2 meters away from the speaker2. Turn off microphone if not in use.3. Adjust microphone volume to lower mode4. Keep mobile away from the speaker whilst a ending a call.5. Keep the speaker away from other wireless equipment |
INFORMATION NOTE ON THE REMOVAL BATTERY
Warning: Only high-qualified personnel should perform this operation!
BATTERY REMOVAL
The appliance should not be plugged to the mains socket when performing this operation!
I. Remove the screws that secure the trolley and the rear metal panel of the battery compartment;
2. Remove it and locate the battery;
3. Disconnect the battery and remove it.
INFORMATION ON DISPOSAL BATTERY
Used batteries should not be disposed of with household waste or thrown into fire or water. Used batteries should be recycled or disposed of in separate waste collection centres.

Precautions for correct disposal of the product.
The symbol shown on the equipment indicates that waste must be disposed of in "separate collection" and so the product must not be disposed of together with urban waste.
The user must take the product to special "separate waste collection centres" provided by local government, or deliver it to the retailer against the purchase of a new product.
Separate collection of waste and subsequent treatment, recycling and disposal operations promotes the production of equipment with recycled materials and limits negative effects on the environment and on health caused by improper handling of waste.
Illegal disposal of the product leads to the enforcement of administrative penalties.
TECHNICAL SPECIFICATIONS
| Power Supply: | 15V --- 3A |
| internal lead acid rechargeable battery 12V | --- 7Ah |
| Power: | Max 100W |
| Operating temperature: | 0° ~ 40°C |
| Humidity: | 5% ~ 90% |
| Output Audio power: | 200W |
| Frequency response: | 40Hz - 18KHz |
| Impedance: | 4Ω |
| Bluetooth peak transmission power: | 2,5mW |
| Band transmission Bluetooth: | 2,4GHz |
| Dimensions: | 518x345x702.5 mm |
| Weight: | 17.28 kg |
WIRELESS MICROPHONES
| Transmission frequency: | 208,6MHz |
| Transmission power: | 10mW (±1) |
| Operating current: | <30mA |
| Power supply: | 2x 1,5V (type “AA”) not included |
NOTES D'EMPLOI
II. ▶ II, Play/Pause.
https://www.trevi.it/dms/zidi/TREVI/DOCXF1600KB.pdf
Simplified EU Declaration Of Conformity
Hereby TREVI S.p.a declares that equipment type
"Power portable speaker with trolley" model XF 1600 KB
is in compliance with Directive 2014/53/EU.
The full text of the EU declaration of conformity is available at the following internet address:
https://www.trevi.it/dms/zidi/TREVI/DOCXF1600KB.pdf

Trevi S.p.A.
Strada Consolare Rimini-San Marino, 62
47924 Rimini (Rn) Italia
Tel. 0541/756420
Fax 0541/756430
www.trevi.it
e-mail: info@trevi.it