ThermoCameraCompact Plus - Camera Laserliner - Free user manual and instructions
Find the device manual for free ThermoCameraCompact Plus Laserliner in PDF.
| Product type | Infrared thermal imaging camera |
| Brand | Laserliner |
| Model | ThermoCamera Compact Plus |
| Sensor type | Uncooled microbolometer, 25 Hz, 8-14 µm |
| Infrared resolution | 80 x 80 pixels |
| Field of view | 17° x 17° (FOV) |
| Spatial resolution (IFOV) | 3.78 mrad |
| Measuring range | -20°C to 150°C / 0°C to 350°C |
| Accuracy | ±2°C or ±2% of measured value |
| Thermal sensitivity (NETD) | 0.1°C at 30°C |
| Display | 2.8 inch color TFT |
| Image modes | Infrared, digital, blended (MIX) |
| Digital zoom | 1x to 32x |
| Storage | Micro SD card (up to 16 GB, FAT32) |
| File formats | JPEG, MPEG-4 (30 Hz), max 1280x960 px |
| Power supply | Li-ion pack 3.7 V / 2.6 Ah |
| Operating time | Approx. 4 hours |
| Dimensions (L x W x H) | 95 x 230 x 80 mm |
| Weight (with battery) | 0.5 kg |
| Aiming laser | Class 2, <1 mW, 635 nm |
| LED lighting | Integrated white LED |
| Interfaces | Mini USB, HDMI, micro SD, audio/micro/headphone |
| Operating conditions | -20°C to 50°C, RH max 85% non-condensing |
| Cleaning | Turn off and remove battery, clean lens with a soft cloth, do not touch the sensor |
| Safety | Avoid eye contact with the laser beam, respect class 2 |
Frequently Asked Questions - ThermoCameraCompact Plus Laserliner
User questions about ThermoCameraCompact Plus Laserliner
0 question about this device. Answer the ones you know or ask your own.
Ask a new question about this device
Download the instructions for your Camera in PDF format for free! Find your manual ThermoCameraCompact Plus - Laserliner and take your electronic device back in hand. On this page are published all the documents necessary for the use of your device. ThermoCameraCompact Plus by Laserliner.
USER MANUAL ThermoCameraCompact Plus Laserliner
ThermoCamera Compact Plus / Pro
Laserliner
| DE | 02 |
| EN | 18 |
| NL | 34 |
| DA | 50 |
| FR | 66 |
| ES | |
| IT | |
| PL | |
| FI | |
| PT | |
| SV | |
| NO | |
| TR | |
| RU | |
| UK | |
| CS | |
| ET | |
| RO | |
| BG | |
| EL | |
| SL | |
| HU | |
| SK | |
| HR |

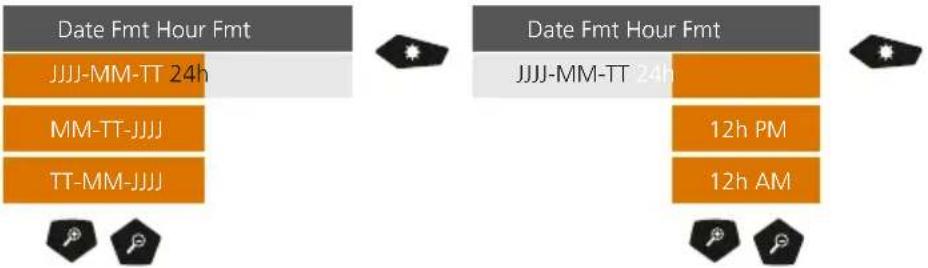
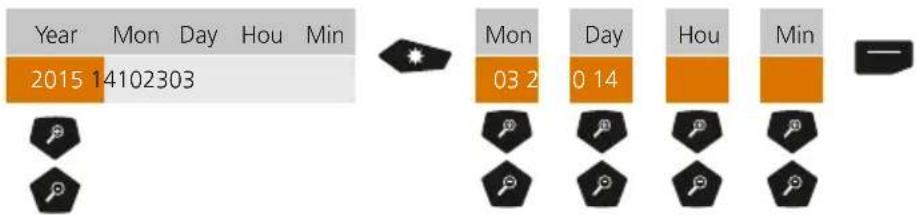
Datum Form. Zeit Form.
JJJ-MM-TT 24h
MM-TT-JJJJ
TT-MM-1


Read the operating instructions and the enclosed brochure „Guarantee and additional notices" completely. Follow the instructions they contain. This document must be kept in a safe place and if the laser device is passed on, this document must be passed on with it.
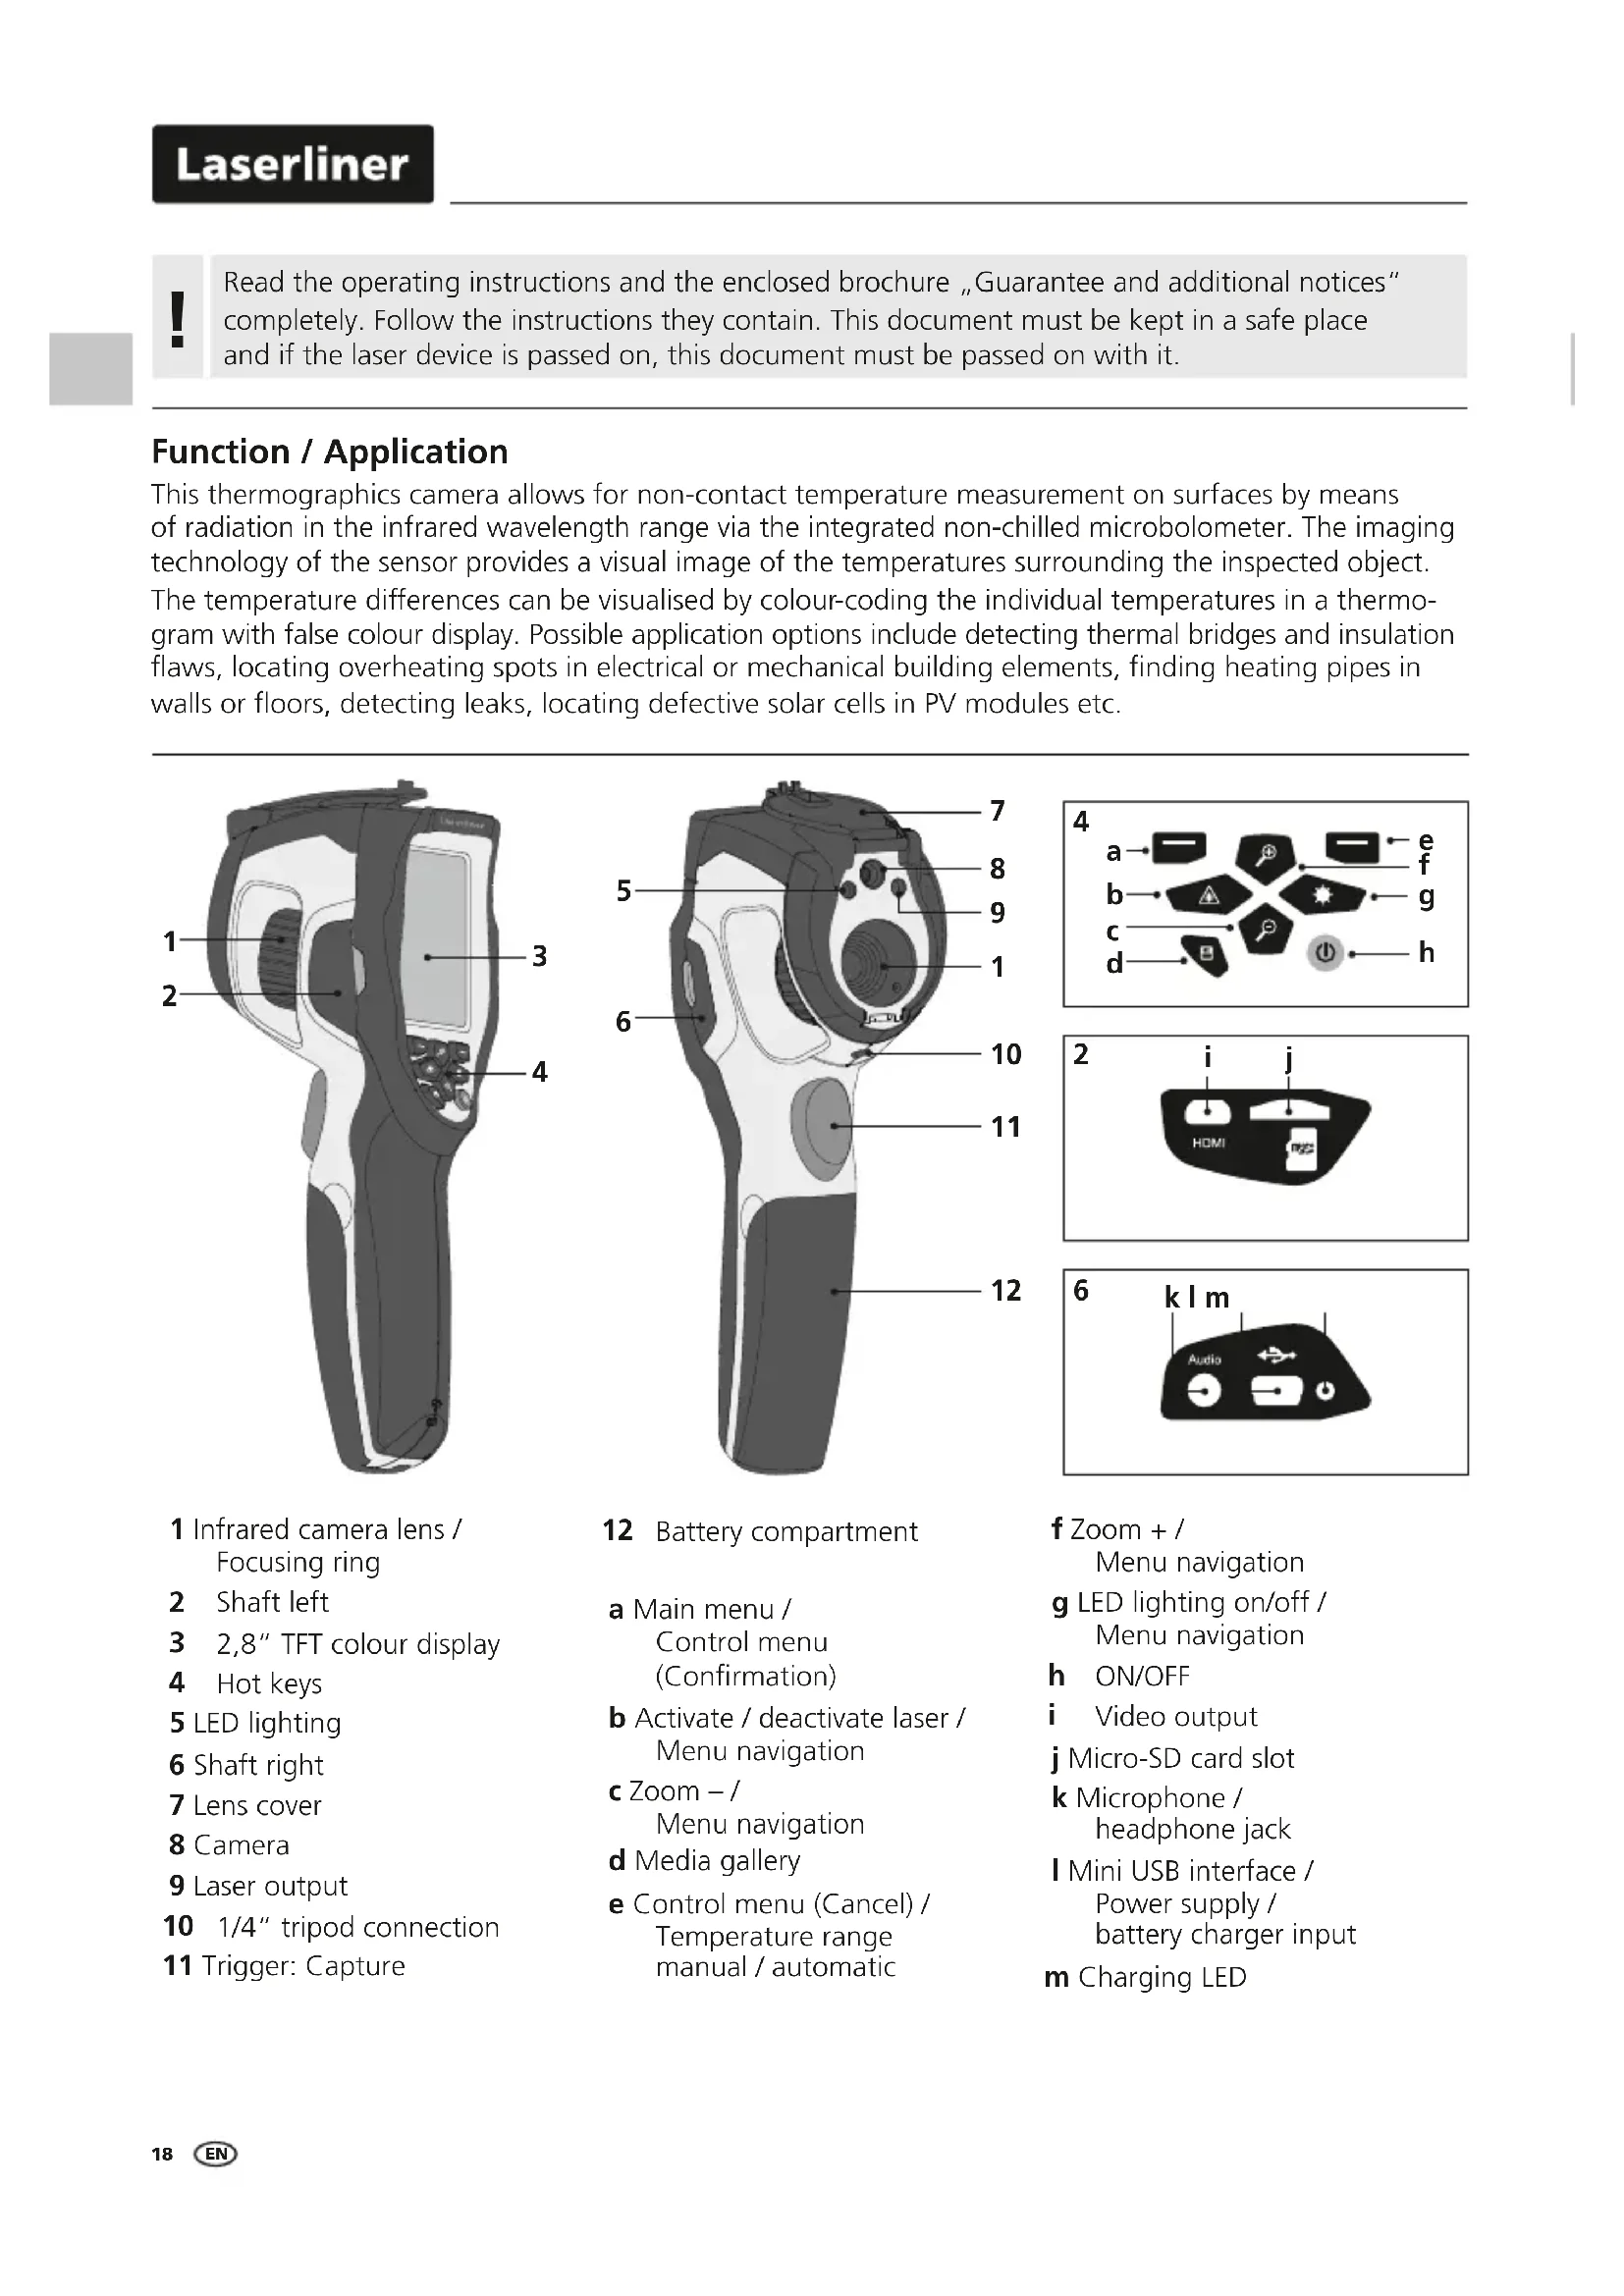
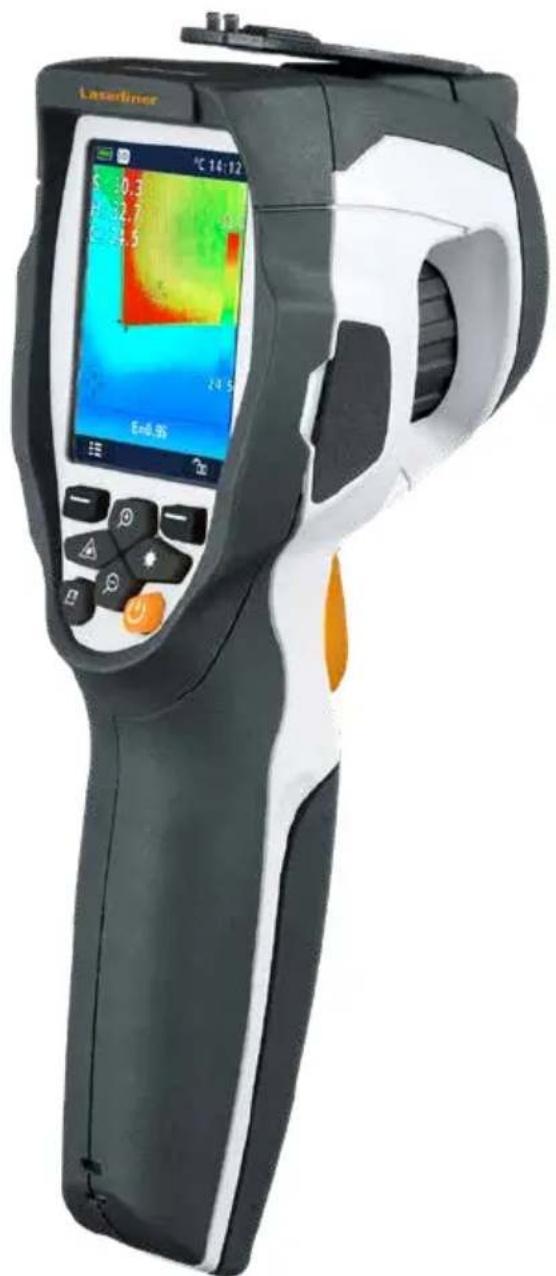
Function / Application
This thermographics camera allows for non-contact temperature measurement on surfaces by means of radiation in the infrared wavelength range via the integrated non-chilled microbolometer. The imaging technology of the sensor provides a visual image of the temperatures surrounding the inspected object. The temperature differences can be visualised by colour-coding the individual temperatures in a thermogram with false colour display. Possible application options include detecting thermal bridges and insulation flaws, locating overheating spots in electrical or mechanical building elements, finding heating pipes in walls or floors, detecting leaks, locating defective solar cells in PV modules etc.
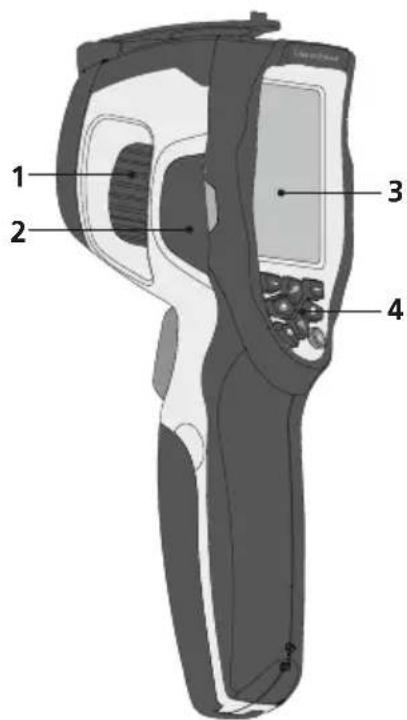
1 Infrared camera lens / Focusing ring
2 Shaft left
3 2,8" TFT colour display
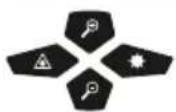
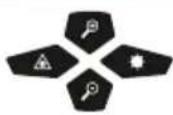
4 Hot keys
5 LED lighting
6 Shaft right
7 Lens cover
8 Camera
9 Laser output
10 1 / 4'' tripod connection
11 Trigger: Capture
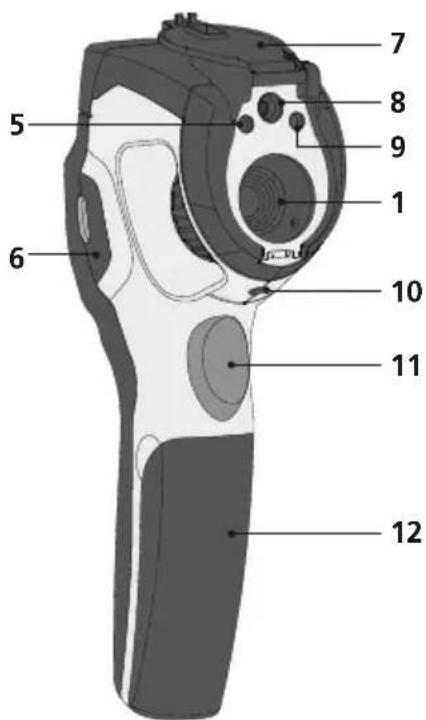
12 Battery compartment
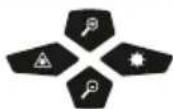
a Main menu / Control menu (Confirmation)
b Activate/deactivate laser / Menu navigation
c Zoom -/ Menu navigation
d Media gallery
e Control menu (Cancel)/ Temperature range manual / automatic

f Zoom +/ Menu navigation
g LED lighting on/off / Menu navigation
h ON/OFF
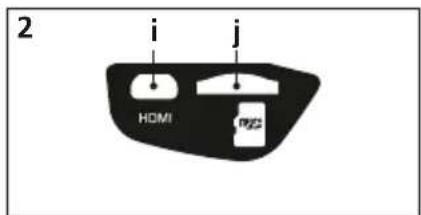
i Video output
j Micro-SD card slot
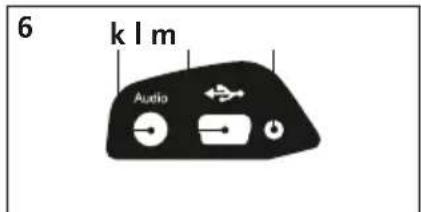
k Microphone / headphone jack
I Mini USB interface / Power supply / battery charger input
m Charging LED
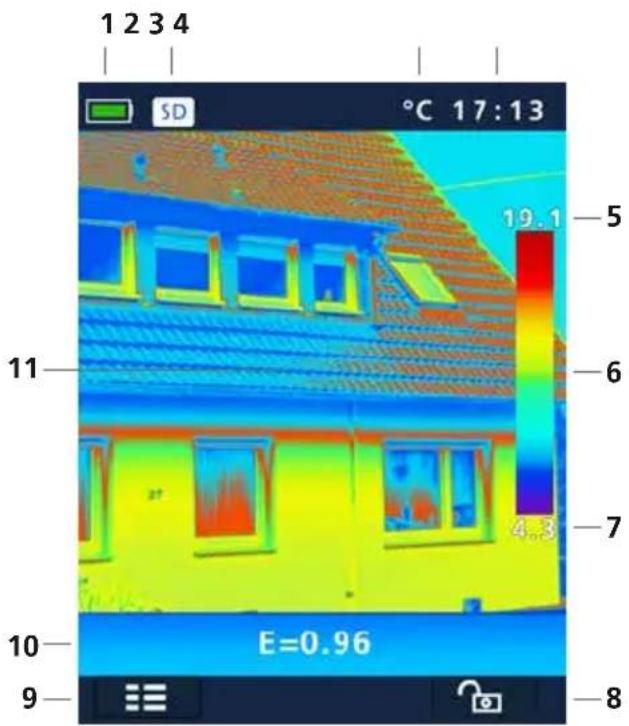
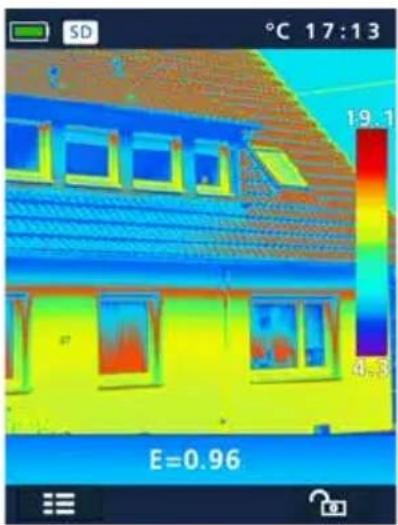
Standard measurement view
1 Battery charge indicator
2 Micro-SD card inserted
3 Temperature unit
4 Time
5 Max. temperature
6 Colour spectrum with temperature range
7 Min. temperature
8 Temperature range manual / automatic
9 Main menu
10 Set emissivity coefficient
11 Thermography image
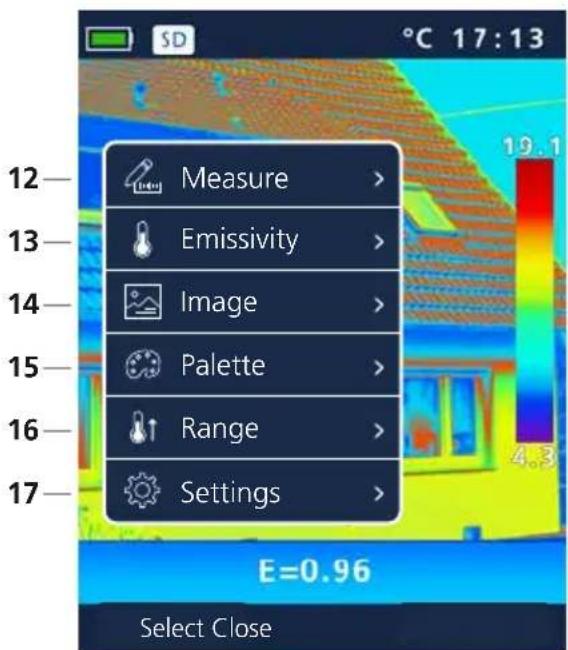
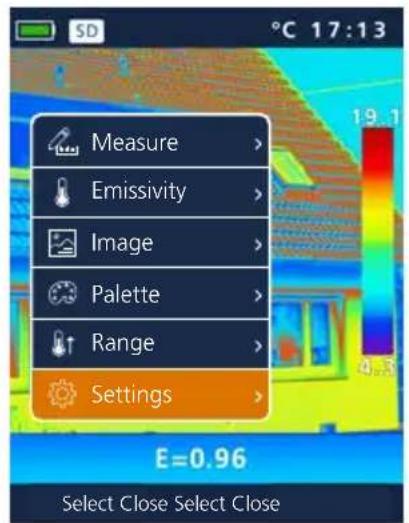
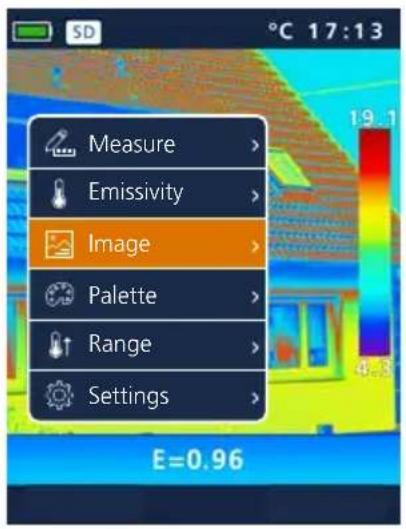
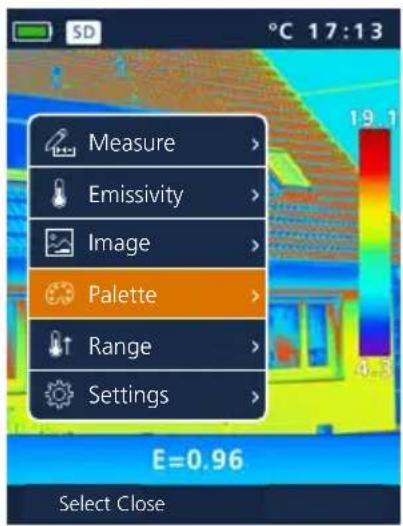
Main menu
12 Add measurement points
13 Set emissivity coefficient
14 Set image
15 Change colour pallet
16 Set measuring range
17 General and measurement-specific settings
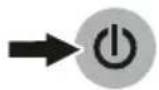
1 ON/OFF
ON
OFF
2 Charging the li-ion battery
To charge the Li-Ion battery pack, plug the supplied power supply/battery charger into charging socket "I" and connect it to an appropriate power source.
Operation while charging is possible.
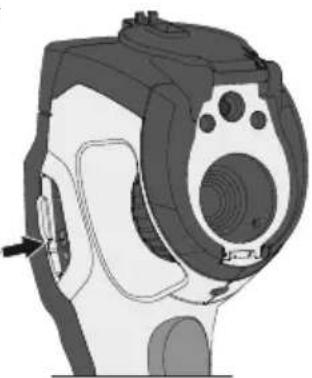
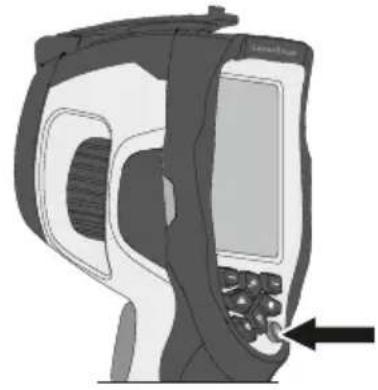
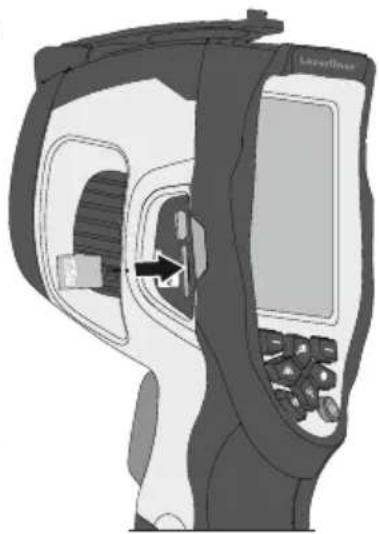
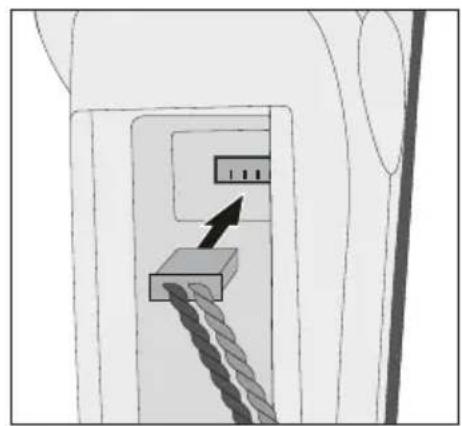
3 Inserting micro-SD card
To insert a micro-SD card, first open the rubber cover and then insert the memory card as illustrated. You cannot record anything without a storage medium.
4 Removing / inserting li-ion battery pack
Open battery compartment (12).
SD card prerequisite: microSDHC, class 10, FAT32
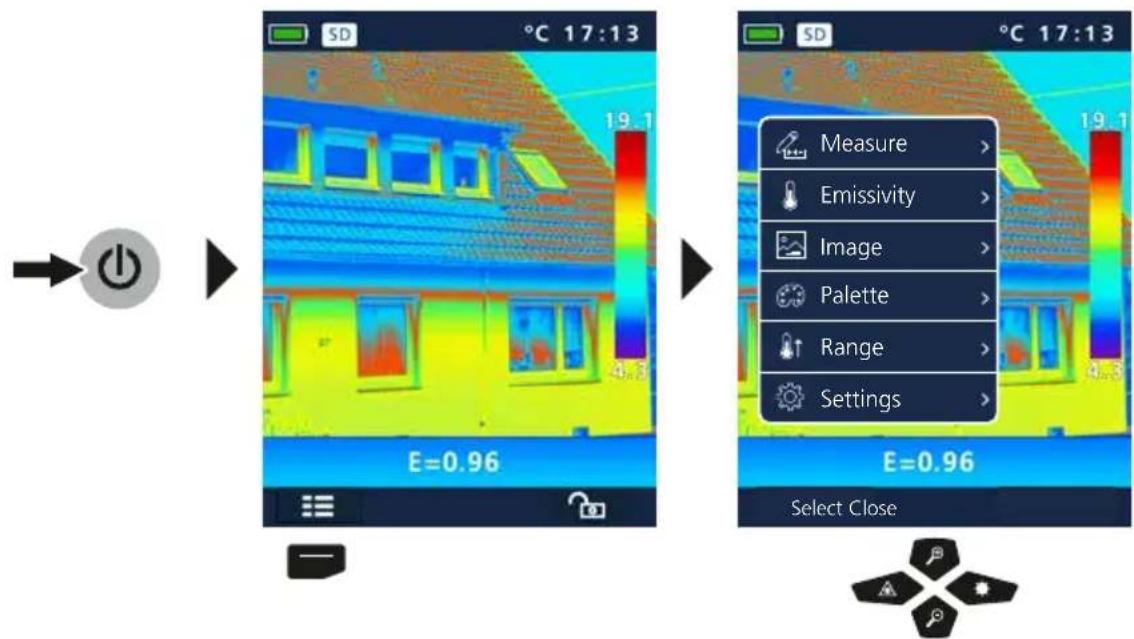
Main menu
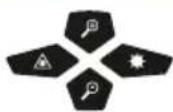
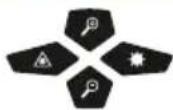
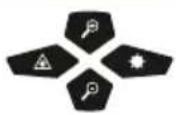
General and measurement-specific settings can be made in the main menu. The menu is controlled with the four buttons (b, c, f, g).
ThermoCamera Compact Plus / Pro
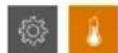
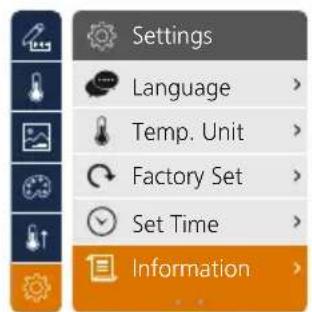
6.0 Settings


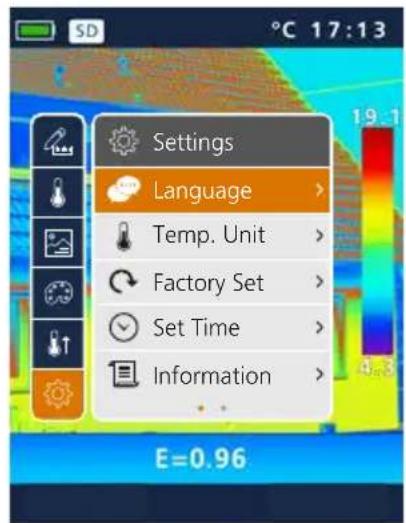
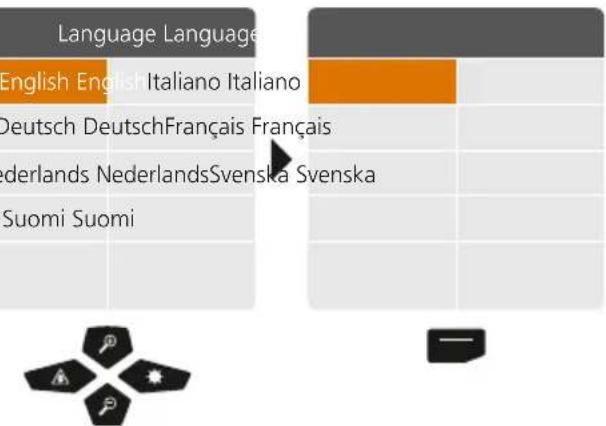
6.1 Settings: To set menu language EN/DE/NL/FI/IT/FR/SV

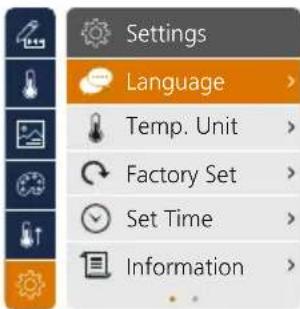


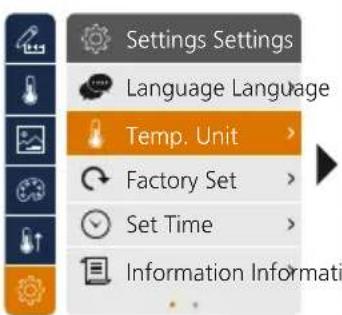
6.2 Settings: Temperature unit
Laserliner

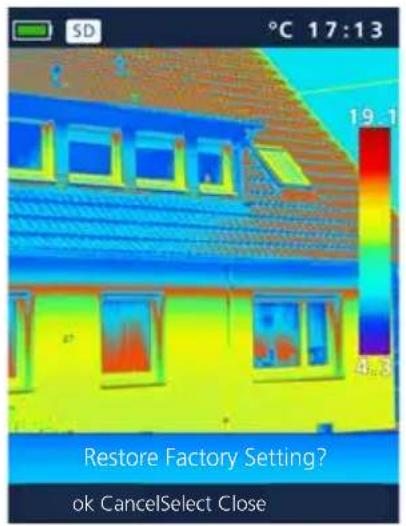
6.3 Settings:Factory Set
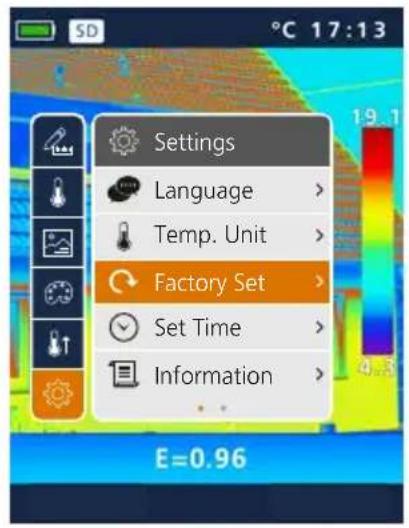


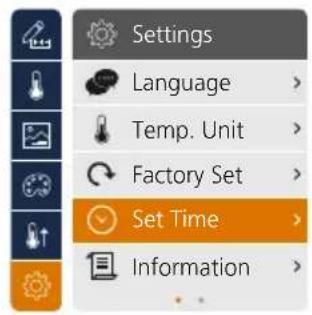
6.4 Settings: Set Time


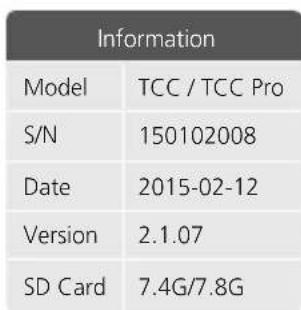
6.5 Settings: Information


ThermoCamera Compact Plus / Pro
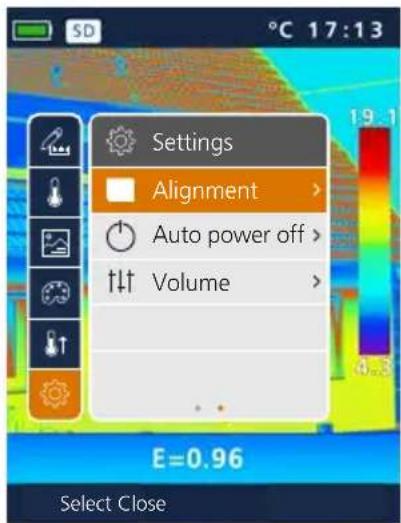
6.6 Settings: Alignment

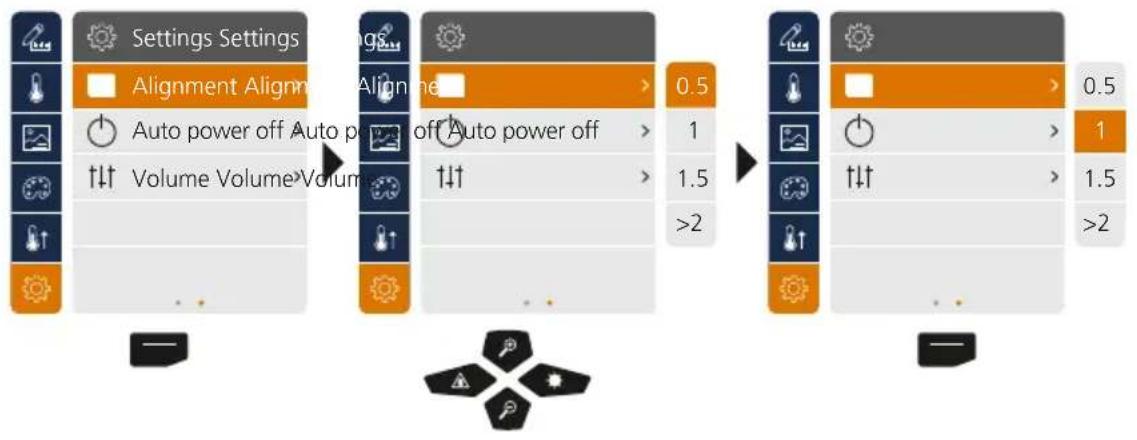
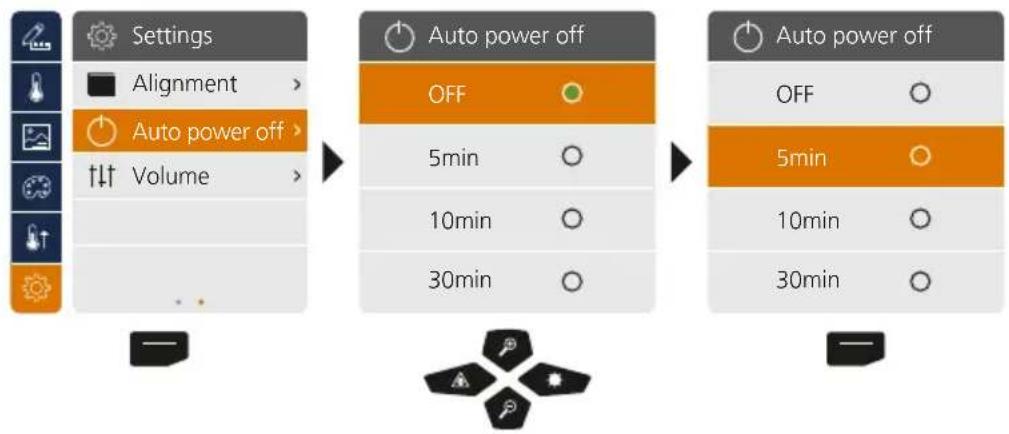
6.7 Settings: Auto power off
The device switches off automatically after a set period of inactivity.
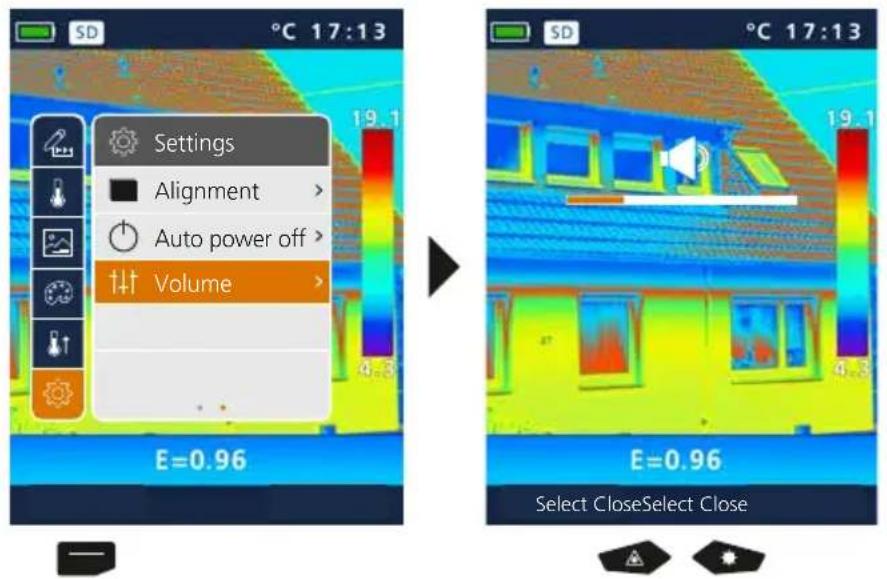
6.8 Settings: Volume
Laserliner
Measure

Up to three measuring points can be defined simultaneously (Spot (S): temperature at centre of image, Max (H): highest temperature, MIN (C): lowest temperature).

8.0 Emissivity

Before each use, check the settings for infrared measurement and adjust them to the respective measuring situation to ensure accurate measurements. Pay particular attention to the general parameters for the emissivity coefficient and the reflection temperature.
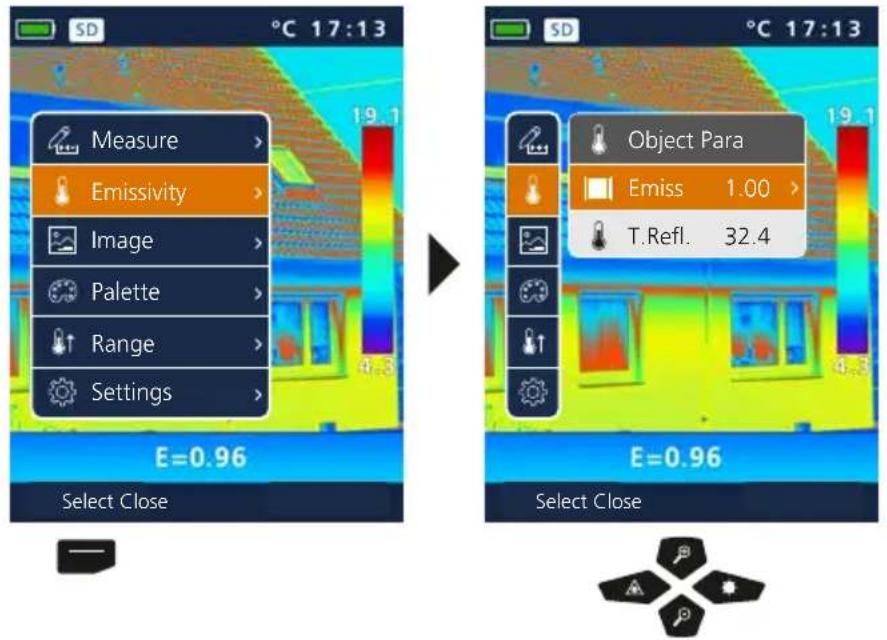
8.1 Emissivity: Emissivity coefficient

The level of infrared emissions given off by everything depends on the specific material and surface. This factor is determined by the emissivity coefficient (0.10 ... 1.0). For accurate measurements, it is absolutely essential that the emissivity coefficient is set first. The emissivity coefficient can either be custom set or selected based on the predefined emissivity coefficients from the material list.
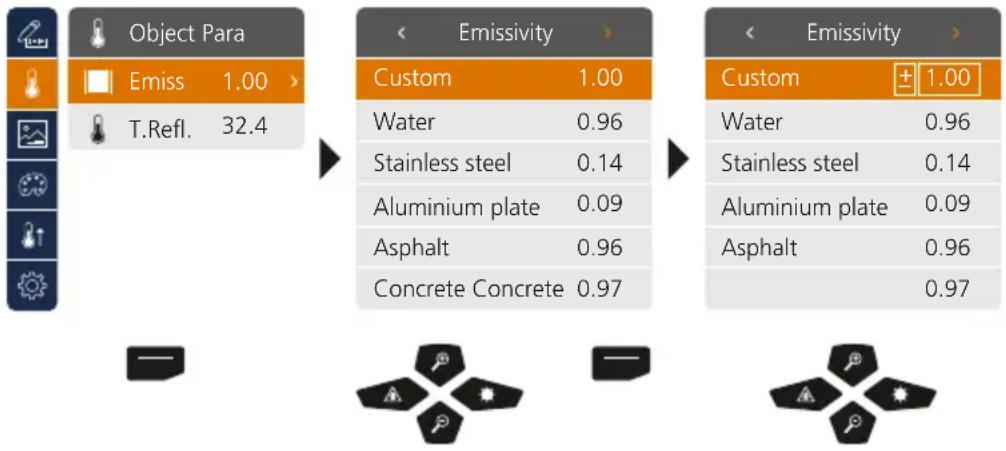

Pressing and holding the button increases or decreases the value in steps of 10.
Emissivity table (reference values with tolerances)
Metals
| Alloy A3003 Oxidised Roughened | 0.20 0.20 | Iron Oxidised With rust | 0.75 0.60 | Steel Alloy (8% nickel, 18% chromium) Galvanised Oxidised Heavily oxidised Freshly rolled Rough, flat surface Rusty, red Sheet, nickel plated Sheet, rolled Stainless steel | 0.35 0.28 0.80 0.88 0.24 0.96 0.69 0.11 0.56 0.45 |
| Aluminium Oxidised Polished | 0.30 0.05 | Iron, cast Non-oxidised Molten mass | 0.20 0.25 | ||
| Brass Polished | 0.30 | Iron, forged Matt | 0.90 | ||
| Oxidised | 0.50 | ||||
| Chromium oxide 0.81 | Lead Rough | 0.40 | |||
| Copper Oxidised | 0.72 | Platinum Black | 0.90 | ||
| Copperoxide | 0.78 | Steel Cold rolled Ground plate Polished plate | 0.80 0.50 0.10 | 0.10 | |
| Inconel Oxidised Electropolished | 0.83 0.15 |
Nonmetals
| Asbestos 0.93 | Gravel 0.95 | Paper All colours | 0.96 | ||
| Asphalt 0.95 | Grit | 0.95 | |||
| Basalt 0.70 | Gypsum | 0.88 | Plastic Translucent | 0.95 | |
| Brick, red 0.93 | Gypsum cardboard | 0.95 | PE, P, PVC | 0.94 | |
| Carborundum 0.90 | Heat sink Black, anodized | 0.98 | Quartz glass | 0.93 | |
| Cement 0.95 | Rubber Hard Soft, grey | 0.94 0.89 | |||
| Ceramics 0.95 | Human skin | 0.98 | |||
| China Brilliant white With glaze | 0.73 0.92 | Ice Clear With heavy frost | 0.97 0.98 | Sand | 0.95 |
| Laminate | 0.90 | 0.93 | |||
| Clay 0.95 | Lime | 0.35 | Screed | 0.80 | |
| Coal Non-oxidised | 0.85 | Lime malm brick | 0.95 | Snow | 0.94 |
| Limestone | 0.98 | Soil | 0.82 | ||
| Concrete, plaster, mortar 0.93 | Tar paper 0.92 | ||||
| Cotton 0.77 | Marble Black, dull finish Greyish, polished | 0.94 0.93 | Transformer paint | 0.94 | |
| Earthenware, matt 0.93 | Wallpaper, light-coloured | 0.89 | |||
| Fabric 0.95 | Masonry 0.93 | Water | 0.93 | ||
| Glass 0.90 | Paint Black, matt Heat-resistant White | 0.97 0.92 0.90 | Wood Untreated Beech, planed | 0.88 0.94 | |
| Glass wool 0.95 | |||||
| Graphite 0.75 |
8.2 Emissivity: Reflection temperature
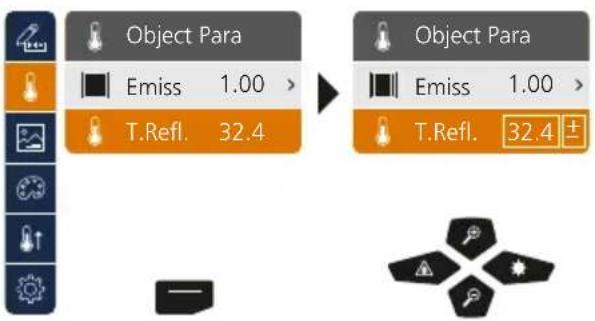
Reflection temperature
Infrared measurements of specific objects can be affected by reflection from other objects nearby or even from the ambient air because the measured object cannot be fully isolated. The reflection temperature setting can help compensate for the interference. The reflection temperature is generally the same as the ambient temperature. However, if larger objects with significantly different temperatures (approx. >20^ ) are in close proximity to the measured area, its effects must be taken into account. For this purpose, follow these steps:
- Set emissivity coefficient to 1.0
- Blur the object out of focus (Refer to Section 14)
- Aim the camera in the opposite direction of the actual measured object
- Determine the average temperature
- Set the average temperature as the reflection temperature
ThermoCamera Compact Plus / Pro
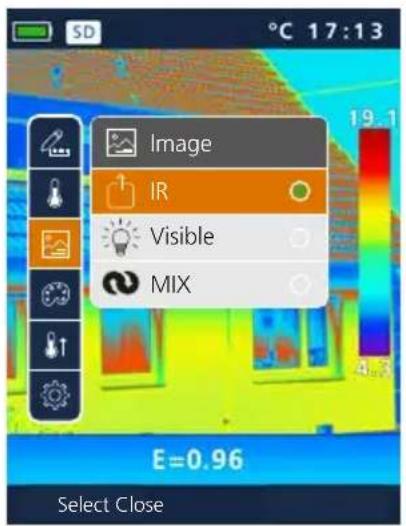
9 Image modes

There are 3 image modes to choose from.
A. IR image (IR)
B. Digital image (Visible)
C. Digital full-screen image with IR image (MIX)


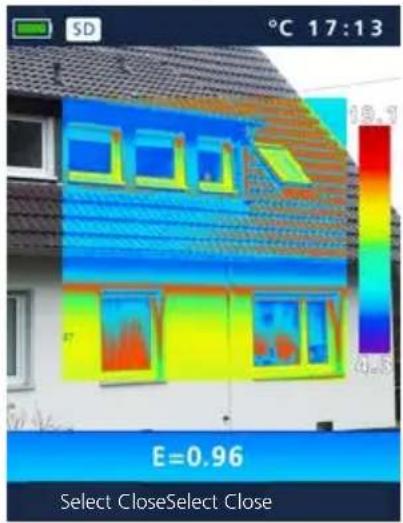
Example image mode MIX
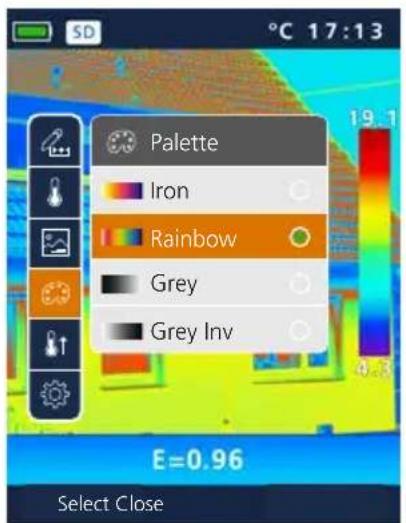
10 Colour ranges IR image

You can choose from several standard colour ranges to represent the measured infrared temperatures. Depending on the colour palette, the measured temperatures are adjusted within the current image section and displayed in the respective colour space. The bargraph for the respective minimum/ maximum temperatures of the entire image serves as a reference for the corresponding temperature/ colour mapping.


Laserliner
11 Measurement range

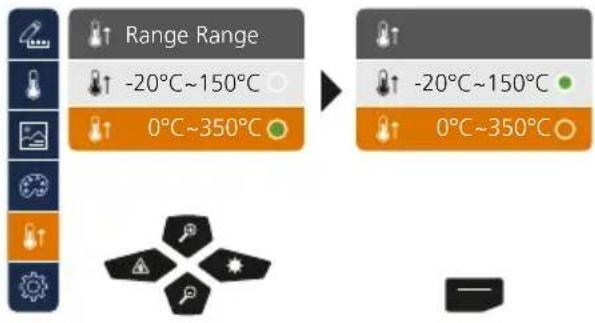
Pre-selection of measurement range:
-20°C ... 150°C
(ideal for interior and exterior)
0^ 350^
(ideal for industrial applications)
12 Temperature range manual / automatic
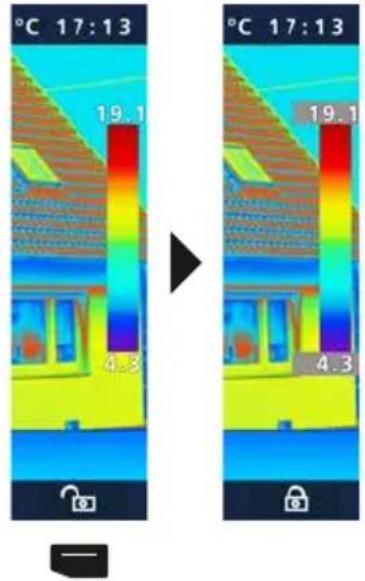
auto man
Automatic temperature range
This setting is used to adjust the temperature range of the IR image and the resulting distribution of the colour spectrum of the infrared image. The colour spectrum of the measured IR image is determined in relation to the temperature range and colour scale.
The colour distribution of the IR image is automatically and dynamically adjusted in the bargraph based on the measured min./max. values.
Manual temperature range
In manual settings mode, the temperature range is no longer set automatically based on the measured min./max. values but rather determined on the basis of manual values. Refer to Section 13

The min/max values last measured are taken as the default setting every time the temperature range is switched from AUTO to Manual.
13 Manual temperature range
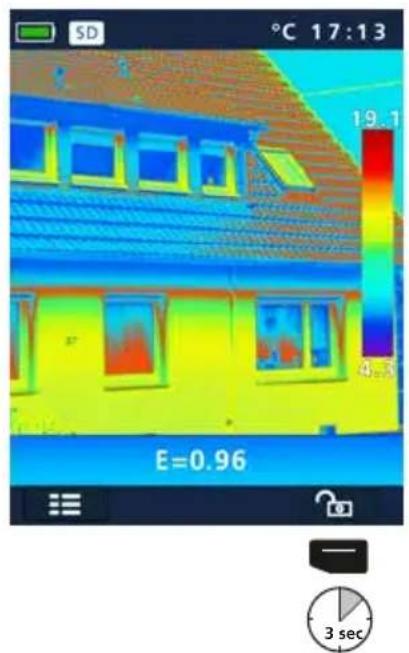

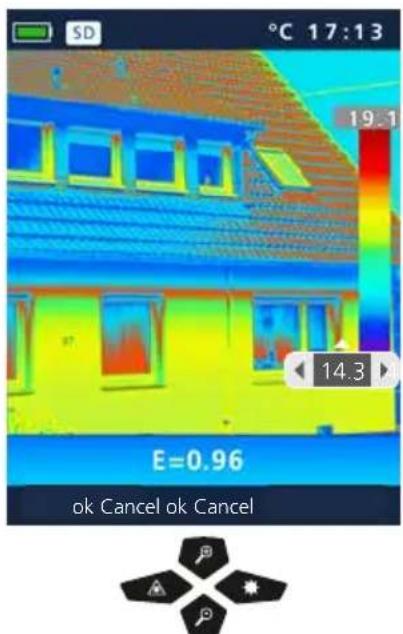

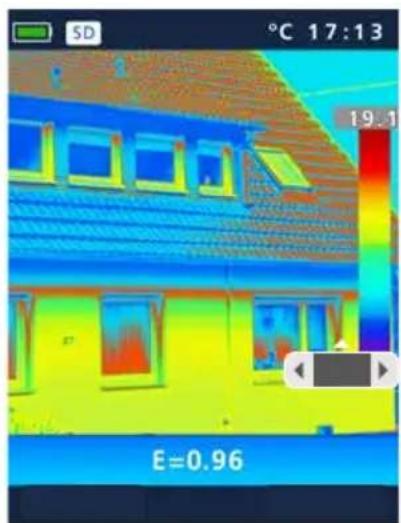

ThermoCamera Compact Plus / Pro
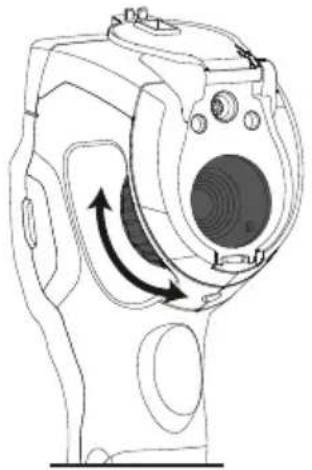
14 Camera focus / Shutter-function
In addition to the basic settings in the measuring tool, the camera focus and the shutter function (image calibration) play an essential role in achieving high-quality thermography results. You should focus on the measured object as well as possible so that the outlines and contours are clearly visible on the display.
Image calibration takes place automatically or can be triggered manually by briefly pressing the ON/OFF button.
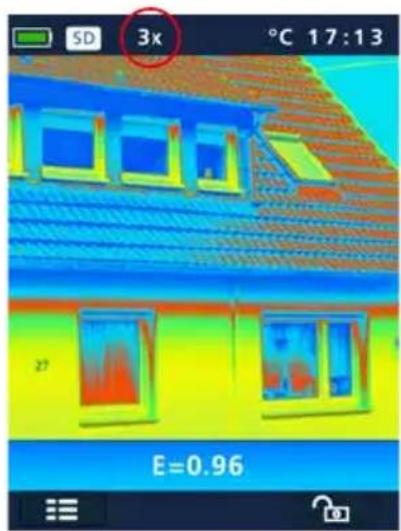
15 Zoom
The view can be zoomed (32x). Pressing and holding the button accelerates the zoom levels.


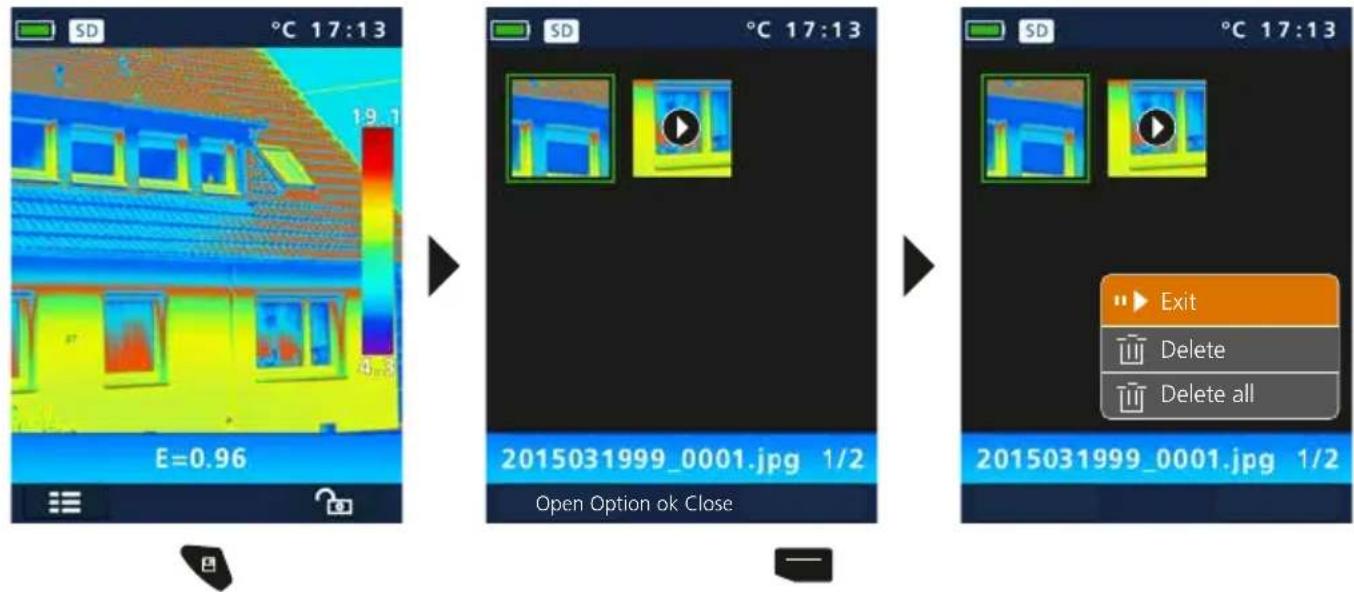
16 Media gallery / playback mode / to delete recording
In the media gallery, you can access and play all of the images and videos recorded with the ThermoCamera Compact
17 Capture image / record audio
Using the „Trigger“ button (11), users can take images or video of any measurement situation for the subsequent documentation. The microphone integrated in the headset also records audio while recording a video.
Record images Record videos
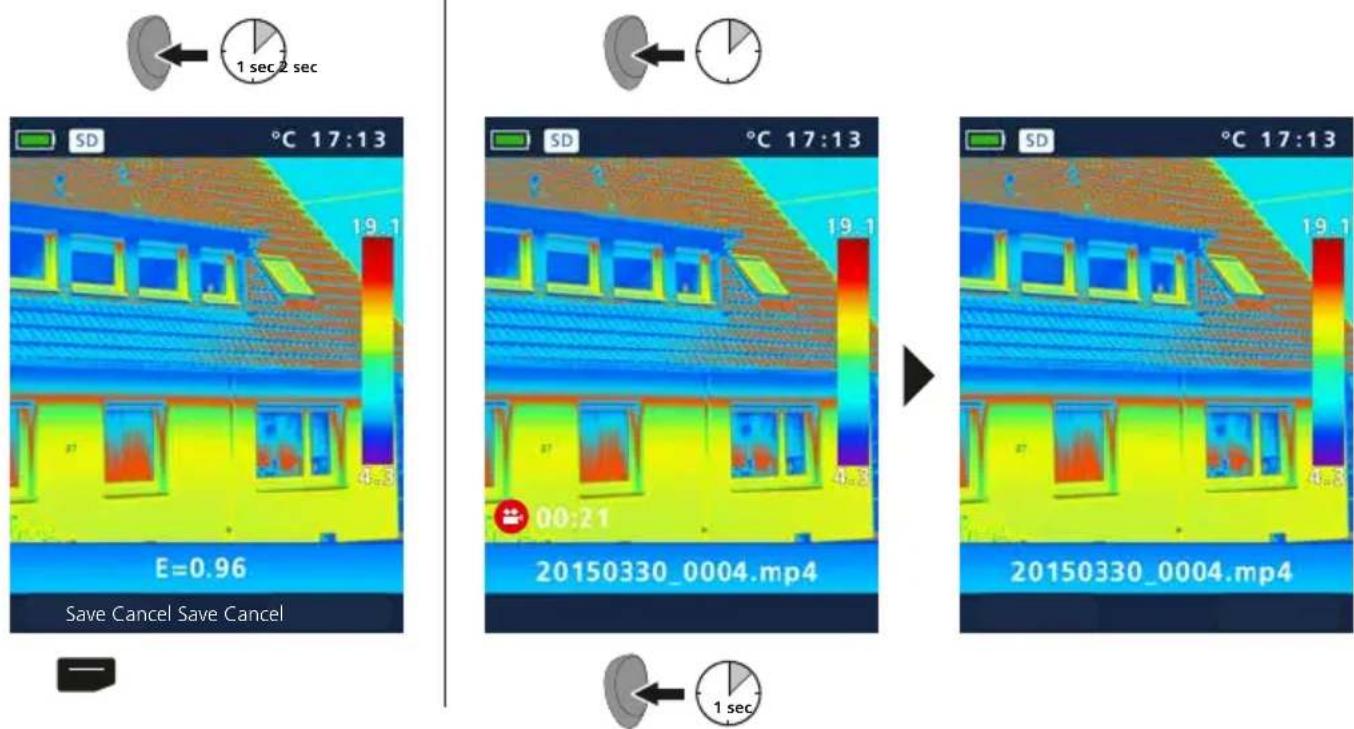
You cannot record anything without a storage medium.
ThermoCamera Compact Plus / Pro
18 Target laser

The target laser makes area-specific measurements easier by facilitating pinpointing. In addition, the laser is represented as a red dot on the display. Press and hold button "b" to switch the device on and off.
19 LED lighting

The LED lighting is switched ON/OFF by pressing and holding button „g".
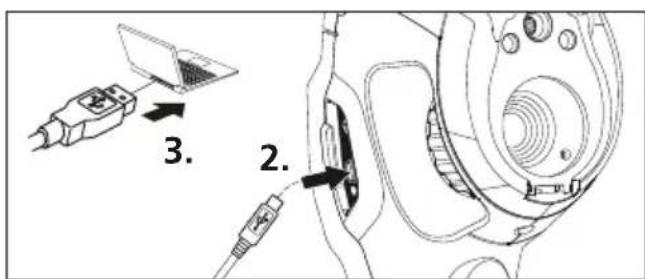
20 USB data transfer
Data saved on the SD card can be transferred to PC either with a suitable card reader or directly via the USB port. Please refer to the manual supplied with your card reader for information about connecting your card adapter or card reader to a PC.
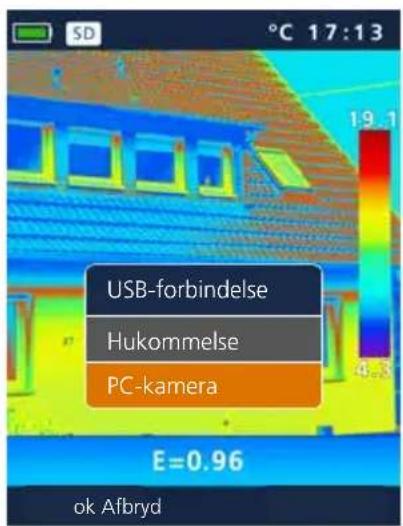
Transfer via USB interface
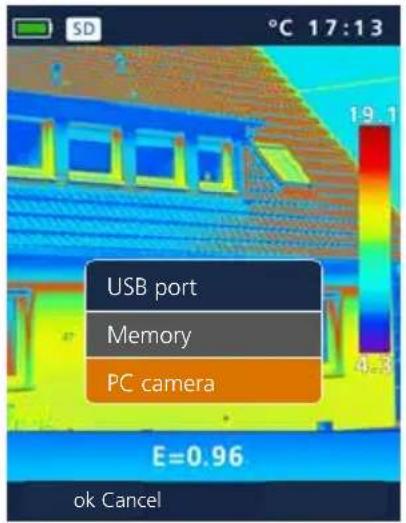
Memory
The SD card is shown as external data medium on the computer.

PC camera
The ThermoCamera Compact is shown as a USB camera.

The "PC camera" function is only available on a Windows PC and can be displayed with a video player with DirectX capabilities.
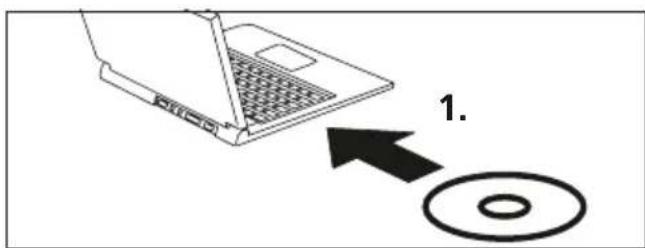
21 Software (optional)
With the software provided on the CD it is possible to transfer the recorded data to a PC and to use the data for further processing and documentation.
Load the CD in the drive and follow the installation routine. After successful installation, start the application. Connect one end of the supplied USB cable to the mini-USB port of the device and the other end to a free USB port on your computer. For further information on how to use the software, refer to the Help function that contains a detailed description of the functions.
It is not necessary to install a driver. The software operates under Windows XP / 7 / 8 and 10.

22 Instructions for maintenance
- Perform the task at a location that is clean and free of dust and water
- Switch off the camera, remove the batteray
Earth to protect from static charges - Do not touch the lens
- Do not touch the parts inside the thermal camera (sensors)
- Protect both the interior and the lens from dust and contamination
Warranty expires in the case of improper handling
EU directives and disposal
This device complies with all necessary standards for the free movement of goods within the EU.
This product is an electric device and must be collected separately for disposal according to the European Directive on waste electrical and electronic equipment.
Further safety and supplementary notices at: www.laserliner.com/info
General safety instructions
Laser radiation!
Do not stare into the beam!
Class 2 laser
<1 mW·635 nm
EN 60825-1:2014/AC:2017
- Attention: Do not look into the direct or reflected beam.
- The laser may not get into the hands of children!
- Do not point the laser beam towards persons.
-
If a person's eyes are exposed to class 2 laser radiation, they should shut their eyes and immediately move away from the beam.
-
Do not expose the device to mechanical stress, extreme temperatures, moisture or significant vibration.
- The device must only be used in accordance with its intended purpose and within the scope of the specifications. Modifications or changes to the device are not permitted.
| Technical data Subject to technical alterations. 21W18 | ||
| ThermoCamera Compact Plus | ThermoCamera Compact Pro | |
| Sensor type uncooled microbolometer, 25 Hz, 8-14 μm | ||
| Infrared temperature resolution 80 x 80 pixels 120 x 160 pixels | ||
| IR optics Germanium infrared lens | ||
| Field of vision 17° x 17° (FOV) 19° x 25° (FOV) | ||
| Spatial resolution 3.78 mrad (IFOV) 2.78 mrad (IFOV) | ||
| Focus adjustable 0.5 m - 10 m adjustable 0.5 m - 30 m | ||
| Thermal sensitivity NETD, 0.1 °C @ +30°C | ||
| Measurement range / Precision -20°C ... 150°C, 0°C ... 350°C / ± 2°C or ± 2% of measured value | ||
| Screen type 2.8" colour TFT | ||
| mode Infrared image, digital image, MIX image | ||
| Image function 1-32x digital zoom | ||
| Format | JPEG format, MPREG-4 standard (30 Hz), max. 1280 x 960 pixels | |
| Memory function | Micro-SD card up to 16 GB | |
| LED | White LED, object lighting | |
| Target Laser | Laser classe 2 < 1 mW, 635 nm, EN 60825-1:2014/AC:2017 | |
| Interface / Ports | Mini USB / micro-SD, video (HDMI), audio, microphone/headphone | |
| Operating conditions | -20°C ... 50°C, max. humidity 85% rH, no condensation, max. working altitude 2000 m above sea level | |
| Storage conditions | -40°C ... 70°C, max. humidity 85% rH | |
| Power supply / Charging time / Operating time | Li-lon pack battery 3.7V / 2.6Ah / approx. 4 h / charg. electronic system, DC 5V | |
| Dimensions / Weight | 95 x 230 x 80 mm / 0.5 kg (incl. battery pack) | |
Laserliner

Overforsel via USB-interface
Hukommelse
SD-kortet vises som eksternt datamedium pa computeren.
PC-kamera
ThermoCamera Compact vises som USB-kamera.