60.2549.08 - Alarm clock radio TFA - Free user manual and instructions
Find the device manual for free 60.2549.08 TFA in PDF.
| Product type | Radio alarm clock |
| Brand | TFA |
| Model | 60.2549.08 |
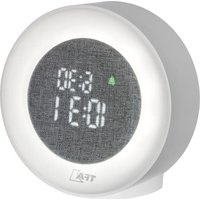
| Design | Minimalist wood effect with invisible screen |
| Display | LED with 3 brightness levels and automatic adjustment |
| Display functions | Time, date or indoor temperature (automatic switching) |
| Clock | DCF radio-controlled (77.5 kHz) with manual setting |
| Alarm | Alarm with time setting, activation by touch or loud noise |
| Display activation | By touch or loud noise (power saving mode) |
| Main power supply | Mains adapter (included) |
| Backup power supply | 3 AAA 1.5V batteries (not included) + internal CR2032 battery for memory |
| DCF reception | Automatic daily at 2:30 AM, can be deactivated |
| Indoor temperature | Range: 0°C to 50°C |
| Dimensions (estimated) | Approximately 15 x 8 x 5 cm |
| Weight (estimated) | Approximately 300 g (without batteries) |
| Maintenance and cleaning | Clean the front glass with a soft, damp cloth, without harsh solvents |
| Safety | Use only the supplied adapter, do not expose to moisture, keep out of reach of children (small parts) |
| Batteries | Do not mix new and used batteries, do not recharge, remove if not used for long periods |
| Repairability | Batteries replaceable by user; for other issues, contact a professional |
| General information | Compliant with EU standards (WEEE). Manufactured by TFA Dostmann |
Frequently Asked Questions - 60.2549.08 TFA
User questions about 60.2549.08 TFA
0 question about this device. Answer the ones you know or ask your own.
Ask a new question about this device
Download the instructions for your Alarm clock radio in PDF format for free! Find your manual 60.2549.08 - TFA and take your electronic device back in hand. On this page are published all the documents necessary for the use of your device. 60.2549.08 by TFA.
USER MANUAL 60.2549.08 TFA
m = 311
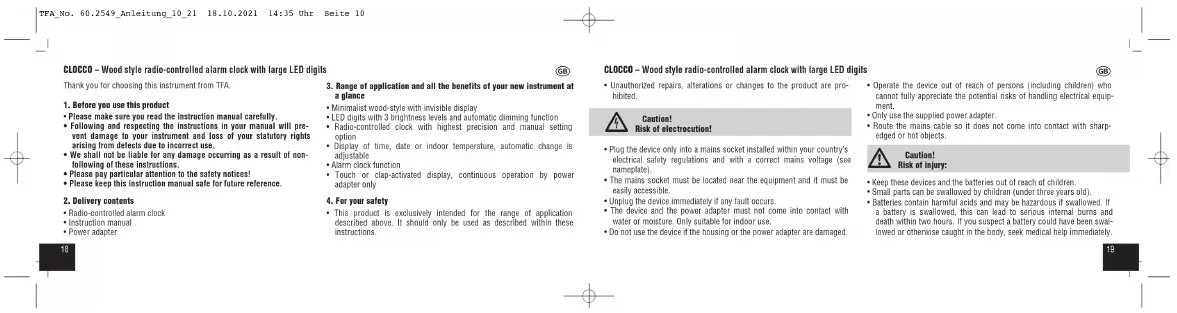
CLOCO - Wood style radio-controlled alarm clock with large LED digits
Thank you for choosing this instrument from TFA.
1. Before you use this product
Please make sure you read the instruction manual carefully.
- Following and respecting the instructions in your manual will prevent damage to your instrument and loss of your statutory rights.
- We shall not be liable for any damage occurring as a result of non-following of these instructions.
Please pay particular attention to the safety notices! Please keep this instruction manual safe for future use.
- I would keep this in
2. Delivery
- Radio-controlled alarm clock
- Instruct
Power adapter


H
ziling
.
图12
calc
theo
CLOCCO - Wood style radio-controlled alarm clock with large LED digits


isok of electrocution!
Plug the device only into a mains socket installed within your country's electrical safety regulations and with a correct mains voltage (see nameplate).
- The mains socket must be located near the equipment and it must be easily accessible.
- Unplug the device immediately if any fault occurs
- The device and the power adapter must not come into contact with water or moisture. Only suitable for indoor use.
-
Do not use the device if the housing or the power adapter are damaged.
-
Operate the devices out of reach of persons (including children) who cannot fully appreciate the potential risks of handling electrical equipment.
- Only use the supplied power adapter.
- Route the mains cable so it does not come into contact with sharp
edged or hot objects.

Caution: Risk of injury:
- Keep these devices and the batteries out of reach of children.
Small parts can be swallowed by children under three years old. - Batteries contain harmful acids and may be hazardous if swallowed. If a battery is swallowed, this can lead to serious internal bursts and
a battery is stolen, this can lead to serious medical costs and death within two hours. If you suspect a battery could have been swab
lowed or otherwise caught in the body, seek medical help immediately.


CLOCO - Wood style radio-controlled alarm clock with large LED digits
Batteries must not be thrown in recharged. Risk of explosion!
- Low ballasties should be changed as soon as possible to prevent damage caused by leaking.
- Never use a combination of old and new batteries together, nor batteries of different types.
- Aoeic contact with skin, eyes and mucus membranes when handling the patient's hands or legs immediately rinse the affected areas with water and consult a doctor.

Important information on product safety:
- Do not expose the device to extreme temperatures, vibrations or shocks.
Do not place any objects on the unit. - Protect it from moisture!
5. Elements
5.1 Display (Fig. 1)
A1: Alarm symbol
A 2: DSE Bercutico symbol
A.3:Timedate/Indoor temperature
5.2 Buttons (Fig.1)
B1:SET button
B2:UPbution
B3:DOWN button
B4:ALARM switch
5.3 Housing (Fig. 2)
C1: Battery compartment CR2032
C2:Inner battery compartment cover


CLOCCO - Wood style radio-controlled alarm clock with large LED digits
6.3Elastycompartment 3x1.5V(44)
6.4 Battery compartment cover
65:Power adapter jack
5. Get1lnu started
- The alarm clock can be operated with the 3 × 1.5 ~V AAA batteries (not included) or with the supplied power adaptor.
- For a permanent display light and to conserve battery power, use the supplied power adaptor.
- The CR2032 bullion cell (included) is a back-up battery to keep the sox operational in the event of a backup or other novel failure.
- Open the alarm clock's battery compartment.
- Remove the battery interruption strip for the button cell battery in the inner battery compartment (reversed).
- Optional: Insert three new AAA 1.5 V batteries, polarity as illustrated.
- Close the battery compartment again.

plus
图
than
m = 311
" scan
1
of the


CLOCO - Wood style radio-controlled alarm clock with large LED digits
- An automatic DCF radio reception to update the time taxes place city at 2:30 and 3:00 a'clock in the morning. If the reception is not successfully received at 3:00 a'clock, further allords will be taken until 5:00 a'clock.
Note: When the CR2623 battery is used up or not inoperated, the DCF signal will be received automatically after start-up. After a test run (1000 until 9999 appear on the display) the clock will scan the DCF frequency signal and the DCF symbol flashes on the display.
There are three different reception states:
Symbol flashing-reception is active
Symbol solid - signal is found
Symbol solid -reception is very good
- If the clock cannot detect the DCF-signal (e.g. due to interference, transmitting distances, etc.), the time can be set manually. The DCF reception symbol disappears and the clock will then work as a normal quartz clock (see: Manual settings).
Note on radio-controlled time
The time base for the radio-controlled time is aesium atomic clock located by the Physikskish Technische Bundesanstalt based in Braunschweig (Brunswick, Germany). It has a time deviation of less than one second in one million years. The time is coded and transmitted from Mainlillingen near Frankfurt via the frequency signal DCF-77 (77.5 kHz) and has a transmitting range of approximately 1,500km . Your radio clock receives the signal, converts it and always shows the exact time. The adjustment to Davight Sating Time (summer/winter time) is automatic. The reception quality depends mainly on geographic location. Normally there should be no reception problems within a 1,500km radius around Frankfurt.
CLOCCO - Wood style radio-controlled alarm clock with large LED digits
Therefore, please note the following steps:
- The recommended distance to any interfering sources like computer sensors as TL ends in less than 1.5 s, or more.
- Within concrete walls [reinforced with steel] such as basements, the received signal is naturally weakened. In extreme cases, please place a protective barrier between the building and the roof.
- During nighttime, the atmospheric interference is usually less severe and reception is possible in most cases. A single daily reception is adequate to keep the accuracy deviation under 1 second.
7. Operation
-
Important: The device cannot be operated during the DGF time-signal
reception. Press and hold the IR or DOWNT button in setting mode for first mode -
The device will automatically quit the setting made if no button is pressed for 10 seconds.
7.1.1 Set mode
- Press and hold the SET button in normal mode for three seconds.
- d-1 (default) will beashing. Press the UP or DOWN button to adjust the display mode.
- Press the SET button to make the settings in the following sequence: The automatic dimming function (A-of - default), the DCF reception (pCIF 1 - default), the hours, the minutes, the year, the month and the day). Press the UP or DOWN button to adjust it.
- Once the DCF time signal is successfully received and the DCF reception is activated (DCF 1), the manually set time is overwritten.


CLOCO - Wood style radio-controlled alarm clock with large LED digits
7.1.1.1 Display mode
- Each press on the UP button in normal mode will change the disp between: Time, date or indoor temperature.
- d-1: In this mode the last selected display is permanently active.
-4-2. After 10 seconds, the display automatically reverts to the clock mode. - d-3: Time, date and Indoor temperature in sequence
7.1.1.2 Automatic dimming function
- By default, the automatic dimming function is disabled (A-ef).
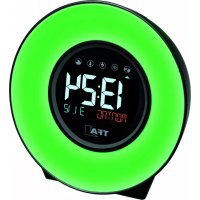
If the automatic dimming function is activated (A-OR), the weak backlight (brightness level L3) turns on automatically between 19:00 and 6:59 am (see "Discolor light").
7.1.1.3 DCF reception
- By default, the DCF reception is activated (DCF 1) and after successful reception of the DCF signal no manual adjustment is necessary.
- Press the UP or DOWN button if you want to deactivate the DCF reception (dCF).
Once the DCF time reception is deactivated the clock and rate must be manually set.
7.1.2 Alarm time setting - Press the SET button in normal mode to enter the setting mode.
- 000 (default) or the last adjusted alarm time appear on the display.
- Press the UP or DOWN button to adjust the hours.
- Confirm with the set out.
- Set the minutes in the same way.

CLOCCO - Wood style radio-controlled alarm clock with large LED digits
- Confirm with the SET button.
To activate the alarm function slide the ALARM switch to ON. Two alarm symbol icons on the display: - The alarm symbol appears on the display.
- When the adjusted alarm time is reached, the alarm rings.
- Press any button to stop the alarm.
- If the alarm is not stopped manually, the ascending alarm tone automatically starts at 10 minutes and it will be rechannelized at the same set time on the following day.
The alarm symbol remains on the display. To detect the alarm situation, the NARM switch to 055 The -
To deactivate the alarm function side the ALARM SWITCH TO OFF. The alarm symbol disappears.
-
Display Light
- Attention: Continuous illuminated display only works when using the peer adaptor.

To change the brightness of the display (3 levels), press the DOWN button (L1-strong, L2-medium, L3-weak).
- If the automatic dimming function is activated (A-un), the weak backlight [brightness level L] turns on automatically between 19:00 and 8:59 am.
8.2 Battery operation (power-saving mode)
To activate the display, touch the alarm clock or make a lead sound (such as clapping your hands).
The display turns on for 15 seconds.
-
Care and maintenance
-
Clean the device with a soft damp cloth. Do not use solvents or scouring agents.
CLOCCO - Wood style radio-controlled alarm clock with large LED digits
- Remove the batteries and pull out the plug of the socket if the device will not be used for an extended period of time.
- Store the device in a dry place.
9.1 Battery replacement
- Change the batteries 3 × 1.5 V AAA when the illumination without the use of the power divider gets weak.
- When the CR2032 battery is used up, see 'Reception of the DCF frequency'.
- Quently signifying the necessity, change the battery
- Open the battery compartment of the arm pump
- Open the inner battery compartment using a screwdriver.
- Insert a new battery (CH2032) with the + - For your batteries, please use only
- Slew the battery switch (see on the website).
- Gaze the battery compartment again.
10.Troubleshooting
Problem Solution
No display Wait for the DCF signal reception
Operation with power adapter
Connect the device to the power adapter
Check the power
Baitery operation
ENHANCE THE PATTERNS POATRITY ARE CORRECT
Activate the display light briefly.
by touching or making a loud sound]

CLOCCO - Wood style radio-controlled alarm clock with large LED digits
No DCF reception Press and hold the DOWN button for
2 seconds to activate the reception
→Chines anther place for your product
- Set the clock manually.
night
- Check if there is any source of inter
Haaar the instrunert aboing to the
Incorrect indication Restart the instrument according to the
manual
RESET: Press and hold the UP and
DOYN button at the same time for
3. SECRES
→ battery operation Change the batteries
1

If your device fails to work despite these measures, contact the retailer
where you purchased the product
11. Waste disposal
This product and its packaging have been manufactured using high-grade materials and components which can be recycled and reused. This reduces waste and protects the environment.
Disposse of the packaging in an environmentally friendly manner using the collection systems that have been set up.


They contain pollutants which, if properly disposed of, can harm the environment and human health. As a consumer, you are required by law to take them in your retail store or to an appropriate collection section depending on national or local regulations in order to protect the environment. The symbols for the combined heavy metals are Col-iodinated, Hg-mercure, Pb-lead.
WARNING: Batteries containing lithium can explode.
- Batteries and rechargeable batteries containing lithium (LiHlithium) present a high risk of fire and explosion due to heat or mechanical damage with potentially serious consequences for people and the environment. Pay particular attention to correct disposal.

m = 311
mtla
…
iPta-
:
73501
图
32
m = 311
Change as ples
Activez I'ecairage de I'ecan temporaire
m = 311 ;
Allchage incorreet RemelteLappeeil en service, cemfme
Alimentation Source (calmlantation, incluced)
E100-230-240H/AC50H=50mA
E
Benedict compound on mode and
53.50%
Consumption electricity hares charge a0,10 €
Ples 3× 1.5V AA4 (non inclusive)
Nous reconnctions des ples alcalines
Pinc botton de securs CR2032 inclus
1x70m
12
1
2
图
图


L-94 100000000000000000000000000000000000000000
Taeetmnnn GnB & CoN 2008 19,9757 Wthtnn, Aen
Hannr d enegsrenent au regne du comme: Reg. Genet Marnen 1 Rn 18
1021

m = 311
m = 311
m = 311


n bet
m = 311
1.1.1
m = 311
it het
m = 311 ;
ak
29


R2:Tea's UP
B. 2: Topo DOWN
B:InteregnderdesizanteALARM
5.3 Cuerpo (Fig. 2)
Dimenstones cel cuero 100x41x70mm