KRI36BK - Cooker Hestan - Free user manual and instructions
Find the device manual for free KRI36BK Hestan in PDF.


| Product Type | Induction Range |
| Brand | Hestan |
| Model | KRI36BK |
| Width | 36 inches (91.4 cm) |
| Electrical Supply | 240/208 VAC, single-phase, 60 Hz, 50 A |
| Number of Cooking Elements | 5 (induction) |
| Number of Induction Generators | 3 |
| Cooktop Functions | Booster, Auto-Heat, Pause, Recall, Child Lock, Key Lock, Chef Function, Warming (3 levels), Independent and Zone Timer, Bridge (for large pots) |
| Oven Functions | Bake, Convection Bake, True Convection, Roast, Convection Roast, Broil, Convection Broil, Proof, Self-Clean, Sabbath Mode |
| Oven Type | Electric with broil element and hidden bake element, convection fan |
| Oven Capacity | 30 or 36 inches (common cavity for both models) |
| Oven Racks | 3 full-extension sliding racks, 6 positions |
| Temperature Probe | Yes, range 115-185°F (46-85°C) |
| Oven Light | 2 halogen bulbs 20 W, 12 V |
| Display | Touchscreen with clock, menu, indicators |
| Cooktop Surface Material | Ceramic glass |
| Exterior Finishes | Stainless steel and painted surfaces |
| Anti-Tip Device | Yes, to be checked regularly |
| Cleaning | Blade scraper for ceramic glass, mild cleaners for stainless steel, pyrolytic self-cleaning oven |
| Limited Warranty | 3 years parts and labor (5 years for some electronic components) |
| Country of Manufacture | United States (Hestan Commercial Corp., Anaheim, CA) |
Frequently Asked Questions - KRI36BK Hestan
User questions about KRI36BK Hestan
0 question about this device. Answer the ones you know or ask your own.
Ask a new question about this device
Download the instructions for your Cooker in PDF format for free! Find your manual KRI36BK - Hestan and take your electronic device back in hand. On this page are published all the documents necessary for the use of your device. KRI36BK by Hestan.
USER MANUAL KRI36BK Hestan
natural_image
Steamed chicken fillet on a wooden cutting board with green beans and lemon slices, garnished with herbs (no text or symbols visible)INDOOR COOKING
Induction Range
KRI
Use & Care Manual
WARNING
IF THE INFORMATION IN THIS MANUAL IS NOT FOLLOWED EXACTLY, A FIRE OR EXPLOSION MAY RESULT CAUSING PROPERTY DAMAGE, PERSONAL INJURY, OR DEATH.
Do not store or use gasoline or other flammable vapors and liquids in the vicinity of this or any other appliance.
Installation and service must be performed by a qualified installer, service agency, or the gas supplier.
DO NOT REPAIR, REPLACE OR REMOVE ANY PART OF THE APPLIANCE UNLESS SPECIFICALLY RECOMMENDED IN THE MANUAL. IMPROPER INSTALLATION, SERVICE OR MAINTENANCE CAN CAUSE INJURY OR PROPERTY DAMAGE. REFER TO THIS MANUAL FOR GUIDANCE. ALL OTHER SERVICING SHOULD BE DONE BY A QUALIFIED TECHNICIAN.
READ THESE INSTRUCTIONS CAREFULLY AND COMPLETELY BEFORE INSTALLING OR USING YOUR APPLIANCE TO REDUCE THE RISK OF FIRE, BURN HAZARD, OR OTHER INJURY. KEEP THIS MANUAL FOR FUTURE REFERENCE.
SAFETY DEFINITIONS

THIS INDICATES THAT DEATH OR SERIOUS INJURY MAY OCCUR AS A RESULT OF NOT OBSERVING THIS WARNING.

THIS INDICATES THAT MINOR OR MODERATE INJURY MAY OCCUR AS A RESULT OF NOT OBSERVING THIS WARNING.

THIS INDICATES THAT DAMAGE TO THE APPLIANCE OR PROPERTY MAY OCCUR AS A RESULT OF NOT OBSERVING THIS WARNING.
INSTALLER: LEAVE THIS MANUAL WITH THE OWNER OF THE APPLIANCE. HOMEOWNER: RETAIN THIS MANUAL FOR FUTURE REFERENCE.
WARNING
TIP OVER HAZARD TIP OVER HAZARD
A child or adult can tip over a range and be killed.
Check installation of the anti-tip device per the Installation Manual. Do not operate the range without this device in place.
Check engagement of anti-tip device if range is moved, such as when cleaning behind the unit.

natural_image
Silhouette of a person pushing a large block on a horizontal line (no text or symbols)To check engagement, carefully tip the range forward while pulling from the rear of the unit. The range should not move more than 1 inch [2.5cm].
Failure to follow these instructions can result in death or serious burns to children and adults.
To reduce the risk of burns, do not move this appliance while hot.
Message from Hestan Message from Hestan
Hestan's award-winning culinary innovations and purpose-built features reinvented the restaurant kitchen and redefined culinary experience in some of America's most acclaimed restaurants. Hestan now takes this performance from the back of the house and puts it front and center in yours. Thoughtfully designed and meticulously built, Hestan will serve you beautifully for years to come.
Hestan is the only residential brand born from the dreams and demands of professional chefs. From ranges to refrigeration, every detail is designed to deliver the performance and reliability expected in a restaurant – now available for you.
We appreciate you choosing Hestan, and we promise to deliver the very best to you.
Welcome to Hestan Welcome to Hestan

natural_image
Group of people sharing a meal together with wine glasses and a pie chart, surrounded by various dishes (no visible text or symbols)TABLE OF CONTENTS
3 SAFETY PRECAUTIONS - BEFORE YOU BEGIN
7 REGULATORY / CODE REQUIREMENTS
8 MODEL NUMBERS
8 RATING LABEL
9 GETTING STARTED WITH YOUR APPLIANCE
16 USER INSTRUCTIONS - INDUCTION RANGETOP
24 USER INSTRUCTIONS - OVEN
28 OVEN CONTROLS
47 ADDITIONAL ITEMS
47 CARE & MAINTENANCE
52 TROUBLESHOOTING GUIDE
54 PARTS LIST
54 SERVICE
54 LIMITED WARRANTY
SAFETY PRECAUTIONS - BEFORE YOU BEGIN
When properly cared for, your Hestan appliance will provide safe, reliable service for many years. When using this appliance, basic safety practices must be followed as outlined below.
INSTALLER: Please leave these Installation Instructions with the owner.
OWNER: Please retain these Installation Instructions for future reference.
This range is designed for residential use only. It is NOT designed for installation in manufactured (mobile) homes or recreational park trailers. Do NOT install this range outdoors.
WARNING
ELECTRICAL SHOCK HAZARDELECTRICAL SHOCK HAZARD
Disconnect power before installing or servicing appliance. Before turning power ON, be sure all controls are in the OFF position. Failure to do so can result in electrical shock or death.

natural_image
Silhouette of a person in motion with a bow and arrow, no text or symbols presentELECTRICAL GROUNDING ELECTRICAL GROUNDING
This appliance must be grounded. Grounding reduces the risk of electric shock in the event of a short circuit. Read the ELECTRICAL CONNECTIONS section of the Installation Manual for complete instructions.
This appliance is equipped with a 4-prong grounding plug for your protection against shock hazard and should be directly plugged into a properly grounded receptacle. Do not cut or remove the grounding prong from this plug.
• DO NOT ground to a gas pipe.
- DO NOT use an extension cord with this appliance.
- DO NOT have a fuse in the NEUTRAL or GROUNDING circuit. A fuse in the NEUTRAL or GROUNDING circuit could result in an electrical shock.
SAFETY PRECAUTIONS - BEFORE YOU BEGIN (CONTINUED)
ELECTRICAL SUPPLY ELECTRICAL SUPPLY
This appliance must be connected to a dedicated circuit, 240 VAC, Single Phase, 60 Hz, with a current rating as shown in the model number listing on page 8. Have the installer show you where the electric circuit breaker is located so you know how to shut off the power to this appliance. It is the responsibility of the user to have the appliance connected by a licensed electrician in accordance with all local codes, or in the absence of local codes, in accordance with the National Electrical Code. Read the ELECTRICAL CONNECTIONS section of the Installation Manual for complete details.
BACKGUARDBACKGUARD
Your Hestan range is supplied at the factory with an Island Trim Backguard. See Table 1 in the APPENDIX section of the Installation Manual for other backguard options available from your Hestan dealer, or visit www.hestanhome.com. Selection of the appropriate backguard depends on the installation location and adjacent materials, and the type of vent hood to be used. Installation instructions are included with the backguard kit.
CAUTION
The top of the backguard serves as an exhaust for the oven when in operation, and as an exhaust vent to remove heat from under the rangetop section of the range as well. DO NOT BLOCK or obstruct the top of the backguard. DO NOT touch the top of the backguard during appliance operation as it may get hot. Allow sufficient time to cool before touching or cleaning this area. DO NOT position plastic or other heat-sensitive items nearby which could melt or burn.
VENTILATION REQUIREMENTS VENTILATION REQUIREMENTS
It is strongly recommended that this appliance be installed with a Hestan vent hood. While this unit does not have the high heat output of a traditional gas range, evacuation of steam, vapors, and cooking odors is still desirable. It is very important that the hood and ductwork installation meets local building codes and is installed by a qualified technician.
Do not use a down-draft style ventilation system.
Do not mount a microwave oven/ventilator combination above the range. These type of units do not typically have sufficient airflow and were not tested with this type of appliance.
Consult the Installation Manual for further details.
CONSULT WITH YOUR HESTAN DEALER ON SELECTING THE APPROPRIATE VENT HOOD FOR YOUR HESTAN APPLIANCE.
NOTICE
IN CASE OF POWER OUTAGE IN CASE OF POWER OUTAGE
All the control knobs must be in the OFF position to prevent unintended operation at power up. To ensure customer safety in the event of a power failure, the range will display an error message when the power is restored unless all the knobs are in the OFF position. Set all the knobs to OFF to clear the error message.
CAUTION
CHILD SAFETY CHILD SAFETY
IT IS THE RESPONSIBILITY OF THE PARENTS OR GUARDIANS TO ENSURE CHILDREN ARE INSTRUCTED IN THE SAFE USE OF THIS APPLIANCE. Do not allow children to use this appliance without adult supervision. Do not allow children to play in or around the appliance, even when not in use. Items of interest to children should not be stored in or on the appliance, in cabinets above, or on the backguard of the appliance. Children climbing on the appliance could be seriously injured.
WARNING
BURN HAZARD - Cookware and all parts of the range can get very hot during operation. The oven door glass and areas surrounding the door get very hot, especially during self-cleaning operations. Do not let children touch the appliance while in operation. Failure to observe these instructions may result in severe burns or injury.
TECHNICAL SAFETY TECHNICAL SAFETY
Installation and service on this appliance must be performed by a qualified appliance installer, or a Hestan authorized service technician. Do not repair or replace any part of the appliance unless specifically instructed to do so. Defective parts must only be replaced with genuine Hestan parts. Contact Hestan Customer Service for inquiries or to arrange a service call.
The appliance must be disconnected from the power during any service or maintenance work. Do not carry or lift the range by the oven handle. The range can only lifted from the sides.
USER SAFETYUSER SAFETY
WARNING
BURN HAZARD - Cookware and all parts of the range and cookware can get very hot during operation. The oven door glass and areas surrounding the door get very hot, especially during self-cleaning operations. Do not touch the appliance while in operation. Failure to observe these instructions may result in severe burns or injury. Use pot holders / gloves to protect yourself when touching hot cookware, placing food in the oven, adjusting the racks, etc.
The upper broil element is exposed and the lower bake element is hidden beneath the floor of the oven cavity. The convection element is hidden behind the fan at the rear of the oven cavity. All these heating elements may be hot, even though they are not glowing. During or after cooking, allow sufficient time for all surfaces to cool.
Use only dry or heat-resistant pot holders / gloves. Using moist or damp potholders can result in steam burns. Do not substitute dish towels or similar items for potholders. These items could come in contact with hot surfaces and ignite.
Avoid wearing loose-fitting garments or long sleeves while cooking. They could ignite. For personal safety, wear proper apparel while using the appliance. Some synthetic fabrics are highly flammable and should not be worn while cooking.
Open the oven door slowly to allow heat and steam to escape before placing or removing food from the oven. Keep your face away from the opening to avoid injury.
METALLIC OBJECTS SUCH AS KNIVES, FORKS, SPOONS AND LIDS MUST NOT BE RESTED ON THE SURFACE OF THE RANGETOP TO PREVENT THEM FROM HEATING UP AND POSSIBLY BURNING YOU WHEN TOUCHED.
CAUTION - DO NOT TOUCH SURFACE UNITS OR AREAS NEAR UNITS.
WARNING
For safety considerations, NEVER use this appliance as a space heater to heat or warm the room. Doing so may result in overheating of the oven or surface elements.
Do not use the oven as a storage space. The high temperatures could also ignite flammable objects nearby.
WARNING
NEVER cover any slots, holes, or passages in the oven bottom or cover an entire oven rack with materials such as aluminum foil. Doing so blocks air flow through the oven and may cause carbon monoxide poisoning. Aluminum foil linings may also trap heat, causing a fire hazard.
SAFETY PRECAUTIONS - BEFORE YOU BEGIN (CONTINUED)
Do not allow anyone to climb, stand, step on, lean against, or sit on any part of the appliance, especially the oven door. This may result in damage to the appliance, or personal injury.
FIRE SAFETYFIRE SAFETY
To reduce the risk of a fire, do not leave surface elements unattended at high settings. Boilover causes smoking and greasy spills that may ignite.
Always turn on the ventilation hood when cooking. Clean vent hood grease filters frequently - grease should not be allowed to accumulate on the fan or filters.
Use the appropriate pan size for the surface element being used.
Keep the appliance area clear and free from combustible materials, gasoline, and other flammable vapors and liquids. NEVER store flammable liquids and materials in, above, or on the range, or near cooking surfaces. Do not obstruct the flow of ventilation air of the appliance.
ALWAYS have a working smoke detector near the kitchen.
ALWAYS have an appropriate dry-chemical fire extinguisher nearby. Smother fire or flames using the lid of the utensil (pot or pan), a cookie sheet or metal tray. Then shut off the surface element. Use an extinguisher, or baking soda if the fire is small and relatively contained. DO NOT USE WATER ON A GREASE FIRE. Doing so may result in spreading the fire elsewhere.
NEVER pick up a flaming pan. You may spill the grease on yourself and be severely burned.
If accessible, turn off the ventilation hood during a fire, but do not reach through the flames to do this.
In the event of personal clothing or hair catching fire, drop and roll immediately to smother the flames. Seek medical attention if necessary.
Do not hang articles from any part of the appliance or place anything against the oven door. Some fabrics are highly flammable and could ignite.
IF THE FLAMES DO NOT GO OUT - EVACUATE AND CALL THE FIRE DEPARTMENT.
SAFETY DURING CLEANING SAFETY DURING CLEANING
Only clean the appliance as directed in the CLEANING & MAINTENANCE section of this manual.
Do not use a steam cleaner to clean the oven or any part of the range. Steam could penetrate into electrical components and cause a short circuit and/or shock hazard.
Do not use abrasive cleaners, hard objects such as brushes or scrapers, or sharp metal tools to clean the door glass or ceramic top. Scratches could cause the glass to shatter.
Heavy food debris should be removed before running the self-clean cycle. Remove all oven racks, broiler pans, utensils, temperature probes, etc. from the oven before self-clean. Removal of the left & right ladder racks inside should also be done as they will discolor from the intense heat.
Do not rub, disturb or damage the cloth-braided door gasket. If the gasket is damaged, it will need to be replaced.
Do not pour cold water onto hot surfaces inside the oven. The steam could cause serious burns. The sudden temperature change could also distort the metal surfaces inside the oven resulting in cracks in the enamel.
If a wet sponge or cloth is used to wipe spills on a hot cooking area, be careful to avoid steam burns.
Wait until the appliance is completely cool before using any aerosol-type cleaners. Many of these cleaners use flammable propellants which could ignite in the presence of heat. Some cleaners can produce noxious fumes if applied to a hot surface.
SAFETY PRECAUTIONS - BEFORE YOU BEGIN (CONTINUED)
Do not let food sit in the oven for more than one hour before or after cooking. Doing so may result in food poisoning or illness.
Do not heat unopened containers (cans) on the rangetop or in the oven. Pressure may build up causing the container to explode, resulting in damage to the appliance, or personal injury.
Always place the oven racks at the desired height before cooking. If the racks must be moved when hot, use potholders to move them and use caution to avoid touching any heating elements.
Only certain types of metallic cookware will work with the surface elements. They must be magnetic-based materials, such as magnetic stainless steel, or fully clad cookware. See COOKWARE RECOMMENDATIONS on page 14.
Bakeware, such as large casserole pans, cookie sheets, etc. should not be used on the surface elements. Elongated pans that span across 2 elements should be used with care and on medium to low settings. This "Bridge" feature is available only on the 36" model and is described in detail later in this manual.
Always position the handles of pot and pans so they do not extend over adjacent work areas or over the edge of the rangetop. This is to avoid knocking over hot contents which could burn you, or result in a fire.
REGULATORY/CODE REQUIREMENTS
Installation of this cooking appliance must be made in accordance with local codes, or in the absence of local codes with the National Electrical Code.
This appliance must be electrically grounded in accordance with local codes or in the absence of local codes with the National Electrical Code ANSI/NFPA 70, or Canadian Electrical code CSA C22.1.
This appliance complies with part 18 of the FCC Rules. This equipment generates, uses and can radiate radio frequency energy and, if not installed and used in accordance with the instructions, may cause harmful interference to radio communications. However, there is no guarantee that interference will not occur in a particular installation. If this equipment does cause harmful interference to radio or television reception, which can be determined by turning the equipment off and on, the user is encouraged to try to correct the interference by one or more of the following measures:
- Reorient or relocate the receiving antennae.
- Increase the distance between the equipment and receiver.
- Connect the equipment into an outlet or a circuit different from that to which the receiver is connected.
- Consult the dealer or an experienced radio/TV technician for help.
Persons who have heart pacemakers or other electronic implants should discuss with their doctor or the manufacturer of the implant as to whether this device is sufficiently safe from interference.
RANGE MODELS RANGE MODELS
| MODEL NO. | DESCRIPTION | CIRCUIT BREAKER CIRCUIT BREAK REQUIRED |
| KRI30 30" INDUCTION | RANGE WITH 4 ELEMENTS 50 Amp | |
| KRI36 36" INDUCTION | RANGE WITH 5 ELEMENTS 50 Amp |
natural_image
Front view of a portable electric stove with four circular vented lights on the back panel (no visible text or symbols)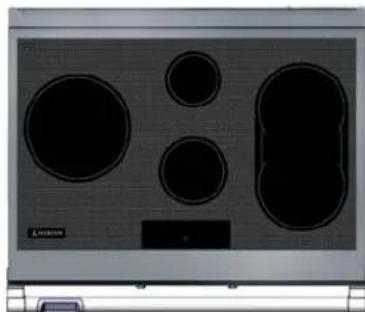
natural_image
Front view of a portable electric stove with multiple black vented lights (no visible text or symbols)KRI36KRI36KR30KRI30
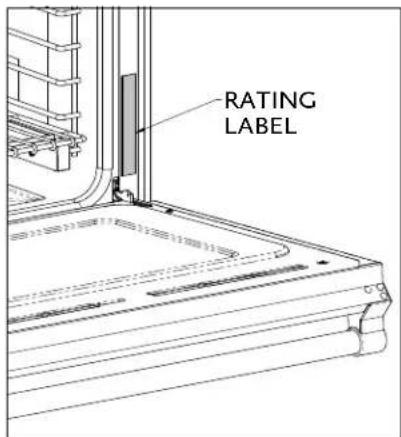
RATING LABEL
The rating label contains important information about your Hestan appliance such as the model and serial number, electrical rating, and the minimum installation clearances.
The rating label is located in one of two places, as shown in the figures on this page.
If service is necessary, contact Hestan Customer Care with the model and serial number information shown on the label.

text_image
HESTAN COMMERCIAL CORP ANAHEIM CA - USA MODEL / MODELE KRI36-BK-XX SER NO. / NO. SER. A1220XXXXXXX PATIENTED: http://www.hestanhome.com/entireu.pdf VOLTE 240/208 MIN. CLEARANCES / DÉGAGEMENTS CONFORME TO UL 898 2014 E4 16-R DAQU'2018 CONFORME LA UNORME, UL 898 2014 E4 16-R DAQU'2018 CAU 001 2014 E4 16-R HOURSELLI COOKING APPLIANCE APPEARLIS CROMÉNIGER DE CUSSON PHASE 1 50 BCK/ 0" 0" SOME: 0" 0" UNITED UNIT : SEE INSTALLATION MANUAL INTE HENYLEE : VOTILE MANUEL INSTALLATION AMPS 50 FC Intertek 5001516KRI36 rating label shown KRI36 rating label shown
text_image
RATING LABEL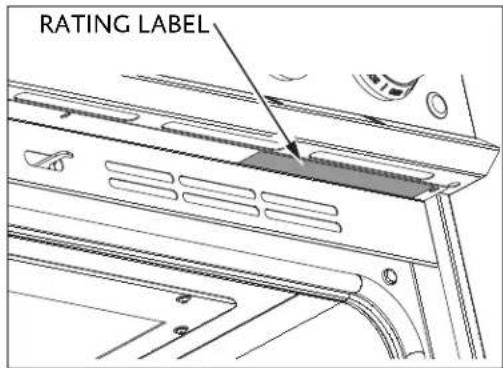
text_image
RATING LABELCOMPONENT IDENTIFICATIONCOMPONENT IDENTIFICATION
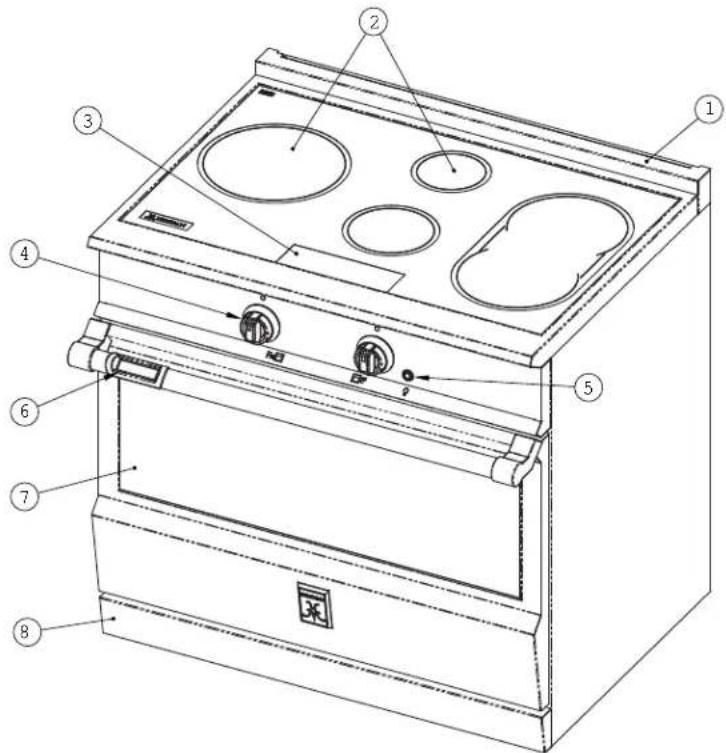
Use the images below to familiarize yourself with the various parts of the induction rangetop and oven.
KRI30, KRI3SKRI30, KRI36
- Island Trim Backguard (included)*
- Induction Elements
- Induction Rangetop Touch Controls
- Control Knobs for Oven
- Oven Light Switch
- Oven Touch-screen Display
- Main Oven
- Kick Plate
text_image
Technical diagram of a portable stove with numbered components for identificationMODEL KRI36 SHOWN
* Low or Tall Backguard ordered separately.
Oven cavity of 30" and 36" range
- Temperature Probe Jack, 36" range
- 6 Position Ladder Rack
- Oven Rack (3 included)
- Fan Cover
- Broil Element
- Bake Element (hidden)
- Temperature Sensor
- Interior Light (2)
- Self-Clean Latch
- Temperature Probe Jack, 30" range
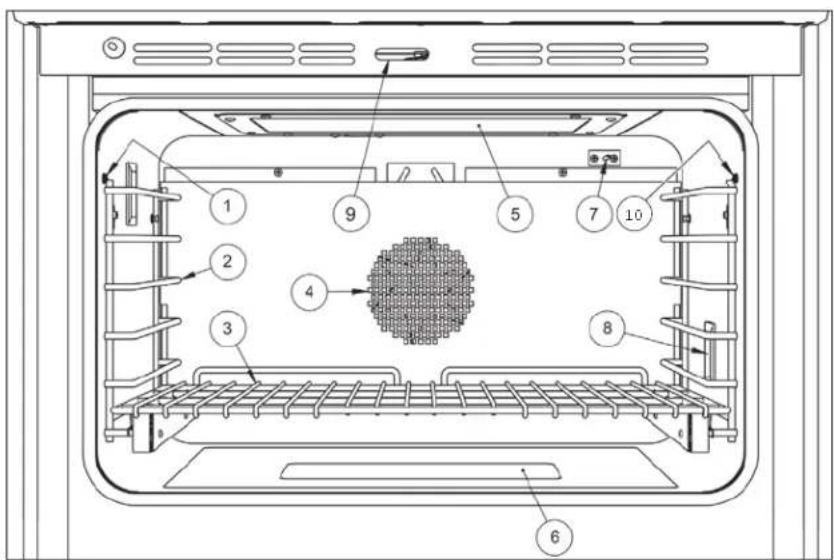
text_image
Technical diagram of an oven with numbered components for identification30" MODEL 30" MODEL

text_image
2 1 3 4 5 HESTAN| Key | Induction element size & power rating | |
| 1 | 7-1/2" x 8-3/4" [185 mm x 220 mm] - 2100W (Booster 3700W) | |
| 2 | 7-1/2" x 8-3/4" [185 mm x 220 mm] - 2100W (Booster 3700W) | |
| 3 | 7" [180 mm] - 1850W (Booster 3000W) | |
| 4 | 7" [180 mm] - 1850W (Booster 3000W) | |
| 5 | touch control | |
36"MODEL36"MODEL
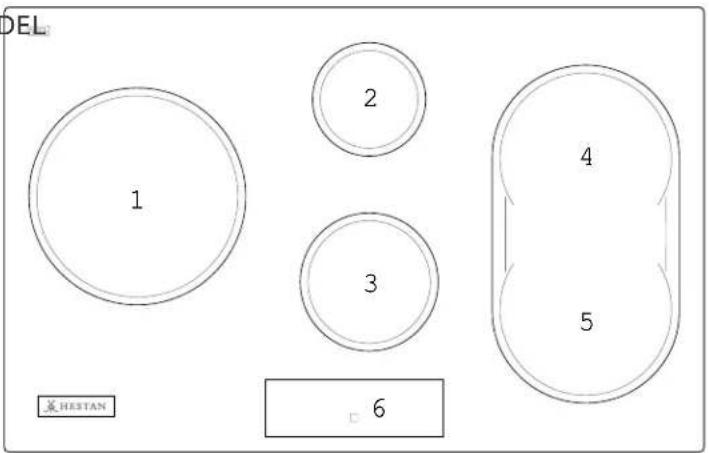
text_image
DEL 1 2 3 4 5 6 HESTAN| Key | Induction element size & power rating | ||
| 1 | 10-1/4'' | [260 mm] | - 2600W (Booster 3700W) |
| 2 | 5-3/4'' | [145 mm] | - 1400W (Booster 2200W) |
| 3 | 7'' | [180 mm] | - 1850W (Booster 3000W) |
| 4 | 7-1/2'' × 8-3/4'' | [185 mm x 220 mm] | - 2100W (Booster 3700W) |
| 5 | 7-1/2'' × 8-3/4'' | [185 mm x 220 mm] | - 2100W (Booster 3700W) |
| 6 | touch control | ||
GETTING STARTED WITH YOUR APPLIANCE (CONTINUED)
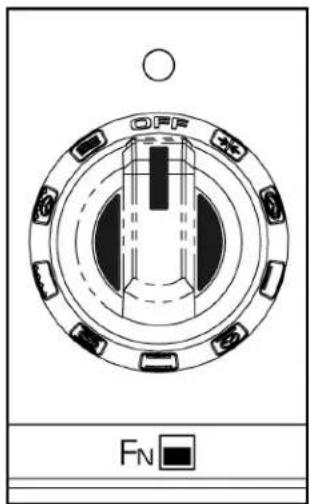
text_image
OFF FNOVEN MODE OVEN MODE
SELECTORSELECTOR
ROTATE LEFTLEFT OR
RIGHTRIGHT TO SELECT
OVEN MODE
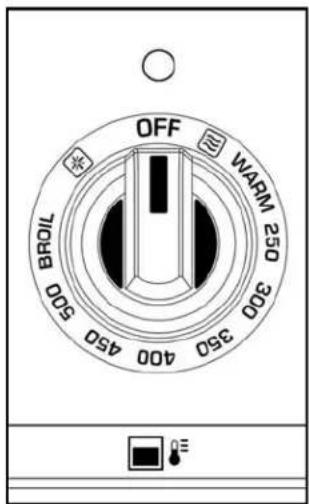
text_image
OFF WARM 250 350 300 250 400 450 500 BROILOVEN OVEN
TEMPERATURE TEMPERATURE
ROTATE LEFTLEFT OR
RIGHTRIGHT TO SELECT
OVEN TEMPERATURE
EN

text_image
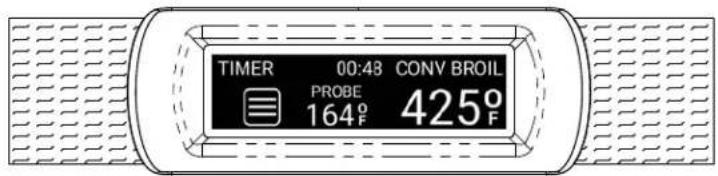
TIMER 00:48 CONV BROIL PROBE 164°F 425°FMARQUISE™ TOUCH CONTROL HANDLE
HOW INDUCTION HEATING WORKSHOW INDUCTION HEATING WORKS
Heating by induction is the most efficient form of cooking available.
The heat is generated by an electromagnetic field, directly on the bottom of the pan or pot used. The surface which is free from contact remains virtually cold.
When the cooking time is up and the container is removed, there is almost no residual heat. It is efficient because there is no waste of energy due to dispersion, as happens with gas burners. It is 30 to 50% faster than normal rangetops using natural or propane gas technology and allows energy savings of up to 25%.
If liquid overflows from the container, it does not stick to the surface of the rangetop, because this is just slightly warm.
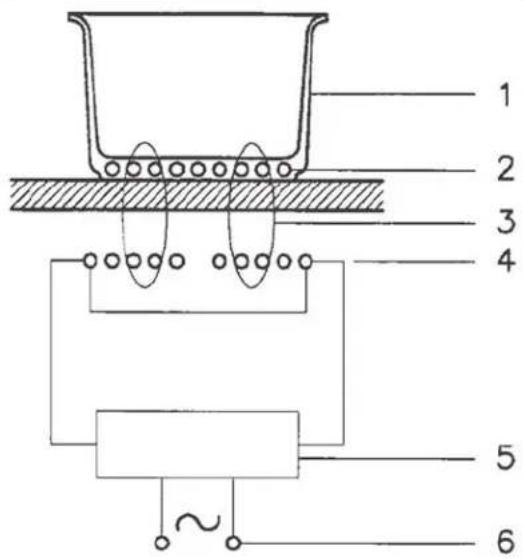
OPERATING PRINCIPLE OPERATING PRINCIPLE
This is based on the electromagnetic properties of most cooking containers.
The electronic circuit governs the operation of the coil (inductor), creating a magnetic field.
The heat is transmitted by the container to the food.
The cooking process takes place as follows:
• Minimum dispersion (high performance);
- Removing of the pan (simply lifting it) automatically stops the system;
- The electronic system allows maximum flexibility and precision of regulation.
text_image
1 2 3 4 5 61 - Recipient
2 - Induced current
3 - Magnetic field
4 - Inductor
5 - Electronic circuit
6 - Electricity supply
FIRST TIME OPERATION - INDUCTION RANGETOP FIRST TIME OPERATION - INDUCTION
All products are wiped clean with solvents at the factory to remove any visible signs of dirt, oil, and grease which may have remained from the manufacturing process. Ensure there are no remaining packaging materials and remove any labels or plastic film from the outside of the appliance.
If present, remove all packing and literature from the rangetop surface.
Clean your ceramic glass top before the first time you use it. A thorough cleaning with a glass top cleaner is recommended. It only takes a minute and puts a clean, shiny coating on the glass top before its initial use.
- There may be a slight odor during the first several uses - this is normal and will disappear.
- Optimum cooking results depend on the proper cookware being selected and used. See COOKWARE RECOMMENDATIONS on page 14.
- The cooking surface can get hot from the cookware and remain hot for some time after cooking zones have been turned off.
- The glass ceramic cooking surface is a durable material resistant to impact but not unbreakable if a pan or other object is dropped on it.
- Do not allow pans to boil dry. This can damage the pan, element and /or rangetop.
- Do not slide cookware across cooking surface, it may scratch the glass
- Using cast iron cookware on the glass rangetop is not recommended. Cast iron retains heat and may result in rangetop damage.
natural_image
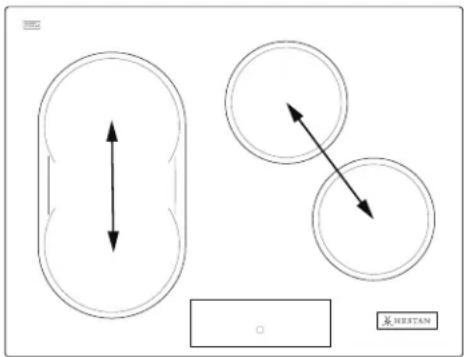
Diagram showing two oval shapes with bidirectional arrows, one larger and one smaller, with a label 'HERSTAN' in the corner (no text or symbols on shapes)Four element rangetop with (2) induction generators.
text_image
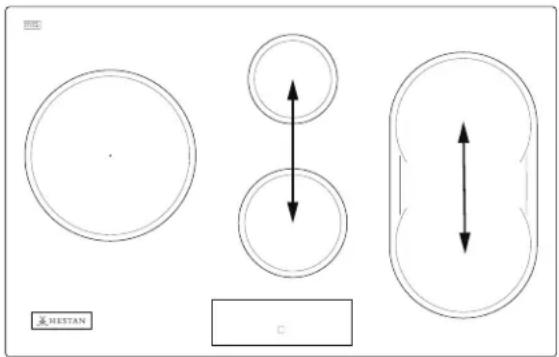
或 HESTAN CFive element rangetop with (3) induction generators.
POWER SHARING POWER SHARING
Four element rangetops are divided into two separate heating zones. Five element rangetops are divided into 3 zones. One generator controls 2 elements. Power Sharing is activated when both elements in the same generator zone are activated and one element is set for Boost (P). The element that is not set for Boost will change to a lower power level. This is called Power Sharing and is intended for safety reasons to prevent an overload of the main power coming into the appliance.
COOKWARE "NOISE" COOKWARE "NOISE"
When using adjacent elements that are set at certain power level setting, magnetic fields may interact and produce a low whistle or intermitted "hum". Pans that completely cover the element ring will produce less noise. A low "humming" noise is normal particularly on high settings. These noises can be reduced or eliminated by lowering or raising the power level settings of one or both of elements.
COOKWARE RECOMMENDATIONS
As previously stated on page 7 of the SAFETY PRECAUTIONS section of this manual, bakeware, such as large casserole pans, cookie sheets, etc. should not be used on the surface elements. Elongated pans that span across 2 elements should be used with care and on medium to low settings.
Do not cook on aluminum foil or thin, disposable aluminum pans. These can melt.
Never let a pot boil dry. If left too long, the pan could melt, or damage the appliance.
Use only high-quality pans with metal handles. Some plastic handles could melt from the intense heat.
Compatible pots and pans are frequently labeled as "Induction-Ready" on the bottom of the pan. If a magnet clings to the bottom of your pan, it will work on an induction cooktop. If it clings softly, it may not work very well.
Multi-layer or fully clad pans, and non-stick pans with a magnetic base will also work. The magnet test will help you choose.
Cast iron pans will work, but are not recommended as they retain a lot of heat even when the element is off, and can easily scratch the glass ceramic surface. However, porcelain coated cookware may be acceptable.
See USER INSTRUCTIONS for more details.
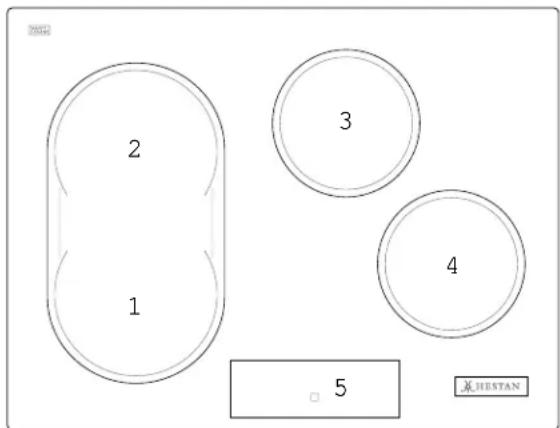
text_image
2 1 3 4 5 HUSTAN30" Wide Rangetop
The minimum pan diameter is shown for each cooking element.
| Position | Minimum pan diameter |
| 1 | 5-3/4" [145 mm] |
| 2 | 5-3/4" [145 mm] |
| 3 | 5-3/4" [145 mm] |
| 4 | 5-3/4" [145 mm] |
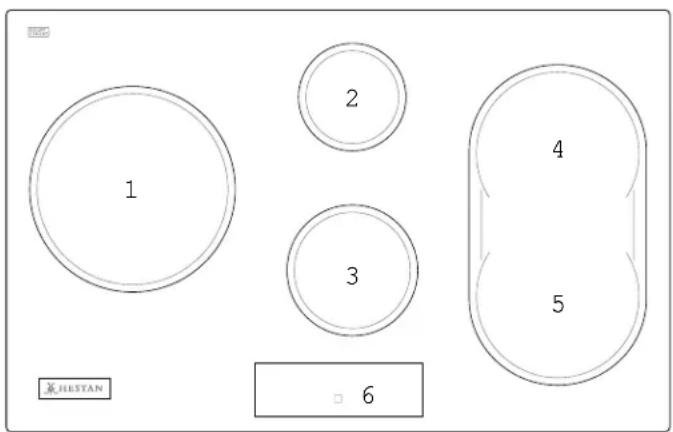
text_image
1 2 3 4 5 636" Wide Rangetop
The minimum pan diameter is shown for each cooking element.
| Position | Minimum pan diameter |
| 1 | 7-1/4" [180 mm] |
| 2 | 4-3/4" [120 mm] |
| 3 | 5-3/4" [145 mm] |
| 4 | 5-3/4" [145 mm] |
| 5 | 5-3/4" [145 mm] |
OVEN RACKSOVEN RACKS
WARNING
BURN HAZARD - To help prevent burns, never remove or reposition the oven racks when the oven is in operation, or is cooling.
WARNING
For safety considerations, NEVER cover any slots, holes, or passages in the oven bottom or cover an entire oven rack with materials such as aluminum foil. Doing so blocks air flow through the oven and may cause carbon monoxide poisoning. Aluminum foil linings may also trap heat, causing a fire hazard.
PLACING THE OVEN RACKS
The oven features ladder racks on the left and right side of the oven with 6 positions. Choose the rack position(s) that result in the best baking, roasting, etc. for your recipe. Rack position #3 (counting from the bottom-up) is the most popular position (vertical center location).
The oven features racks with full-extension, ball-bearing slides which require minimal maintenance.
ALWAYS REMOVE THE LADDER RACKS, OVEN RACKS, AND ALL OTHER ITEMS FROM THE OVEN DURING THE SELF-CLEANING CYCLE.
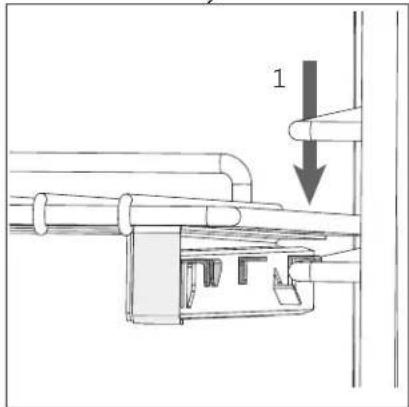
- Do not extend the slides - it is easier to install the rack when NOT extended.
While raising the front of the rack slightly, place the rear hook onto the desired ladder rack, then slide the small tab under the ladder as you flatten out the rack.
-
Continue sliding the rack back into the oven.
-
When you reach the front-most hook, slightly lift the rack again to hook over the ladder.
Move the rack a few times in and out to ensure it is locked into the ladders and will not detach.
text_image
1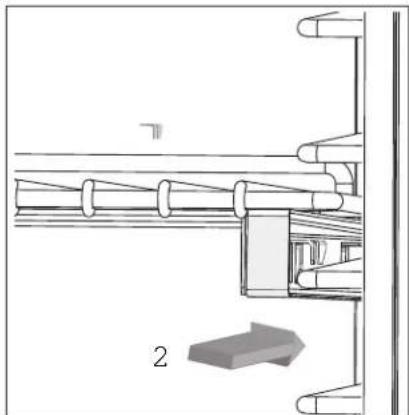
natural_image
Technical diagram of a mechanical assembly with no visible text or symbols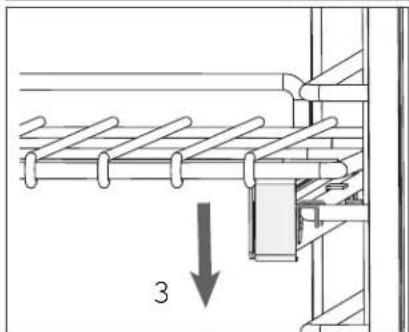
text_image
3© 2021 Hestan Commercial Corporation
GETTING STARTED WITH YOUR APPLIANCE (CONTINUED)
Ensure there are no packaging materials inside the oven. Remove any labels or plastic film from the outside of the appliance. Before using your oven for the first time, it will be necessary to run a bake cycle to burn off any manufacturing oils and residues from the oven cavity. This may produce a little smoke and some odor. This is normal and is typical of any new oven when first used. If the smell is strong, remove persons and animals from the kitchen during this period. Open any windows to further vent the odor from the room.
Install all the oven racks. Turn on your vent hood, and run the oven on BAKE at 500^ F [260°C] for 1-1/2 hours. Allow to cool completely before attempting to cook.
USER INSTRUCTIONS - INDUCTION RANGETOP
USING THE INDUCTION RANGETOP / GENERAL INFORMATION
GENERALGENERAL
The induction controls combine display and touch elements. Generally, the behavior is as follows:
- Functions which are not available are not lit and disappear completely beyond the dark glass ceramic.
- Selections which are available in the next operating step are displayed with low intensity.
- The active selection is displayed with high intensity.
The slider provides a convenient way of setting cooking power level or entering the digits from 0 to 9. You may touch a digit directly, or by sliding with the finger from the left side to the right or vice versa.
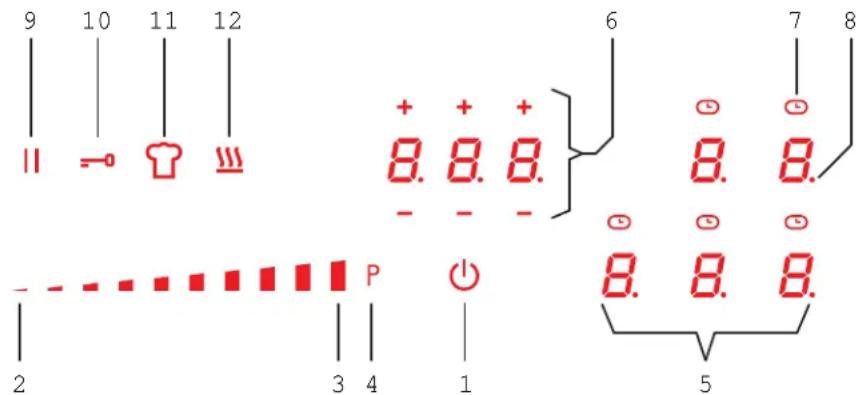
text_image
9 10 11 12 11 = - T T + + + 8. 8. 8. - - - - 6 7 8 8. 8. - - - - P - 3 4 1 8. 8. 8. 5USER INTERFACE
| 1 ON/OFF 7 Timer clock indicator (for each zone) | ||
| 2 Power slider - minimum power 8 Selection indicator dot | ||
| 3 Power slider - maximum power 9 Pause / Recall Function | ||
| 4 Power Booster (P) 10 Key Lock Function | ||
| 5 Cooking Zone displays | 11 Chef Cook Function | |
| 6 Timer display and +/ - setting keys | 12 Warming Function | |
TURNING THE RANGETOP ON AND OFF
The rangetop is turned on by touching the On/Off key (1). The power levels for all zones will display 0. After switching on, the touch control remains active for 20 seconds. If you do not select either a
cooking zone or the timer, the touch control automatically returns to stand-by mode. Any running timers will continue their countdown, and the residual heat indicator will also work.
ACOUSTIC SIGNALACOUSTIC SIGNAL
During use, the following activities are signaled by a beep or buzzer:
• Normal touching of the keys with a short beep.
- If a key is held for more than 10 seconds, a buzzer will sound and an error symbol is displayed.
TURNING ON A COOKING ZONETURNING ON A COOKING ZONE
Position a pot and touch the selector key (5) for the cooking zone. A dot (8) will appear behind the zone to indicate the selection. Slide your finger on the power slider to the right to increase the cooking level (3), or slide your finger to the left to decrease it (2). See PAN DETECTION for additional info.
TURNING OFF A COOKING ZONETURNING OFF A COOKING ZONE
A single cooking zone can be turned off directly by touching the selector key (5) for the cooking zone that is working. Hot cooking zones will be displayed with a letter "H". You can turn off all cooking zones immediately at any time using the power On/Off key (1).
If, during cooking, you inadvertently turn off the surface while using the controls, you can turn it on again with the On/Off key and you will have 6 seconds to touch the PAUSE key (9). See PAUSE function on page 16 for details.
The power level of the cooking zone can be set from level 1 to level 9. A further level P (Power Booster) is available that allows a very rapid heating of food and, therefore, saves you time. See BOOSTER AND POWER MANAGEMENT for more information.
When the automatic preheating function is active, the power level shows a numeric value alternating with the letter "A". See AUTOMATIC HEATING for more information.
To begin, position the pan in the chosen cooking zone. The control will indicate that a pan is detected. If no pan is detected, the system cannot start.

PAN DETECTION PAN DETECTION
The rangetop will detect a pan in any of the cooking zones. The system will only apply power to a cooking zone where a pan is detected. If a pan is not detected in the cooking
zone, the display for that zone will alternate between the selected power level and the "missing pan" symbol.

RESIDUAL HEAT INDICATOR RESIDUAL HEAT INDICATOR
This warns the user that the glass is hot in the cooking zone. The temperature is determined using a mathematical model and any residual heat is indicated with an "H" on the corresponding display.
Heating and cooling are calculated from the power level selected (from "0" to "9") and the related activation period. After switching a cooking zone off, its display shows an "H" until the computed temperature in the zone falls below 140^ F [60°C]. This feature exists for obvious safety reasons.
PROTECTION IN THE EVENT OF ACCIDENTAL SWITCHING ON
If a key is continuously activated for about 10 seconds, it switches off automatically. A buzzer begins sounding warning the user of the presence of an object on the sensors. The displays show the permanent error code, which will be displayed as long as the electronic control senses the error. If the cooking zone "burns", an "H" will appear on the display, alternating with the error signal.
- If no cooking zone is activated within 10 seconds of switching on the touch control, the control returns to stand-by mode.
USER INSTRUCTIONS - INDUCTION RANGETOP (CONT.)
- The ON/OFF key takes priority over all other keys, so the touch control can be switched off at any time, even in the case of multiple or continuous activation of the keys.
- In stand-by mode, continuous activation of the keys will have no effect. However, before the electronic control can be switched on again, it must acknowledge that no key is active.
PRECAUTIONSPRECAUTIONS
- If there is even the tiniest crack in the ceramic glass surface, immediately disconnect the rangetop from the electricity supply. DO NOT COOK on a cracked or broken ceramic glass surface. Cleaning solutions and spillovers may penetrate and create a risk of electric shock. Contact Hestan Customer care to arrange for service.
- During operation, move any magnetic materials such as credit cards, computer disks, calculators, etc., away from the zone.
- Never use cooking foil or rest products wrapped in foil directly on the rangetop.
- METALLIC OBJECTS SUCH AS KNIVES, FORKS, SPOONS AND LIDS MUST NOT BE RESTED ON THE SURFACE OF THE RANGETOP TO PREVENT THEM FROM HEATING UP AND POSSIBLY BURNING YOU WHEN TOUCHED.
- When cooking with non-stick cookware without using water or oil, limit any preheating time to one or two minutes.
- When cooking foods which tend to stick to the bottom of the pan, start at minimum power and gradually increase the heat, stirring frequently.
- After use, turn off element manually (decreasing to "0") rather than relying on the pan detection sensor.
PANSPANS
If a magnet is attracted to the bottom of your cookware, then it is suitable for induction cooking.
- Try to use pans declared as suitable for induction cooking.
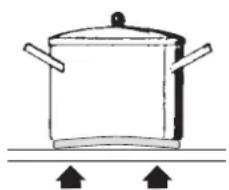
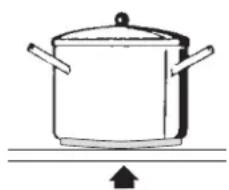
- Flat, thick-bottomed pans will perform best. Any concave or convex bottoms will not make effective contact with the induction
natural_image
Simple line drawing of a cooking pot with two handles and two upward arrows below (no text or symbols)No No Yes
natural_image
Simple line drawing of a cooking pot with two handles and an upward arrow below (no text or symbols)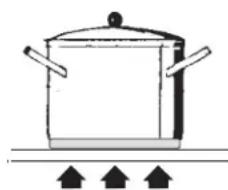
natural_image
Simple line drawing of a cooking pot with three upward-pointing arrows below (no text or symbols)coils and result in poor performance. Proper relationship of utensil to induction element will also improve efficiency.
• Always use a pan of roughly the same diameter as the element on the induction surface.
- An 8" [20 cm] diameter saucepan can benefit from maximum power.
- A small saucepan reduces the power but will not cause energy dispersion. The use of cookware with a diameter of less than 3" [12 cm] is not recommended.
- Stainless steel cookware with multilayer bottom or ferrite stainless steel if the bottom indicates: for induction.
- Cast iron containers, better with an enameled bottom to avoid scratching the ceramic glass rangetop.
- Containers made of glass, ceramic, terracotta, aluminum, copper or non-magnetic stainless steel (austenitic) are not recommended and are unsuitable.
SPECIAL FUNCTIONSSPECIAL FUNCTIONS

BOOSTER AND POWER MANAGEMENT BOOSTER AND POWER MANAGEMENT
The power of a cooking zone can be “boosted” for a certain period of time. With Booster enabled, an individual cooking zone is heated with power that is significantly higher than the rated power.
ACTIVATING THE BOOSTER ACTIVATING THE BOOSTER
The Booster function can be activated by touching the "P" symbol at the end of the power slider of the cooking zone (4). When the Booster function is active, the display of the selected cooking zone shows a "P".
DEACTIVATING THE BOOSTER DEACTIVATING THE BOOSTER
Select a new cooking power level for the zone where the booster is currently active. The booster function is terminated and the cooking zone is heated at the new level.
The power increase is different depending on the size of the cooking zone:
- For a cooking zone with a diameter of 5-3/4" [145 mm], the power goes from a level 9 of 1400 W to the Booster level of 2200 W for 10 minutes.
- For a cooking zone with a diameter of 7" [180 mm], the power goes from a level 9 of 1850 W to the Booster level of 3000 W for 10 minutes.
- For a cooking zone with a diameter of 10-1/4" [260 mm], the power goes from a level 9 of 2600 W to the Booster level of 3700 W for 10 minutes.
- For a rectangular cooking zone 7-1/2" x 8-3/4" [185 mm x 220 mm], the power goes from a level 9 of 2100 W to the Booster level of 3700 W for 10 minutes.
For safety reasons, the Booster function has a limited duration (10 minutes) for all zones. After 10 minutes the zone is reduced to level 9.
If the cooking vessel is removed from the cooking zone during the Booster time, the Booster remains active and the Booster time is not deactivated. With the Booster activated, changing the value set with your finger in the power slider zone deactivates the Booster. The Booster function "P" can be activated in all cooking zones, but priority is given to the last Booster activated, reducing any other cooking levels.
WARNING
Note: Due to the high temperatures, do not use the Booster function for rapidly heating oil or fat, as it may start to burn.

BRIDGE FUNCTION (FOR LARGE PANS) BRIDGE FUNCTION (FOR LARGE PANS)
This function facilitates cooking with elongated pans using the rangetop's rectangular cooking zones.
ACTIVATING BRIDGE MODE ACTIVATING BRIDGE MODE
Activate bridge mode by simultaneously touching both zone keys. The bridge symbol will appear in one of the bridged cook zone displays, while the other key is used to select the heating power.
DEACTIVATING BRIDGE MODEDEACTIVATING BRIDGE MODE
To disable bridge mode, touch both zone keys simultaneously. The cooking zones are split into 2 separate zones again. The bridge symbol disappears.

AUTOMATIC HEATING (OR "HEAT-UP" FUNCTION) AUTOMATIC HEATING (OR "HEAT-UP" FUNCTION)
This feature makes cooking easier by adding 'boil and reduce' functionality to the elements. The surface automatically heats up at Full Power and then returns to the selected power level after a certain time (see Table below).
ACTIVATING AUTOMATIC HEATING ACTIVATING AUTOMATIC HEATING
Slide to choose the cooking power, then hold that position for about 3 seconds until you hear a beep. For example, if you select level 3 and hold it until it beeps: the cook zone display will show the letter "A" alternating with "3". With these settings, the cooking surface heats the cooking zone at the maximum level "9" for 3 minutes 50 seconds and then continues cooking at level "3" thereafter.
| Power level | Automatic Heating Function duration | Maximum time elements will operate at power setting (time in minutes) |
| Warming 1 - 120 | ||
| Warming 2 - 120 | ||
| Warming 3 - 120 | ||
| 10m 48s 360 | ||
| 22m 24s 360 | ||
| 3 | 3m 50s 300 | |
| 45m 12s 300 | ||
| 56m 48s 240 | ||
| 62m 90 | ||
| 7 | 2m 48s 90 | |
| 83m 36s 90 | ||
| 9 | not available 90 | |
| P | not available 10 | |

PAUSEPAUSE
This function allows setting a pause during cooking (which is useful, for example, when answering a phone call). No cooking zone is using any power, booster and automatic warming is stopped, and all timers are suspended for a maximum of 10 minutes, after which the rangetop turns off.
ACTIVATING PAUSE
- Touch and hold the PAUSE key (9) for 1 second. All the displays will show
DEACTIVATING PAUSE
-
Touch the PAUSE key (9) again for 1 second. The symbol will start flashing.
-
Touch or slide any other control key within 10 seconds. The pause function is deactivated. If no other control is touched, the rangetop will turn off.
RECALLRECALL
If the rangetop was inadvertently switched off, or after a power outage, the RECALL function enables the user to recover all previous settings (power levels, automatic warming, and timers).
ACTIVATING RECALL ACTIVATING RECALL
- If the rangetop was just switched off, turn ON the rangetop again.
- The PAUSE key (9) will flash for 6 seconds. Touch the PAUSE key for 1 second. The recall function activates to recover all previous settings.

It can only be activated when the appliance is ON but no cooking zone is in operation. Child Safety Lock stays active even after a power interruption. It has to be deactivated manually.
ACTIVATING CHILD SAFETY LOCK ACTIVATING CHILD SAFETY LOCK
- Touch and hold the button for any cooking element for 3 seconds, then release. The slider area will show a chasing sequence of flashing dashes.
- Slide the slider from 0 to 9 within 10 seconds. The Child Safety Lock is activated. The letter "L" will appear on all displays for 10 seconds and then turn off. When you try to turn on the cooking surface with the On/Off key (1), the letter "L" will be displayed and it will not be possible to cook.
DEACTIVATING CHILD SAFETY LOCK DEACTIVATING CHILD SAFETY LOCK
- Touch and hold the button for any cooking element for 3 seconds, then release. The slider area will show a chasing sequence of flashing dashes.
- Slide the slider from 9 to 0 within 10 seconds. The Child Safety Lock is deactivated. The rangetop goes to operation mode and it will be possible to cook normally.

KEY LOCKKEY LOCK
This feature is intended to lock the keys while the rangetop is in operation or in pause state. This may be useful to lock the keypad for cleaning the control zone, or if during operation when you do not want to change any settings.
- Touch the second (10) for 1 second. All keys except the Key Lock and On/Off are locked. Touching any unlit key will result in a error tone.
- Touch the second (10) for 1 second. The lock is deactivated and the rangetop can be operated normally.

CHEF COOK FUNCTION CHEF COOK FUNCTION
This feature enables all cooking zones with different heating power levels. Starting from left to right, the following power levels are set and dissipated as soon as suitable cookware is placed on the cooking zones.
Left cooking zones(s): 2
Middle cooking zone(s): 6
Right cooking zone(s): 9
NOTES:
- The power levels can be defined for each element by the user.
- The operation time limitation for the chef cook function is 2 hours.
- While the chef cook function is active, the "pot missing" symbol is suppressed.
ACTIVATING CHEF COOK ACTIVATING CHEF COOK
- Touch the 📋 icon (11) for 1 second. The displays for the cooking zones show the bridge symbols and set the power levels (2, 6, and 9) from left to right.
DEACTIVATING CHEF COOK DEACTIVATING CHEF COOK
- Touch the 📋 icon (11) for 1 second. The chef cook mode is deactivated. The power levels are set to 0.

WARMING FUNCTION (LOW TEMP) WARMING FUNCTION (LOW TEMP)
This function is intended to keep food warm, or for very low temperature cooking.
ACTIVATING WARMING FUNCTION ACTIVATING WARMING FUNCTION
- Select the desired cooking element. A dot (8) will appear behind the current cooking level to indicate the selection.
- Touch the icon (12) to activate warming level 1, touch two times for level 2, touch 3 times for level 3. Touch again to exit the warming function.
- The selected warming level is indicated on the display as shown in the table below.
| LEVEL | LEVEL DESCRIPTION | APPROXDESCRIPTION |
 | MELTING | 111°F [44°C] |
| [ZSCD] | WARMING | 158°F [70°C] |
 | SIMMERING | 201°F [94°C] |
These temperatures are approximate and are greatly dependent on the pot and the quantity of food. Warming functions operate for a maximum of 2 hours.
DEACTIVATING WARMING FUNCTION
- Select the desired cooking element. A dot (8) will appear behind the current cooking level to indicate the selection.
- Touch the icon (12) several times until the level display returns to 0.
TIMER FUNCTION TIMER FUNCTION
The user interface has 2 different types of timers which are explained in detail below. If more than one timer is set, the timer will always display the lowest remaining time. The timer is only intended as an acoustic advisor that recalls the attention of the user. Timers have no effect on the heating elements. Cooking zones must always be stopped manually.
There are two versions of the timer function:
- An independent timer (similar to an egg timer) with a range of 1 min. to 9h 59 min. OR from 1 h 59 min. At less than 10 min., the display will countdown accurate to the second. After the time has run out, a signal tone will be emitted.
- Cooking zone timers can be used to switch a cooking zone OFF automatically after the set time has run out. It can be adjusted with a range of 1 min. to 9h 59 min. OR from 1 h 59 min. At less than 10 min., the display will countdown accurate to the second. While the timer is running, the cooking zone can be operated normally, i.e. changing the cooking level is possible. Each cooking zone has an independent timer, i.e. an individual time selection per cooking zone is possible.
Notes:
- The timer selection is kept for 5 sec after the last action. Each change resets the selection time back to 5 sec.
- If a cooking zone with a running cooking zone timer is selected, the current value of the timer is shown in the timer display (6).
- There is a timer clock indicator (7) above each cooking zone display (5). The timer with the least time is highlighted and the related clock icon (7) is flashing. The other timer settings are still active and running, but those clock icons (7) will be less bright. For example 0.11 indicates 0 hours and 11 minutes.
INDEPENDENT TIMER (EGG TIMER) INDEPENDENT TIMER (EGG TIMER)
ACTIVATING TIMER ACTIVATING TIMER
- Ensure that no cooking zone has been selected. Touch the timer icon (6). The current time value is displayed flashing (rounded to full minutes).
- Set the new desired time digit for digit with +/- icons (6) above and below the digits.
- Do not perform any action for 5 seconds.
- The timer starts counting backwards starting with the new time. At less than 10 min., the display shows the current time accurate to the second. If it has reached 0, a signal tone will be emitted.
DEACTIVATING TIMER DEACTIVATING TIMER
- Ensure that no cooking zone has been selected. Touch the timer icon (6). The current time value is displayed flashing (rounded to full minutes).
- Set the timer to "000" as described above in step 2.
- The independent timer is deactivated.
- A pot is already placed on a zone and a cooking level has already been set.
- Select the corresponding cooking zone (5). The display of the cooking zone shows a dot (8) in addition to the selected cooking level.
USER INSTRUCTIONS - OVEN (CONT.)
- Touch the timer icon (6). The display flashes "000" for the next 10 sec and the timer clock indicator (7) above the cooking zone starts pulsating.
- Adjust the desired start time digit for digit with +/- icons (6) above and below the digits.
- Do not perform any action for about 5 sec.
- The timer starts counting backwards. At less than 10 min., the display shows the current time accurate to the second. When it has reached 0, a signal tone will be emitted. The timer display shows 000 and the corresponding cooking zone will be turned OFF. If the residual heat detection detects a hot cooking zone, an "H" will be displayed at the corresponding cooking zone.
- Touch any icon to disable the signal tone. The signal tone stops and the cooktop can be operated normally.
CHANGING THE VALUE OF THE COOKING ZONE TIMERSCHANGING THE VALUE OF THE COOKING ZONE TIMER
- While a timer is active, select the corresponding cooking zone (5).
- Touch the timer icon (6). The display flashes the current time value (rounded to full minutes).
- Set the new desired time digit for digit with +/- icons (6) above and below the digits.
- Do not perform any action for 5 seconds.
- The timer starts counting backwards starting with the new time. At less than 10 min., the display shows the current time accurate to the second. When it has reached 0, a signal tone will be emitted. The timer display shows 000 and the corresponding cooking zone will be turned OFF. When you touch the + or - keys, the timer display turns off.
DEACTIVATING TIMER DEACTIVATING TIMER
- Set the timer to "000" as described previously.
USER INSTRUCTIONS - OVEN
OVEN FEATURES OVEN FEATURES
The oven in the 30" and 36" ranges have exactly the same features and capabilities. Rack suggestions are shown on the following pages.
TIPS AND TRICKS ON HOW TO USE YOUR OVENTIPS AND TRICKS ON HOW TO USE YOUR
As you begin to use your Hestan Range, it is important to take the time to become familiar with the new settings and the performance of this appliance. Previous ranges may have performed differently than your Hestan – allow some time to adjust.
HOW TO GET THE BEST RESULTS WHEN COOKING IN THE OVEN
- Many recipes give their own rack suggestions, it is best to follow what is suggested by the recipe.
- After a few times of using your new range, you will become more comfortable with rack placements and temperature settings.
- Avoid opening the oven door while cooking. This will prevent heat from escaping and provide the best results.
- Make sure to preheat the oven to the cooking temperature given in the recipe.
-
When baking with more than one rack, stagger the pans and give them at least 2'' of space between each pan.
-
Remember that different bakeware and pans cook and heat differently.
• Light-colored non-stick pans result in golden crust that is tender. - Dark-colored non-stick pans result in a more brown, crisp crust.
- Generally, when using any Convection mode, it is suggested to reduce the temperature by 25^ [14^] , though this does not apply to all recipes or meats and poultry.
Rack positions depend on the food items you are baking or roasting. Follow the instructions, or your best experience, on which rack position is best to use for a given recipe.
Not all oven racks need to be kept in the oven. If you find you only need one or two racks most of the time, remove the extra rack and store in a convenient location should it be needed later.
ALWAYS place the oven racks at the desired height before cooking. If the racks must be moved when hot, use potholders to move them and use caution to avoid touching any heating elements.
Minimize opening the oven door by using the oven light.
QUICK GUIDE FOR RACK POSITIONS / USES QUICK GUIDE FOR RACK POSITIONS / USES
Choose the rack position(s) that result in the best baking, roasting, etc. for your recipe. Rack position #3 (counting from the bottom-up) is the most popular position (vertical center location).
| OVEN MODE | SUGGESTED RACK POSITIONS | USES |
| PROOF Any Best for allowing bread dough to rise. | ||
| SELF-CLEAN N/A High-Temperature cleaning cycle, allowing food debris to burn off. | ||
| TRUE CONVECTION | Single Rack: #3Two Racks: #3 & #5Multiple Racks: #1 #3 & #5 | Using air movement produced by the convection fan, this allows for multi-rack cooking. |
| BAKE Center rack #3 | Best for baked items. Single-rack cooking or baking. This is the standard mode for most recipes. | |
| CONVECTION BAKE | Single Rack: #3Two Racks: #3 & #5 | During this mode, a fan in the back of the oven helps air move evenly throughout, allowing for even baking and cooking. |
| ROAST Center rack | #3 Roast less tender cuts of meat such as beef roast. Also good for stews that have to be covered. | |
| CONVECTION ROAST | Center rack #3 This mode allows for a crisp outside and a tender and juicy interior on poultry and meats. Ideal for roasting tender cuts of beef lamb poultry. | |
| BROIL | Rack #5 for steaks, hamburgers, etc. 1" (2.5cm) and under.Rack #4 for steaks, hamburgers, etc. thicker than 1" [2.5 cm]. | Broiling meats, fish, and poultry pieces.Direct heat from above only. Pre-heat broil for 3-4 minutes before starting cooking. |
| CONVECTION BROIL | Rack #5 for steaks, hamburgers, etc. 1" (2.5cm) and under.Rack #4 for steaks, hamburgers, etc. thicker than 1" [2.5 cm] | Shortens broiling times for thicker cut of meat, fish, poultry. Pre-heat broil for 3-4 minutes before starting cooking. |
PRE-HEATING PRE-HEATING
Many recipes call for a pre-heated oven. Refer to your recipe for instructions. Pre-heating time depends on the Mode and Temperature selected, as well as the number of racks inside the oven.
APPROPRIATE BAKEWARE / APPROPRIATE BAKEWARE /
PLACEMENT PLACEMENT
Bakeware suitable for use in your Hestan oven are metal, heat-proof glass (Pyrex®), glass-ceramic, earthenware pottery, etc. Cookie sheets / jelly roll pans with a small lip are also suitable. Thicker sheets or double-sided sheets may increase baking times.
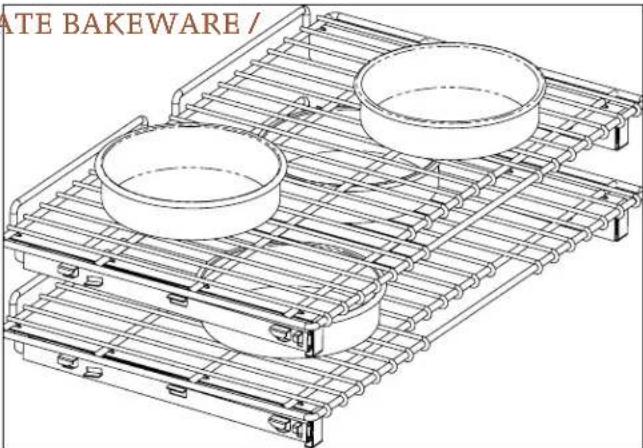
Stagger multiple cake pans as shown here. Leave approximately 2" [5 cm] space between all pans and oven walls to allow for hot air circulation inside the oven.
natural_image
Technical line drawing of a baking rack with two circular containers, no text or symbols presentMEAT PROBE MEAT PROBE
The meat probe only works in the following modes: Bake, Convection Bake, Roast, Convection Roast, True Convection.
The probe measures between 115 - 185°F [46 - 85°C].
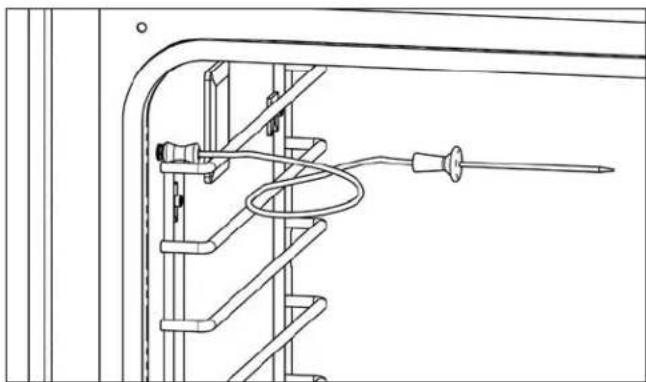
In the 36" oven, the probe inserts into a jack on the upper LEFT side of the oven cavity.
In the 30" oven, the probe inserts into a jack on the upper RIGHT side of the oven cavity.
To avoid damaging the probe, do not insert it into frozen meats, or try to force it into your food. The probe should not touch any part of the cooking vessel or the oven. For best results with
natural_image
Technical line drawing of a mechanical or electrical assembly with no visible text, numbers, or symbols.most meats, the probe should be inserted into the thickest portion of the meat. Ensure the probe tip does not touch bone or fat to get the most accurate internal temperature readings. For poultry, the probe should be inserted into the thickest part of the thigh, or breast.
Use only the probe shipped with the appliance. Use only genuine Hestan spare parts if you need a replacement.
When the probe temperature reaches the set temperature, the cooking mode will stop and the oven will shut off. An audible alert will sound a total of 3 times at 1 minute intervals, or until the user cancels the alert and is prompted to turn both control knobs to OFF.
COOKING WITH THE OVENCOOKING WITH THE OVEN
The following pages will help you with the various oven controls. Your recipe will guide you on which cooking modes are best. However, food safety (handling, cooking, storage) is very important in preventing food-borne illness. The table below are recommendations to keep you and your family safe.
| FOOD ITEM | SAFE MINIMUM INTERNAL TEMPERATURES |
| GROUND MEATS (BEEF, VEAL, LAMB, PORK) | 160°F [72°C] |
| BEEF, VEAL, LAMB ROAST, STEAKS, CHOPS M | Medium Rare - 145°F [63°C] |
| Medium - 160°F [72°C] | |
| Well Done - 170°F [77°C] | |
| PORK ROAST, STEAKS, CHOPS Medium - 160°F | [72°C] |
| Well Done - 170°F [77°C] | |
| HAM Un-cooked - 145°F [63°C] | |
| Reheat cooked hams packaged in USDA-inspected plants to 140°F [60°C] and all others to 165°F [74°C] | |
| GROUND CHICKEN/TURKEY 165°F [74°C] | |
| WHOLE CHICKEN/TURKEY 180°F [82°C] | |
| POULTRY BREAST, ROASTS 165°F [74°C] | |
| POULTRY THIGHS & WINGS 165°F [74°C] | |
| STUFFING (cooked alone) 165°F [74°C] | |
| EGG DISHES | 160°F [72°C] |
| FISH & SHELLFISH | 145°F [63°C] |
| LEFTOVERS | 165°F [74°C] |
| CASSEROLES | 165°F [74°C] |
- Safe minimum internal temperatures per US Dept. of Agriculture Food Safety & Inspection Services guidelines.
DISPLAY LAYOUT / KNOB ICONS DISPLAY LAYOUT / KNOB ICONS 30", 36" Oven
text_image
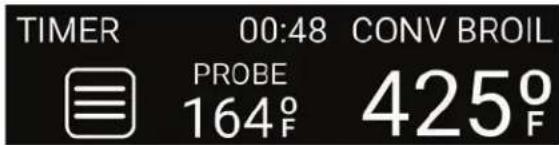
TIMER 00:48 CONV BROIL PROBE 164°F 425°FWhen inactive, the display will be dark. Turning any control knob, or touching anywhere on the screen for 2 or more seconds will activate the display. After more than 1 minute of inactivity, the display will go dark again.

natural_image
Completely black image with no visible content or text.
text_image
12:48Turning the Oven Temperature knob will prompt you select a cooking mode with the Mode Select knob.
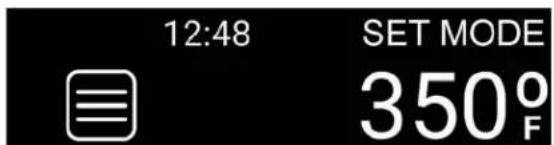
text_image
12:48 SET MODE 350° FIn the example below, the Mode Select knob has been turned to the True Convection function. The clock time is displayed, as well as the Menu icon on the left. The Oven Temperature knob has been set to 350^ F which also displayed.
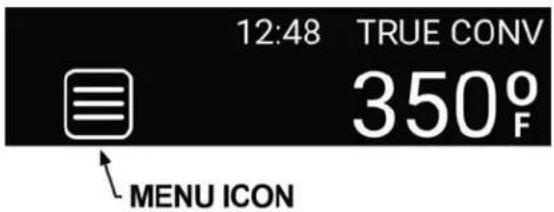
text_image
12:48 TRUE CONV 350°F MENU ICONDISPLAY MENUS DISPLAY MENUS
Selecting the Menu button shows a list of menu items and options.
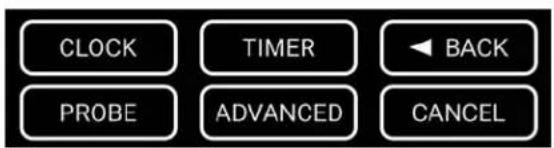
text_image
CLOCK TIMER BACK PROBE ADVANCED CANCEL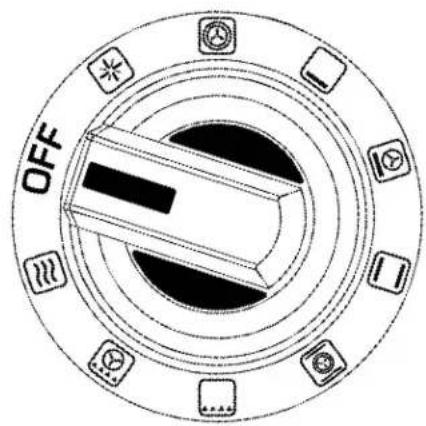
text_image
OFF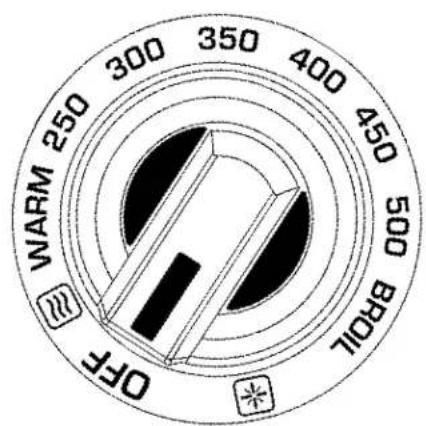
text_image
WARM 250 300 350 400 450 500 BMOIL OFFSETTING THE CLOCKSETTING THE CLOCK
- Activate the display by touching and holding for 2 or more seconds. At first power-up, or after a power failure, the display will flash 00:00. Press the Menu icon.
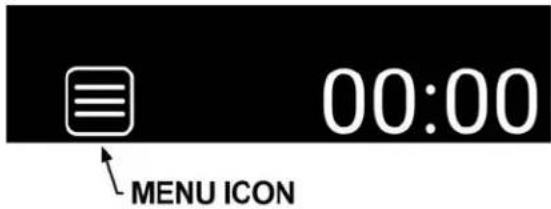
text_image
00:00 MENU ICON- Touch the CLOCK button.
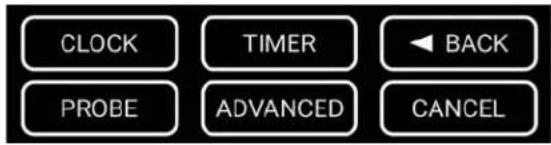
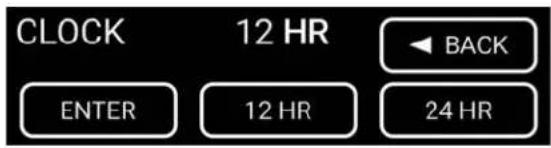
text_image
CLOCK TIMER BACK PROBE ADVANCED CANCEL- Touch the 12 HR or 24 HR button, then touch ENTER to set.
text_image
CLOCK 12 HR ENTER 12 HR BACK 24 HR- Touch the UP and DOWN arrows to set the correct hour, then touch HOUR to set.
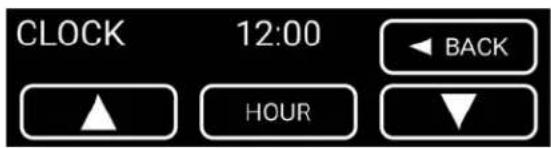
text_image
CLOCK 12:00 ▲ HOUR ◄ BACK ▼- Touch the UP and DOWN arrows to set the correct minutes, then touch MINUTE to set.
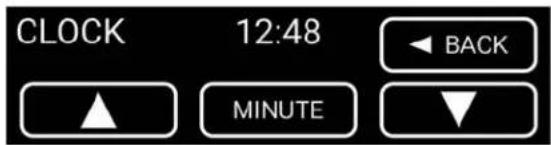
text_image
CLOCK 12:48 ▲ MINUTE ▼ BACK- Touch the AM or PM, then touch ENTER to set.
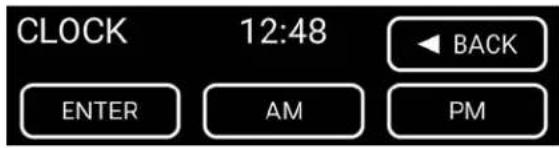
text_image
CLOCK 12:48 ENTER AM PM BACK- The clock now displays the correct time.

text_image
12:48NOTES:
During timed cooking, probe cooking, and Sabbath mode, the clock time is not displayed.
SETTING THE TIMERSETTING THE TIMER
- Activate the display by touching and holding for 2 seconds. Touch the Menu icon.

text_image
12:48- Touch the TIMER button.
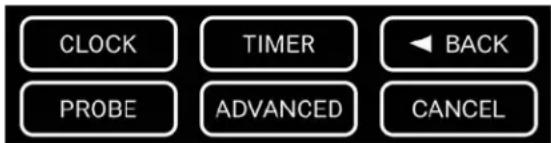
text_image
CLOCK TIMER BACK PROBE ADVANCED CANCEL- Touch the UP and DOWN arrows to set the desired amount of hours, then touch HOUR to set.
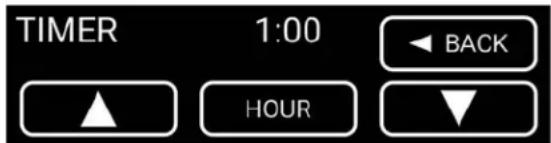
text_image
TIMER 1:00 ▲ HOURS BACK ▼- Touch the UP and DOWN arrows to set the desired amount of minutes, then touch MINUTE to set.
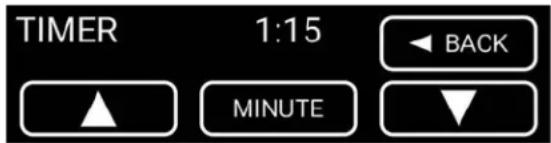
text_image
TIMER 1:15 ▲ MINUTE ◄ BACK ▼- The timer has been set and displays the amount of time remaining. The timer counts down in 1 minute increments.

text_image
12:48 TIMER 1:15- The display will remain on until the time has expired and there is an audible alert. The alert will sound a total of 3 times at 1 minute intervals, or until the user touches the CANCEL button.
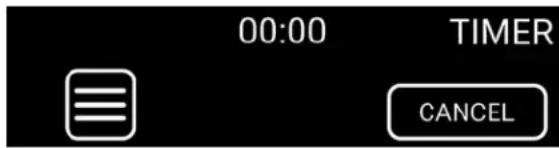
text_image
00:00 TIMER CANCEL- After the audible alerts, or after the user touches CANCEL, the display will revert back to the default screen.

text_image
2:03NOTES:
a. The timer is not associated with any oven mode or function.
b. The timer is used solely as a count-down timer, mainly as an aid to rangetop cooking activity.
c. The timer counts down in one minute intervals.
d. The maximum timer setting is 23 hour & 59 minutes.
SETTING THE PROBE TEMPERATURE SETTING THE PROBE TEMPERATURE
- Activate the display by touching and holding for 2 seconds. Touch the Menu icon.

12:48
- Touch the PROBE button.
CLOCK
TIMER
BACK
PROBE
ADVANCED
CANCEL
- Touch the UP and DOWN arrows to set the desired cooking probe temperature, then touch PRB TEMP to set.
PROBE
160°F
BACK

PRB TEMP

- The probe temperature is displayed and the user must select a cooking function to activate Probe Cooking.
PROBE COOK

PROBE 160°F
PROBE COOK is displayed along with the probe temperature setting. In this example, True Convection cooking was chosen with a 350^ F oven temperature. Once cooking has started, the probe temperature displayed will fluctuate between the actual temperature and the probe set temperature in 15 second intervals.
PROBE COOK

PROBE 160°F
TRUE CONV
PRE
PROBE COOK

PROBE 145 ^o F
TRUE CONV
350 ^o F
- Once PROBE COOK has reached the set temperature, the heating elements will shut off. An audible alert will sound a total of 3 times at 1 minute intervals, or until the user cancels the alert and is prompted to turn both control knobs to OFF.
PROBE COOK 160°F

PROBE COOK COMPLETED TURN KNOBS TO OFF
NOTES:
a. The factory default probe temperature setting is 160^ F [71°C] and can be adjusted up or down in 1^ increments. Touch and hold to adjust in 5^ increments.
b. The probe itself has a range of 115 - 185°F [46 - 85°C]. Do not allow the probe tip to touch anything but the meat or food product you are cooking.
c. The oven will continue cooking until the probe reaches the set temperature, and then the oven will shut off.
d. Probe cooking supersedes Timed Cooking when both types of cooking are being used.
e. When Delay Start is used, it supersedes Probe Cooking.
f. The user can cancel the function at any time by touching the Menu icon and touching CANCEL.
SETTING FAHRENHEIT / CELSIUS SETTING FAHRENHEIT / CELSIUS
- Activate the display by touching and holding for 2 seconds. Touch the Menu icon.

text_image
12:48- Depending on the selection, the letter F or C will be shown under the degree symbol during cooking.
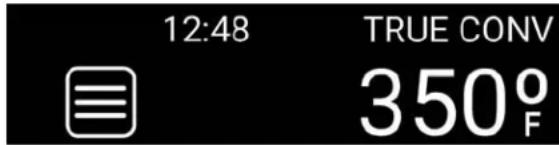
text_image
12:48 TRUE CONV 350°F- Touch the ADVANCED button.
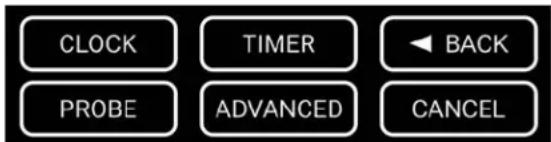
text_image
CLOCK TIMER BACK PROBE ADVANCED CANCELNOTES:
The factory default is degrees Fahrenheit.
- Touch the °F / °C button.
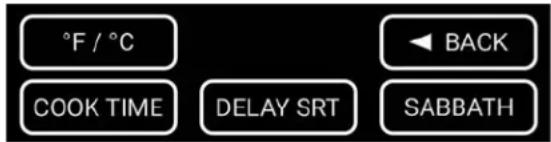
text_image
°F / °C COOK TIME DELAY SRT BACK SABBATH- Touch the °F or °C button and touch ENTER.
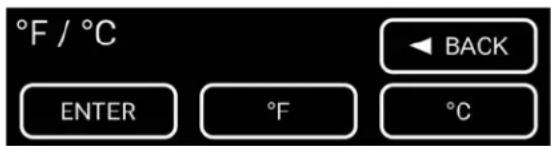
text_image
°F / °C ENTER °F °C BACK- The display will revert back to the main display.
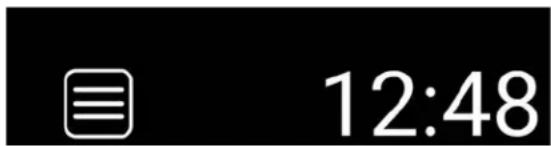
text_image
12:48SETTING COOK TIME SETTING COOK TIME
- Activate the display by touching and holding for 2 seconds. Touch the Menu icon.

text_image
12:48- Touch the ADVANCED button.
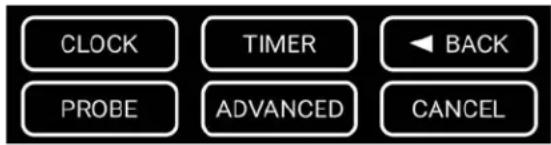
text_image
CLOCK TIMER BACK PROBE ADVANCED CANCEL- Touch the COOK TIME button.
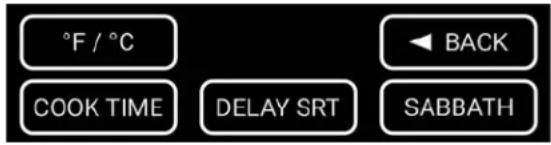
text_image
°F / °C COOK TIME DELAY SRT BACK SABBATH- Touch the UP and DOWN arrows to set the amount of hours, then touch HOUR to set. If 0 hours are desired, just touch the HOUR button.
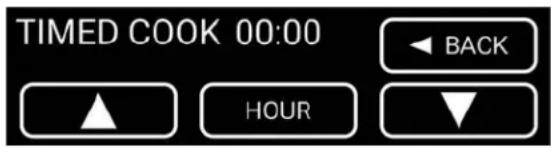
text_image
TIMED COOK 00:00 HOUR BACK- Touch the UP and DOWN arrows to set the amount of minutes, then touch MINUTE to set.
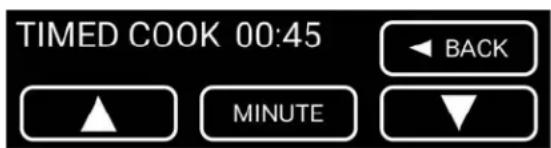
text_image
TIMED COOK 00:45 ▲ MINUTE ◄ BACK- TIMED COOK is displayed and will be activated once the user sets the desired oven mode and temperature.
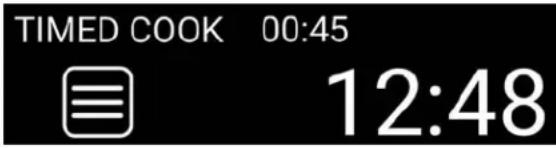
text_image
TIMED COOK 00:45 12:48- Once TIMED COOK has ended, an audible alert will sound a total of 3 times at 1 minute intervals, or until the user cancels the alert and is prompted to turn both control knobs to OFF.
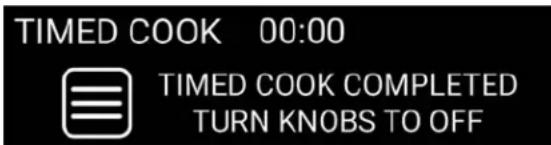
text_image
TIMED COOK 00:00 TIMED COOK COMPLETED TURN KNOBS TO OFFNOTES:
a. There is a 2 minute waiting period when the user has set an advanced cooking mode (Timed Cook or Delayed Start), but has not yet selected a Mode or Temperature setting.
b. Timed Cook counts down in 1 minute intervals.
c. Timed Cook is superseded by Probe Cook and Delay Start in the case where multiple modes are set and in use.
d. The maximum setting for Timed Cook is 23 hours & 59 minutes.
SETTING DELAYED START SETTING DELAYED START
- Activate the display by touching and holding for 2 seconds. Touch the Menu icon.

text_image
12:48- Touch the ADVANCED button.
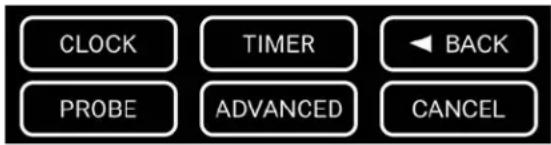
text_image
CLOCK TIMER BACK PROBE ADVANCED CANCEL- Touch the DELAY SRT button.
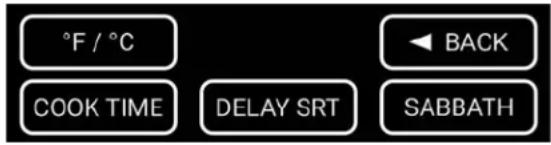
text_image
°F / °C COOK TIME DELAY SRT BACK SABBATH- Touch the UP and DOWN arrows to set the hour time you want to start, then touch HOUR to set. If 0 hours are desired, just touch the HOUR button.
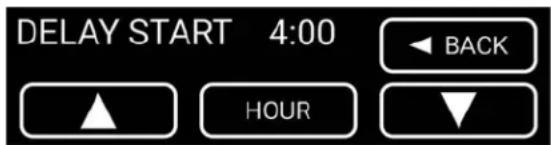
text_image
DELAY START 4:00 ▲ HOURS BACK- Touch the UP and DOWN arrows to set the minute time you want to start, then touch MINUTE to set. In this example, we want to start cooking at 4:30.
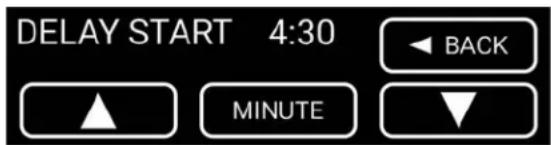
text_image
DELAY START 4:30 ▲ MINUTE BACK- Touch AM or PM, then touch ENTER.
NOTE: This step is skipped when the clock is set to 24 hr display.
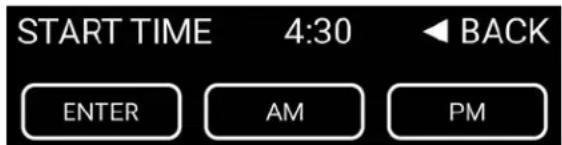
text_image
START TIME 4:30 BACK ENTER AM PM- The display will revert back to the default display showing the delayed start time. It shows cooking will start at 4:30PM.
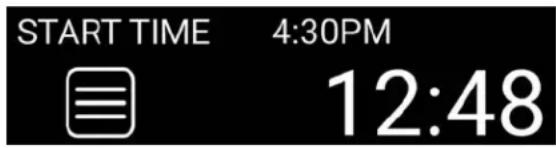
text_image
START TIME 4:30PM 12:48NOTES:
a. There is a 2 minute waiting period when the user has set an advanced cooking mode (Timed Cook or Delayed Start), but has not yet selected a Mode or Temperature setting.
b. Delay Start supersedes Timed Cook and Probe Cook in the case where either or both have been set.
c. Preheat is not used / does not apply to any cooking modes when Delay Start is used.
SETTING SABBATH MODE SETTING SABBATH MODE
- Activate the display by touching and holding for 2 seconds. Touch the Menu icon.

text_image
12:48- Touch the ADVANCED button.

text_image
CLOCK TIMER ◄ BACK PROBE ADVANCED CANCEL- Touch the SABBATH button.
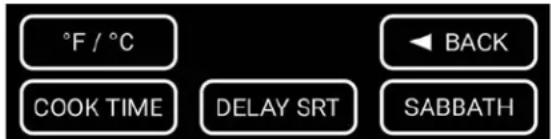
text_image
°F / °C COOK TIME DELAY SRT BACK SABBATH- The Oven Mode knob must be set to BAKE. "SET TO BAKE" will flash intermittently until the knob is rotated to this position.
- Then touch the START button to engage Sabbath Mode.
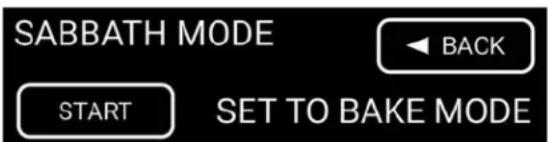
text_image
SABBATH MODE BACK START SET TO BAKE MODE- The Sabbath Mode is set and the display prompts the user to set the Temperature knob.
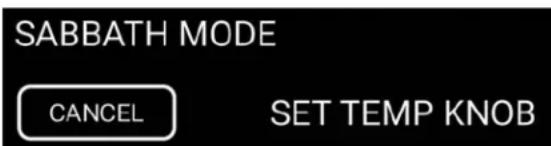
text_image
SABBATH MODE CANCEL SET TEMP KNOBNOTES:
a. Once the Sabbath Mode is set, SABBATH MODE is shown in the display.
b. Sabbath Mode may be canceled by touching the CANCEL button and holding for 2 seconds.
c. While in Sabbath Mode, the BAKE function becomes the default and ONLY oven cooking function available for use.
d. During Sabbath Mode, changes made to the oven temperature knob result in a programmed delay of 3 minutes while random calculations complete the change and engage the oven heating elements.
e. In Sabbath Mode, the oven door switch will not turn off the oven heating element. The interior lights will also not come on, nor can they be turned on in any way.

SETTING SABBATH MODE (CONTINUED) SETTING SABBATH MODE (CONTINUED)
- Once the temperature knob is set, the display shows a wavy lines icon indicating that the oven heating element is active. The words "OVEN HEATING ON" is also displayed.
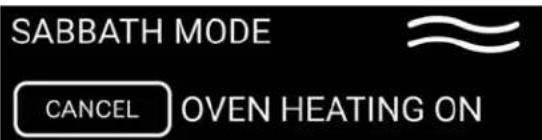
text_image
SABBATH MODE CANCEL OVEN HEATING ON- In the event of a power failure during Sabbath Mode, once power is restored, the words "POWER RESTORED" is displayed and the oven heating element icon is not shown, indicating the heating element is not active.
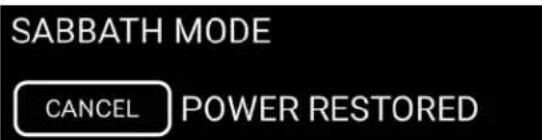
text_image
SABBATH MODE CANCEL POWER RESTORED- TIMED COOK may be used with Sabbath Mode, but the TIMED COOK must be set by the user prior to setting the Sabbath Mode (the timer for Timed Cook is active in the display).
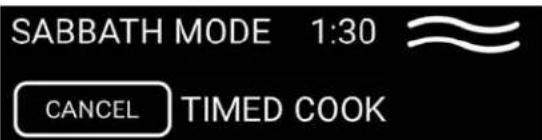
text_image
SABBATH MODE 1:30 ≈ CANCEL TIMED COOK- Once the programmed time for Timed Cook has elapsed, the display timer, heating element icon, and TIMED COOK are no longer displayed.
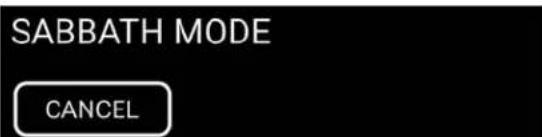
text_image
SABBATH MODE CANCELADDITIONAL NOTES:
a. During Sabbath Mode, the oven interior light is never on, nor can it be turned on in any way.
TRUE CONVECTION COOKING MODE TRUE CONVECTION COOKING MODE
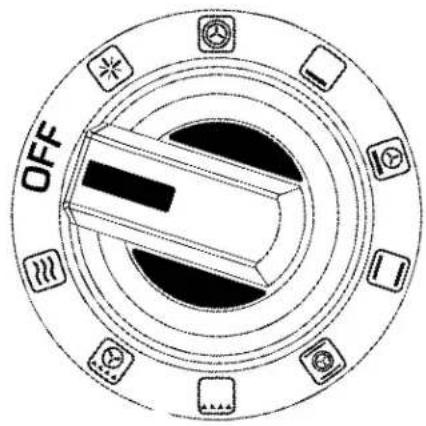
- Turn the Mode Select knob to the TRUE CONVECTION setting.
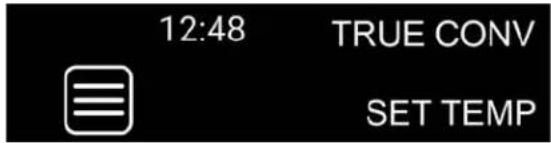
text_image
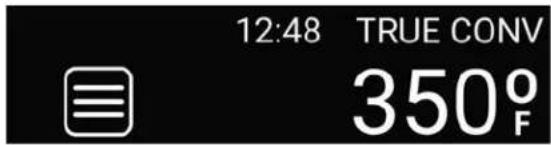
12:48 TRUE CONV SET TEMP- Set the Temperature knob to the desired cooking temperature. In this example, it has been set to 350^ F which is also displayed.
text_image
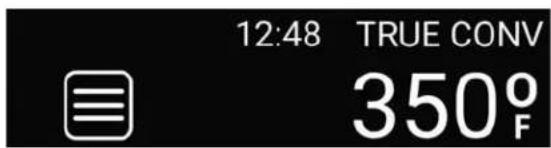
12:48 TRUE CONV 350° F- The display will now show "PRE" indicating the oven is preheating. The display will fluctuate between "PRE" and the actual temperature in 5 second intervals.

text_image
12:48 TRUE CONV PRE- Once the set temperature has been reached, it will then show and remain in the display.
text_image
12:48 TRUE CONV 350°FTIPS:
• Best for multi-rack baking.
- Will help save time when making a batch of cookies.

text_image
OFF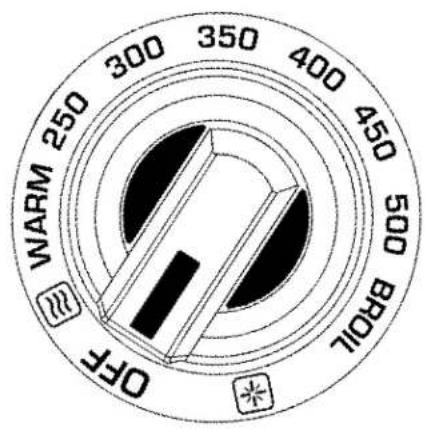
text_image
300 350 400 450 500 BROLL WARM OFFNOTES:
a. Once settings for Timed Cook or Probe Cook have been entered, the user has 2 minutes to set the cooking mode and temperature before the unit will revert back to the default and re-entering the settings will be required.
b. In general, convection cooking should be done using low, shallow bakeware or pans to allow the heated air to circulate around the food. Removal of any lids is also recommended for the same reason.
- Turn the Mode Select knob to the BAKE setting.
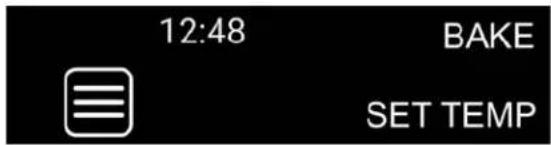
text_image
12:48 BAKE SET TEMP- Set the Temperature knob to the desired cooking temperature. In this example, it has been set to 250^ F which is also displayed.
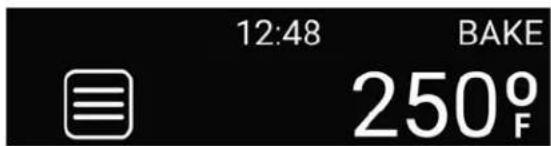
text_image
12:48 BAKE 250°F- The display will now show "PRE" indicating the oven is preheating. The display will fluctuate between "PRE" and the actual temperature in 5 second intervals.

text_image
12:48 BAKE PRE- Once the set temperature has been reached, it will then show and remain in the display.
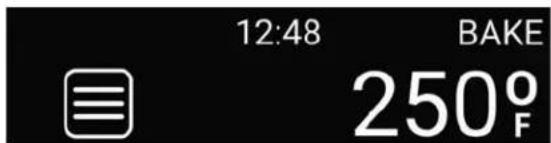
text_image
12:48 BAKE 250°F
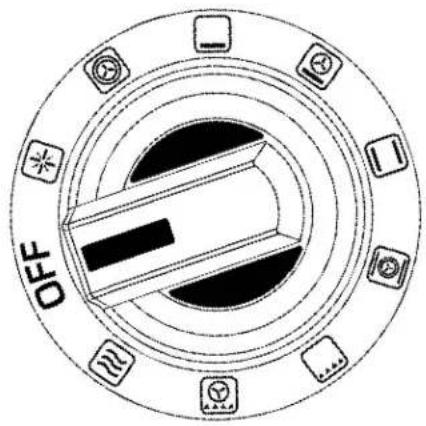
text_image
OFF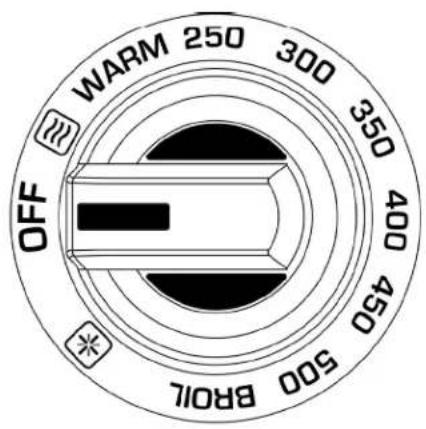
text_image
WARM 250 300 350 400 450 500 BROLL OFFNOTES:
a. Once settings for Timed Cook or Probe Cook have been entered, the user has 2 minutes to set the cooking mode and temperature before the unit will revert back to the default and re-entering the settings will be required.
CONVECTION BAKE COOKING MODE CONVECTION BAKE COOKING MODE
- Turn the Mode Select knob to the CONVECTION BAKE setting.

text_image
12:48 CONV BAKE SET TEMP- Set the Temperature knob to the desired cooking temperature. In this example, it has been set to 250^ F which is also displayed.
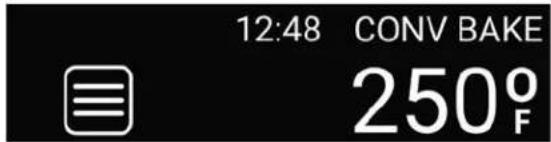
text_image
12:48 CONV BAKE 250°F- The display will now show "PRE" indicating the oven is preheating. The display will fluctuate between "PRE" and the actual temperature in 5 second intervals.

text_image
12:48 CONV BAKE PRE- Once the set temperature has been reached, it will then show and remain in the display.
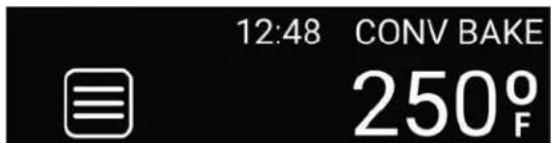
text_image
12:48 CONV BAKE 250°FTIPS:
• This mode is best used for baked goods.
- Using pans with low sides helps to get the most even flow of heated air to the food.
- No need to rotate the pan when using this mode.
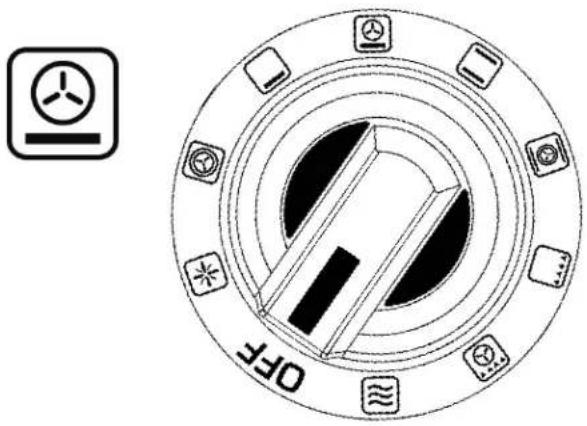
text_image
OFF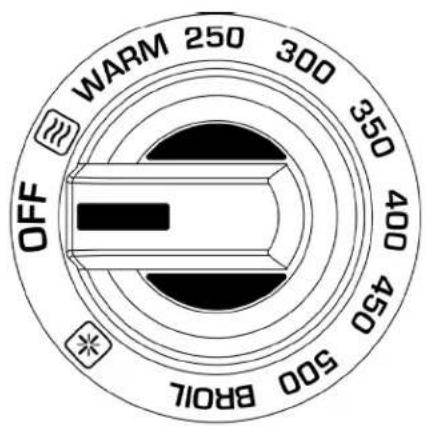
text_image
WARM 250 300 350 400 450 OFF BROLLNOTES:
a. Once settings for Timed Cook or Probe Cook have been entered, the user has 2 minutes to set the cooking mode and temperature before the unit will revert back to the default and re-entering the settings will be required.
b. In general, convection cooking should be done using low, shallow bakeware or pans to allow the heated air to circulate around the food. Removal of any lids is also recommended for the same reason.
ROAST COOKING MODEROAST COOKING MODE
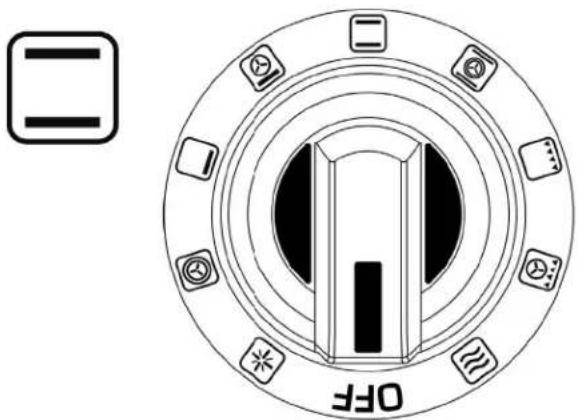
- Turn the Mode Select knob to the ROAST setting.
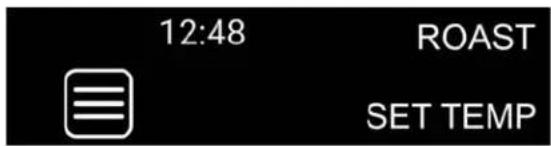
text_image
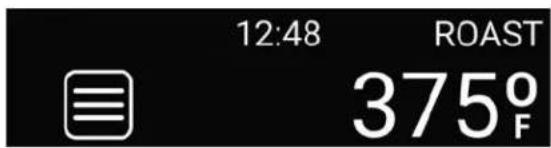
12:48 ROAST SET TEMP- Set the Temperature knob to the desired cooking temperature. In this example, it has been set to 375^ F which is also displayed.
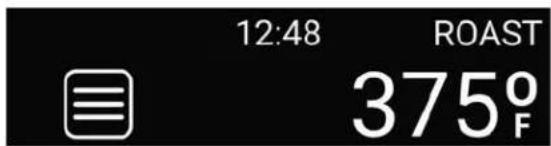
text_image
12:48 ROAST 375°F- The display will now show "PRE" indicating the oven is preheating. The display will fluctuate between "PRE" and the actual temperature in 5 second intervals.
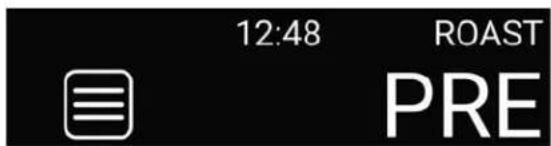
text_image
12:48 ROAST PRE- Once the set temperature has been reached, it will then show and remain in the display.
text_image
12:48 ROAST 375°FTIPS:
- Designed for less tender cuts of meat.
- It helps to add moisture such as broths and liquids when cooking meats on this mode.
text_image
OFF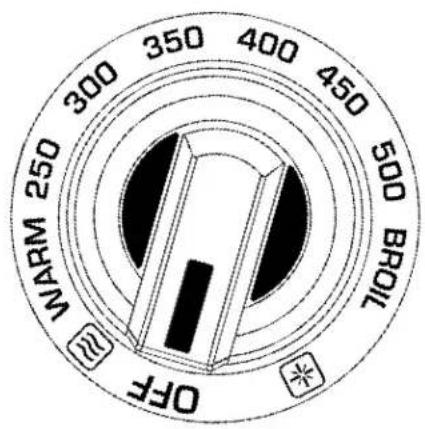
text_image
WARM 250 300 350 400 450 500 BROIL OFFNOTES:
a. Once settings for Timed Cook or Probe Cook have been entered, the user has 2 minutes to set the cooking mode and temperature before the unit will revert back to the default and re-entering the settings will be required.
CONVECTION ROAST COOKING MODE CONVECTION ROAST COOKING MODE
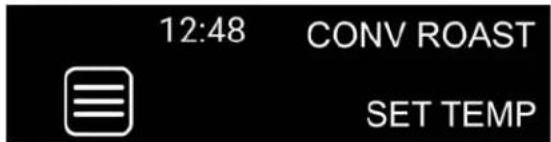
- Turn the Mode Select knob to the CONVECTION ROAST setting.
text_image
12:48 CONV ROAST SET TEMP- Set the Temperature knob to the desired cooking temperature. In this example, it has been set to 375^ F which is also displayed.
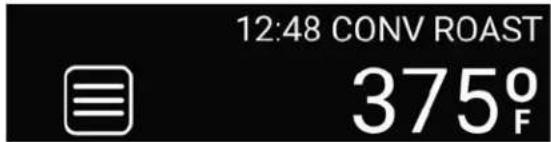
text_image
12:48 CONV ROAST 375°F- The display will now show "PRE" indicating the oven is preheating. The display will fluctuate between "PRE" and the actual temperature in 5 second intervals.
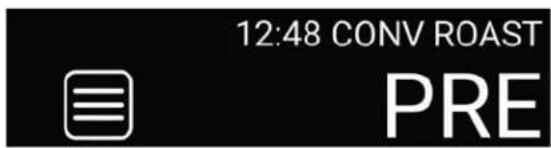
text_image
12:48 CONV ROAST PRE- Once the set temperature has been reached, it will then show and remain in the display.
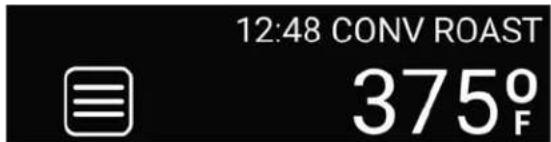
text_image
12:48 CONV ROAST 375°FTIPS:
• Best for roasting.
- Provides a crispier skin while maintaining a juicy interior in poultry and meats.
- No need to drop temperature by 25^ [14°C].
- Check internal temperature when cooking poultry and meats.

text_image
OFF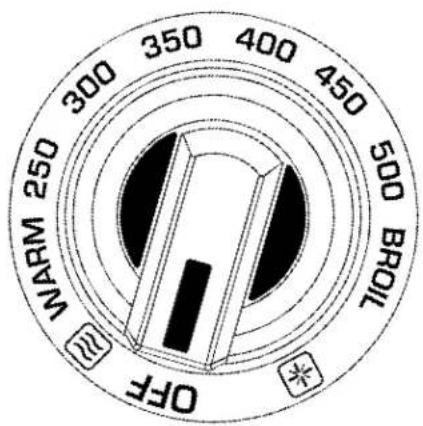
text_image
WARM 250 300 350 400 450 500 BROLL OFFNOTES:
a. Once settings for Timed Cook or Probe Cook have been entered, the user has 2 minutes to set the cooking mode and temperature before the unit will revert back to the default and re-entering the settings will be required.
b. In general, convection cooking should be done using low, shallow bakeware or pans to allow the heated air to circulate around the food. Removal of any lids is also recommended for the same reason.
BROIL COOKING MODEBROIL COOKING MODE
- Turn the Mode Select knob to the BROIL setting.
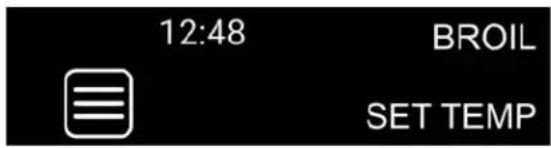
text_image
12:48 BROIL SET TEMP- Set the Temperature knob to the BROIL setting. The display will show "BRL" to indicate this setting.

text_image
12:48 BROIL BRLTIPS:
- This mode is excellent for broiling steaks, ground beef patties, and browning the top of foods.
- The door should remain closed during the entire broiling period.
- Make sure the pan is placed in the center of the rack, directly under the broil element.
- Food only needs to be turned once. Thin foods such as fish do not need to be flipped.
- Use the provided broiler pan and slotted cover when broiling, making sure to leave the slots of the cover open. Do not line with foil.
- Be careful when opening the oven door during broil as intense heat has been accumulating for a period of time.


text_image
OFF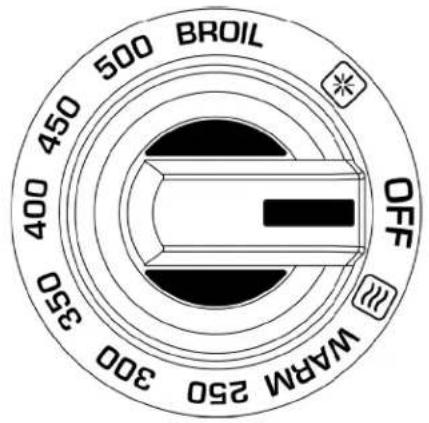
text_image
BROIL 500 450 400 350 300 WARM 250 OFFNOTE:
a. Timed Cook or Probe Cook should not be used in the BROIL mode.
CONVECTION BROIL COOKING MODE CONVECTION BROIL COOKING MODE
- Turn the Mode Select knob to the CONVECTION BROIL setting.
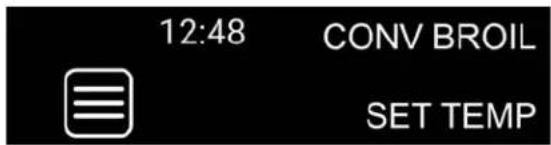
text_image
12:48 CONV BROIL SET TEMP- Set the Temperature knob to the BROIL setting. The display will show "BRL" to indicate this setting.

text_image
12:48 CONV BROIL BRLTIPS:
• Similar tips as BROIL.
- Please refer to recipe instructions for best results.

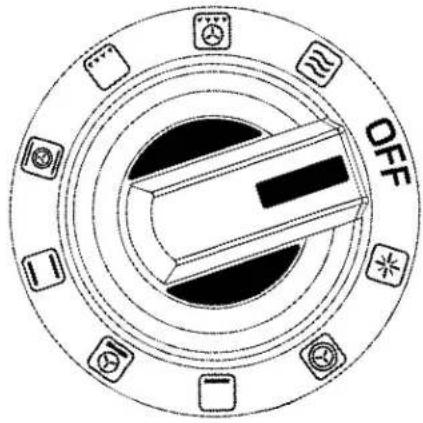
text_image
OFF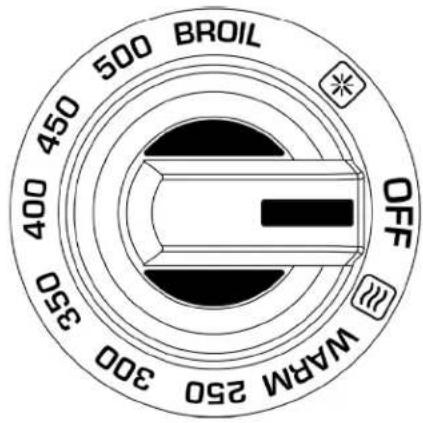
text_image
BROIL 500 450 400 350 300 WARM 250 OFFNOTES:
a. Timed Cook or Probe Cook should not be used in the CONVECTION BROIL mode.
b. In general, convection cooking should be done using low, shallow bakeware or pans to allow the heated air to circulate around the food. Removal of any lids is also recommended for the same reason.
PROOF COOKING MODE PROOF COOKING MODE
- Turn the Mode Select knob to the PROOF setting.

text_image
12:48 PROOF SET TEMP- Set the Temperature knob to the PROOF setting. The display will show "PRF" to indicate this setting.

text_image
12:48 PROOF PRF- If the oven temperature knob is not in the PROOF setting, the display shows "SET TEMP" and flashes "PRF" intermittently until the knob is rotated to this position.

text_image
12:48 PROOF SET TEMP- Once the set temperature has been reached, the display will look like the image below.

text_image
12:48 PROOF PRF
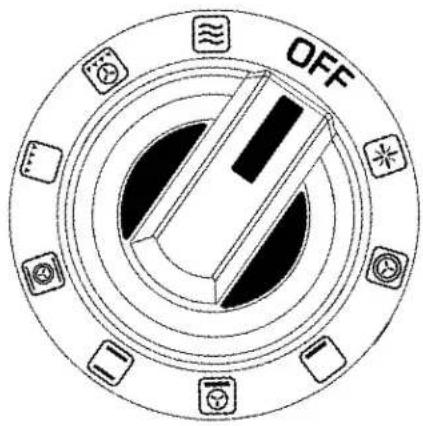
text_image
OFF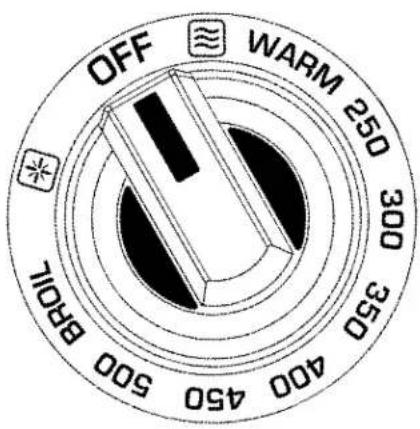
text_image
OFF WARM 250 300 350 400 450 500 BPOILNOTE:
a. The PROOF setting is a very low oven temperature around 100^ F [ 38^ C] for assisting yeast-leavened breads and other baked goods to rise.
b. It is best to start with a cool oven when using this setting.
SELF-CLEAN MODESELF-CLEAN MODE
NOTICE
Heavy food debris should be removed before running the self-clean cycle. Remove all oven racks, ladder racks, broiler pans, utensils, temperature probes, etc. from the oven before self-clean. The interior lights are disabled during this cycle.
See the CARE & MAINTENANCE section of this manual for more details.
- Turn BOTH the Mode Select and Temperature knob to the SELF CLEAN setting. The display will show "SELF CLEAN" to indicate this setting.
12:48

SELF CLEAN
SET TEMP
- Select the desired level of cleaning: Speed Clean, Medium Clean, or Heavy Clean. See table for times.
SELECT LEVEL
SPEED CLN
MEDIUM
HEAVY
- Once selected, the display will show "SELF CLEAN" and the selected cleaning level (SPD, MED, or HVY). The door will latch and the lock icon and the time remaining are displayed. The oven cavity will reach a temperature of approx. 825°F [440°C].
TIMER
00:48
SELF CLEAN


- Once self clean has completed, an audible alert will sound, the timer will show 00:00 and "COOLING" will be displayed. The oven is now in cool-down mode. See table for times.
TIMER
00:00
SELF CLEAN
COOLING

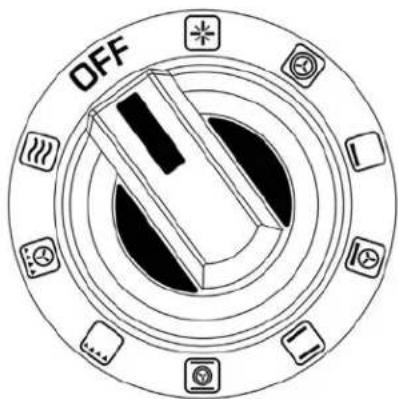
text_image
OFF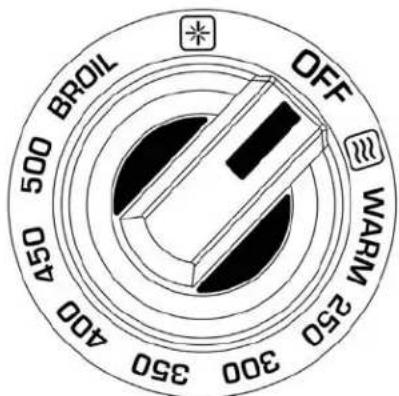
text_image
BROIL 500 005 450 400 300 350 400 OFF WARM 250
- Once the oven cavity has reached a safe temperature (550°F / 288°C) the door will unlatch, the lock icon will go out, and the display prompts the user to return both oven knobs to the OFF position.
TIMER
00:00

SELF CLEAN COMPLETED TURN KNOBS TO OFF
CAUTION: The oven has not cooled-down completely!
The oven could now be used again. However, you must wait for the oven to cool completely to room temperature before wiping down the interior.
NOTE:
a. If a power failure occurs while the door is locked, it will remain locked until power is restored and the oven temperature cools to a safe level.
| SELF-CLEANING TIMES | |||
| LEVEL | HIGH-TEMP CLEANING | TIME TO DOOR UN-LATCH (550°F / 290°C) | TOTAL TIME |
| SPEED-CLEAN | 2:30 :40 | 3:10 | |
| MEDIUM | 3:00 :40 | 3:40 | |
| HEAVY | 3:30 :40 | 4:10 | |
COOLING BLOWERS COOLING BLOWERS
The range has a cooling blower to protect the electronic components. The blower(s) activate when the oven reaches a temperature around 300^ F [149°C], and will stay on throughout any oven cooking cycle. After cooking, even though you may have shut off the oven, the blower(s) will remain on until the oven cools down to a temperature near 250^ F [121°C]. The induction section also has its own cooling blowers which may remain on briefly after shutting off the surface elements.
If you notice the blower(s) fail to activate during any oven cycle (especially Broil), do not use the oven. Call for service. Failure to do so may permanently damage the oven.
BROILER PAN BROILER PAN
The range is supplied with a porcelain enamel 2-piece broiler pan with slotted cover. The slotted cover allows drippings to flow into the base of the pan, away from the intense heat of the broiler. This will reduce smoke and the chance of a grease fire.
DO NOT use aluminum foil or thin, disposable aluminum pans when broiling. These can melt.
CARE & MAINTENANCE
SELF-CLEANING OVENSELF-CLEANING OVEN
WARNING
BURN HAZARD - All parts of the range can get very hot during operation. The oven door glass and areas surrounding the door get very hot, especially during self-cleaning operations. Do not touch the appliance while in operation. Failure to observe these instructions may result in severe burns or injury. Do not allow children to use this appliance without adult supervision. Do not allow children to play in or around the appliance, even when not in use.
MANUAL CLEANING MANUAL CLEANING
Minor spills and spatters inside the oven may be cleaned by hand, instead of running a self-clean cycle. Try wiping up the spill with warm soapy water, or a mild cleanser such as Fantastik® or SoftScrub®. Rinse and dry thoroughly. If you choose to use a commercial oven cleaner, follow the instructions on the product label.
BEFORE RUNNING SELF-CLEAN BEFORE RUNNING SELF-CLEAN
Heavy food debris should be removed before running the self-clean cycle. Wipe up any puddles of grease or debris. Do not scrape the oven surface or door glass with sharp objects, as this may damage the surfaces, or could leave scratches which would shatter the glass. Remove all oven racks, ladder racks, broiler pans, utensils, temperature probes, etc. from the oven before self-clean.
Do not pour cold water onto hot surfaces inside the oven. The steam could cause serious burns. The sudden temperature change could also distort the metal surfaces inside the oven resulting in cracks in the porcelain.
The self-cleaning cycle uses a very high temperature of 825^ F [ 440^ C] to incinerate any food debris inside the oven cavity. This may produce a little smoke and some odor. This is normal and is typical for the self-clean cycle, especially if heavily soiled. Turn on your vent hood while running self-clean. If the smell is strong, remove persons and animals from the kitchen during this period. Open any windows to further vent the odor from the room.
OVEN LATCHOVEN LATCH
The self-clean cycle will engage an automatic door latch to prevent the user from opening the oven door and being exposed to the high heat. When you see the lock icon displayed, check the door to be sure it is locked. If it does not lock, cancel the self-clean cycle and contact Hestan Customer Service.
TIMER 00:48 SELF CLEAN
SPD
SELF-CLEAN OPERATION SELF-CLEAN OPERATION
See instructions on page 46 of this manual for operation instructions, and for cleaning times.
AFTER SELF-CLEAN AFTER SELF-CLEAN
After the cycle is complete and the oven has completely cooled down, all that remains is ash, which can be wiped away with a damp paper towel or cloth. Return the ladder racks and oven racks to their original locations.
Do not rub, disturb or damage the cloth-braided door gasket. If the gasket is damaged, it will need to be replaced. Use only Hestan genuine replacement parts.
While the self-clean cycle is running, the rangetop elements may be used.
After the self-clean cycle has completed and the door has un-latched, all other oven functions are available immediately.
OVEN EXTERIOR/GLASSOVEN EXTERIOR/GLASS
Do not allow food stains or salt to remain in contact with stainless steel surfaces too long. The stainless steel exterior of the oven may be cleaned with warm soapy water, or any number of commercial stainless steel cleaners. Check to make sure the cleaners do not contain chlorine or chlorine compounds as these are corrosive to stainless steel. Rinse thoroughly.
For painted surfaces, use a mild household liquid detergent solution to remove dust and other deposits. Never use any solvent-based cleaners, stainless steel cleaners, heavy degreasers, oven cleaners, etc. on the painted surfaces. They can permanently damage the paint. Rinse off with clean fresh water and dry with a clean cloth.
SUGGESTED CLEANERS:
Hot water & mild detergent
Fantastik®
These cleaners may also be effective in areas with heat discoloration. ALWAYS clean stainless steel in the direction of the grain with light pressure.
If your Hestan appliance has colored panels, use warm soapy water ONLY. Rinse and dry thoroughly.
Be careful when cleaning near the oven door vents at the top of the oven glass. Water or cleaners could get inside and leave spots or streaks on the inside of the glass.
Do not rub, disturb or damage the cloth-braided door gasket. If the gasket is damaged, it will need to be replaced. Use only Hestan genuine replacement parts.
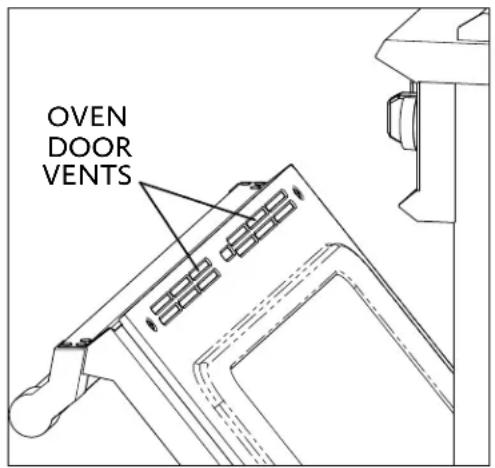
text_image
OVEN DOOR VENTSWait until the appliance is completely cool before using any aerosol-type cleaners. Many of these cleaners use flammable propellants which could ignite in the presence of heat.
LADDER RACKS / OVEN RACKSLADDER RACKS / OVEN RACKS
The oven racks and the left & right ladder racks can be removed from the oven for cleaning. DO NOT clean these items in a self-cleaning oven.
The racks may be cleaned with warm soapy water, or any number of commercial stainless steel cleaners. Check to make sure the cleaners do not contain chlorine or chlorine compounds as these are corrosive to stainless steel. Rinse thoroughly. If the racks do not slide easily after cleaning, apply a small amount of food-safe or cooking oil to the slide rails.
SUGGESTED CLEANERS:
Hot water & mild detergent Vinegar & water
| Fantastik® | |
| Kleen King | ® |
Bon-Ami®
SoftScrub®
MEAT PROBEMEAT PROBE
DO NOT wash the meat probe in the dishwasher. Wash all parts of the probe by hand using warm soapy water. Rinse and dry thoroughly.
INDUCTION ELEMENTS / CERAMIC GLASS TOPINDUCTION ELEMENTS / CERAMIC GLASS
Once the rangetop has cooled down, traces of foil, food residues, splashes of fat, sugar or very sugary foods must be removed from the rangetop using a razor blade scraper to avoid damaging the rangetop surface. You can remove spilled ingredients immediately, but use caution. Never use abrasive sponges, scouring pads of any type, or clothes. Avoid using aggressive chemical cleansers such as POWDERED CLEANSERS, OVEN SPRAYS, or DISHWASHER TABS. Do not use STAIN REMOVERS containing chlorine or ammonia. DO NOT USE STEAM CLEANERS.
Step 1:
This is the most important step of the cleaning process. Use a razor blade scraper to clean off build up. You can find them at your local hardware store in the paint department. Hold the scraper at a 45-degree angle, making sure the blade stays flush with the surface, and scrape off any food residue. Scrape off sticky items like sugar or jam immediately before the cooktop cools, but use a potholder to hold the scraper so you don't burn your hand.
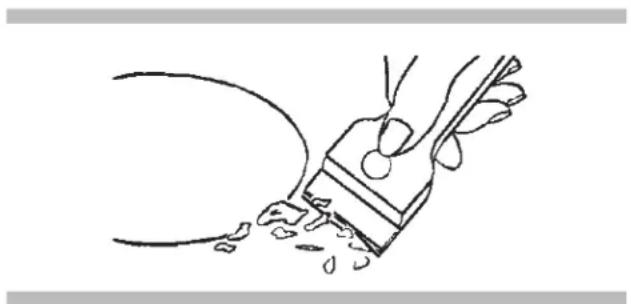
natural_image
Line drawing of a hand holding a paintbrush with spray particles, no text or symbols presentStep 2:
Once the rangetop has completely cooled, add a few drops of an approved Ceran® cooktop cleanser, and rub with a paper towel or soft cloth. These cream cleansers are mildly abrasive which cut through tough stains without leaving surface scratches. Do not use an excessive amount of cleanser. Too much will not hurt the glass, but it will take longer to fully remove.
Step 3:
After rubbing down the surface with the cleanser, dampen a paper towel or soft cloth with water and wipe down the entire glass surface to remove any cleanser residue. Dry the surface with a clean paper towel or soft cloth.
SUGGESTED CLEANERS:
Cerama Bryte®
Carbona®
Hope's® Cooktop Cleaning Cream
Affresh® Cooktop Cleaner
Weiman® Cooktop Cleaning Cream
Easy-Off® 3-in-1 Glass Top Cleaner Spray
EXTERIOR SURFACESEXTERIOR SURFACES
Do not allow food stains or salt to remain in contact with stainless steel surfaces too long. All stainless steel exterior surfaces may be cleaned with warm soapy water, or any number of commercial stainless steel cleaners. Check to make sure the cleaners do not contain chlorine or chlorine compounds as these are corrosive to stainless steel. Rinse thoroughly.
SUGGESTED CLEANERS:
Hot water & mild detergent
Fantastik®
ALWAYS clean stainless steel in the direction of the grain with light pressure.
For painted surfaces, use a mild household liquid detergent solution to remove dust and other deposits. Never use any solvent-based cleaners, stainless steel cleaners, heavy degreasers, oven cleaners, etc. on the painted surfaces. They can permanently damage the paint. Rinse off with clean fresh water and dry with a clean cloth.
Wait until the appliance is completely cool before using any aerosol-type cleaners. Many of these cleaners use flammable propellants which could ignite in the presence of heat.
REPLACING THE OVEN LIGHT BULB REPLACING THE OVEN LIGHT BULB
WARNING
ELECTRICAL SHOCK HAZARD - Make sure the power has been shut off to the range. The light socket is energized when the door is open. Failure to shut off the power when replacing a light bulb could result in electric shock or burns.
Make sure the glass lens is cool to the touch. Use care when handling the lens, it is fragile and can break if dropped.
Use only 20 watt, 12 Volt, halogen "Bi-Pin" bulbs suitable for appliance oven use. This type of bulb may be available at hardware stores and home centers, or specialty lighting stores. Call Hestan Customer Care for more information.
- MAKE SURE POWER IS OFF! Open the oven and remove the oven racks and ladder racks if they are in the way.
- Place a thick towel or cloth on the oven floor below the lamp to catch the glass lens should it fall.
- Use a small flat-blade screwdriver to carefully pry off the glass lens and set aside. Reach into the lamp housing and pull out the old light bulb as shown in the image below.
- Before installation, it is very important to clean the new bulb carefully with a clean, soft cloth, or tissue paper. Grease, fingerprints, or oils in your skin can leave a residue on the glass surface of the bulb which will create a hot-spot. The bulb will eventually crack at this hot-spot.
CARE & MAINTENANCE (CONTINUED)
- While still using a cloth or tissue paper, insert the new bulb in the lamp housing. Push the bulb fully into the socket.
- Re-install the glass lens taking note of the cutaway in the glass which aligns with the bulb socket.
- Restore the power and check if the new bulb is working. Re-install any racks you removed earlier.
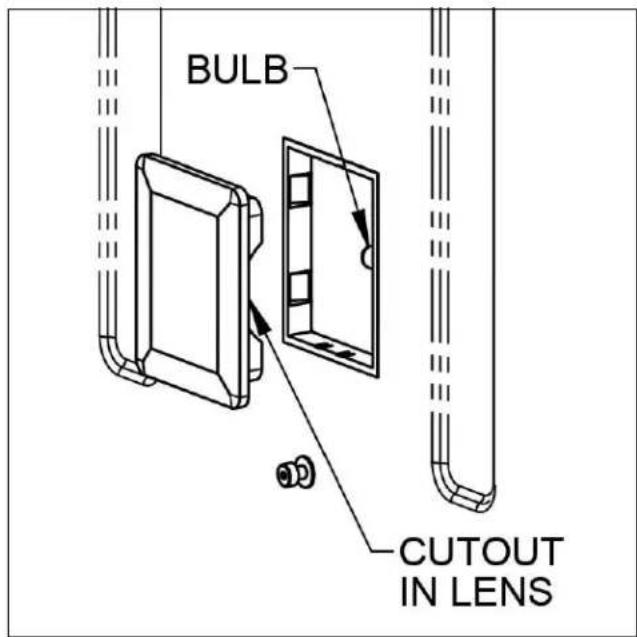
text_image
BULB CUTOUT IN LENSOVEN ERROR CODESOVEN ERROR CODES
| SYMPTOM | POSSIBLE CAUSE | SOLUTION |
| Range does not operate (no display, knob lights, interior lights, etc.). | Power cord not plugged in, or no power to receptacle, or breaker tripped. | Check breaker. Call for service for other issues. |
| Power on but no response from display. | Control board needs a reset. Turn off circuit breaker for 5 seconds to reset. | |
| Oven Light not working. Power | cord not plugged in, or no power to receptacle, or breaker tripped.Bulb is burned out. | Check breaker. Call for service for other issues.Replace bulb. |
| Oven door will not open. Oven | door is latched during self-cleaning mode. | Once oven has reached a safe temperature, door will un-latch.If door will not un-latch, call for service. |
| Heat escaping from top of oven door. | Oven door not sealing correctly. Check/clean oven door gasket.Replace if worn. | |
| Fan noise / hot air coming from appliance, even when off. | Oven cooling down. This is normal. If you DO NOThear the fan running during or after using the oven, call for service. | |
| ERR04, ERR05, ERR08 or ERR20 code displayed. | Non-critical electronic malfunction. Attempt a reset at the breaker. If error code persists, oven can still be operated without affected feature. Call for service at earliest opportunity. | |
| All other error codes displayed. | Critical electronic malfunction. Attempt a reset at the breaker.If error code persists, do not use oven; call for service. | |
| Oven Mode and/or Oven Temperature backlight on or blinking | Problem with controller or temperature sensing | Turn both oven controls OFF. If problem persists, call for service.Rangetop can still be used. |
INDUCTION RANGETOP ERROR CODESINDUCTION RANGETOP ERROR CODES
Error codes are displayed by the 7-segment display with "Er" or "E" plus the error number.
| Error message | Description Possible error reason Troubleshooting | ||
| Er 03 and tone or [IMAGE] | Continuous sensor activation; Touch Control turn off after 10 sec. | Water or cooking utensils on the glass above the control unit | Clean the control surface, remove objects on sensors |
| Er 20 | Flash memory - Touch Control Failure | Faulty microcontroller Exchange control unit | |
| Er 22 | Defective Key evaluation, UI shuts off after 3.5 - 7.5 sec. | Short-circuit or no continuity in the area of the key evaluation | Exchange control unit |
| Er 31 | Incorrect configuration data or deviation between generator and Touch Control | New configuration of induction generator required | New Configuration (Service Menu) |
| Er 36 | NTC value defective on Touch Control; UI turns off | Short or open circuit of NTC | Exchange control unit |
| Er 47 | Communication error between Touch Control and induction | None or faulty communication | Connection cable not correctly plugged in or defective |
| U 400 | Continuous tone Power supply on inlet too high | Incorrect communication of the appliance | Correct power supply connection |
| E 2 Overheating of the induction coils | Overload of rangetop or empty boiled cookware | Let system cool down. | |
| E A Error on power board Component failure Replace power board | |||
| E 6 | Error on power board or supply element | No power supply to the power element or error on power board | 1. check wiring2. check filter board3. replace power board |
| E 8 Incorrect fan speed Error on fan left or right | Air exhaust blocked, or replace defective fan | ||
| E 9 | Defective temperature sensor on inductor | Replace inductorReplace power board | |
| Problem Cause Possible | Remedy | |
| Nothing works | Appliance not connected to proper electrical circuit.Fuse is blown or circuit breaker is tripped.No electricity to the appliance. Have electrician check your power supply.Rangetop is in lockout mode. Unlock rangetop. | Have electrician verify that the proper rated voltage is being supplied to the appliance.Replace fuse or reset circuit breaker. |
| Heating elements do not heat properly | Improper cookware is being used. Select proper cookware as outlined in the Cookware Recommendations section of this manual. | |
| Glass ceramic surface is see-through or appears to be red in color | Under direct or bright lighting, you will sometimes be able to see through the glass and into the chassis due to its transparent quality. You may also notice a red tint under these conditions. | These are normal properties of black ceramic glass panels. |
PARTS LIST
Please visit the Hestan website to access the parts list for your Hestan Indoor product: www.hestanhome.com.www.hestanhome.com.
SERVICE
All warranty and non-warranty repairs should be performed by qualified service personnel. To locate an authorized service agent in your area, contact your Hestan dealer, local representative, or Hestan. Before you call, please have the model number and serial number information ready.
Hestan Commercial Corporation
3375 E. La Palma Avenue
Anaheim, CA 92806
(888) 905-7463
LIMITED WARRANTY
WHAT THIS LIMITED WARRANTY COVERS: WHAT THIS LIMITED WARRANTY COVERS:
Hestan Commercial Corporation ("HCC") warrants to the original consumer purchaser of a Hestan Indoor Cooking product (the "Product") from an HCC authorized dealer that the Product is free from defective materials or workmanship for a period of three (3) years from the date of original retail purchase or closing date for new construction, whichever period is longer ("Limited Warranty Period"). HCC agrees to repair or replace, at HCC's sole option, any part or component of the Product that fails due to defective materials or workmanship during the Limited Warranty Period. This Limited Warranty is not transferable and does not extend to anyone beyond the original consumer purchaser ("Purchaser"). This Limited Warranty is valid only on Products that are (i) purchased and received from an HCC authorized dealer, (ii) delivered after purchase to a consumer, and (iii) continuously thereafter remain located, in the fifty United States, the District of Columbia and Canada. Events that will void this warranty include purchasing or taking delivery in, or moving Products to any location outside of, the fifty United States, the District of Columbia and Canada. This Limited Warranty applies only to Products in non-commercial use and does not extend to Products used in commercial applications.
HOW TO OBTAIN WARRANTY SERVICE: HOW TO OBTAIN WARRANTY SERVICE:
If the Product fails during the Limited Warranty Period for reasons covered by this Limited Warranty, the Purchaser must immediately contact the dealer from whom the Product was purchased or HCC at 888.905.7463.
Purchaser is responsible for making the Product reasonably accessible for service or for paying the cost to make the Product reasonably accessible for service. Service is to be provided during normal business hours of the authorized Hestan Commercial Service Provider. To the extent Purchaser requests service outside of the normal business hours of the authorized Hestan Commercial Service Provider, Purchaser will pay the difference between regular rates and overtime or premium rates. Purchaser is required to pay all travel costs for travel beyond 50 miles (one way) from the nearest authorized Hestan Commercial Service Provider over time or premium rates. Purchaser is required to pay all travel costs for travel beyond 50 miles (one way) from the nearest authorized Hestan Commercial Service Provider.
EXTENSIONS TO THREE YEAR LIMITED WARRANTY PERIOD:
In addition to the three-year limited warranty, the following components have extended warranty coverage as specifically set forth below:
- The Product's gas burners (excludes appearance), electric heating elements, blower motors (ventilation hoods), electronic control boards, magnetron tubes and induction generators (where applicable) are warranted to be free from defects in material and workmanship under normal non-commercial use and service for a period of five (5) years of the original Purchaser. This excludes surface corrosion, scratches, and discoloration which may occur during normal use
and is limited to replacement of the defective part(s), with the Purchaser paying all other costs, including labor, shipping and handling, as applicable.
EN
WHAT THIS LIMITED WARRANTY DOES NOT COVER WHAT THIS LIMITED WARRANTY DOES NOT COVER:
This Limited Warranty does not cover and HCC will not be responsible for and will not pay for: damage to or defects in any Product not purchased from an HCC authorized dealer; color variations in color finishes or other cosmetic damage; failure or damage from abuse, misuse, accident, fire, natural disaster, commercial use of the Product, or loss of electrical power or gas supply to the Product; damage from alteration, improper installation, or improper operation of the Product; damage from improper or unauthorized repair or replacement of any part or component of the Product; damage from service by someone other than an authorized agent or representative of the Hestan Commercial Service Network; normal wear and tear; damage from exposure of the Product to a corrosive atmosphere containing chlorine, fluorine, or any other damaging chemicals; damage resulting from the failure to provide normal care and maintenance to the Product; damage HCC was not notified of within the Limited Warranty Period; and incidental and consequential damages caused by any defective material or workmanship.
ARBITRATION: ARBITRATION:
This Limited Warranty is governed by the Federal Arbitration Act. Any dispute between Purchaser and HCC regarding or related to the Product or to this Limited Warranty shall be resolved by binding arbitration only on an individual basis with Purchaser. Arbitration will be conducted by the American Arbitration Association (“AAA”) in accordance with its Consumer Arbitration Rules or by JAMS. The arbitration hearing shall be before one arbitrator appointed by the AAA or JAMS. The arbitrator shall not conduct class arbitration and Purchaser shall not bring any claims against HCC in a representative capacity on behalf of others.
LIMITATION OF LIABILITY: LIMITATION OF LIABILITY:
This Limited Warranty is the final, complete and exclusive agreement between HCC and Purchaser regarding the Product.
THERE ARE NO EXPRESS WARRANTIES OTHER THAN THOSE LISTED AND DESCRIBED ABOVE. NO WARRANTIES WHETHER EXPRESS OR IMPLIED, INCLUDING, BUT NOT LIMITED TO, ANY IMPLIED WARRANTIES OF MERCHANTABILITY OR FITNESS FOR A PARTICULAR PURPOSE SHALL APPLY AFTER THE LIMITED WARRANTY PERIOD STATED ABOVE. NO OTHER EXPRESS WARRANTY OR GUARANTY GIVEN BY ANY PERSON, FIRM OR CORPORATION WITH RESPECT TO THIS PRODUCT SHALL BE BINDING ON HCC. HCC ASSUMES NO RESPONSIBILITY THAT THE PRODUCT WILL BE FIT FOR ANY PARTICULAR PURPOSE, EXCEPT AS OTHERWISE PROVIDED BY APPLICABLE LAW. HCC SHALL NOT BE LIABLE FOR LOSS OF REVENUE OR PROFITS, FAILURE TO REALIZE SAVINGS OR OTHER BENEFITS, OR ANY OTHER SPECIAL, INCIDENTAL OR CONSEQUENTIAL DAMAGES CAUSED BY THE USE, MISUSE OR INABILITY TO USE THE PRODUCT, REGARDLESS OF THE LEGAL THEORY ON WHICH THE CLAIM IS BASED, AND EVEN IF HCC HAS BEEN ADVISED OF THE POSSIBILITY OF SUCH DAMAGES. NO RECOVERY OF ANY KIND AGAINST HCC SHALL BE GREATER IN AMOUNT THAN THE PURCHASE PRICE OF THE PRODUCT. WITHOUT LIMITING THE FOREGOING, YOU ASSUME ALL RISK AND LIABILITY FOR LOSS, DAMAGE OR INJURY TO YOU AND YOUR PROPERTY AND TO OTHERS AND THEIR PROPERTY ARISING OUT OF THE USE, MISUSE OR INABILITY TO USE THE PRODUCT NOT CAUSED DIRECTLY BY THE NEGLIGENCE OF HCC. THIS LIMITED WARRANTY STATES YOUR EXCLUSIVE REMEDY.
No oral or written representation or commitment given by anyone, including but not limited to, an employee representative or agent of HCC will create a warranty or in any way increase the scope of this express Limited Three Year Warranty. If there is any inconsistency between this Limited Warranty and any other agreement or statement included with or relating to the Product, this Limited Warranty shall govern. If any provision of this Limited Warranty is found invalid or unenforceable, it shall be deemed modified to the minimum extent necessary to make it enforceable and the remainder of the Limited Warranty shall remain valid and enforceable according to its terms.
INTERACTION OF LAWS WITH THIS LIMITED WARRANTY:
Some states, provinces or territories may not allow limitations on how long an implied warranty lasts or the exclusion or limitation of incidental or consequential damages, so the above limitations or exclusions may not apply to you. Some states, provinces or territories may provide for additional warranty rights and remedies, and the provisions contained in this Limited Warranty are not intended to limit, modify, take away from, disclaim or exclude any mandatory warranty requirements provided by states, provinces or territories, including certain implied warranties. This warranty gives you specific legal rights, and you may also have other rights which vary depending on location.
Any questions about this Limited Warranty may be directed to: Hestan Commercial Corporation at (888) 905-7463
NOTES
EN
⚠ AVERTISSEMENT
LE NON-RESPECT À LA LETTRE DE CES INSTRUCTIONS PEUT CAUSER UN INCENDIE OU UNE EXPLOSION, QUI POURRAIT ENTRAÎNER DES DOMMAGES MATÉRIELS, DES BLESSURES OU LA MORT.
natural_image
Silhouette of a person pushing a large block on a horizontal line (no text or symbols)natural_image
Group of people sharing a meal together with wine glasses and a pie chart, surrounded by various dishes (no visible text or symbols)TABLE DES MATIÈRES
3 PRÉCAUTIONS DE SÉCURITÉ - AVANT DE COMMENCER
7 RESPECT DE LA RÉGLEMENTATION ET DES CODES EN VIGUEUR
8 NUMÉROS DE MODÈLE
8 PLAQUE SIGNALÉTIQUE
9 COMMENT COMMENCER AVEC VOTRE APPAREIL
16 UTILISATION - TABLE DE CUISSON À INDUCTION
25 UTILISATION - FOUR
29 COMMANDES DU FOUR
48 ÉLÉMENTS SUPPLÉMENTAIRES
49 NETTOYAGE ET ENTRETIEN
53 GUIDE DE DÉPANNAGE
56 LISTE DES PIÈCES
56 SERVICE
56 GARANTIE LIMITÉE
PRÉCAUTIONS DE SÉCURITÉ - AVANT DE COMMENCER
natural_image
Silhouette of a person in motion, possibly shooting or arching, with no visible text or symbols.natural_image
Front view of a modern electric stove with four circular vented cutouts and a control panel (no visible text or symbols)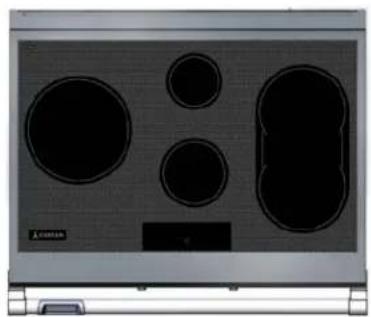
natural_image
Front view of a portable stove with multiple black vented lights and a small control panel (no visible text or symbols)KR36KRI36KRI30KRI30
PLAQUE SIGNALÉTIQUE
text_image
Technical diagram of a portable stove with numbered components and control knobstext_image
Technical diagram of a microwave oven with numbered components for identificationMODELE MODELO
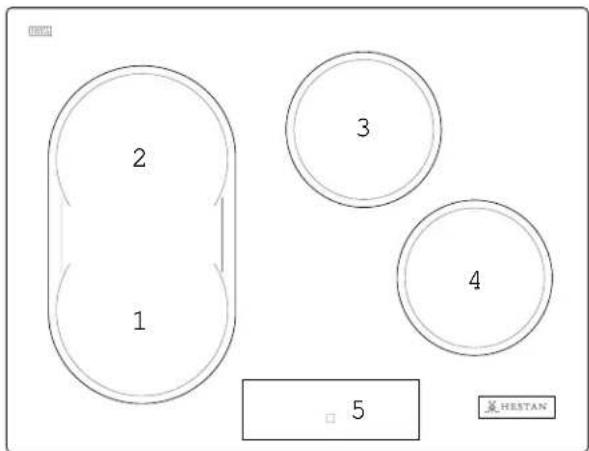
text_image
2 1 3 4 5 HESTAN| Article | Taille de l'élément d'induction et puissance nominale | ||
| 1 | 7-1/2" x 8-3/4 po | [185 mm x 220 mm] | - 2100W (Booster 3700W) |
| 2 | 7-1/2" x 8-3/4 po | [185 mm x 220 mm] | - 2100W (Booster 3700W) |
| 3 | 7 po | [180 mm] | - 1850W (Booster 3000W) |
| 4 | 7 po | [180 mm] | - 1850W (Booster 3000W) |
| 5 | contrôle tactile | ||
MODELE MODELPO
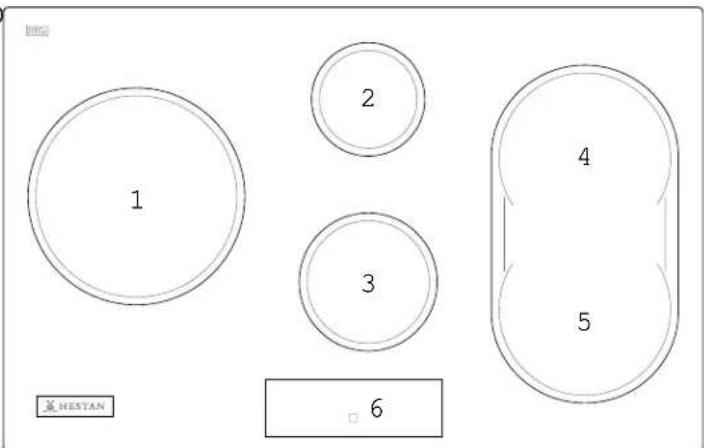
text_image
1 2 3 4 5 6 HESTAN| Article | Taille de l'élément d'induction et puissance nominale | ||
| 1 | 10-1/4 po | [260 mm] | - 2600W (Booster 3700W) |
| 2 | 5-3/4 po | [145 mm] | - 1400W (Booster 2200W) |
| 3 | 7 po | [180 mm] | - 1850W (Booster 3000W) |
| 4 | 7-1/2" x 8-3/4 po | [185 mm x 220 mm] | - 2100W (Booster 3700W) |
| 5 | 7-1/2" x 8-3/4 po | [185 mm x 220 mm] | - 2100W (Booster 3700W) |
| 6 | contrôle tactile | ||
COMMENT COMMENCER AVEC VOTRE APPAREIL (SUITE)
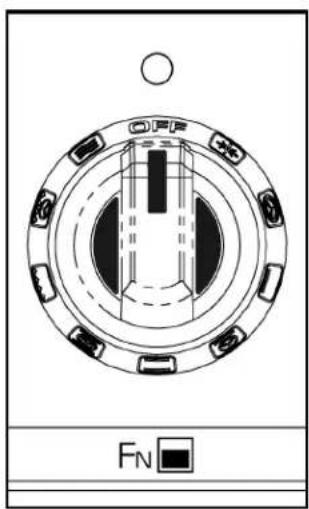
text_image
OFF FNTOURNEZ À GAUCHE OU À DROITE POUR SÉLECTIONNER LE MODE DU FOUR
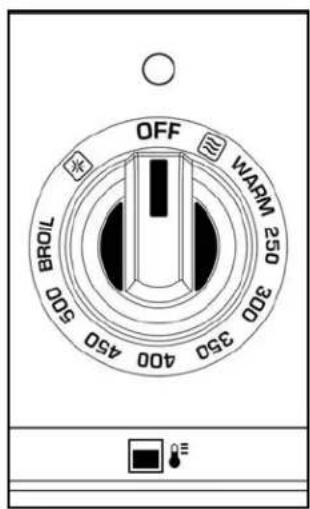
text_image
OFF WARM 250 350 400 450 500 BROIL 350TOURNEZ À GAUCHE OU À DROITE POUR SÉLECTIONNER LA TEMPÉRATURE DU FOUR
SÉLECTEUR DE SÉLECTEUR DE
MODE DU FOURMODE DU FOUR
TEMPÉRATURE TEMPÉRATURE
DU FOUR DU FOUR

LUMIÈRELUMIÈRE
DU FOURDU FOUR
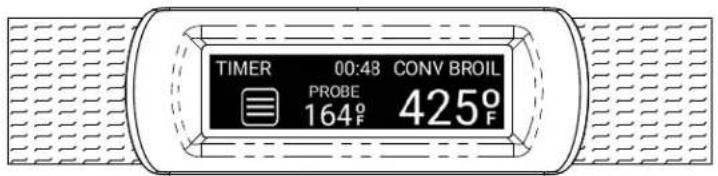
text_image
TIMER 00:43 CONV BROIL PROBE 164°F 425°FPOIGNÉE DE COMMANDE TACTILE MARQUISE™
FONCTIONNEMENT DU CHAUFFAGE PAR INDUCTIONFONCTIONNEMENT DU CHAUFFA
natural_image
Technical diagram of a mechanical assembly with no visible text or symbols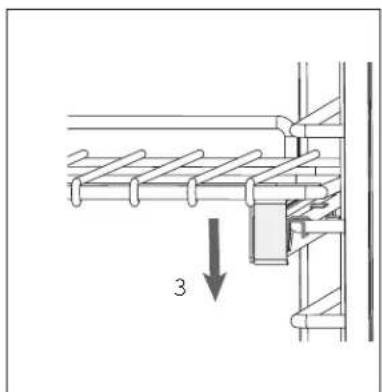
text_image
3© 2021 Hestan Commercial Corporation
COMMENT COMMENCER AVEC VOTRE APPAREIL (SUITE)
PREMIÈRE OPÉRATION - FOUR PREMIÈRE OPÉRATION - FOUR
natural_image
Simple line drawing of a cooking pot with two handles and two arrows below indicating upward motion (no text or symbols)No No Oui
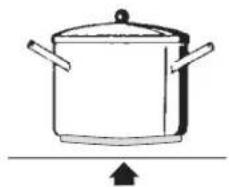
natural_image
Simple line drawing of a cooking pot with two handles and a lid, no text or symbols present.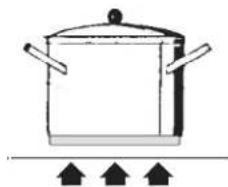
natural_image
Simple line drawing of a cooking pot with three upward-pointing arrows below (no text or symbols)CUISSON AU FOUR CUISSON AU FOUR

Convection
Véritable

Grillage

Cuisson
text_image
12:48 SET MODE 350° Ftext_image
12:48 TRUE CONV SET TEMPtext_image
12:48 BAKE SET TEMPtext_image
12:48 CONV BAKE SET TEMPtext_image
12:48 BROIL SET TEMPtext_image
12:48 CONV BROIL SET TEMPtext_image
12:48 PROOF SET TEMPtext_image
12:48 PROOF PRFtext_image
12:48 PROOF SET TEMPtext_image
12:48 PROOF PRF
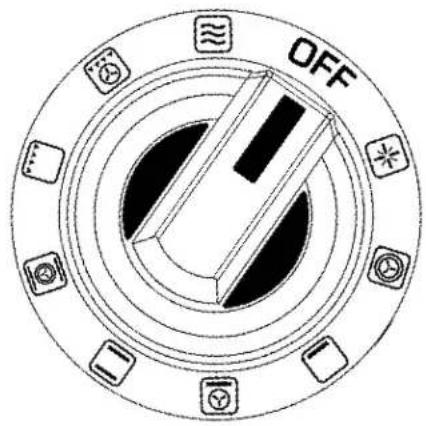
text_image
OFF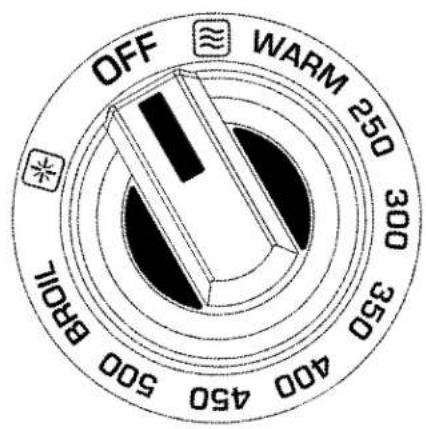
text_image
OFF WARM 250 300 350 400 450 500 BROLLREMARQUES:
natural_image
Line drawing of a hand using a paintbrush to scrape or brush with droplets (no text or symbols)Étape 2:
Affresh® Cooktop Cleaner
Weiman® Cooktop Cleaning Cream
Easy-Off® 3-in-1 Glass Top Cleaner Spray
SURFACES EXTÉRIEURESSURFACES EXTÉRIEURES
INDICATIONS D'ERREUR DU FOURINDICATIONS D'ERREUR DU FOUR
www.hestanhome.com.www.hestanhome.com.
SERVICE
Hestan Commercial Corporation
3375 E. La Palma Avenue
Anaheim, CA 92806
(888) 905-7463
GARANTIE LIMITÉE
ÉLÉMENTS COUVERTS PAR LA PRÉSENTE GARANTIE LIMITÉE :
Hestan Commercial Corporation
3375 E. La Palma Ave.
Anaheim, CA 92806
(888) 905-7463