
Talento - Coffee machine NUOVA SIMONELLI - Free user manual and instructions
Find the device manual for free Talento NUOVA SIMONELLI in PDF.

| Product type | Fully automatic espresso coffee machine |
| Brand | Nuova Simonelli |
| Model | Talento (versions: Talento Plus, Talento Special) |
| Power supply | 110-120 V~ / 220-240 V~, 50-60 Hz |
| Maximum power | 5000 W |
| Coffee boiler capacity | From 0.6 L to 23.1 L depending on version |
| Maximum pressure | 0.18 MPa |
| Maximum temperature | 130.5 °C |
| Coffee bean hopper | Capacity not specified (standard type) |
| Milk reservoir | External milk suction tube |
| Main functions | Coffee dispensing (single/double), double dose, left grinder, cappuccino, latte, hot water, steam, pre-infusion, dose and cycle programming |
| Programming | User and technician: languages, counters, doses, temperatures, grind, air, etc. |
| Routine maintenance | Group cleaning with tablets, automatic milk circuit wash, steam wand cleaning, drip tray, grid |
| Safety | Pump stop after 1 min 30, omnipolar circuit breaker, level probe, safety thermostat, various alarms |
| Spare parts | Grinder, dispensing group, pump, solenoid valves, probes, diffuser, cappuccinatore, etc. |
| Repairability | Interventions exclusively by qualified technician; original parts recommended |
| Standards applied | EEC 89/392, EEC 89/336, EEC 73/23, EEC 89/109 and amendments |
| Country of origin | Italy (brand Nuova Simonelli) |
Frequently Asked Questions - Talento NUOVA SIMONELLI
User questions about Talento NUOVA SIMONELLI
0 question about this device. Answer the ones you know or ask your own.
Ask a new question about this device
Download the instructions for your Coffee machine in PDF format for free! Find your manual Talento - NUOVA SIMONELLI and take your electronic device back in hand. On this page are published all the documents necessary for the use of your device. Talento by NUOVA SIMONELLI.
USER MANUAL Talento NUOVA SIMONELLI
natural_image
Exterior view of a modern laboratory instrument with digital display and control panel (no visible text or symbols)LIBRETTO ISTRUZIONI UTILIZZATORE
USER MANUAL
NOTICE D'INSTRUCTIONS UTILISATEUR
DICHIARAZIONE DI CONFORMITÀ CE ATTREZZATURA A PRESSIONE
EC DECLARATION OF CONFORMITY PRESSURE EQUIPMENT DECLARATION DE CONFORMITE MACHINE SOUS PRESSION
Model and production: See label on machine
Applied regulations: Collections M,S, VSR editions '78 and '95 and available in the registered office.
ATTENTION: This declaration is to be kept with the equipment at all times and must always go together with the equipment. Any use of the equipment than for the purposes for which it was designed is prohibited. The integrity and efficiency of the equipment of the safety devices are the responsibility of the user. The declaration is null and void if the machine is modified without the express authorization of the manufacturer or if improperly installed and used in such a way that does not comply with indications in the user's manual and the instructions.
natural_image
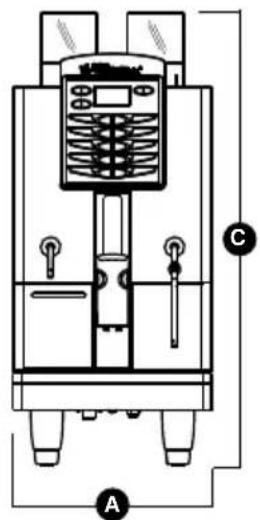
Technical line drawing of a laboratory apparatus with control panel and tubing (no text or symbols)CARATTERISTICHE TECNICHE
| PESO NETTO | 65 Kg 143 | 3 lb |
| PESO LORDO | 74 Kg 163.1 | lb |
| POT. TERMICA | 6000 W - 3000W | 6000 W - 3000W |
| DIMENSIONI | A 400 mm A | 15.748 inc |
| B 607 mm B | 23.897 inc | |
| C 844 mm C | 33.228 inc | |
| D 154 mm D | 6.063 inc | |
| E 41,5 mm - 141,5 mm | E 1.634 inc - 5.571 inc |

text_image
Technical diagram of a mechanical device with labeled components A, B, and C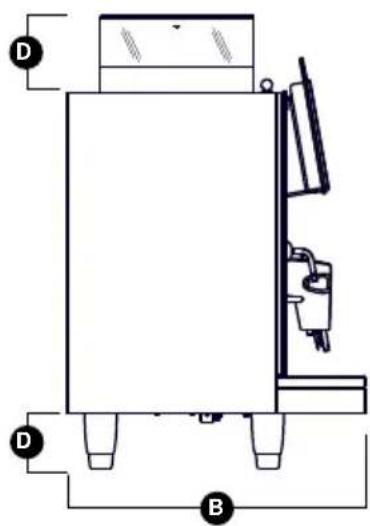
natural_image
Technical line drawing of a mechanical device with labeled components (D and B), no readable text or symbols present.INDICE
CARATTERISTICHE TECNICHE ....
- DESCRIZIONE 3
1.1 DESCRIZIONE TASTIERA (Configurazione standard) 4 - PRESCRIZIONI DI SICUREZZA ..... 5
- TRASPORTO
E MOVIMENTAZIONE....9
3.1 IDENTIFICAZIONE MACCHINA 9
3.2 TRASPORTO 9
3.3 MOVIMENTAZIONE 9 - INSTALLAZIONE E OPERAZIONI PRELIMINARI...10
4.1 INSTALLAZIONE MACCHINA 10
4.2 RIEMPIMENTO CONTENITORE CAFFÈ ..... 11
4.3 ACCENSIONE MACCHINA 11
4.4 SPEGNIMENTO MACCHINA 11 - REGOLAZIONI DEL TECNICO QUALIFICATO....12
5.1 REGOLAZIONE DEL GRADO DI MACINATURA 12
5.2 REGOLAZIONE ARIA CAPPUCCINATORE..... 12
5.3 REGOLAZIONE FLUSSO DEL LATTE (Regolazione Temperatura)....13
5.4 REGOLAZIONE ARIA EASYCREAM (optional)....13 - UTILIZZO 14
6.1 EROGAZIONE DECAFFEINATO 14
6.2 EROGAZIONE DOSE DOPPIA 14
6.3 UTILIZZO MACININO SINISTRO 14 -
PROGRAMMAZIONE......15
7.1 ENTRATA IN PROGRAMMAZIONE 15
7.2 PROGRAMMAZIONE MODALITÀ UTENTE .... 15 -
PULIZIA E MANUTENZIONE.....22
8.1 PULIZIA DELLA CARROZZERIA....22
8.2 PULIZIA DEL GRUPPO EROGATORE E CAPPUCCINATORE....22
8.3 PULIZIA DEL CONTENITORE E DEL CONVOGLIATORE DEL CAFFÈ....23
8.4 PULIZIA DELLA LANCIA VAPORE...... 24
8.5 PULIZIA DELLA GRIGLIA CONTENITORE RACCOGLIGOCCE....24
8.6 PULIZIA DEL CONTENITORE RACCOGLIGOCCE.... 24
8.7 PULIZIA GUARNIZIONE GRUPPO 24
8.8 PULIZIA CAPPUCCINATORE TALENTO PLUS....25
8.9 PULIZIA DIFFUSORE E CAPPUCCINATORE TALENTO SPECIAL.... 25 - TABELLA DATI IMPOSTAZIONI STANDARD.....26
- MESSAGGI FUNZIONI MACCHINA......27
IMPIANTO IDRAULICO TALENTO PLUS....88
IMPIANTO IDRAULICO TALENTO SPECIAL....90
IMPIANTO ELETTRICO TALENTO PLUS / SPECIAL....92
IMPIANTO ELETTRICO SECONDARIO TALENTO PLUS / SPECIAL....94
1. DESCRIZIONE
text_image
Technical diagram of a refrigerant appliance with numbered components for identificationFig. 1
LEGENDA
text_image
LEFT BRINDER /CLEAN SWITCH WHIP 2 3 4Fig. 2
LEGENDA
natural_image
Simple line drawing of a landscape with a black 'X' symbol and a small object, no text or symbols present.
natural_image
Simple electrical symbol for a lamp or lamp, no text or labels presentFig. 4

natural_image
Diagram of a device with a black X mark and a control panel, labeled Fig. 8 (no text or symbols on the diagram itself)
natural_image
Simple line drawing of a cross symbol over a landscape with trees and hills (no text or symbols)
natural_image
Illustration of a hand cleaning a kitchen sink with a black X symbol (no text or symbols present)
natural_image
Technical line drawing of a mechanical device with control panel and housing (no text or symbols)
ATTENZIONE

natural_image
Symbol of a trash bin crossed with diagonal lines, no text or labels presentnatural_image
Simple line drawing of a landscape with mountains, trees, and a marked cross symbol (no text or labels)natural_image
Simple line drawing of a mountain landscape with trees and a cross symbol (no text or labels)natural_image
Diagram of a coiled hose with connectors, labeled Fig. 15 (no text or symbols on the diagram itself)natural_image
Mechanical assembly diagram showing pipe fittings and a piston (no text or symbols)natural_image
Illustration of a hand pouring granular material into a multi-layered cylindrical device (no text or symbols)natural_image
Technical diagram showing a hand using a tool to mark a circular component with a plus and minus symbol, alongside a grid-patterned object (no text or symbols present)TOT CI CLI TOT ASSOLUT N. 0006500
text_image
TOT CI CLI TOT ASSOLUT N. 0006500TOT MAC DX H: MIN 000000:63

TOT MAC DX TOT ASSOLUT H: MIN 000000:63

text_image
DAILY CLEANING 1. Daily cleaning 2. Daily cleaning 3. Daily cleaning 4. Daily cleaning 5. Daily cleaning 6. Daily cleaning 7. Daily cleaning 8. Daily cleaning 9. Daily cleaning 10. Daily cleaning 11. Daily cleaning 12. Daily cleaning 13. Daily cleaning 14. Daily cleaning 15. Daily cleaning 16. Daily cleaning 17. Daily cleaning 18. Daily cleaning 19. Daily cleaning 20. Daily cleaning 21. Daily cleaning 22. Daily cleaning 23. Daily cleaning 24. Daily cleaning 25. Daily cleaning 26. Daily cleaning 27. Daily cleaning 28. Daily cleaning 29. Daily cleaning 30. Daily cleaning 31. Daily cleaning 32. Daily cleaning 33. Daily cleaning 34. Daily cleaning 35. Daily cleaning 36. Daily cleaning 37. Daily cleaning 38. Daily cleaning 39. Daily cleaning 40. Daily cleaning 41. Daily cleaning 42. Daily cleaning 43. Daily cleaning 44. Daily cleaning 45. Daily cleaning 46. Daily cleaning 47. Daily cleaning 48. Daily cleaning 49. Daily cleaning 50. Daily cleaning 51. Daily cleaning 52. Daily cleaning 53. Daily cleaning 54. Daily cleaning 55. Daily cleaning 56. Daily cleaning 57. Daily cleaning 58. Daily cleaning 59. Daily cleaning 60. Daily cleaning 61. Daily cleaning 62. Daily cleaning 63. Daily cleaning 64. Daily cleaning 65. Daily cleaning 66. Daily cleaning 67. Daily cleaning 68. Daily cleaning 69. Daily cleaning 70. Daily cleaning 71. Daily cleaning 72. Daily cleaning 73. Daily cleaning 74. Daily cleaning 75. Daily cleaning 76. Daily cleaning 77. Daily cleaning 78. Daily cleaning 79. Daily cleaning 80. Daily cleaning 81. Daily cleaning 82. Daily cleaning 83. Daily cleaning 84. Daily cleaning 85. Daily cleaning 86. Daily cleaning 87. Daily cleaning 88. Daily cleaning 89. Daily cleaning 90. Daily cleaning 91. Daily cleaning 92. Daily cleaning 93. Daily cleaning 94. Daily cleaning 95. Daily cleaning 96. Daily cleaning 97. Daily cleaning 98. Daily cleaning 99. Daily cleaningFig. 26
natural_image
Illustration of a coffee maker pouring liquid into a container with a side view showing a water dispenser (no text or symbols)natural_image
Illustration of a hand adjusting a mechanical component with a circular knob, labeled Fig. 28 (no text or symbols on the diagram itself)text_image
RI SCI ACQUORIPRISTINO DI UN LAVAGGIO INTERROTTO
natural_image
Technical line drawing of a mechanical or industrial device with control panel and piping (no text or symbols)natural_image
Isometric technical drawing of a mechanical housing or enclosure with three cylindrical components mounted on a base plate (no text or symbols visible)natural_image
Diagram of a kitchen sink with a bag and utensils, showing internal components (no text or symbols)8.5 PULIZIA DELLA GRIGLIA CONTENITORE RACCOGLIGOCCE
natural_image
Diagram of a mobile phone screen with grid pattern and hand interacting (no text or symbols)8.6 PULIZIA DEL CONTENITORE RACCOGLIGOCCE
natural_image
Line drawing of a hand holding a rectangular object with internal lines, labeled Fig. 33 (no text or symbols on the object itself)
ATTENZIONE
natural_image
Technical line drawing of a mechanical assembly with no visible text or symbols8.8
PULIZIA CAPPUCCINATORE TALENTO PLUS
natural_image
3D rendered mechanical component with red and blue tubes, no visible text or symbolsFig. 35
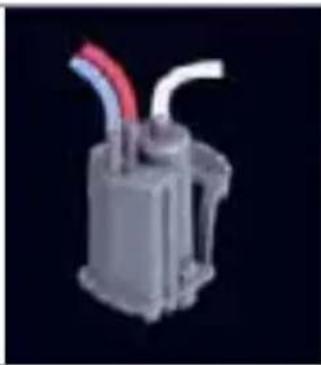
8.9 PULIZIA DIFFUSORE E CAPPUCCINATORE TALENTO SPECIAL
natural_image
Exploded view of a mechanical assembly showing internal components (no text or labels visible)Fig. 36
natural_image
3D rendered mechanical component with red and white tubes, no visible text or symbolsFig. 37
upon the wise choice you have made by purchasing the TALENTO model.
n fact, you are now the owner of not just a simple coffee dispenser, but a true espresso coffee-making machine which is fully automatic and completely controlled by a microprocessor. This means absolute reliability and simple to use. We are certain that our TALENTO model will increase your confidence in Nuova Simonelli and that you will undoubtedly recommend others to purchase this coffee-making machine, since the TALENTO model has been chosen to increase the profitability of the coffee shop, thus fully optimising running costs.
This machine has been manufactured in compliance with the EEC directives 89/392, 89/336, 73/23, 89/109 and subsequent modifications.
With best wishes
natural_image
Technical line drawing of a laboratory apparatus with control panel and tubing (no text or symbols)TECHNICAL CHARACTERISTICS
| NET WEIGHT | 65 Kg 143 | 3 lb |
| GROS WEIGHT | 74 Kg 163.1 | lb |
| POWER | 6000 W - 3000W | 6000 W - 3000W |
| DIMENSIONS | A 400 mm A | 15.748 inc |
| B 607 mm B | 23.897 inc | |
| C 844 mm C | 33.228 inc | |
| D 154 mm D | 6.063 inc | |
| E 41,5 mm - 141,5 mm | E 1.634 inc - 5.571 inc |

text_image
Technical diagram of a mechanical device with labeled components A, C, and D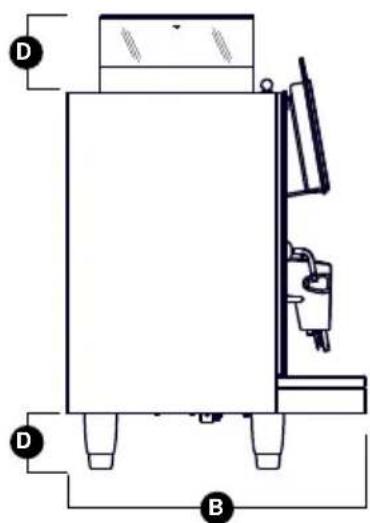
natural_image
Technical line drawing of a mechanical device with labeled components (D and B), no readable text or symbols present.INDEX
TECHNICAL CHARACTERISTICS...31
- DESCRIPTION 32
1.1 KEYBOARD DESCRIPTION (Standard configuration) 33 - SAFETY INSTRUCTIONS .....34
- TRANSPORT AND HANDLING ....38
3.1 MACHINE IDENTIFICATION 38
3.2 TRANSPORT 38
3.3 HANDLING 38 - INSTALLATION AND PRELIMINARY OPERATIONS.....39
4.1 MACHINE INSTALLATION 39
4.2 FILLING THE COFFEE CONTAINER....40
4.3 SWITCHING ON 40
4.4 SWITCHING OFF....40 - ADJUSTMENTS TO BE MADE
BY A QUALIFIED
TECHNICIAN ONLY....41
5.1 GRINDING ADJUSTMENT 41
5.2 MILK FOAMER ADJUSTMENT 41
5.3 MILK FLOW ADJUSTMENT (Temperature Regulation)....42
5.4 AIR ADJUSTMENT FOR EASYCREAM (optional)....42 - USE 43
6.1 POURING DECAFFEINATED COFFEE....43
6.2 DISPENSING DOUBLE DOSES 43
6.3 USING THE LEFT GRINDER 43 -
PROGRAMMING 44
7.1 ENTERING THE PROGRAMMING MODE....44
7.2 PROGRAMMING IN USER MODE 42 -
CLEANING AND MAINTENANCE ....50
8.1 CLEANING THE OUTSIDE OF THE MACHINE...50
8.2 CLEANING THE DELIVERY UNIT AND THE MILK FOAMER ....50
8.3 COFFEE HOLDER AND COFFEE DELIVERY UNIT CLEANING ....52
8.4 CLEANING THE STEAM NOZZLE 52
8.5 CLEANING THE DROP COLLECTING TRAY GRID ....52
8.6 CLEANING THE WATER COLLECTING TRAY ....53
8.7 CLEANING THE GASKE 53
8.8 CLEANING THE MILK FOAMER TALENTO PLUS....53
8.9 CLEANING THE DIFFUSER AND MILK FOAMER (TALENTO SPECIAL) 54 -
STANDARD SETTING TABLE .....55
-
MACHINE FUNCTIONS MESSAGES.....56
PLUMBING SYSTEM TALENTO PLUS 88
PLUMBING SYSTEM TALENTO SPECIAL....90
ELECTRICAL SYSTEM TALENTO PLUS / SPECIAL....92
SECONDARY ELECTRICAL SYSTEM TALENTO PLUS / SPECIAL....94
1. DESCRIPTION

text_image
Technical diagram of a device with numbered components, likely an appliance or control unit with labeled parts.Fig. 1
LEGEND
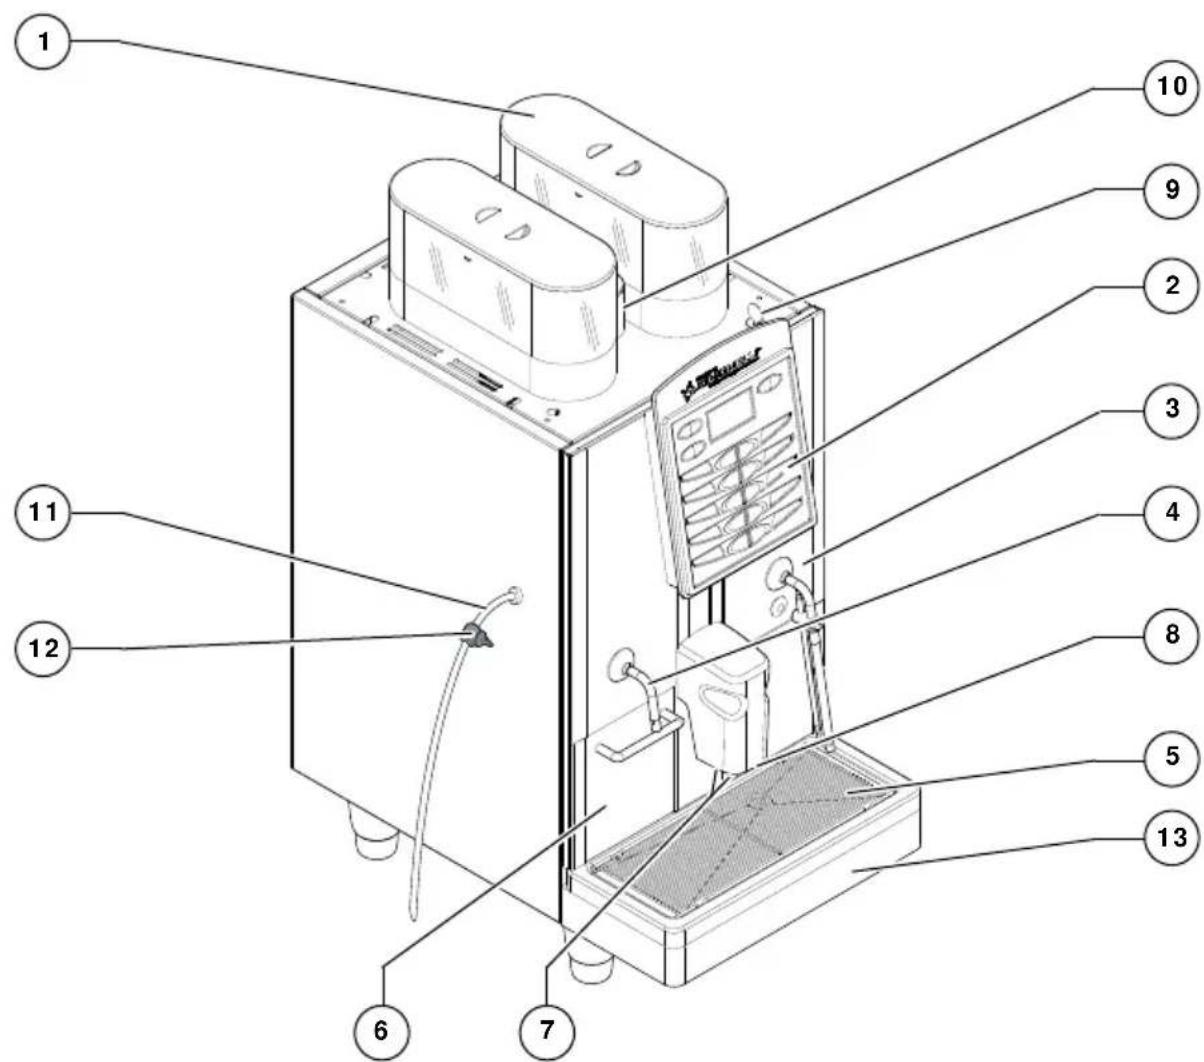
1 Coffee bean holder cap
2 Control panel
3 Front door
4 Steam pipe / Hot water pipe
5 Drop collecting tray grid
6 Coffee grounds drawer
7 Coffee nozzles
8 Milk/Cappuccino nozzle
9 Control panel hatch opening / locking key
10 Ground coffee conveyor hatch
11 Milk suction tube
12 Milk flow adjusting tap (TALENTO PLUS)
13 Water collecting tray
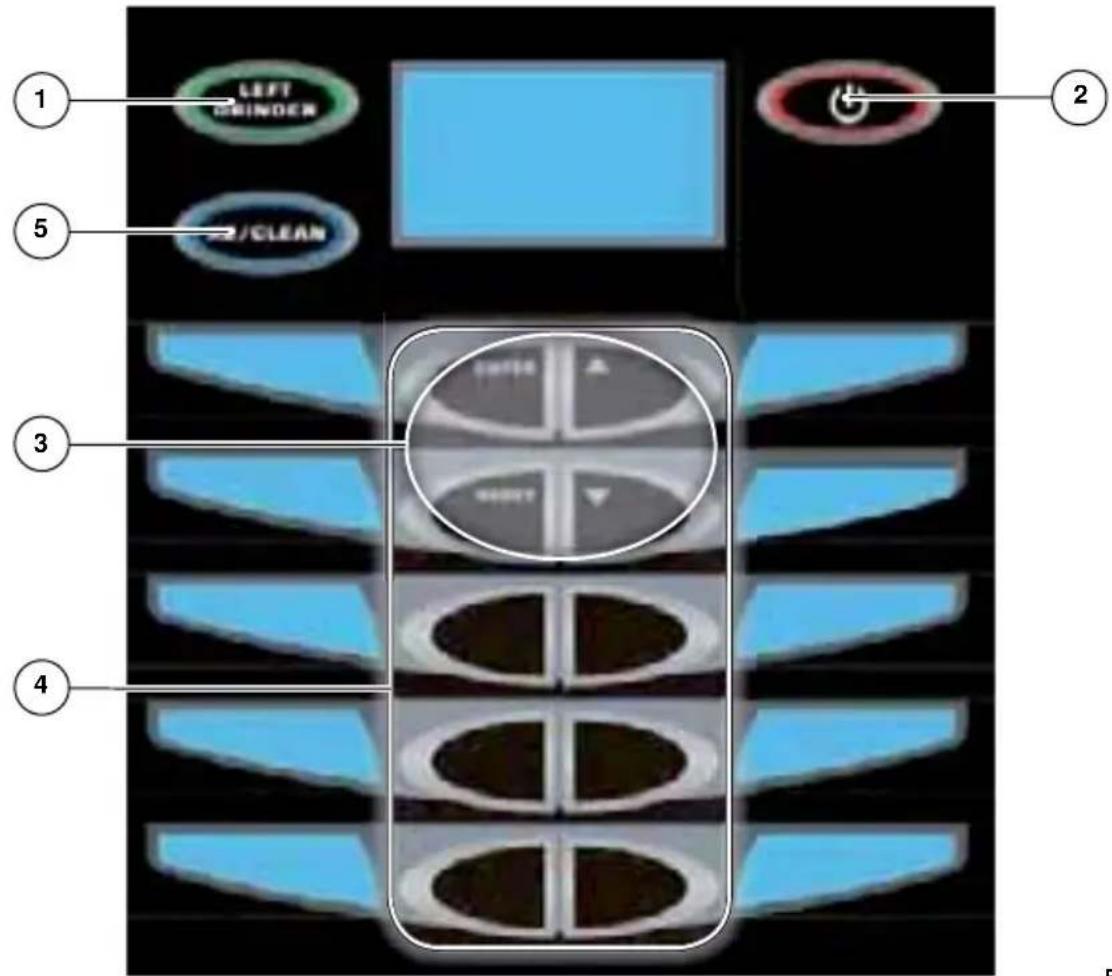
1.1 KEYBOARD DESCRIPTION (Standard configuration)
text_image
LEFT ORINDER /CLEAN SWITCH RIGHT 2 3 4Fig. 2
LEGEND
1 Left grinder key
2 On/Off key
3 Programming key
4 Product dose keys
5 Double dose/cleaning cycle key
2. SAFETY INSTRUCTIONS

This manual is an integral and essential part of the product and must be given to the user. Read this book carefully. It provides important information concerning safety of installation, use and maintenance. Save it carefully for future reference.

After unpacking, make sure the appliance is complete. In case of doubts, do not use the appliance, but consult a qualified technician. Packaging items which are potentially dangerous (plastic bags, polystyrene foam, nails, etc.) must be kept out of children's reach and must not be disposed of in the environment.
RISK OF POLLUTION
natural_image
Simple line drawing of a cross symbol over a landscape with trees and hills (no text or labels)
Before connecting the appliance make sure the rating plate data correspond with the mains. The nameplate is located on the back of the machine, on the left-hand side at the bottom. The appliance must be installed by qualified technicians in accordance with current standards and manufacturer's instructions.
The manufacturer is not liable for any damage caused due to failure to ground the system. For the electrical safety of the appliance, it is necessary to equip the system with the proper grounding. This must be carried out by a qualified electrician who must ensure that the electric power of the system is sufficient to absorb the maximum power input stated on the plate.

natural_image
Simple black circular icon with a white lightning bolt symbol (no text or numbers)Fig. 4

In particular you must ensure that the size of the wiring cables is sufficient to absorb power input. The use of adapters, multiple sockets or extensions is strictly forbidden. If they prove necessary, call a fully qualified electrician.

This appliance is not suitable for use by children or people with reduced physical, sensory or mental capabilities or by people without the proper experience, unless correctly supervised and instructed.

This machine can be installed in locations such as service areas for staff in shops, offices and other work environments, in farm holiday accommodation, and in guest areas in hotels, motels, bed and breakfast establishments and other residential facilities.

When installing the device, it is necessary to use the parts and materials supplied with the device itself. Should it be necessary to use other parts, the installation engineer needs to check their suitability for use in contact with water for human consumption.

This machine must be installed according to the applicable federal, state, and local standards (codes) in force with regard to plumbing systems including backflow prevention devices. For this reason, the plumbing connections must be carried out by a qualified technician.

The device needs to be supplied with water that is suitable for human consumption and compliant with the regulations in force in the place of installation. The installation engineer needs confirmation from the owner/manager of the system that the water complies with the requirements and standards stated above.

This appliance must only be used as described in this handbook. The manufacturer shall not be liable for any damage caused due to improper, incorrect and unreasonable use.

At the end of installation, the device is switched on and taken to rated operating conditions, leaving it in a state in which it is “ready for operation”. The device is then switched off and the whole hydraulic circuit is bled of the first lot of water in order to remove any initial impurities.
The device is then refilled and taken to rated operating conditions.
After reaching the "ready for operation" condition, the following dispensing operations are carried out:
- 100% of the coffee circuit through the coffee dispenser (for more than one dispenser, this is divided equally);
- 100% of the hot water circuit through the water dispenser (for more than one dispenser, this is divided equally);
- opening of each steam outlet for 1 minute.
At the end of installation, it is good practice to draw up a report of the operations.

Basic rules must be observed when using any electric appliance. In particular:
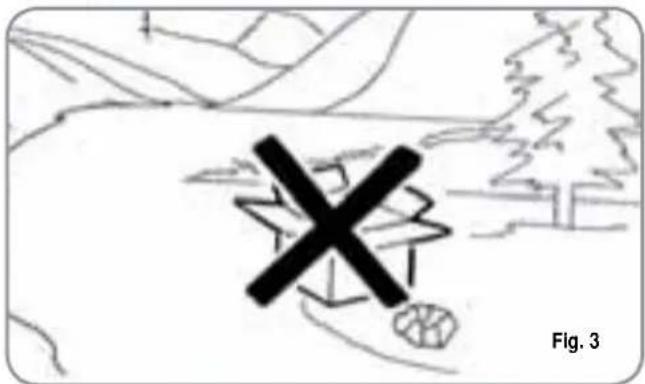
• do not touch the appliance when hands or feet are wet;

CAUTION
RISK OF ELECTRIC SHOCK
text_image
Fig. 5- do not use the appliance when bar foot;
- do not use extensions in bath or shower rooms;
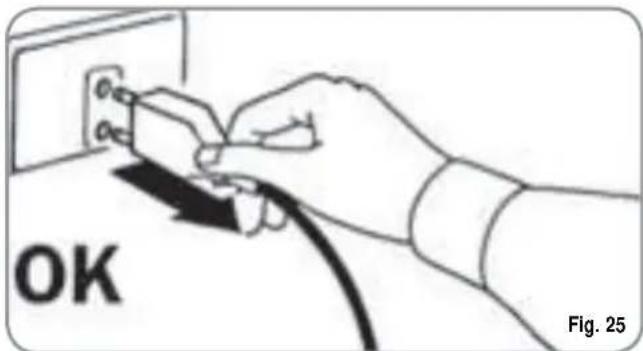
- do not pull the supply cord out of the socket to disconnect it from the mains;
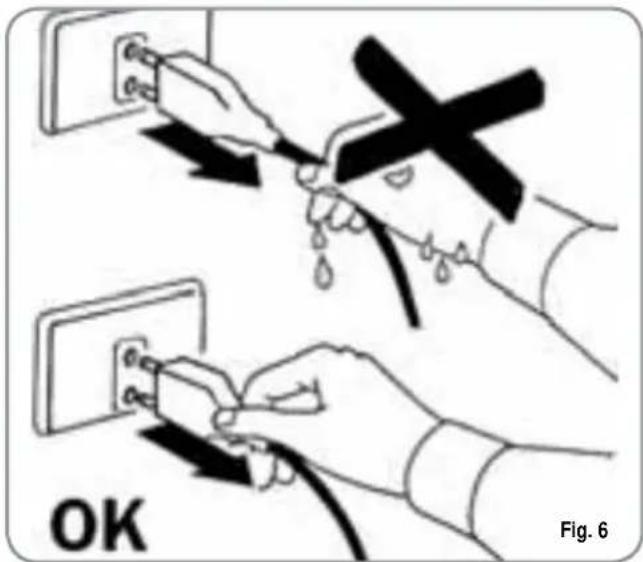
text_image
OK Fig. 6• do not leave the appliance exposed to atmospheric agents (rain, sun, etc.);
• do not let the appliance be used children, unauthorised staff or staff who have not read and fully understood the contents of this handbook.

Before servicing the appliance, the authorised technician must first switch off the appliance and remove the plug.
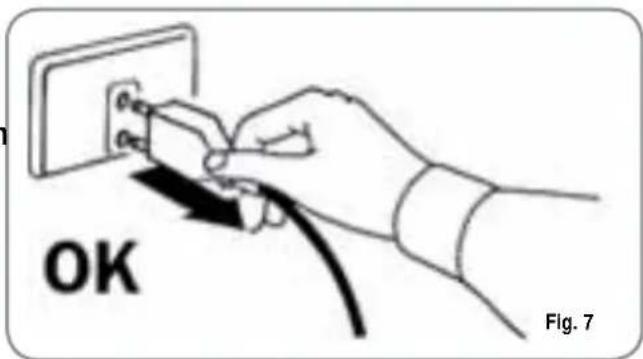
text_image
OK Fig. 7
To clean the appliance, set the machine to the "0" energy level, that is, "WITH THE MACHINE SWITCHED OFF AND THE PLUG REMOVED FROM THE MAINS" and follow the instructions in this handbook.

If the appliance breaks down or fails to work properly, switch it off. Any intervention is strictly forbidden. Contact qualified experts only. Repairs should only be made by the manufacturer or authorized service centres. Only original spare parts must be used.
Failure to observe the above, could make the appliance unsafe.

For installation, the qualified electrician must fit an omnipolar switch in accordance with the safety regulations in force and with 3 (0,12) or more mm (in) between contacts.

To avoid dangerous overheating, make sure the supply cord is fully uncoiled.

Do not obstruct the extraction and/or dissipator grids, especially of the cup warmer.
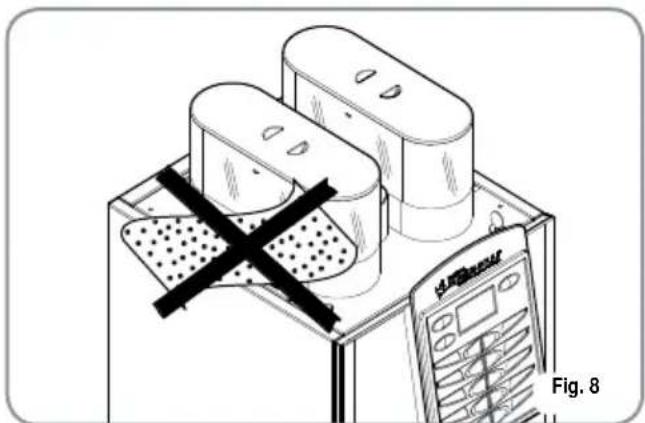
natural_image
Diagram of a device with a cross mark and a calculator, labeled Fig. 8 (no text or symbols on the devices themselves)
The user must not replace the appliance supply cord. If the cord is damaged, switch off the appliance and have a qualified technician change the cord.

If no longer using the appliance, we recommend making it inoperative; after removing the plug from the mains electricity, cut the power supply cable.

CAUTION RISK OF POLLUTION

Do not dispose of the machine in the environment: to dispose of the machine, use an authorised centre, or contact the manufacturer for relative information.
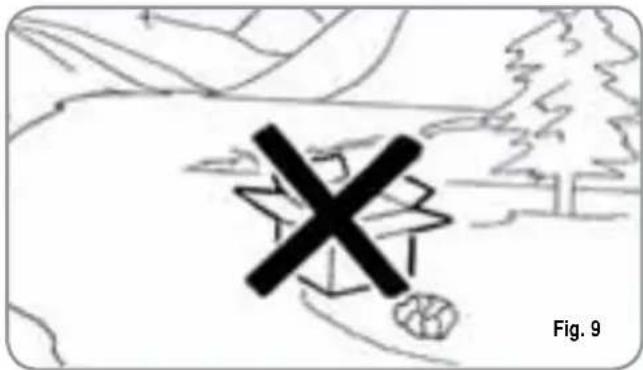
natural_image
Simple line drawing of a cross symbol over a landscape with trees and hills (no text or symbols)
To ensure that the machine is properly ventilated, place it with the ventilation side at a distance of 15 cm (5.9 in) from walls or other objects.

Once a machine wash cycle has been started, do not interrupt it, as detergent residues may then be left inside the delivery group.

CAUTION RISK OF INTOXICATION

Use the steam nozzle with care and never place hands below the jet of steam. Do not touch the nozzle immediately after use.
natural_image
Illustration of a hand cleaning a kitchen sink with a 'X' mark, no text or symbols present
CAUTION RISK OF BURNS OR SCALDING

We remind you that before carrying out any installation, maintenance, unloading or adjustment operations, the qualified operator must put on work gloves and protective footwear.

CAUTION RISK OF CUTTING

When adding coffee beans, the machine operator must not place his/her hands inside the container.

WARNING MECHANICAL HAZARD

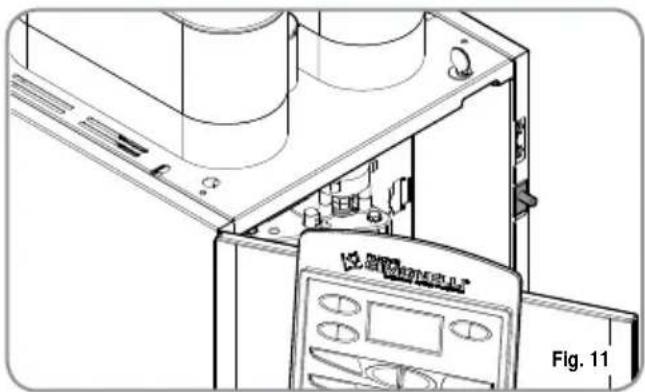
Never press and/or pull the safety switch.
natural_image
Technical line drawing of a mechanical device with internal components and a control panel (no text or symbols)
CAUTION
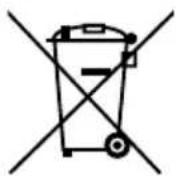
INFORMATION TO THE USERS Under the senses of art. 13 of Law Decree 25th July 2005, n. 151 "Implementation of the Directives/ Guidelines 2002/95/CE, 2002/96/ CE and 2003/108/CE, concerning the reduction of the use of dangerous substances in electric and electronic equipment, as well as the disposal of wastes".
The symbol of the crossed large rubbish container that is present on the machine points out that the product at the end of its life cycle must be collected separately from the other wastes. The user for this reason will have to give the equipment that got to its life cycle to the suitable separate waste collection centres of electronic and electrotechnical wastes, or to give it back to the seller or dealer when buying a new equipment of equivalent type, in terms of one to one. The suitable separate waste collection for the following sending of the disused equipment to recycling, the dealing or handling and compatible environment disposal contributes to avoid possible negative effects on the environment and on the people's health and helps the recycling of the materials the machine is composed of. The user's illegal disposal of the product implies the application of administrative fines as stated in Law Decree n.22/1997" (article 50 and followings of the Law Decree n.22/1997).
3. TRANSPORT AND HANDLING
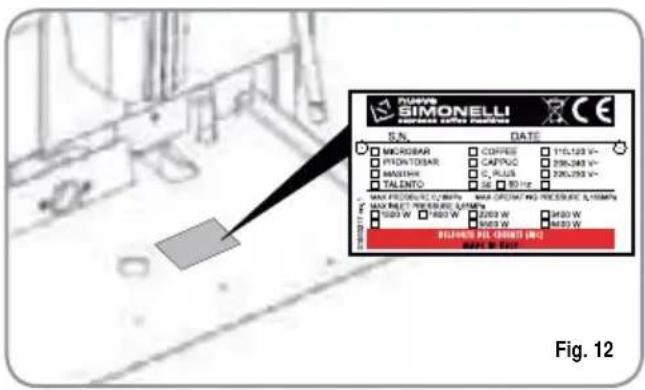
3.1 MACHINE IDENTIFICATION
Always quote the machine serial number in all communications to the manufacturer, Nuova Simonelli.
text_image
SIMONELI S.N. DATE MICROBAR COFFEE 110,123 V~ PROMTOR CAPCUC 256,245 V~ MASTINI C PLUS 220,793 V~ TALENTO SE 80 Hz MAX PROMTOR C Litter MAX DRYAN NO PRESENT A: 100% MAX DRYAN NO PRESENT A: 100% TALO W 200 W 300 W BUTTER BIL CRUDE (M) DATE: 09/12/2017 Fig. 123.2 TRANSPORT
The machine is transported on pallets which also contain other machines - all boxed and secured to the pallet with supports.
Prior to carrying out any transport or handling operation, the operator must:
- put on work gloves and protective footwear, as well as a set of overalls which must be elasticated at the wrists and ankles.
The pallet must be transported using a suitable means for lifting (e.g., forklift).
3.3 HANDLING

CAUTION RISK OF IMPACT OR CRASHING
During all handling operations, the operator must ensure that there are no persons, objects or property in the handling area.
The pallet must be slowly raised to a height of 30 cm (11,8 in) and moved to the loading area.
After first ensuring that there are no persons, objects or property, loading operations can be carried out.
Upon arrival at the destination and after ensuring that there are no persons, objects or property in the unloading area, the proper lifting equipment
(e.g. forklift) should be used to lower the pallet to the ground and then to move it (at approx. 30 cm (11,8 in) from ground level), to the storage area.

CAUTION RISK OF IMPACT OR CRASHING
Before carrying out the following operation, the load must be checked to ensure that it is in the correct position and that, when the supports are cut, it will not fall.
The operator, who must first put on work gloves and protective footwear, will proceed to cut the supports and to storing the product. To carry out this operation, the technical characteristics of the product must be consulted in order to know the weight of the machine and to store it accordingly.

CAUTION RISK OF POLLUTION
natural_image
Simple line drawing of a landscape with mountains, trees, and a marked cross symbol (no text or labels)4. INSTALLATION AND PRELIMINARY OPERATIONS

text_image
CAUTION RISK OF POLLUTIONDo not dispose of packaging in the environment.
natural_image
Simple line drawing of a mountain landscape with trees and a cross symbol (no text or labels)Before carrying out any installation and adjustment operations you must read and fully understand the SAFETY INSTRUCTIONS of this handbook. The company cannot be held responsible for damage to things or injury to persons caused by failure to comply with the safety instructions and installation and maintenance instructions contained in this handbook.

text_image
WARNINGPlace the machine on a flat, level surface to avoid any possible malfunctioning.

text_image
WARNINGNever install the machine in areas where it could come into contact with jets of water.

text_image
WARNINGThe machine can be used with the following:
- Coffee grains
- Decaffeinated coffee powder
- Milk (not powdered)
The use of any other substance not listed here above may cause serious damage to the machine itself.

text_image
WARNINGThe machine is designed to operate at temperatures ranging from +5°C to +40°C (41°F - 104°F).

text_image
CAUTION RISK OF SHORT CIRCUITSBefore connecting the machine to the mains power supply, please check that the supply voltage corresponds to the machine voltage.
NOTE: At the start of the day's activities and in any case, if there are any pauses of more than 8 hours, then it is necessary to change 100% of the water in the circuits, using the relevant dispensers.
NOTE: In case of use where service is continuous, make the above changes at least once a week.
4.1 MACHINE INSTALLATION
Once the machine has been withdrawn from the packaging, carry out the following instructions:
1 Position the unit on a horizontal surface.
2 Remove the pipe with 3/4" coupling from the hatch in the top of the machine.
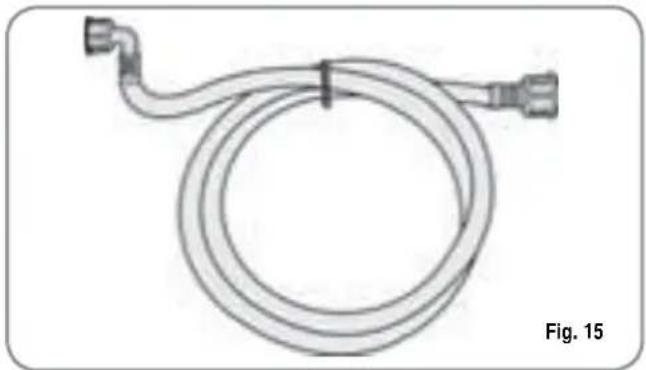
natural_image
Line drawing of a coiled hose with connectors, labeled Fig. 15 (no text or symbols on the diagram itself)3 Connect one end of the pipe to the 3/4" inlet on the back of the machine.
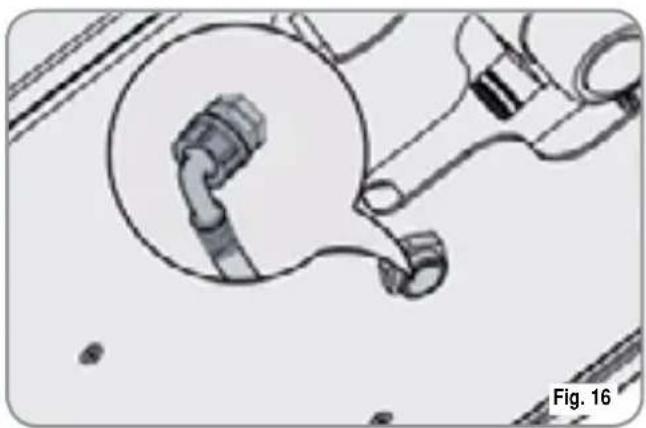
natural_image
Mechanical assembly diagram showing pipe fittings and a piston mechanism (no text or labels)4 Connect the other end of the pipe to the water mains.

WARNING
The water hardness must be less then 4^ - 6^ fr (french degree).
The chlorine content must not exceed 100mg per litre (0.00000361lb/cu in).
Otherwise the conditions of guarantee of the machine will expire.

The machine must be installed according to the local standards in force with regard to plumbing systems. For this reason, the plumbing connections must be carried out by a qualified technician.
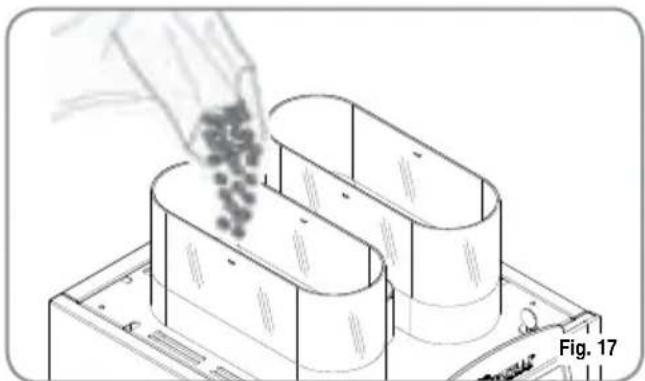
4.2 FILLING THE COFFEE CONTAINER
1 Remove the cap to access the granulated coffee bean container.

WARNING
Pour ONLY toasted coffee beans into the coffee bean holder. any other kind of coffee, for example ground coffee, will damage the coffee grinder.
Don't insert caramelized, sugar coated, or similarly coated coffee beans, or instant coffee or other sugary beverages because they will harm the appliance.
2 Don't fill to the brim but pour just enough toasted coffee beans into the coffee bean holder to ensure correct closure of the unit.
natural_image
Illustration of a hand pouring granular material into a multi-layered cylindrical container (no text or symbols)3 Close the cap.
4.3
SWITCHING
ON
NOTE: in case the following procedure shouldn't take effect, see the chapter on "Problems and Solutions".
After the preliminary operations:
Press the ON/OFF key

The machine will carry out a group positioning cycle; this is the cycle for filling the boiler with water at the end of which, if the machine is cold, there will be a heating cycle and the display will read:
PLEASE WAIT
after the heating phase, the display will read:
SELECT PRODUCT
and the machine will be ready for use.
The heating stage takes approx, 5 minutes.
NOTE: The appliance is endowed with a security system that will stop the machine after about 1.5 minutes of constant functioning of the pump (to avoid pump overheating). In this case, switch off the main switch of the machine and then turn it on again.
The machine is now ready to be used.

WARNING
WHEN INSTALLING FOR THE FIRST TIME OR STARTING THE MACHINE AGAIN AFTER BOILER TANK GROUP SERVICING, BEFORE SWITCHING ON THE MACHINE AND STARTING THE HEATING PROCESS, BE SURE TO FILL THE COFFEE BOILER TANK, (PAGE 49 PARAGRAPH 8.3) UNTIL THERE IS A REGULAR FLOW FROM THE WAND.
4.4 SWITCHING OFF
To switch off the machine, proceed as follows:
- Press the ON/OFF key

5. ADJUSTMENTS TO BE MADE BY A QUALIFIED TECHNICIAN ONLY

WARNING
The adjustments listed here below may be performed by Specialist Technical Engineers ONLY. Nuova Simonelli cannot accept any liability for damage to people or property arising from failure to follow the safety regulations listed in this manual.
5.1 GRINDING ADJUSTMENT

WARNING
Switch on the grinder to carry out the grinding adjustment procedures.
NOTA: The procedure is possible also with the appliance on.
- Put the key into its lock.
- Turn the control panel hatchdoor key counterclockwise.
- Open the control hatch to access the grinding adjustment screw. Follow the direction of the arrows to increase the COARSE setting (anticlockwise) or the FINE setting (clockwise) for grinding the coffee beans, using a flat head screwdriver.
- Lock the hatchdoor.
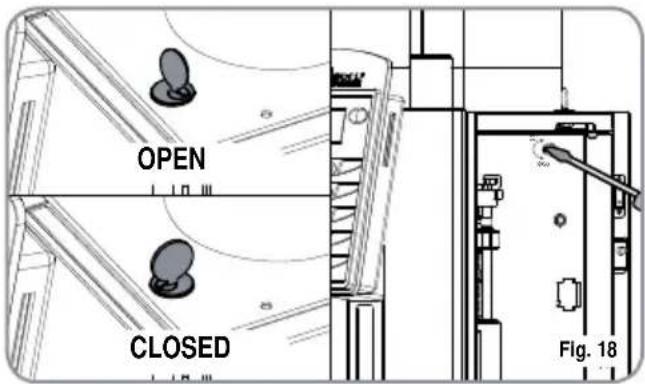
text_image
OPEN CLOSED Fig. 185.2 MILK FOAMER ADJUSTMENT
NOTE: The procedure is possible also with the appliance on.
To change the amount of air to the milk foamer and therefore, to change the amount of foam, use the
adjustment screw as illustrated in the figure so as to increase / reduce the air to the milk foamer.
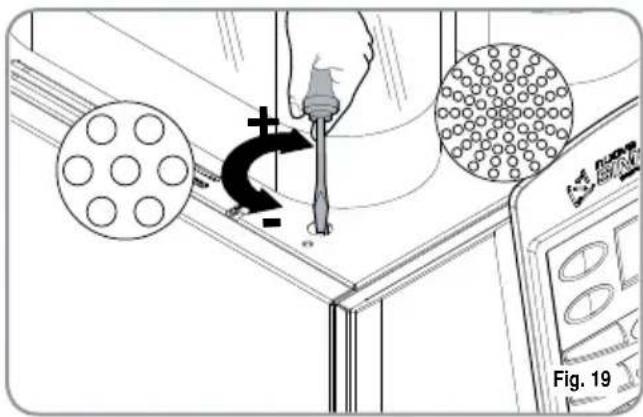
text_image
Fig. 19After setting the amount of foam for the milk foamer, it is possible to install the adjustment knob (A) by inserting it in the centre of the slot. To fix the knob in place, tighten the grub screw (B) inside the door.
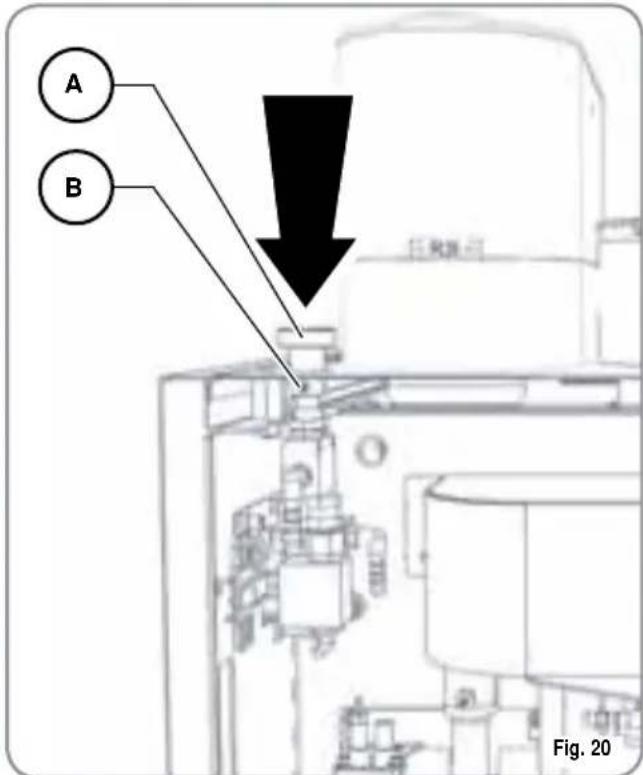
text_image
A B 图 205.3 MILK FLOW ADJUSTMENT (Temperature Regulation)
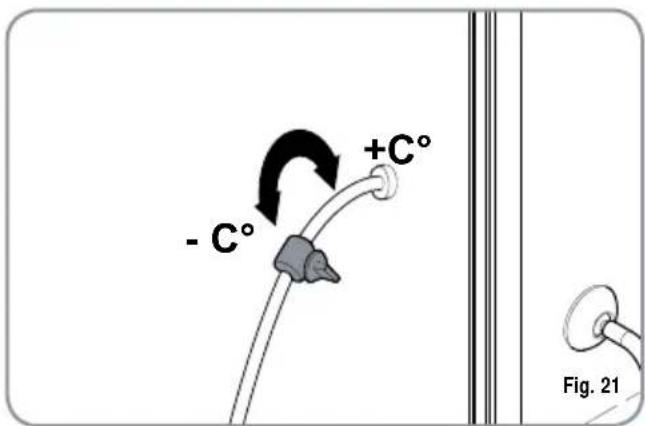
text_image
- C° +C° Fig. 21NOTE: The procedure is possible also with the appliance on.
To adjust both the flow and the temperature of the milk delivery, turn the adjusting tap as follows:
- Turn the milk suction tap CLOCKWISE/COUNTERCLOCKWISE to INCREASE/DECREASE the milk suction and then DECREASE/INCREASE the temperature.
- Turn the tap until the milk reaches the desired temperature.
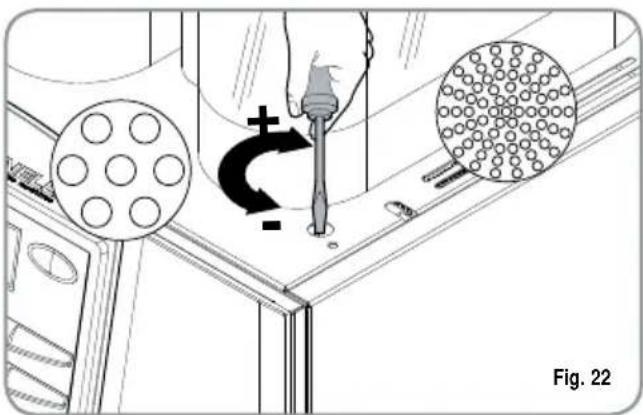
5.4 AIR ADJUSTMENT FOR EASYCREAM (optional)
NOTE: This operation can also be performed with the machine switched on.
To change the amount of air injected into the Easycream and therefore, the amount of foam, use the special adjustment screw as shown in the figure to increase/reduce the air to the Easycream.
natural_image
Technical diagram showing a hand using a tool to interact with a component, including circular elements and a grid-patterned object (no text or symbols)After setting the amount of foam for the milk foamer, it is possible to install the adjustment knob (A) by inserting it in the centre of the slot. To fix the knob in place, tighten the grub screw (B) inside the door.
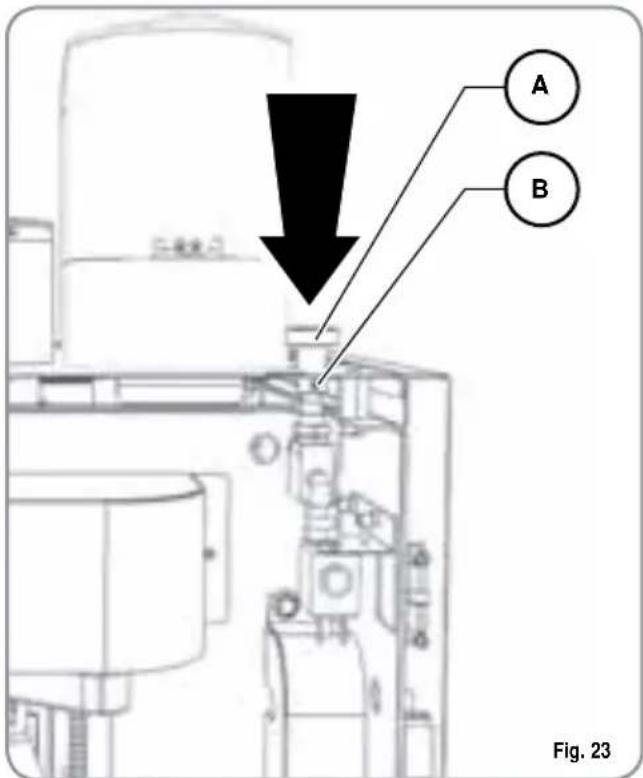
text_image
A B Fig. 236. USE
Before starting usage of the appliance, the operator must read and fully understand the safety instructions in this handbook.

WARNING
If the self-diagnostic function indicates anomalies or failures, call the assistance centre. Operators must never intervene.
6.1
POURING DECAFFEINATED COFFEE
- Open the decaffeinated coffee hatch.
- The display will read:

text_image
CLOSE DECA- Insert the ground coffee into the chute and close the hatch. The display will read:
text_image
DECA- Select the required beverage to be dispensed using the powder in the chute within 8 seconds.
6.2
DISPENSING DOSES
DOUBLE
- Press the DOUBLE DOSE button.
• The display will turn blue: - Select the key for the beverage to be poured.
(It is possible to use the DOUBLE DOSE key together with the LEFT GRINDER key; the display will turn green).
6.3 USING THE LEFT GRINDER
- Press the LEFT GRINDER key.
• The display will turn green. - Select the key for the beverage to be poured.
(It is possible to use the LEFT GRINDER key together with the DOUBLE DOSE key).
7. PROGRAMMING
7.1 ENTERING THE PROGRAMMING MODE
Hold down the ON/OFF key with the machine switched off (approx. 5 seconds) until the display shows the first programming function:

text_image
LANGUAGEThe keys available during the programming stage are:

ENTER key: To enter the menu and/or confirm the setting.
CURSORS key: To scroll through the menu and increase/reduce settings.
RESET key: To go back to the previous step.
LIST OF PROGRAMMABLE FUNCTIONS
Functions that can be accessed from the USER and TECHNICIAN modes:
- LANGUAGE (LANGUAGE SELECTION)
Functions "ONLY" accessible in USER MODE.
- COUNTERS
- PROG DOSES
- SETTINGS
- SAVE DATA
7.2 PROGRAMMING IN USER MODE
1. LANGUAGE
Press the keys to select the required language.

The possible languages are as follows: ENGLISH, ITALIANO, FRANCAIS, DEUTSCH, ESPANOL. Onfirm your selection and move to the next function
by pressing ENTER
To access the functions that can only be programmed in USER MODE, press the up arrow from the SELECT LANGUAGE menu and the display will read:

text_image
PASSWORDEnter the correct password to access the first item in the programming menu that can be accessed from the USER MODE.
The default PASSWORD setting is 4 times the LEFT GRINDER:

2. COUNTERS
Pressing the ENTER enter the submenu.
key it is possible to
2.1 DRINK COUNT
(Beverage count)
Press ENTER to enter the sub menu; all of the beverage keys (1-10) will start to flash.
Press the beverage key to read the number of beverages poured, e.g.:
DRINK COUNT
COFFEE
DX 000024
SX 000036
Press RESET

to quit the counter for the
selected beverage; press RESET 3 seconds to quit the sub menu.

again for
2.2
DRINK
TOTAL
(Total beverages)
Press ENTER the beverage the beverage poured, e.g.:

to enter the sub menu; all of keys (1-10) will start to flash. Press key to read the number of beverages

text_image
DRI NK TOTAL N. 000060Press RESET
to quit the sub menu.
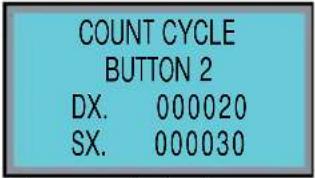
2.3
COUNT
CYCLE
(Cycle
Press ENTER the beverage the beverage poured, e.g.:

to enter the sub menu; all of keys (1-10) will start to flash. Press key to read the number of beverages
text_image
COUNT CYCLE BUTTON 2 DX. 000020 SX. 000030
es refer to single beverages; press 2X to read the number of cycles for double beverages.
Press RESET

to quit the counter for the
selected beverage; press RESET 3 seconds to quit the sub menu.

again for
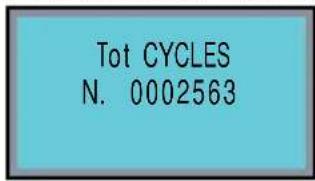
2.4
TOT
CYCLES
(Total Cycles)
Press ENTER
to enter the sub menu; the
keys remain lit and the display will read:
text_image
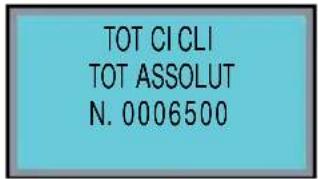
Tot CYCLES N. 0002563The number of cycles is the sum of all beverages, single and double.
Press and hold down ENTER for 10 seconds

to read the absolute total:
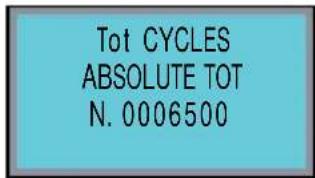
text_image
Tot CYCLES ABSOLUTE TOT N. 0006500Press RESET

to quit the submenu.
2.5
TOT
GRIND
R
( Right hand grinder total)
Press ENTER

to enter the sub menu; the keys remain lit and the display will read:
counter)
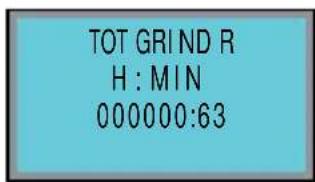
text_image
TOT GRIND R H : MIN 000000:63Press and hold down ENTER to read the absolute total:

for 10 seconds
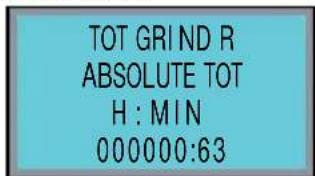
text_image
TOT GRIND R ABSOLUTE TOT H : MIN 000000:63Press RESET

to quit the submenu.
2.6 TOT GRIND L
(Left hand grinder total)
Press ENTER to enter the sub menu; the keys remain lit and the display will read:
TOT GRIND L H: MIN 000000:63
Press and hold down ENTER for 10 seconds to read the absolute total:

TOT GRIND L ABSOLUTE TOT H : MIN 000000:63
Press RESET

to quit the submenu.
2.7 TOT TEA
(Hot water total)
Press ENTER to enter the sub menu; all of the beverage keys (1-8) will start to flash and the display will read:

to enter the sub menu; all of Press and hold down ENTER for 10 seconds to read the absolute total:
TOT TEA N. 00000008

TOT TEA ABSOLUTE TOT N. 00000008
Press RESET

to quit the submenu.
2.8 TOT STEAM (Steam total)
Press ENTER to enter the sub menu; all of the beverage keys (1-8) will start to flash and the display will read:
TOT STEAM N. 00000008
Press and hold down ENTER for 10 seconds to read the absolute total:
TOT STEAM ABSOLUTE TOT N. 00000008
Press RESET

to quit the submenu.
2.9 TOT LITRES (Total litres)
Press ENTER to enter the sub menu; all of the beverage keys (1-10) will start to flash and the display will read:

to enter the sub menu; all of (1-10) will start to flash and the [Non-Text]
TOT LITRES
LITRES
0000032.56
Press and hold down ENTER for 10 seconds to read the absolute total:
TOT LI TRES ABSOLUTE TOT
LITRES 0000056.08

for 10 seconds
Press and hold down ENTER or 6 seconds from the total absolute menu to reset the TOT LITRES counter.
Press RESET

to quit the submenu
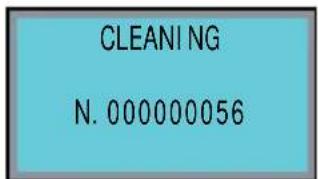
2.10 CLEARING (Total wash cycles)
Press ENTER

to enter the sub menu: all of the beverage keys (1-10) will start to flash and the display will read
text_image
CLEANING N. 000000056Press and hold down ENTER

for 10 seconds
to read the absolute total:

text_image
CLEANING ABSOLUTE TOT N. 00000056Press RESET
to quit the submenu.
Press RESET
to quit the submenu.
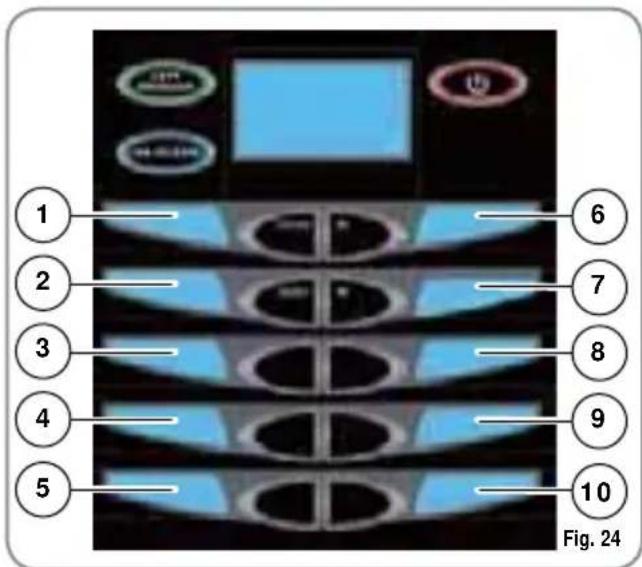
3. PROG DOSES (Dose programming)
Pressing ENTER

it is possible to access the
sub menu and then to use the to select the key to be programmed. The numbers, from 1 to 10 are shown in fig. 24:


text_image
1 2 3 4 5 6 7 8 9 10 Fig. 24Press the ENTER

key to enter the programming mode for the

ons for the single key, fol-
lowed by ENTER

to enter the programming mode for the cycle functions.
GRIND TIME R (Grinding Time right grinder):
It is possible to set the grinding time in seconds and therefore, the amount of ground coffee used.
Pressing the ENTER
key it is possible to
access the


which serve to increase/decrease the grinding time to a maximum of 0.5 sec.
Pressing ENTER

to confirm settings.
GRIND TIME L (Grinding Time left grinder):
It is possible to set the grinding time in seconds and therefore, the amount of ground coffee used.
Pressing the ENTER
key it is possible to
access the


which serve to increase/decrease the grinding time to a maximum of 0.5 sec.
Pressing ENTER

to confirm settings.
GRIND SEL (Selects Default Grinder):
It is possible to read the default grinder (left LH or right RH).
Pressing the ENTER
key, it is possible to open the submen
Press the RESET

key to exit the setting.
VOLUME CC. (Water Volume):
It is possible to set the volume of the water for the coffee in cc.
Pressing ENTER
it is possible to enter the
sub menu; the


increase/reduce water volume.
Press ENTER

to confirm settings.
PRE-BREWING (Pre-infusion Time):
It is possible to read the pre-infusion time in sec.
Pressing the ENTER

key, it is possible to
open the submenu. Press the RESET key to exit the setting.
TAMPING (Pressing):
It is possible to read if pressing is on or off (YES or NO).
Pressing the ENTER

key, it is possible to
open the submenu. Press the RESET key to exit the setting.
DILUTE:
It is possible to set the volume, in cc of hot water to add to the beverage.
Pressing the ENTER

key, it is possible to
enter the submenu with the volume of hot water.
Press ENTER

to confirm the setting.
MULTICYCLE (multiple cycles):
It is possible to read the number of cycles set.
Press the ENTER

key to open the submenu.
Press RESET

to quit the setting function.
MILK TIME (Milk Time):
It is possible to set the time and therefore, the amount of milk.
Pressing ENTER

it is possible to enter the
sub menu; the


increase/reduce the amount of milk.
Press ENTER

to confirm settings.
NO AIR TIME (Air Time disabled):
It is possible to read the part of the total milk time in which the air solenoid is closed in order to regulate the amount of foam in the milk.
Pressing the ENTER open the submenu.

key, it is possible to
Press the RESET

key to exit the setting.
AUTOWASHING (Automatic milk tube wash):
It is possible to read the wash time with cold water at the end of milk dispensing.
Pressing the ENTER open the submenu.

key, it is possible to
Press the RESET

key to exit the setting.
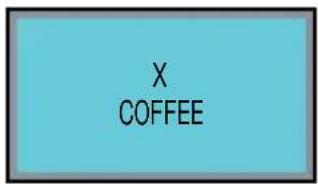
To program the double dose, after entering the menu for the required key:
text_image
X COFFEE
Press the : key. it will be possible to program the same list of functions for the double dose.
PAUSE (MACCHIATO cycle only):
It is possible to set the pause (in seconds) between the milk and coffee (min 0 - max 20).
Press the ENTER

key to open the submenu,
the keys can then be used to increase/reduce the pause.
Press ENTER

to confirm the setting.
TEMPERATURE (milk temperature)
It is possible to set the temperature of the milk.
Press the ENTER

key to open the submenu,
the keys can then be used to increase/reduce the temperature of the milk drink by a maximum of ± 10%.
Press ENTER

to confirm the setting.
DELAY (steam delay)
It is possible to read the steam delay time so as to fill the .pipe with milk before foaming it with the steam.
Press the ENTER

key to open the submenu.
Press RESET

to quit the setting function.
TEA (Tea time):
Pressing this key from the cycle menu will open the TEA cycle: press ENTER to open
the submenu; the keys serve to increase/reduce the time and therefore the volume of the water.
Press ENTER to confirm settings.
MANUAL STEAM (Steam Time):
Pressing key from the cycle menu will open
the MANUAL STEAM cycle; press ENTER
to open the submenu; the keys serve to increase/reduce the time of the steam.
Press ENTER to confirm settings.
AUTOSTEAM:
Pressing key from the cycle menu will open the AUTOSTEAM cycle; press ENTER to
open the submenu; the keys serve to increase/reduce the temperature that the beverage being heated needs to reach.
Press ENTER to confirm settings.
FINAL TEMP (final temperature)
Press the ENTER key to open the submenu.
The keys can then be used to increase/reduce the temperature required for the beverage being heated.
Press ENTER to confirm the setting.
AIR TEMP (air temperature)
Press the ENTER key to open the submenu.
The keys can then be used to increase/reduce the temperature at which the air compressor switches off by a maximum of ± 5^ .
Press ENTER to confirm the setting.
DELAY (air delay):
It is possible to read the time at which the air compressor switches on. After this time the compressor pushes the air into the milk to create the foam.
Press the ENTER key to open the submenu.
Press RESET to quit the setting function.
4. SETTINGS
Pressing ENTER it is possible to enter the sub menu and use the keys to select the function to be programmed.
Press ENTER again to open the function.
4.1 COFFEE TEMP (Coffee boiler temperature)
It is possible to programme the temperature of the water in the coffee boiler.
Pressing ENTER is possible to enter the sub menu; the keys are used to increase/reduce the temperature of the water in the coffee boiler tank ( T permitted ± 3°C).
Press ENTER to confirm settings.
4.2 STEAM TEMP (Steam boiler temperature) It is possible to read the steam temperature in the service boiler.
Pressing the ENTER key, it is possible to open the submenu.
Press the RESET key to exit the setting.
4.3 GROUP TEMP
(Pouring group temperature)
It is possible to programme the temperature of the pouring group.
Pressing ENTER
it is possible to enter
the sub menu; the

to increase/reduce the temperature of the pouring group ( T permitted ± 3^ ).
Press ENTER

to confirm settings.
5. SAVE DATA
Pressing ENTER

is possible to store all data set during the programming stage in the machine's memory.
Pressing RESET

it is possible to quit the programming mode without saving.
8. CLEANING AND MAINTENANCE

WARNING
NEVER use water jets to clean the machine.
During maintenance/repairs, the parts used must be able to guarantee compliance with the safety and hygiene requirements envisaged for the device.
Original replacement parts can offer this guarantee.
After repairs to/replacement of a part that comes into contact with foods or water, it is necessary to carry out a washing procedure or to follow the steps indicated by the manufacturer.
8.1 CLEANING THE OUTSIDE OF THE MACHINE
Before carrying out any cleaning operations, set the machine to the "O" energy level, (machine switched off and plug removed from the mains).
text_image
OK Fig. 25
WARNING
Never use solvents, chlorine-based products, abrasives.
Cleaning the work area: slide out the work top and remove the drip tray; clean all with hot water and detergent.
Cleaning the external surfaces: To clean the panels, use a soft, damp cloth.
8.2 CLEANING THE DELIVERY UNIT AND THE MILK FOAMER
NOTE: Follow the instructions on the label applied on the inside of the front door.
text_image
DAILY CLEANING HATACOFT SHAOHAI GAO SHAOHAI GAO SHAOHAI GAO SHAOHAI GAO SHAOHAI GAO SHAOHAI GAO SHAOHAI GAO SHAOHAI GAO SHAOHAI GAO SHAOHAI GAO SHAOHAI GAO SHAOHAI GAO SHAOHAI GAO SHAOHAI GAO SHAOHAI GAO SINCHI SHAOHAI GAO SHAOHAI GAO SHAOHAI GAO SHAOHAI GAO SHAOHAI GAO SHAOHAI GAO SHAOHAI GAO SHAOHAI GAO SHAOHAI GAO SHAOHAI GAO SHAOHAI GAO SHAOHAI GAO SHAOHAI GAO SHAOHAI GAO SHAO HUAAN GAO SHAO HUAAN GAO SHAO HUAAN GAO SHAO HUAAN GAO SHAO HUAAN GAO SHAO HUAAN GAO SHAO HUAAN GAO SHAO HUAAN GAO SHAO HUAAN GAO SHAO HUAAN GAO SHAO HUAAN GAO SHAO HUAAN GAO SHAO HUAAN GAO SINCHI SHOOHAI GAO SHOOHAI GAO SHOOHAI GAO SHOOHAI GAO SHOOHAI GAO SHOOHAI GAO SHOOHAI GAO SHOOHAI GAOFig. 26
The machine is equipped to wash the delivery unit with detergent tablets and the milk circuit with liquid cleansers.
The machine will begin a wash cycle that consists of hot water deliveries alternated with pauses. The whole cycle lasts approximately 4 minutes.
We recommend that you carry out a WASHING CYCLE at least once a day using special cleansers.

CAUTION RISK OF INTOXICATION.
We remind you not to interrupt a washing cycle using detergent tablets once started, otherwise detergent residues may remain inside the machine.
In order to execute the washing procedure proceed as follows:
- Place a container with 1 litre of water alongside the machine.
- Put the suction tube inside it.
- Add the specific cleaning product (20 ml [0.005 Gal] of Puly Milk).
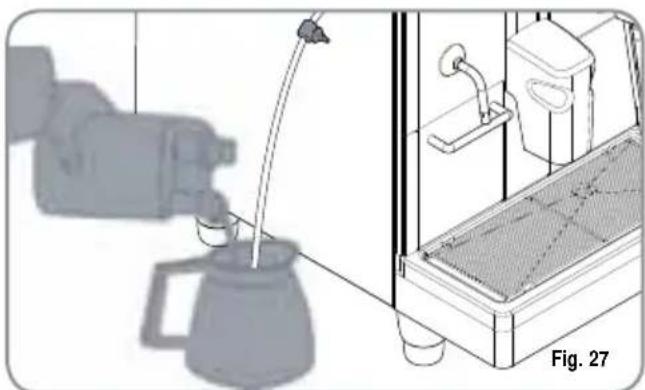
natural_image
Illustration of a coffee maker pouring liquid into a container with a side view showing equipment (no text or symbols)- Press the following key:

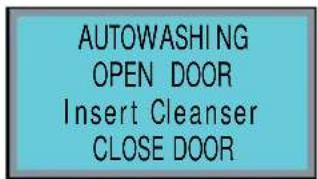
- Keep pressing down on the key for about 6 seconds until the display reads:
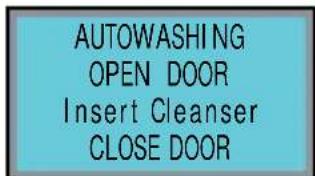
text_image
AUTOWASHING OPEN DOOR Insert Cleanser CLOSE DOOR- Open the front hatch on the machine.
- Insert the cleanser tablet (Puly Caff) and close the hatch.
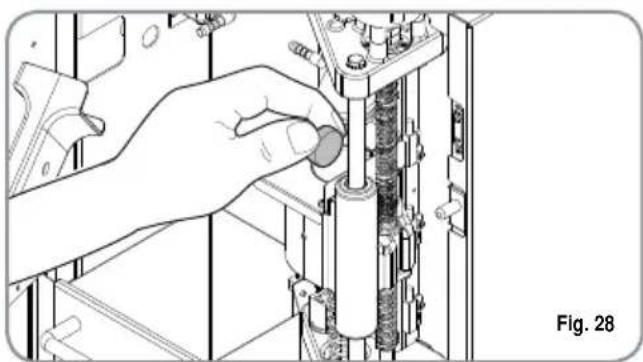
natural_image
Illustration of a hand adjusting a mechanical component with no visible text or symbols- Clean the shower head on the top piston with a damp cloth.
- Close the hatch.
The display will read:
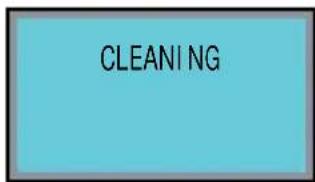
text_image
CLEANINGNOTE: Dose keys are disabled during washing.
At the end of the wash cycle, the display will read:
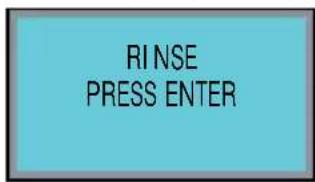
text_image
RINSE PRESS ENTERReposition a container with 1 litre of fresh water, and
press ENTER , the machine will carry out a rinse cycle and the display will read:
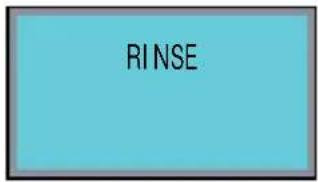
text_image
RINSERESTORING AN INTERRUPTED WASH CYCLE
If the washing cycle is interrupted by cutting off power to the machine, when it is switched on again, the group will position itself in the standby phase and the display will read:
text_image
AUTOWASHING OPEN DOOR Insert Cleanser CLOSE DOOR- Open the front hatch of the machine.
- Place a detergent tab (Puly Caff) inside the pouring chamber.
- Use a damp cloth to wipe clean the shower head on the top piston.
- Close the front door on the machine.
8.3 COFFEE HOLDER AND COFFEE DELIVERY UNIT CLEANING

CAUTION RISK OF BURNS OR SCALDING
- Set the machine to the "O" energy level.
- Insert the key in the lock.
- Turn the key to open the hatch anticlockwise.
- Open the front hatch.
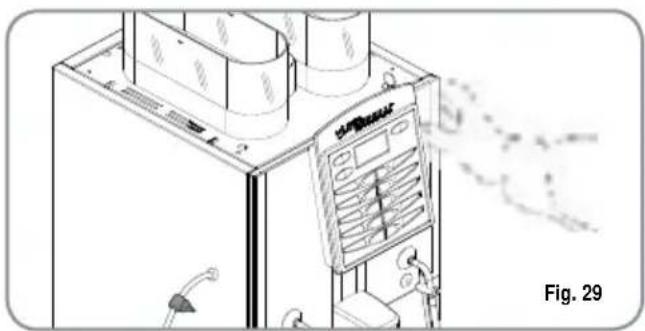
natural_image
Illustration of a gas station with refrigerators and a digital display unit, no visible text or symbols- Remove any coffee residues that may have deposited on the sides of the conveyor using the fine brush provided.
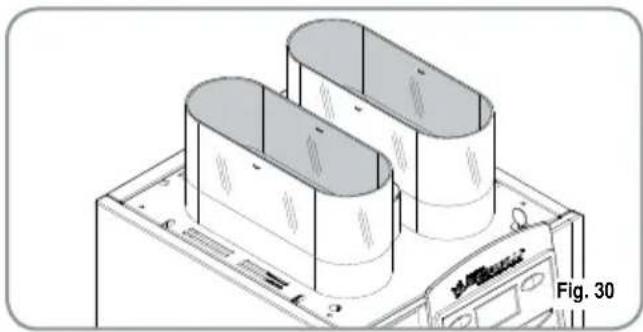
natural_image
Isometric technical drawing of a computer chassis with two cylindrical components, labeled Fig. 30 (no text or symbols on the diagram itself)- Use a damp cloth and/or a little mild detergent to clean the coffee bean bells.
8.4 CLEANING THE STEAM NOZZLE
Clean the steam nozzle each time it is used to warm up drinks.
CAUTION RISK OF BURNS OR SCALDING
If cleaned when the nozzle is still hot, avoid touching it with bare hands.
Use a cloth dipped in hot water and/or a neutral cleanser.
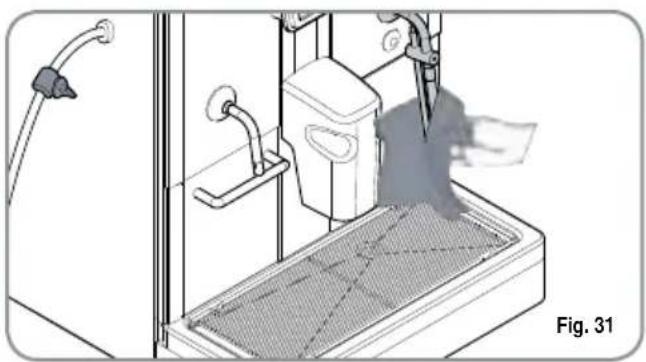
natural_image
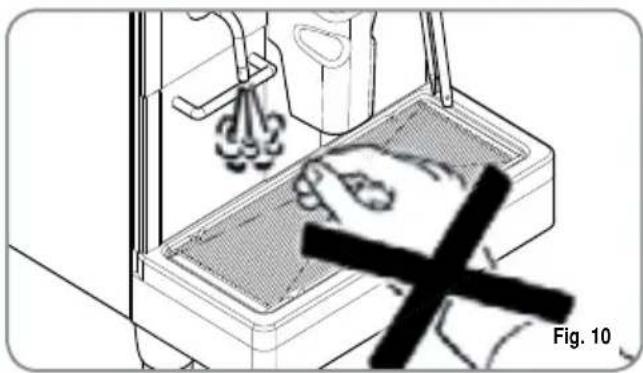
Technical illustration of a mechanical device with a mesh base and tool, labeled Fig. 31 (no text or symbols on the diagram itself)8.5 CLEANING THE DROP COLLECTING TRAY GRID
- Wash the grid clean with a brush and hot water and soap.
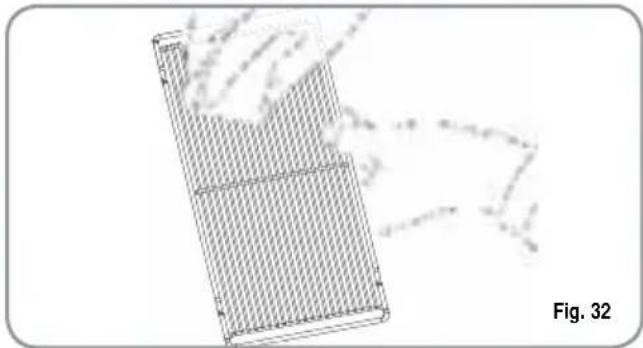
natural_image
Diagram of a grid-patterned rectangular device with a hand interacting, labeled Fig. 32 (no text or symbols on the device itself)8.6 CLEANING THE WATER COLLECTING TRAY
- Clean the drip container with hot, soapy water.
NOTE: The water collecting tray can be washed in the dishwasher.
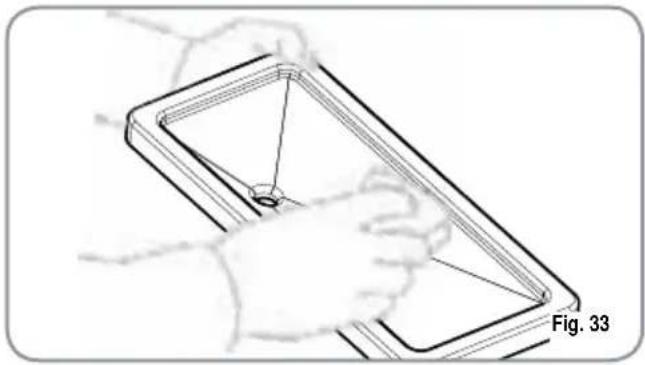
natural_image
Line drawing of a hand holding a rectangular object with internal lines, labeled Fig. 33 (no text or symbols on the object itself)
CAUTION
Never use any sort of solvent.
8.7 CLEANING THE GASKET
- Use a small brush to clean any deposits or coffee residues off the piston and the delivery unit site or any other areas soiled with coffee.
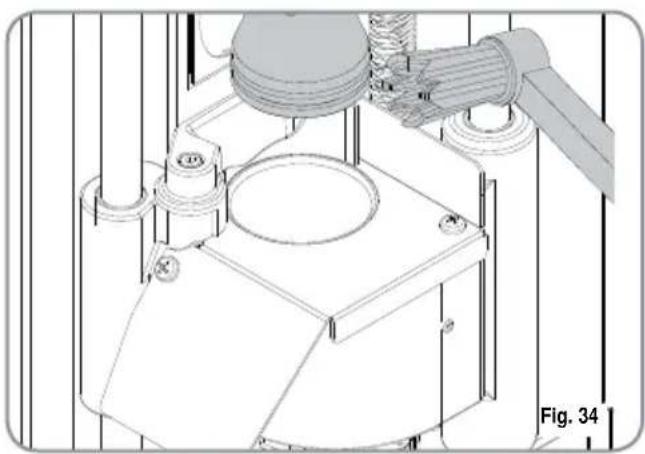
natural_image
Technical line drawing of a mechanical assembly with no visible text or symbols8.8 CLEANING THE MILK FOAMER TALENTO PLUS
NOTE: Follow the instructions applied on the label on the inside of the front door too.
IMPORTANT: Proceed with caution
- Remove the lid of the pouring nozzle by pulling it towards you.
- Remove the cappuccino maker from the nozzle by sliding it upwards.
- Disconnect all of the connected pipes.
- Remove the cappuccino maker and wash it with care.
NOTE: For intervals of more than three hours between one cappuccino and the next, it is advisable to wash the cappuccino maker by taking in water through the milk suction pipe instead of milk.
- To reassemble proceed inversely, attaching the milk foamer tubes properly.
NOTE: To make the reassembling procedure easier, an explanatory label has been attached to the front door.

natural_image
3D rendered mechanical component with red and blue tubes, no visible text or symbolsFig. 35
8.9
CLEANING THE DIFFUSER AND MILK FOAMER (TALENTO SPECIAL)
NOTE: Also follow the instructions on the decal inside the front door of the machine.
IMPORTANT: Proceed with care.
- Open the machine door.
• Take the milk foamer out of its support. - Remove the .pipes connected to it.
• Disassemble the foamer and wash it thoroughly.
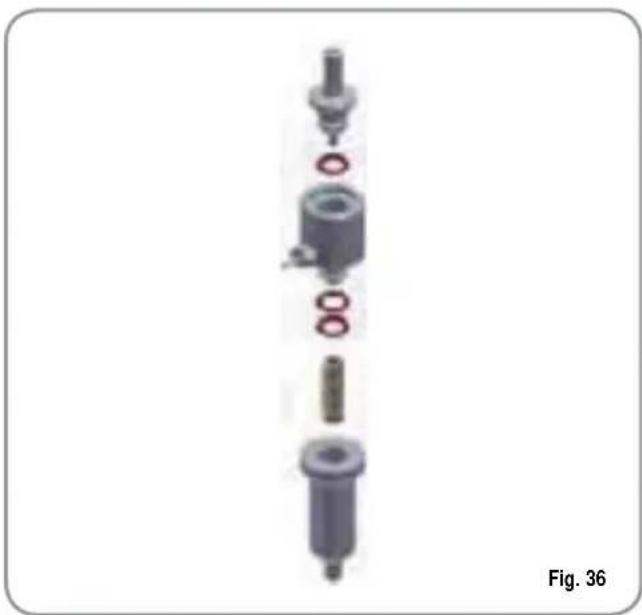
natural_image
Exploded view diagram of a mechanical assembly (no text or labels visible)NOTE: For time intervals of more than 3 hours between one cappuccino and another, we recommend washing the milk foamer and diffuser by flushing the milk suction pipe through with water instead of milk.
- To refit the foamer, follow the above steps in reverse order.
DIFFUSER
• Take the cover from the nozzle by pulling it towards you.
• Take the diffuser out of the dispensing nozzle by sliding it upwards.
- Remove the .pipe connected to it.
- Wash it with care.
NOTE: For easier reassembly, an explanatory decal has been affixed inside the front door of the machine.
natural_image
3D rendered mechanical component with red and white tubes, no visible text or symbolsFig. 37
- STANDARD SETTING TABLE
| RISTRETTO | 2 RISTRETTO | ESPRESSO | 2 ESPRESSO | COFFEE | 2 COFFEE | AMERICANO | 2 AMERICANO | CAPPUCCINO | 2 CAPPUCCINO | MACCHIATO | 2 MACCHIATO | CAFFELLATTE | 2 CAFFELLATTE | MILK | 2 MILK | COLD MILK | 2 COLD MILK | |
| Milk time | 12 2 | 2 20 36 | 15 22 | 15 20 | 15 20 | |||||||||||||
| No air milk | 0 0 | 10 18 | 15 22 | 15 20 | 15 20 | |||||||||||||
| Autowashing | 0,5 0,5 0,5 | 0,5 0,5 | 0,5 0 | 5 0,5 0,5 | 0,5 0,5 | |||||||||||||
| Pause | 0 | 0 | ||||||||||||||||
| Temperature(TALENTO SPECIAL only) | 100 | 100 | ||||||||||||||||
| Delay(TALENTO SPECIAL only) | 0 | 0 | 0 | 0 | 0 | 0 | 0 | 0 | 0 | 0 | ||||||||
| Grind time R | 2,5 3,5 3,0 | 4,0 3,5 | 4,5 2 | 5 3,5 | 2,5 3,5 | 2,5 3,5 | 3,0 3,5 | |||||||||||
| Grind time L | 2,5 3,5 3,0 | 4,0 3,5 | 4,5 2 | 5 3,5 | 2,5 3,5 | 2,5 3,5 | 3,0 3,5 | |||||||||||
| Select grinder | D | D | D | D | S | S | D | D | D | D | D | D | S | S | ||||
| Volume | 42 55 45 65 | 120 | 160 50 | 70 50 | 70 40 | 55 60 | 90 | |||||||||||
| Pre-brewing | 0,5 0,5 0,5 | 0,5 0,0 | 0,0 0 | 5 0,5 | 0,5 0,5 | 0,0 0,0 | 0,0 0,0 | 0,0 | ||||||||||
| Tamping | S | N | S | N | N | N | S | N | S | N | N | N | S | N | ||||
| Extra water | 95 135 |
- MACHINE FUNCTIONS MESSAGES
| DISPLAY | CAUSE | EFFECT | SOLUTION | NOTE |
| GROUNDS DRAWER FULLMACHI NERY READY CASSETTO PI ENO | Grounds drawer full. The number of coffee grounds in the drawer has reached the number set during programming stage. | Keys delivering coffee based drinks are blocked. | Pull out the grounds drawer and empty it into a garbage bag. Put the drawer back into place, when the display reads:MACHI NERY READY DRAWER OUT | |
| GROUNDS DRAWER OUT OF PLACEMACHI NERY READY DRAWER OUT | Grounds drawer out of place. | Keys delivering coffee based drinks are blocked. | Insert the grounds drawer into its special slot.Should this alarm turn on during the delivery of a coffee based drink:• up until brewing, the alarm is displayed but the drink will be delivered;• after brewing, the cycle in progress will be suspended.The coffee cycle will recommence only when the drawer has been put back in its place.Should this alarm turn on during the group movement phase:• the movement will be interrupted When the drawer is back in its place, the reset group will be repeated. | |
| FRONT PANEL POSITIONMACHI NERY OFF FRONT PANEL OPEN | Front panel open. The machine functions are blocked. | Close the front panel. | ||
WASHING CYCLE IS NEEDED | The set number of cycles programmed before washing, has been exceeded. | The message will appear on the display but the machine will continue to deliver drinks. | Do a washing cycle (see paragraph WASHING THE DELIVERY UNIT AND MILK FOAMER). | |
UPPER PISTON MOTOR GROUP ALARM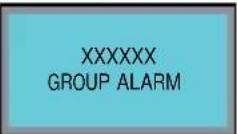 | During the group handling phase, the upper piston exceeded maximum set time by 10 seconds before recognizing motor pickup. | The control unit will halt whatever cycle is on by turning off both the movement actuator and those for drink delivery; the operator will not be able to make selections on the keyboard. | Open and close the machine door. | If the alarm reappears after the second time of taying, call the Service Technician. |
HEATER FILLING ALARM | The heater filling stage has exceeded the 3 minute maximum time; the probe level is uncovered. | The machine will stop. | If the alarm reappears after the second time of taying, call the Service Technician. | |
TURBINE ALARMFor alarm found the display control unit alternates with the message about drink under way with the error message associated with this function.Eg: | The volume counter will not send any impulses to the control unit for 5 seconds. | The delivery will continue for up to 60 seconds or for as long as any of the coffee based drink keys are pressed. | Open and close the machine door.The control unit will repeat the machine starting up procedure. | In case the alarm persists, the machine can be used as a manual appliance.Press the selected key to start the dosing;Once the desired dose has been delivered in the cup, press the same key to halt the dose being delivered.Call the Service Technician. |
| TEMPERATURE PROBE MALFUNCTION ALARMALARM:COFFEE TEM P. | One of the two temperature probes is broken. | Coffee will not be delivered. | Substitute the broken probe. | This alarm blocks all deliveries. |
| ALARM:STEAM TEM P. | ||||
Toutes nos félicitations,
natural_image
Technical line drawing of a laboratory apparatus with control panel and tubing (no text or symbols)CARACTÉRISTIQUES TECHNIQUES
| POIDS NET | 65 Kg 143 | 3 lb |
| POIDS BRUT | 74 Kg 163.1 | lb |
| PUISS.THERMIQUE | 6000 W -3000W | 6000 W -3000W |
| DIMENSIONS | A 400 mm A | 15.748 inc |
| B 607 mm B | 23.897 inc | |
| C 844 mm C | 33.228 inc | |
| D 154 mm D | 6.063 inc | |
| E 41,5 mm -141,5 mm | E 1.634 inc -5.571 inc |
text_image
Technical diagram of a mechanical device with labeled components A, B, and C
natural_image
Technical line drawing of a mechanical device with labeled components (D and B), no readable text or symbols present.INDEX
CARACTÉRISTIQUES TECHNIQUES 59
- DESCRIPTION 61
1.1 DESCRIPTION CLAVIER (Configuration standard) 62 - PRESCRIPTIONS DE SÉCURITÉ...63
- TRANSPORT ET DEPLACEMENT..67
3.1 IDENTIFICATION DE LA MACHINE....67
3.2 TRANSPORT 67
3.3 DÉPLACEMENT....67 - INSTALLATION ET OPÉRATIONS PRÉLIMINAIRES...68
4.1 INSTALLATION DE LA MACHINE....68
4.2 REMPLISSAGE RÉCIPIENT CAFÉ 69
4.3 MISE EN MARCHE....69
4.4 ARRÊT DE LA MACHINE....69 - RÉGLAGES DU
TECHNICIEN QUALIFIE ....70
5.1 RÉGLAGE DU DEGRÉ DE MOUTURE....70
5.2 RÉGLAGE AIR GÉNÉRATEUR DE MOUSSE POUR CAPPUCCINO ....70
5.3 RÉGLAGE DU FLUX DE LAIT (Réglage Température) 71
5.4 REGLAGE AIR EASYCREAM (en option)....71 - UTILISATION....72
6.1 DISTRIBUTION DECAFEINE....72
6.2 DISTRIBUTION DOUBLE DOSE....72
6.3 UTILISATION MOULIN DE GAUCHE....72 -
PROGRAMMATION 73
7.1 ACCES A LA PROGRAMMATION....73
7.2 PROGRAMMATION MODALITE UTILISATEUR...73 -
NETTOYAGE ET ENTRETIEN ..... 80
8.1 NETTOYAGE DE LA CARROSSERIE....80
8.2 NETTOYAGE GROUPE DE DISTRIBUTION ET GÉNÉRATEUR DE MOUSSE POUR CAPPUCCINO 80
8.3 NETTOYAGE RÉCIPIENT ET CONVOYEUR DU CAFÉ....81
8.4 NETTOYAGE BEC A VAPEUR 82
8.5 NETTOYAGE GRILLE DU BAC DE RÉCUPÉRATION DES GOUTTES 82
8.6 NETTOYAGE BAC DE RÉCUPÉRATION DES GOUTTES ....82
8.7 NETTOYAGE GARNITURE DU GROUPE....82
8.8 NETTOYAGE GÉNÉRATEUR DE MOUSSE POUR CAPPUCCINO TALENTO PLUS....83
8.9 NETTOYAGE DIFFUSEUR ET GROUPE A CAPPUCCINOS TALENTO SPECIAL....83 - TABLEAU DES DONNÉES DE PROGRAMMATIONS STANDARD....84
- MESSAGES FONCTIONS MACHINE....85
INSTALLATION HYDRAULIQUE TALENTO PLUS....88
INSTALLATION HYDRAULIQUE TALENTO SPECIAL....90
INSTALLATION ÉLECTRIQUE TALENTO PLUS / SPECIAL....92
SECONDE INSTALLATION ÉLECTRIQUE TALENTO PLUS / SPECIAL....94
1. DESCRIPTION

text_image
Technical diagram of a refrigerant or industrial device with numbered components labeled for identification.Fig. 1
LÉGENDE
natural_image
Simple line drawing of a landscape with a black 'X' symbol and a small animal, no text or symbols present.
natural_image
Simple electrical circuit symbol (no text or labels)Fig. 4

natural_image
Diagram of a device with a black X mark indicating a disconnection or prohibition, no text or symbols present.
natural_image
Simple line drawing of a cross symbol over a landscape with trees and hills (no text or symbols)
natural_image
Illustration of a hand cleaning a washing machine with a black X mark, labeled Fig. 10 (no text or symbols on the diagram itself)
ATTENTION RISQUE DE BRULURES

natural_image
Technical line drawing of a mechanical device with internal components and a control panel labeled Fig. 11 (no readable text or symbols)
ATTENTION
natural_image
Symbol of a trash bin crossed with a diagonal line, no text or labels presentRENSEIGNEMENT AUX UTILISATEURS
3. TRANSPORT ET DEPLACEMENT
3.1 IDENTIFICATION DE LA MACHINE
natural_image
Simple line drawing of a mountain landscape with trees and a marked cross symbol (no text or labels)4. INSTALLATION ET OPERATIONS PRÉLIMINAIRES

ATTENTION
RISQUE DE POLLUTION
natural_image
Simple line drawing of a mountain landscape with trees and a marked cross symbol (no text or labels)natural_image
Diagram of a coiled hose with connectors, labeled Fig. 15 (no text or symbols on the diagram itself)natural_image
Mechanical assembly diagram showing pipe fittings and a piston (no text or symbols)natural_image
Illustration of a hand pouring granular material into a multi-layered cylindrical container (no text or symbols)3 Refermer le couvercle.
4.3 MISE EN MARCHE
text_image
SELECT PRODUCTnatural_image
Technical diagram showing a hand using a tool to adjust a component with circular elements, including a magnified inset of a textured surface (no text or symbols)2.8 TOT VAPEUR (Total vap
MULTICYCLE (cycles multiples):
natural_image
Illustration of a mechanical device with a cup pouring liquid into a container, alongside a close-up view of the interior (no text or symbols)- Frapper la touche:

natural_image
Illustration of a hand adjusting a mechanical component with a circular knob, labeled Fig. 28 (no text or symbols on the diagram itself)natural_image
Technical line drawing of a mechanical or electrical enclosure with control panel and wiring (no text or symbols)natural_image
Isometric technical drawing of a mechanical housing or enclosure with three cylindrical components mounted on a base plate (no text or symbols visible)natural_image
Diagram of a kitchen appliance with a grater and kitchen sink, showing internal components and a steam rising (no text or symbols)8.5 NETTOYAGE GRILLE DU BAC DE RÉCUPÉRATION DES GOUTTES
natural_image
Diagram of a rectangular device with grid pattern and internal structure, labeled Fig. 32 (no text or symbols on the diagram itself)8.6 NETTOYAGE BAC DE RÉCUPÉRATION DES GOUTTES
natural_image
Line drawing of a hand holding a rectangular object with internal lines, labeled Fig. 33 (no text or symbols on the object itself)
ATTENTION
natural_image
Technical line drawing of a mechanical assembly with labeled components (no readable text or symbols)8.8
NETTOYAGE GÉNÉRATEUR DE MOUSSE POUR CAPPUCCINO TALENTO PLUS
natural_image
3D rendered mechanical component with red and blue blades against a black background (no text or symbols)Fig. 35
8.9
NETTOYAGE DIFFUSEUR ET GROUPE A CAPPUCCINOS TALENTO SPECIAL
natural_image
Exploded view of a mechanical assembly showing internal components and mounting holes (no text or labels)Fig. 36
natural_image
3D rendered mechanical component with red and white tubes against a black background (no text or symbols)Fig. 37
- TABLEAU DES DONNÉES DE PROGRAMMATIONS STANDARD
| RISTRETTO | 2 RISTRETTO | ESPRESSO | 2 ESPRESSO | COFFEE | 2 COFFEE | AMERICANO | 2 AMERICANO | CAPPUCCINO | 2 CAPPUCCINO | MACCHATO | 2 MACCHATO | CAFFELATTE | 2CAFFELATTE | MILK | 2 MILK | COLD MILK | 2 COLD MILK | |
| Milk time | 12 22 20 36 15 22 15 20 15 20 | |||||||||||||||||
| No air milk | 0 0 10 18 15 22 15 20 15 20 | |||||||||||||||||
| Autowashing | 0,5 0,5 0,5 0,5 0,5 0,5 0,5 0,5 0,5 0,5 0,5 0,5 0,5 0,5 0,5 0,5 0,5 0,5 0,5 0,5 0,5 0,5 0,5 0,5 0,5 0,5 | |||||||||||||||||
| Pause | 0 | 0 | ||||||||||||||||
| Temperature(TALENTO SPECIAL only) | 100 100 | |||||||||||||||||
| Delay(TALENTO SPECIAL only) | 0 | 0 | 0 | 0 | 0 | 0 | 0 | 0 | 0 | 0 | ||||||||
| Grind time R | 2,5 3,5 3,0 | 4,0 3,5 | 4,5 2 | 5 3,5 | 2,5 3,5 | 2,5 3,5 | 3,0 3,5 | |||||||||||
| Grind time L | 2,5 3,5 3,0 | 4,0 3,5 | 4,5 2 | 5 3,5 | 2,5 3,5 | 2,5 3,5 | 3,0 3,5 | |||||||||||
| Select grinder | D | D | D | S | S | D | D | D | D | D | D | S | S | |||||
| Volume | 42 55 45 65 | 120 | 160 50 | 70 50 | 70 40 | 55 60 | 90 | |||||||||||
| Pre-brewing | 0,5 0,5 0,5 | 0,5 0,0 | 0,0 0 | 5 0,5 | 0,5 0,5 | 0,0 0,0 | 0,0 0,0 | 0 | ||||||||||
| Tamping | S | N | S | N | N | S | N | S | N | N | N | S | N | |||||
| Extra water | 95 135 | |||||||||||||||||
10. MESSAGES FONCTIONS MACHINE
expresso coffee machines
Nuova Distribution Centre
LLC 6940Salashan PKWY BLDG A 98248 Ferdale, WA
Tel. +1.360.3662226
Fax +1.3603664015
videoconf.+1.360.3188595
expressed coffee machines
Via M. d'Antegiano, 6
62020 Belforte del Chienti
Macerata Italy
Tel. +39.0733.9501
Fax +39.0733-950242