FCHD 1200 RC - Basket Fulgor Milano - Free user manual and instructions
Find the device manual for free FCHD 1200 RC Fulgor Milano in PDF.

User questions about FCHD 1200 RC Fulgor Milano
0 question about this device. Answer the ones you know or ask your own.
Ask a new question about this device
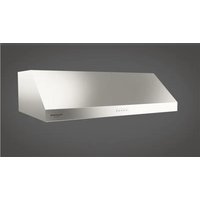
Download the instructions for your Basket in PDF format for free! Find your manual FCHD 1200 RC - Fulgor Milano and take your electronic device back in hand. On this page are published all the documents necessary for the use of your device. FCHD 1200 RC by Fulgor Milano.
USER MANUAL FCHD 1200 RC Fulgor Milano
This appliance can be used by children aged from 8 years and above and persons with reduced physical, sensory or mental capabilities or lack of experience and knowledge if they have been given supervision or instruction concerning use of the appliance in a safe way and understand the hazards involved.
Children shall not play with the appliance.
Cleaning and user maintenance shall not be made by children without supervision.
If the supply cord is damaged, it must be replaced by the manufacturer, its service agent or similarly qualified persons in order to avoid a hazard.
There is a fire risk if cleaning is not carried out in accordance with the instructions;
Do not flambé under the range hood.
The air must not be discharged into a flue that is used for exhausting fumes from appliances burning gas or other fuels (not applicable to appliances that only discharge the air back into the room);
This appliance and its accessible parts are likely to become very hot if used in combination with cooking devices.
In case of installation with gas hobs the cooker surface and the inferior part of the cooker hood must be at a minimum di! stance of 65 cm.
To evacuate the air outlet, please comply with the pertaining rules given by competent authorities.
When performing the electrical connections on the appliance, please make sure that the power supply is provided with earth connection and that voltage values correspond to those indicated on the label placed inside the appliance itself.
If the supply cord is damaged, it must be replaced by the manufacturer, its service agent or similarly qualified persons in order to avoid a hazard.
Before carrying out any cleaning or maintaining operations, the appliance needs to be removed from the electric grid. If the appliance is not provided with a non-separable flexible cable and plug, or with another device ensuring disconnections from the grid, with an opening distance between the contacts of at least 3mm , then such disconnecting devices must be supplied within the fixed installation.
If the fixed appliance is endowed with a supply cord and a plug, the appliance has to be put in a place where the plug can be reached easily.
Before carrying out the installation of the appliance, please check that all components are not damaged. In such a case, make contact with your retailer and do not proceed with the installation.
Should the product show any anomaly, disconnect the appliance from the power supply.
When the range hood and appliances supplied with energy other than electricity are simultaneously in operation, the negative pressure in the room must not exceed 4 Pa (4 x 10⁻⁵ bar).
USES
SLT968 EM and SLT 968 EM models can be used only if connected with external motors manufactured by the same producer.
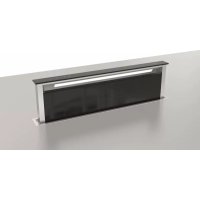
SLT968 and SLT969 models are equipped with internal motor.
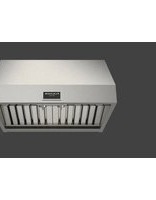
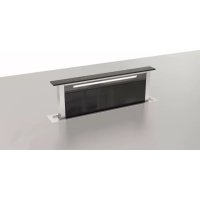
PANEL OPENING
It is possible to open the panel, which cover the grease filters, slightly pulling the panel on a side, as shown on fig. 1.
In order to make the hood working properly, it is recommended to install the appliance at a distance of 2000 - 2100 mm from the floor.
Before starting the appliance installation, please check that all components are not damaged, in such a case contact your retailer and do not carry out installation.
Furthermore, please read carefully all of the following installation instructions.
- Use an exhausting pipe whose maximum length does not exceed 5 meters.
- Limit the no. of elbows in the piping, since each elbow reduces the air capacity of 1 linear meter.
(Ex.: if you use no. 2 × 90^ elbows, the length of piping must not exceed 3 meters). - Avoid abrupt direction changes.
- Use a 150mm constant diameter pipe for the whole length, or same section.
- Use piping approved by standards in force.
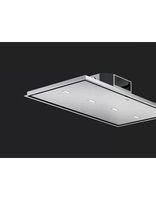
INSTALLATION
Secure the hood to the ceiling, by using the screws supplied, as shown in Fig. 6.
Take the product out of the packaging and place it on a suitable surface: we Suggest to use a soft material, such as a sponge or a cloth.
Open the glass panel, rotating it as shown in Fig. 1, and remove the grease filters.
IN CASE THE HOOD COMES WITH A GLASS PANEL BEFORE INSTALLATION, IN ORDER TO AVOID
ANY POSSIBLE DAMAGE TO THE GLASSES, WE RECOMMEND TO REMOVE THEM BY UNSCREWING THE EIGHT SCREWS SHOWN IN FIG. 2.
Where you intend to install the appliance, you must create a recess which will have a rectangular opening of:
865x515 mm model FCHD Cm.90
1165X615 mm model FCHD Cm.120
The depth must range from 200 to 280mm
INSTALL THE HOOD ON THE CEILING, CONNECT THE CANAL SYSTEM FOR THE AIR OUTLET, SET
THE ELECTRICAL CONNEC! TION AND THEN COMPLETE THE PLASTERBOARD STRUCTURE.
The recess shall be provided with a socket and a round pipe of 150mm diameter, or a similar section, for the air outlet.
Drill the holes on the ceiling, as shown in Fig. 3. Insert the plastic plugs into the holes made, and then fix the ceiling brackets as shown in Fig. 4.
The ceiling brackets are telescopic, so their height can be adjusted at 80~mm between the ceiling and the hood.
You can choose one of the three air outlets shown in Fig. 5: fit the air outlet plastic flange in the de! sired outlet; the remaining outlets shall be closed with the specific metal caps, as shown in fig. 5.
Bring the hood close to the brackets previously fixe and then connect the appliance to the supply mains.
WORKING
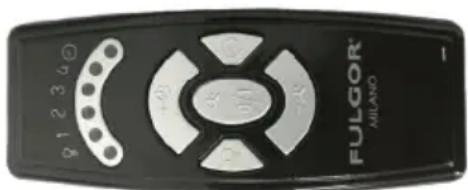
RC001
RADIO CONTROL
Radio control used for the remote operation of ducted cooker hoods.
TECHNICAL DATA
- Alkaline battery powered: 12V mod. 27A
- Operating frequency: 433.92 Mhz
- Combinations: 32.768
- Max. consumption: 25 mA
- Operating temperature: -20 ÷ +55^ C
- Dimensions: 130 × 45 × 15 mm .
OPERATING DESCRIPTION
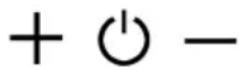
The transmitter is equipped with 5 buttons for cooker hood management, as specified below:
Light ON/OFF command.
Motor ON (speed level 1) / OFF command.
Reduce speed.
+Increase speed.
10-minute timer.
The set suction speed is indicated by the LED in the suction perimeter channel.
To each color generated by the LED, it corresponds a specific speed, as shown below:
First speed WHITE
Second speed BLUE
Third speed DARK BLUE
Fourth speed RED
DIMMABLE LIGHTS FUNCTION
THIS FUNCTION PROVIDES FOR LIGHTS DIMMABILITY, RANGING FROM 20% TO 100%, BY CONTINUUSLY PRESSING THE LIGHT KEY ON THE REMOTE CONTROL.
FUNCTIONS ARE THE FOLLOWING:
-
HOOD LIGHT OFF - SHORTLY PRESS THE KEY - LIGHT ON AT 100% .
-
LIGHT ON AT 100% - SHORTLY PRESS THE KEY - LIGHT OFF.
-
LIGHT ON AT 100% CONTINUUSLY PRESS THE KEY-BRIGHTNESS REDUCTION.
-
RELEASING THE KEY DURING REDUCTION OR INCREASE - LIGHT KEEPS THE LUMINOUS INTENSITY REACHED.
-
LIGHT ON - DIMMED - CONTINuously PRESS THE KEY - BRIGHTNESS IS INVERTED IF COMPARED TO THE PREVIOUS FUNCTION.
The manufacturer supplies the radio control unit ready to be used with codes preset in the Factory
OPERATION MODE
Standard configuration:
Standard configuration requires all "cooker hoods - radio control - system" to be provided with the same transmission code. In the event two cooker hoods - radio control system are installed in the same room or nearby, each system may affect the operation of the another. Therefore, the code of one radio control system must be changed.
Generating a new transmission code:
The radio control system is provided with preset codes. Should new codes be required, proceed as follows: Press simultaneously buttons:
for two seconds. When LEDs light on, press buttons:
(within 5 seconds). Leds flashing 3 times indicate the procedure is completed.
WARNING! This operation deletes permanently the preset codes.
Learning the new transmission code:
Once the transmission code is changed in the radio control unit, the electronic central unit of the cooker hood must be made to set the new code in the following way:
Press the main power-off button (fig. 15) of the hood and then restore power to the electronic control unit. Within the next 15 seconds, press the Liight Button to synchronise the central unit with the code.
Reset of the Factory configuration:
To restore the Factory configuration, follow the procedure described below: press simultaneously buttons:

for 2 seconds. When LEDs light on, press buttons:

(within 5 seconds). Leds flashing 6 times indicate the procedure is completed.
WARNING! This operation deletes permanently the preset codes.
Emergency button:
In the event that the radio control does not work, use the emergency button to switch the appliance off. After any necessary repairs have been performed, reset the emergency button.
WARNING
The battery should be replaced every year to guarantee the optimal range of the transmitter. To replace the exhausted battery, take the plastic lid off, remove the battery and replace it with a new one, observing the correct battery polarities.
Used batteries should be discarded in special collection bins.
The below product:
RC001 Radio Control

complies with the specifications set out in the Directive RED 2014/53/EU.
WARNING
Any adjustments or modifications which have not been expressly approved by the holder of the legal conformity certificate may invalidate the user's rights relating to the operation of the device.
Rev. 026/08/14
The products are endowed with an electronic device which allows the automatic switching off after 4 hours working from the last operation.
MAINTENANCE
An accurate maintenance guarantees good functioning and long-lasting performance. Special care needs to be taken with the grease filter: to access the filter, proceed as described in the PANEL OPENING chapter.
Remove the grease filter, using the special handle.
To refit the grease filter after cleaning, carry out the same operation in reverse order.
To remove the carbon filter, if fitted, follow the same steps as for the grease filter.
The carbon filter is located immediately above the grease filter.
Tepid water and neutral detergents are recommended to clean the appliance, while abrasive products should be avoided.
If the supply cord is damaged, it must be replaced by the manufacturer or its service agent or a similarly qualified person in order to avoid a hazard.
CONTENTS

Attention
Emploi
Installation
Fonctionnement
Entretien
ATTENTION
The symbol on the product or on its packaging indicates that this product may not be treated as household waste. Instead it shall be handed over to the applicable collection point for the recycling of electrical and electronic equipment. By ensuring this product is disposed of correctly, you will help prevent potential negative consequences for the environment and human health, which could otherwise be caused by inappropriate waste handling of this product. For more detailed information about recycling of this product, please contact your local city office, your household waste disposal service or the shop where you purchased the product. This appliance is marked according to the European directive 2012/19/EC on waste electrical and electronic equipment (WEEE).