Manicure & Set Pro Collection MAN3000 - Manicure and pedicure set REMINGTON - Free user manual and instructions
Find the device manual for free Manicure & Set Pro Collection MAN3000 REMINGTON in PDF.
Document temporarily unavailable
The manual is currently being transferred to our new server. It will be accessible again in a few hours. Thank you for your patience.
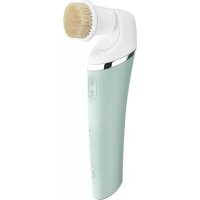
| Product type | Manicure and pedicure set |
| Brand | Remington |
| Model | MAN3000 |
| Power supply | Mains adapter |
| Speeds | 2 speeds (low and high) |
| Rotation direction | Clockwise and counterclockwise |
| Illuminated tip | Yes, for precision work |
| Included accessories | 12 high-quality accessories |
| Needle-shaped drill bit | For ingrown nails and dead nail pieces |
| Flame-shaped drill bit | For removing ingrown nails |
| Sapphire cone | For filing, manicure, removing dead skin |
| Cylindrical drill bit | For grinding and polishing thick nails |
| Callus file | For removing hard skin and calluses |
| Felt cone | For polishing and shining nails |
| Sandpaper tips | 10 refills for removing hard skin |
| Fine sapphire disc | For delicate nail filing |
| Other accessories | Nail clippers, cuticle pusher, toe separators, cleaning brush, storage case |
| Cleaning | Wipe the body with a damp cloth, clean accessories with the supplied brush |
| Safety | Do not use near water, keep dry, supervision needed for sensitive persons |
| Use | Household only (non-commercial) |
| Spare parts | Contact local technical service |
| Recycling | Do not dispose of with household waste, take to collection centre |
Frequently Asked Questions - Manicure & Set Pro Collection MAN3000 REMINGTON
User questions about Manicure & Set Pro Collection MAN3000 REMINGTON
0 question about this device. Answer the ones you know or ask your own.
Ask a new question about this device
Download the instructions for your Manicure and pedicure set in PDF format for free! Find your manual Manicure & Set Pro Collection MAN3000 - REMINGTON and take your electronic device back in hand. On this page are published all the documents necessary for the use of your device. Manicure & Set Pro Collection MAN3000 by REMINGTON.