
Oscar II - Coffee machine NUOVA SIMONELLI - Free user manual and instructions
Find the device manual for free Oscar II NUOVA SIMONELLI in PDF.
| Product Type | Professional espresso machine |
| Brand | Nuova Simonelli |
| Model | Oscar II |
| Power supply | 220-240 V ~ 50 Hz, 1200 W |
| Operating pressure | 0.165 MPa (1.65 bar) |
| Maximum inlet pressure | 0.65 MPa (6.5 bar) |
| Ambient temperature range | +5 °C to +35 °C |
| Noise level | Less than 70 dB |
| Water supply | Removable tank or direct mains connection (pressure 2-4 bar) |
| Main functions | Single/double coffee dispensing, steam, cup warmer |
| Dose programming | Yes, via double coffee button (long press 5 s) |
| Stand-by mode | Yes, via single coffee button (long press 5 s) |
| Control panel | Water level and heating indicators, single/double coffee buttons |
| Boiler type | With automatic electronic leveling |
| Electrical safety | Mandatory grounding, omnipolar switch, pump stop after 90 s, safety thermostat |
| Periodic maintenance | Regular cleaning of components (filter, portafilter, steam nozzle, drip tray, drip grid, water tank); annual replacement of brew group and gasket |
| Intended use | Professional (bars, offices, institutions) |
| Certifications | CE compliance, Directive 89/392/EEC |
| Included accessories | Single and double filters, portafilter, tamper, dosing scoop, steam wand with insulating rubber |
| Warranty | Valid subject to compliance with water characteristics and maintenance |
Frequently Asked Questions - Oscar II NUOVA SIMONELLI
User questions about Oscar II NUOVA SIMONELLI
0 question about this device. Answer the ones you know or ask your own.
Ask a new question about this device
Download the instructions for your Coffee machine in PDF format for free! Find your manual Oscar II - NUOVA SIMONELLI and take your electronic device back in hand. On this page are published all the documents necessary for the use of your device. Oscar II by NUOVA SIMONELLI.
USER MANUAL Oscar II NUOVA SIMONELLI
espresso coffee machines
natural_image
Modern white and black espresso machine with a digital display (no visible text or symbols)OSCAR II
LIBRETTO ISTRUZIONI
USER HANDBOOK MANUEL D'INSTRUCTIONS GEBRAUCHANWEISUNGEN INSTRUCCIONES DE MANEJO
Istruzioni Originali - Translation of the Original Instructions - Traduction des Instructions Originales
natural_image
Simple line drawing of a mountain landscape with trees and a marked cross symbol (no text or labels)natural_image
Simple white cross symbol on a dark gray circular background, resembling a stylized battery or circuit symbol (no text or numbers present)natural_image
Illustration of a portable device with a hand holding a black X symbol, no text or symbols present
text_image
OKnatural_image
Hand-drawn sketch of a mechanical device with a shield emblem and mounting bracket (no text or symbols)text_image
PERICOLO DI USTIONEnatural_image
Line drawing of a mountainous landscape with a black X symbol overlay (no text or symbols present)natural_image
Modern espresso machine with black and silver casing, no visible text or symbolsnatural_image
Exterior view of a modern coffee maker with a 300 mm size and 12-inch base (no text or symbols on the device itself)
text_image
C 400 mm 15,8" B 408 mm 16"| N. GRUPPI | PESO NETTO | PESO LORDO | POTENZA TERMICA | VOLTS/Hz |
| 1 | 14 Kg. 31Lb | 17 Kg. 37Lb | 1200 W | 115 - 230V50 - 60 Hz |
1. DESCRIZIONE
IMPIANTO ELETTRICO....66
2. INSTALLAZIONE
natural_image
Line drawing of a hand reaching toward a window with a mesh screen (no text or symbols)natural_image
Technical line drawing of a mechanical assembly with two circular components and a central component (no text or symbols)natural_image
Illustration of a mechanical device with a circular top and a rectangular blade (no text or symbols)natural_image
Mechanical assembly diagram showing a lever and pin assembly with an arrow indicating motion (no text or symbols)natural_image
Line drawing of a coffee machine with two cups and a tray, no text or symbols presentnatural_image
Illustration of a mechanical device with a cross mark and a gear-like component inside (no text or symbols)natural_image
Line drawing of a hand reaching toward a window with a bird visible on the left side (no text or symbols)The present manual is an integral and essential part of the product and is to be delivered to the user. Carefully read all warnings in the manual as they provide important information required to install, use and maintain the unit safely. Keep this manual in a safe place for further consultation.
After having removed the packaging, make certain that the unit is not damaged in any way.
If you have any doubts, do not use the unit and contact a professionally qualified person. Always keep all packaging (plastic bags, polystyrene foam, nails, etc.) out of the reach of children as they are a potential source of danger and never loiter the environment with such materials.

DANGER OF POLLUTION
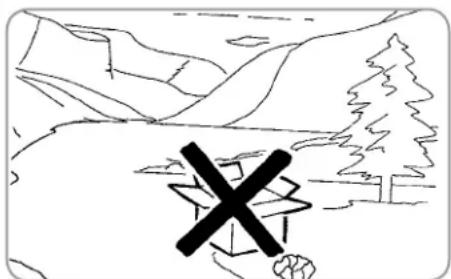
natural_image
Simple line drawing of a mountain landscape with trees and a marked cross symbol (no text or labels)The machine is can be installed in staff kitchen areas in shops, offices and other working environments, farm houses by clients in hotels, motels and other residential type environments bed and breakfast type environments.
Before turning on the unit make certain that the rating indicated on the label matches the available power supply. The nameplate can be seen Inside the machine when removing the water collection tray. Installation must be performed following the standards in force in the country where it is being installed and following the manufacturer's instructions. Only skilled personnel can install this unit.
The warranty expires if the characteristics of the power supply do not correspond to the nameplate data.
The manufacturer cannot be held responsible for any damages incurred if the system is not grounded.
For electrical safety, this machine requires a ground system. Contact a technically certified electrician who must check that the line electrical capacity is adequate for the maximum capacity indicated on the unit label.

natural_image
Simple white symbol on dark gray circular background, resembling a stylized lightning bolt or cross (no text or numbers)The qualified electrician must also check that the section of the installation's cables is large enough for the absorbed power of the appliance.
Never use adapters, multiple jacks or extension cords. When such items prove absolutely necessary, call in a qualified electrician.
When installing the device, it is necessary to use the parts and materials supplied with the device itself. Should it be necessary to use other parts, the installation engineer needs to check their suitability for use in contact with water for human consumption.
The installer must Make the hydraulic connections respecting the rules of hygiene and water safety to environmental protection in force in the place of installation. So for the hydraulic plant contact an authorized technician. Always utilise the new hose supplied for connection to the water supply. Old hoses must not be utilised.
The device needs to be supplied with water that is suitable for human consumption and compliant with the regulations in force in the place of installation. The installation engineer needs confirmation from the owner/manager of the system that the water complies with the requirements and standards stated above.
This unit must only be used for the purposes described in the present manual. The manufacturer cannot be held responsible for any damages caused by improper, mistaken and unreasonable use.
The appliance is not to be used by children or persons with reduced physical, sensory or mental capabilities, or lack of experience and knowledge, unless they have been given supervision or instruction. Children must not play with the appliance. Cleaning and maintenance must not be carried out by children unless supervised.
This appliance is for professional use only.
The operating temperature must be within the range of [+5, +35]^ .
At the end of installation, the device is switched on and taken to rated operating conditions, leaving it in a state in which it is "ready for operation".
After reaching the "ready for operation" condition, the following dispensing operations are carried out:
- 100% of the coffee circuit through the coffe penser (for more than one dispenser, this is divided equally);
- Open the steam outlet for 1 minute.
At the end of installation, it is good practice to draw up a report of the operations.

WARNING
Before using the machine, read this manual in its entirety or, at the very least, read the safety and set up instructions.
There are some basic rules for the use of any electrical appliance.
In particular:
• Never touch the unit with wet hands or feet;
• Never use the unit with bare feet;
- Never use extension cords in areas equipped with baths or showers;
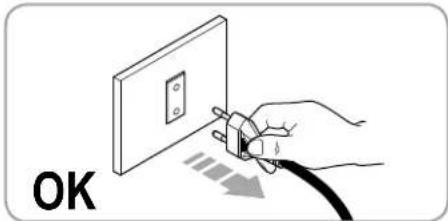
- Never pull on the power supply cord to unplug the unit;
- Never leave the unit exposed to atmospheric agents (rain, direct sunlight, etc.);
- Never let children, unauthorized personnel or anyone who has not read this manual operate the unit.
Before performing any sort of maintenance, the authorized technician must turn off the unit and unplug it from the mains.

natural_image
Illustration of a portable electronic device with a black X symbol indicating a warning or hazard (no text or symbols present)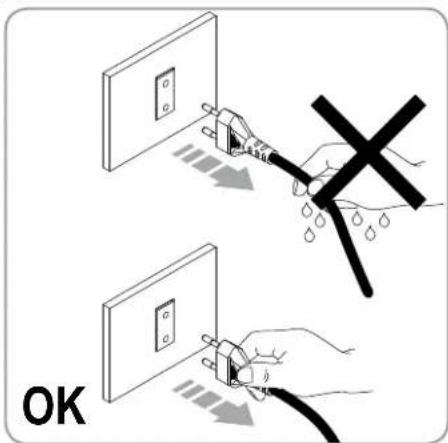
text_image
OKBefore cleaning the unit set it in a state of "0" energy: that is, "MACHINE SWITCHED OFF AND UNPLUGGED". Follow the instructions given in this manual carefully.
Refer to chapters 6 and 7 for periodical cleaning and maintenance.
text_image
OKIn case of breakdown or poor function, turn off the unit. Never tamper with the unit. Contact only professionally qualified personnel.
Only the manufacturer or an authorized service center can make repairs and only using original spare parts. Non compliance with the above can compromise machine safety.
On installation, the qualified electrician must fit a circuit breaker switch as foreseen by the safety norms in force that has a contact open distance that permits the complete disconnection under conditions of overload category III.
To prevent dangerous overheating, it is advisable to fully extend the power supply cord.
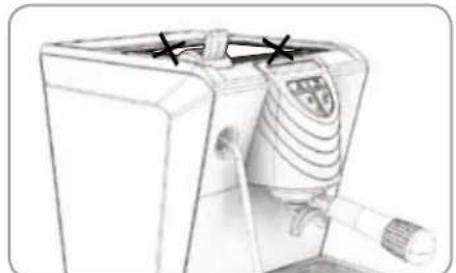
Never block the intake and/or heat dissipation grills, in particular those for the cup warmer.
natural_image
Line drawing of a mechanical device with a shield emblem and mounting bracket (no text or symbols)The user must never replace the unit's power supply cord. If this cord is damaged, turn off the unit and have it replaced by a professionally qualified technician.
Should it be necessary to replace the power cord, this replacement operation must only be performed by an authorized service centre or by the manufacturer.
Should you decide to stop using this type of unit, we suggest you render it inoperable by unplugging it and cutting the power supply cord.
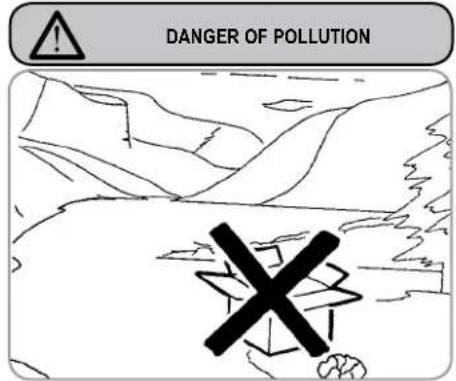
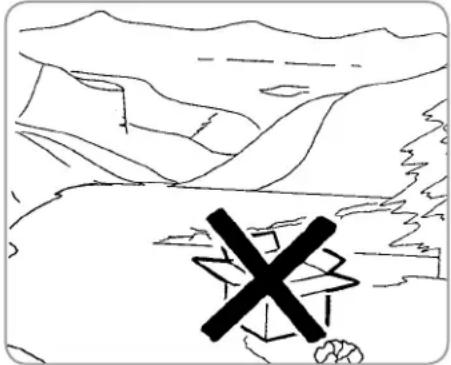
Never dispose of the machine in the environment: to dispose of the machine, contact an authorized center or contact the manufacturer for pertinent indications.
text_image
DANGER OF POLLUTION
Once started the washing machine, do not interrupt, the detergent residue may remain inside the delivery unit.
To facilitate aeration of the unit, position the aeration portion of the machine 15 cm from walls or other machinery.
text_image
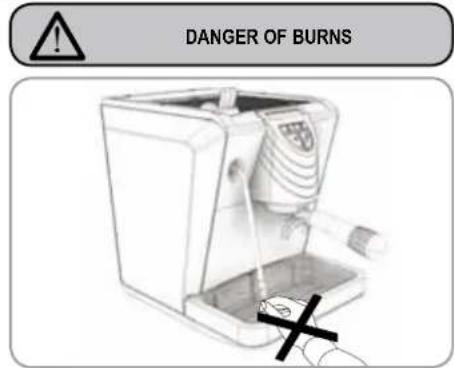
DANGER OF BURNSBe extremely careful when using the steam nozzle. Never place your hands under the nozzle and never touch it right after use.
Remember that to install, maintain, unload and regulate the unit, the qualified operator must always wear work gloves and safety shoes.
When adding the coffee, the operator must never put his hands into the container.
The noise level of the machine is less than 70db.
For machines connected to the mains water supply, the minimum pressure must be 2 bar and the maximum pressure for correct machine operation must not exceed 4 bar.

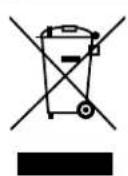
INFORMATION TO THE USERS Under the senses of art. 13 of Law Decree 25th July 2005, n. 151 "Implementation of the Directives/ Guidelines 2002/95/CE, 2002/96/CE and 2003/108/CE, concerning the reduction of the use of dangerous substances in electric and electronic equipment, as well as the disposal of wastes".
The symbol of the crossed large rubbish container that is present on the machine points out that the product at the end of its life cycle must be collected separately from the other wastes. The user for this reason will have to give the equipment that got to its life cycle to the suitable separate waste collection centres of electronic and electro-technical wastes, or to give it back to the seller or dealer when buying a new equipment of equivalent type, in terms of one to one.
The suitable separate waste collection for the following sending of the disused equipment to recycling, the dealing or handling and compatible environment disposal contributes to avoid possible negative effects on the environment and on the people's health and helps the recycling of the materials the machine is composed of. The user's illegal disposal of the product implies the application of administrative fines as stated in Law Decree n.22/1997* (article 50 and followings of the Law Decree n.22/1997).
SHIPPING AND HANDLING
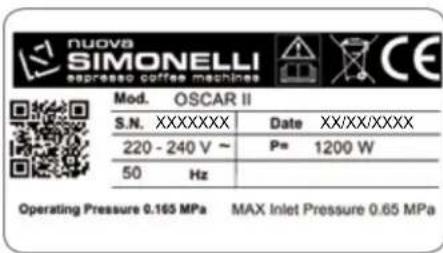
MACHINE ID
When communicating with the manufacturer Nuova Simonelli, always cite the machine ID number.
text_image
nuova SIMONELLI espresso coffee machines Mod. OSCAR II S.N. XXXXXXX Date XX/XX/XXXX 220 - 240 V ~ P= 1200 W 50 Hz Operating Pressure 0.165 MPa MAX Inlet Pressure 0.65 MPaThe machine is transported on pallets containing several machines inside cartons strapped to the pallet.
Operators performing any shipping or handling operations must:
- Wear gloves, safety shoes and overalls with elasticized cuffs.
Always move pallets using adequate equipment (i.e. fork lift trucks).

During handling, the operator must make certain that there are no persons, things or objects in the vicinity.
Slowly lift the pallet approximately 30 cm off the ground and drive to the loading zone. After having made certain that there are no obstacles, things or persons in the way, proceed with loading.
Once the destination has been reached, again using adequate lifting equipment (i.e. fork lift truck) and after having made certain that there is nothing and no one in the unloading area, set the pallet on the ground and move it to the storage area; always carry the load at a height of approximately 30 cm from the ground.
text_image
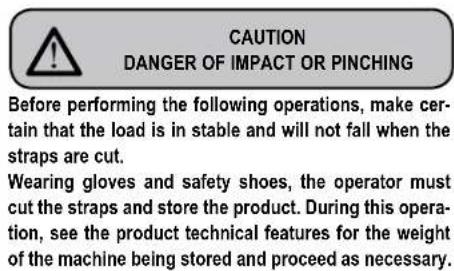
CAUTION DANGER OF IMPACT OR PINCHING Before performing the following operations, make certain that the load is in stable and will not fall when the straps are cut. Wearing gloves and safety shoes, the operator must cut the straps and store the product. During this operation, see the product technical features for the weight of the machine being stored and proceed as necessary.
natural_image
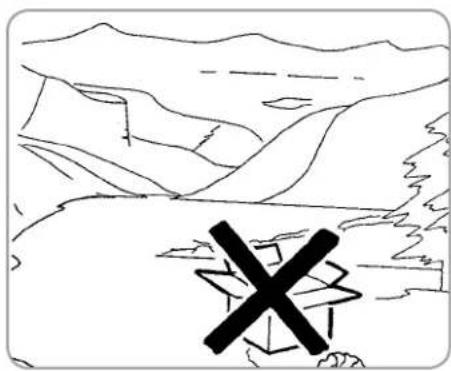
Line drawing of a mountainous landscape with a large 'X' symbol overlay (no text or symbols present)Once the machine has been released from the pallet or container, do not pollute the environment with these items.
natural_image
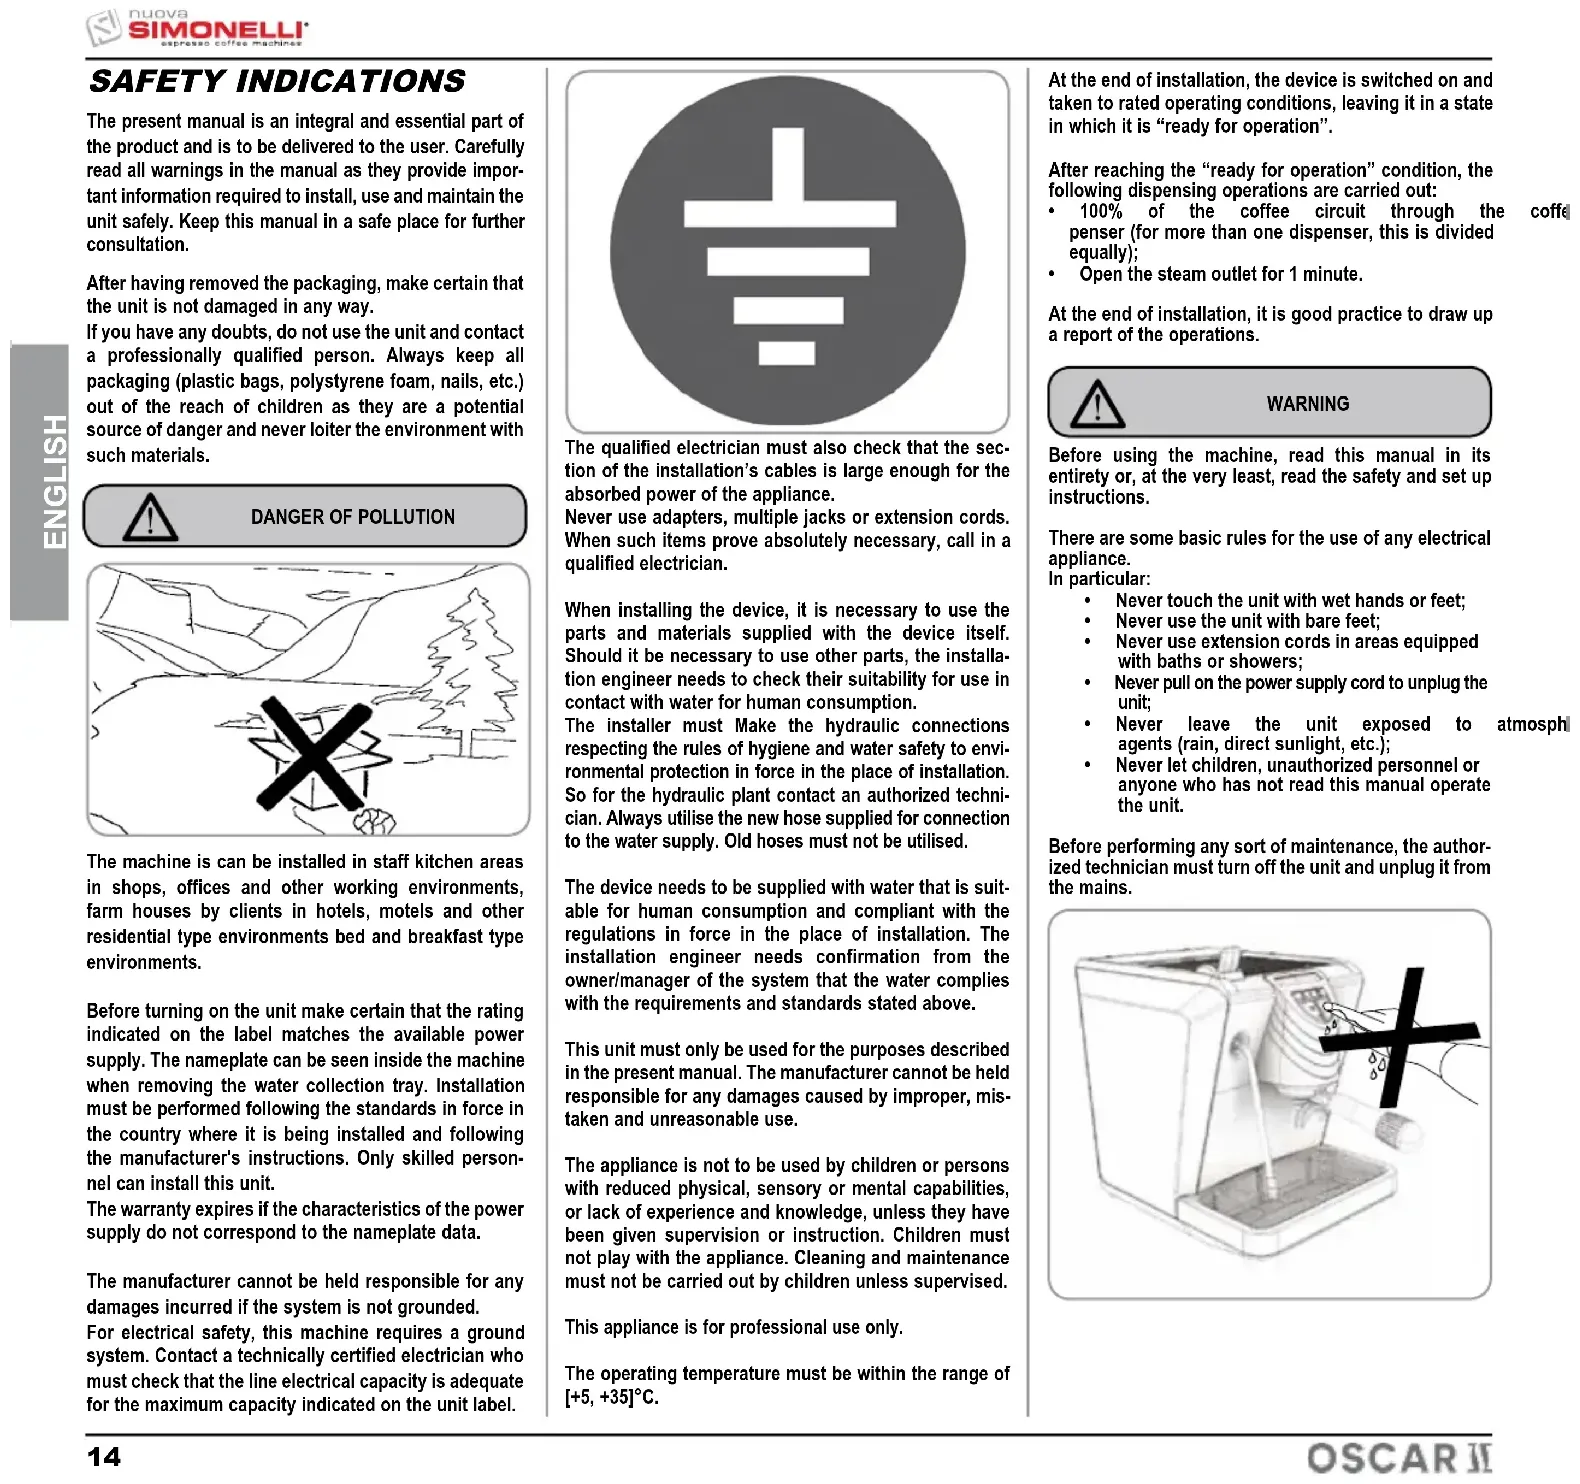
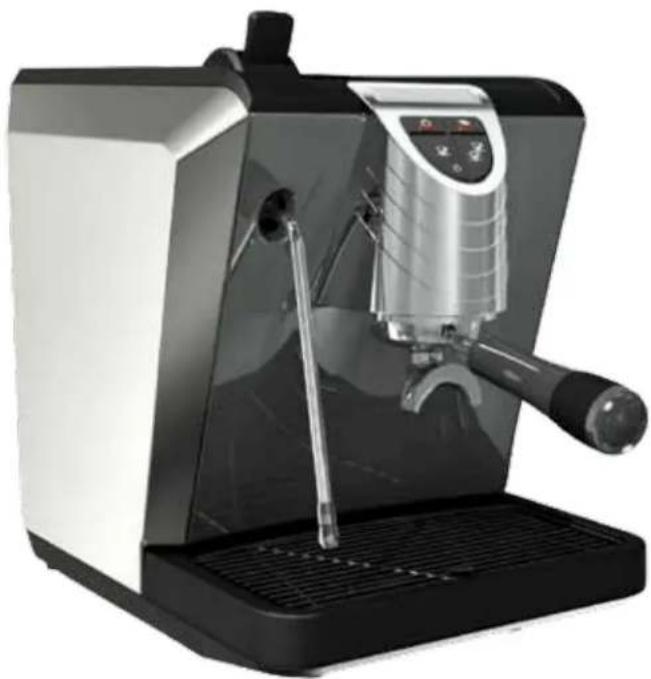
Modern espresso machine with black and silver casing, no visible text or symbolsCompliments and thank you for having chosen Oscar II.
Please read carefully all the advice and suggestions that follow to ensure that your machine is installed correctly.
We have designed the machine to offer a real experience to those persons who prepare and enjoy expresso coffee.
Utilising the machine you will realise how easy it is to prepare an expresso coffee and eventually how little maintenance is needed.
One thing is certain; Oscar II will be the "protagonist" in your "bar" at home or in the office.
The international mark of approvement certifies that all our machines have undergone severe tests and inspections. (International certification attests to the thorough testing and calibration of these machines).
natural_image
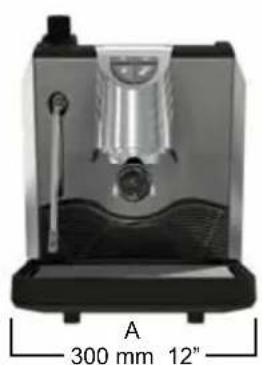
Exterior view of a modern coffee maker with labeled dimensions (300 mm x 12") and no visible text or symbols beyond measurement labels.
text_image
C 400 mm 15,8" B 408 mm 16"| N. OF UNITS | NET WEIGHT | GROSS WEIGHT | HEATING CAPACITY | VOLTS/Hz |
| 1 | 14 Kg. 31Lb | 17 Kg. 37Lb | 1200 W | 115 - 230V50 - 60 Hz |
1. DESCRIPTION
text_image
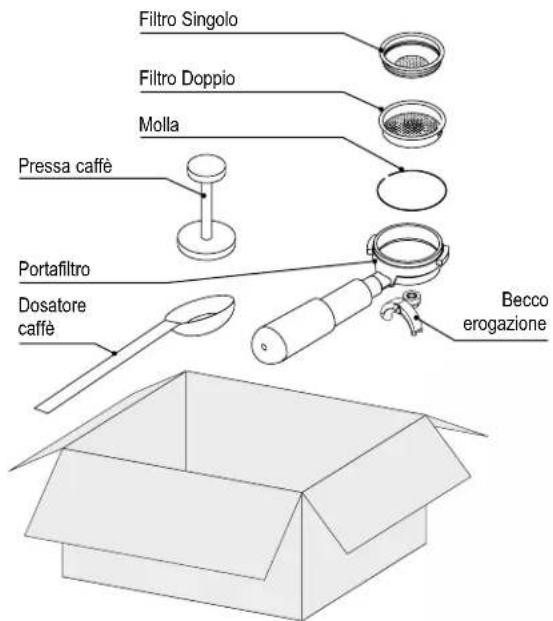
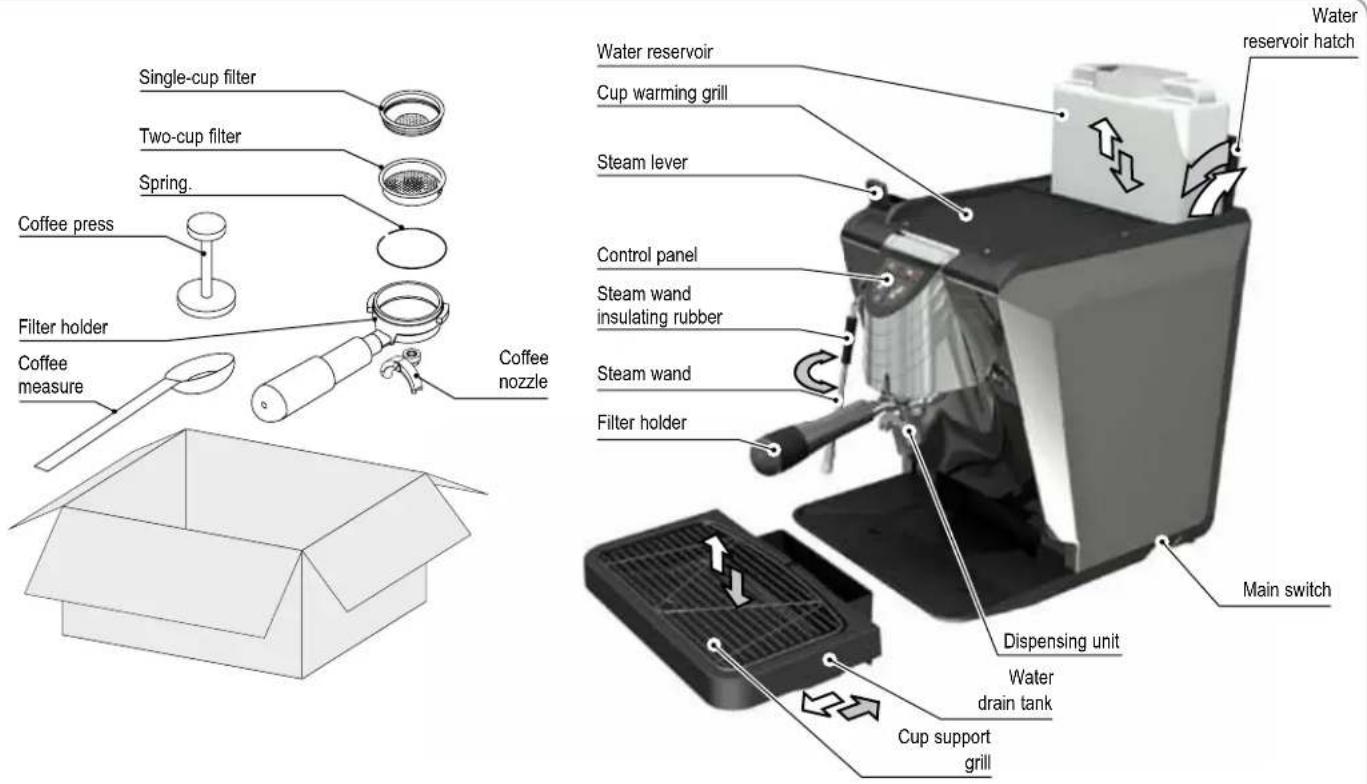
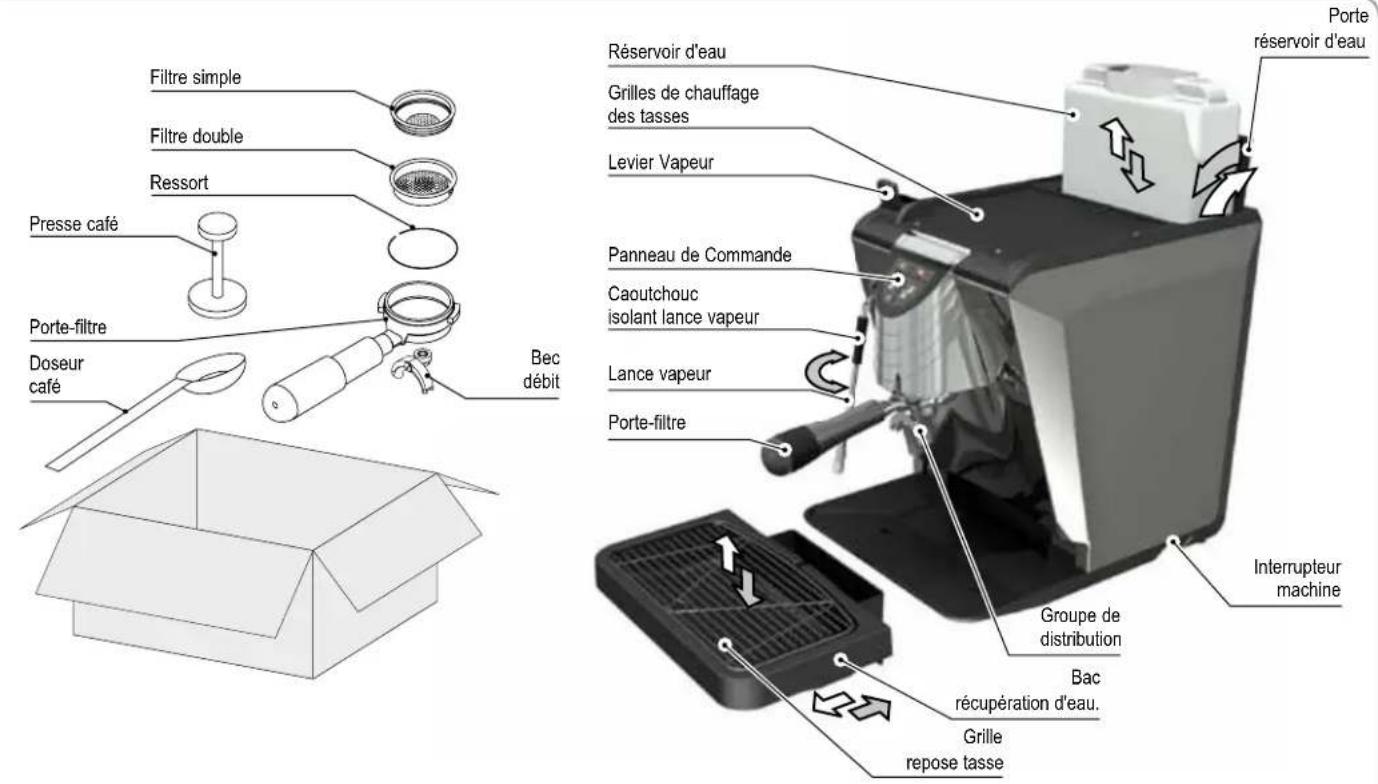
Single-cup filter Two-cup filter Spring. Coffee press Filter holder Coffee measure Coffee nozzle Water reservoir Cup warming grill Steam lever Control panel Steam wand insulating rubber Steam wand Filter holder Main switch Dispensing unit Water drain tank Cup support grill Water reservoir hatch1.1 CONTROL PANEL DESCRIPTION
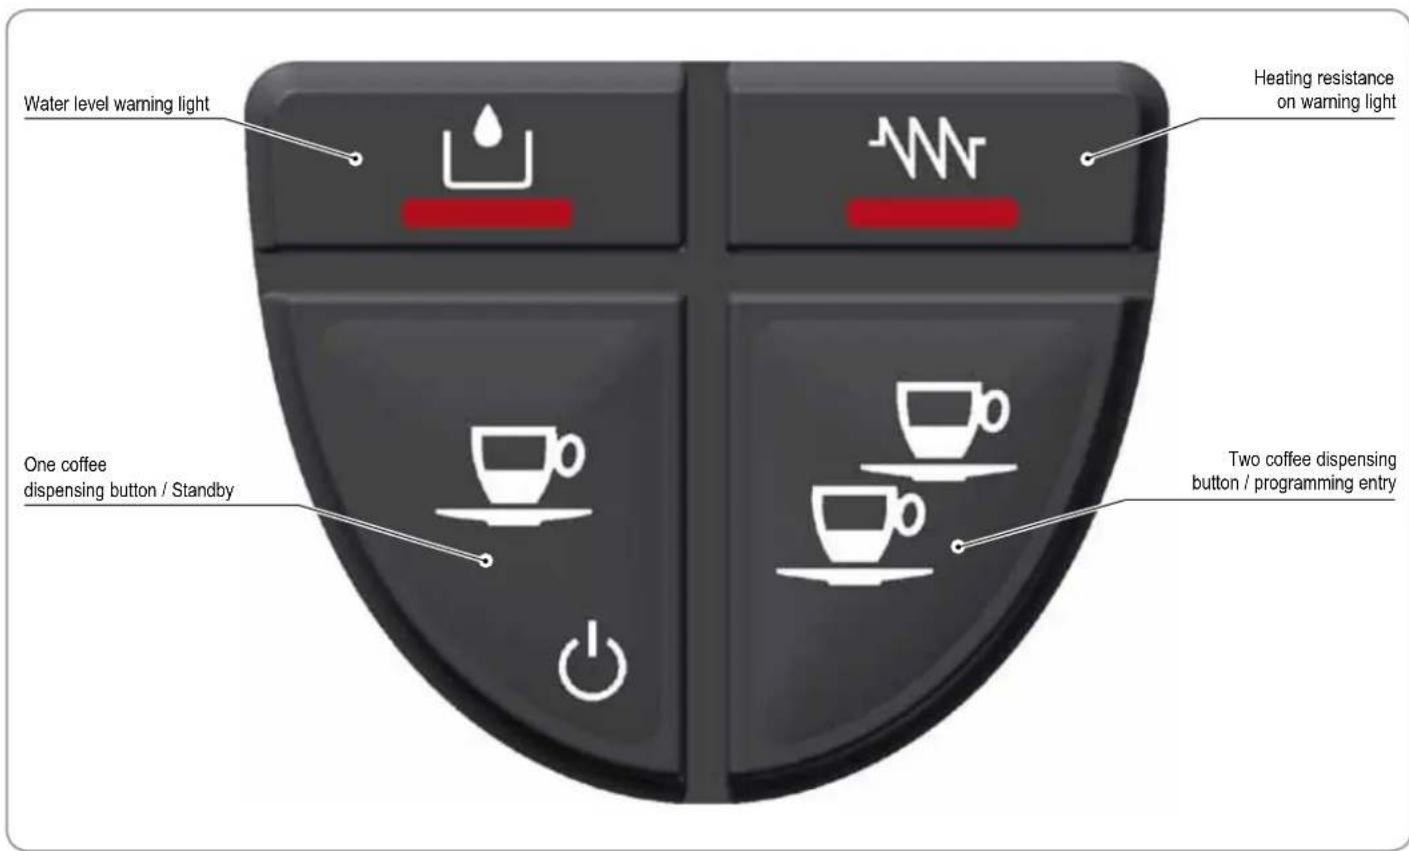
text_image
Water level warning light Heating resistance on warning light One coffee dispensing button / Standby Two coffee dispensing button / programming entryCONTENTS
SAFETY INDICATIONS 14
SHIPPING AND HANDLING....13
MACHINE ID 16
- DESCRIPTION 18
1.1 CONTROL PANEL DESCRIPTION....18
- INSTALLATION 21
2.1 FILLING THE BOILER 21
2.2 WATER SPECIFICATIONS 21
- PROGRAMMING 22
3.1 PROGRAMMING DOSES 22
3.2 PROGRAMMING COFFEE DOSES 22
- UTILISATION....23
4.1 SWITCHING ON/OFF THE MACHINE 23
4.2 MACHINE STAND-BY 23
4.3 COFFEE DISPENSING 23
4.4 STEAM DISPENSING 24
-
SHUTDOWN 25
-
MAINTENANCE 25
-
CLEANING 25
-
TROUBLESHOOTING 26
ELECTRIC SYSTEM 66
2. INSTALLATION
Before carrying out the installation carefully read the safety instructions at the beginning of this manual and particularly about how to put THE MACHINE INTO ZERO ENERGY STATUS.
1) Once the machine has been removed from the packaging, position it on a horizontal surface and proceed with the installation as illustrated in the following paragraphs.
Arrange the accessories as follows:
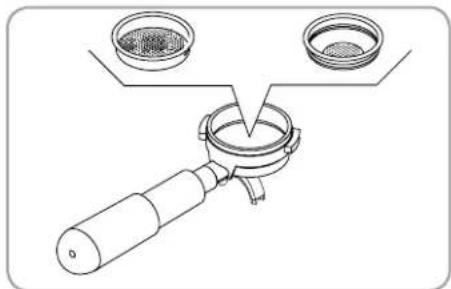
2) Insert the ring in its seat inside the filter holder.
3) Insert one of the two filters.
4) Caution: danger of pollution.

DANGER OF POLLUTION
natural_image
Simple line drawing of a landscape with mountains, river, and a cross symbol (no text or labels)Tank Model
5) Open the hatch and take out the reservoir. Especially the first time, wash the reservoir with soap and water. Fill the reservoir with water and make certain that the outside of the reservoir is dry.
6) Return the reservoir to its housing and close the hatch.
7) Make certain that the water drain tank has been inserted.
Direct attachment version
5) Open the door of the tank and remove the hose for direct attachment.
6) Connect the hose to the water supply and open the tap upstream of the machine if present.
7) Make certain that the water drain tank has been inserted.
Make certain that the cup support grill is positioned squarely and is level.
8) Check that the steam lever is closed.
9) Make certain that the line voltage corresponds to the requirements indicated on the label.
10) The preliminary operations have been completed and the machine is ready to be set up.
2.1 FILLING THE BOILER
NOTE: if the sequence indicated below does not take place, see the chapter entitled "TROUBLESHOOTING".
After having completed the preliminary operations:
1) Press the On switch on the right side of the machine; the keyboard lights up. The machine automatically loads the water into the boiler (initial time approximately three minutes). When the water has reached the correct level, the heating of the water starts signalled by the resistance warning light coming on.
NOTE: the machine has an electronic level valve so it automatically feeds in water to the boiler as needed to restore the level.
NOTE: the machine safety system shuts down the machine after the pump has been running steadily for approximately 1,5 minutes (this prevents the pump from overheating). In this case, switch off the machine using the main switch and switch on again to complete the first filling.
Whilst functioning, the keyboard is backlit.
The WY resistance warning light comes on when it is necessary to heat the water in the boiler and when the level in the boiler is sufficient.
2) Wait until the heating light goes off, indicating that the water has reached the desired temperature.
NOTE if the water light goes on, it means that the water reservoir is empty or nearly empty.
NOTE remember that to obtain a good drink it is best to use the cup warming shelf to keep the cups warm.
3) After the water has been loaded press a dispensing button until water pours out from the unit.
4) At this point the machine has been set up and is ready to make coffee or produce steam.
NOTE: At the start of the day's activities and in any case, if there are any pauses of more than 8 hours, then it is necessary to change 100% of the water in the circuits, using the relevant dispensers.
NOTE: In case of use where service is continuous, make the above changes at least once a week.
2.2 WATER SPECIFICATIONS
Monitoring of water recipe to keep it within required levels and maintenance of filtration system is the user's responsibility. Failing to meet and maintain water at the following levels will void the entire warranty:
• Total hardness 50-60 ppm (parts per million) (5-6 french degrees (°F));
• Water line pressure between 2 - 4 bar and water to be cold;
• Min flow rate: 200 l/hr
• Filtration level below 1.0 micron
• TDS (Total Dissolved Solids) level between 50 - 250 ppm
• Alkalinity level between 10 - 150 ppm
• Chlorine level less than 0.50 mg/l
• Ph level between 6.5 and 8.5.
3. PROGRAMMING
3.1 PROGRAMMING DOSES
Carry out the following operations to enter into programming mode:
NOTE: Operation to be carried out with the machine switched on.

• To enter into programming mode, press the two coffee dispensing button for 5 seconds.
• The dispensing buttons start to flash.
NOTE: After 30 seconds of inactivity (no buttons pressed) in programming mode, the machine returns to normal mode and no data is memorised.
3.2 PROGRAMMING COFFEE DOSES
To programme the dose of water relative to one of the

ising buttons, proceed as follows:
- Fill the filter holder with the correct dose of coffee (the filter holder can be single or double depending on the button to be programmed).
- Place the filter holder into the unit.
- Press one of the dispensing buttons.
- Dispensing starts; once the desired quantity has been reached press the same button again.
• To exit from the programming mode and memorise
the desired doses, keep the button pressed for at least 5 seconds; the buttons stop flashing.
4. UTILISATION
Before utilising the machine, the operator must have read and fully understood the safety instructions in this manual.
4.1 SWITCHING ON/OFF THE MACHINE
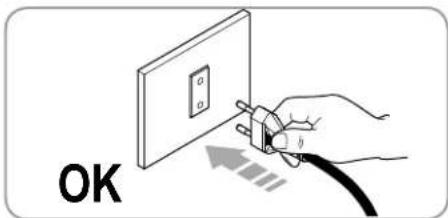
- Connect the machine to the power socket.
text_image
OK- Press the ON switch of the machine.

natural_image
Line drawing of a hand pressing down on a surface near a window (no text or symbols)The machine carries out the following checks:
Control of the water level in the boiler
- Correct level: the resistance warning light comes on and the resistance starts to heat the water.
- Incorrect level: the pump is activated to load more water into the circuit.

ATTENTION
If the maximum water level in the boiler is not reached after 90 seconds, the pump stops and the 4 LEDs start to flash on the control panel. Switch off the machine and switch it on again to start loading water again.
NOTE: The loading of water during normal functioning is connected to the dispensing of coffee, inasmuch that the machine resets the water level only after dispensing has finished.
Control of the water level in the tank
- Correct level: the water level warning light is switched off. - Incorrect level: the water level warning light comes on and is fixed.

ATTENTION
If the tank water level warning light comes on during the heating phase, the phase is carried out (if the water level in the boiler is correct) and the machine finishes any dispensing in progress. Afterwards, it is necessary to reset the water level in the tank to carry out normal functioning of the machine.
After the control phase the machine is ready for normal utilisa-
buttons come on and also the resistance warning light (until heating is completed).

4.2 MACHINE STAND-BY
If the machine is not used for short periods, it is good practice to place it into stand-by mode to save energy.
- Press the one coffee dispensing button for 5 seconds (it starts to flash) to enter into stand-by mode.
- Press the one coffee dispensing button again to reset the machine to normal functioning (the LEDs of
sing buttons start flashing).

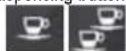
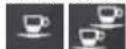
4.3 COFFEE DISPENSING

ATTENTION
If the sequence indicated below does not take place, see the chapter entitled "TROUBLESHOOTING".
1) After commissioning the machine, insert the desired filter (single or double inside the filter holder).
natural_image
Technical line drawing of a mechanical assembly with two circular components and a central pin (no text or symbols)2) Fill the doser with coffee to the brim and put the coffee inside the filter.
natural_image
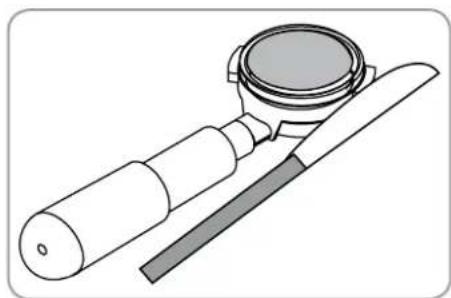
Illustration of a mechanical device with a cylindrical component and a flat blade (no text or symbols)3) Press the coffee in the filter uniformly using the appropriate presser.

natural_image
Mechanical assembly diagram showing a lever and pin assembly with an arrow indicating motion (no text or symbols)4) Clean the edge of the filter of coffee residues and insert the filter holder into the dispensing unit.
text_image
01 025) Position the cup/s under the spout/s.
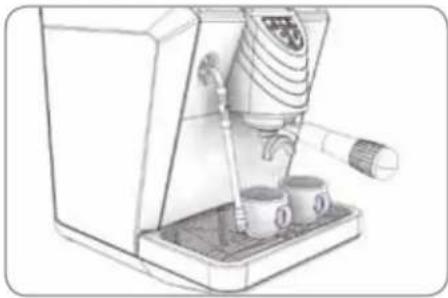
natural_image
Line drawing of a coffee machine with three cups and a spool (no text or symbols)
6) Press the relative dispensing button for 1 cup or 2 cups of coffee.
7) The pump activates and starts the dispensing.
8) On reaching the set quantity, the pump stops and the dispensing automatically stops.
4.4 STEAM DISPENSING
NOTE: if the sequence indicated below does not take place, see the chapter entitled "TROUBLESHOOTING".

DANGER OF BURNS
natural_image
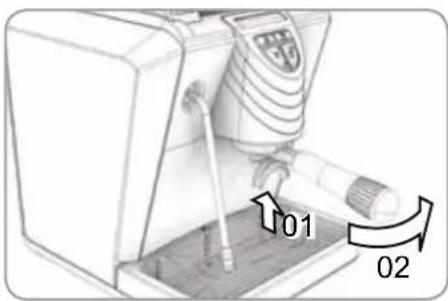
Illustration of a mechanical device with a cross mark and a gear-like component inside (no text or symbols)1) It is compulsory to utilise the insulating rubber to manoeuvre the steam wand.
2) After having set up the machine, clean the steam nozzle with a cloth dipped in hot water.
3) Make certain that the spout of the nozzle is within the grill.
4) Being very careful, gradually move the steam lever and keep it open until any drops of hot water inside the wand come out.
5) When only steam comes out, move the wand using the rubber protection and immerse it in the liquid to be heated.
6) Utilising the lever, regulate the steam as necessary. Keep the nozzle in the liquid while regulating the steam.
7) Once the liquid has been heated, close the steam lever and remove the heated liquid container.
8) Use a cloth dipped in hot water to clean any residues of the heated liquid from the steam nozzle spout.
9) You have finished heating the liquid.
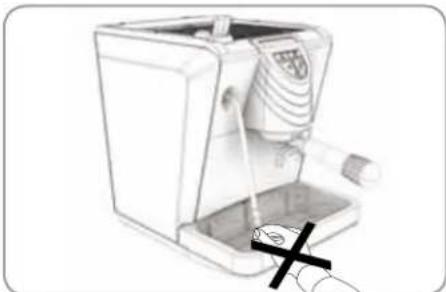
NOTE: Before using the steam wand, always bleed out any condensation for at least 2 seconds or according to the manufacturer's instructions.
5. SHUTDOWN
To stop the machine, press the start switch again (all warning lights turn off).
natural_image
Line drawing of a hand reaching toward a window, with a small object visible on the left (no text or symbols)NOTE: If the machine is not used for a long period it is good practice to remove the plug from the socket.
6. MAINTENANCE
Maintenance includes:
1) Cleaning of the various components (see chapter "CLEANING") with minimum frequency every two weeks.
2) Annual replacement of the showerhead and gasket group. To do so, contact your qualified technician.
Failure to follow these conditions means the automatic decay of the guarantee.
For any further intervention on the machine, contact the dealer where you purchased the product.
During maintenance/repairs, the parts used must be able to guarantee compliance with the safety and hygiene requirements envisaged for the device. Original replacement parts can offer this guarantee.
After repairs to/replacement of a part that comes into contact with foods or water, it is necessary to carry out a washing procedure or to follow the steps indicated by the manufacturer.
7. CLEANING
Except for cleaning of dispensing assembly - shown in the table below - any other form of cleaning must be performed when the unit is in a condition of zero energy (off and unplugged from the power supply) and only after the hot parts have cooled to room temperature. See the table below.
1) Cleaning the steam nozzle.
Use a cloth dipped in hot water and/or a neutral detergent.
2) Cleaning the filter and filter holder.
- If necessary use a tool to pry the filter out of the filter holder.
- Rinse under a jet of water (tap) and dry.
- If necessary, use a small brush to clean out the filter.
3) Cleaning the outside of the machine.
- Never use any sort of solvent to clean the outside of the machine; use only a cloth dipped in hot water and a neutral soap.
4) Cleaning the grill.
- Brush the grill clean with hot water and soap.
5) Cleaning the liquid tank.
- Clean the liquid tank with hot water and soap, if necessary using a brush.

ATTENTION
Never use any sort of solvent.
6) Cleaning the water reservoir.
- Use soap and water and rinse thoroughly.
NOTE: if for any reason the water has left undesired scale, wash out with a swab.
7) Cleaning the dispensing spout

DANGER OF BURNS
This operation is performed with the unit on and for this reason requires utmost care.
- Clean the holes in the dispensing spout using a brush with slightly stiff bristles.
- Press the dispensing button to unplug the holes.
8) Cleaning the gasket on the dispenser assembly.
- Use a small brush to clean away any scale or coffee residues from the gasket on the dispenser assembly.
9) Cleaning the dispenser assembly.
- Use a small brush to clean away any scale or coffee residues from the dispenser assembly spout.
| immediately after use | daily | weekly | ||
| 1 | Steam nozzle | ■ | ■ | ■ |
| 2 | Filter and filter holder | ■ | ■ | ■ |
| 3 | Outside of the machine | ■ | ■ | |
| 4 | Grill | ■ | ■ | |
| 5 | Liquid tank | ■ | ■ | ■ |
| 6 | Water reservoir | ■ | ||
| 7 | Dispensing spout | ■ | ||
| 8 | Gasket on the dispenser assembly | ■ | ■ | |
| 9 | Dispenser assembly | ■ |
8. TROUBLESHOOTING
If your espresso coffee maker is not functioning properly, see if you can find the problem in the troubleshooting list below. Also reread the corresponding sections in the user's manual.
| Problem | Remedy |
| The machine does not prepare the espresso coffee. | Check whether the reservoir empty light is on: no water in the reservoir, or reservoir not inserted correctly.The coffee has been ground too fine or has been pressed too hard.The spout is plugged.Scale must be removed from the machine. |
| The coffee comes out of the sides of the filter holder. | The filter holder was not inserted correctly.The filter holder was not tightened enough.Clean coffee grinds away from the gasket (see the section on cleaning). |
| There is too little or no "cream". | Check the amount of coffee: the measure must be filled level.The machine is not hot: is the heating element off?The coffee has not been ground fine enough.The coffee in the filter has not been pressed correctlyThe coffee is not fresh.The water is not fresh. |
| The "cream" is too dark and/or the coffee has a burnt flavour. | The coffee has been ground too fine.The coffee has been pressed too hard.Too much coffee has been measured. |
| The coffee is not hot enough. | The hot water passes through the filter too quickly. It takes 25-40 seconds to make 2 cups.The coffee in the filter has not been pressed correctly.The coffee has not been ground fine enough.The filter holder is cold. The filter holder should always left inserted in the machine while the unit is heating up and during use so it remains hot.The cups are cold. The cups must be placed on the heated shelf or preheated with hot water prior to use.The boiler safety thermostat has cut in: contact the nearest service center. |
| The pump does not suck water from the tank. | Open the steam tap and push repeatedly the coffee delivery key. |
CONSIGNES DE SÉCURITÉ
natural_image
Simple line drawing of a mountain landscape with trees and a cross symbol (no text or labels)natural_image
Simple white cross symbol on dark gray circular background, no text or numbers presentnatural_image
Illustration of a hand using a manual machine to press or install a device, with no visible text or symbols.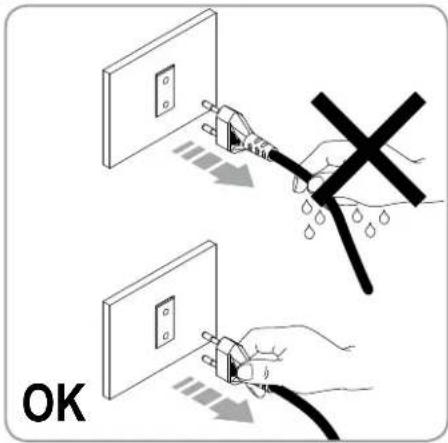
text_image
OKnatural_image
Line drawing of a mechanical device with a shield emblem and mounting bracket (no text or symbols)TRANSPORT ET MANUTENTION
IDENTIFICATION DE LA MACHINE
natural_image
Simple line drawing of a mountainous landscape with a cross symbol overlay (no text or symbols present)natural_image
Modern espresso machine with black and silver casing, no visible text or symbolsnatural_image
Exterior view of a modern coffee maker with a 300 mm size and 12-inch base (no text or symbols on the device itself)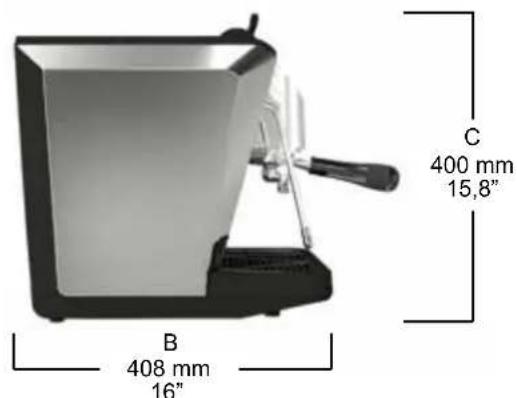
text_image
C 400 mm 15,8" B 408 mm 16"| Nbr.GROUPES | POIDSNET | POIDSBRUT | PUIS.THERMIQUE | VOLTS/Hz |
| 1 | 14 Kg. 31Lb | 17 Kg. 37Lb | 1200 W | 115 - 230V50 - 60 Hz |
1. DESCRIPTION
TRANSPORT ET MANUTENTION 29
IDENTIFICATION DE LA MACHINE 29
- DESCRIPTION 31
1.1 DESCRIPTION PANNEAU DE COMMANDE....32
- INSTALLATION 34
2.1 REMPLISSAGE DE LA CHAUDIÈRE 34
2.2 CARACTÉRISTIQUES EAU 34
- PROGRAMMATION 35
3.1 PROGRAMMATION DOSES 35
3.2 PROGRAMMATION DOSES CAFÉ 35
- UTILISATION 36
4.1 MARCHE / ARRÊT DE LA MACHINE....36
4.2 STAND-BY MACHINE 36
4.3 DISTRIBUTION CAFÉ 36
4.4 DISTRIBUTION VAPEUR....37
-
ARRÊT 38
-
ENTRETIEN 38
-
NETTOYAGE 38
-
ANOMALIES ET REMÈDES....39
INSTALLATION ÉLECTRIQUE 66
2. INSTALLATION
natural_image
Simple line drawing of a mountainous landscape with a cross symbol overlay (no text or symbols)3.2 PROGRAMMATION DOSES CAFÉ
natural_image
Line drawing of a hand pressing down on a surface near a vehicle (no text or symbols)natural_image
Technical line drawing of a mechanical assembly with two circular components and a central component (no text or symbols)natural_image
Illustration of a mechanical device with a cylindrical component and a rectangular tool (no text or symbols)natural_image
Mechanical assembly diagram showing a lever and pin assembly with an arrow indicating motion (no text or symbols)natural_image
Line drawing of a coffee machine with three cups and a tray, no text or symbols presentnatural_image
Illustration of a mechanical device with a cross mark indicating a disassembly or disassembly process (no text or symbols present)natural_image
Line drawing of a hand pressing down on a surface near a window (no text or symbols)natural_image
Simple line drawing of a mountain landscape with trees and a marked cross symbol (no text or labels)natural_image
Simple white symbol on dark gray circular background, resembling a stylized lightning bolt or cross (no text or numbers)natural_image
Illustration of a portable device with cables and a cross symbol overlay (no text or symbols present)
text_image
OKnatural_image
Line drawing of a mechanical device with a shield emblem and mounting bracket (no text or symbols)natural_image
Exterior view of a modern white and black espresso machine (no visible text or symbols)natural_image
Exterior view of a modern coffee maker with a 300 mm size and 12-inch base (no text or symbols on the device itself)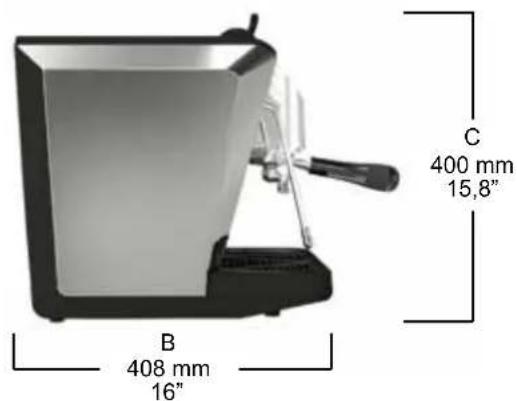
text_image
C 400 mm 15,8" B 408 mm 16"| Anz. GRUPPEN | NETTO GEWITCH | BRUTTO GEWITCH | WÄRMELEISTUNG | VOLTS/Hz |
| 1 | 14 Kg. 31Lb | 17 Kg. 37Lb | 1200 W | 115 - 230V50 - 60 Hz |
1. BESCHREIBUNG

natural_image
Simple line drawing of a landscape with mountains, river, and a black X symbol (no text or labels)natural_image
Line drawing of a hand reaching toward a window with a small object on the left (no text or symbols)natural_image
Technical line drawing of a mechanical device with two circular components and a central component (no text or symbols)natural_image
Illustration of a magnifying glass and a tool (no text or symbols)natural_image
Mechanical assembly diagram showing a lever and pin assembly with an arrow indicating motion (no text or symbols)natural_image
Line drawing of a coffee machine with two cups and a tray, no text or symbols presentnatural_image
Illustration of a mechanical device with a cross mark and a gear-like component inside (no text or symbols)natural_image
Line drawing of a hand reaching toward a window with a bird perched on the side (no text or symbols)ANMERKUNG:
natural_image
Simple line drawing of a mountain landscape with trees and a marked cross symbol (no text or labels)natural_image
Simple white cross symbol on dark gray circular background, no text or numbers presentnatural_image
Illustration of a hand using a manual machine to press or install a device, with no visible text or symbols.
text_image
OKnatural_image
Line drawing of a mechanical device with a shield emblem and mounting bracket (no text or symbols)natural_image
Simple line drawing of a mountainous landscape with a river and a cross symbol (no text or labels)natural_image
Modern espresso machine with black and silver casing, no visible text or symbolsnatural_image
Exterior view of a modern coffee maker with labeled dimensions (300 mm x 12") and no visible text or symbols beyond measurement labels.
text_image
C 400 mm 15,8" B 408 mm 16"| GRUPOS | PESO NETO | PESO BRUTO | POT. TERMICA | VOLTS/Hz |
| 1 | 14 Kg. 31Lb | 17 Kg. 37Lb | 1200 W | 115 - 230V50 - 60 Hz |
1. DESCRIPCIÓN
natural_image
Simple line drawing of a mountainous landscape with a cross symbol overlay (no text or symbols present)Tanque Version
natural_image
Line drawing of a hand reaching toward a window with a small object on the left (no text or symbols)natural_image
Technical line drawing of a mechanical device with three circular components and a central pin (no text or symbols)natural_image
Illustration of a mechanical device with a circular top and a rectangular blade (no text or symbols)natural_image
Diagram of a mechanical device with a lever and handle, showing a press or adjustment mechanism (no text or symbols present)natural_image
Line drawing of a coffee machine with two cups and a tray, no text or symbols presentnatural_image
Illustration of a mechanical device with a cross mark and a gear-like component inside (no text or symbols)natural_image
Line drawing of a hand reaching toward a window with a small object visible on the left (no text or symbols)- Nuova Simonelli S.p.A. declares under its own responsibility that the espresso coffee machine identified as below complies with the directives specified below and meets the essential requirements indicated in attachment A Conformity evaluation: category 1, form A The following harmonized standards have been applied following the provisions of the directives specified below.
The technical file has been deposited at the company headquarters, at the address on the back. The person in charge of collating and managing the technical file is Mr. Lauro Fioretti.
Applied regulations: Collections M,S, VSR editions '78 and '95 and available in the registered office.
Drawing No.: (See the end of the Instruction Booklet)
ATTENTION: This declaration is to be kept with the equipment at all times and must always go together with the equipment. Any use of the equipment than for the purposes for which it was designed is prohibited. The integrity and efficiency of the equipment of the safety devices are the responsibility of the user. The declaration is null and void if the machine is modified without the express authorization of the manufacturer or if improperly installed and used in such a way that does not comply with indications in the user's manual and the instructions.
espresso coffee machines
Nuova Distribution Centre
LLC 6940Salashan PKWY BLDG A 98248
Ferdale, WA
Tel. +1.360.3662226
Fax +1.3603664015
videoconf.+1.360.3188595
espresso coffee machines
Via M. d'Antegiano, 6
62020 Belforte del Chienti
Macerata Italy
Tel. +39.0733.9501
Fax +39.0733-950242