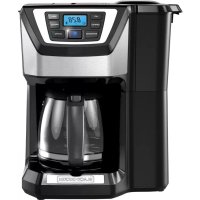
Mill & Brew CM5000BD - Coffee machine BLACK & DECKER - Free user manual and instructions
Find the device manual for free Mill & Brew CM5000BD BLACK & DECKER in PDF.



| Product Type | Coffee Maker with Built-in Grinder |
| Brand | Black & Decker |
| Model | Mill & Brew CM5000BD |
| Color | Black (model CM5000BD) |
| Capacity | 12 cups |
| Power Supply | 120 V, 60 Hz |
| Power | Approximately 900 W |
| Coffee Type | Whole beans or ground coffee |
| Grinder | Built-in, adjustable by number of cups (4, 6, 8, 10, 12) |
| Brew Strength | Regular, strong, bold (3 levels) |
| Special Features | Automatic delayed brew, adjustable auto shut-off (0-2 h), Sneak-A-Cup™ function, backlit digital clock |
| Filter | High-performance permanent filter (reusable) |
| Carafe | Duralife™ glass carafe with lid, level markings |
| Warming Plate | Non-stick, keeps warm up to 2 h |
| Cleaning | Removable parts dishwasher safe (top rack) or hand wash; monthly vinegar descaling recommended |
| Safety | Auto shut-off, locked lid, polarized plug |
| Replacement Parts | Carafe (CM5000-01), coffee scoop (CM5000-02), 2-in-1 grinder and filter basket (CM5000-03), washable brew basket (CM5000-04), removable sprayhead (CM5000-05) |
| Warranty | 2 years |
| Country of Manufacture | China |
Frequently Asked Questions - Mill & Brew CM5000BD BLACK & DECKER
User questions about Mill & Brew CM5000BD BLACK & DECKER
0 question about this device. Answer the ones you know or ask your own.
Ask a new question about this device
Download the instructions for your Coffee machine in PDF format for free! Find your manual Mill & Brew CM5000BD - BLACK & DECKER and take your electronic device back in hand. On this page are published all the documents necessary for the use of your device. Mill & Brew CM5000BD by BLACK & DECKER.
USER MANUAL Mill & Brew CM5000BD BLACK & DECKER
natural_image
Black and white photo of a modern coffee maker with digital display and control buttons (no visible text or symbols)use and care manual
natural_image
White ceramic coffee cup filled with dark coffee, placed on a saucer with scattered black coffee beans (no text or symbols visible)CONTENTS
Important Safeguards 3-4
Getting to know your Mill & Brew Coffee Maker 5-6
Mill & Brew Coffee Maker Product Benefits 7
Getting to know your Control Panel 8
Before Brewing 9
Programming your Mill & Brew Coffee Maker 9-10
4 Elements to Brew the Perfect Cup 11
Tips for a Perfect Cup of Coffee 12
Brewing Coffee 13-14
Care and Cleaning 15-16
Troubleshooting 17
Warranty and Customer Service Information 18

WARNING
RISK OF FIRE OR ELECTRIC SHOCK. DO NOT OPEN.
The lightning symbol refers to "dangerous voltage"; the exclamation symbol refers to maintenance instructions. See below.
Warning: To reduce the risk of fire or electric shock, do not remove the cover of the coffeemaker. There are no user-serviceable parts inside. Repair should be done by authorized service personnel only.
IMPORTANT SAFEGUARDS.
When using electrical appliances, basic safety precautions should always be followed to reduce the risk of fire, electric shock, and/or injury, including the following:
- Read all instructions.
- Do not touch hot surfaces. Use handles or knobs.
- To protect against fire, electric shock and injury to persons do not immerse cord, plugs or appliance in water or other liquid.
- Close supervision is necessary when any appliance is used by or near children.
- Unplug from outlet when either the appliance or display clock is not in use, and before cleaning. Allow to cool before putting on or taking off parts, and before cleaning the appliance.
- Do not operate any appliance with a damaged cord or plug, or after the appliance malfunctions or has been damaged in any manner. Contact Consumer Support at the number listed in this manual.
- The use of accessory attachments not recommended by the appliance manufacturer may result in fire, electric shock or injury to persons.
- Do not use outdoors.
- Do not let cord hang over edge of table or counter, or touch hot surfaces.
- Do not place on or near a hot gas or electric burner, or in a heated oven.
- To disconnect, turn any control to off, then remove plug from wall outlet.
-
Do not use this appliance for other than intended use.
-
Keep lid on the carafe when in use.
- Scalding may occur if the lid is removed during the brewing cycles.
- The carafe is designed for use with this appliance. It must never be used on a range top.
- Do not set a hot carafe on a wet or cold surface.
- Do not use a cracked carafe or a carafe having a loose or weakened handle.
- Do not clean carafe with cleansers, steel wool pads or other abrasive material.
- This appliance is not intended for use by persons (including children) with reduced physical, sensory or mental capabilities, or lack of experience and knowledge, unless they have been given supervision or instruction concerning use of the appliance by a person responsible for their safety.
• Children should be supervised to ensure that they do not play with the appliance. - Scalding and/or burns may occur if the integrated grinder lid is removed during the brewing cycle.
- Check the grinder basket for presence of foreign objects before using.
- Only coffee beans and coffee grounds should be placed into the grinder basket.
- Avoid contact with moving parts.
SAVE THESE INSTRUCTIONS.
This product is for household use only.
POLARIZED PLUG (120V models only)
This appliance has a polarized plug (one blade is wider than the other). To reduce the risk of electric shock, this plug is intended to fit into a polarized outlet only one way. If the plug does not fit fully into the outlet, reverse the plug. If it still does not fit, contact a qualified electrician. Do not attempt to modify the plug in any way.
TAMPER-RESISTANT SCREW
Warning: This appliance is equipped with a tamper-resistant screw to prevent removal of the outer cover. To reduce the risk of fire or electric shock, do not attempt to remove the outer cover. There are no user-serviceable parts inside. Repair should be done only by authorized service personnel.
ELECTRICAL CORD
a) A short power-supply cord is provided to reduce the risks resulting from becoming entangled in or tripping over a longer cord.
b) Extension cords are available and may be used if care is exercised in their use.
c) If an extension cord is used:
1) The marked electrical rating of the extension cord should be at least as great as the electrical rating of the appliance;
2) If the appliance is of the grounded type, the extension cord should be a grounding-type 3-wire cord; and
3) The cord should be arranged so that it will not drape over the counter top or tabletop where it can be pulled on by children or tripped over.
Note: If the power cord is damaged, please contact the warranty department listed in these instructions.
GETTING TO KNOW YOUR MILL & BREW COFFEE MAKER

- Control panel
- Lift latch
- Lid
- Water reservoir cover
-
Easy viewing water window
-
Duralife™ glass carafe (Part# CM5000-01)
- "Keep hot" carafe plate
- Coffee scoop (Part# CM5000-02)
Product may vary slightly from what is illustrated.
GETTING TO KNOW YOUR MILL & BREW COFFEE MAKER
- 2-in-1 grinder and permanent filter basket (Part# CM5000-03)
- Washable brew basket (Part# CM5000-04)

- Lift latch
- Grinder lid
- Removable showerhead (press highlighted tabs to remove) (Part# CM5000-05)

MILL & BREW COFFEE MAKER PRODUCT BENEFITS
Fresh Brew Timer
After the brew cycle is complete, the time since brewed will be displayed in 1-minute increments. This information will be in place of the digital clock during keep warm.
2-in-1 Grinder and
Permanent Filter Basket
Whole coffee beans are ground and brewed in the same grinder assembly, allowing for fast brewing and easy clean-up.
Eco-Friendly Permanent Filter
The high-performance Bronze Tone permanent filter eliminates the need for paper filters and minimizes any coffee staining appearance.
The washable brew basket can easily be removed and washed after brewing, and is top rack dishwasher safe.
Removable Showerhead
The coffeemaker's showerhead is removable for easy cleaning.
Auto Brew
The programmable Auto Brew delay start allows you to set the 24-hour timer to brew coffee at the selected time, day or night.
Digital Clock with Backlighting
The LCD display features a programmable digital clock and backlighting for easy-viewing in low light conditions.
Adjustable Auto-Shutoff
This feature allows you to select automatic shutoff times from 0-2 hours in 30 minute increments. The “Keep Hot” carafe plate will be activated until the automatic shutoff time is reached.
Brew Strength Selector
Customize the flavor of your coffee by selecting from three brew strength settings: regular, strong, or bold.
Sneak-A-Cup™
Can't wait for the full pot of coffee to finish brewing? Sneak-A-Cup™ of coffee before brewing using this great feature, which stops the flow of coffee into your carafe. Replace the carafe back in the coffee maker within 15 seconds to prevent brew basket overflow.
Grind Select
Cycles through optimal grind settings (4, 6, 8, 10, 12) correlating with the number of cups to be brewed, or turns the grinder OFF for brewing pre-ground coffee.
Duralife™ Glass Carafe
Durable construction provides an extended carafe life. Water level markings make for easy filling and pouring.
Non-stick "Keep Hot" Carafe Plate
This feature allows you to keep your carafe of coffee hot after brewing until the selected auto-shutoff time has been reached.
Easy Viewing Water Window
The water window shows the amount of water in the reservoir for easy and accurate filling.
Cord Storage
Keep excess cord out of the way and your countertop neat with simple cord storage.
GETTING TO KNOW YOUR CONTROL PANEL
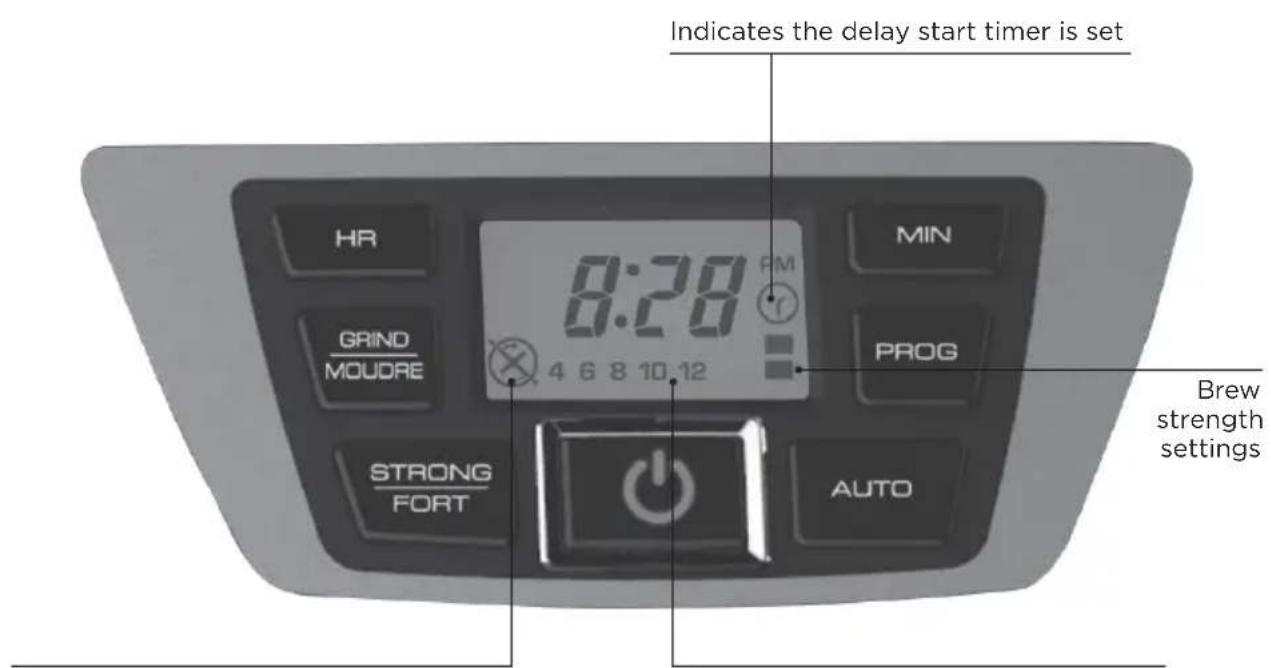
Indicates if the whole bean grinder function has been turned OFF (✗) or ON (✗)
Optimal grind setting correlating with the number of cups to be brewed
Clock / Backlit LCD Display
Power ⏻: Turns the unit ON or OFF.
AUTO: Turns on the Auto Brew delayed start.
PROG (Program): Auto Brew, press and release button once. Keep Warm, press and hold.
HR (Hour): Use to program the clock (see "Programming" section).
MIN (Minute): Use to program the clock (or cycle through different keep warm settings when in that program mode to adjust "Keep Warm" time.)
GRIND: Cycles through optimal grind settings (4, 6, 8, 10, 12) correlating with the number of cups to be brewed. Also, turns the grinder OFF (Q) for brewing pre-ground coffee.
STRONG: Use to select the Brew Strength setting (3 levels)
No bars = regular (default setting)
1 bar (■) = strong
2 bars (■) = bold
BEFORE BREWING
- Carefully unpack your coffeemaker, removing all packaging materials, labels, and/or stickers from your coffeemaker.
-
Clean your coffeemaker thoroughly before using for the first time. Wash the Glass Carafe, Washable Brew Basket, 2-in-1 Grinder and Permanent Filter Basket, and Removable Showerhead in warm, soapy water. Rinse and dry, then place back into your coffeemaker.
-
Clean the inside of your coffeemaker by running two full brewing cycles with water only, no coffee.
a. Pour fresh, cold water into the water reservoir up to the 12-cup MAX mark, then place carafe on the warming plate.
b. Plug cord into standard electrical outlet.
c. Press the GRIND button until you reach the symbol to turn the grinder OFF( )
d. Push the ON-OFF / Power Button to immediately brew water through the coffeemaker without adding coffee.
e. Once the cycle is finished, discard water and rinse out the 2-in-1 Grinder and Permanent Filter Basket.
f. Turn off appliance, unplug and allow to cool down for 15 minutes before repeating.
PROGRAMMING YOUR MILL & BREW COFFEE MAKER
Note: The first button press illuminates the backlit display and any subsequent presses will perform the programming.
Setting the Digital Clock
- Plug the coffeemaker into a standard electrical outlet.
- The digital clock display flashes "12:00".
- To set the time, press the HR button until the correct hour appears on the display. The "PM" symbol will appear in the upper right corner of the digital display for PM time settings.
- Press the MIN button to select minutes.
Note: If the unit is unplugged or power interrupted, the time will need to be reset, as will the Auto Brew delay start time.
Setting the Auto Brew Delay Start
The programmable Auto Brew delay start allows you to set the 24-hour timer to brew coffee at the selected time, day or night. To activate the Auto Brew timer, follow the steps on the next page
PROGRAMMING YOUR MILL & BREW COFFEE MAKER
- After the digital clock is set, press the PROG button. The timer icon ( ) will begin to flash and display will read 12:00.
- Press the HR button and then MIN button to select the time you would like automatic brewing to begin (for example: 7:30 AM). Make sure the PM light is not on, if needed.
- The timer display will flash several times then switch back to the current time of day.
- Press and release the AUTO button to activate the delay start time that was just programmed. The timer icon ( ) will remain solid, indicating Auto Brew is activated.
- When the time of day matches the programmed Auto Brew set time, your coffeemaker will activate the brew cycle.
- To cancel the Auto Brew function, press the AUTO button until the timer icon ( ) disappears.
Note: To check the preset Auto Brew time, press PROG button and the preset Auto Brew time is displayed. Press AUTO button to reactivate the timer.
Setting the Adjustable Auto-off, Keep Warm Time
This feature allows you to select automatic shutoff times from 0-2 hours in 30 minute increments. The “Keep Hot” carafe plate will be activated until the automatic shutoff time is reached.
- Press and hold PROG button for 3 seconds. This will show the default (120 minutes) keep warm time setting.
- Press the MIN button to toggle through the keep warm settings (00, 30, 60, 90, 120). The values correlate to length of time (in minutes) the keep warm will remain on after brewing.
- Press the PROG button to lock in the keep warm setting.
Note: To check the time Auto Brew is set for without making changes, press the PROG button to display the Auto Brew time, then press the AUTO button."
Setting the Brew Strength Selector
The Brew Strength Selector customizes the flavor of your coffee by selecting from three brew strength settings.
- Press the STRONG button to cycle through the different Brew Strength settings (3 levels).
a. No bars = regular (default setting)
b. 1 bar (■) = strong
c. 2 bars (■) = bold
4 ELEMENTS TO BREW THE PERFECT CUP

Water Quality
A great cup of coffee starts with fresh, quality water. Since water represents more than 98% of brewed coffee, it is just as important as the coffee quality itself. The water you use should taste like fresh, good-quality drinking water, have an odorless aroma, and contain no visible impurities.

Coffee Freshness
A truly fresh cup of coffee only comes from freshly ground coffee beans. In fact, once a coffee bean is broken or ground, its flavor will begin to degrade over time. Your Mill & Brew coffee maker maximizes the freshness of your coffee by grinding the coffee beans just prior to brewing.

Grind Selection
The particle size of the coffee grind is vital for ensuring proper flavor and extraction. A coffee grind that is too coarse will allow water to pass through too quickly without proper extraction. A coffee grind that is too fine will lead to over-extraction and produce a bitter taste. Your Mill & Brew coffee maker comes with a Grind setting to select the optimal grind, correlating with the number of cups to be brewed and ensuring proper grind size for this type of coffee maker.

Proper Proportion
It is important to use the proper coffee-to-water ratio to produce a finished brew that isn't too strong or weak. When using whole coffee beans or pre-ground coffee, we recommend using 1 tablespoon for every 1 cup of brewed coffee. This proportion may be adjusted to suit your individual taste, or try the Brew Strength Selector to customize your flavor!
- To maximize the freshness of your coffee, use the integrated grinder to grind your coffee beans just before brewing.
- When brewing whole bean coffee, use the Grind setting to select the optimal grind, correlating with the number of cups to be brewed and ensuring proper grind size.
- The coffee grinder is intended for coffee beans only. Do not grind other food products or spices in the coffee grinder.
• Always use fresh, cold, clean water in your coffee maker. The water you use should have an odorless aroma and contain no visible impurities. -
Use spring water or filtered water, not distilled water which lacks the minerals necessary to bind to elements of the coffee bean.
-
A clean coffee maker is always important. Regular cleaning is required for the best tasting coffee.
• Always store your coffee in a cool, dry place. Once coffee has been opened, keep it tightly sealed in an airtight container. - Do not refrigerate or freeze your daily supply of coffee, as contact with moisture will cause the coffee to deteriorate.
- Never re-use your coffee grounds. After brewing, the desirable coffee flavors have been extracted and only the bitter flavors remain.
- Brewed coffee should be enjoyed immediately! Allowing coffee to sit too long and reheating coffee will impact the flavor.
- Smell the aroma of your freshly brewed coffee, and remember that every sip is meant to be savored and enjoyed!
BREWING COFFEE
-
Fill the carafe with the desired amount of fresh, cold water and pour into the water reservoir. Do not fill with more than 12 cups of water.
-
Close the water reservoir cover and place the carafe on the Keep Hot carafe plate.
-
(a) Open the grinder lid using the lift latch and (b) add the desired amount of coffee into the 2-in-1 Grinder and Permanent Filter.

-
Secure the integrated grinder lid back into place. Push the lid cover down until it snaps into place or until you hear a click. The coffee maker will not operate without the lid being closed, all grinder assembly parts in place, and the removable showerhead in place.
-
Make sure the coffee maker is plugged into a standard electrical outlet.
-
(a) If using whole beans, push the GRIND button to cycle through and select the optimal grind setting (4, 6, 8, 10, 12) correlating with the number of cups to be brewed.

natural_image
Close-up of a kitchen blender with digital display and water pouring (no visible text or symbols)
natural_image
Close-up of a black motorcycle body with a handle and a small tool, labeled 3a and 3b (no visible text or symbols on the body itself)
natural_image
Close-up of a mechanical component with a circular opening and internal features (no visible text or symbols)
BREWING COFFEE
6( b) If using ground coffee, push the GRIND button to cycle through the grind settings until you reach the symbol to turn the grinder OFF for brewing pre-ground coffee.
- To set the Auto Brew delay start, adjustable auto-off, and Brew Strength Selector, follow the detailed instructions in the "Programming your Mill & Brew" coffee maker section.
- Press the ON-OFF/Power Button just once to begin the brew cycle. If using whole beans, the brew cycle will automatically start after grinding.
- The Sneak-A-Cup™ feature allows you to pour a cup of coffee before the brewing cycle is complete. The carafe must be placed back into the coffeemaker within 15 seconds to prevent overflow. Replacing the carafe will restart the brewing process.
- Once the coffee grounds are cool, empty your brew basket and rinse after each brewing cycle just like a regular permanent filter.


natural_image
Exterior view of a modern office building (no signage)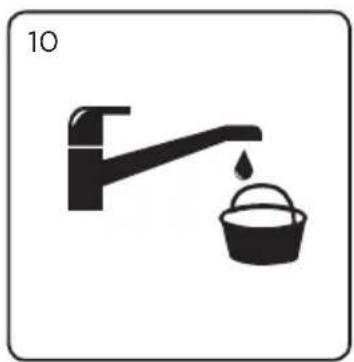
natural_image
Simple line drawing of a faucet with a bucket and water drop symbol (no text or labels)CARE AND CLEANING
Cleaning your coffee maker, following the directions below is recommended after every use. This product contains no user serviceable parts.
Cleaning
- Make sure your coffee maker is turned OFF, unplugged and allow to cool.
- Wipe the outside of your coffee maker and carafe warming plate with a soft, damp cloth.
- Remove the Washable Brew Basket and 2-in-1 Grinder and Permanent Filter Basket, and discard the coffee grounds.
- Wash the Removable Showerhead and 2-in-1 Grinder and Permanent Filter Basket by hand in warm water and dish soap.
- Wash the glass carafe and Washable Brew Basket either by hand in warm water with dish soap, or in the dishwasher (top rack only).
- To clean the inside of the cover and inside of the grinder assembly, open the cover, leave in the open position, and wipe with a damp cloth.
Note: Do not use abrasive cleansers or scouring pads, and never immerse the coffee maker housing or power cord in water.
| COFFEEMAKER PART CLEANING INSTRUCTIONS | |
| HousingCarafe Warming PlatePower Cord | Wipe with a soft, damp cloth. |
| Removable Showerhead2-in-1 Grinder andPermanent Filter Basket | Wash by hand in warmsoapy water. |
| Carafe and carafe lidWashable Brew Basket | Wash by hand in warm soapywater, or in the dishwasher(top rack only). |
CARE AND CLEANING
Descaling with Vinegar
With regular use, minerals and hard water can clog your coffee maker. A full cleaning with vinegar is recommended once a month.
- Pour white vinegar into the water reservoir up to the 6-cup mark on the water window. Add fresh, cold water up to the 10-cup mark.
- Put the 2-in-1 Grinder and Permanent Filter and Washable Brew Basket into the Mill & Brew™ Assembly and close the cover. Set empty carafe on the “Keep Hot” carafe plate.
- Push the GRIND button to cycle through the grind settings until you reach the symbol to turn the grinder OFF ( ) ☒
- Push the ON-OFF / Power Button and let half the cleaning mixture brew into the carafe (until level is around 5-cup mark). Turn OFF coffee maker and let it soak for at least 15 minutes.
- Turn ON coffee maker again and brew remaining cleaning mixture into carafe.
- Turn OFF coffee maker and empty the carafe.
- Fill the water reservoir with cold water to the 11-cup line; replace carafe on the carafe plate and then turn ON coffeemaker for a complete brewing cycle to flush out remaining cleaning mixture. Repeat this step to completely remove the vinegar smell/taste.
- Wash the Removable Showerhead, Washable Brew Basket, 2-in-1 Grinder and Permanent Filter Basket, and glass Carafe as instructed in the Care and Cleaning Table.
TROUBLESHOOTING
| PROBLEM POSSIBLE CAUSE SOLUTION | ||
| Coffee maker does not turn on. | Coffee maker is not plugged in. | Make sure appliance is plugged into a working outlet. |
| Coffee maker is leaking. | Water reservoir may be overfilled. | Make sure water reservoir has not been filled beyond the 12-cup MAX line. |
| Carafe may not be correctly placed on the “Keep Hot” carafe plate | Make sure carafe is placed correctly on the “Keep Hot” carafe plate. | |
| The brew basket overflows. | The carafe has been removed for longer than 15 seconds when using the Sneak-A-CupTM feature. | Make sure to replace the carafe within 15 seconds during the brewing cycle. |
| Excessive amount of coffee is used. | Reduce the amount of coffee used to eliminate brew basket overflows. | |
| The coffee has been ground too finely. | Adjust the grind setting, cup selection, to a lower cup setting. | |
 | The brew basket Sneak-A-CupTM mushroom may be clogged with coffee grounds. | Free the brew basket of coffee grounds by pushing the mushroom shaped Sneak-A-CupTM part up and down during rinsing. |
| Coffee sediment in brewed cup of coffee. | Coffee grounds are small enough to pass through the permanent filter. | While it is normal to see some coffee sediment when using a permanent filter, a coarser grind can reduce the amount of sediment. |
| The coffee maker brews slowly. | The coffee maker needs cleaning. | Follow the instructions in the “Descaling with Vinegar” section on page 14. |
| Grinder does not turn on | Grinder overheated Let cool | 15 minutes and unplug unit for at least 30 seconds to reset fuse. |
If additional assistance is needed, please contact our consumer service team at 1-800-465-6070.
WARRANTY AND CUSTOMER SERVICE INFORMATION
For service, repair or any questions regarding your appliance, call the appropriate 800 number listed within this section. Please DO NOT return the product to the place of purchase. Also, please DO NOT mail product back to manufacturer, nor bring it to a service center. You may also want to consult the website listed on the cover of this manual.
Two-Year Limited Warranty (Applies only in the United States and Canada)
What does it cover?
- Any defect in material or workmanship provided; however, Spectrum Brands, Inc.'s liability will not exceed the purchase price of product.
For how long?
- Two years from the date of original purchase with proof of purchase.
What will we do to help you?
- Provide you with a reasonably similar replacement product that is either new or factory refurbished.
How do you get service?
- Save your receipt as proof of date of sale.
- Visit the online service website at www.prodprotect.com/blackanddecker, or call toll-free 1-800-465-6070, for general warranty service.
- If you need parts or accessories, please call 1-800-738-0245.
What does your warranty not cover?
- Damage from commercial use
- Damage from misuse, abuse or neglect
- Products that have been modified in any way
- Products used or serviced outside the country of purchase
- Glass parts and other accessory items that are packed with the unit
- Shipping and handling costs associated with the replacement of the unit
- Consequential or incidental damages (Please note, however, that some states do not allow the exclusion or limitation of consequential or incidental damages, so this limitation may not apply to you.)
How does state law relate to this warranty?
- This warranty gives you specific legal rights. You may also have other rights that vary from state to state or province to province.
TABLA DE CONTENIDOS
natural_image
Close-up of a kitchen appliance with digital display and water pouring (no visible text or symbols)
natural_image
Close-up of a mechanical device with labeled parts 3a and 3b, showing no visible text or symbols.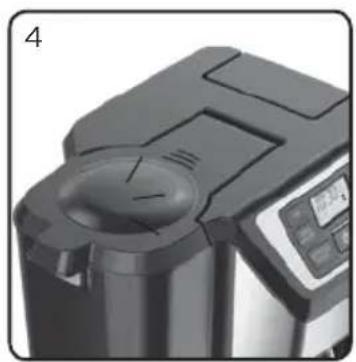
natural_image
Close-up of a black industrial kitchen appliance with a circular lid and control panel (no visible text or symbols)
PREPARACIÓN DE CAFÉ
natural_image
Close-up of a modern office chair with a glass door handle (no visible text or symbols)10

natural_image
Simple black-and-white illustration of a faucet with a bucket and water droplet (no text or symbols)CUIDADO Y LIMPIEZA
C.A.B.A. - Argentina
Chile
Col. Centro, Cuauhtemoc,
México, D.F.
Tel. 01 800 714 2503
Nicaragua
LRM ELECTRONICA
Managua - Sinsa Altamira 1.5
kilómetros al norte
Nicaragua
Tel. (505) 2270-2684
Panamá
Supermarcas
City Market Nivel Plaza Local 153
Diagonal Hotel Melia,
Caracas.
Tel. (582) 324-0969
PÓLIZA DE GARANTÍA
Auto : Turns on the Auto Brew delayed start.
natural_image
Close-up of a digital kitchen appliance with a glass pouring liquid from a container (no visible text or symbols)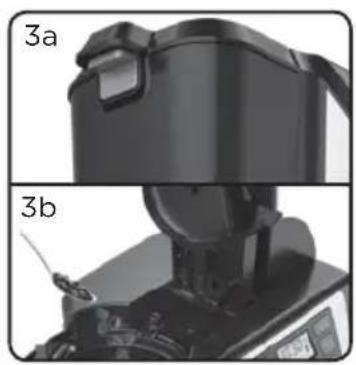
natural_image
Two-panel image showing a device with a cylindrical component and a tool, labeled 3a and 3b (no readable text or symbols)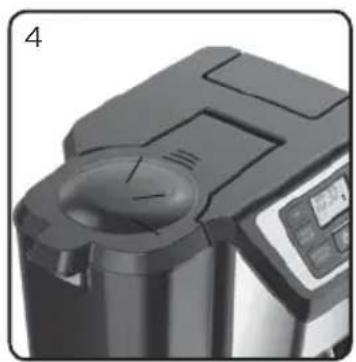
natural_image
Close-up of a black industrial kitchen or oven with a circular vent and control panel (no visible text or symbols)
INFUSION DU CAFÉ
natural_image
Close-up of a mechanical device with a handle and glass bowl (no visible text or symbols)10
natural_image
Simple black-and-white illustration of a faucet with a bucket pouring liquid (no text or symbols)ENTRETIEN ET NETTOYAGE
natural_image
Black and white photo of a glass mug filled with dark beverage, no text or symbols visibleBLACK+DECKER and the BLACK+DECKER logos and product names are trademarks of The Black & Decker Corporation, used under license. All rights reserved.
All other marks are Trademarks of Spectrum Brands, Inc.

- CONTENTS
- WARNING
- IMPORTANT SAFEGUARDS.
- SAVE THESE INSTRUCTIONS.
- This product is for household use only.
- POLARIZED PLUG (120V models only)
- TAMPER-RESISTANT SCREW
- ELECTRICAL CORD
- GETTING TO KNOW YOUR MILL & BREW COFFEE MAKER
- MILL & BREW COFFEE MAKER PRODUCT BENEFITS
- Fresh Brew Timer
- 2-in-1 Grinder and
- Permanent Filter Basket
- Eco-Friendly Permanent Filter
- Removable Showerhead
- Auto Brew
- Digital Clock with Backlighting
- Adjustable Auto-Shutoff
- Brew Strength Selector
- Sneak-A-Cup™
- Grind Select
- Duralife™ Glass Carafe
- Non-stick "Keep Hot" Carafe Plate
- Easy Viewing Water Window
- Cord Storage
- GETTING TO KNOW YOUR CONTROL PANEL
- Clock / Backlit LCD Display
- BEFORE BREWING
- PROGRAMMING YOUR MILL & BREW COFFEE MAKER
- Setting the Digital Clock
- Setting the Auto Brew Delay Start
- Setting the Adjustable Auto-off, Keep Warm Time
- Setting the Brew Strength Selector
- ELEMENTS TO BREW THE PERFECT CUP
- Water Quality
- Coffee Freshness
- Grind Selection
- Proper Proportion
- BREWING COFFEE
- CARE AND CLEANING
- Cleaning
- Descaling with Vinegar
- TROUBLESHOOTING
- WARRANTY AND CUSTOMER SERVICE INFORMATION
- Two-Year Limited Warranty (Applies only in the United States and Canada)
- What does it cover?
- For how long?
- What will we do to help you?
- How do you get service?
- What does your warranty not cover?
- How does state law relate to this warranty?
- TABLA DE CONTENIDOS
- PREPARACIÓN DE CAFÉ
- CUIDADO Y LIMPIEZA
- Chile
- Nicaragua
- Panamá
- PÓLIZA DE GARANTÍA
- INFUSION DU CAFÉ
- ENTRETIEN ET NETTOYAGE
Brand : BLACK & DECKER
Model : Mill & Brew CM5000BD
Category : Coffee machine