DOC30P977DS - Microwave Oven Dacor - Free user manual and instructions
Find the device manual for free DOC30P977DS Dacor in PDF.



| Product Type | Built-in Combination Microwave Oven |
| Brand | Dacor |
| Model | DOC30P977DS |
| Main Functions | Microwave, Convection, Grill, Convection Sear, Quick Grill, Automatic Cooking (44 programs), Defrost (4 programs), Sensor Cooking (16 options), Healthy Cooking (26 programs), Air Fry, Steam Cooking, Steam Roast, Steam Rise, GreenClean Steam Cleaning, Pyrolytic Self-Cleaning |
| Cooking Type | Microwave, Convection, Combination Microwave+Convection, Grill, Combination Microwave+Grill |
| Convection Temperature Range | 100°F to 450°F (40°C to 230°C) |
| Microwave Power Levels | 10% to 100% (in 10% increments) |
| Timer | Up to 23h59min59s, with customizable name |
| Control Lock | Yes (activate by pressing and holding SETTINGS) |
| Lighting | Door LED, interior halogen lamp |
| Included Accessories | Guide ring, large turntable, tray, low rack, high rack, temperature probe, metal grid, 2 sliding grids |
| Water Tank | Yes, 22 oz (650 ml) capacity for steam functions |
| Cleaning | GreenClean Steam Cleaning, Pyrolytic Self-Cleaning |
| Safety | Automatic shut-off, door lock, steam detection, child lock |
| Installation | Built-in |
| Warranty | 1 year parts and labor (USA and Canada) |
| Customer Service | Dacor, phone 833-35-ELITE (833-353-5483) |
| Weight | Not specified |
| Dimensions (W x H x D) | Not specified |
| Electrical Supply | Not specified (must be grounded) |
| Country of Manufacture | Not specified |
Frequently Asked Questions - DOC30P977DS Dacor
User questions about DOC30P977DS Dacor
0 question about this device. Answer the ones you know or ask your own.
Ask a new question about this device
Download the instructions for your Microwave Oven in PDF format for free! Find your manual DOC30P977DS - Dacor and take your electronic device back in hand. On this page are published all the documents necessary for the use of your device. DOC30P977DS by Dacor.
USER MANUAL DOC30P977DS Dacor
Built-In Microwave Combi Oven
DOC30P977D*

To Our Valued Customer:
Congratulations on your purchase of the very latest in Dacor products! Our unique combination of features, style and performance make us The Life of the Kitchen™, and a great addition to your home.
In order to familiarize yourself with the controls, functions and full potential of your new Dacor Appliance, read this use and care manual thoroughly, beginning with the Important Safety Instructions section.
All Dacor appliances are designed and manufactured with quality and pride, while working within the framework of our company value. Should you ever experience a problem with your product, please first check the Troubleshooting section of this manual for guidance. It provides useful suggestions and remedies prior to calling for service.
Valuable customer input helps us to continuously improve our products and services, so please feel free to contact our Customer Service Team for assistance with any of your product support needs.
Dacor Customer Service Team
14425 Clark Avenue
City of Industry, CA 91745
Telephone: 833-35-ELITE (833-353-5483), USA and Canada
Fax: (626) 403-3130
Hours of Operation: Monday through Friday 5:00 A.M. to 5:00 P.M. Pacific Time
Website: www.Dacor.com
Thank you for choosing Dacor for your home. We are a company built by families for families, and we are dedicated to serving yours. We are confident that your new Dacor product will deliver a high level of performance and enjoyment for many years to come.
Sincerely,
The Dacoon Customer Service Team
2 English
Regulatory Notice
PRECAUTIONS TO AVOID POSSIBLE EXPOSURE TO EXCESSIVE MICROWAVE ENERGY
A. Do not attempt to operate this microwave oven with the door open since open-door operation can result in harmful exposure to microwave energy. It is important not to defeat or tamper with the safety interlocks.
B. Do not place any object between the oven front face and the door or allow soil or cleaner residue to accumulate on the sealing surface.
C. Do not operate the microwave oven if it is damaged. It is particularly important that the oven door close properly and that there is no damage to the:
1) Door (bent).
2) Hinges and latches, (broken or loosened).
3) Door seals and sealing surface.
D. The microwave oven should not be adjusted or repaired by anyone except properly qualified service personnel.
1. FCC Notice
CAUTION
FCC CAUTION: Any changes or modifications not expressly approved by the party responsible for compliance could void the user's authority to operate the equipment. This device complies with Part 15 of FCC Rules. Operation is Subject to following two conditions:
1) This device may not cause harmful interference, and
2) This device must accept any interference received including interference that cause undesired operation.
For products sold in the US and Canadian markets, only channels 1~11 are available. You cannot select any other channels.
FCC STATEMENT:
This equipment has been tested and found to comply within the limits for a Class B digital device, pursuant to part 15 of the FCC Rules. These limits are designed to provide reasonable protection against harmful interference in a residential installation.
This equipment generates, uses, and can radiate radio frequency energy and, if not installed and used in accordance with the instructions, may cause harmful interference to radio communications. However, there is no guarantee that interference will not occur in a particular installation.
Regulatory Notice
If this equipment does cause harmful interference to radio or television reception, which can be determined by turning the equipment off and on, the user is encouraged to try to correct the interference by one or more of the following measures:
Reorienting or relocating the receiving antenna
- Increasing the separation between the equipment and receiver
- Connecting the equipment to an outlet that is on a different circuit than the radio or TV
- Consulting the dealer or an experienced radio/TV technician for help.
FCC RADIATION EXPOSURE STATEMENT:
This equipment complies with FCC radiation exposure limits set forth for an uncontrolled environment. This equipment should be installed and operated so there is at least 8 inches (20 cm) between the radiator and your body. This device and its antenna(s) must not be co-located or operated in conjunction with any other antenna or transmitter.
2. IC Notice
The term "IC" before the radio certification number only signifies that Industry Canada technical specifications were met. Operation is subject to the following two conditions: (1) this device may not cause interference, and (2) this device must accept any interference, including interference that may cause undesired operation of the device.
This Class B digital apparatus complies with Canadian ICES-003. For products sold in the US and Canadian markets, only channels 1~11 are available. You cannot select any other channels.
IC RADIATION EXPOSURE STATEMENT:
This equipment complies with IC RSS-102 radiation exposure limits set forth for an uncontrolled environment. This equipment should be installed and operated so there is at least 8 inches (20 cm) between the radiator and your body. This device and its antenna(s) must not be co-located or operated in conjunction with any other antenna or transmitter.
Contents
Important safety instructions 6
Introducing your new oven 20
Overview
What's included with your oven 20
Before you begin 21
Energy saving tips 21
Optitray (For microwave oven) 21
Water reservoir 22
Basic operations 23
Control panel 23
Setting the temperature 23
Control lockout 24
Kitchen timer 24
Microwave oven (Upper Oven) 26
Setting the power level 26
Timed cooking 26
Microwave 27
Convection Scar 28
Braill 29
Speed Conv.Sear 29
Speed broil 30
Auto cook 31
Defrost 36
Sense Cook 37
Healthy Choice 40
Healthy Fry 43
Conv.Sear AutoCook 44
Oven (Lower Oven) 47
Timed cooking 47
Delay start 47
Using the temp probe 48
Oven functions 50
Using the Chef Mode feature 55
Using the iQ control feature 56
Using the oven racks 57
Using the gliding rack 59
Using the clean feature 60
settings 65
Using the sabbath feature 67
Care and maintenance 69
Care and cleaning of the oven 69
Removing the oven doors 71
Replacing the oven doors 72
Changing the oven light 73
Troubleshooting 74
Control Display 74
For the Microwave Oven 74
For the Lower Oven 78
Information codes 80
Warranty and Service 81
Getting Help 81
Warranty 81
Appendix 83
Open Source Announcement 83
Important safety instructions
Read and follow all instructions before using your oven to prevent the risk of fire, electric shock, personal injury, or damage when using the oven. This guide does not cover all possible conditions that may occur. Always contact your service agent or the manufacturer about problems that you do not understand.
WHAT YOU NEED TO KNOW ABOUT SAFETY INSTRUCTIONS
Warnings and important safety instructions in this manual do not cover all possible conditions and situations that may occur. It is your responsibility to use common sense, caution, and care when installing, maintaining, and operating your oven.
Important safety symbols and precautions
What the icons and signs in this user manual mean:
WARNING
Hazards or unsafe practices that may result in severe personal injury or death.
CAUTION
Hazards or unsafe practices that may result in minor personal injury or property damage.
SAVE THESE INSTRUCTIONS
6 English

CAUTION
To reduce the risk of fire, explosion, electric shock, or personal injury when using your oven, follow these basic safety precautions.
Do NOT attempt.
Do NOT disassemble.
Do NOT touch.
Follow directions explicitly.
Unplug the power plug from the wall socket.
Make sure the machine is grounded to prevent electric shock.
Call a Dacor service center for help.
Note
These warning signs are here to prevent injury to you and others. Please follow them explicitly.
After reading this section, keep it in a safe place for future reference.
Important safety instructions (Microwave Oven)
CALIFORNIA PROPOSITION 65 WARNING
WARNING
Cancer and Reproductive Harm - www.P65Warnings.ca.gov.
WARNING
To reduce risk of burns, electric shock, fire, personal injury or exposure to excessive microwave energy:
- Read all safety instructions before using the appliance.
- Read and follow the specific "PRECAUTIONS TO AVOID POSSIBLE EXPOSURE TO EXCESSIVE MICROWAVE ENERGY" on page 3.
- This appliance must be grounded. Connect only to properly grounded outlets. See important "GROUNDING INSTRUCTIONS" on page 8 of this manual.
- Install or locate this appliance only in accordance with the provided installation instructions.
- Some products such as whole eggs and sealed containers (for example, closed glass jars) can explode if heated rapidly. Never heat them in a microwave oven.
- Use this appliance only for its intended use as described in the manual. Do not put corrosive chemicals or vapors in or on this appliance. This type of microwave oven is specifically designed to heat, cook, or dry food. It is not designed for industrial or laboratory use.
- As with any appliance, close supervision is necessary when it is used by children. Keep children away from the door when opening or closing it as they may bump themselves on the door or catch their fingers in the door.
-
Do not operate this appliance if it has a damaged cord or plug, if it is not working properly, or if it has been damaged or dropped.
-
This appliance should be repaired or serviced only by qualified service personnel. Contact the nearest authorized service facility for examination, repair, or adjustment.
- Do not cover or block any openings in the appliance.
- Do not tamper with or make any adjustments or repairs to the door.
- Do not store this appliance outdoors. Do not use this product near water, for example, near a kitchen sink, in a wet basement, near a swimming pool, or similar locations.
- Do not immerse the cord or plug in water.
- Keep the cord away from heated surfaces (including the back of the oven).
- Do not let the cord hang over edge of table or counter.
- When cleaning surfaces of the door and oven that come together when the door closes, use only mild, nonabrasive soaps, or detergents applied with a sponge or soft cloth. Unplug the plug before cleaning the unit.
-
To reduce the risk of fire in the oven cavity:
-
Do not overcook food. Carefully attend appliance when paper, plastic, or other combustible materials are placed inside the oven to facilitate cooking.
-
Remove wire twist-ties from paper or plastic bags before placing the bags in the oven.
-
If materials inside the oven ignite, keep the oven door closed, turn the oven off, and disconnect the power cord, or shut off the power at the fuse or circuit breaker panel. If the door is opened, the fire may spread.
- Do not use the cavity for storage purposes. Do not leave paper products, cooking utensils, or food in the cavity when not in use.
SAVE THESE INSTRUCTIONS
Important safety instructions
- Liquids, such as water, milk, coffee, or tea can be overheated beyond the boiling point without appearing to be boiling. Visible bubbling or boiling when the container is removed from the microwave oven is not always present. THIS COULD RESULT IN VERY HOT LIQUIDS SUDDENLY BOILING OVER WHEN THE CONTAINER IS DISTURBED OR A SPOON OR OTHER UTENSIL IS INSERTED INTO THE LIQUID. To reduce the risk of injury:
Do not overheat liquid.
- Stir liquid both before and halfway through heating it.
Do not use straight-sided containers with narrow necks.
After heating, let containers with liquid stand in the microwave oven for a short time before removing.
- Use extreme care when inserting a spoon or other utensil into a container holding liquid.
- Oversized foods or oversized metal utensils should not be inserted into the microwave oven as they may create a fire or electric shock.
- Do not clean with metal scouring pads. Pieces can burn off the pad and touch electrical parts creating a risk of electric shock.
- Do not store any materials, other than manufacturer's recommended accessories, in this microwave oven when not in use.
- Do not cover the racks or any other part of the microwave oven with metal foil. This will cause overheating of the oven.
GROUNDING INSTRUCTIONS
This appliance must be grounded. In the event of an electrical short circuit, grounding reduces the risk of electric shock by providing an escape wire for the electrical current. This appliance is equipped with a cord that includes a grounding wire and a grounding plug. The plug must be plugged into an outlet that is properly installed and grounded.
WARNING
Improper use of the grounding plug can result in a risk of electric shock.
- Plug into a grounded 3 prong outlet. Do not remove the third (grounding) prong. Do not use an adaptor or otherwise defeat the grounding plug.
- Consult a qualified electrician or service person if you do not understand the grounding instructions or if you are not sure if the appliance is properly grounded.
- We do not recommend using an extension cord with this appliance. If the power-supply cord is too short, have a qualified electrician or serviceman install an outlet near the appliance. However, if it is necessary to use an extension cord, read and follow the "Use of Extension Cords" section below.
USE OF EXTENSION CORDS
A short power-supply cord is provided to reduce the risk of your becoming entangled in or tripping over a longer cord. Longer cord sets or extension cords are available and you can use them if you exercise care. If you use a long cord or extension cord:
- The marked electrical rating of the cord set or extension cord should be at least as great as the electrical rating of the appliance.
- The extension cord must be a grounding-type 3-wire cord and it must be plugged into a 3-slot outlet.
- The longer cord should be arranged so that it will not drape over the counter top or tabletop where it can be pulled on by children or tripped over accidentally. If you use an extension cord, the interior light may flicker and the speed of the blower may vary when the microwave oven is on. Cooking times may be longer too.
SAVE THESE INSTRUCTIONS
8 English
Important safety instructions (Oven)
FOR YOUR SAFETY
When using electrical appliances, you should follow basic safety precautions, including the following:
CAUTION
- Use this appliance only for its intended purpose as described in this Owner's Manual.
- Potentially hot surfaces include the oven vent opening, surfaces near the opening, and crevices around the oven door.
Proper Installation - Be sure your appliance is properly installed and grounded by a qualified technician.
User servicing - Do not repair or replace any part of the appliance unless specifically recommended in this manual. All other servicing should be referred to a qualified technician.
Always disconnect the power to the appliance before servicing by removing the fuse or switching off the circuit breaker.
Do not enter the oven.
- Do not leave children alone. Never leave children alone or unattended in an area where this appliance is in use. They should never be allowed to sit or stand on any part of the appliance.
- Never use your appliance for warming or heating the room.
- Do not use water on grease fires. Turn off the oven to avoid spreading the flames. Smother the fire or flames by closing the door or use a dry chemical, baking soda, or foam-type extinguisher.
- Avoid scratching or striking the glass doors and the control panel. Doing so may lead to glass breakage. Do not cook on a product with broken glass. Shock, fire, or cuts may occur.
SAVE THESE INSTRUCTIONS
Important safety instructions
If there is a fire in the oven during self-cleaning, turn the oven off and wait for the fire to go out. Do not force the door open. The introduction of fresh air at self-cleaning temperatures may lead to a burst of flame from the oven. Failure to follow these instructions may result in severe burns.
- If the oven is heavily soiled with oil, self-clean the oven before using the oven again. Leaving the oil in place creates a risk of fire.
- Wipe up heavy soil on the oven bottom with a paper towel or rag before self-cleaning. Self-cleaning the oven when there is heavy soil on the oven bottom requires longer cleaning cycles and produces more smoke.
Storage in or on the appliance. Do not store flammable materials in the oven or near the surface units. Be sure all packing materials are removed from the appliance before operating it. Keep plastics, clothes, and paper away from parts of the appliance that may become hot.
- Wear proper apparel. Never wear loose-fitting or hanging garments while using the appliance.
Use only dry potholders. Placing moist or damp potholders on hot surfaces may result in burns from steam. Do not let the potholder touch hot heating elements. Do not use a towel or other bulky cloth instead of a potholder.
- Teach children not to play with the controls or any other part of the oven.
- For your safety, do not use high-pressure water cleaners or steam jet cleaners to clean any part of the oven.
If the power cord is damaged, it must be replaced by the manufacturer, its service agent, or similarly qualified persons to avoid creating a hazard. - The appliance is not intended for use by persons (including children) with reduced physical, sensory or mental capabilities, or lack of experience and knowledge, unless they have been given supervision or instruction concerning use of the appliance by a person responsible for their safety.
SAVE THESE INSTRUCTIONS
10 English
Important safety instructions (Oven)
ELECTRICAL SAFETY

- Use only the factory installed flexible power cord to connect to the power supply. Do not use a 3rd party power supply cord kit.
- The appliance should be serviced only by qualified service personnel. Repairs carried out by unqualified individuals may cause injury or a serious malfunction. If your appliance is in need of repair, contact a Dacor authorized service center. Failure to follow these instructions may result in damage and void the warranty.
- Flush - mounted appliances may be operated only after they have been installed in cabinets and workplaces that conform to the relevant standards. This ensures that the appliances are installed in compliance with the appropriate safety standards.
If your appliance malfunctions or if fractures, cracks, or splits appear:
Switch off the oven.
Unplug the oven from the AC wall outlet.
Contact your local Dacor service center.
WARNING
- Ensure that the appliance is switched off before replacing the lamp to avoid the possibility of electric shock.
CHILD SAFETY
WARNING
- This appliance is not intended for use by young children or infirm persons without the adequate supervision of a responsible adult.
- Young children should be supervised to ensure that they do not play with the appliance.
- Keep children away from the door when opening or closing it as they may bump themselves on the door or catch their fingers in the door.
- During self-cleaning, the surfaces may get hotter than usual. Keep small children away from the oven when it is in the self-cleaning mode.
WARNING
Accessible parts may become hot during use. To avoid burns, young children should be kept away.
SAVE THESE INSTRUCTIONS
Important safety instructions
OVEN

DO NOT TOUCH THE HEATING ELEMENTS OR INTERIOR SURFACES OF THE OVEN. Heating elements may be hot even though they are dark in color. Interior surfaces of an oven become hot enough to cause burns. During and after use, do not touch or let clothing or other flammable materials contact the heating elements or interior surfaces of the oven until they have had sufficient time to cool. Other surfaces of the appliance may become hot enough to cause burns. Among these surfaces are oven vent openings and surfaces near these openings, the oven door, and the window of the oven door.
- Do not heat unopened food containers. The build-up of pressure may cause the container to burst and result in injury.
- Do not use the oven to dry newspapers. If overheated, newspapers can catch fire.
- Do not use the oven for a storage area. Items stored in an oven can ignite.


Use care when opening the door. Let hot air or steam escape before you remove food from or put food into the oven.
- Protective liners. Do not use aluminum foil to line the oven bottoms, except as suggested in this manual. Improper installation of these liners may result in a risk of electric shock or fire.
- Placement of oven racks. Always place oven racks in the desired location while the oven is cool. If the rack must be moved while the oven is hot, use potholders. Do not let the potholders come in contact with the hot heating element in the oven.
- Do not allow aluminum foil or a meat probe to contact the heating elements.
During use, the appliance becomes hot. Care should be taken to avoid touching heating elements inside the oven.
- Do not use harsh abrasive cleaners or sharp metal scrapers to clean the oven door glass. They can scratch the surface which may result in the glass shattering.
SAVE THESE INSTRUCTIONS
12 English
Important safety instructions (Oven)
CAUTION
Do not attempt to operate the oven during a power failure. If the power fails, always turn the oven off. If the oven is not turned off and the power returns, the oven may begin to operate again. Food left unattended could catch fire or spoil.
SELF-CLEANING OVENS
Do not clean the door gasket. The door gasket is essential for a good seal. Care should be taken not to rub, damage, or move the gasket.
- Never keep pet birds in the kitchen. Birds are extremely sensitive to the fumes released during an oven self-clean cycle. Fumes may be harmful or fatal to birds. Move birds to a well-ventilated room.
Clean only the parts listed in this manual in the self-clean cycle. Before self-cleaning the oven, remove the partition, racks, utensils, and any food.
- Before operating the self-clean cycle, wipe grease and food soils from the oven. Excessive amounts of grease may ignite, leading to smoke damage to your home.
Do not use any commercial oven cleaner or oven liner protective coating of any kind in or on the outside of the oven.
- Remove the nickel oven shelves from the oven before you begin the self-cleaning cycle or they may discolor.
If the self-cleaning mode malfunctions, turn the oven off and disconnect the power supply. Have it serviced by a qualified technician. - Excess spillage must be removed before you run the self-cleaning cycle.
VENTILATING HOOD
Clean ventilating hoods frequently. Do not let grease accumulate on the hood or filter.
- When flaming foods under the hood, turn the fan on.
SAVE THESE INSTRUCTIONS
Important safety instructions
CRITICAL INSTALLATION WARNINGS
WARNING
This appliance must be installed by a qualified technician or service company. Failing to have a qualified technician install the oven may result in electric shock, fire, an explosion, problems with the product, or injury.
- Unpack the oven, remove all packaging material and examine the oven for any damage such as dents on the interior or exterior of the oven, broken door latches, cracks in the door, or a door that is not lined up correctly. If there is any damage, do not operate the oven and notify your dealer immediately.
- Keep all packaging materials out of the reach of children. Children may use them for play and injure themselves.
This appliance must be properly grounded. Do not ground the appliance to a gas pipe, plastic water pipe, or telephone line. This may result in electric shock, fire, an explosion, or problems with the product
Do not cut or remove the ground prong from the power cord under any circumstances.
- Connect the oven to a circuit that provides the correct amperage.
- Do not install this appliance in a humid, oily or dusty location, or in a location exposed to direct sunlight or water (rain drops).
-
This may result in electric shock or fire.
-
Do not use a damaged power cord or loose wall socket.
This may result in electric shock or fire.
- Do not pull or excessively bend the power cord.
- Do not twist or tie the power cord.
- Do not hook the power cord over a metal object, place a heavy object on the power cord, or insert the power cord between objects.
This may result in electric shock or fire.
If the power cord is damaged, contact your nearest Dacor service center.
SAVE THESE INSTRUCTIONS
14 English
Important safety instructions (Oven)
CRITICAL USAGE WARNING

CAUTION

If the appliance is flooded by any liquid, please contact your nearest Doror service center. Failing to do so may result in electric shock or fire.
- If the appliance produces a strange noise, a burning smell, or smoke, unplug the power plug immediately and contact your nearest Dacor service center.
Failing to do so may result in electric shock or fire
- In the event of a gas leak (such as propane gas, LP gas, etc.), ventilate the area immediately. Do not touch the power cord. Do not touch the appliance.
A spark may result in an explosion or fire.
Take care not to contact the oven door, heating elements, or any of the other hot parts with your body while cooking or just after cooking.
Failing to do so may result in burns. - If materials inside the oven should ignite, keep the oven door closed, turn the oven off and disconnect the power cord, or shut off power at the fuse or circuit breaker panel. If the door is opened, the fire may spread.

Always observe safety precautions when using your oven. Never try to repair the oven on your own - there is dangerous voltage inside. If the oven needs to be repaired, contact an authorized Dacor service center near you.
- If you use the appliance when it is contaminated by foreign substances such as food waste, it may result in a problem with the appliance.
Take care when removing the wrapping from food you have taken out of the oven. If the food is hot, hot steam may be emitted abruptly when you remove the wrapping and this may result in burns.
- Do not attempt to repair, disassemble, or modify the appliance yourself.
Since a high voltage current enters the product chassis, it may result in electric shock or fire.
- When a repair is needed, contact your nearest Dacor service center.
If any foreign substance such as water has entered the appliance, contact your nearest Dacor service center.
- Failing to do so may result in electric shock or fire.
SAVE THESE INSTRUCTIONS
Important safety instructions
- Do not touch the power cord with wet hands.
This may result in electric shock.
- Do not turn the appliance off while an operation is in progress.
This may cause a spark and result in electric shock or fire.
- Do not let children or any person with reduced physical, sensory, or mental capabilities use this appliance unsupervised.
Make sure that the appliance's controls and cooking areas are out of the reach of children.
Failing to do so may result in electric shock, burns, or injury.
- Do not touch the inside of the appliance immediately after cooking. The inside of the appliance will be hot.
Failing to do so may result in burns.
- Do not use or place flammable sprays or objects near the oven.
Flammable items or sprays can cause fires or an explosion.
-
Do not insert fingers, foreign substances, or metal objects such as pins or needles into inlets, outlets, or holes. If foreign substances are inserted into any of these holes, contact your product provider or nearest Dacor service center.
-
Do not tamper with or make any adjustments or repairs to the door. Under no circumstances should you remove the door or outer shell of the oven.
-
Do not store or use the oven outdoors.
-
Never use this appliance for purposes other than cooking.
-
Using the appliance for any purpose other than cooking may result in fire.
-
Open the cap or stopper of sealed containers (herb tonic tea bottle, baby bottle, milk bottle and so on) before heating them. Make a hole in food items that have shells (eggs, chestnuts, etc.) with a knife before cooking them.
Failing to do so may result in burns or injury.
- Never heat plastic or paper containers and do not use them for cooking.
Failing to do so may result in fire.
SAVE THESE INSTRUCTIONS
16 English
Important safety instructions (Oven)

- Do not heat food wrapped in paper from magazines, newspapers, etc.
- This may result in fire.
- Do not open the door when the food in the oven is burning.
- If you open the door, it causes an inflow of oxygen and may cause the food to ignite.
- Do not apply excessive pressure to the door or the inside of the appliance. Do not strike the door or the inside or the appliance.
- Hanging on to the door may result in the product falling and cause serious injury.
- If the door is damaged, do not use the appliance. Contact a Dacor service center.
- Do not hold food in your bare hands during or immediately after cooking.
- Use cooking gloves. The food may be very hot and you could burn yourself.
As the handle and oven surfaces may be hot enough to cause burns after cooking, use cooking gloves to protect your hands from burns.
USAGE CAUTIONS

CAUTION

- If the surface is cracked, turn the appliance off. - Failing to do so may result in electric shock.
- Dishes and containers can become hot. Handle with care.
- Hot foods and steam can cause burns. Carefully remove container coverings, directing the steam away your hands and face.
- Remove lids from baby food jars before heating. After heating baby food, stir well to distribute the heat evenly. Always test the temperature by tasting before feeding the baby. The glass jar or the surface of the food may appear to be cooler than the interior, which can be hot enough to burn an infant's mouth.
Take care as beverages or food may be very hot after heating.
Especially when feeding a child, make sure the food or beverage has cooled sufficiently.
SAVE THESE INSTRUCTIONS
Important safety instructions

Take care when heating liquids such as water or other beverages.
Make sure to stir during or after cooking.
Avoid using a slippery container with a narrow neck.
Wait at least 30 seconds after heating before removing the heated liquid.
Failing to do so may result in an abrupt overflow of the contents and cause burns.

- Do not stand on top of the appliance or place objects (such as laundry, an oven cover, lighted candles, lighted cigarettes, dishes, chemicals, metal objects, etc.) on the appliance.
Items, such as a cloth, may get caught in the door.
This may result in electric shock, cre, problems with the product, or injury.
Do not operate the appliance with wet hands.
This may result in electric shock.
- Do not spray volatile substances such as insecticide onto the surface of the appliance.
As well as being harmful to humans, it may also result in electric shock, fire, or problems with the product.
SAVE THESE INSTRUCTIONS
18 English

-
Do not put your face or body close to the appliance while cooking or when opening the door just after cooking.
-
Take care that children do not come too close to the appliance.
-
Failing to do so may result in children burning themselves.
-
Do not place food or heavy objects over the edge of the oven door.
- If you open the door, the food or object may fall and this may result in burns or injury.
- Do not abruptly cool the door, the inside of the appliance, or a dish by pouring water over it during or just after cooking.
- This may result in damage to the appliance. The steam or water spray may result in burns or injury.
- Do not operate while empty except for self-cleaning.
- Do not defrost frozen beverages in narrow-necked bottles. The bottles can break.
- Do not scratch the glass of the oven door with a sharp object.
This may result in the glass being damaged or broken. - Do not store anything directly on top of the appliance when it is in operation.
Important safety instructions (Oven)

- Do not use sealed containers. Remove seals and lids before cooking. Sealed containers can explode due to the build up of pressure even after the oven has been turned off.
Take care that food you are cooking in the oven does not come into contact with the heating element. This may result in fire. - Do not over-heat food.
Overheating food may result in fire.
- Use caution when opening or closing the door. Your fingers may be pinched, resulting in physical injury.
- The door has wires at the bottom for connecting LED lights. Be careful not to pull or cut the wires when handling the door.
CRITICAL CLEANING WARNINGS

CAUTION

-
Do not clean the appliance by spraying water directly on to it.
-
Do not use benzene, thinner, or alcohol to clean the appliance.
- This may result in discoloration, deformation, damage, electric shock, or fire.
Take care not to hurt yourself when cleaning the appliance (externally or internally).
You may hurt yourself on the sharp edges of the appliance.
- Do not clean the appliance with a steam cleaner.
This may result in corrosion. - Keep the inside of the oven clean. Food particles or spattered oils stuck to the oven walls or floor can cause paint damage and reduce the efficiency of the oven.
SAVE THESE INSTRUCTIONS
Introducing your new oven

Overview
01 Control panel
02 Door latch
03MWDoor
04DoorLEDlight
05 Oven gasket
06Oyen door
07 LED lamp
08 Convection fan
09 Halogen lamp
10 Water reservoir 11 Shelf position
What's included with your oven
This oven ships with different kinds of accessories that help you cook what you want.


Wire rack (1) Cliding racks (2) Temp probe (1)*
Accessories for oven
| Wire rack | Use these racks in the lower oven when baking and broiling. |
| Gliding racks | The fully extendable gliding Rack makes food preparation easier, especially when you are preparing heavier dishes. |
| Temp probe | The Temo probe lets you cook meat to the exact internal temperature you want, taking the guess work out of determining whether a piece of meat is done or not. |
20 English
Introducing your new oven
Accessories for microwave

| Roller ring Put in the center of the base. It supports the optitray. |
| Optitray Put on the roller ring with the center fitting of the coupler. It serves as a cooking base. |
| Racks Use one of these racks as appropriate to cook two dishes simultaneously. A smaller dish on the optitray, and the other on the selected rack. You can use these racks with Broil or Convection function. |
| NOTE Do not use wire racks with Microwave mode except where specifically noted in this manual. |
| Even plate Put on the optitray. Use this to brown food, or to keep pastries or pizza crisp. |

Do not use the optitray without the roller ring.
If you need an accessory marked with a 串 ^ 串 you can buy it from the Dacor Customer Service 833-35 ELITE (833-353 5483).
Before you begin
Before using the top and bottom ovens for the first time, remove all the accessories, and then clean the ovens thoroughly. Then, set the lower oven to Bake, and run it at 400°F for 1 hour. Next, set the microwave (top) oven to Power Convection, and then run it at 400°F for 1 hour. There will be a distinctive odor. This is normal. Ensure your kitchen is well ventilated during this conditioning period.
Energy saving tips
During cooking, the oven door should remain closed except when you turn food over. Do not open the door frequently during cooking to maintain the oven temperature and to save energy.
- If cooking time is more than 30 minutes, you can switch the oven off 5-10 minutes before the end of the cooking time to save energy. The residual heat will complete the cooking process.
- To save energy and reduce the time needed for re-heating the oven, plan oven use to avoid turning the oven off between cooking one item and the next.
- Whenever possible, cook more than one item at a time.
Optitray (For microwave oven)

Remove all packing materials inside the oven install the roller ring and optitray. Check that the optitray rotates freely.
Before you begin
Water reservoir
The water reservoir is used for the Steam Bake, Steam Roast, Steam Proof and GreenClean™ functions and also to remove water scale that may form on the oven walls, especially after Steam Baking, Steam Roasting, Steam Proofing and Green cleaning. Fill it with water in advance of steam cooking or descaling.
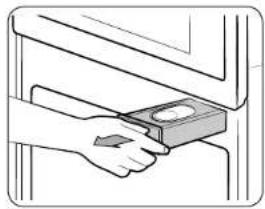
- Locate the water reservoir. The water reservoir is on the right side of the oven, just above the oven opening. Touch OPEN/CLOSE RESERVOIR on the control panel. The oven ejects the water reservoir.
Grasp the front of the reservoir, and then slide it out to remove.
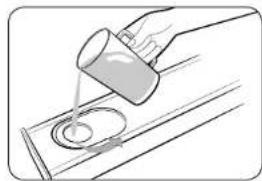
- Open the reservoir cap, and then fill the reservoir with 22 oz. (650 ml) of drinkable water.
NOTE
You can open the reservoir by removing the rubber cap or by removing the clear plastic top.

- Replace the cap or the clear plastic top, and then slide the reservoir back into the reservoir slot.
- Push the reservoir in. There will be soft click when it is in place correctly. Touch OPEN/CLOSE RESERVOIR. The oven retracts the water reservoir.
- Close the oven door.

NOTE
Do not exceed the max line.

NOTE
Make sure the cap and the upper portion of the water reservoir (labeled A) are closed before using the oven.

CAUTION
The water reservoir becomes hot during cooking. Make sure you wear oven gloves to remove or refill the water reservoir.
Basic operations
Control panel
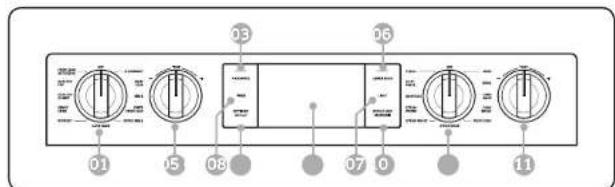
01 Upper Mode Knob: Use to select the mode of the upper Microwave Oven.
02 Temperature Knob: Use to set the temperature for the upper Microwave oven.
03 MICROWAVE: Use to display the upper Microwave oven mode screen on the display. Touching here does not turn the oven on or off. It only displays its current status.
04 TIMER: Use to display the set Timer screen.
05 SETTINGS:Use to display the Setting screen.If you touch and hold this key for 3 seconds, all oven functions will be disabled.
06 LOWER OVEN: Use to display the lower oven mode screen on the display. Touching here does not turn the oven on or off. It only displays its current status.
07 LIGHT: Use to turn the oven light on or off.
08 OPEN/CLOSE RESERVOIR: Touch to open the water reservoir.
09 Display: Swipe to navigate through the menus and tap to select a desired setting.
10 Lower Mode Knob: Use to select the mode of the lower Oven.
11 Temperature Knob Use to set the temperature for the lower oven.

NOTE
If you tap the display while wearing plastic or oven gloves, the display will not operate properly. Take the gloves off first, and then tap with a bare finger.
Setting the temperature
This oven provides two methods to set the temperature
Temperature knob
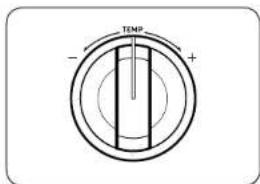
Use the Temperature knob on the left or right side of the control panel to set the temperature for the upper Microwave oven and the lower oven respectively. For the upper oven, you can use this knob in Power Convection and Speed Power Convection features. For the lower oven, you can use this knob in Bake, Convection Bake, Convection Roast, Steam Bake and Steam Roast features.
- Turn the appropriate knob clockwise (+) or counterclockwise (-) and then release. The temperature will rise or fall by 5^ .
To change the temperature quickly by more than 5^ , turn and hold the knob at the + or - position.
Numeric pad
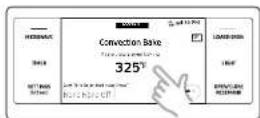
- Tap the temperature area to display the numeric pad.
- Tap the numbers in the numeric pad to set the temperature.
- Tap OK

Basic operations
Control lockout
Control Lockout lets you lock the buttons on the touch pad so they cannot be activated accidentally. Control Lock locks only the lower oven door so it cannot be opened. You can only activate Control Lockout when the oven is in standby mode.
How to activate the control lockkout feature

- Cancel or turn off all functions.
- Touch SETTINGS for 3 seconds
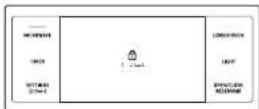
- The display will change to the Control Lock screen and the control lock confirmation will appear at the bottom of the screen.


Control Lockout is available only when the oven temperature is under 400^
All other functions must be cancelled before you activate Control Lockout.
How to unlock the controls

Touch SETTINGS for 3 seconds.
The control lock confirmation and the lock icon will disappear from the display.

It may take up to 10 seconds for the doors to unlock.
Kitchen timer
The kitchen timer serves as an extra timer that will beep when the set time has elapsed. It does not start or stop cooking functions. You can use the kitchen timer with any of the other oven functions. You can set 10 timers maximum simultaneously. Each timer will count down independently of all the other active timers.
How to set the timer
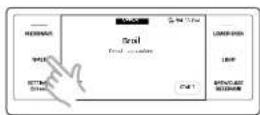
- Touch TIMER
The display will change to the timer screen.
-
Tap + Add timer
-
Tap the numbers in the numeric pad to set the timer. (You can set the timer for any amount of time from 1 sec to 23 hr 59 min 59 sec).
- Tap OK
24 English


5. Tap START.
When the set time has elapsed, the oven will beep and the display will show the Timer has finished.
- You can pause, reset, or delete the timer at any time by tapping the screen.
NOTE
After you have performed Steps 1 to 5, you can return to Step 2 and set additional timers. You can also name timers so you can identify them separately. See page 25.
How to change the timer name
| TOM | ||
| LIMPLISH | ||
| C5H5OH | ||
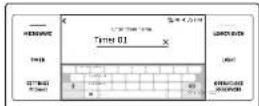
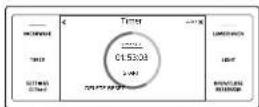
You can change the timer name to identify what you are timing, for example, a chicken.
1. Tap the timer name area.
The keyboard appears.
- Enter the new timer name, and then tap OK.
The display shows the changed timer name.
Minimum and maximum settings
Upper microwave oven
All the features listed in the table below have minimum and maximum time, temperatures, and power-level settings.
Tap MICROWAVE to select the cooking mode. Set the temperature or microwave power level using the numeric pad. See Basic baking and broiling instructions starting on page 53.
| Feature | Temp./ Power range | Default Temp./ Power | Max. time | |
| Manual mode | Microwave | 10-100% | 100% | 1 Hr. 30 min. |
| The microwave energy enables food to be cooked or reheated without changing either the form or the color. | ||||
| Convection Sear | 100-450 °F (40-230 °C) | 350 °F | 2 Hr. | |
| Convection Sear is similar to Convection mode. However, the heating elements generate stronger heat and distribute stronger air currents inside the oven. This is designed to cook food faster while keeping or improving the taste. | ||||
| Broil | 1 Hr. 30 min. | |||
| Use this for grilling food such as meat. | ||||
| Speed Conv.Sear | 100-450 °F (40-230 °C) 10-70% | 350 °F 30% | 1 Hr. 30 min. | |
| The heating elements generate heat and the convection fan distributes the heat inside the oven, which is reinforced by microwave energy. | ||||
| Speed Broil | 10-70% | 30% | 1 Hr. 30 min. | |
| The heating elements generate heat, which is reinforced by microwave energy. | ||||
| Feature | Temp./ Power range | Default Temp./ Power | Max. time | |
| Auto mode | Sense Cook" | The 16 Sensor Cooking features provide pre-programmed cooking times.You do not need to set either the cooking times or the power levels. | ||
| Conv.Sear AutoCook | To accommodate first-time users of the Power Convection mode, the oven offers 20 auto programs. | |||
| Healthy Fry | You do not need to set either the cooking time or power level. You can adjust the Healthy fry cook category as shown in this manual (see page 43). You will use less oil compared to frying with an oil fryer. | |||
| Defrost The | oven offers 4 defrosting programs. | |||
| Healthy Choice | The Healthy Choice menu contains pre-set cooking programs for 26 different items. You do not need to set the cooking times or the power levels. | |||
| Auto Cook | For cooking beginners, the oven offers a total of 44 auto cooking programs. | |||
Microwave oven (Upper Oven)
Setting the power level
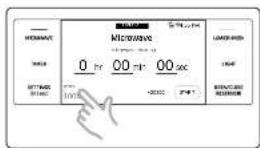
Tap the Power Level area.
- Flick the wheel selector up or down or tap the wheel selector to set the power level. If you tap the wheel selector, the numeric pad will appear and you can use the numeric pad to set the power level.

Timed cooking
In timed cooking mode, the oven turns on immediately and cooks for the length of time you select.
At the end of the cooking time, the oven turns off automatically.
- You can use the timed cooking feature only with another cooking operation. (Microwave, Convection Scar, Broil, Speed Conv.Scar, Speed Broil).
How to set the oven for timed cooking

- Turn the upper oven mode knob to the cooking operation you want.
- Tap Cook Time: The display will change to the cooking time screen.
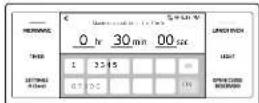


- Tap numbers in the numeric pad to set the cooking time.
-
Tap OK. The cooking time screen closes.
-
The cooking time is displayed in the Cook Time area on the screen.
- Tap START to start cooking.
- If you want to pause cooking, tap PAUSE. In PAUSE, you can cancel or continue cooking by tapping CANCEL or CONTINUE.
CAUTION
Use caution with the timed cooking features. You can use these features to cook cured or frozen meats and most fruits and vegetables.
For food that can easily spoil, such as milk, eggs, and unfrozen or fresh fish, meat, or poultry, chill them in the refrigerator first.
Even when chilled, they should not stand in the oven for more than 1 hour before cooking begins, and should be removed promptly when cooking is completed.
Eating spoiled food can result in sickness from food poisoning.
Microwave
Microwaves are high-frequency electromagnetic waves that can be used to cook or reheat food without changing either the form or color of the food.

- Put food in a microwave-safe container, and then place the container in the center of the optitray. Close the door.
- Turn the upper mode knob to select Microwave.
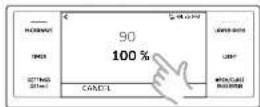
- Tap Power Level, and then, flick the wheel picker up or down or tap the wheel picker to set the power level. If you tap the wheel picker, the numeric pad will appear and you can use the numeric pad to set the power level.
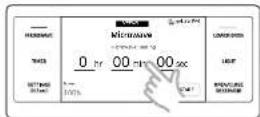
- Tap Cook Time, and then use the number pad to input a desired cook time. You can also use the +30SEC button to specify the cooking time.
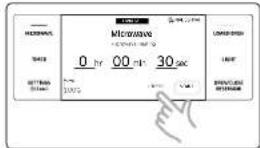
Microwave oven (Upper Oven)

-
Tap START to start cooking.
-
If you want to pause cooking, tap
PAUSE. In PAUSE, you can cancel or continue cooking by tapping CANCEL or CONTINUE.
CAUTION
- Use only microwave-safe cookware
Use oven gloves when taking out food.
Power level
| 100% (High) 50% (Medium) | ||
| 90% (Sauté) 40% (Medium low) | ||
| 80% (Reheat) 30% (Low) | ||
| 70% (Medium high) 20% (Defrost) | ||
| 60% (Simmer) 10% (Warm) |
Convection Sear
The heating elements generate heat, which is evenly distributed inside the oven by the convection fan. You can use a microwave rack or a combination of a rack and even plate on the optitray. Use this mode for biscuits, individual scones, rolls, and cakes as well as fruit cakes, choux pastries, and souffles.
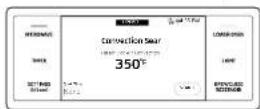
- Put a rack or the combination of a rack and the even plate on the gottaway.
- Turn the upper mode knob to select Convection Sear, and then tap the temperature area. If you tap the temperature area, the numeric pad will appear. You can input a desired temperature between 100 °F and 450 °F (default: 350 °F).

NOTE
To preheat, simply tap START.
3. Tap Cook Time, and then use the number pad to specify a cooking time.

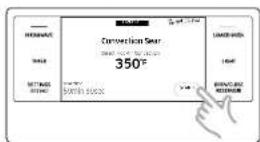
- Tap START to start cooking.
- If you want to pause cooking, tap PAUSE. In PAUSE, you can cancel or continue cooking by tapping CANCEL or CONTINUE.
CAUTION
Use glass, ceramic, or metal cookware. Use oven gloves when taking out food.
Broil
For best performance, make sure all heating elements are in the horizontal position.
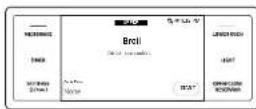
- Put a rack or the combination of a rack and the even plate on the optitray.
- Turn the upper mode knob to select Boil. If preheating is preferred, simply tap START.

You cannot set the temperature in Broil mode.

- Tap Cook Time, and then use the number pad to specify a cooking time.

- Tap START to start cooking.
- If you want to pause cooking, tap PAUSE. In PAUSE, you can cancel or continue cooking by tapping CANCEL or CONTINUE.
CAUTION
- Use glass, ceramic, or metal cookware.
- Use oven gloves when taking out food.
Speed Conv.Sear

- Put a rack or the combination of a rack and the even plate on the optitray.
- Turn the upper mode knob to select Speed Conv.Sear, and then tap the temperature area. If you tap the temperature area, the numeric pad will appear. You can input a desired temperature between 100 °F and 450 °F (default: 350 °F).

To preheat, simply tap START
- Tap Power Level, and then flick the wheel picker up or down or tap the wheel picker to specify a power level between 10% and 70% . If you tap the wheel picker, the numeric pad appears and you can use the numeric pad to set the power level.
- Tap Cook Time, and then use the number pad to specify a cooking time. You can also use the +30SEC button to specify the cooking time.

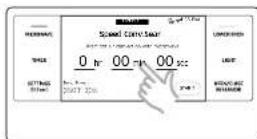

Microwave oven (Upper Oven)
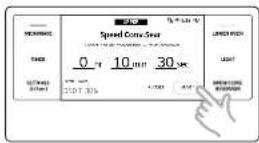
- Tap START to start cooking.
- If you want to pause cooking, tap PAUSE. In PAUSE, you can cancel or continue cooking by tapping CANCEL or CONTINUE.
CAUTION
Use glass or ceramic cookware.
- Use oven gloves when taking out food.
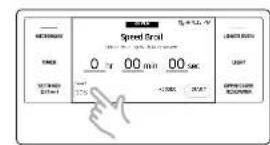
Speed broil
The heating elements generate heat, which is reinforced by the microwave energy.

- Put a rack or the combination of a rack and the even plate on the optitray.
- Turn the upper mode knob to select Speed Broil
NOTE
You cannot set the temperature in Speed broil mode.
3. Tap Power Level, and then flick the wheel selector up or down or tap the wheel selector to specify a power level between 10% and 70% . If you tap the wheel selector, the numeric pad appears and you can use the numeric pad to set the power level.

- Tap Cook Time, and then use the number pad to specify a cooking time. You can also use the +30SEC button to specify the cooking time.
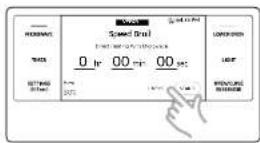
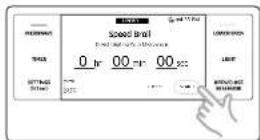
- Tap START to start cooking.
- If you want to pause cooking, tap PAUSE. In PAUSE, you can cancel or continue cooking by tapping CANCEL or CONTINUE.
30 English
CAUTION
Use glass or ceramic cookware.
Use oven gloves when taking out food.
Auto cook
The oven offers 44 different auto cook options for your convenience. You do not need to set either the cooking time or the power level. You can adjust the size of the serving.

- Put the food in the center of the optitray and close the door.
- Turn the upper mode knob to select Auto Cook. The display will show the Speed Cook and Soften/Meit menus. Choose the menu you want, and then view the auto cook programs in the menu by scrolling the list. The two menus together provide 44 auto cook options.
- Tap the Auto Cook option you want.
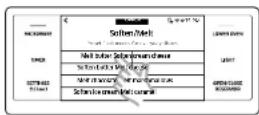
- Tap the weight area to select the food weight screen.

- Flick the wheel picker to select the food weight.
- Tap OK.

- Tap START to start cooking.
- If you want to pause cooking, tap PAUSE. In PAUSE, you can cancel or continue cooking by tapping CANCEL or CONTINUE.
CAUTION
Use only microwave-safe cookware. Use oven gloves when taking out for
| Food | Amount | Instructions |
| Breakfast | ||
| Bacon, Uncooked | 2 ea. 4 ca. 6 ca. | Layer 2 paper towels on a microwave-safe plate and arrange the bacon on the towels. Do not overlap bacon. Cover with an additional paper towel. Remove the paper towel immediately after cooking. |
| Bacon, Pre-cooked | 2 ea. 4 ca. 6 ca. | Layer 2 paper towels on a microwave-safe plate and arrange the bacon on the towels. Do not overlap bacon. Cover with an additional paper towel. Remove the paper towel immediately after cooking. |
| Sausage links, Frozen | 4 ca. 8 ca. | Place the sausage links on the oven plate. Place the plate on the low rack. |
| Sausage links, Fresh | 4 ca. 8 ca. | Place the sausage links on the oven plate. Place the plate on the low rack. |
| Sausage patties, Frozen | 2 ca. 4 ca. | Place the sausage patties on the oven plate. Place the plate on the high rack. |
| Sausage patties, Fresh | 2 ca. 4 ca. | Place the sausage patties on the oven plate. Place the plate on the high rack. |
Microwave oven (Upper Oven)
| Food Amount Instructions | ||
| Frozen french toast | 2 ea.4 ea. | Place the french toast on the high rack. |
| Frozen sandwich | 2 ea.4 ea. | Place the sandwich on the even plate, then place the plate on the low rack. |
| Frozen bagels 2 ca. | ca.4 ea. | Place the bagels on the even plate, then place the plate on the low rack. |
| Snacks | ||
| Popcorn 1.5 oz. | 3.0 oz.3.5 oz.(1 package) | Use only one microwave popcorn bag at a time. Be careful when removing the heated bag from the oven and when opening it. |
| Hot dog 2 ea. | 4 ea. | Pierce the hot dogs 3 times with a fork. Place the hot dogs on the even plate, then place the plate on the low rack. When the microwave beeps, add the buns and then press START to continue. |
| Nachos 1 serving. Arrange the tortilla chips uniformly on a microwave-safe plate, then place the plate on the high rack. Sprinkle evenly with cheese.Contents:· 4 to 5 oz. tortilla chips· 1/2 cup grated cheese | ||
| Baked potato 2 ea. | 4 ea. | Pierce the potatoes 3 times with a fork. Place the potatoes on the low rack. After cooking, let the potatoes stand for 3-5 minutes. |
| Food Amount Instructions | ||
| Frozen garlic bread | 6 ea. Put frozen garlic bread on the even plate, then place the plate on the low rack. When the microwave beeps, turn the bread over, and then press START to continue. After cooking, let stand for 1-2 minutes. | |
| Homemade gratin | 20 oz.40 oz. Ingredients (40 oz.):25 oz. potatoes, 4 oz. milk, 4 oz. cream, 1 oz. beaten whole egg, 1 tsp each of salt, pepper, nutmeg, 5-6 oz. grated mozzarella cheese, butter, thyme.For a 20 oz. recipe, use half the quantities above.Method:Peel potatoes and slice them to 1/4-1/4 inch thickness. Spread the slices on a clean towel and keep them covered with the towel while you prepare the rest of the ingredients. Rub the surface of a gratin dish with the butter. Put the rest of the ingredients except grated cheese into a large bowl and stir well. Layer the potato slices in the dish slightly overlapping and pour the mixture over the potatoes. Spread the grated cheese over the top, and then put the gratin dish on the low rack.After cooking, let stand for 2-3 minutes.Serve sprinkled with a few fresh thyme leaves. | |
| Food Amount Instructions | ||
| Homemade lasagna | 40 oz. Ingredients:1/4 lb. ground beef, 2 tbsp. olive oil, 8 oz. tomato sauce, 4 oz. beef stock, 8 lasagna sheets, 1 onion (chopped), oregano, and basil to taste, 8 oz. grated mozzarella cheese.Method:Sauce: Heat the oil in a frying pan, then cook the ground beef and chopped onion for about 10 min until browned all over. Combine with the tomato sauce and beef stock, add the dried herbs. Bring to a boil, and then simmer for 30 minutes.Cook lasagna noodles according to the package directions.Layer noodle, meat sauce, and cheese then repeat. Sprinkle the remaining cheese evenly on the top layer. Place the oven dish on the low rack.After cooking, let stand for 2-3 minutes. | |
| Frozen soft pretzels | 2 ea.4 ea. | Place the pretzels on the oven plate, then place the plate on the low rack. |
| Frozen churros | 2 ea.4 ea. | Place the churros on the oven plate, then place the plate on the high rack. |
| Quesadilla 1 ca. | 2 ea. | Follow the package preparation instructions. Place the Quesadilla on the oven plate, then place the plate on the low rack. |
| Toast hawaii 4 ea. | Toast the bread slices first. Put the toast with topping on the high rack.Let stand for 2-3 minutes. | |
| Frozen lasagna 1 | serving.2 servings. | Place the frozen lasagna on the low rack.Let stand for 2-3 minutes. |
| Food Amount Instructions | ||
| Beef | ||
| Meat loaf 2.5 lbs. | Ingredients: | 1 1/2 lbs. ground beef, 1 egg, 1 onion (chopped), 1 cup milk, 1 cup dried bread crumbs, salt and pepper to taste. Method: In a large bowl, combine the beef, egg, onion, milk, and bread crumbs. Season with salt and pepper to taste, and then place in a lightly greased 5 x 9 inch microwave-safe loaf pan. Place the pan on the low rack. |
| Roast beef 2.0 lbs. | 3.0 lbs. | Brush the roast beef with oil and seasonings. Place the roast beef on the low rack. When the microwave beeps, turn over the roast beef, and then press START to continue. |
| Poultry | ||
| Whole chicken | 4.0 lbs. | Brush the chicken oil and spices. Put breast side down in the middle of low rack. When the beep sounds, turn the chicken over using tongs, and then press START to continue. After cooking, let stand for 2-3 minutes. |
| 5.0 lbs. | ||
| Chicken breast | 0.75 lb. | Put chicken breast on the high rack. Let stand for 1-2 minutes. |
| 1.5 lbs. | ||
| Turkey breast 0.75 lb. | 1.5 lbs. | Put turkey breast on the high rack. Let stand for 1-2 minutes. |
Microwave oven (Upper Oven)
| Food Amount Instructions | |
| Bake | |
| Box cake mix 1 pack. Pour the batter into 8 inch round cake pan. Place the pan on the low rack. | |
| Brownie mix 1 pack. Pour the batter into an 8 x 8 inch pan, then place the pan on the low rack. | |
| Cookie dough, Frozen | 8 ea. Place 8 cookies on the even plate, then place the plate on the low rack. |
| Cookie dough, Chilled | 8 ea. Place 8 cookies on the even plate, then place the plate on the low rack. |
| Chocolate chip cookies | 8 ea. Ingredients (16 ea.): · 1¼ cups all-purpose flour, ½ teaspoon baking soda, ¼ teaspoon salt, ½ cup butter, softened, 1 teaspoons vanilla extract, ¼ cup white granulated sugar, ¼ cup brown sugar, 1 egg, ¼ cups dark chocolate morsels, ½ cup chopped walnuts. Method: 1. In a large bowl combine the flour, baking soda and salt, and then set aside for later use. Using an electric mixer, blend the butter, vanilla, white and brown sugar together, then mix in the egg. Mix in the flour mixture until the dough forms. then mix in the chocolate chips and walnuts. 2. Roll dough into small balls (about 2 tablespoons each), and then place on the even plate 2 inches apart. Place the plate on the low rack. |
| Food Amount Instructions | |
| Oatmeal raisin cookies | 8 ea. Ingredients:1/4 cups all-purpose flour, 1/2 teaspoon baking soda, 1/2 teaspoon baking powder, 1/2 teaspoon ground cinnamon, 1/4 teaspoon salt, 1/2 cup butter, softened, 1 teaspoon vanilla extract, 1/4 cup white granulated sugar, 1/4 cup brown sugar, 1 egg, 1/2 cups oats, 1/2 cup raisins.Method:1. In a large bowl mix together the flour, baking soda, baking powder, cinnamon and salt, and then set aside for later use. In a large bowl using an electric mixer blend the butter, vanilla, white and brown sugar, and then mix in the egg. Mix in the flour mixture until the dough forms then mix in the oats and raisins.2. Roll dough into small balls (about 2 tablespoons each), and then place on the even plate 2 inches apart. Place the plate on the low rack. |
| Cupcakes 6 ea. Place 6 cupcakes on a 6 cup muffin mold, then place the mold on the low rack. | |
| Marble cake 1 ea. Put the fresh dough into round cake dish. Put the dish on the low rack. After cooking, let stand for 5-10 minutes. | |
34 English
| Food Amount Instructions | |
| Cheese cake 1 ea. Ingredients: | 15 graham crackers crushed, 1/2 cup butter, 14 oz. cream cheese. softened, 2 eggs, 1 cup granulated sugar, 1 teaspoon vanilla extract.Method:1. Melt the butter in a pan. Add thecrushed graham crackers and stir until well coated with butter. Spread over the bottom of the 8 inch cake pan, and then press down on the mixture until firm.2. Mix the cream cheese, eggs, sugar and vanilla extract until smooth. Pour it over the graham cracker base and spread out with a spatula.3. Place the cake pan on the low rack.After cooking, let cool and then refrigerate for 5 hours before serving. |
| Pound cake 1 ea. Ingredients: | 1/4 sticks butter, softened, 1/4 cups sugar, 3 eggs, 2 cups all-purpose flour, 1/4 teaspoon baking powder, 1/4 cup milk. 1/4 teaspoon vanilla extract.Method:1. In a large bowl mix together the butter and sugar then add the eggs and mix until smooth. Mix in the remaining ingredients.2. Pour batter into a greased tube pan. Put the pan on the low rack. |
| Food Amount Instructions | ||
| Soften/Melt | ||
| Melt butter 0.25 lb. (1 stick)0.5 lb. (2 sticks) | Unwrap the butter and cut the butter into several pieces. Place the butter on a microwave safe dish and cover with wax paper. Stir well afterwards. | |
| Soften butter 0.25 lb. (1 stick)0.5 lb. (2 sticks) | Remove the butter from the packaging and place on a microwave-safe dish. | |
| Melt chocolate 1 cup. Place the chocolate chips in a microwave-safe dish. When the microwave beops, stir well, and then press START to continue. Unless stirred, the chocolate chips will keep their shape even when the heating time is over. | ||
| Soften ice cream | 1 serving:1 pint2 servings:1.5 quarts | Remove the lid of the carton. Place the carton in the center of the microwave. |
| Soften cream cheese | 4 oz.8 oz. | Unwrap the cream cheese and place on a microwave safe dish. |
| Melt cheese 4 oz | 8 oz. | Place the cheese in a microwave-safe bowl and cover with wax paper. Stir well afterwards. |
| Melt marshmallows | 5 oz.10 oz. | Place the marshmallows in a large microwave-safe dish. Stir well afterwards. |
| Melt caramel 4 oz. | 8 oz. | Place the caramel in a large microwave-safe dish. Stir well afterwards. |
Microwave oven (Upper Oven)
Defrost
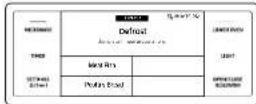
The oven provides 4 different defrosting options for your convenience. The time and power levels are automatically adjusted according to your selection.
- Put food in suitable cookware, then put the cookware on the optitray and close the door.
- Turn the upper mode knob to select Defrost The display will show 4 defrost options.
- Tap the Defrost option you want.

- Tap the weight area to select the food weight.

- Flick the screen or tap the number to select the food weight. If you tap the number, the numeric pad appears.
- Tap OK

- Tap START to start defrosting.
- If you want to pause defrosting, tap PAUSE. In PAUSE, you can cancel or continue defrosting by tapping CANCEL or CONTINUE
CAUTION
Use only microwave safe cookware.
Use oven gloves when taking out food.
| Food Amount Instructions | ||
| Meat | 0.1-3.5 lbs. Shield the edges | meat over when the oven beeps. This program is suitable for lamb, pork, steaks, chops, and ground meat. For ground meat, place the meat directly on the optilray tray on wax paper. Do not use an extra tray. Let stand, covered with foil, for 5-10 minutes. |
| Poultry | 0.1-3.5 lbs. | Shield the leg and wing tips with aluminium foil. Turn the poultry over when the oven beeps. This program is suitable for whole chicken as well as for chicken portions. |
| Fish | 0.1-3.5 lbs. | Shield the tail of a whole fish with aluminium foil. Turn the fish over when the oven beeps. This program is suitable for whole fish as well as for fish fillets. |
| Bread | 0.1-2.0 lbs. | Place bread on a ceramic plate and if possible, turn over as soon as the oven beeps. This program is suitable for all kinds of bread, sliced or whole, as well as for bread rolls and baguettes. Arrange bread rolls in a circle. |
36 English
Sense CookTM
The oven offers 16 different Sense Cook options for your convenience, which include pre-programmed cooking times. You do not need to set either the cooking time or the power level. Once you have selected a program and touched START, the oven automatically sets the cooking time and starts to cook. The gas sensing animation effect shows the status of the sensing process.


- Put the food in the center of the optitray and close the door.
- Turn the upper mode knob to select Sense CookTM The display will show 16 Sense Cook options. (You can scroll down through the list.)
-
Tap the Sense Cook™ option you want.
-
Tap START to start cooking.
- If you want to pause cooking, tap PAUSE. In PAUSE, you can cancel or continue cooking by tapping CANCEL or CONTINUE.

CAUTION
Use only microwave-safe cookware. Use oven gloves when taking out food.
| Food Amount | Instructions | |
| Popcorn | 3.0-3.5 oz.1 package | Use only one microwave popcorn bag at a time.Be careful when removing the heated bag from the oven and when opening it. |
| Potato 1 to 5 ca Pierce each potato slice | veral times with a fork. Place on the optitray in a spoke-like fashion. After cooking, let the potatoes stand for 3-5 minutes. Let the oven cool for at least 5 minutes before using it again. | |
| Pizza | 1 to 4 slices | Place 1-4 pizza slices on a microwave safe plate with the wide ends of the slices towards the outside edge of the plate.Do not let the slices overlap.Do not cover. Let the oven cool for at least 5 minutes before using it again. |
| Beverage | 6 to 8 oz. Use | a measuring cup or mug and do not cover. Place the beverage in the oven. After heating, stir well. Let the oven cool for at least 5 minutes before using it again. |
Microwave oven (Upper Oven)
| Food Amount Instructions | |
| Dinner Plate 1 serving Use only precooked, refrigerated foodsCover the plate with vented (1 inch vent) plastic wrap or waxed paper tucked under the plate. If the food is not as hot as you would like after using the "Sensor" function, continue heating using additional time and power.Contents:·3-4 oz. meat, poultry, or fish (up to 6 oz. with bone)·1/2 cup starch (potatoes, pasta, rice, etc.)·1/2 cup vegetables (about 3-4 oz.) | |
| Casserole 1 to 4 servings Cover the plate | ate with vented (1 inch vent) plastic wrap. If the food is not as hot as you would like after using the "Sensor" function, continue heating using additional time and power. Stir the food once before serving.Contents:Cassaroles: refrigerated |
| Pasta 1 to 4 servings Cover the plate | with vented (1 inch vent) plastic wrap. If the food is not as hot as you would like after using the "Sensor" function, continue heating using additional time and power. Stir the food once before serving.Contents:Pasta: canned spaghetti |
| Food Amount | Instructions | |
| Soup 1 to 4 servings | Cover the bowl with vented (1 inch vent) plastic wrap. If the soup is not as hot as you would like after using the "Sensor" function, continue heating using additional time and power. Stir the soup once before serving. Contents: Soup: refrigerated | |
| Frozen Breakfast 4 | to 8 oz. Use this button for frozen sandwiches, breakfast entrees, pancakes, waffles, etc. Follow the package instructions for covering and standing. Let the oven cool for at least 5 minutes before using it again. | |
| Frozen Dinner 13 to | 18 oz. Remove the food from its wrapping and follow the instructions on the box for covering and letting stand. Let the oven cool for at least 5 minutes before using it again. | |
| Rice | 1 to 2 cups | Add 1 cup of cold water for 1 cup of rice. Use a large glass pyrex bowl. Cover with vented (1 inch vent) plastic wrap. Rice doubles in volume curing cooking. After the cooking time is over, stir before standing time, and then salt or add herbs and butter. |
| Mini Ravioli | 8 to 14 oz. | Put mini ravioli evenly into a microwave safe glass bowl. Cover with vented (1 inch vent) plastic wrap. Let stand for 2-3 minutes. Stir the food once before serving. |
38 English
| Food Amount | Instructions | |
| Fresh Vegetables 1 | to 4 servings Plac | the fresh vegetables (broccoli, florets, cauliflower florets, zucchini, eggplant, etc.) in a microwave safe ceramic, glass, or plastic dish and add 2-4 tbs. water. Cover with vented (1 inch vent) plastic wrap while cooking and stir before letting stand. Let the oven cool for at least 5 minutes before using it again. |
| Fresh Root Vegetables | 1 to 4 servings P | place the fresh vegetables (carrots, leeks, potatoes, beet etc.) in a microwave safe ceramic, glass, or plastic dish and add 2-4 tbs. water. Cover with vented (1 inch vent) plastic wrap while cooking and stir before letting stand. Let the oven cool for at least 5 minutes before using it again. |
| Frozen Vegetables | 1 to 4 servings P | place the frozen vegetables in a microwave safe ceramic, glass, or plastic dish and add 2-4 tbs. water. Cover with vented (1 inch vent) plastic wrap to cook. Stir before letting stand for 3-5 minutes. Let the oven cool for at least 5 minutes before using it again. |
| Canned Vegetables | 1 to 4 servings P | place the canned vegetables in a microwave safe ceramic, glass, or plastic dish. Cover with vented (1 inch vent) plastic wrap while cooking and stir before letting stand. Let the oven cool for at least 5 minutes before using it again. |
Auto sensor cooking instructions
The Auto Sensor cooks your food automatically by detecting the amount of gases generated from the food while it is cooking.
- When food is cooked, many kinds of gases are generated. The Auto Sensor determines the proper time and power level by detecting these gases, eliminating the need to set the cooking time and power level.
- When you cover a container with its lid or plastic wrap during Sensor Cooking, the Auto Sensor will detect the gases generated after the container has been saturated with steam.

If using cling film or plastic wrap, leave a small opening (vent) near the edge of the dish for ventilation or pierce the plastic with a knife or fork in several places.
- Shortly before cooking ends, the remaining cooking time will begin its count down. This will be a good time for you to rotate or stir the food for even cooking if it is necessary.
Before Auto Sensor cooking, food may be seasoned with herbs, spices, or browning sauces. A word of caution though. Salt or sugar may cause burn spots on food so these ingredients should be added after cooking.
Microwave oven (Upper Oven)
Utensils & cover
To obtain good cooking results with the Auto Sensor function, follow the directions for selecting appropriate containers and covers in the charts in this manual.
Always use microwave-safe containers and cover them with their lids or with plastic wrap. When using plastic wrap, turn back one corner to allow steam to escape at the proper rate.
Always cover your microwave safe dish or container with its matching lid. If the dish or container does not have its own lid, use plastic wrap.
- Fill containers at least half full.
- Foods that require stirring or rotating should be stirred or turned toward the end of the Sense Cook cycle, after the time has started to count down on the display.
CAUTION
After installing the oven and plugging it into an electrical outlet, do not unplug the power cord for 24 hours. The gas sensor needs time to stabilize in order to cook satisfactorily.
It is not advisable to use the Auto Sensor cooking feature continuously. i.e. one cooking operation immediately after another.
- Install the oven in a well ventilated location for proper cooling and airflow and to ensure the sensor will operate accurately.
To avoid poor results, do not use the Auto Sensor cooking function when the room ambient temperature is above 90°F or below 45°F.
- Do not use volatile detergent to clean your oven. Cas resulting from this detergent may affect the sensor.
- Avoid placing the oven near high moisture or gas emitting appliances, since this will interfere with the proper performance of the Auto Sensor.
Always keep the inside of the oven clean. Wipe all spills with a damp cloth. This oven is designed for household use only.
Healthy Choice
- Put the food in the center of the optitray and close the door.
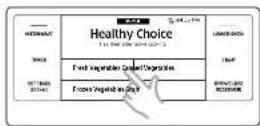
- Turn the upper mode knob to select Healthy Choice.

-
Tap to select Healthy Choice cook. The display will show 4 different menus. These provide 26 Healthy Choice cook options. (You can scroll down the list.)
-
Tap the serving area to display the servings of food screen.
-
Flick the number to select the number of servings.
- Tap OK.
- Tap START to start cooking
- If you want to pause cooking, tap PAUSE. In PAUSE, you can cancel or continue cooking by tapping CANCEL or CONTINUE.
40 English

CAUTION
Use only microwave-safe cookware. Use oven gloves when taking out fo
| Food Amount Instructions | ||
| Fresh Vegetables | ||
| Broccoli Florets | serving2 servings3 servings4 servings(1 serving = 4-5 oz.) | Wash and clean the broccoli. Prepare the florets and place in a microwave safe bowl. Add 1-4 tablespoons of water (1 Tbsp per serving). Cover during cooking and stir afterwards. |
| Cauliflower Florets | 1 serving2 servings3 servings4 servings(1 serving = 4-5 oz.) | Wash and clean the cauliflower. Prepare the florets and place in a microwave safe bowl. Add 1-4 tablespoons of water (1 Tbsp per serving). Cover during cooking and stir afterwards. |
| Carrots 1 serving | 2 servings3 servings4 servings(1 serving = 4-5 oz.) | Wash and clean the carrots. Cut the carrots into even slices and place in a microwave safe bowl. Add 1-4 tablespoons of water (1 Tbsp per serving). Cover during cooking and stir afterwards. |
| Green Beans 1 serving | 2 servings3 servings4 servings(1 serving = 4-5 oz.) | Wash and clean the green beans. Place the green beans in a microwave safe bowl. Add 1-4 tablespoons of water (1 Tbsp per serving). Cover during cooking and stir afterwards. |
| Food Amount Instructions | ||
| Spinach 1 serving | 2 servings3 servings4 scrivings(1 serving = 4-5 oz.) | Wash and clean the spinach. Place the spinach in a microwave safe bowl.Add 1-4 tablespoons of water (1 Tbsp per serving). Cover during cooking and stir afterwards. |
| Zucchini 1 serving | 2 servings3 servings4 servings(1 serving = 4-5 oz.) | Wash and clean the zucchini. Cut zucchini into slices. Place the zucchini in a microwave safe bowl.Add 1-4 tablespoons of water (1 Tbsp per serving). Cover during cooking and stir afterwards. |
| Eggplants 1 serving | 2 servings3 scrivings4 scrivings(1 serving = 4-5 oz.) | Wash and clean the eggplants. Cut eggplants into slices. Place the eggplants in a microwave safe bowl and sprinkle with 1 Tbsp lemon juice.Add 1-4 tablespoons of water (1 Tbsp per serving). Cover during cooking and stir afterwards. |
| Potatoes 1 ea | 2 ea3 ea4 ea | Pierce each potato several times with a fork. Place on the optitray in a spoke like fashion. After cooking, let the potatoes stand for 3-5 minutes. |
Microwave oven (Upper Oven)
| Food Amount Instructions | ||
| Frozen Vegetables | ||
| Broccoli Florets | 1 serving2 servings3 servings4 servings(1 serving = 4-5 oz.) | Place the broccoli in a microwave safe bowl. Add 1-4 tablespoons of water (1 Tbsp per serving). Cover during cooking and stir afterwards. |
| Carrots 1 serving | 2 servings3 servings4 servings(1 serving = 4-5 oz.) | Place the carrots in a microwave safe bowl. Add 1-4 tablespoons of water (1 Tbsp per serving). Cover during cooking and stir afterwards. |
| Corn 1 serving | 2 servings3 servings4 servings(1 serving = 3-4 oz.) | Place the corn in a microwave safe bowl. Add 1-4 tablespoons of water (1 Tbsp per serving). Cover during cooking and stir afterwards. |
| Green Beans 1 serving | 2 servings3 servings4 servings(1 serving = 4-5 oz.) | Place the green beans in a microwave safe bowl. Add 1-4 tablespoons of water (1 Tbsp per serving). Cover during cooking and stir afterwards. |
| Peas 1 serving | 2 servings3 servings4 servings(1 serving = 3-4 oz.) | Place the peas in a microwave safe bowl. Add 1-4 tablespoons of water (1 Tbsp per serving). Cover during cooking and stir afterwards. |
| Mixed Vegetables | 1 serving2 servings3 servings4 servings(1 serving = 4-5 oz.) | Place the mixed vegetables in a microwave safe bowl. Add 1-4 tablespoons of water (1 Tbsp per serving). Cover during cooking and stir afterwards. |
| Food Amount Instructions | ||
| Canned Vegetables | ||
| Carrots 1 serving | 2 servings3 servings4 servings(1 serving = 4-5 oz.) | Place the carrots in a microwave safe bowl. Cover during cooking and stir afterwards. |
| Corn 1 serving | 2 scrivings3 servings4 servings(1 serving = 3-4 oz.) | Place the corn in a microwave safe bowl. Cover during cooking and stir afterwards. |
| Green Beans 1 serving | 2 scrivings3 servings4 servings(1 serving = 4-5 oz.) | Place the green beans in a microwave safe bowl. Cover during cooking and stir afterwards. |
| Peas 1 serving | 2 scrivings3 servings4 servings(1 serving = 3-4 oz.) | Place the peas in a microwave safe bowl. Cover during cooking and stir afterwards. |
| Spinach 1 serving | 2 servings3 servings4 servings(1 serving = 4-5 oz.) | Place the spinach in a microwave safe bowl. Cover during cooking and stir afterwards. |
| Beans 1 serving | 2 servings3 servings4 servings(1 serving = 4-5 oz.) | Place the beans in a microwave safe bowl. Cover during cooking and stir afterwards. |
| Grain | ||
| Oatmeal 1 pack | 2 packs | Follow the package directions for the recommended amount of water needed. Stir well before cooking and afterwards. |
| Brown Rice 1 cup | 2 cups | Add 1 cup of cold water for 1 cup of rice. Use a large glass bowl. Cover with vented (1 inch vent) plastic wrap. Rice doubles in volume during cooking. After the cooking time is over, stir before standing time, and then salt or add herbs and butter. |
| White Rice 1 cup | 2 cups | Add 1 cup of cold water for 1 cup of rice. Use a large glass bowl. Cover with vented (1 inch vent) plastic wrap. Rice doubles in volume during cooking. After the cooking time is over, stir before standing time, and then salt or add herbs and butter. |
| Bulgur 1/2 cup | 1 cup | Follow the package directions for the recommended amount of water needed. Stir well before cooking and fluff with a fork afterwards. |
| Quinoa 1 cup | 2 cups | Follow the package directions for the recommended amount of water needed. Stir well before cooking and afterwards. |
| Whole Wheat Macaroni | 1 cup2 cups | Follow the package directions for the recommended amount of water needed. Carefully remove from the microwave and drain the hot water. |
Healthy Fry

- Put the food in the center of the optitray, and then close the door
- Turn the upper mode knob to select Healthy Fry.
- Tap to select one of 10 different options.
- Tap the weight area to select the food weight screen.

- Flick the wheel picker to select the food weight.
- Tap OK.
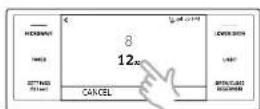

- Tap START to start cooking.
- If you want to pause cooking, tap PAUSE. In PAUSE, you can cancel or continue cooking by tapping CANCEL or CONTINUE.
CAUTION
Use only microwaves safe cookware.
Use oven gloves when taking out food.
Microwave oven (Upper Oven)
| Food Amount Instructions | ||
| Frozen Onion Rings | 8 oz.12 oz. | Place the onion rings on the even plate, then place the plate on the high rack. |
| Frozen Potato Croquettes | 8 oz.16 oz. | Place frozen potato croquettes on the even plate, then place the plate on the high rack. |
| Frozen Prawns,Breaded | 8 oz.12 oz. | Place frozen prawns on the even plate, then place the plate on the high rack. |
| Frozen Mini Spring Rolls | 8 oz.12 oz. | Place frozen mini spring rolls on the even plate, then place the plate on the high rack. |
| Frozen Potato Wedges | 12 oz.16 oz. | Place frozen potato wedges on the even plate, then place the plate on the high rack. |
| Frozen Fish Cutlets | 8 oz.12 oz. | Place frozen fish cutlets on the even plate, then place the plate on the high rack. |
| Homemade French Fries | 8 oz.12 oz. | Peel potatoes and cut into sticks with a thickness of .4 x .4 in (10 x 10 mm).Soak in cold water for 30-40 minutes.(Put some salt in the cold water for the osmotic pressure.) Dry potato sticks with a towel, and then brush with 1 tsp (5 g) oil.(Try to remove the moisture completely.Otherwise, the potatoes may get scorched and stick to the bottom of the tray.) Place them on the even plate, then place the plate on the high rack. |
| Drumsticks 3 ea | 6 ca | Rinse drumsticks and place them on the even plate, then place the plate on the high rack. When the microwave beeps, turn over drumsticks, and then press START to continue. |
| Food Amount Instructions | ||
| Chicken Wings 10 | ea20 ea | Rinse chicken wings and place on the even plate, then place the plate on the high rack. |
| Roasted Vegetables | 8 oz.12 oz. | Cut eggplants, carrots, zucchini, and then brush them with 1 tsp (5 g) oil. Place sliced vegetables on the even plate, then place the plate on the high rack. |
Conv.Sear AutoCook

- Put the food in the center of the optitray and close the door.
- Turn the upper mode knob to select Conv.Sear AutoCook.
- Tap to select one of 20 different options.
- Tap the weight area to select the food weight screen.

- Flick the wheel picker to select the food weight.


- Tap START to start cooking.
- If you want to pause cooking, tap PAUSE. In PAUSE, you can cancel or continue cooking by tapping CANCEL or CONTINUE.
CAUTION
- Use only microwave-safe cookware.
Use oven gloves when taking out food.
| Food Amount Instructions | ||
| Bone-In Chicken Pieces | 1.0 lb.2.0 lbs. | Brush the chicken pieces with oil and seasonings. Place the pieces skin side down on the high rack. When the microwave beeps, turn over bone-in chicken pieces, and then press START to continue. |
| Hamburger 2 ea | 4 ea(1 ca: 4 oz) | Place the hamburgers on the even plate. Place the plate on the high rack. When the microwave beps, turn the hamburgers over, and then press START to continue. |
| Sirloin Steak, Medium (1 Inch) | 1 inch, 1.0 lb. B | Rush the steak with oil and seasonings. Place the steak on the high rack. When the microwave beps, turn over the steak, and then press START to continue. Let the steak rest for 5 minutes before slicing. |
| Food Amount | Instructions | |
| Sirloin Steak, Well Done (1 inch) | 1 inch, 1.0 lb. | Brush the steak with oil and seasonings. Place the steak on the high rack. When the microwave beeps, turn over the steak and then press START to continue. Let the steak rest for 5 minutes before slicing. |
| Tenderloin steak, Medium (1 inch) | 1 inch1.0 lb. | Brush the steak with oil and seasonings. Place the steak on the high rack. When the microwave beeps, turn over the steak and then press START to continue. Let the steak rest for 5 minutes before slicing. |
| Tenderloin steak, Well done (1 inch) | 1 inch1.0 lb. | Brush the steak with oil and seasonings. Place the steak on the high rack. When the microwave beeps, turn over the steak and then press START to continue. Let the steak rest for 5 minutes before slicing. |
| T-Bone steak, Medium (1 inch) | 1.5 lbs. Brush | the steak with oil and seasonings. Place the steak on the high rack. When the microwave beeps, turn over the steak and then press START to continue. Let the steak rest for 5 minutes before slicing. |
| T-Bone steak, Well done (1 inch) | 1.5 lbs. Brush | the steak with oil and seasonings. Place the steak on the high rack. When the microwave beeps, turn over the steak and then press START to continue. Let the steak rest for 5 minutes before slicing. |
| Barbecue pork ribs | 1.0 lb.2.0 lbs. | Brush the pork ribs with barbecue sauce. Place the pork ribs on the low rack. |
| Boneless Pork Chops | 2 ca.4 ea.(1 ea. = 5-6 oz.) | Brush the pork chops with oil and seasonings. Place the pork chops on the high rack. When the microwave beeps, turn over the pork chops, and then press START to continue. |
Microwave oven (Upper Oven)
| Food Amount Instructions | |
| Salmon Steak 2 ea. | 4 ea.(1 ea. = 5-6 oz)Brush the salmon steak with oil and seasonings. Place the salmon steak on the even plate, and then place the plate on the high rack. |
| Homemade Gratin | 20 oz.40 oz.Ingredients (40 oz.)25 oz. potatoes, 4 oz. milk, 4 oz. cream, 1 oz. beaten whole cgg, 1 tsp each of salt, pepper, nutmeg, 5-6 oz. grated mozzarella cheese, butter, thyme.For a 20 oz. recipe, use half the quantities above.MethodPeel potatoes and slice them to 0.1-0.2 inch thickness. Spread the slices on a clean towel and keep them covered with the towel while you prepare the rest of the ingredients. Rub the surface of a gratin dish with the butter. Put the rest of the ingredients except grated cheese into a large bowl and stir well. Layer the potato slices in the dish slightly overlapping and pour the mixture over the potatoes. Spread the grated cheese over the top, and then put the gratin dish on the low rack. After cooking, let stand for 2-3 minutes. Serve sprinkled with a few fresh thyme leaves. |
| Homemade Mac and Cheese | 12 oz. Put oven dish on the low rack and cook. |
| Frozen Pizza (6 inch) | 6 inch Placcethe pizza on the high rack. |
| Food Amount | Instructions | |
| Frozen Pizza (12 inch) | 12 inch Place | the pizza on the low rack. |
| Frozen Waffles 2 ea | 4 ca | Place the waffles on the even plate, then place the plate on the low rack. |
| Frozen Cheese Sticks | 6 ea | Place the cheese sticks on the even plate, then place the plate on the high rack. |
| 12 ea | ||
| Frozen Buffalo Wings | 12 oz. | Place the chicken wings on the even plate, then place the plate on the high rack. |
| 16 oz. | ||
| Frozen Potato Chips (Frozen French Fries) | 12 oz. | Place the frozen potato chips (Frozen french fries) on the even plate, then place the plate on the high rack. |
| 16 oz. | ||
| Frozen Chicken Nuggets | 8 oz. | Place the frozen chicken nuggets on the even plate, then place the plate on the high rack. |
| 16 oz. |
Oven (Lower Oven)
Timed cooking
In timed cooking mode, the oven turns on immediately and cooks for the length of time you select.
At the end of the cooking time, the oven turns off automatically.
- You can use the timed cooking feature only with another cooking operation.
(Bake, Convection Bake, Convection Roast, Pure Convection, Steam Bake,
Steam Roast, Steam Proof, Dehydrate).
How to set the oven for timed cooking


- Turn the lower oven mode knob to the cooking operation you want.
-
Tap Cook Time. The display will change to the cooking time screen.
-
Tap numbers in the numeric pad to set the cooking time. (You can set the cooking time for any amount of time from 1 minute to 9 hours and 59 minutes).
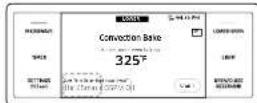
- Tap OK. The cooking time screen closes. The cooking time is displayed in the Cook Time area on the screen.
- Tap START to start cooking.
- You can cancel a cook time at any time by setting the Cook Time to 0 minutes

NOTE
See pages 53 through 54 for Basic baking and broiling instructions.
CAUTION
Use caution with the timed cooking or delay start features. You can use these features to cook cured or frozen meals and most fruits and vegetables.
For food that can easily spoil, such as milk, eggs, and unfrozen or fresh fish, meat, or poultry, chill them in the refrigerator first.
Even when chilled, they should not stand in the oven for more than 1 hour before cooking begins, and should be removed promptly when cooking is completed.
Eating spoiled food can result in sickness from food poisoning.
Delay start
In the delay timed cooking mode, the oven's timer turns the oven on at a time you select in advance. You can have the oven turn off automatically after a set time has elapsed by setting the Timed Cooking function as well.
- You can use the clayay start feature only with another cooking operation (Bake, Convection Bake, Convection Roast, Pure Convection, Steam Bake, Steam Roast, Steam Proof, Dehydrate, Self clean).
- You can set the oven for a delayed start before setting other cooking operations.
The clock must be set to the current time.
Oven (Lower Oven)
How to set the oven for delay timed cooking
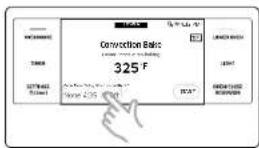
- Position the oven rack(s) and place the food in the oven.
- Turn the lower oven mode knob to the cooking operation you want.
- Set the cooking time if you want the oven to turn off automatically after a set time. (See the Timed cooking section on page 47)
- Tap Delay start. The current time is displayed as the first entry.

- Tap numbers in the numeric pad to set the time you want the oven to start.

- Tap OK. The Delay Start screen closes. The start time, and, if you set it, the cooking time, is displayed on the screen.
- Tap START to start cooking.
NOTE
See pages 53 through 54 for Basic baking and broiling instructions.
Using the temp probe
For many foods, especially roasts and poultry (beef, chicken, turkey, pork, lamb, etc), measuring the internal temperature is the best way to determine if the food is properly cooked. The Temp probe lets you cook meat to the exact internal temperature you want, taking the guess work out of determining whether a piece of meat is done or not. This function can be used with Bake, Convection Bake, Convection Roast, Steam Bake, Steam Roast, or Pure Convection.
After the internal temperature of the food reaches 100°F, the increasing internal temperature will be shown in the display.
How to use the temp probe
- Push the tip of the Temp probe into the meat as fully as possible, so that the tip is in the center of the meat.
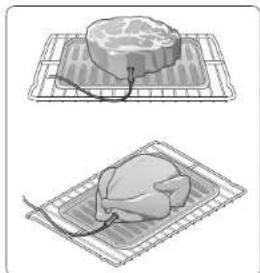
Insert the probe completely into the meat as shown in the illustrations. It should not touch bone, fat, or gristle
if you do not fully insert the probe into the meat, the Temo Probe function will not work correctly because the probe will sense the oven temperature, not the temperature of the meat.
For bone-in meals, insert the probe into the center of the lowest and thickest portion of the piece.
For whole poultry (turkey, large chickens, etc.), insert the probe into the thickest part of the inner thigh, parallel to the leg.

- Insert the temp probe plug into the socket on the top side wall of the oven as far as it will go.
- Turn the lower oven mode knob to select the desired cooking mode (Bake, Convection Bake or Convection Roast). Set the cooking temperature. (See pages 23.)
- Tap Temp Probe
- Set the desired internal temperature using the numeric pad.
Available temperatures 100 F to 200 F
- If you want to use Cook time or Delay start, set each function.
- Tap START
- When the desired internal temperature is reached, the function automatically stops and an alarm sounds.
CAUTION
To protect the Temp probe's tip, be careful not to insert the probe so that the tip protrudes through the surface of the meat. Make sure that the tip is in or near the center of the meat.
CAUTION
Do not store the probe in the oven.
- Do not leave the probe inside the oven during a self-cleaning or boiling cycle. You can permanently damage the probe and it will no longer work.
To avoid breaking the probe's tip, defrost your food completely.
- Do not use tongs when inserting or removing the probe. Tongs can damage the probe.
Use the Temp probe for Temp Probe function cooking only. Do not use the Temp probe for any other purpose.
NOTE
If you remove the Temp probe while the Temp Probe function is operating or insert the Temp probe while baking or cooking normally, cooking will stop after 1 minute.
If you use the probe to cook frozen food, there will be times when the oven will not be able to detect it. (The probe icon won't appear in the display.)
Temp probe table
| Type of Food Internal temperature | ||
| Beef / Lamb | Rare 140°F | |
| Medium 160°F | ||
| Well done 170°F | ||
| Pork 170°F | ||
| Poultry 180-185°F | ||
NOTE
If you cover the meat with aluminum foil and allow it to stand for 10 minutes after cooking, the internal temperature will rise 5-10 degrees.
Removing the temp probe
Remove the temp probe plug from the socket.
CAUTION
After cooking, the Temp probe is hot enough to cause burns. Let it cool sufficiently before attempting to remove it.
Oven (Lower Oven)
Oven functions
Cooking mode
Turn the Upper or Lower oven mode knob to select the cooking mode. Set the temperature using the Upper or Lower oven Temp knob, the numeric pad, or the wheel picker. See Setting the Temperature on pages 23 and Basic Baking and Broiling Instructions starting on page 53.
| Mode Temp | perature range Lower | Temp probe | InstantHeat™ | |
| Bake 175 | F (80 °C) - 550 °F (285 °C) O O - | |||
| Broil LO / HIO - | ||||
| Convection Bake | 175 °F (80 °C) - 550 °F (285 °C) O O O | |||
| ConvectionRoast | 175 °F (80 °C) - 550 °F (285 °C) O O O | |||
| Pureconvection | 175 °F (80 °C) - 550 °F (285 °C) O O - | |||
| Steam Bake 2 | 30 °F (110 °C) - 550 °F (285 °C) O O - | |||
| Steam Roast | 230 °F (110 °C) - 550 °F (285 °C) O O - | |||
| Steam Proof | 95 °F (35 °C) - 105 °F (40 °C) O O - | |||
| Dehydrate | 100 °F (40 °C) - 225 °F (105 °C) O O - | |||
O = Available
Not Available
None means that a factory set temperature is applied for the best performance. You cannot adjust this temperature.
| Mode | Instruction |
| Bake | · Bake is used to cook cakes, cookies, and casseroles. Always preheat the oven first. ·Baking temperatures and times will vary depending on the ingredients and the size and shape of the baking pan used. ·Dark or nonstick coatings may cook faster with more browning. NOTE For performance reasons, the convection fan may turn on or off during baking. |
| Broil | ·Broiling is a method of cooking tender cuts of meat by direct heat under the broil element of the oven. ·The high heat cooks quickly and gives a rich, brown outer appearance. Broil mode is best for meats, fish, and poultry up to 1 inch thick. ·Always preheat the oven for 5 minutes before broiling. ·See the Broil recommended guide section starting on page 52. |
| Convection Bake | ·Convection Bake uses a fan to circulate the oven's heat evenly and continuously within the oven. ·This improved heat distribution allows for even cooking and excellent results while using multiple racks at the same time. ·Breads and pastries brown more evenly. |
| Convection Roast | ·Convection Roast is good for cooking large tender cuts of meat, uncovered. The convection fan circulates the heated air evenly over and around the food. ·Meat and poultry are browned on all sides as if they were cooked on a rotisserie. ·The heated air seals in juices quickly for moist and tender results while, at the same time, creating a rich golden brown exterior. |
50 English
| Mode Instruction | |
| Pure convection | • Pure Convection uses the convection element and fan. The uniform air circulation provided by Pure Convection allows you to use more oven capacity at once. Use this mode for single rack baking, multiple rack baking, roasting, and preparation of complete meals. Many foods, such as pizzas, cakes, cookies, biscuits, muffins, rolls and frozen convenience foods can be successfully prepared on two or three racks at a time. Pure Convection is also good for whole roasted duck, lamb shoulder and short leg of lamb. |
| Steam Bake | • Steam Bake provides excellent baking conditions for breads, pastries, and desserts by increasing moisture content and improving texture and flavor. • See the Steam cook recommendation guide section starting on page 52. |
| Steam Roast | • Steam Roast provides excellent cooking conditions for roasted meats or poultry by maintaining a crispy surface while sealing in the juices for a moist and tender result. • See the Steam cook recommendation guide section starting on page 52. |
| Steam Proof | For bread dough (ycast dough and sour dough), added steam shortens fermentation time and keeps the surface of the dough from drying out. • Place the dough on rack position 1 or 2. There is no need to cover it with cloth or with plastic wrap. • For the best result, always start the Steam Proof option with a cool oven. • Do not use Steam Proof for warming food. The proofing temperature is not hot enough to keep food warm. |
| Mode Instruction | |
| Dehydrate | • Dehydrate dries food or removes moisture from food via heat circulation. • After drying the food, keep it in a cool and dry place. • For fruit, adding lemon or pineapple juice or sprinkling sugar on the fruit helps the fruit retain sweetness. • See the table below for Dehydrate settings. |
| Category Rack position Temperature (°F) | |
| Vegetables or Fruit 3 or 4 100-150 | |
| Meat 3 or 4 145-225 | |
Oven (Lower Oven)
Broiling recommendation guide
The size, weight, thickness, starting temperature, and your doneness preference will affect broiling times. This guide is based on meats at refrigerator temperature. Always use a broiler pan and its grid when broiling. Always preheat the oven for 5 minutes before broiling.
| Food Don | ness Size Th | ckness Level | Rack positon | Cooking time(min) | |||
| 1st side 2nd side | |||||||
| Hamburgers | Medium | 9 patties | 3/4' | Hi | 6 | 3:00 | 2:00 |
| Medium | 9 patties | 1" | Hi | 6 | 3:20 | 2:20 | |
| Beef steaks | Rare | - | 1" | Hi | 5 | 5:00 | 4:00 |
| Medium | - | 1- 1 1/2" | Hi | 5 | 6:00-6:30 | 4:30-4:00 | |
| Well done | - | 1- 1 1/2" | Lo | 4 | 7:00 8:00 | 4:00 5:00 | |
| Chicken pieces | Well done | 4.5 lbs. | 1/2-3/4" | Lo | 3 | 16:00-18:00 | 13:00-15:00 |
| Well done | 2 lbs. | 1/2-3/4" | Lo | 3 or 4 | 15:00-16:00 | 10:00-12:00 | |
| Pork chops | Well done | 1 lbs. | 1" | Lo | 3 | 8:00-10:00 | 6:00-8:00 |
| Fish fillets | Well done | - | 1/4 1/2" | Lo | 3 or 4 | 7:00 8:00 | 4:00 5:00 |
Steam cook recommendation guide
| Steam mode level | Foods | |
| Steam bake | High Rye breads, Desserts (Flan caramel) | |
| Med Croissants, Pies, Reheats (Pizza, Casseroles) | ||
| Low Pastris | ||
| Steam Roast | High - | |
| Med Meats, Poultry | ||
| Low Turkey, Large meats | ||
52 English
Basic Baking and Broiling Instructions

- Turn the upper or lower oven Mode knob to select the desired cooking mode.

- Set the temperature you want. (See the Setting the temperature section on page 23.)
Broil mode can be set only Hi or Low.
Some mode's temperatures are fixed and cannot be changed.


- Follow the steps below to use the InstantHeat™ feature, Steam Bake, or Steam Roast. If you are not using these features, skip these steps and go to Step 4 in the next column.
InstantHeat
a. If you are select Convection Bake or Convection Roast, the display will show the InstantHeat information. (The default is OFF)
b. Tap the InstantHeat™ area. The InstantHeat™ feature is activated and the display will show ON.

NOTE
- For best performance, we recommend cooking on a single rack.
| Type Rack Positions |
| Baking 3 or 4 |
| Roasting 1 or 2 |
Place food in the oven before you start cooking when using the InstantHeat feature.
InstantHeat" is one of the preheating option and not required for preheating when you cook. It just can be used for Convection Bake and Convection Roast mode and it is required for the Single rack cooking. Refer to as above the Rack positions.
For best performance, preheat the oven when baking rising bakery products such as angel food cakes, bundt cakes, or puff pastries.
Oven (Lower Oven)


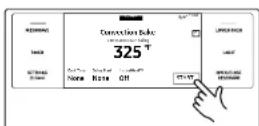
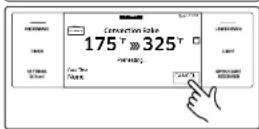
Steam Bake, Steam Roast
a. If you selected Steam Bake or Steam Roast, the display will show the steam level information. (The default is Medium).
b. Tap the Steam area to adjust the steam level. The steam level adjustment screen appears. You can set the steam level to Low, Medium, or High.
c. Tap OK. The steam level adjustment screen closes and the steam level information is displayed on the screen. Important: You must fill the water reservoir before you start steam cooking. See the Water reservoir section on page 22.
4. If you want to use the Cook Time, or Delay Start function, set each function now. See pages 47 and 48 for instructions.
5. Tap START to begin cooking.
6. Tap CANCEL when cooking is done or if you want to cancel cooking.
How to adjust the temperature while cooking


If you are using the ovens in single mode,
do one of the following:
Use the upper or lower oven temperature knob to adjust the temperature.
- Tap UPPER on the screen, tap the temperature area, enter the new temperature using the numeric keypad, and then tap OK.
- Tap UPPER on the scrocn, touch and hold the temperature area, flick the wheel pickler to set the temperature, and then tap OK.
Use the upper oven temperature knob to adjust the temperature.
- Tap the temperature area, enter the new temperature using the numeric keypad, and then tap OK.
- Touch and hold the temperature area, flick the wheel picker to set the temperature, and then tap OK.
Place food in the oven after preheating if the recipe calls for it. Preheating is very important for good results when baking cakes, cookies, pastry, and breads. After the oven has reached the desired temperature, the oven will beep 6 times.
The convection oven fan shuts off when the oven door is opened.
DO NOT leave the door open for long periods of time while using convection cooking or you may shorten the life of the convection heating element.

NOTE
If you leave the oven door open for more than 2 minutes when the oven is on, all heating elements will shut off automatically.
- When you have finished cooking, the cooling fan will continue to run until the oven has cooled down.
- Make sure to drain the remaining water after using steam cooking. Once the oven starts draining, please wait until the draining cycle is complete.
- When a steam function is complete, you must empty the water reservoir because the remaining water can affect other cooking modes.
If you are using an oven thermometer in the oven cavity, the temperature registered by the thermometer may differ from the actual set oven temperature.
For performance reasons, the convection fan may turn on or off while the oven is cooking.
This oven is designed for CLOSED DOOR brailing. The oven door must be closed during brailing.

CAUTION
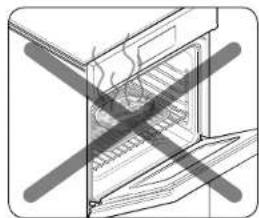
Always broil with the oven door closed. Use care when opening the door. Let hot air or steam escape before you remove food from or put food into the oven.
Using the Chef Mode feature
For inexperienced cooks, the oven offers 11 gourmet auto cook features. Take advantage of this feature to save time or shorten your learning curve. The cooking time and temperature will be adjusted according to the selected recipe.

- Turn the Mode knob to the Chef Mode. The display will show 11 auto cook features. (You can scroll down through the list).


- Tap the Chef Mode feature you want.

Oven (Lower Oven)

- Tap START to start cooking.
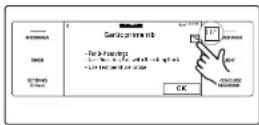
Cooking tips in the Chef Mode
- Tap TIP on the screen to see a cooking tip.
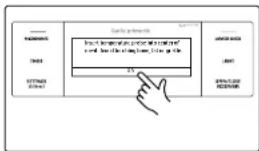
- The display will show the cooking tip. You can see the cooking tip before you start cooking or while you are cooking.
Using the iQ control feature
To use the oven's IQ control, you must download the SmartThings app to a mobile device. Functions that can be operated using the SmartThings app may not work smoothly if communication conditions are poor or the oven is installed in a place with a weak Wi-Fi signal.
Please refer to the following table for the main functions that can be operated from the app.
| When IQ control on the oven is off | Monitoring (Oven, Probe), Oven off |
| When IQ control on the oven is on | Monitoring (Oven, Probe), Oven start, Oven off, Error check |
How to connect the oven
- Download and open the SmartThings app on your smart device.
- Follow the app's on-screen instructions to connect your oven.
- Once the process is complete, the connected n th located on your oven displays and the app will confirm you are connected.
- If the connection icon does not turn on, follow the instruction in the app to reconnect.
56 English
To start the oven remotely
- Tap SETTINGS > IQ Control, and then tap ON of LOWER.
When IQ control is on you can:
- Remotely change oven settings (mode, time, temperature) using your mobile device.
- Remotely start the oven.
- Remotely turn off the oven.
Once cooking starts, you can change the cooking time and temperature remotely.

Important Self Clean mode cannot be started remotely.

- Opening the oven door or turning the mode knob to other modes will deactivate IQ control and prevent you from turning the oven on or controlling the oven remotely.
If IQ control is deactivated, you can still monitor the oven's status and turn the oven off. - When oven cooking is finished or cancelled, IQ control will be deactivated.
Using the oven racks
Lower oven rack positions

Recommended rack positions for cooking
| TYPE OF FOOD RACK | POSITION |
| Broiling hamburgers 6 | |
| Broiling meats or small cuts of poultry, fish | 3-5 |
| Bundt cakes, pound cakes, frozen pies, cassericles | 3 or 4 |
| Angel food cakes, small roasts | 2 |
| Turkeys, large roasts, hams, fresh pizza | 1 |
This table is for reference only.
Oven (Lower Oven)
Rack and Pan placement

Single Oven Rack
Centering baking pans in the oven as much as possible will produce better results. If baking with more than one pan, place the pans so each has at least 1^ to 12^ of air space around it.
When baking on a single oven rack, place the oven rack in position 3 or 4. See the figure on the left. When baking cakes and cookies on multiple racks, place the oven racks in positions 3 and 5.

Multiple Oven Racks
Using multiple oven racks
Type of Baking Rack Positions
Cakes and cookies 3 and 5

Multiple Oven Racks
Before using the racks
Each rack has stops that need to be placed correctly on the supports. These stops will keep the rack from coming completely out.
Removing the racks
-
Pull the rack straight out until it stops.
-
Lift up the front of the rack, and then pull it out.
Replacing the racks
- Place the end of the rack on the support
- Tilt the front end up and push the rack in.


CAUTION
Do not cover a rack with aluminum foil or piece aluminum foil on the oven bottom. This will hamper heat circulation, resulting in poor baking, and may damage the oven bottom.
- Arrange the oven racks only when the oven is cool.
58 English
Using the gliding rack
The fully extendable Gilding rack makes food preparation easier, especially when you are preparing heavier dishes. The Gilding rack has 2 glide tracks that allow you to extend the rack well out of the oven without touching the sides of the oven walls.
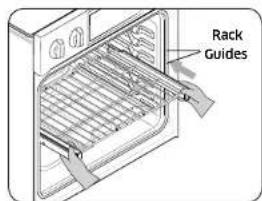
Installing the Gliding rack
With the Giding rack in the Closed position and the oven off, carefully insert the Cliding Rack between the guides until the rack reaches the back.

When using the Gliding rack in the oven, be sure to pull on the handle of the rack only to slice it in and out. If you grasp the frame while using the rack, the entire gliding rack will be removed. Make sure you use oven mitts when handling the gliding rack during cooking.

Removing the Giding rack
With the Cliding rack in the Closed position and the oven off and cool, grasp the rack and frame and pull both forward to remove.

CAUTION
Do not install the Gilding rack directly above the wire rack.
You will not be able to install it properly and the rack could fall.

NOTE
You can install the Gliding rack in any rack positions except the lowest rack position in the oven (level 1).
Oven (Lower Oven)
Using the clean feature
The Clean feature has four selections: Self-Clean, GreenClean™, Descale, and Draining.
Self Clean
This self-cleaning oven uses high temperatures (well above cooking temperatures) to burn off leftover grease and residue completely or reduce them to a finely powdered ash that you can wipe away with a damp cloth.
CAUTION
During the self cleaning cycle, the outside of the oven will become very hot to the touch. Do not leave small children unattended near the appliance.
- Some birds are extremely sensitive to the fumes given off during the self-cleaning cycle of any oven. Move birds to another well ventilated room.
- Do not line the oven walls, racks, bottom, or any other part of the oven with aluminum foil. Doing so will result in poor heat distribution, poor baking results, and cause permanent damage to the oven interior. Aluminum foil will melt and adhere to the interior surface of the oven.
The oven door locks during self-cleaning. Do not force the oven door open. This can damage the automatic door locking system. Use care when opening the oven door after the self-cleaning cycle is complete. Stand to the side of the oven when opening the door to allow hot air or steam to escape. The oven may still be VERY HOT.
Before a self cleaning cycle

Fig.1

Fig. 2
We recommend venting your kitchen with an open window or using a ventilation fan or hood during the selfcleaning cycle.
- Remove the wire rack, broil pan, broil pan insert, all cookware, and any aluminum foil from the oven.
- Wipe up debris from the oven bottom. (Fig. 1)
The silver-colored oven racks can be self-cleaned, but they will darken, lose their luster, and become hard to slide.
- Residue on the front frame of the oven and outside the gasket on the door will need to be cleaned by hand. Clean these areas with hot water, soap-filled steel-wool pads, or cleansers such as Soft Scrub. Rinse well with clean water and dry.
Do not clean the gasket. The fiberglass material of the oven door gasket cannot withstand abrasion. It is essential for the gasket to remain intact. If you notice it becoming worn or frayed, have it replaced. (Fig. 2)
Make sure the oven light cover is in place and the oven light is off.
60 English
How to run a self cleaning cycle

- Turn the Mode knob to Clean. The display will show 4 cleaning selections.
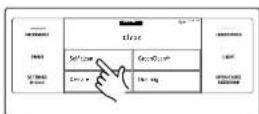
- Tap Self Clean.
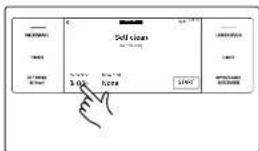
- Tap Clean Time

-
Flick the screen to set the clean time. You can choose 2 hours, 3 hours, or 5 hours. (The default is 3h).
-
Tap OK

- If you don't want to use the Delay Start feature, go to Step 8. Otherwise, tap Delay Start, and then go to Step 7.
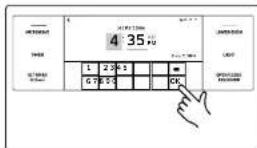
- Set the time you want self-cleaning to start, and then tap OK.

- Tap START to begin self-cleaning. The motor-driven door lock will engage automatically.
Important: Both doors lock when you run a self cleaning cycle on either oven.
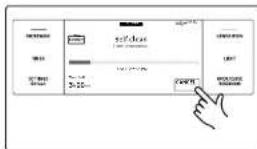
- If you need to stop or interrupt a self cleaning cycle, tap CANCEL.
Oven (Lower Oven)
NOTE
- You will not be able to start a self-cleaning cycle if the control lockout feature is activated or if the oven's temperature is too hot.
The oven doors lock automatically. The display will show the cleaning time remaining. You cannot open the oven doors until the temperature drops to a safe/cool temperature. - The self clean feature can be used in only one oven at a time. While one oven is in self cleaning mode, you cannot use the other oven for cooking.
After a self-cleaning cycle
- You may notice some white ash in the oven. Wipe it up with a damp cloth after the oven cools. (If white spots remain, remove them with a soap-filled steel wool pad and rinse thoroughly with a vinegar and water mixture.)
If the oven is not clean after one cycle, repeat the cycle. - You cannot set the oven for cooking until the oven is cool enough for the door to unlock.
GreenClean
The GreenClean™ function saves time and energy by removing leftover grease and residue that you can wipe away with a damp cloth.
NOTE
The oven door locks during GreenClean™. Do not force the oven door open. This can damage the automatic door locking system. Use care when opening the oven door after a GreenClean™ cycle is complete. Stand to the side of the oven when opening the door to allow hot air or steam to escape.
How to run a GreenClean™ cycle
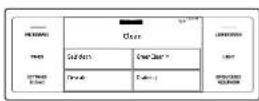
- Swipe the screen to Clean. The display will show 4 cleaning selections. (Descale and Draining features can be used only LOWER ovencl).

- Tap GreenClean™

- Tap START to begin GreenClean
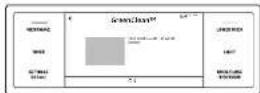
- Follow the on screen instructions. GreenClean™ will start automatically

- When GreenClean™ is complete, clean the oven's interior. There will be a significant amount of water remaining on the bottom of the oven after a GreenClean™ cycle. Remove the residual water with a sponge or soft, dry cloth.
NOTE
NOTE
For GreenClean, use exactly 10 oz (300 ml) of water since this produces the best results.
- You will not be able to start a GreenClean™ cycle if the Control lockout feature is activated or if the oven's temperature is too high.
After a GreenClean™ cycle
Take care when opening the door after a GreenClean™ procedures has ended. The water on the bottom is hot.
- Open the oven door and remove the remaining water with a sponge. Do not leave the residual water in the oven for any length of time. Wipe the oven clean and dry with a soft cloth. Do not forget to wipe under the oven door seal.
Use a detergent soaked sponge, a soft brush, or a nylon scrubber to wipe the oven interior. Remove stubborn residue with a nylon scourer. You can remove lime deposits with a cloth soaked in vinegar.
If the oven remains dirty, you can repeat the procedure once the oven has cooled.
- For heavy residue, such as grease left over from roasting, we recommend that you rub detergent into the residue before activating the CleanClean™ function
After cleaning, leave the oven door ajar at a 15^ angle to allow the interior enamel surface to dry thoroughly.

NOTE
The GreenClean™ feature can be used in only one oven at a time. While one oven is in GreenClean™ mode, you cannot use the other oven for cooking.
Descale (LOWER oven only)
If you use Steam Bake or Steam Roast functions frequently, we recommend.
descaling regularly to remove minerals from the oven that may affect the taste or
quality of food cooked. When running a descending cycle, use only descaling agents.
that are specific to steam ovens or coffee machines.

NOTE
If you use Steam Bake or Steam Roast functions for more than a total of 12 hours, the Descale indicator turns on. You can still enable the Steam Bake or Steam Roast functions for the next two hours without descaling. However, after those two hours are up, the Steam Bake or Steam Roast functions will be disabled until you run a descending cycle.

How to run a descale cycle
- Turn the Mode knob to Clean The display will show 4 cleaning selections.
- Tap Descale

- Tap START.
Oven (Lower Oven)

- Follow the on-screen instructions. It takes 3 hours to complete the cycle.
Empty and clean the water reservoir, and then fill it with 1.7 oz (50 ml) of descaling agent and 13.5 oz (400 ml) of drinkable water.

- When descending is complete, the oven drains water automatically.
- Use oven gloves to remove and empty the water reservoir, and then refill it with 22 oz (650 ml) of drinkable water for rinsing.
- Follow the on-screen instructions, and then tap OK to start rinsing.

- When rinsing is complete, use oven gloves to empty and clean the water reservoir.

WARNING
Use only descending agents that are specific to steam ovens or coffee machines.

CAUTION
Running the Descalinq function disables Steam Bake and Steam Roast. Do not cancel descalinq while it is in process. If you stop it, you must restart the descalinq cycle and complete it within the next three hours to re-enable the Steam Bake and Steam Roast functions.
To avoid accidents, keep children away from the oven.
For the correct ratio of water and the descending agent, follow the agent manufacturer's instructions. If the ratio of water to descending agent differs from the instructions here (8 to 1), use the ratio indicated in the instructions for the descending agent.

Although the oven automatically starts descending in 5 seconds without your confirmation, we recommend that you confirm your selection. This is to prevent descending from starting by mistake.
Draining (LOWER oven only)
When a steam function is complete, you must drain the remaining water to prevent the water from affecting other cooking modes. To drain the water, follow these steps:

How to run a draining
- Turn the Mode knob to Clean. The display will show 4 cleaning selections.
- Tap Draining.

- Tap START. The oven drains water from the steam generator to the water reservoir.

- When draining is complete, use oven gloves to remove and empty the water reservoir.


Once the oven starts draining, please wait until the draining cycle is complete.
Settings
In Settings, you can change the default settings to your preference or diagnose problems with the network connection.

Tap SETTINGS The display will show the Setting item.
Wi-Fi
To enable a Wi-Fi connection
-
Tap SETTINGS >Wi-Fi, and then tap ON in the right screen.
-
Tap Wi Fi, and then tap a Wi-Fi network in the list that appears.
-
You will be prompted to provide a password for a secure network. Enter the password.
To manually input an IP
- Tap SETTINGS 加 > Wi-Fi, and then tap ON in the right screen.
- Tap Add Network
- Enter an IP manually, and then tap CONNECT to apply your settings.

To disable a Wi-Fi connection. Tap SETTINGS >Wi-Fi, and then tap OFF in the right screen.
- For details about the Wi-Fi connection and using the SmartThings app, see the SmartThings app user manual.
iQ control
To start the oven remotely.
Tap SETTINGS + IQ Control, and then tap ON of LOWER. (See the using the IQ control feature section on page 56.)
Oven (Lower Oven)
Easy connection
Easy connection enables you to easily configure the network settings including the authentication procedure.
Display
- Brightness
You can change the brightness of the display screen.
Tap SETTINGS >Display >Brightness, and then use the bar next to Brightness to adjust the brightness of the screen.
- Screen saver
If screen saver is turned off, the Clock theme and Timeout menu are disabled.
-
Tap SETTINGS > Display > Screen saver, and then tap OFF in the right screen.
-
Clock theme
-
Tap SETTINGS > Display > Clock theme, and then tap in the right screen. You can select a theme.
-
Timing
-
Tap SETTINGS > DSplay > Timeout, and then tap in the right screen. You can select a time from 5 minutes to Always on.
Date & Time
To enable automatic date and time
-
Turn on the Wi-Fi connection
-
Tap SETTINGS 日 Date & Time, and then tap Date & Time.
-
Tap ON in the right screen. The data and time are set automatically.
To manually input the date and time
-
Tap SETTINGS > Date & Time, and then tap Date & Time.
-
Tap OFF in the right screen. Time zone, set date, and set time are activated.
-
You can set the time zone, date, and time.
To change the time format
- Tap SETTINGS > Date & Time > Select time format, and then tap in the right screen.
- You can select 12-hour clock or 24-hour clock.
Language
Choose a display language.
-
Tap SETTINGS > Language, and then tap in the right screen.
-
You can select English, Spanish, or French
Volume
Adjust the volume level for beeps and melodies.
Tap SETTINGS >Volume, and then use the bar next to Volume to adjust the volume.
Temp
- Temp unit
You can program the oven control to display the temperature in Fahrenheit or Celsius. The oven has been preset at the factory to display in Fahrenheit.
-
Tap SETTINGS > Temp > Temperature Unit and then tap in the right screen. You can select °C or °F.
-
Temp adjust
The temperature in the oven has been calibrated at the factory. When first using the oven, be sure to follow recipe times and temperatures. If you think the oven is too hot or too cool, you can correct the temperature in the oven. Before correcting, test a recipe by using a temperature setting that is higher or lower than the recommended temperature.
The baking results should help you to decide how much of an adjustment is needed. The oven temperature can be adjusted ± 35^(± 19^)
- Tap SETTINGS > Temp > Temperature Adjust, and then tap in the right screen. You can increase or decrease the temperature by 35^ (19 °C).
NOTENOTE
This adjustment will not affect the broiling or the self-cleaning temperatures. The adjustment will be retained in memory after a power failure.
12 hour energy Saving
If you accidentally leave the oven on, this feature will automatically turn off the oven after 12 hours during baking functions or after 3 hours during a broil function.
1. Tap SETTINGS > 12 hour energy Saving, and then tap ON in the right screen.
2. The 12 hour energy saving icon will appear in the indicator area.
Help
Help provides useful tips and explanations on a specific item that you select.
- Troubleshooting
- Tap a checkpoint directly on the screen, and try the suggestions.
- Guide for first use
- Provides simple instructions on the basic use of the oven.
About device
You can see information about the oven and do a software update.
To update the software:
- Tap SETTINGS > About device > Software update, and then tap Update in
the right screen. - Tap INSTALL. The software is updated and the system restarts automatically.
Sabbath
You can set Sabbath mode. See the Using the sabbath feature section on the next page.
Demo mode
This option is for use by retail establishments for display purposes only.
(The heating element does not operate.)
- Tap SETTINGS > Demo mode, and then tap ON in the right screen.
- The Demo mode indicator appears on screen.
Remote Management
The call center will access your product remotely to check internal when you have some problems.
Tap SETTINGS 品 Remote management, and then tap ACTIVATE
Using the sabbath feature
(For use on the Jewish Sabbath & Holidays)

For further assistance, guidelines for proper usage, and a complete list
of models with the Sabbath feature, please visit the web at
http://www star-k.org.
You can use the Sabbath feature with baking only. The oven temperature may be set higher or lower after you set the Sabbath feature. (The oven temperature adjustment feature should be used only during Jewish holidays.) The display, however, will not change and tones will not sound when a change occurs. Once the oven is properly set for baking with the Sabbath feature active, the oven will remain on continuously until the Sabbath feature is cancelled. This will override the factory preset 12 hour energy saving feature. If the oven light is needed during the Sabbath, touch LIGHT before activating the Sabbath feature. Once the oven light is turned on and the Sabbath feature is active, the oven light will remain on until the Sabbath feature is turned off. If the oven light needs to be off, be sure to turn the oven light off before activating the Sabbath feature.

How to use the Sabbath feature
- Turn the Mode knob to Bake mode.

- Set the temperature and cook time you want.
- Tap START.
Oven (Lower Oven)

- Tap SETTINGS > Sabbath, and then tap Sabbath to use the Sabbath feature. The oven will not beep or display any further changes. You may change the oven temperature once baking has started. Remember that the oven will not beep or display any further changes once the Sabbath feature is engaged.
- You can turn the oven off at any time by turning the Mode knob to the OFF position.
NOTE
that this does not turn Sabbath mode off.
- To turn Sabbath mode off, touch and hold Sabbath Mode Off for 3 seconds.
Do not to attempt to activate any other program feature except Bake while the Sabbath feature is active.
You can change the oven temperature, but the display will not change and tones will not sound when a change occurs. (The oven temperature adjustment feature should be used only on Jewish holidays.) After you change the temperature while the unit is in Sabbath mode, there is a 15 second delay before the unit recognizes the change.
You can set the Cook Time function before activating the Sabbath feature.
Should you experience a power failure or interruption, the oven will shut off. When power is returned, the oven will not turn back on automatically. Sabbath will be displayed in the oven control display, but the oven will not operate. Food may be safely removed from the oven while it is still in the Sabbath mode, however the oven cannot be turned back on until after the Sabbath Holidays. After the Sabbath observance, turn off the Sabbath mode. Touch and hold Sabbath Mode Off for 3 seconds.
Do not open the oven door or change the oven temperature for about 30 minutes after you have started Sabbath mode to allow the oven to reach the set temperature. Note that for best performance, the oven fan operates only when the oven temperature is rising.
68 English
Care and maintenance
Care and cleaning of the oven
Cleaning painted parts and decorative trim
For general cleaning, use a cloth with hot, soapy water.
For more difficult residue and built-up grease, apply a liquid detergent directly onto the area and leave for 30 to 60 minutes. Wipe with a damp cloth and dry. Do not use abrasive cleaners on any oven surface. They can be scratched.
Clean soil from the porcelain surfaces of the door outside of the door gasket Rinse surfaces well with a solution of vinegar and water, then wipe dry. Heavily soiled areas may be cleaned with a non-scratching scouring pad.
Cleaning stainless-steel surfaces
- Shake a bottle of stainless-steel Appliance Cleaner or Polish well
- Place a small amount of stainless-steel appliance cleaner or polish on a damp cloth or damp paper towel.
- Clean a small area, rubbing with the grain of the stainless steel if applicable.
- Dry and buff with a clean, dry paper towel or soft cloth.
- Repeat as necessary.

-
Do not use a steel-wool pad. It will scratch the surface.
-
If a mineral oil based stainless steel appliance cleaner has been used before to clean the appliance, wash the surface with dishwashing liquid and water prior to using the stainless-steel appliance cleaner or polish.
Convection filter
The convection filter is located in the back of each oven chamber.
Clean the filter regularly, if you allow it to become clogged, the oven's convection cooking modes will not work properly.
You also need to remove the filter during the self-clean cycle.

For your safety and proper oven performance, re-install the filter before using the oven to cook. If you don't, the spinning fan blades at the back of the oven will be exposed.
Removing your oven's convection filter
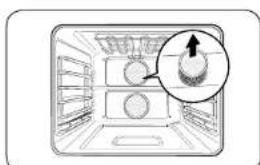
When the oven is cool, put your fingers around the edges of the filter and gently push up.
To clean the filter
Soak it in hot, soapy water. Rinse well. You may also place it in a dishwasher on the top rack. Dry the filter before re-installing it.
Installing your oven's convection filter

Carefully hook the metal clips on the back of the filter over the metal bar across the fan hole. Make sure it is centered over the hole. Be careful not to scratch the porcelain surfaces with the back of the filter
Care and maintenance
To lubricate the slides of the gliding rack
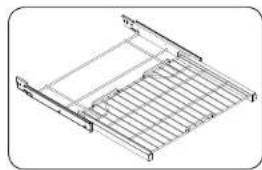
- Remove the rack from the oven. See removing the gliding rack in the Using the gliding rack section on page 59
- Fully extend the rack on a table or countertop. Newspaper may be placed underneath the rack for easy cleanup.

- If there is debris in the slide tracks, wipe it away using a paper towel. Any graphite lubricant wiped away must be replaced. See steps 4 through 7.

- Shake the graphite lubricant before opening it. Starting with the left (front and back) slide mechanism of the rack, place four (4) small drops of lubricant on the two (2) bottom tracks of the slide close to the bearing carriers.

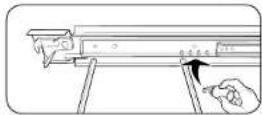
- Repeat for the right (front and back) slide mechanism of the rack.
- Open and close the rack several times to distribute the lubricant.
- Replace the cap on the lubricant and shake it again. Turn the rack over and repeat steps 3, 4, 5, and 6.
- Close the rack, turn the rack right-side-up, and then place in oven. See Installing the Gilding rack on page 59.
NOTE
Do not spray the gliding rack with cooking spray or other lubricant sprays.
Oven door

Use soap and water to thoroughly clean the top, sides, and front of the oven door. Rinse well. You may use a glass cleaner on the outside glass of the oven door. DO NOT immerse the door in water. DO NOT spray or allow water or the glass cleaner to enter the door vents. DO NOT use oven cleaners, cleaning powders, or any harsh abrasive cleaning materials on the outside of the oven door.
DO NOT clean the oven door gasket. The oven door gasket is made of a woven material which is essential for a good seal. Care should be taken not to rub, damage, or remove this gasket.
70 English
Removing the oven doors
CAUTION
The door is very heavy. Be careful when removing and lifting the door.
Do not lift the door by the handle.
Use two hands to remove an oven door. For double ovens, repeat the process for each door.

A. Wire Harness
- Prior to removing the oven door, prepare a surface where you will place it. This surface should be flat and covered with a soft blanket. You can also use the corner posts from your packaging material.
- Remove the rubber cap (for LOWER oven door, and then disconnect the LED light's Wire Harness from the bottom right of the door.
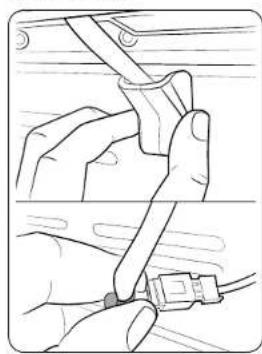
NOTE
If you are removing the LOWER door, you must open the lower door to access the wire harness.
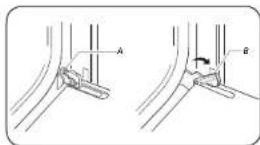
A. Oven door hinge lock in locked position
B. Oven door hinge lock in unlocked position
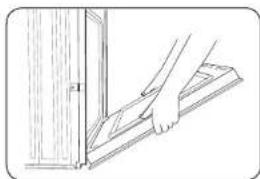

- Open the oven door.
- Locate the oven door hinge locks in both corners of the oven door, and then rotate the hinge locks toward the oven door to the unlocked position. If the door hinge lock is not rotated fully (see illustration B on the left for an example of full rotation), you will not be able to remove the door properly.
- Partially close the door to engage the door latch locks. The door will stop at this point.
- Using two hands, grasp the edges of the oven door. Lift and pull the oven door toward you and remove. You may need to gently shift the door from side to side as you pull.
- Set the oven door aside on the prepared covered work surface with the oven door resting on its handle.
Care and maintenance
Replacing the oven doors
CAUTION
The door is very heavy. You may need help lifting the door high enough to slide it into the hinge slots. Do not lift the door by the handle.

A. Slot in the oven cavity for the door hinge lock
- Using two hands, grasp the side edges of the door at the midpoint. Face the ovenc cavity.
- Locate the slots on each side of the oven cavity for the door hinge locks.

- Hold the door at a 45^ angle, and then align the door hinges with the slots in the lower front of the oven cavity. Slowly insert the door, making sure you maintain the 45^ angle. You will know the door is engaged in the slot when you feel a slight drop.

- Lower the oven door to the fully open position. If the oven door does not open to a full 90^ , repeat steps 1 through 3.
- Locate the oven door hinge locks in the corners of the oven door, and rotate the hinge locks toward the oven cavity to the locked position. See Step 3 (Illustration A) in the "Removing the oven doors" section for the proper locked position.
- Close the oven door.
- When the hinges are properly installed and the door is closed, there should be an even gap between the door and the control panel. If one side of the oven door is hanging lower than the other, the hinge on that side is not properly installed.
- Reconnect the LED light's Wire Harness and re-insert the rubber.
CAUTION
After replacing the door, make sure to reconnect the wires. Push them inward to arrange them as they were before you removed the door. Wires that are not connected or arranged correctly can be caught in the door or damaged by heat.
72 English
Changing the oven light
The oven light is a standard 40-watt appliance halogen bulb. It comes on when the oven door is open. When the oven door is closed, touch LIGHT to turn the light on or off. It will not work during a self-cleaning or GreenClean" cycle.
CAUTION
Before changing the oven light, make sure to wear gloves to protect your hands.


- To change the bulb, you must tilt the broil heater down. To do this, turn the circular nut on the support counterclockwise while holding the broil heater. The broil heater should loosen and tilt down.
CAUTION
The broil heater is not a removable part. Do not force the broil heater down. Do not let it drop down.


- While holding the glass cover with one hand, insert a flat-sharp tool such as a table knife between the glass and the frame to remove the glass cover.
- Turn the bulb cap counterclockwise to remove.
NOTE
If necessary, remove the metal rings and clean the bulb cap. - Replace the bulb.
- Place the bulb cap and glass cover back into their position.
- Return the broil heater back by following step 1 in reverse order.
CAUTION
Before changing your oven light, disconnect the electrical power to the oven at the main fuse or circuit breaker panel. Make sure the oven and the halogen bulb are cool.
Troubleshooting
If you experience malfunctions or performance issues, review the tables in this section to resolve the issue yourself. If you still cannot resolve the issue, call DACor Customer Service 833-35-ELITE (833-353-5483).
Control Display
| Problem Possible cause Solution | ||
| The display goes blank. | A fuse in your home may be blown or the circuit breaker tripped. | Replace the fuse or reset the circuit breaker. |
| The buttons cannot be pressed properly. | • There is foreign matter caught between the buttons • Touch model: There is moisture on the exterior • The lock function is set | • Remove the foreign matter and try again. • Remove the moisture and try again. • Check whether the lock function is set. |
For the Microwave Oven
| Symptom Cause | Action | |
| General | ||
| The buttons cannot be pressed properly. | Foreign matter may be caught between the buttons. | Remove the foreign matter and try again. |
| For touch models: Moisture is on the exterior. | Wipe the moisture from the exterior. | |
| Control lock is activated. | Activate Control lock. | |
| The oven does not work. | Power is not supplied. Make sure power is supplied. Make sure the oven is plugged in. Check if a fuse has been blown or circuit breaker has been tripped. | |
| The door is open. Close the door and try again. | ||
| The door open safety mechanisms are covered in foreign matter. | Remove the foreign matter and try again. | |
| The oven stops while in operation. | The user has opened the door to turn food over. | After turning over the food, press the Start button again to start operation. |
74 English
| Symptom Cause | Action | |
| The power turns off during operation. | The oven has been cooking for an extended period of time. | After cooking for an extended period of time, let the oven cool. |
| The cooling fan is not working. | Listen for the sound of the cooling fan. | |
| Trying to operate the oven without food inside. | Put food in the oven. | |
| There is insufficient ventilation space for the oven. | There are intake/exhaust outlets on the front and rear of the oven for ventilation. Maintain the gaps specified in the product installation guide. | |
| Several power plugs are being used in the same socket. | Designate only one socket to be used for the oven. | |
| There is a popping sound during operation, and the oven doesn't work. | Cooking food in a sealed container or using a container with a lid may cause popping sounds. | Do not use sealed containers as they may burst during cooking due to expansion of the contents. |
| The oven exterior is too hot during operation. | There is insufficient ventilation space for the oven. | There are intake/exhaust outlets on the front and rear of the oven for ventilation. Maintain the gaps specified in the product installation guide. |
| Objects are on top of the oven. | Remove all objects on the top of the oven. | |
| The door cannot be opened properly. | Food residue is stuck between the door and oven interior. | Clean the oven and then open the door. |
| Symptom Cause | Action | |
| Heating including the Warm function does not work properly. | The oven may not work, too much food is being cooked, or improper cookware is being used. | Put one cup of water in a microwave-safe container and run the microwave for 1-2 minutes to check whether the water is heated. Reduce the amount of food and start the function again. Use a cooking container with a flat bottom. |
| The thaw function does not work. | Too much food is being thawed. | Reduce the amount of food and start the function again. |
| The interior light is dim or does not turn on. | The door has been left open for a long time. | The interior light may automatically turn off when the Eco function operates. Close and reopen the door or press the Cancel button. |
| The interior light is covered by foreign matter. | Clean the inside of the oven and check again. | |
| A beeping sound occurs during cooking. | If the Auto Cook function is being used, this beeping sound means it's time to turn over the food during thawing. | After turning over the food, press the Start button again to restart operation. |
| The oven is not level. | The oven is installed on an uneven surface. | Make sure the oven is installed on flat, stable surface. |
| There are sparks during cooking. | Metal containers are used during oven/thawing functions. | Do not use metal containers. |
Troubleshooting
| Symptom Cause | Action | |
| When power is connected, the oven immediately starts to work. | The door is not properly closed. | Close the door and check again. |
| There is electricity coming from the oven. | The power or power socket is not properly grounded. | Make sure the power and power socket are properly grounded. |
| 1. Water drips.2. Steam is emitted through a door crack.3. Water remains in the oven. | There may be water or steam in some cases depending on the food. This is not an oven malfunction. | Let the oven cool and then wipe with a dry dish towel. |
| The brightness inside the oven varies. | The brightness can change depending on power output which can change according to the function you choose. | Power output changes during cooking are not malfunctions. |
| Cooking is finished, but the cooling fan is still running. | To ventilate the oven, the cooling fan continues to run for about 3 minutes after cooking is complete. | This is not an oven malfunction. |
| Symptom Cause | Action | |
| Optitray | ||
| While turning, the optitray comes out of place or stops turning. | There is no roller ring, or the roller ring is not properly in place. | Install the roller ring and then try again. |
| The turn table drags while turning. | The roller ring is not properly in place, there is too much food, or the container is too large and touches the inside of the microwave. | Correct the placement of the roller ring. Adjust the amount of food. Do not use containers that are too large. |
| The turn table rattles while turning and is noisy. | Food residue is stuck to the bottom of the oven. | Remove any food residue stuck to the bottom of the oven. |
| Briiling | ||
| Smoke comes out during operation. | During initial operation, smoke may come from the heating elements when you first use the oven. | This is not a malfunction. After you run the oven 2-3 times, it should stop. |
| Food is on the heating elements. | Let the oven cool and then remove the food from the heating elements. | |
| Food is too close to the grill. | Put the food a suitable distance away while cooking. | |
| Food is not properly prepared and/or arranged. | Make sure food is properly prepared and arranged. | |
| Convection | ||
| The oven does not heat. | The door is open. Close the door and try again. | |
| Smoke comes out during preheating. | During initial operation, smoke may come from the heating elements when you first use the oven. | This is not a malfunction. After you run the oven 2-3 times, it should stop. |
| Food is on the heating elements. | Let the oven cool and then remove the food from the heating elements. | |
| There is a burning or plastic smell when using the oven. | Plastic or non heat-resistant cookware is used. | Use glass cookware suitable for high temperatures. |
| There is a bad smell coming from inside the oven. | Food residue or plastic has melted and stuck to the interior. | Run the Steam Bake function for an hour, and then wipe with a dry cloth. You can put a lemon slice inside, and then run Steam Bake to remove the odor more quickly. |
| Symptom Cause | Action | |
| The oven does not cook properly. | The oven door is frequently opened during cooking. | If you open the door often, the interior temperature will be lowered and this may affect the results of your cooking. |
| The oven controls are not correctly set. | Correctly set the oven controls and try again. | |
| The broil heater or other accessories are not correctly inserted. | Correctly insert the accessories. | |
| The wrong size or wrong type of cookware is used. | Use suitable cookware with flat bottoms. |
Troubleshooting
For the Lower Oven
| Problem Possible cause Solution | ||
| The oven will not turn on. | The oven is not completely plugged into the electrical outlet. | Make sure the electrical plug is inserted into a live, properly grounded outlet. |
| A fuse in your home may be blown or a circuit breaker may have tripped. | Replace the fuse or reset the circuit breaker. | |
| The oven controls have been set improperly. | See the Basic operations section starting on page 23. | |
| The oven is too hot. Allow the oven to cool. | ||
| Incomplete service wiring. Call for service. | ||
| Power outage. Check to see if the house lights will turn on. If necessary, call your local electric company for service. | ||
| The oven light will not turn on. | The light is loose or defective. | Tighten or replace the lamp. Call for service if the door light does not turn on. |
| The switch operating the light is broken. | Call for service. | |
| Problem Possible cause Solution | ||
| The oven smokes excessively during broiling. | The oven controls have not been set properly. | See the Basic operations section starting on page 23. |
| The meat has been placed too close to the element. | Reposition the rack to provide proper clearance between the meat and the element. Preheat the broil element for searing. | |
| The meat has not been properly prepared. | Remove excess fat from the meat. Cut away fatty edges that may curl, leaving the lean intact. | |
| Crcase has built up on oven surfaces. | Regular cleaning is necessary when broiling frequently. | |
| Food does not bake or roast properly. | The oven controls have not been set correctly. | See the Basic operations section starting on page 23. |
| The oven rack has been positioned incorrectly or is not level. | See the Using the oven racks section on page 57. | |
| The oven thermistor needs to be adjusted. | See Temp adjust in the Settings section on page 66. | |
78 English
| Problem Possible cause Solution | ||
| Food does not broil properly. | The serving size may not be appropriate. | Refer to the Broiling recommendation guide for serving sizes on page 52, and then try again. |
| The rack has not been properly positioned. | See the Broiling recommendation guide on page 52. | |
| The cookware is not suited for broiling. | Use suitable cookware. | |
| In some areas, the power (voltage) may be low. | • Preheat the broil element for 10 minutes. • See the Broiling recommendation guide on page 52. | |
| The oven temperature is too hot or too cold. | The oven thermistor needs to be adjusted. | See Temp adjust in the Settings section on page 66. |
| There is water dripping. | You may see water or steam in some cases depending on the food you are cooking. This is not a product malfunction. | Let the oven cool and then wipe up with a dry dish towel. |
| There is steam coming through the crack between the oven body and the door. | ||
| Water remains in the oven. | ||
| Problem Possible cause Solution | ||
| I can hear water boiling during steam cooking. | Water is being heated by the steam heater. | This is not a product malfunction. |
| The oven will not self-clean. | The oven temperature is too high to start a self-clean operation. | Allow the oven to cool, and reset the controls. |
| The oven controls have been set incorrectly. | See the Self Clean section on page 60. | |
| A self-cleaning cycle cannot be started if the oven lockout feature has been activated. | Deactivate the oven Control lockout (see page 24). | |
| Excessive smoking during a self-cleaning cycle. | There is excessive soiling in the oven. | Press CANCEL Open the windows to rid the room of smoke. Wait until the self-cleaning cycle is cancelled. Wipe up the excessive soil and then start the self-cleaning cycle again. |
| The oven door will not open after a self-cleaning cycle. | The oven is too hot. Allow the oven to cool. | |
| The oven is not clean after a self-cleaning cycle. | The oven controls were not set correctly. | See the Self Clean section on page 60. |
| The oven was heavily soiled. Wp | pc up heavy spillovers before starting the self-cleaning cycle. Heavily soiled ovens may need to be self-cleaned again or for a longer period of time. | |
Troubleshooting
| Problem Possible cause Solution | ||
| Steam is coming out of the vent. | When using the convection feature, it is normal to see steam coming out of the oven vent. | This is normal operation and not a system failure.Use the oven as usual. |
| As the number of racks or amount of food being cooked increases, the amount of visible steam will increase. | ||
| A burning or oily odor is coming from the vent. | This is normal for a new oven and will disappear in time. | To speed the process,set a self-cleaning cycle for a minimum of 3 hours.See the Self Clean section on page 60. |
| Strong odor. An odor coming from the insulation around the inside of the oven is normal for the first few times the oven is used. | Operate the oven empty on the bake setting at 400℉ for 1 hour. | |
| Fan noise. A convection fan may automatically turn on and off. | This is not a system failure but normal operation. | |
| The oven racks are difficult to slide. | The shiny, silver-colored racks were cleaned in a self-cleaning cycle. | Apply a small amount of vegetable oil to a paper towel, and then wipe the edges of the oven racks with the paper towel. |
| The oven door is locked. | The circuit breaker has been tripped or there was a power failure while the oven door was locked. | Activate Control Lockout, and then unlock the control.Soc the oven Control lockout section on page 24. |
Information codes
| Displayed Code | Possible cause Solution | |
| C-d0 | This code occurs if the control key is short for 1 minute. | Clean the buttons and make sure there is no water on/ around them. Turn off the oven and try again. If the problem continues, contact a local Dacor service center. |
| C-d1 | This code occurs if the door lock is mispositioned. | Press CANCEL, and then restart the oven. If the problem persists, disconnect all power to the oven for at least 30 seconds and then reconnect the power. If this does not solve the problem, call for service. |
| C-F0 | This code occurs if communication between the Main and Sub PBA is interrupted. | |
| C-F2 | This code occurs if communication between the Main and Touch is interrupted. | |
| C-10 | The cooking sensor is open when the microwave is operating. | |
| The cooking sensor is short when the microwave is operating. | ||
| C-20 | The oven sensor is open when the oven is operating. | |
| The oven sensor is short when the oven is operating. | ||
| C-21 | This code occurs if the internal temperature rises abnormally high. |
Warranty and Service
| Displayed Code | Possible cause Solution | ||
| C-23 | The temp probe sensor is short when the oven is operating. | Press CANCEL, and then restart the oven. If the problem persists, disconnect all power to the oven for at least 30 seconds and then reconnect the power. If this does not solve the problem, call for service. | |
| C-30 | The PCB sensor is open when the oven is operating. | ||
| The PCB sensor is short when the oven is operating. | |||
| C-31 | This code occurs if the PCB temperature rises abnormally high. | Call for service | |
| C-70 The steam sensor is open when the oven is operating | Press CANCEL, and then restart the oven. If the problem persists, disconnect all power to the oven for at least 30 seconds and then reconnect the power. If does not solve the problem, call the service. | ||
| The steam sensor is short when the oven is operating | |||
| C-72 There are drain system related problems. | |||
| C-A2 | The cooling motor is operating abnormally. | Call for service. | |
Getting Help
Before you request service:
you request service:
1. Review the Troubleshooting section of this manual (see page 74).
2. Use the helpful tips found in our Troubleshooting.
3. Become familiar with the warranty terms and conditions of your product.
4. If none of these tips or suggestions resolves your problem, call our Customer
Service center at the number below.
Dacor's Customer Service center is available 5:00 am - 5:00 pm Pacific Time
Phone:833-35-ELITE (833-353-5483),USA and Canada
Contact us through our website at: www.dacor.com
Warranty
What Is Covered
CERTIFICATE OF WARRANTY: DACOR OVENS
WITHIN THE FIFTY STATES OF THE U.S.A., THE DISTRICT OF COLUMBIA, AND
CANADA:
FULL TWO-YEAR WARRANTY
The warranty applies only to the Dacor appliance sold to the first use purchaser, starting from the date of original retail purchase or closing date for new construction, whichever period is longer. Warranty is valid on products purchased brand new from a Dacor Authorized Dealer, or other seller authorized by Dacor. If your Dacor product fails to function within one year of the original date of purchase, due to a defect in material or workmanship, Dacor will remedy it without charge to you.
Warranty and Service
All cosmetic damage (such as scratches on stainless steel, paint/porcelain blemishes, etc.) to the product or included accessories must be reported to Dacor within 60 days of the original purchase date to qualify for warranty coverage. Consumable parts such as filters and light bulbs are not covered and are the responsibility of the purchaser.
LIMITATIONS OF COVERAGE
Service will be provided by a Dacor designated service company during regular business hours. Please note service providers are independent entities and are not agents of Dacor.
Dealer display and model home display products with a production date greater than 5 years, products sold "As Is," and products installed for non-residential use, which include but are not limited to religious organizations, fire stations, bed and breakfast, and spas carry a one year parts warranty only. All delivery, installation, labor costs, and other service fees are the responsibility of the purchaser. Warranty will be null and void on product that has altered, defaced, or missing serial numbers and tags.
The owner must provide proof of purchase or closing statement for new construction upon request. All Dacor products must be accessible for service. Warranty is null and void if non ETL or non CUL approved product is transported from the U.S.A.
OUTSIDE THE FIFTY STATES OF THE U.S.A, THE DISTRICT OF COLUMBIA, AND CANADA:
LIMITED FIRST YEAR WARRANTY
If your Dacor product fails to function within one year of the original date of purchase due to a defect in material or workmanship, Dacor will furnish a new part, F.O.B. factory to replace the defective part.
All delivery, installation, labor costs and other service fees are the responsibility of the purchaser.
What Is Not Covered
- Slight color variations may be noticed because of differences in painted parts, kitchen lighting, product placement, and other factors; this warranty does not apply to color variation.
Service calls to educate the customer on proper use and care of the product.
Service fees for travel to islands and remote areas, which include but are not limited to, ferries, toll roads or other travel expenses.
Consequential or incidental damage, including but not limited to food or medicine loss, time away from work or restaurant meals. - Failure of the product when used for commercial, business, rental or any application other than for residential consumer use.
- Failure of the product caused by improper product installation.
- Replacement of house fuses, fuse boxes or resetting of circuit breakers.
- Damage to the product caused by accident, fire, flood, power interruption, power surges or other acts of God.
- Liability or responsibility for damage to surrounding property including cabinetry, floors, ceilings and other structures or objects around the product.
- Breakage, discoloration, or damage to glass, metal surfaces, plastic components, trim, paint or other cosmetic finish caused by improper usage, care, abuse or neglect.
82 English
Appendix
Out of Warranty
Should you experience a service issue beyond the standard warranty period, please contact us. Dacor reviews each issue and customer concern to provide the best possible solution based on the circumstances.
THE REMEDIES PROVIDED IN THE ABOVE EXPRESS WARRANTY ARE THE SOLE AND EXCLUSIVE REMEDIES. THEREFORE, NO OTHER EXPRESS WARRANTY ARE MADE, AND OUTSIDE THE FIFTY STATES OF THE UNITED STATES, THE DISTRICT OF COLUMBIA AND CANADA. ALL IMPLIED WARRANTY, INCLUDING BUT NOT LIMITED TO, ANY IMPLIED WARRANTY OF MERCHANTABILITY OR FITNESS FOR A PARTICULAR USE OR PURPOSE, ARE LIMITED IN DURATION TO ONE YEAR FROM THE DATE OF ORIGINAL PURCHASE. IN NO EVENT SHALL DACOR BE LIABLE FOR INCIDENTAL EXPENSE OR CONSEQUENTIAL DAMAGES. IN THE EVENT DACOR PREVAILS IN ANY LAWSUIT. DACOR SHALL BE ENTITLED TO REIMBURSEMENT OF ALL COSTS AND EXPENSES, INCLUDING ATTORNEY'S FEES, FROM THE DACOR CUSTOMER. NO WARRANTYES. EXPRESS OR IMplied, ARE MADE TO ANY BUYER FOR RESALE.
Some states do not allow limitations on how long an implied warranty lasts, or do not allow the exclusion or limitation of inconsequential damages, therefore the above limitations or exclusions may not apply to you. This warranty gives you specific legal rights, and you may also have other rights that vary from state to state.
Open Source Announcement
The software included in this product contains open source software. You may obtain the complete corresponding source code for a period of three years after the last shipment of this product by contacting our support team via http:// opensource.samsung.com (Please use the "Inquiry" menu.)
It is also possible to obtain the complete corresponding source code in a physical medium such as a CD-ROM: a minimal charge will be required.
The following URL http://opensource.samsung.com/opensource/OVEN_A20_TZ/seq/q leads to the open source license information as related to this product. This offer is valid to anyone in receipt of this information.

English 83
Memo
Memo
Memo
dacor
Please visit www.Dacor.com to activate your warranty online.
WARRANTY INFORMATION

IMPORTANT:
Your warranty will not begin until you activate it online or return this form to Dacc. If you have purchased more than one Decor product, please return all forms in one envelope, or activate the warranty for each product, online.
Please rest assured that under no corrlions will Decor sell your name or any of the information on this form for mailing is purposes. We are very grateful that you have chosen Dacor products for your home and we can not consider the sale of such information to be a proper way of expressing our gratitude!
| Owner's Name: | |
| Street | LETHORACEYTROPYTROPYPERMINE |
| City State: | |
| Zip: | |
| Purchase Date: Email: | |
| Telephone: | |
| Dealer: | |
| City State: | |
| Zip: | |
Your willingness to take a few seconds to fill in the section below will be sincerely appreciated.
Thank you.
- How were you first exposed to Dacor products? (Please check one only.)
A.TV.Cooking Show
Fuiider
B. Magazine
G.Architect/Designer
C. Appliance Dealer Showroom
H.AnotherDacorOwner
U. D.Kitchen Dealer Showroom
U Mode
E.Home Show
□□Other
- Where did you buy your Dacor appliances?
A.Appliance Dealer
D.Bullder
G. Kishen Dealer
C. Other
C Builder Supoier
- For what purpose was the product purchased?
A. Replacememy
P. E. Part of a Remodel
- what is your household income?
A.Under $75,000
E75000100,000
C. 100,000 -150,000
C New Home
D. Other
- What are the brands of appliances that you have in your kitchen?
A.Cooklop C.Dishwasher
B.Cyan
D. Refrigerator
- Would you buy or recommend another Dacor product?
Yes
Comments:
No
Thank you very much for your assistance. The information you have provided will be extremely valuable in helping us plan for the future and giving you the support you deserve.
Place Serial Number Label Here
Website: www.Dacor.com
Phone:83335ELITE(833-3535483)

BUSINESS REPLY MAIL FIRST-CLASS MAIL PERMIT NO 1600 CITY OF INDUSTRY CA POSTAGE WILL BE PAID BY ADDRESSEE
DACOR
ATTN: WARRANTY PROCESSING DEPT
PO BOX 90070
CITY OF INDUSTRY, CA 91715-9807
llllllllllllllll
told here
DcOR

00000000000000000000000000000
Paeep 14425 Cour Avenue City of Industry, CA 97125
Pone 633-35-E1TE 633-353-483-Fax 628)409-3130-WWW dxco.com
Horno combinado de microondas empotable
DOC30P977D*

Estimado cliente:
Dacor Customer Service Team
14425 Clark Avenue
City of Industry, CA 91745
The Dacon Customer Service Team
2 Espanol
solicit service technique
A.Menos de 975.030
□B75000-1000
C. 100,000 -150,000
D. 150,000 -200,000
□=20000-25000
H F M s de $250,000
ATTN: WARRANTY PROCESSING DEPT
POBOX90070
CITY OF INDUSTRY, CA 91715-9907
1111111111111111
DcOR

DC89136400
Daccr·14425ClarkAvenueCityofIndustryCA91745
- Telefon: 633-35-ELITE (633-353-5483) - Fax (626) 403-3130 - www.dacor.com
A nos chers clients:
City of Industry, CA 91745
The Dacon Customer Service Team
2 Français
CONSIGNES PERMETTANT D'ÉVITER UNE EXPOSITION EXCESSIVE AUX MICRO-ONDES
Kitchen M nuterie 24
CERTIFICAT DE GARANTIE :FOURS DACOR
DANS LES CINQUANTE ETATS DES ETATS-UNIS, LE DISTRICT DE COLUMBIA ET AU CANADA:
GARANTIE LIMITEE DE DEUX ANS
Site Web: www.Dacor.com
Telephone:83335ELTE8333535483)
BUSINESS REPLY MAIL FIRST-CLASS MAIL PERMIT NO 1600 CITY OF INDUSTRY CA POSTAGE WILL BE PAID BY ADDRESSEE
DACOR
ATTN: WARRANTY PROCESSING DEPT
PO BOX 90070
CITY OF INDUSTRY, CA 91715-9807
llllllllllllllll
foll here
DcOR

DC6801316A00
Dacar • 14425 Clark Avenue City of Industry, CA 91745
- Telephone: 833-35-ELITE (833-353-5463) - Telecopic: (626) 403-3130 - www.dacor.com
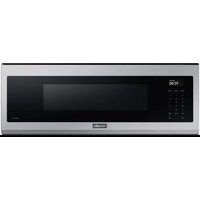
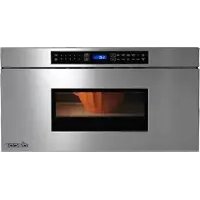
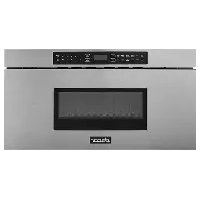
- Built-In Microwave Combi Oven
- Regulatory Notice
- PRECAUTIONS TO AVOID POSSIBLE EXPOSURE TO EXCESSIVE MICROWAVE ENERGY
- FCC Notice
- CAUTION
- FCC STATEMENT:
- FCC RADIATION EXPOSURE STATEMENT:
- IC Notice
- IC RADIATION EXPOSURE STATEMENT:
- Contents
- Important safety instructions
- WHAT YOU NEED TO KNOW ABOUT SAFETY INSTRUCTIONS
- Important safety symbols and precautions
- WARNING
- SAVE THESE INSTRUCTIONS
- Important safety instructions (Microwave Oven)
- CALIFORNIA PROPOSITION 65 WARNING
- GROUNDING INSTRUCTIONS
- USE OF EXTENSION CORDS
- Important safety instructions (Oven)
- FOR YOUR SAFETY
- ELECTRICAL SAFETY
- CHILD SAFETY
- OVEN
- SELF-CLEANING OVENS
- VENTILATING HOOD
- CRITICAL INSTALLATION WARNINGS
- CRITICAL USAGE WARNING
- USAGE CAUTIONS
- CRITICAL CLEANING WARNINGS
- Introducing your new oven
- What's included with your oven
- Accessories for microwave
- Before you begin
- Energy saving tips
- Optitray (For microwave oven)
- Water reservoir
- NOTE
- Basic operations
- Control panel
- Setting the temperature
- Temperature knob
- Numeric pad
- Control lockout
- How to activate the control lockkout feature
- How to unlock the controls
- Kitchen timer
- How to set the timer
- Tap START.
- Minimum and maximum settings
- Upper microwave oven
- Microwave oven (Upper Oven)
- Setting the power level
- Timed cooking
- How to set the oven for timed cooking
- Microwave
- Convection Sear
- Broil
- Speed Conv.Sear
- Speed broil
- Auto cook
- Defrost
- Sense CookTM
- Auto sensor cooking instructions
- Utensils & cover
- Healthy Choice
- Healthy Fry
- Conv.Sear AutoCook
- Oven (Lower Oven)
- Delay start
- How to set the oven for delay timed cooking
- Using the temp probe
- How to use the temp probe
- Removing the temp probe
- Oven functions
- Cooking mode
- Broiling recommendation guide
- Basic Baking and Broiling Instructions
- How to adjust the temperature while cooking
- Using the Chef Mode feature
- Using the iQ control feature
- How to connect the oven
- To start the oven remotely
- Using the oven racks
- Lower oven rack positions
- Rack and Pan placement
- Before using the racks
- Removing the racks
- Replacing the racks
- Using the gliding rack
- Using the clean feature
- Self Clean
- Before a self cleaning cycle
- How to run a self cleaning cycle
- After a self-cleaning cycle
- GreenClean
- How to run a GreenClean™ cycle
- After a GreenClean™ cycle
- Descale (LOWER oven only)
- Draining (LOWER oven only)
- Settings
- Wi-Fi
- iQ control
- Easy connection
- Display
- Date & Time
- Language
- Volume
- Temp
- NOTENOTE
- hour energy Saving
- Help
- About device
- Sabbath
- Demo mode
- Remote Management
- Using the sabbath feature
- Care and maintenance
- Care and cleaning of the oven
- Cleaning painted parts and decorative trim
- Cleaning stainless-steel surfaces
- Convection filter
- Removing your oven's convection filter
- To clean the filter
- Installing your oven's convection filter
- To lubricate the slides of the gliding rack
- Oven door
- Removing the oven doors
- Replacing the oven doors
- Changing the oven light
- Troubleshooting
- Information codes
- Warranty and Service
- Getting Help
- Warranty
- What Is Covered
- CERTIFICATE OF WARRANTY: DACOR OVENS
- CANADA:
- FULL TWO-YEAR WARRANTY
- LIMITATIONS OF COVERAGE
- OUTSIDE THE FIFTY STATES OF THE U.S.A, THE DISTRICT OF COLUMBIA, AND CANADA:
- LIMITED FIRST YEAR WARRANTY
- What Is Not Covered
- Appendix
- Out of Warranty
- Open Source Announcement
- dacor
- IMPORTANT:
- Horno combinado de microondas empotable
- CONSIGNES PERMETTANT D'ÉVITER UNE EXPOSITION EXCESSIVE AUX MICRO-ONDES
- GARANTIE LIMITEE DE DEUX ANS
Brand : Dacor
Model : DOC30P977DS
Category : Microwave Oven