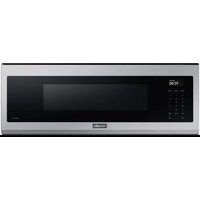
DMO30U970SS - Microwave Oven Dacor - Free user manual and instructions
Find the device manual for free DMO30U970SS Dacor in PDF.


| Product type | Built-in microwave oven |
| Brand | Dacor |
| Model | DMO30U970SS |
| Capacity | 1.7 cu ft (48 L) |
| Microwave power | 1000 W |
| Dimensions (W×H×D) | 762 × 457 × 508 mm |
| Net weight | 36 kg |
| Power supply voltage | 120 V / 60 Hz |
| Rated power | 1500 W |
| Control type | Touch |
| Cavity material | Stainless steel |
| Color | Stainless steel |
| Door | Side-opening |
| Interior lighting | LED |
| Main functions | Defrost, reheating, auto cooking, timer, clock |
| Safety | Child lock |
| Cleaning | Fingerprint-resistant coating, easy cleaning |
| Spare parts | Available from the manufacturer |
| Repairability | Estimated high repairability index |
| Certifications | UL, FCC |
| Warranty | 2 years |
Frequently Asked Questions - DMO30U970SS Dacor
User questions about DMO30U970SS Dacor
0 question about this device. Answer the ones you know or ask your own.
Ask a new question about this device
Download the instructions for your Microwave Oven in PDF format for free! Find your manual DMO30U970SS - Dacor and take your electronic device back in hand. On this page are published all the documents necessary for the use of your device. DMO30U970SS by Dacor.
USER MANUAL DMO30U970SS Dacor
To Our Valued Customer:
Congratulations on your purchase of the very latest in Dacor® products! Our unique combination of features, style and performance make us The Life of the Kitchen™, and a great addition to your home.
In order to familiarize yourself with the controls, functions and full potential of your new Dacor Appliance, read this use and care manual thoroughly, beginning with the Important Safety Instructions section.
All Dacor appliances are designed and manufactured with quality and pride, while working within the framework of our company value. Should you ever experience a problem with your product, please first check the Troubleshooting section of this manual for guidance. It provides useful suggestions and remedies prior to calling for service.
Valuable customer input helps us to continuously improve our products and services, so please feel free to contact our Customer Service Team for assistance with any of your product support needs.
Dacor Customer Service Team
14425 Clark Avenue
City of Industry, CA 91745
Telephone: (800) 793 0093
Fax: (626) 403-3130
Hours of Operation: Monday through Friday 6:00 A.M. to 5:00 P.M. Pacific Time
Website: www.Dacor.com
Thank you for choosing Dacor for your home. We are a company built by families for families, and we are dedicated to serving yours. We are confident that your new Dacor product will deliver a high level of performance and enjoyment for many years to come.
Sincerely,
The Dacon Customer Service Team
2 English
Important safety instructions 3
Setting up your new microwave oven 10
Checking the parts 10
Setting up your microwave oven 11
Learning about the control panel 12
Set Time 12
Set Date 12
| Sound | 13 |
| System Settings 13 | |
| Smart Control 14 | |
| Voice Control 15 |
Using your microwave oven 16
Turntable (On/Off) 16
Kitchen Timer 16
Child Lock 16
Back Button 17
More/Less Feature 17
Stop Button 17
Eco Mode 17
+30 sec 17
Cooktop Lamp (High/Low/Off) 18
Vent Fan (Boost/High/Medium/Low/Off) 18
Popcorn 18
Reheat 18
Defrost 19
Sensor Cook 20
Auto Cook 21
Glass steamer cooking guide 26
Conditions of use 26
Maintenance 26
Microwave 27
Power levels 27
One-stage cooking 27
Multi-stage cooking (maximum of 2 stages) 27
Cookware guide 28
Recommended cooking utensils 28
Limited use items 28
Not recommended 28
Testing utensils 28
Cooking guide 29
Cooking techniques 29
General cooking recommendations 30
Guide for cooking eggs in your microwave 30
Guide for cooking vegetables in your microwave 30
Cleaning and maintaining your microwave oven 31
Cleaning the exterior 31
Cleaning under your microwave oven 31
Cleaning the control panel 31
Cleaning the door and door seals 31
Cleaning the interior 31
Cleaning the turntable and roller rings 31
Storing and repairing your microwave oven 32
Replacing the cooktop/night light 32
Replacing the oven light 33
Cleaning the grease filter 33
Replacing the charcoal filter 34
Troubleshooting 35
Check points 35
Information codes 39
Appendix 39
Specifications 39
Warranty 40
United States - Warranty 40
Canada - Warranty 42
Important safety instructions
Congratulations on your new Dacor microwave oven. This manual contains important information on the installation, use and care of your appliance. Please take time to read this manual to take full advantage of your microwave oven's many benefits and features.
WHAT YOU NEED TO KNOW ABOUT SAFETY INSTRUCTIONS
Warnings and Important Safety Instructions in this manual do not cover all possible conditions and situations that may occur. It is your responsibility to use common sense, caution, and care when installing, maintaining, and operating your microwave oven.
PRECAUTIONS TO AVOID POSSIBLE EXPOSURE TO EXCESSIVE MICROWAVE ENERGY
A. Do not attempt to operate this oven with the door open since open-door operation can result in harmful exposure to microwave energy. It is important not to defeat or tamper with the safety interlocks.
B. Do not place any object between the oven front face and the door or allow soil or cleaner residue to accumulate on the sealing surface.
C. Do not operate the oven if it is damaged. It is particularly important that the oven door close properly and that there is no damage to the:
- Door (bent).
- Hinges and latches, (broken or loosened),
- Door seals and sealing surface.
D. The oven should not be adjusted or repaired by anyone except properly qualified service personnel.
SAVE THESE INSTRUCTIONS
English 3
Important safety instructions
IMPORTANT SAFETY SYMBOLS AND PRECAUTIONS
What the icons and signs in this user manual mean:
WARNING
Hazards or unsafe practices that may result in severe personal injury or death.
CAUTION
Hazards or unsafe practices that may result in minor personal injury or property damage.
CAUTION
To reduce the risk of fire, explosion, electric shock, or personal injury when using your microwave oven, follow these basic safety precautions.

Do NOT attempt.

Unplug the power plug from the wall socket.

Do NOT disassemble.

Make sure the machine is grounded to prevent electric shock.

Do NOT touch. Call the service center for help.

Follow directions explicitly. Note
These warning signs are here to prevent injury to you and others. Please follow them explicitly. After reading this section, keep it in a safe place for future reference.
FCC STATEMENT
WARNING
This device complies with part 18 of the FCC Rules.
SAVE THESE INSTRUCTIONS
4 English
STATE OF CALIFORNIA PROPOSITION 65 WARNING (US ONLY)
WARNING: This product contains chemicals known to the State of California to cause cancer and birth defects or other reproductive harm. When using any electrical appliance, basic safety precautions should be followed, including the following:

WARNING
Cancer and Reproductive Harm - www.P65Warnings.ca.gov

WARNING
To reduce risk of burns, electric shock, fire, personal injury or exposure to excessive microwave energy:
- Read all safety instructions before using the appliance.
- Read and follow the specific PRECAUTIONS TO AVOID POSSIBLE EXPOSURE TO EXCESSIVE MICROWAVE ENERGY on page 3.
- This appliance must be grounded. Connect only to properly grounded outlets. See Important Grounding instructions on page 5 of this manual.
- Install or locate this appliance only in accordance with the provided installation instructions.
- Some products such as whole eggs and sealed containers (for example, closed glass jars) can explode if heated rapidly. Never heat them in a microwave oven.
- Use this appliance only for its intended use as described in the manual. Do not put corrosive chemicals or vapors in or on this appliance. This type of oven is specifically designed to heat, cook, or dry food. It is not designed for industrial or laboratory use.
- As with any appliance, close supervision is necessary when it is used by children. Keep children away from the door when opening or closing it as they may bump themselves on the door or catch their fingers in the door.
- HOT CONTENTS CAN CAUSE SEVERE BURNS. DO NOT ALLOW CHILDREN TO USE THE MICROWAVE.
- Do not operate this appliance if it has a damaged cord or plug, if it is not working properly, or if it has been damaged or dropped.
- This appliance should be repaired or serviced only by qualified service personnel. Contact the nearest authorized service facility for examination, repair, or adjustment.
- Do not cover or block any openings on the appliance.
- Do not tamper with or make any adjustments or repairs to the door.
- Do not store this appliance outdoors. Do not use this product near water, for example, near a kitchen sink, in a wet basement, near a swimming pool, or similar locations.
- Do not immerse the cord or plug in water.
- Keep the cord away from heated surfaces. (including the back of the oven).
- Do not let the cord hang over the edge of a table or counter.
- When cleaning surfaces of the door and oven that come together when the door closes, use only mild, nonabrasive soaps, or detergents applied with a sponge or soft cloth. Unplug the plug before cleaning.
- To reduce the risk of fire in the oven cavity:
a. Do not overcook food. Carefully attend the appliance when paper, plastic, or other combustible materials are placed inside the oven to facilitate cooking.
b. Remove wire twist-ties from paper or plastic bags before placing the bags in the oven.
c. If materials inside the oven ignite, keep the oven door closed, turn the oven off, and disconnect the power cord, or shut off the power at the fuse or circuit breaker panel. If the door is opened, the fire may spread.
d. Do not use the cavity for storage purposes. Do not leave paper products, cooking utensils, or food in the cavity when not in use.
- Liquids, such as water, milk, coffee, or tea can be overheated beyond the boiling point without appearing to be boiling. Visible bubbling or boiling when the container is removed from the microwave oven is not always present. THIS COULD RESULT IN VERY HOT LIQUIDS SUDDENLY BOILING OVER WHEN THE CONTAINER IS DISTURBED OR A SPOON OR OTHER UTENSIL IS INSERTED INTO THE LIQUID. To reduce the risk of injury:
a. Do not overheat liquid.
b. Stir liquid both before and halfway through heating it.
c. Do not use straight-sided containers with narrow necks.
d. After heating, allow the container to stand in the microwave oven for a short time before removing the container.
e. Use extreme care when inserting a spoon or other utensil into the container.
- Oversized foods or oversized metal utensils should not be inserted into the microwave oven as they may cause a fire or risk of electric shock.
- Do not clean the microwave with a metal scouring pad. A piece of metal could come off the pad, contact electrical parts, and cause an electric shock.
- Do not put paper products into the oven when you are operating it in the toaster mode.
- Do not store any materials, other than manufacturer's recommended accessories, in this oven when not in use.
- Do not cover the racks or any other part of the oven with metal foil. This will cause the oven to overheat.
CAUTION
- Clean Ventilating Hoods Frequently - Crease should not be allowed to accumulate on the hood of the filter.
- When flaming foods under the hood, turn the fan on.
- Use care when cleaning the vent-hood filter. Corrosive cleaning agents, such as lye-based oven cleaner, may damage the filter.
GROUNDING INSTRUCTIONS
This appliance must be grounded. In the event of an electrical short circuit, grounding reduces the risk of electric shock by providing an escape wire for the electrical current. This appliance is equipped with a cord that includes a grounding wire and a grounding plug. The plug must be plugged into an outlet that is properly installed and grounded.
SAVE THESE INSTRUCTIONS
English 5


Important safety instructions
WARNING
Improper use of the grounding plug can result in a risk of electric shock.
- Plug into a grounded, 3 pronged outlet. Do not remove the third (grounding) prong. Do not use an adaptor or otherwise thwart the safety function of the grounding plug.
- Consult a qualified electrician or service person if you do not understand the grounding instructions or if you are not sure if the appliance is properly grounded.
- We do not recommend using an extension cord with this appliance. If the power-supply cord is too short, have a qualified electrician or serviceman install an outlet near the appliance. However, if it is necessary to use an extension cord, read and follow the "Use of Extension Cords" section below.
USE OF EXTENSION CORDS
A short power supply cord is provided to reduce the risk of your becoming entangled in or tripping over a longer cord. Longer cord sets or extension cords are available and you can use them if you exercise care. If you use a long cord or an extension cord:
- The marked electrical rating of the cord set or extension cord should be at least as great as the electrical rating of the appliance.
- The extension cord must be a grounding-type 3-wire cord and it must be plugged into a 3-slot outlet.
- The longer cord should be arranged so that it will not drape over the counter top or tabletop where it can be pulled on by children or tripped over accidentally. If you use an extension cord, the interior light may flicker and the speed of the blower may vary when the microwave oven is on. Cooking times may be longer too.
SAVE THESE INSTRUCTIONS
6 English
▲ CRITICAL INSTALLATION WARNINGS
This appliance must be installed by a qualified technician or service company.
- Failing to have a qualified technician install the oven may result in electric shock, fire, an explosion, problems with the product, or injury. Unpack the oven, remove all packaging material and examine the oven for any damage such as dents on the interior or exterior of the oven, broken door latches, cracks in the door, or a door that is not lined up correctly. If there is any damage, do not operate the oven and notify your dealer immediately.
Make sure to install your oven in a location with adequate space. Remove all foreign substances such as dust or water from the power plug terminals and contact points using a dry cloth on a regular basis. - Unplug the power plug and clean it with a dry cloth.
- Failing to do so may result in electric shock or fire.
Plug the power cord into a properly grounded 3 pronged outlet. Your oven should be the only appliance connected to this circuit. - Sharing a wall socket with other appliances, using a power strip, or extending the power cord may result in electric shock or fire.
- Do not use an electric transformer. It may result in electric shock or fire.
- Ensure that the voltage, frequency and current provided match the product's specifications. Failing to do so may result in electric shock or fire.
Keep all packaging materials out of the reach of children. Children may use them for play.
This appliance must be properly grounded. Read and follow the specific "Grounding instructions" found in the beginning of this section. Do not ground the appliance to a gas pipe, plastic water pipe, or telephone line.
- This may result in electric shock, fire, an explosion, or problems with the product.
- Never plug the power cord into a socket that is not grounded correctly and make sure that it is grounded in accordance with local and national codes.
Do not cut or remove the third (ground) prong from the power cord under any circumstances.
The microwave requires a separate branch circuit single grounded outlet of at least 15A and max of 20A.
Do not install this appliance in a humid, oily, or dusty location, or in a location exposed to direct sunlight or water (rain drops).
- This may result in electric shock or fire.
Plug the power plug into the wall socket firmly. Do not use a damaged power plug, damaged power cord, or loose wall socket.
- This may result in electric shock or fire.
Do not mount over a sink.
Do not pull or excessively bend the power cord.
Do not twist or tie the power cord.
Do not hook the power cord over a metal object, place a heavy object on the power cord, insert the power cord between objects, or push the power cord into the space behind the appliance.
• This may result in electric shock or fire.
Do not pull the power cord when you unplug the oven.
- Unplug the oven by pulling the plug only.
- Failing to do so may result in electric shock or fire.
If the power plug or power cord is damaged, contact your nearest service center for a replacement or repair.
⚠️ INSTALLATION CAUTIONS
Position the oven so that the plug is easily accessible.
- Failing to do so may result in electric shock or fire due to electric leakage.
Unplug the oven when it is not being used for long periods of time or during a thunder/lightning storm.
- Failing to do so may result in electric shock or fire.
▲ CRITICAL USAGE WARNINGS
If the microwave appliance is flooded, please contact your nearest Dacor service center. Failing to do so may result in electric shock or fire. Read and follow the specific "Precautions to Avoid Possible Exposure to Excessive Microwave Energy", found in the beginning of this Safety Information Section.
If the microwave generates a strange noise, a burning smell or smoke, unplug it immediately and contact your nearest Dacor service center.
- Failing to do so may result in electric shock or fire. In the event of a gas leak (propane gas, LP gas, etc.), ventilate the room immediately. Do not touch the microwave, power cord, or plug.
- Do not use a ventilating fan.
• A spark may result in an explosion or fire.
Take care that the door or any of the other parts do not come into contact with your body while the microwave is cooking or just after cooking.
- Failing to do so may result in burns.
SAVE THESE INSTRUCTIONS
English 7
Important safety instructions
In the event of a grease fire on the surface units below the microwave oven, smother the flaming pan on the surface unit by covering the pan completely with a lid, a cookie sheet, or a flat tray.
Never leave surface units beneath your microwave oven unattended at high heat settings. Boil overs cause smoking and greasy spillovers that may ignite and spread if the vent fan is operating. To minimize automatic fan operation, use adequate sized cookware and use high heat on surface units only when necessary.
If materials inside the microwave oven should ignite, keep the oven door closed, turn the oven off and disconnect the power cord, or shut off power at the fuse or circuit breaker panel. If the door is opened, the fire may spread. Use of inadequately sized cookware on top of the stove may result in melting of microwave door or other damage.
• Always observe safety precautions when using your microwave oven. Never try to repair the oven on your own. There is dangerous voltage inside. If the oven needs to be repaired, contact an authorized service center near you.
Do not attempt to repair, disassemble, or modify the appliance yourself.
- Because a high voltage current enters the product chassis during operation, opening the chassis can result in electric shock or fire.
- You may be exposed to electromagnetic waves.
- If your microwave oven requires repair, contact your nearest Dacor service center.
If any foreign substance such as water enters the microwave, unplug it, and then contact your nearest service center.
- Failing to do so may result in electric shock or fire.
Do not touch the power plug with wet hands.
• This may result in electric shock
Do not turn the appliance off by unplugging the power plug while the appliance is in operation.
- Plugging the power plug into the wall socket again may cause a spark and result in electric shock or fire Keep all packaging materials well out of the reach of children. Packaging materials can be dangerous to children.
- If a child places a bag over its head, the child can suffocate.
Do not let children or any person with reduced physical, sensory or mental capabilities use this appliance unsupervised. Make sure that the appliance is out of the reach of children.
- Failing to do so may result in electric shock, burns, or injury.
Do not touch the inside of the appliance immediately after cooking. The inside of the appliance will be hot.
- The heat on the inside of your microwave oven can cause burns.
Do not put aluminum foil (except as specifically directed in this manual), metal objects (such as containers, forks, etc.), or containers with golden or silver rims into the microwave.
• These objects can cause sparks or a fire.
Do not use or place flammable sprays or objects near the microwave oven.
- Heat from the microwave can cause flammable sprays to explode or burn.
- Failing to do so may result in electric shock or injury.
Do not tamper with or make any adjustments or repairs to the door. Under no circumstances should you remove the outer cabinet.
Do not store or use your microwave oven outdoors.
SAVE THESE INSTRUCTIONS
8 English

USAGE CAUTIONS

If the surface of the microwave is cracked, turn it off.
- Failing to do so may result in electric shock.
Dishes and containers can become hot. Handle with care.
Hot foods and steam can cause burns. Carefully remove container coverings, directing steam away from your hands and face.
Remove lids from baby food before heating. After heating baby food, stir well to distribute the heat evenly. Always test the temperature by tasting before feeding the baby. The glass jar or surface of the food may appear to be cooler than the food in the interior, which can be so hot that it will burn the infant's mouth.
Make sure all cookware used in your microwave oven is suitable for microwaving.
Use microwavable cookware in strict compliance with such manufacturer's recommendations.

Do not stand on top of the microwave or place objects (such as laundry, oven covers, lighted candles, lighted cigarettes, dishes, chemicals, metal objects, etc.) on the appliance.
- Items, such as a cloth, may get caught in the door.
- This may result in electric shock, fire, problems with the product, or injury.
Do not operate the appliance with wet hands.
- This may result in electric shock.
Do not spray volatile material such as insecticide onto the surface of the appliance.
- As well as being harmful to humans, it may also result in electric shock, fire or problems with the product.
Do not place the appliance over a fragile object such as a sink or glass object.
• This may result in damage to the sink or glass object.

Do not put your face or body close to the appliance while it is cooking or when opening the door just after cooking.
• Take care that children do not come too close to the appliance.
- Failing to do so may result in children burning themselves.
Do not place food or heavy objects over the door
- When you open the door, the food or object may fall and this may result in burns or injury.
Do not abruptly cool the door, the inside of the appliance, or the dish by pouring water over it during or just after cooking.
- This may result in damage to the appliance. The steam or water spray may result in burns or injury.
Do not cook without the glass tray in place on the oven floor. Food will not cook properly without the tray.
Do not defrost, frozen beverages in narrow-necked bottles. The containers can break.
Do not scratch the glass of your microwave oven door with a sharp object.
• This may result in the glass being damaged or broken.
Do not store anything directly on top of the appliance when it is in operation.
Do not use sealed containers. Remove seals and lids before use. Sealed containers can explode due to buildup of pressure even after the oven has been turned off.
SAVE THESE INSTRUCTIONS
English 9

Setting up your new microwave oven Setting up your new microwave oven
▲ CRITICAL CLEANING INSTRUCTIONS
Do not clean the appliance by spraying water directly onto it. Do not use benzene, thinner, or alcohol to clean the appliance.
- This may result in discoloration, deformation, damage, electric shock, or fire. Before cleaning or performing maintenance, unplug the appliance from the wall socket. Then, remove food waste from the door and cooking compartment.
- Failing to do so may result in electric shock or fire.
Take care not to hurt yourself when cleaning the appliance, (external/internal)
- You may hurt yourself on the sharp edges of the appliance. Do not clean the appliance with a steam cleaner.
• This may result in corrosion.
Keep the inside of your microwave oven clean. Food particles or spattered oils stuck to the oven walls or floor can cause paint damage and reduce the efficiency of the oven.
Be sure to follow these instructions closely so that your new microwave oven works properly.
Checking the parts
Carefully unpack your microwave oven, and make sure you've received all the parts shown below. If your microwave oven was damaged during shipping, or if you do not have all the parts, contact the Dacor Customer Service at (800) 793-0093.
(Refer to the WARRANTY AND SERVICE INFORMATION on page 40.)

natural_image
Isometric line drawing of a rectangular electronic device casing with internal compartments (no text or symbols)Microwave oven


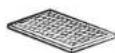
* Glass tray * Roller guide ring * Charcoal filters (2ea)


* Baffle filters (2ea) * Exhaust adaptor Cover air-left

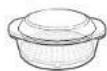
Cover air-right (2ea) Class steamer
10 English

* Hardware kit (Screws & Brackets)

Manuals
(User & Installation)

Templates (Top & Wall)

NOTE
If you need an accessory marked with an ^ (asterisk), please call Dacor Customer Service (1-800-793-0093).
Setting up your microwave oven
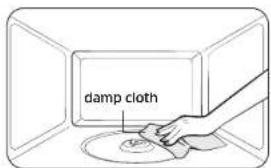
- Open the door by pulling the handle on the right side of the door.
- Wipe the inside of your microwave oven with a damp cloth.
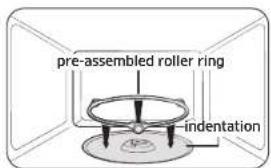
- Install the pre-assembled ring into the indentation at the center of the microwave oven.

- Fit the center of the glass tray to the coupler.
English 11
Setting up your new microwave oven
Learning about the control panel

01 Popcorn Button
02 Reheat Button
03 Defrost Button
04 Number Pad
05 Back Button
06 More Functions Button
07 Left Button
08 OK Button
09 Right Button
10 STOP Eco Button
11 +30 sec Button
12 START Button
13 Light Button (Hi/Low/Off)
14 Vent Button (4 Speed & On/Off)
Set Time
Your microwave oven is equipped with a built-in clock. Set the clock when first installing your microwave oven or after a power failure. The time is displayed whenever the microwave oven is not being used.
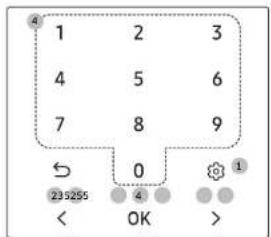
-
Touch the More Functions button.
-
Touch '<' or '> button until display shows Set Time.
-
Touch the OK button.
-
Use the numeric buttons to enter hour, touch OK button, use numeric buttons again to enter minutes and then touch OK button.
-
For 12 hour display mode, touch '<' or '>' button to set AM or PM and then touch OK button.
Set Date
Set the date when first installing your microwave oven and after a power failure.

-
Touch the More Functions button.
-
Touch '<' or '> button until display shows Set Date
-
Touch the OK button.
-
Use the numeric buttons to enter the month, touch OK button, use numeric buttons to enter day, touch OK button, use numeric buttons again to enter year and then touch OK button.
12 English
Sound
You can turn the sound on or off.
| 1 | 2 | 3 |
| 4 | 5 | 6 |
| 7 | 8 | 9 |
| ← | 0 | 1 |
| < | OK | > |
System Settings
You can customize your new microwave oven to suit your preferences.
To customize:
| 1 | 2 | 3 |
| 4 | 5 | 6 |
| 7 | 8 | 9 |
| ← | 0 | 1 |
| < | OK | > |
- Touch the More Functions button.
- Touch '<' or '>' button until display shows Sound.
- Touch the OK button.
- Use '<' or '> button to select a setting
- Touch the OK button.
The functions and options are listed in the table below.
| Function Description Options | |||
| 1 Wi-Fi | The Wi-Fi function can be turned on and off. | On | |
| Off | |||
| 2 | Screen time out | Screen time out options are 5 min, 10 min, 15 min and always on. | 5 min |
| 10 min | |||
| 15 min | |||
| Always On | |||
| 3 Time Format | The clock can display in either the 12 hr or 24 hr time mode. | 12 hr | |
| 24 hr | |||
| 4 Weight Unit | Weight option can display in either pounds or kilograms. | lb | |
| g | |||
| 5 Language | You can choose the language of your microwave oven. | English | |
| Francais | |||
| 6 | Remind End Signal | The remind end signal can be turned on and off. | On |
| Off | |||
| 7 | Daylight Saving Time | The time can be advanced one hour for DST without setting the clock again. | On(to advance one hour) |
| Off(to go back one hour) | |||
| 8 Filter Remind | The filter remind function can be turned on and off. | On | |
| Off | |||
Setting up your new microwave oven
| Function Description Options | |||
| 9 My Pattern | The my pattern function can be turned on and off. it will let you see the most used cooking mode first on the display. | On | |
| Off | |||
| 10 Demo mode | The demo mode can be turned on and off. | On | |
| Off | |||
| 11 Reset | You can reset the settings of you microwave oven. | Reset | |

NOTE
- If you change your mind while adjusting a setting, touch the ↩ button to go back, and then adjust the setting again.
- If there is a power interruption, you will need to reset these options.
- If the clock is set for standard time, the Daylight Savings Time Adjustment function allows you to change the time easily without needing to reset the clock. Daylight Saving Time begins for most of the United States at 2 a.m. on the first Sunday of April and reverts to Standard Time at 2 a.m. on the last Sunday of October.
- If the Filter Remind function is ON, the microwave will remind you to clean or replace the baffle filter every four months. When it is time to clean or replace the baffle filter, the microwave displays the "Filter" message to remind you to clean or replace the baffle filter. To remove the message, touch the number 0 when the microwave is in standby mode. If you don't want to receive this message, set the Filter Remind function off in Options.
Smart Control
To use the microwave oven's Smart Control, you must download the SmartThings app to a mobile device. Functions operated by the SmartThings app may not work smoothly if communication conditions are poor or the microwave oven is installed in a place with a weak Wi-Fi signal.
How to connect the microwave oven
- Download and open the SmartThings app on your smart device.
- Follow the app's on-screen instructions to connect your microwave oven.
- To operate smart control function from the microwave oven, touch and hold OK button for 3 seconds.
- Once the process is complete, microwave oven and SmartThings app will confirm you are connected.
- If the microwave oven is not connected, follow the instruction on the app to reconnect.
| Microwave Oven remote control using the SmartThings app | |
| Microwave Oven Monitoring Check the status of the microwave oven | |
| Microwave Oven Remote Control Remotely control vent fan speed/cooktop lamp |

NOTE
For safety reasons, you cannot turn on the microwave oven remotely and you must specify the cooking time to enable remote control. Smart Control will not work properly if the Wi-Fi Connection is unstable.
14 English

Voice Control
To use the microwave oven's Voice Control function, you need Bixby / Amazon Alexa App / Google Assistant App on your mobile device.
Bixby
Start conversation with Bixby on Dacor mobile by saying "Hi Bixby" or by pressing the side key.
| Function "Hi Bixby" | |
| Turn Off/Stop • Cancel | the microwave• Turn off the microwave |
| Check Time • Check the | remaining time of the microwave• How much time is left on the microwave timer? |
| Check Status • Check the | microwave status• Check the status of the microwave |
| MW Hood Control • Turn | on/off the microwave hood light• Turn on/off hood power of microwave• Turn on/off hood fan of microwave• Set the microwave hood fan speed to high/mid/low |
Amazon Alexa & Google Assistant
Dacor smart home appliances are supported by SmartThings skill in Alexa & action in Google Assistant.
Installation Guide
Here's how to link SmartThings account into Amazon Alexa or Google Assistant. SmartThings App and Alexa App (or Google Assistant App) Should be installed on your phone.
- Setup the supported devices to SmartThings.
- After device setup, tap + button on the screen.
-
Tap 'Voice assistant' and link your Dacor account to Amazon Alexa (or Google Assistant)
-
Check the devices are visible on Amazon Alexa app. Then account linking is complete. (Check the devices are visible and set the location (home & room) of devices in Google home app. Then account linking is complete.)
| Function "Alexa" | "Ok Google" | |
| Turn Off/Stop | Turn off the microwaveStop the microwave | Turn off the microwaveStop the microwave |
| Check Status | Is the microwave running?Is the microwave on? | Is the microwave running?Is the microwave on? |
| MW Hood Control | Turn on/off the (hood light, hood lamp, lamp, light) on microwaveTurn on/off the (hood light, hood lamp)Set the microwave (brightness, light level, lamp level) to [low, high]Turn on/off the (hood, fan, hood fan) on microwave [device name]Turn on/off the (hood, hood fan)Set the microwave (hood, fan, hood fan) speed to [low, medium, high] | Turn on/off the microwave (light, lamp)Turn on/off the (hood light, hood lamp)Set the microwave (brightness, light level, lamp level) to [low, high]Turn on/off the (hood, fan, hood fan) on microwaveTurn on/off the (hood, hood fan)Set the microwave (hood, fan, hood fan) speed to [low, medium, high] |
NOTE
For safety reasons, you cannot turn on the microwave oven remotely.
English 15
Using your microwave oven
Turntable (On/Off)

- Touch the More Functions button
- Touch '<' or '>' button until display shows Turn Table.
- Touch the OK button.
- Touch '<' or '>' and then touch OK button to set the function on/off.
NOTE
You can use this feature only on manual cooking mode.
If the turntable does not rotate for an extended period of time, food may burn. For best cooking results, leave the turntable feature on.
CAUTION
The turntable may become too hot to touch.
Use pot holders to handle the turntable during and after cooking.
Kitchen Timer
Your microwave has a built-in timer function - the Kitchen Timer. Use the Kitchen Timer for timing up to 99 minutes, 99 seconds.

- Touch the More Functions button.
- Touch '<' or '>' button until display shows Timer and then use numeric buttons to set the time.
- Touch the OK button.
- The display counts down, and then beeps when the time has elapsed.
- To cancel the timer setting, touch the button.
Child Lock
The Child Lock function allows you to lock all buttons so that the microwave oven cannot be operated by children accidentally.

Activating
- Touch the More Functions button.
- Touch '<' or '>' button until display shows Lock.
- Touch the OK button.
Deactivating
- Touch and hold the More Functions button until the lock function is deactivated.
16 English

Back Button
The Button allows you to un-do the action you have just entered.
- To un-do the action you have just entered, touch the button and then re-enter the instructions.
• To cancel a timer setting, touch the ↻ button.
More/Less Feature
The more/less feature allows you to adjust the cooking time during manual cooking mode.

-
To add more cooking time during manual cooking mode, touch the >' button. Each time you touch the >' button, cooking time will be increased by 10 seconds.
-
To reduce cooking time during manual cooking mode, touch the '<' button. Each time you touch the '<' button, cooking time will be decreased by 10 seconds.
Stop Button
The STOP button allows you to clear instructions you have entered.
It also allows you to pause your microwave oven's cooking cycle, so that you can check the food.
- To pause the oven during cooking, touch the STOP button once. To restart, touch the START button.
- To stop cooking, erase instructions, and return the oven display to the time of day, touch the STOP button twice.
Eco Mode
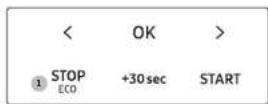
Eco Mode reduces standby power usage. When you touch the STOP ECO button once, the display will go out and the microwave shifts to a mode which minimizes power usage. To cancel the Eco mode, touch any button.
+30 sec
This feature offers a convenient way to increase cooking time in manual cooking mode.
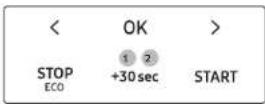
- In standby mode, touching +30 sec button will add 30 seconds of microwave mode.
- If the oven is in manual cooking mode, touching +30 sec button will add cooking time by 30 seconds.
English 17
Using your microwave oven
Cooktop Lamp (High/Low/Off)
| STOPECO | +30 sec | START | |
| 1 | LIGHT | VENT |
Touch the LIGHT button to turn the cooktop lamp on or off. Touch the button once for high, twice for low and three times to turn the cooktop lamp off.
Vent Fan (Boost/High/Medium/Low/Off)
The vent fan removes steam and other vapors that result from cooking on the cooktop below.
| STOP ECO | +30 sec | START |
| LIGHT | VENT 1 |
Touch the VENT button once for boost fan, twice for high fan, three times for medium fan and four times for low fan speed. Touch the VENT button five times to turn the fan off.
NOTE
The exhaust fan's speed may decrease when the oven's cooking function is activated.
NOTE
The Vent Fan protects the microwave from excess heat.
It automatically turns on if it senses too much heat. If you have turned the fan on, you may find that you cannot turn it off. The fan will automatically turn off when the internal parts are cool. It may stay on for 30 minutes or more after the cooktop and microwave controls are turned off.
Popcorn
You can cook popcorn easily using the Popcorn button. You do not need to set either the cooking time or the power level.
| 2 | POPCORN | REHEAT | DEFROST |
| 1 | 2 | 3 | |
| 4 | 5 | 6 | |
| 7 | 8 | 9 | |
| → | 0 | ⊗ | |
| < | OK | > | |
| STOP ECO | +30 sec | START |
- Put a bag of unpopped popcorn on the tray.
- Touch the POPCORN button.
- Touch START button. The microwave oven will automatically operate by sensing the popcorn inside. (3 - 3.5 OZ)
Reheat
You can reheat foods easily using the Reheat button. You do not need to set either the cooking time or the power level.
| POPCORN | REHEAT? | DEFROST |
| 1 | 2 | 3 |
| 4 | 5 | 6 |
| 7 | 8 | 9 |
| 0 | ||
| 4 | 3 | |
| < | OK | > |
| STOPECD | +30 sec | START |
- Put the food on the tray.
- Touch REHEAT button.
- Select food item by touching '<' or '>' button.
- Touch OK or START button. The microwave oven will automatically operate by sensing the food inside.
18 English

| Food Amount Instructions | ||
| Pizza 1-4 slices | Place 1-4 pizza slices on a microwave-safe plate with the wide ends of the slices towards the outside edge of the plate. Do not let the slices overlap. Do not cover. Let the microwave oven cool for at least 5 minutes before using it again. | |
| Casserole 1-4 servings | Cover the plate with vented (1 inch vent) plastic wrap. If the food is not as hot as you would like after using the function, continue heating using additional time and power. Stir the food once before serving.Contents:Casserolics (refrigerated) | |
| Dinner plate 1 serving | Use only precooked, refrigerated foods.Cover the plate with vented (1 inch vent) plastic wrap or waxed paper tucked under the plate. If the food is not as hot as you would like after using the function, continue heating using additional time and power.Contents:3-4 oz, meat, poultry or fish (up to 6 oz. with bone) 12 cup starch (potatoes, pasta, rice, etc.) 12 cup vegetables (about 3-4 oz.) | |
| Pasta 1-4 servings | Cover the plate with vented (1 inch vent) plastic wrap. If the food is not as hot as you would like after using the function, continue heating using additional time and power. Stir the food once before serving.Contents:Pasta (canned spaghetti) | |
Defrost
To thaw frozen foods, enter the weight of the food, and the microwave automatically sets the defrosting time, power level, and standing time.
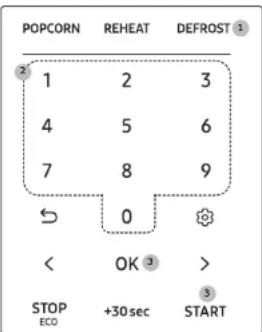
- Touch the DEFROST button.
- Touch the numeric buttons to directly enter the weight of the food. (0.1-6.0 lbs, 100-2700gr. See the table following)
- Touch OK or START button.
- The oven will beep and the display will show Turn the food over during the defrosting process. Open the oven door, and turn the food over. If you do not turn the food over when Turn the food over is displayed, the microwave will continue until the end of cooking time.
| Food Amount Instructions | ||
| Meat | 0.1-6.0 lbs. 100-2700 gr | Shield the edges with aluminium foil. Turn the meat over when the oven beeps. This program is suitable for lamb, pork, steaks, chops, and ground meat. Let stand, covered with foil for 5-10 minutes. |
English 19
Using your microwave oven
NOTE
Check the food when you hear the oven signal. After the final stage, small sections may still be icy; let them stand to continue the thawing process. The food is not defrosted until all ice crystals have melted. Shielding roasts and pieces of steak using small pieces of foil prevents the edges from being cooked before the center of the food has defrosted. Use narrow, flat, smooth strips of aluminum foil to cover edges and thinner sections of the food.
Sensor Cook
The Sensor Cook buttons lets you cook favorite foods using preset power levels and times. If the food is not thoroughly cooked after using Sensor Cook feature, complete the cooking process by cooking the food for an additional amount of time.

- Put the food on the tray.
- Touch '<' or '>' button until display shows Sensor Cook and then touch OK button.
- Select the food item you want by touching '<', '>' and OK button.
- Touch OK or START button to start cooking. The microwave oven will automatically operate by sensing the food inside.
| Category | Food Amount | Instructions | |
| Potatoes | Potatoes | 1-6 potatoes. | Pierce each potato several times with a fork. Place on the turntable in a spoke-like fashion. After cooking, let the potatoes stand for 3-5 minutes. Let the microwave oven cool for at least 5 minutes before using it again. |
| Cook | Beverage 8 oz, 1 cup | Use a measuring cup or mug and do not cover. Place the beverage in the microwave oven. After heating, stir well. Let the microwave oven cool for at least 5 minutes before using it again. | |
| Frozen breakfast | 4-8 oz. | Use for frozen sandwiches, breakfast entrees, pancakes, waffles, etc. Follow the package instructions for covering and standing. Let the microwave oven cool for at least 5 minutes before using it again. | |
| Chicken breasts | 8-24 oz. | Pierce the chicken breasts 3 times with a knife. Place the chicken breasts on the microwave safe dish. Cover with vented (1 inch vent) plastic wrap while cooking and stir before letting stand. Let the microwave oven cool for at least 5 minutes before using it again. | |
| Frozen dinner | 12-16 oz. | Remove the food from its wrapping and follow the instructions on the box for covering and letting stand. Let the microwave oven cool for at least 5 minutes before using it again. | |
20 English
| Category | Food Amount | Instructions | |
| Veggies | Fresh vegetables | 1-4 servings | Place the fresh vegetables (broccoli florets, cauliflower florets, zucchini, eggplants etc.) in a microwave safe ceramic, glass, or plastic dish and add 1-4 tbs. water. Cover with vented (1 inch vent) plastic wrap while cooking and stir before letting stand. Let the microwave oven cool for at least 5 minutes before using it again. |
| Frozen vegetables | 1-4 servings | Place the frozen vegetables in a microwave safe ceramic, glass, or plastic dish and add 1-4 tbs. water. Cover with vented (1 inch vent) plastic wrap while cooking and stir before letting stand. Let the microwave oven cool for at least 5 minutes before using it again. |
Auto Cook
The Auto Cook button lets you cook favorite foods using preset power levels and times. If the food is not thoroughly cooked after using Auto Cook feature, complete the cooking process by cooking the food for an additional amount of time.

- Put the food on the tray.
- Touch '<' or '> button until display shows Auto Cook and then touch OK button.
- Select the food item you want by touching '<', '>' and OK button.
- Select the amount of food by touching '<' or '> button.
- Touch OK or START button to start cooking. The microwave oven will automatically operate by pre-programmed time.
English 21
Using your microwave oven
| Category Food Amount Instructions | |||
| Snack | Fish sticks | 1 serving | Place the fish sticks on the microwave safe dish. Place the dish on the center of the turntable. |
| 2 servings | |||
| Quesadillas | 1 serving | Follow the package directions. Place the quesadilla on the microwave safe dish. Place the dish on the center of the turntable. | |
| 2 servings | |||
| Hot dogs | 2 each | Pierce the hot dogs 3 times with a fork. Place the hot dogs on the microwave safe dish. Place the dish on the center of the turntable. When the microwave beeps, add the buns and restart the microwave. For the best texture, the buns should be added after the microwave beeps. | |
| 4 each | |||
| Instant macaroni and cheese | 1 serving | Follow the package directions. Place the dish on the center of the turntable. Stir afterwards. | |
| 2 servings | |||
| Frozen waffles | 1 serving | Place the waffles on the microwave safe dish. Place the dish on the center of the turntable. | |
| 2 servings | |||
| Frozen croquettes | 1 serving | Place the croquettes on the microwave safe dish. Place the dish on the center of the turntable. | |
| 2 servings | |||
| Burritos | 1 each | Follow the package directions. Place the burrito on the microwave safe dish. Place the dish on the center of the turntable. | |
| 2 each | |||
| Instant mashed potatoes | 2 servings | Follow the package directions. Place the dish on the center of the turntable. Stir afterwards.4 servings | |
| Category Food Amount Instructions | |||
| Fresh Vegetables | Broccoli | 1 serving | Wash and clean the broccoli. Place the broccoli florets in the microwave safe bowl. Add 1-4 tbs. of water (1 tbs. per serving). Cover with vented (1 inch vent) plastic wrap while cooking and stir before letting stand. |
| 2 servings | |||
| 3 servings | |||
| 4 servings | |||
| Carrots | 1 serving | Wash and clean the carrots. Cut the carrots into even slices and place in the microwave safe bowl. Add 1-4 tbs. of water (1 tbs. per serving). Cover with vented (1 inch vent) plastic wrap while cooking and stir before letting stand. | |
| 2 servings | |||
| 3 servings | |||
| 4 servings | |||
| Green beans | 1 serving | Wash and clean the green beans. Place the green beans in the microwave safe bowl. Add 1-4 tbs. of water (1 tbs. per serving). Cover with vented (1 inch vent) plastic wrap while cooking and stir before letting stand. | |
| 2 servings | |||
| 3 servings | |||
| 4 servings | |||
| Spinach | 1 serving | Wash and clean the spinach. Place the spinach in a microwave safe bowl. Add 1-4 tbs. of water (1 tbs. per serving). Cover with vented (1 inch vent) plastic wrap while cooking and stir before letting stand. | |
| 2 servings | |||
| 3 servings | |||
| 4 servings | |||
| Squash | 2 servings | Slice the squash in half and remove the seeds. Place the squash cut side down in a microwave safe dish and add 14 cup of water. Cover with vented (1 inch vent) plastic wrap while cooking and stir before letting stand. | |
| 4 servings | |||
22 English
| Category Food Amount Instructions | |||
| Frozen Vegetables | Broccoli | 1 serving | Place the broccoli in the microwave safe bowl. Add 1-4 tbs. of water (1 tbs. per serving). Cover with vented (1 inch vent) plastic wrap while cooking and stir before letting stand. |
| 2 servings | |||
| 3 servings | |||
| 4 servings | |||
| Carrots | 1 serving | Place the carrots in the microwave safe bowl. Add 1-4 tbs. of water (1 tbs. per serving). Cover with vented (1 inch vent) plastic wrap while cooking and stir before letting stand. | |
| 2 servings | |||
| 3 servings | |||
| 4 servings | |||
| Corn | 1 serving | Place the corn in the microwave safe bowl. Add 1-4 tbs. of water (1 tbs. per serving). Cover with vented (1 inch vent) plastic wrap while cooking and stir before letting stand. | |
| 2 servings | |||
| 3 servings | |||
| 4 servings | |||
| Green beans | 1 serving | Place the green beans in the microwave safe bowl. Add 1-4 tbs. of water (1 tbs. per serving). Cover with vented (1 inch vent) plastic wrap while cooking and stir before letting stand. | |
| 2 servings | |||
| 3 servings | |||
| 4 servings | |||
| Peas | 1 serving | Place the peas in the microwave safe bowl. Add 1-4 tbs. of water (1 tbs. per serving). Cover with vented (1 inch vent) plastic wrap while cooking and stir before letting stand. | |
| 2 servings | |||
| 3 servings | |||
| 4 servings | |||
| Category | Food Amount Instructions | ||
| Meal | Oatmeal | 1 pack | Follow the package directions for the recommended amount of water needed. Stir well before cooking and afterwards. |
| 2 packs | |||
| Quinoa | 2 servings | Follow the package directions for the recommended amount of water needed. Stir well before cooking and afterwards. | |
| 4 servings | |||
| Frozen dinner | 12 oz (340 gram) | Remove the food from its wrapping and follow the instructions on the box for covering and letting stand. | |
| 16 oz (454 gram) | |||
| Frozen breakfast | 5 oz (142 gram) | Use for frozen sandwiches, breakfast entrees, pancakes, waffles, etc. Follow the package instructions for covering and standing. | |
| 8 oz (227 gram) | |||
| Brown rice | 2 servings | Add 1 cup of cold water for 1 cup of rice. Use a large glass bowl. Cover with vented (1 inch vent) plastic wrap. Rice doubles in volume during cooking. After the cooking time is over, stir before standing time, and then salt or add herbs and butter. | |
| 4 servings | |||
Using your microwave oven
| Category Food Amount Instructions | |||
| Meal | Whole wheat macaroni | 2 servings | Add 1 cup of cold water for 1 cup of macaroni. Use a large glass bowl. Cover with vented (1 inch vent) plastic wrap. Carefully remove from the microwave and drain the hot water. |
| 4 servings | |||
| Bacon, pre-cooked | 2 slices | Layer 2 paper towels on a microwave safe plate and arrange the bacon on the towels. Do not overlap bacon. Cover with an additional paper towel. Remove the paper towel immediately after cooking. | |
| 4 slices | |||
| 6 slices | |||
| Melt/ Soften | Melt butter | 1 stick ( 14 lb.) | Unwrap the butter and cut the butter into several pieces. Place the butter on a microwave safe dish and cover with wax paper. Stir well afterwards. |
| 2 sticks ( 12 lb.) | |||
| Soften butter | 1 stick ( 14 lb.) | Remove the butter from the packaging and place on a microwave safe dish. | |
| 2 sticks ( 12 lb.) | |||
| Melt chocolate 1 | cup | Place the chocolate chips in a microwave safe dish. When the microwave oven beeps, stir well, and then press START to continue. Unless stirred, the chocolate chips will keep their shape even when the heating time is over. | |
| Soften ice cream | 1 pint | Remove the lid of the carton. Place the carton in the center of the microwave. | |
| 4 pints | |||
| Category | Food Amount Instructions | ||
| Melt/ Soften | Soften cream cheese | 1 pack | Unwrap the cream cheese and place on a microwave safe dish. |
| Soften frozen juice | 1 pack | Do not place metal juice cans in the microwave. Remove the plastic lid and place in center of microwave. Stir well afterwards. | |
| Melt cheese 1 cup | Place the cheese in a microwave safe bowl and cover with wax paper. Stir well afterwards. | ||
| Melt caramel | 10 oz (280 gram) | Place the caramel in a large microwave safe dish. Stir well afterwards. | |
| Melt marshmallows | 10 oz (280 gram) | Place the marshmallows in a large microwave safe dish. Stir well afterwards. | |
| Poultry/ Fish | Chicken breasts 4 servings | Pierce the chicken breasts 3 times with a knife. Place the chicken breasts on the microwave safe dish and cover with plastic wrap. Place the dish on the center of the turntable. | |
| Salmon fillets | 1 serving | Put the salmon fillets on the microwave safe dish and cover with plastic wrap. Place the dish on the center of the turntable. | |
| 2 servings | |||
| White fish fillets | 1 serving | Put the white fish fillets on the microwave safe dish and cover with plastic wrap. Place the dish on the center of the turntable. | |
| 2 servings | |||
| Fresh prawns | 1 serving | Place the prawns in the microwave safe dish and cover with plastic wrap. Place the dish on the center of the turntable. | |
| 2 servings | |||
24 English
| Category Food Amount Instructions | |||
| Steam cook | Broccoli Florets | 2 servings | Wash and clean the broccoli florets. Pour 100mL of water into the Steamer. Place the broccoli florets on the silicon plate. Cover with the lid while cooking and stand for 2-3 minutes. |
| 4 servings | |||
| Sliced Carrots | 2 servings | Wash and clean the carrots. Cut the carrots into even slices. Pour 100mL of water into the Steamer. Place the florets on the silicon plate. Cover with the lid while cooking and stand for 2-3 minutes. | |
| 4 servings | |||
| Cauliflower Florets | 2 servings | Wash and clean the cauliflower florets. Pour 100mL of water into the Steamer. Place the cauliflower florets on the silicon plate. Cover with the lid while cooking and stand for 2-3 minutes. | |
| 4 servings | |||
| Spinach | 2 servings | Wash and clean the spinach. Pour 100mL of water into the Steamer. Place the spinach on the silicon plate. Cover with the lid while cooking and stand for 2-3 minutes. | |
| 4 servings | |||
| Peeled Potatoes | 2 servings | Wash and clean the potatoes. Cut the potato into 8 equal parts. Pour 100mL of water into the Steamer. Place the slices on the silicon plate. Cover with the lid while cooking and stand for 2-3 minutes. | |
| 4 servings | |||
| Squash | 1 serving | Wash and clean the squashes. Slice the squash in half and remove the seeds. Pour 100mL of water into the Steamer. Place the squash cut side down on the silicon plate. Cover with the lid while cooking and stand for 2-3 minutes. | |
| 2 servings | |||
| Category Food Amount Instructions | |||
| Steam cook | Brown Rice | 2 servings | Remove the silicon plate into the Glass steamer. Add 1 cup rice of cold water for 1 cup of brown rice(in the case of 2servings). Cover with the lid. After the cooking time is over, stir before standing time, and then salt or add herbs and butter. |
| 4 servings | |||
| Whole Wheat Macaroni | 2 servings | Remove the silicon plate into the Glass steamer. Add 1 cup of cold water for 1 cup of macaroni (in the case of 2 servings). Cover with the lid. Carefully, drain the hot water after cooking. | |
| 4 servings | |||
| Quinoa | 2 servings | Remove the silicon plate into the glass steamer. Add 2 cups of cold water for 1 cup of quinoa(in the case of 2 servings). Cover with the lid. Stir well before cooking and afterwards. | |
| 4 servings | |||
| White Fish Fillet | 1 serving | Pour 100mL of water into the Steamer. Place the white fish fillets on the silicon plate and cover with the lid. After cooking, stand for 2-3 minutes. | |
| 2 servings | |||
English 25
Using your microwave oven
| Category Food Amount Instructions | |||
| Steam cook | Salmon Fillet | 1 serving | Pour 100mL of water into the Steamer. Place the salmon fillets on the silicon plate and cover with the lid. After cooking, stand for 2-3 minutes. |
| 2 servings | |||
| Fresh Prawns | 1 serving | Wash and clean the prawns. Pour 100mL of water into the Steamer. Place the prawns on the silicon plate and cover with the lid. After cooking, stand for 2-3 minutes. | |
| 2 servings | |||
Glass steamer cooking guide
The Glass Steamer is based on the principle of steam cooking, and is designed for fast, healthy cooking in your Dacor Microwave oven.
This accessory is ideal for cooking rice, pasta, vegetables, etc. in record time, while preserving their nutritional values. The Microwave Glass steamer set is made up of 3 items:

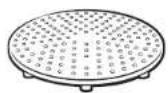

Bowl Silicon plate Lid
All parts withstand temperatures from -20 °C to 200 °C.
Suitable for freezer storage. Can also be used separately or together.
Conditions of use
- Do not use:
- clean with wet towel or place on a wet surface when the glass is hot.
-
place on a direct flame.
-
Wash all parts well in soapy water before first use.
• Take caution when removing the Glass Steamer because the handle becomes very hot. Make sure to use oven gloves. - By the time cooking is complete, the Glass Steamer is filled with steam, causing a risk of burns. Do not put your face close to the container, and make sure to use oven gloves when taking off the lid.
Maintenance
- Your steamer can be washed in a dishwasher.
- When washing by hand, use hot water and washing-up liquid. Do not use abrasive pads.
- Some foods (such as tomato) may discolour the plastic. This is normal and not a manufacturing fault.
26 English
Microwave
Your microwave oven allows you to set two different cooking stages, each with its own time length and power level. The power level lets you control the heating intensity from Warm (1) to High (10).
Power levels
The 10 power levels allow you to choose the optimal power level for your cooking needs.
| Power Level Description Power Level Description | |||||
| 1 10 Warm 6 60 Simmer | |||||
| 2 | 20 | Low | 7 | 70 | Medium high |
| 3 30 Defrost 8 80 Reheat | |||||
| 4 40 Medium low 9 90 Sauté | |||||
| 5 50 Medium 1,0 100 High | |||||
One-stage cooking

- In standby mode, touch the numeric buttons to set a cooking time. You can enter a time from one second to 99 minutes and 99 seconds. If the display is showing cooking modes, touch 'or >' button until the display shows Microwave and then touch OK button. To select a time greater than one minute, enter the seconds too. (For example, to set a cooking time of 20 minutes, enter 2, 0, 0, 0.) If you do not need to set the power level, just touch the START button. The microwave will automatically operate at the High power level.
- If you want to set the power level to a level other than High, touch the OK button.
- Touch the '<,' >' or numeric buttons that correspond to the power level you want to use.
- Touch the START button. If you want to add or reduce the cooking time, use the '<' or '>' button. You can adjust the cooking time while the microwave oven is operating.
Multi-stage cooking (maximum of 2 stages)
Your oven allows you to set two different cooking stages, each with its own time length and power level. The power level lets you control the heating intensity from Warm to High.
- Follow steps 1, 2, and 3 from the "One-stage cooking" section.
- Touch OK button to move to the second stage.
- Follow steps 1, 2, 3, and 4 from the "One-stage cooking" section.
English 27
Cookware guide
To cook food in your microwave oven, microwaves must be able to penetrate the food without being reflected or absorbed by the cookware holding the food. Consequently, it is important to choose cookware that both allows microwaves to penetrate food and is microwave safe. The following lists contain various types of cookware and indicate if and how the cookware should be used in a microwave oven.
Recommended cooking utensils
• Glass and glass-ceramic bowls and dishes – Use for heating or cooking.
- Microwavable plastic wrap – Use to cover. Leave a small opening for steam to escape and avoid placing it directly on the food.
- Wax paper – Use as a cover to prevent spattering.
- Paper towels and napkins – Use for short-term heating and covering. They absorb excess moisture and prevent spattering. Do not use recycled paper towels, which may contain metal and can catch fire.
- Paper plates and cups – Use for short-term heating at low temperatures. Do not use recycled paper, which may contain metal and can catch fire.
- Thermometers – Use only those labeled "Microwave Safe" and follow all directions. Check the food in several places. Conventional thermometers may be used once the food has been removed from the oven.
Limited use items
- Aluminum foil – Use narrow strips of foil to prevent overcooking of exposed areas. Using too much foil can damage your oven, so be careful.
- Ceramic, porcelain, and stoneware – Use these if they are labeled "Microwave Safe". If they are not labeled, test them to make sure they can be used safely. Never use dishes with metallic trim.
- Plastic – Use only if labeled "Microwave Safe". Other plastics can melt.
- Straw, wicker, and wood – Use only for short-term heating, as they are flammable.
Not recommended
- Glass jars and bottles – Regular glass is too thin to be used in a microwave and can shatter.
- Paper bags – These are a fire hazard, except for popcorn bags that are designed for microwave use.
- Styrofoam plates and cups – These can melt and leave an unhealthy residue on food.
- Plastic storage and food containers – Containers such as margarine tubs can melt in the microwave.
Testing utensils
If you are not sure whether a dish is microwave-safe or not, you can perform this test:

natural_image
Simple line drawing of a round table with a mug and a side dish, no text or symbols present.- Fill a 1 cup glass measuring cup with water and put it inside your oven, next to the dish you want to test.
- Set the microwave to 1 minute using the numeric buttons, and then touch the START button. This will heat the glass and dish for one minute at High power.
When the microwave stops, the water should be warm and the dish you are testing should be cool. If the dish is warm, then it is absorbing microwave energy and is not acceptable for use in the microwave.
28 English
Cooking guide
Microwave energy actually penetrates food and is attracted to and absorbed by the water, fat, and sugar molecules in the food. The microwaves cause the molecules in the food to move rapidly. The rapid movement of these molecules creates friction and the resulting heat cooks the food.
Cooking techniques
Stirring
Stir foods such as casseroles and vegetables while cooking to distribute heat evenly. Food at the outside of the dish absorbs more energy and heats more quickly, so stir from the outside to the center. The oven will turn off when you open the door to stir your food.
Arrangement
Arrange unevenly shaped foods, such as chicken pieces or chops, with the thicker, meatier parts toward the outside of the turntable where they will receive more microwave energy. To prevent overcooking, place thin or delicate parts toward the center of the turntable.
Shielding
Shield food with narrow strips of aluminum foil to prevent overcooking. Areas that need shielding include poultry wing-tips, the ends of poultry legs, and the corners of square baking dishes. Use only small amounts of aluminum foil. Larger amounts can damage your oven.
Turning
Turn foods over midway through cooking to expose all parts to microwave energy. This is especially important with large items such as roasts.
Standing
Food cooked in the microwave builds up internal heat and continues to cook for a few minutes after the oven stops. Let food stand to complete cooking, especially food such as roasts and whole vegetables. Roasts need this time to complete cooking in the center without overcooking the outer areas. All liquids, such as soup or hot chocolate, should be shaken or stirred when cooking is complete. Let liquids stand a moment before serving. When heating baby food, stir well and test the temperature before serving.
Adding Moisture
Microwave energy is attracted to water molecules. Food that is uneven in moisture content should be covered or allowed to stand so that the heat disperses evenly. Add a small amount of water to dry food to help it cook.
Venting
After covering a dish with plastic wrap, vent the plastic wrap by turning back one corner so excess steam can escape.
English 29
Cooking guide
General cooking recommendations
- Dense foods, such as potatoes, take longer to heat than lighter foods. Food with a delicate texture should be heated at a low power level to prevent it from becoming tough.
- Altitude and the type of cookware you are using can affect cooking time. When trying a new recipe, use the minimum cooking time and check the food occasionally to prevent overcooking.
- Food with a non-porous skin such as potatoes or hot dogs should be pierced to prevent bursting.
- Frying with oil or fat is not recommended. Fat and oil can suddenly boil over and cause severe burns.
- Some ingredients heat faster than others. For example, the jelly inside a jelly doughnut will be hotter than the dough. Keep this in mind to avoid burns.
- Home canning in the microwave oven is not recommended because all harmful bacteria may not be destroyed by the microwave heating process.
- Although microwaves do not heat the cookware, the heat from the food is often transferred to the cookware. Always use pot holders when removing food from the microwave and instruct children to do the same.
- Making candy in the microwave is not recommended as candy can heat to very high temperatures. Keep this in mind to avoid injury.
Guide for cooking eggs in your microwave
- Never cook eggs in the shell and never warm hard-cooked eggs in the shell. They can explode.
• Always pierce whole eggs to keep them from bursting.
• Cook eggs just until set. They become tough if overcooked.
Guide for cooking vegetables in your microwave
- Vegetables should be washed just before cooking. Often, no extra water is needed. If you are cooking dense vegetables such as cubed potatoes, carrots, or green beans, add about 14 cup water.
- Small vegetables (sliced carrots, peas, lima beans, etc.) will cook faster than larger ones.
- Whole vegetables, such as potatoes, acorn squash, or corn on the cob, should be arranged in a circle on the turntable before cooking. They will cook more evenly if turned over after half the cooking time.
• Always place vegetables like asparagus and broccoli with the stem ends pointing towards the edge of the dish and the tips toward the center. - When cooking cut vegetables, always cover the dish with a lid or vented microwavable plastic wrap.
- Whole, unpeeled vegetables such as potatoes, squash, eggplant, etc., should have their skin pricked in several spots before cooking to prevent them from bursting.
- For more even cooking, stir or rearrange whole vegetables halfway through the cooking time.
- Generally, the denser the food, the longer the standing time. (Standing time refers to the time necessary for dense, large foods and vegetables to finish cooking after they come out of the oven.) A baked potato can stand on the counter for five minutes before cooking is completed, while a dish of peas can be served immediately.
Cleaning and maintaining your microwave oven
Keeping your microwave oven clean improves its performance, wards off unnecessary repairs, and lengthens its life.
Cleaning the exterior
It's best to clean spills on the outside of your microwave oven as they occur. Use a soft cloth and warm, soapy water. Rinse and dry.

CAUTION
Do not get water into the vents. Never use abrasive products or chemical solvents such as ammonia or alcohol as they can damage the appearance of your microwave.

WARNING
Unplug the microwave plug before cleaning.
Cleaning under your microwave oven
Regularly clean baffle and dust from the bottom of your microwave using a solution of warm water and detergent.
Cleaning the control panel
Wipe with a damp cloth and dry thoroughly. Do not use cleaning sprays, large amounts of soap and water, abrasives, or sharp objects on the panel as it is easily damaged.
Cleaning the door and door seals
Always ensure that the door seals are clean and that the door closes properly. Take particular care when cleaning the door seals to ensure that no particles accumulate and prevent the door from closing correctly. Wash the glass door with very mild soap and water. Be sure to use a soft cloth to avoid scratching.

NOTE
If steam accumulates inside or outside the oven door, wipe with a soft cloth. Steam can accumulate when you operate the oven when humidity is high and in no way indicates microwave leakage.
Cleaning the interior

CAUTION
To avoid injury, ensure that the microwave oven has cooled down before cleaning it.

CAUTION
Remove the glass tray from the oven when cleaning the oven or tray. To prevent the tray from breaking, handle it with care and do not put it in water immediately after cooking. Wash the tray carefully in warm sudsy water or in the dishwasher.
Cleaning the turntable and roller rings
Clean the roller rings periodically and wash the turntable as required. The turntable can be washed safely in your dishwasher.
English 31
Cleaning and maintaining your microwave oven
Storing and repairing your microwave oven
If you need to store your microwave oven for a short or extended period of time, choose a dust-free, dry location. Dust and dampness may adversely affect the functionality of the microwave parts.

WARNING
Do not repair, replace, or service any part of your microwave oven yourself. Allow only a qualified service technician to perform repairs. If the oven is faulty and needs servicing, or you are in doubt about its condition, unplug the oven from the power outlet and contact your nearest service center.
Do not use the oven if the microwave oven is damaged, in particular, if the door or door seals are damaged or the door does not close properly. This can be caused by a broken hinge, a worn out seal or distorted/bent casing.
Do not remove the oven from its casing.
This microwave oven is for home use only and is not intended for commercial use.
Replacing the cooktop/night light
When replacing the cooktop/night light, make sure that you are wearing gloves to avoid injury from the heat of the lamp.

natural_image
Line drawing of a microwave oven with three fans (no text or symbols)- Unplug the oven or turn off the power at the main power supply.
- Remove the screw from the light cover and lower the cover.
natural_image
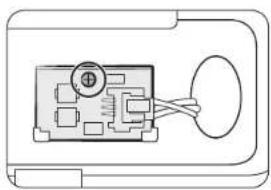
Pure electrical circuit lines without any symbols- Remove the screw securing the LED lamp board.

- Disconnect the wire connectors by pressing the hook of connector which is locked to the LED lamp board.
- Replace the LED lamp board. To assemble LED lamp board, proceed opposite order from above instructions.
NOTE
To purchase a new LED lamp board, visit an authorized Dacor service center or call (800) 793 0093.
32 English
Replacing the oven light
When replacing the oven light, make sure that you are wearing gloves to avoid injury from the heat of the lamp.

- Unplug the oven or turn off the power at the main power supply.
- Remove the vent cover mounting screw and then remove the vent cover.
- Lift up the holder lamp by pushing the hook slightly.
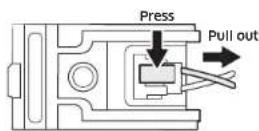
- Press the hook of connector which is locked to the LED lamp board and pull out the wire connector.

- Remove LED lamp board by bending hooks which is holding it.
- Replace the LED lamp board. To assemble LED lamp board, proceed opposite order from above instructions.
- Plug the oven in or turn on the power at the main power supply. Set the clock again.

NOTE
To purchase a new LED lamp board, visit an authorized Dacor service center or call (800) 793-0093.
Cleaning the baffle filter
Your microwave oven has reusable baffle filter. The baffle filter should be removed and cleaned at least once a month or as required.
To order a new baffle filter, contact Dacor Customer Service at (800) 793-0093. You can also order online at (http://www.dacor.com/Customer-care/service-Parts)

WARNING
To avoid the risk of personal injury or property damage, do not operate the oven hood without the filter in place.
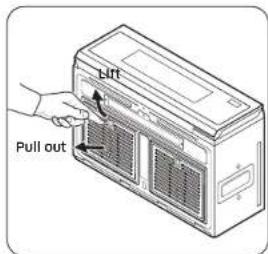
- To remove the filter, lift the handle of the baffle filter and pull out from the microwave oven.

natural_image
Line drawing of a kitchen appliance with ventilation grilles and doorways (no text or symbols)- Remove the clip from the ring and remove the baffle filter.
English 33

Cleaning and maintaining your microwave oven

natural_image
Illustration of a cleaning or cleaning process with a bag and a plate, no text or symbols visible- Soak the baffle filter in hot water mixed with a mild detergent. Rinse well and shake to dry. If necessary, brush the filter lightly to remove embedded dirt.
WARNING
Do not use ammonia or put the baffle filter in the microwave oven to dry. The aluminum will darken.

natural_image
Line drawing of a microwave oven with paper feed and ventilation slots (no text or symbols)- To re-insert the filter into the microwave oven, connect a clip to the ring and place the bottom hook of the filter to rear side.

- Lift the handle and push the baffle filter to install.
Replacing the charcoal filter
The charcoal filter should be replaced every 6 to 12 months and more often if necessary. If the filter is not replaced periodically, the powder may fall off. The charcoal filter cannot be cleaned. To order a new charcoal filter, contact the Dacor Customer Service at (800) 793-0093. You can also order online at our homepage (http://www.dacor.com/Customer-Care/Service-Parts).
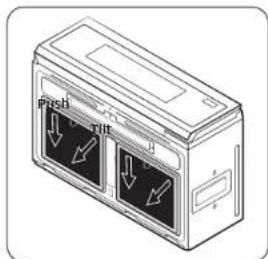
- Unplug the oven or turn off the power at the main power supply.
- Remove the baffle filter. (Check the instructions on 'Cleaning the baffle filter')
- Push the charcoal filter backwards by using handle of it and then tilt it.
- Pull the filter out to remove it.
- Slide a new charcoal filter into place. Proceed opposite order from above instructions.
- Insert baffle filter. Plug the oven in or turn on the power at the main power supply. Set the clock again.
Troubleshooting
Check points
If you encounter a problem with your oven, first check the tables starting below and try the recommendations. If a problem persists, or if an information code keeps appearing on the display, call Dacor Customer Service at (800) 793-0093.
| Problem Cause Action | ||
| General | ||
| The buttons cannot be touched properly. | Foreign matter may be caught between the buttons. | Remove the foreign matter and try again. |
| For touch models: Moisture is on the exterior. | Wipe the moisture from the exterior. | |
| The Child Lock is activated. | Deactivate the Child Lock. | |
| The time is not displayed. | Power is not supplied. Make sure power is supplied. Confirm the microwave is plugged in. Check your fuses or circuit breakers. | |
| The Eco (power-saving) function is set. | Turn off the Eco function. | |
| The oven does not work. | Power is not supplied. Make sure power is supplied. Confirm the microwave is plugged in. Check your fuses or circuit breakers. | |
| The door is open. Close the door and try again. | ||
| The door open safety mechanisms are covered by foreign matter. | Remove the foreign matter and try again. | |
| Problem Cause Action | ||
| The oven stops while in operation. | The user has opened the door to turn food over. | After turning over the food, touch the START button again to start operation. |
| The power turns off during operation. | The oven has been cooking for an extended period of time. | After the oven has cooked for an extended period of time, let the oven cool. |
| The cooling fan is not working. | Listen for the sound of the cooling fan. | |
| Trying to operate the oven without food inside. | Put food in the oven. | |
| There is not enough ventilation space around the oven. | There are intake/exhaust outlets on the front and rear of the oven for ventilation. Check the installation guide and make sure that the microwave is far enough away from walls and cabinets for proper ventilation. | |
| Several appliances or devices are plugged into the same outlet. | Unplug all other appliances or devices from the outlet. | |
| There is no power to the oven. | Power is not supplied. Make | sure power is supplied. Confirm the microwave is plugged in. Check your fuses or circuit breakers. |

English 35
Troubleshooting
| Problem Cause Action | ||
| There is a popping sound during operation, and the oven doesn't work. | Cooking food in a sealed container or using a container with a tight lid. | Do not cook food in sealed containers or in containers with tight lids. Expanding steam from the cooking food can cause the containers to burst or the lids to pop off. |
| The oven exterior gets too hot during operation. | There is not enough ventilation space around the oven. | There are intake/exhaust outlets on the front and rear of the oven for ventilation. Check the installation guide and make sure that the microwave is far enough away from walls and cabinets for proper ventilation. |
| Objects are on top of the oven. | Remove all objects on the top of the oven. | |
| The door cannot be opened properly. | Food residue is stuck between the door and oven interior. | Clean the oven and then open the door. |
| Problem Cause Action | ||
| The oven does not heat. | The oven may not work if too much food is being cooked or improper cookware is being used. | To test the oven, put one cup of water in a microwave-safe container, put the container in the oven, and then run the microwave for 1-2 minutes to check whether the water is heated. If the water is heated, reduce the amount of food and start the function again. Use a cooking container with a flat bottom. |
| Heating is weak or slow. | The oven may not work if too much food is being cooked or improper cookware is being used. | To test the oven, put one cup of water in a microwave-safe container, put the container in the oven, and then run the microwave for 1-2 minutes to check whether the water is heated. If the water is heated, reduce the amount of food and start the function again. Use a cooking container with a flat bottom. |
36 English
| Problem Cause Action | ||
| The warm function does not work. | The oven may not work if too much food is being warmed or improper cookware is being used. | To test the oven, put one cup of water in a microwave-safe container, put the container in the oven, and then run the microwave for 1-2 minutes to check whether the water is heated. If the water is heated, reduce the amount of food and start the function again. Use a cooking container with a flat bottom. |
| The thaw function does not work. | The oven may not work if too much food is being thawed or improper cookware is being used. | To test the oven, put one cup of water in a microwave-safe container, put the container in the oven, and then run the microwave for 1-2 minutes to check whether the water is heated. If the water is heated, reduce the amount of food and start the function again. Use a cooking container with a flat bottom. |
| Problem Cause Action | ||
| The interior light is dim or does not turn on. | The door has been left open for a long time. | The interior light may automatically turn off when the Eco function operates. Close and reopen the door or touch the STOP button. |
| The interior light is covered by foreign matter. | Clean the inside of the oven and check again. | |
| A beeping sound occurs during cooking. | If the Auto Cook function is being used, this beeping sound means it's time to turn over the food. | After turning over the food, touch the START button again to restart operation. |
| The oven is not level. The oven is installed on an uneven surface. | Make sure the oven is installed on flat, stable surface. | |
| There are sparks during cooking. | Metal containers are used during cooking or thawing. | Do not use metal containers. |
| When power is connected, the oven immediately starts to work. | The door is not properly closed. | Close the door and check again. |
| There is electricity coming from the oven. | The power source or power outlet is not properly grounded. | Make sure the power source and power outlet are properly grounded. |

English 37
Troubleshooting
| Problem Cause Action | ||
| There is water dripping. | Water or steam may be generated by the cooking or defrosting process, depending on the food. This is not an oven malfunction. | Let the oven cool and then wipe with a dry dish towel. |
| There is steam coming through a crack in the door. | Water or steam may be generated by the cooking or defrosting process, depending on the food. This is not an oven malfunction. | Let the oven cool and then wipe with a dry dish towel. |
| There is water left in the oven. | Water or steam may be generated by the cooking or defrosting process, depending on the food. This is not an oven malfunction. | Let the oven cool and then wipe with a dry dish towel. |
| The brightness inside the oven varies. | Changes in brightness reflect changes in power output. Power output changes depending on the functions in use. | Power output changes during cooking are not malfunctions. |
| Cooking is finished, but the cooling fan is still running. | To ventilate the oven, the cooling fan continues to run for about 3 minutes after cooking is complete. | This is not an oven malfunction. |
| Problem Cause Action | ||
| Touching the START button operates the oven. | This happens when the oven is not operating. | The microwave oven is designed to start operating when you touch the START button if it was not operating. |
| Turntable | ||
| While turning, the turntable comes out of place or stops turning. | There is no roller ring, or the roller ring is not properly in place. | Install the roller ring properly and then try again. |
| The turn table drags while turning. | The roller ring is not properly in place, there is too much food, or the container is too large and touches the inside of the microwave. | Install the roller ring properly. Adjust the amount of food. Do not use containers that are too large. |
| The turn table rattles while turning and is noisy. | Food residue is stuck to the bottom of the oven. | Remove any food residue stuck to the bottom of the oven. |
38 English
Information codes
If the microwave oven fails to operate, you may see an information code on the display. Check the table below for the code, and then follow the directions.
| Code Description Action | ||
| C-10 | The GAS sensor is open. | Unplug the power cord of the oven, and then contact a local Dacor service center. |
| The GAS sensor is shorted. | ||
| C-F0 | The microwave has sensed an internal communications failure. | Unplug the power cord of the oven, and then contact a local Dacor service center. |
| C-F1 | Only occurs when EEPROM Read or Write is not working. | Unplug the power cord of the oven, and then contact a local Dacor service center. |
| C-F2 | A touch button has malfunctioned. | Touch STOP, and then try the button again. |
| C-d0 | Control buttons are touched over 1 minute. | Clean the keys and check if there is water on the surface around key. If it appears again, turn off the microwave oven, let it sit for more than 30 seconds, and then try setting again. If this code re-appears, contact a local Dacor service center. |
Appendix
Specifications
| Model DMO30U970S*/DA | |
| Oven Cavity 1.1 cu ft | |
| Controls 10 power level, including | Defrost |
| Timer 99 minutes, 99 seconds | |
| Power Source 120 VAC, 60 Hz | |
| Power Consumption | 1650 Watt Microwave |
| Microwave Power Output 1100 Watts | |
| Cook Top Light LED lamp (3 EA) | |
| Oven Light LED lamp | |
| Oven Cavity Dimensions (inches) | 18 1/2" (W) X 6 1/4" (H) X 14 1/4" (D) |
| Outside Dimensions (inches) | 29 7/8" (W) X 10 3/4" (H) X 19 1/8" (D) |
| Shipping Dimensions (inches) | 33 1/4" (W) X 15 3/6" (H) X 22 1/8" (D) |
| Net/Shipping Weight | 58.9 lbs. / 65.3 lbs.(26.2 kg / 32.8 kg) |
English 39

Warranty
Customer Service
Customer Service
Before you request help or schedule service:
- Try the Solutions offered in the Problem-Solution table in the "Troubleshooting" section.
- Become familiar with the warranty terms and conditions of your product.
- If none of these tips or suggestions resolves your problem, visit dacor.com or call our Customer Service center at:
(833) 353-5483 (United States)
(844) 509 4659 (Canada)
United States - Warranty
CERTIFICATE OF WARRANTY ON DACOR MICROWAVE OVEN - UNITED STATES: FULL TWO-YEARS WARRANTY
This warranty covers any defects in materials or workmanship in the Dacor-branded new appliance purchased from a Dacor Authorized Dealer or other seller authorized by Dacor.
This full warranty runs for two years starting from the date of original retail purchase receipt or closing date for new construction, whichever period is longer. Dacor will repair or replace your product.
LIMITED WARRANTY
After the Full Warranty period has ended, this product is warranted against defects in materials or workmanship reported to us during the applicable warranty periods as follows:
Cosmetic Defects. In addition, for 60 days from the date of purchase, your product is warranted to be free from cosmetic defects in material and workmanship (such as scratches of stainless steel, paint/porcelain blemishes, chip, dents, or other damage to the finish). Color variations are excluded, and display, floor-model, "as is" or refurbished products are specifically excluded.
COVERAGE LIMITATIONS
Service will be provided by a Dacor designated service company during regular business hours. Please note service providers are independent entities and are not agents of Dacor.
The owner must provide proof-of-purchase or a closing statement for new construction upon request. All Dacor products must be accessible for service.
Warranty will be null and void on product that has altered, defaced, or missing serial numbers and tags.
Warranty is null and void if non-CSA approved product is transported from the U.S.A.
40 English
WHAT IS NOT COVERED
| Due to differences in painted parts, kitchen lighting, product placement, and other factors; this warranty does not apply to color variation. | Service calls to educate the customer on proper use and care of the product. |
| Service fees for travel to islands and remote areas, which include but are not limited to, ferries, toll roads, or other travel expenses. | Consequential or incidental damage, including but not limited to: food or medicine loss, time away from work, or restaurant meals. |
| Commercial, business, or rental use, or any application other than residential consumer use. | Failure of the product caused by improper product installation. |
| Replacement of house fuses, fuse boxes, or resetting of circuit breakers. | Damage caused by accident, fire, flood, power, interruption power surges, or acts of God. |
| Liability or responsibility for damage to surrounding property including cabinetry, floors, ceilings and other structures or objects. | Breakage, discoloration or damage to glass, metal surfaces, plastic components, trim, paint, or other cosmetic finish caused by improper usage, care, abuse, or neglect. |
| Except as noted above, consumable parts such as filters and light bulbs are not covered and are the responsibility of the purchaser. |
THE REMEDIES PROVIDED IN THE ABOVE EXPRESS WARRANTIES ARE THE SOLE AND EXCLUSIVE REMEDIES. THEREFORE, NO OTHER EXPRESS WARRANTIES ARE MADE, AND OUTSIDE THE FIFTY STATES OF THE UNITED STATES AND CANADA, ALL IMPLIED WARRANTIES, INCLUDING BUT NOT LIMITED TO, ANY IMPLIED WARRANTY OF MERCHANTABILITY OR FITNESS FOR A PARTICULAR USE OR PURPOSE. ARE LIMITED IN DURATION TO ONE YEAR FROM THE DATE OF ORIGINAL PURCHASE. IN NO EVENT SHALL DACOR BE LIABLE FOR INCIDENTAL EXPENSE OR CONSEQUENTIAL DAMAGES. IN THE EVENT DACOR PREVAILS IN ANY LAWSUIT, DACOR SHALL BE ENTITLED TO REIMBURSEMENT OF ALL COSTS AND EXPENSES, INCLUDING ATTORNEY'S FEES, FROM THE DACOR CUSTOMER. NO WARRANTIES, EXPRESS OR IMPLIED, ARE MADE TO ANY BUYER FOR RESALE.
Some states do not allow limitations on how long an implied warranty lasts, or do not allow the exclusion or limitation of inconsequential damages, therefore the above limitations or exclusions may not apply to you. This warranty gives you specific legal rights, and you may also have other rights that vary from state-to-state. Warrantor: Dacor Electronics America, Ridgefield Park, NJ, 07660.
English 41
Warranty
Canada - Warranty
CERTIFICATE OF WARRANTY ON DACOR MICROWAVE OVEN - CANADA:
This Limited Warranty covers only those Products supplied and distributed in Canada by us and delivered new, in the original carton or packaging, to the original consumer purchaser that are purchased from an authorized reseller or distributor, except as otherwise stated herein. Except where prohibited by applicable provincial law, only the original consumer purchaser of the Product has any rights under this Limited Warranty and this Limited Warranty may not be transferred or assigned. Any additional statements such as dealer advertising or presentation, whether oral or written, that make additional warranties or modifications to this Limited Warranty do not con constitute warranties by us and should not be relied upon.
1. WHAT IS COVERED AND FOR HOW LONG
We warrant to the original purchaser ("Purchaser") that your Dacor Microwave Oven purchased from an authorized reseller or distributor in Canada (the "Products") is free from defects in material and workmanship encountered in normal use for the warranty period identified below, effective as of the date of purchase or closing date for new construction, whichever period is longer.
| Dacor Product or Part | Warranty Period and Warranty Coverage |
| Microwave Oven Two (2) Years: Parts and Labour | |
Cosmetic Defects. For sixty (60) days from the date of purchase, the Product is warranted to be free from cosmetic defects in material and workmanship (such as scratches of stainless steel, paint/porcelain blemishes, chip, dents, or other damage to the finish). Color variations are excluded, and display, floor-model, "as-is" or refurbished products are specifically excluded.
2. COVERAGE LIMITATIONS
If the Product fails to operate according to the Product's specifications during the applicable warranty period and the failure is due to improper workmanship or defective material, we will repair or replace, at our sole option, and
without charge to the Purchaser, the Product or any defective component part of the Product. We may, at our sole option, use rebuilt, reconditioned, or new parts or components when repairing any Product. If the same model Product or part is not available for replacement, we may, at our sole option, replace the Product or part with any rebuilt, refurbished, reconditioned or new Product or part of similar utility and value to the Product or part being replaced.
We expressly reserve the exclusive right, at our sole option, and in lieu of any service, repair or replacement of Dacor Product or Part Warranty Period
and Warranty Coverage Microwave Oven Two (2) Years: Parts and Labour a Product under this Limited Warranty, to offer the purchaser a partial refund of the original purchase price paid by the Purchaser for that Product (a "Partial Refund").
The amount of any Partial Refund to be offered shall be determined in our discretion based on the fair market value of the Product given its age and condition. If Purchaser accepts that offer of a Partial Refund, the Purchaser shall be deemed to have released us from any claim or liability whatsoever under this Limited Warranty or under any other applicable express or implied warranty or condition in respect of that Product.
All repaired parts or replaced Products will be warranted for a period equal to the remainder of the original Limited Warranty on the original Product or for 90 days, whichever is longer.
3. WHAT IS NOT COVERED
The remedies provided for in this Limited Warranty are available only within Canada. This Limited Warranty does not cover any defect, malfunction, failure or damage caused by or resulting from any of the following:
(a) removal, installation, re-installation, maintenance, or service of the Product that was not authorized by us; (b) accident, fire, flood, power interruption, power surges, incorrect line voltage or supply or electrical current, fuses, house wiring, circuit breakers, connectors not supplied by us, unusual electrical or electromechanical stress, acts of God, or acts of nature;
42 English

(c) misuse, abuse, neglect, mishandling, misapplication, alteration or modification of the Product or any part of the Product; (c) use of the Product in conjunction with products, equipment, utilities, services, parts, supplies, accessories, applications, external wiring, connectors, or ancillary or peripheral equipment not supplied or authorized by us; (e) uses for which the Product was not intended. Further, this Limited Warranty does not cover: (i) any Product or part from which the serial number has been removed or on which the serial number has been made illegible. Removing the serial number on any Product or rendering it illegible on any Product will immediately void the Limited Warranty for that Product; (ii) any damage whatsoever that occurs during shipment of the Product once the Product has been accepted by the Purchaser; (iii) any damage whatsoever resulting from any failure to follow operating, maintenance or environmental instructions contained in any instruction booklet or owner's manual available in connection with the Product; (iv) service fees for travel to islands and remote areas, which include but are not limited to, ferries, toll roads, or other travel expenses; (v) replacement of house fuses, fuse boxes, or resetting of circuit breakers; (vi) liability or responsibility for damage to surrounding property including cabinetry, floors, ceilings and other structures or objects; (vii) the cost of service calls for instructions, for the correction of installation errors, for customer adjustments that are explained in the Product owner's manual, or where the Product operates according to the Product's specifications. There may be a service charge for service calls made for issues not covered under this Limited Warranty; (viii) breakage, discoloration or damage to glass, metal surfaces, plastic components, trim, paint, or other cosmetic finish caused by improper usage, care, abuse, or neglect; (ix) except as noted above, consumable parts such as filters and light bulbs are not covered and are the responsibility of the Purchaser; (x) commercial, business, or rental use, or any application other than residential consumer use; (xi) colour variation due to differences in painted parts, kitchen lighting, product placement, and other factors; We do not warrant or guarantee uninterrupted or error-free operation of the Product.
4. WHAT ARE THE LIMITATIONS ON IN-HOME WARRANTY SERVICE?
In-home service is subject to availability, and it is not available in all areas of Canada. In-home service will only be provided if the Product is unobstructed and easily accessible from floor level to service personnel. If repair cannot be completed during in-home service or if in-home service is not available in your area, you may be directed to deliver the Product to a Dacor Authorized Service Center for warranty service. The cost of transportation of the Product to and from a Dacor Authorized Service Centre shall be paid by the Purchaser unless we elect to provide that transportation at our discretion. To receive in-home service, the Purchaser must first contact Dacor Customer Care for problem determination and service procedures. All in-home warranty repairs must be performed by a Dacor Authorized Service Center. Valid proof of purchase must be presented to us at the time that service is requested and before warranty services are rendered. When in-home service is not available, the Purchaser must return the Product to a Dacor Authorized Service Center for analysis. Assistance on where to deliver the Product can be obtained by contacting our Customer Service center. The cost of transporting the Product to or from the Authorized Service Center must be paid by the Purchaser.
5. WHAT ARE THE LIMITS OF OUR LIABILITY?
EXCEPT AS EXPRESSLY SET FORTH IN THIS LIMITED WARRANTY, OUR LIABILITY IS SUBJECT TO THE FOLLOWING LIMITATIONS:
(A) THE PURCHASER TAKES THE PRODUCT "AS IS" AND WE MAKE NO WARRANTY OR REPRESENTATION OF ANY KIND WHATSOEVER WITH RESPECT TO THE PRODUCT.
(B) THERE ARE NO CONDITIONS, EXPRESS OR IMPLIED, STATUTORY OR OTHERWISE, WITH RESPECT TO THE PRODUCT.
(C) IN PARTICULAR, AND WITHOUT LIMITING THE GENERALITY OF THE FOREGOING PARAGRAPHS (A) AND (B), WE MAKE NO WARRANTY, CONDITION OR REPRESENTATION AS TO ANY OF THE FOLLOWING: (i) THE MERCHANTABILITY
English 43
Warranty
OF THE PRODUCT OR ITS FITNESS FOR ANY PARTICULAR PURPOSE OR USE; (ii) TITLE OR NON-INFRINGEMENT; (iii) DESIGN, CONDITION, QUALITY, OR PERFORMANCE OF THE PRODUCT; (iv) THE WORKMANSHIP OF THE PRODUCT OR THE COMPONENTS CONTAINED THEREIN; (v) COMPLIANCE OF THE PRODUCT WITH THE REQUIREMENTS OF ANY LAW, RULE, SPECIFICATION OR CONTRACT PERTAINING TO THE PRODUCT.
(D) NOTHING CONTAINED IN ANY INSTRUCTION MANUAL OR OWNER'S MANUAL SHALL BE CONSTRUED TO CREATE AN EXPRESS WARRANTY OF ANY KIND WHATSOEVER WITH RESPECT TO THE PRODUCT.
THE PROVISIONS FOUND IN PARAGRAPHS (E) AND (F) BELOW DO NOT APPLY IN CIRCUMSTANCES WHERE THIS LIMITED WARRANTY IS COVERNED BY THE LAWS OF THE PROVINCE OF QUEBEC.
(E) ALL IMPLIED WARRANTIES AND CONDITIONS THAT MAY ARISE BY OPERATION OF LAW, INCLUDING ANY APPLICABLE IMPLIED WARRANTY OR CONDITION OF MERCHANTABILITY OR FITNESS FOR A PARTICULAR PURPOSE. ARE HEREBY LIMITED TO THE SAME DURATION OF TIME AS THIS LIMITED WARRANTY.
SOME PROVINCES PROHIBIT LIMITATIONS ON HOW LONG AN IMPLIED WARRANTY LASTS, AND THE LIMITATION ON THE DURATION OF THE IMPLIED WARRANTY WILL NOT APPLY TO THE EXTENT THAT THE LIMITATION IS PROHIBITED BY APPLICABLE PROVINCIAL LAW.
(F) WE SHALL NOT BE LIABLE FOR DAMAGES OF ANY KIND (INCLUDING, WITHOUT LIMITATION, ANY INCIDENTAL, SPECIAL, CONSEQUENTIAL OR SIMILAR DAMAGES) THAT RESULT OR ARISE DIRECTLY OR INDIRECTLY FROM ANY OF THE FOLLOWING: (i) THE PURCHASE, USE, OR MISUSE OF THE PRODUCT; (ii) ANY LOSS OF USE OF THE PRODUCT OR INABILITY TO USE THE PRODUCT; (iii) ANY BREACH OF THE EXPRESS WARRANTY; (iv) ANY LOSS OF ANTICIPATED PROFITS OR BENEFITS; (v) ANY LOSS OF FOOD OR CONSUMABLES; (vi) ANY TORT (INCLUDING NEGLIGENCE OR GROSS NEGLIGENCE) OR FAULT COMMITTED BY US, ITS AGENTS OR EMPLOYEES; (vii) ANY BREACH OF CONTRACT; (viii) ANY CLAIM BROUGHT AGAINST THE PURCHASER BY ANY OTHER PARTY. SOME PROVINCES PROHIBIT THE EXCLUSION OR LIMITATION OF INCIDENTAL OR CONSEQUENTIAL DAMAGES, AND THE ABOVE EXCLUSION OF INCIDENTAL OR CONSEQUENTIAL DAMAGES WILL NOT APPLY TO THE EXTENT THAT THE EXCLUSION IS PROHIBITED BY APPLICABLE PROVINCIAL LAW.
(G) THIS WARRANTY GIVES YOU SPECIFIC LEGAL RIGHTS, AND YOU MAY ALSO HAVE OTHER RIGHTS, WHICH VARY FROM PROVINCE TO PROVINCE. THIS LIMITED WARRANTY STATES THE PURCHASER'S EXCLUSIVE REMEDY. EXCEPT WHERE PROHIBITED BY APPLICABLE PROVINCIAL LAW, THIS LIMITED WARRANTY IS NOT TRANSFERABLE WITHOUT OUR EXPRESS CONSENT.
(H) IF ANY PORTION OF THIS LIMITED WARRANTY IS HELD ILLEGAL OR UNENFORCEABLE BY REASON OF ANY LAW, SUCH PARTIAL ILLEGALITY OR UNENFORCEABILITY SHALL NOT AFFECT THE ENFORCEABILITY FOR THE REMAINDER OF THIS LIMITED WARRANTY.
If the Product is purchased from a non-authorized reseller or distributor or purchased outside of Canada, this Limited Warranty does not apply except that the above limitations specified in Sections 5(A) through 5(I) shall apply. Warrantor in Canada: Dacor Electronics Canada Inc., Mississauga, ON, L5N 0B9 Canada
OUTSIDE THE UNITED STATES AND CANADA:
LIMITED FIRST YEAR WARRANTY
If your Dacor product fails to function within one year of the original date of purchase due to a defect in material or workmanship, Dacor will furnish a new part, F.O.B. factory to replace the defective part. All delivery, installation, labor costs, and other service fees are the responsibility of the purchaser
44 English
Memo
English 45
Memo
46 English


Memo
English 47
Contact Dacor
If you have any questions or comments relating to Dacor appliances, please contact the Dacor Customer Service Center.
| Country Contact Center Web Site | |
| U.S.A 1-833-353-5438 www.dacor.com | |
| CANADA 1-844-509-4659 www.dacor.com |


DE68-04568E-00
dacor.
Manual del usuario
Horno microondas
DM030U970S*
Contenido Contenido
dacor.
Estimado cliente:
Dacor Customer Service Team
14425 Clark Avenue
City of Industry, CA 91745
The Dacon Customer Service Team
2 Español
natural_image
Line drawing of a rectangular electronic device casing with internal compartments and ports (no text or symbols)Horno de microondas


natural_image
Simple line drawing of a round table with a mug and a side dish (no text or symbols)natural_image
Line drawing of a two-door air conditioner unit (no text or symbols)natural_image
Pure electrical circuit lines without any symbolsnatural_image
Line drawing of a microwave oven with ventilation grilles and cooling fins (no text or symbols)natural_image
Illustration of a washing machine with a plate and bucket (no text or symbols)natural_image
Line drawing of a microwave oven with ventilation grilles and airflow indicators (no text or symbols)Electronics Canada Inc., Mississauga, ON, L5N 0B9 Canada
FUERA DE ESTADOS UNIDOS Y CANADÁ:
City of Industry, CA 91745
The Dacon Customer Service Team
2 Français
natural_image
Isometric line drawing of a rectangular electronic device casing with internal circuit-like components (no text or symbols)Four micro-ondes
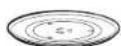


natural_image
Simple line drawing of a round table with a mug and a side dish (no text or symbols)natural_image
Line drawing of a rectangular appliance with three doors and control knobs (no text or symbols)natural_image
Diagram of a device with a circular component and connecting wires, no text or symbols present- Retirez la vis assurant la fixation de la barrette des DEL

natural_image
Line drawing of a kitchen air conditioner unit with ventilation grilles and doorways (no text or symbols)natural_image
Illustration of a washing machine with a plate and bucket (no text or symbols)natural_image
Line drawing of a microwave oven with airflow arrows indicating electron flow (no text or symbols)
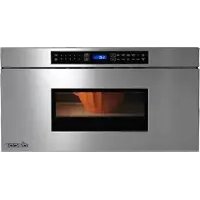
- The Dacon Customer Service Team
- Important safety instructions 3
- Setting up your new microwave oven 10
- Using your microwave oven 16
- Cookware guide 28
- Cooking guide 29
- Cleaning and maintaining your microwave oven 31
- Troubleshooting 35
- Appendix 39
- Warranty 40
- Important safety instructions
- WHAT YOU NEED TO KNOW ABOUT SAFETY INSTRUCTIONS
- PRECAUTIONS TO AVOID POSSIBLE EXPOSURE TO EXCESSIVE MICROWAVE ENERGY
- SAVE THESE INSTRUCTIONS
- IMPORTANT SAFETY SYMBOLS AND PRECAUTIONS
- FCC STATEMENT
- STATE OF CALIFORNIA PROPOSITION 65 WARNING (US ONLY)
- WARNING
- CAUTION
- GROUNDING INSTRUCTIONS
- USE OF EXTENSION CORDS
- ▲ CRITICAL INSTALLATION WARNINGS
- ⚠️ INSTALLATION CAUTIONS
- ▲ CRITICAL USAGE WARNINGS
- USAGE CAUTIONS
- Setting up your new microwave oven Setting up your new microwave oven
- ▲ CRITICAL CLEANING INSTRUCTIONS
- Checking the parts
- NOTE
- Setting up your microwave oven
- Setting up your new microwave oven
- Learning about the control panel
- Set Time
- Set Date
- Sound
- System Settings
- Smart Control
- How to connect the microwave oven
- Voice Control
- Bixby
- Amazon Alexa & Google Assistant
- Installation Guide
- Using your microwave oven
- Turntable (On/Off)
- Kitchen Timer
- Child Lock
- Activating
- Deactivating
- Back Button
- More/Less Feature
- Stop Button
- Eco Mode
- +30 sec
- Cooktop Lamp (High/Low/Off)
- Vent Fan (Boost/High/Medium/Low/Off)
- Popcorn
- Reheat
- Defrost
- Sensor Cook
- Auto Cook
- Glass steamer cooking guide
- Conditions of use
- Maintenance
- Microwave
- Power levels
- One-stage cooking
- Multi-stage cooking (maximum of 2 stages)
- Cookware guide
- Recommended cooking utensils
- Limited use items
- Not recommended
- Testing utensils
- Cooking guide
- Cooking techniques
- Stirring
- Arrangement
- Shielding
- Turning
- Standing
- Adding Moisture
- Venting
- General cooking recommendations
- Guide for cooking eggs in your microwave
- Guide for cooking vegetables in your microwave
- Cleaning and maintaining your microwave oven
- Cleaning the exterior
- Cleaning under your microwave oven
- Cleaning the control panel
- Cleaning the door and door seals
- Cleaning the interior
- Cleaning the turntable and roller rings
- Storing and repairing your microwave oven
- Replacing the cooktop/night light
- Replacing the oven light
- Cleaning the baffle filter
- Replacing the charcoal filter
- Troubleshooting
- Check points
- Information codes
- Appendix
- Warranty
- Customer Service
- United States - Warranty
- CERTIFICATE OF WARRANTY ON DACOR MICROWAVE OVEN - UNITED STATES: FULL TWO-YEARS WARRANTY
- LIMITED WARRANTY
- COVERAGE LIMITATIONS
- Canada - Warranty
- CERTIFICATE OF WARRANTY ON DACOR MICROWAVE OVEN - CANADA:
- WHAT IS COVERED AND FOR HOW LONG
- COVERAGE LIMITATIONS
- WHAT IS NOT COVERED
- WHAT ARE THE LIMITATIONS ON IN-HOME WARRANTY SERVICE?
- WHAT ARE THE LIMITS OF OUR LIABILITY?
- OUTSIDE THE UNITED STATES AND CANADA:
- Memo
- Contact Dacor
- Contenido Contenido
- dacor.
- FUERA DE ESTADOS UNIDOS Y CANADÁ:
Brand : Dacor
Model : DMO30U970SS
Category : Microwave Oven