02793 - Deep fryer Gourmetmaxx - Free user manual and instructions
Find the device manual for free 02793 Gourmetmaxx in PDF.

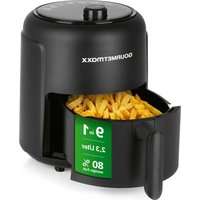
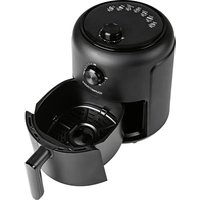
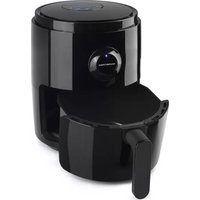
| Product type | Hot air fryer (Air fryer) |
| Brand | Gourmetmaxx |
| Model | 02793 |
| Power supply | 220-240 V ~ 50/60 Hz |
| Power | 1300-1500 W |
| Temperature range | 80 °C to 200 °C |
| Timer | Up to 60 minutes (in 1-minute increments) |
| Basket capacity | Approximately 3.5 L (estimate) |
| Body material | Heat-resistant plastic, metal interior |
| Dimensions (W x D x H) | Approximately 30 x 30 x 35 cm (estimate) |
| Weight | Approximately 4 kg (estimate) |
| Color | Black/gray (model 02793) |
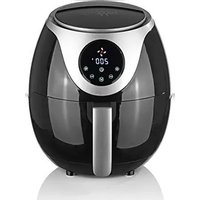
| Display | LED touch |
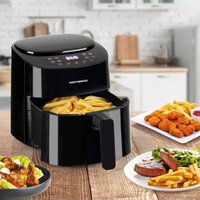
| Preset programs | 7 (Manual, Chicken, Fries, Shrimp, Bake, Meat, Fish) |
| Functions | Grill, bake, defrost, reheat |
| Safety | Automatic shut-off when drawer is removed, overheat protection, automatic shut-off at timer end |
| Cleaning | Drawer and basket washable with hot water and mild detergent; body can be cleaned with a damp cloth |
| Included accessories | Drawer, basket, instruction manual |
| Spare parts | Available through after-sales service (DS Direct GmbH) |
| Repairability | Entrust to a specialist workshop; do not repair yourself |
| Protection class | I |
Frequently Asked Questions - 02793 Gourmetmaxx
User questions about 02793 Gourmetmaxx
0 question about this device. Answer the ones you know or ask your own.
Ask a new question about this device
Download the instructions for your Deep fryer in PDF format for free! Find your manual 02793 - Gourmetmaxx and take your electronic device back in hand. On this page are published all the documents necessary for the use of your device. 02793 by Gourmetmaxx.
USER MANUAL 02793 Gourmetmaxx
ID Anleitung: Z 02365_02383_02783_02793_02799_02819 M DS V4.1 0219


Entsorgung

Items Supplied and Device Overview 20
Intended Use 21
Safety Instructions 21
Before Initial Use 24
Operation 25
Tips 26
Using the Device and Preparing Food 27
Recipe ideas 29
Cleaning, Care and Storage 32
Troubleshooting 32
Technical Data 34
Disposal 34
Explanation of the Symbols

Danger symbols: These symbols indicate risks of injury (e. g. from electricity or fire). Read through the associated safety instructions carefully and follow them.
Explanation of the Signal Words
DANGER
warnings of serious injuries and danger to life
WARNING
wars of possible
serious injuries and danger to life
CAUTION
warnings of slight to moderate injuries
NOTICE
wars of damage to property


Caution: hot surfaces!
Suitable for food use.
Read instructions before use!
Supplementary information
Items Supplied and Device Overview
Check the items for completeness and transport damage. If the device, the mains plug or the mains cable does have damage, do not (!) use the device, but contact our customer service department.
Key
(See fold-out page for illustrations)
1 Device housing
2 Ventilation slots (on the back)
3 Ventilation slots (on the bottom)
4 Feet
5Drawer
6 Basket insert handle
7 Release button of the basket insert (under the cover)
8 Basket insert
9 Touchscreen panel
10 Display
11 - Cake programme
12 -Fan
13 -Meat programme
14 °C - Degrees Celsius
15 - Fish programme
16 min - Minutes
17 - Set temperature
18 (M) - Menu selection
19 - Set timer
20 - Switch on / off | Start "Manual" programme
21 LED display showing set temperature / timer time
22 Chicken programme
23 - Heating
24 - Chips programme
25 - Prawns programme
Not shown:
- Mains cable with mains plug
- Operating instructions
Dear Customer,
We are delighted that you have chosen our hot air frying machine.
Before using the device for the first time, please read the instructions carefully and keep them for future reference. If the device is given to someone else, these instructions should also be handed over with it. The manufacturer and importer do not accept any liability if the information in these instructions is not complied with.
Please note: The illustrations in these instructions may differ slightly from the actual device.
If you have any questions about the device and about spare parts / accessories, contact the customer service department via our website:
- The device is designed for grilling, baking, defrosting and heating up food.
- The device is not a conventional fryer in which food is deep-fried using oil. The device works with hot air! Do not fill the drawer containing the basket with fairly large amounts of cooking oil or deep-frying fat!
- The device is not suitable for preparing liquid dishes such as soups, sauces or stews!
- The device is for personal use only and is not intended for commercial applications.
- The device should only be used as described in these instructions. Any other use is deemed to be improper. Incorrect operation and incorrect handling may cause faults with the device and cause injury to the user.
- The following are excluded from the warranty: all defects caused by improper handling, damage or unauthorised attempts at repair. The same applies to normal wear and tear.
Safety Instructions

WARNING: Read all safety notices, instructions, illustrations and technical data provided with this device. Failure to follow the safety notices and instructions may result in electric shock, fire and/or injuries.
This device may be used by children aged 8 and over and by people with reduced physical, sensory or mental abilities or a lack of experience and/or knowledge if they are supervise have received instruction on how to use the device safely and have understood the dangers resulting from failure to comply with the relevant safety precautions.
Children must not play with the device.
- Cleaning and user maintenance may not be performed by children, unless they are older than 8 years of age and are supervised.
Children younger than 8 years of age and animals must be kept away from the device and the connecting cable.
CAUTION: Hot Surfaces!
The device will become very hot during use. Make sure that no heated parts are touched while using and after using the device. Only ever touch the handle and the control panel while the device is in operation or immediately after it has been switched off.
- Never immerse the main unit and connecting cable in water or other liquids and ensure that they cannot fall into water or become wet. There is a danger of electric shock from water.
- Do not pour any liquids (e.g. oil or water) directly into the device or the drawer or place a liquid-filled vessel into the device. It works exclusively with hot air.
- The device must always be disconnected from the mains power when it is left unattended and before filling, emptying or cleaning the device.
The device is not designed to be operated with an external timer or a separate remote control system.
In the interest of your own safety, inspect the device and the connecting cable for damage each time before you use it. Use the device only if it is in working order. - Do not make any modifications to the device. Do not replace the connecting cable yourself. If the device or the connecting cable are damaged, they must be replaced by the manufacturer, customer service department or a specialist workshop in order to avoid any hazards.
It is essential to follow the instructions in the "Cleaning, Care and Storage" chapter.

DANGER - Risk of Electric Shock
Use and store only in closed rooms. Do not use the device in rooms with high humidity.
Should the main unit fall into water, cut off the power supply immediately. Do not attempt to pull the device out of the water while it is still connected to the mains power! Have the device checked in a specialist workshop before using it again.
- Never touch the device and the connecting cable with wet hands when these components are connected to the mains power.
Make sure that the steam which emerges is not aimed directly at electrical devices and equipment containing electrical components.

WARNING - Danger of Injury
- Keep children and animals away from plastic bags and films. There is a danger of suffocation.
Make sure that the mains cable is always kept out of the reach of small children and animals. There is a danger of strangulation.
Danger of scalding from heat, hot steam or condensation!
Hot steam can escape from the device during operation and when the drawer is pulled out. You should therefore keep your head and hands out of the danger zone (e.g. the ventilation slots on the back of the device). We also recommend the use of oven cloths or oven gloves when removing the drawer.
The food which has been cooked is hot. Be careful when handling hot foodstuffs.
Make sure that the connected mains cable does not present a trip hazard. The mains cable may not hang down from the surface on which the device is placed in order to prevent the device from being pulled down.

WARNING - Danger of Fire
- Do not use the device in rooms containing easily ignitable substances or poisonous and explosive fumes.
- Do not operate the device in the vicinity of combustible material. Do not place any combustible materials (e.g. cardboard, paper, wood or plastic) in or on the device.
- Do not connect the device along with other consumers (with a high wattage) to a multiple socket in order to prevent overloading and a possible short circuit (fire).
Do not use any extension cables.
- Do not insert anything into the ventilation openings of the device and make sure that these do not become clogged.
Make sure that foodstuffs containing oil and fats are not overheated.
Do not cover the device during operation in order to prevent it from catching fire.
In the event of a fire: Do not extinguish with water! Smother the flames with a fire blanket or a suitable fire extinguisher.
NOTICE - Risk of Damage to Material and Property
- Only connect the device to a socket with safety contacts that is properly installed and matches the technical data of the device. The socket must also be readily accessible after connection so that the connection to the mains can quickly be isolated.
Unwind the connecting cable fully before connecting up the device.
Make sure that the connecting cable is not squashed, bent or laid over sharp edges and does not come into contact with hot surfaces (e.g. of the device).
Do not wrap the mains cable around the device (danger of the cable breaking).
The mains cable may not hang down from the surface on which the device is placed in order to prevent the device from being pulled down.
Do not place any metal foil packaging or tools in the device.
The device must be switched off when inserting or removing the mains plug. - Never pull or carry the device by the mains cable. When you pull it out of the socket, always pull on the mains plug and never the mains cable!
Do not place or lay any heavy objects on the device or the connecting cable. - Remove the mains plug from the plug socket if a fault occurs during operation, in the event of a power outage or before a thunderstorm.
- Protect the device from other heat sources, naked flames, sub-zero temperatures, persistent moisture, wet conditions and impacts.
Use only original spare parts from the manufacturer in order to guarantee that there is no interference that may prevent the device from working and to avoid damage.
Before Initial Use
- Remove all packaging materials and any possible protective films used for protection during transportation. Never remove the rating plate and any possible warnings!
- Before you first enjoy any fried food, we recommend that you carry out a trial run to remove any possible production residues. To do this, allow the device to heat up on the highest temperature setting for approx. 15 minutes without any food in it (see the "Using the Device and Preparing Food" chapter). Make sure that the room is well ventilated as you do this!

When the device is first used, production-related additives (e.g. grease) may cause a small amount of smoke and / or an odour to be produced. This is normal and not a device defect.
- Clean the device and all accessories thoroughly (see the "Cleaning, Care and Storage" chapter).
Setting Up and Connecting the Device

PLEASE NOTE!
- Place the device on a dry, level, firm and heat-resistant surface. Never place the device on a soft surface. The ventilation slots on the bottom of the device must not be covered. Otherwise it could overheat and be damaged.
-
Set up the device with a clear space on all sides (at least 20~cm ) and clear space above it (at least 30~cm ).
The device has rubber feet. Some items of furniture are coated with materials which could attack the rubber feet. If necessary, place a mat under the device to be on the safe side. -
Set up the device in a suitable location, following the safety instructions and the notes provided at the beginning of this chapter.
- Fully unwind the mains cable.
- Insert the mains plug into a properly installed socket that is easily accessible. A beep will be heard and all the elements in the display will light up once. All elements then go out again.
Safety Features
- The device is equipped with an internal timer. Once the set timer time has elapsed, the supply of heat is automatically switched off. To switch the device on again, touch the field (20) (see the "Using the Device and Preparing Food" chapter).
- The device switches off automatically when the drawer (5) with the basket insert (8) is removed from the device. All elements on the display (10) go out. When the drawer is inserted back into the device, a beep sounds, all elements light up once on the display and then go out again. The display shows the symbol for the previously selected programme ("Manual" programme excluded) and the set temperature and the remaining timer time appear on the LED display (21). The set programme con
tinues to run until the timer time has elapsed or the device is switched off manually (see the "Operation" and "Using the Device and Preparing Food" chapters).
Operation

Please note that the preset cooking temperatures and cooking times are average values. As ingredients may differ in terms of their origin, size, shape and brand, we are unable to guarantee an optimal setting for your ingredients. The actual cooking times may therefore vary depending on portion size. Before serving, please make sure that your food is well done!
Programmes
The device has 7 programmes:
| Programme | Temperature (preset) | Duration (preset) | Suitable for (examples) |
| Manual 180 °C 15 min. | Vegetable sticks, mozzarella sticks, apple turnovers | ||
| Chicken | 200 °C 20 min. | Chicken wings, chicken thighs, chicken nuggets | |
| Chips | 180 °C 15 min. | Potato and sweet potato chips | |
| Prawns | 160 °C 20 min. | Prawns, shrimps (each without shell) | |
| Baking * | 160 °C 30 min. | Cake, bread, pizza, casseroles | |
| Meat | 180 °C 25 min. Cutlets, meatballs | ||
| Fish | 180 °C | 20 min. | Fried fish, fish fingers |
| * only use in conjunction with the optionally available bread baking basket (see fold-out page) | |||
- For each programme the temperature and the duration can be set individually (see the "Operating Elements and Functions" section).
- Depending on which programme is selected, the corresponding symbol appears on the display (10). If no programme symbol is shown on the display, the "Manual" programme is set.
Operating Elements and Functions
The device has the following operating elements and functions:
| Operating elements Functions | |
| Fields + and – for timer | Heating duration (1 – 60 minutes in 1-minute increments) |
| Fields + and – for temperature | Temperature (80 – 200 °C in 5-degree increments) |
| Field | Switch the device on and off |
| Start “Manual” programme | |
| Menu fi eld | Select menu |
- The required duration and temperature can be set by touching the relevant + and - fields. If the fields are pressed for an extended period, the fast increment mode is activated.
- Touching the f@d20) switches the device on or off. If you are on the "Manual" menu, the programme is started by touching the fi eld ⑥.
- The required programme can be set by touching the field (M) (18) several times. When the device is switched on, the "Manual" programme is preset. The programmes can be selected in the following order:
Chicken > Chips > Prawns > Baking > Meat >
Fish > Manual
Tips
- This device works with hot air. In general, you can prepare all dishes that can also be prepared in a conventional fan oven. It is suitable, among other things, for hot-air grilling of chips and potato wedges made from fresh potatoes, for cooking frozen chips and other frozen convenience products, and for cooking all kinds of chopped up food (both fresh vegetables and fresh meat and fresh fish).
- Generally it is not necessary to preheat the device. However, to be better able to determine when the food is cooked and when preparing food which has to be ready "on the dot", preheating to the required temperature is recommended (see the "Using the Device and Preparing Food" chapter). The set temperature has been reached when the symbol (23) goes out on the display (10).
- You generally do not require any oil to cook food in the device. You can add oil to your food to enhance the taste by spraying your food with a little oil from the oil atomiser. In addition, you can also prepare marinated food or food in breadcrumbs in the device.
- Cooking times are dependent on the size and quantity of the food and on the cooking temperature. However, in general the cooking times are shorter than in a conventional oven. We recommend starting with short cooking times and then adapting them to your personal taste.
- For the preparation of frozen products, follow the time and temperature specifications of the manufacturer. To get a crispy result, never add fat when preparing mass
produced frozen products as they have generally already been preparation time may be reduced slightly. You should therefore check whether your food is fully cooked before the stated cooking time has expired.
- With some food (e. g. chips and similar items), it is advisable to mix the food around from time to time to obtain an even cooking result. To do this, remove the draw (5) from the device and give the food a light shake. Then re-insert the drawer and continue the cooking process.
Using the Device and Preparing Food

PLEASE NOTE!
The drawer and the basket insert will be hot after being removed from the device! Only ever place on a heat-resistant surface!
Make sure that the drawer has been inserted correctly. The device cannot be switched on if the drawer is not inserted correctly.
Insert the drawer into the device only with the basket insert placed in it.
- Do not overfill the basket insert so that the hot air can circulate optimally inside the device. Fill the basket insert no more than 2/3 full.
Do not place food that is still packed in plastic wrap or plastic bags in the device.
Make sure that the food that you would like to prepare does not come into contact with the heating elements of the device.

This device works with hot air. It is not a conventional fryer in which food is deep-fried using lots of oil! In general, you can prepare all dishes that can also be prepared in a conventional fan oven. For good results, please read the "Tips" chapter.
- Insert the basket insert (8) into the drawer (5). It must click audibly into place.
- Pour the food that is to be prepared into the basket insert.
- Insert the drawer containing the basket insert into the device. A beep must sound and all elements must light up once on the display (10) and then go out again. The drawer is then fitted correctly in the device.
- Switch on the device by touching the field (20). The preset temperature and duration of the "Manual" programme are displayed alternately in the LED display (21).
- Use the field (18) to select the programme you want or stay on the preset "Manual" programme (see the "Operation" chapter | "Operating Elements and Functions"). If necessary, adjust the temperature and the timer time individually using the relevant + and - fields (see the "Operation" chapter | "Operating Elements and Functions"). The selected programme starts automatically after approx. 5 seconds. The symbol (12) and symbol (23) appear on the display to indicate that the device is heating up.

The "Manual" programme must be started via the field
- The temperature and the timer time can also be adjusted during the cooking process.
Please Note: The symbol goes out and appears again at regular intervals. This is not a malfunction. To maintain a constant temperature, the device heats up or the device stops the heating process at regular intervals. When the symbol appears, the device is in a heating phrase, and when the symbol goes out, the supply of heat has been briefly interrupted.
- Once the set timer time has elapsed, the supply of heat is ended automatically. All elements go out, except for the symbol .

By touching the field during the cooking process, it can be manually aborted at any time.
Please Note: After the set timer time has elapsed or the device is switched off manually, the fan initially continues to operate! The symbol remains visible on the display. After approx. 20 seconds, five beeps sound and the fan and the device switch off entirely. The symbol goes out.
- Carefully pull the drawer containing the basket insert straight out of the device using the basket insert handle (6) and place the drawer down on a heat-resistant, non-slip surface.
- Remove the basket insert from the drawer by pushing the cover on the basket insert handle forwards and pressing the release button (7) beneath it (Picture A1 and A2). Pull the basket insert up out of the drawer.
- Carefully remove the food from the basket insert.
- Pull the mains plug out of the socket and allow the device to cool down completely.
- Clean the device after each use to prevent germ formation (see the "Cleaning, Care and Storage" chapter). Do not allow any food residues to dry on the device.
Recipe ideas
Notes on cooking time and cooking temperature
Please note that the preset cooking temperatures and cooking times are average values. As ingredients may differ in terms of their origin, size, shape and brand, we are unable to guarantee an optimal setting for your ingredients. The actual cooking times may therefore vary depending on portion size. Before serving, please make sure that your food is well done!
Homemade French fries
Ingredients:
4 large
potatoes
(waxy)
1-2 TBSP cooking oil
Salt to taste
Preparation:
- Peel the potatoes and cut them into sticks of equal size.
- Wash and then dry the potatoes thoroughly.
- Add 1 - 2 TBSP of oil to the potatoes and mix.

You do not have to add oil. However, adding oil to the French fries will make them crispier and tastier.
Tips:
- Mix the oil before adding your favourite spices and herbs. This way, you can also make delicious curry or pepper fries for example. Let your imagination run wild.
- Depending on how thick you cut the potatoes, you can vary between potato wedges and thick or thin fries. The thicker you cut the potatoes, the longer the cooking time.
- Use waxy potatoes. Young potatoes contain more water and therefore take longer to cook and it is possible that they may not go as crispy.
- Wash the chopped-up potatoes with cold, clear water to remove any excess starch in the potatoes. IMPORTANT: Then thoroughly dry the potatoes. The less moisture is present, the crispier the chips will become.
- Preboiled potatoes will cook more evenly! Cut the potatoes into small sticks and preboil them for around five minutes. This will prevent your chips from being crispy on the outside but not fully cooked on the inside.
Coconut shrimps
Ingredients:
12 shrimps (peeled and gutted)
For the breadcrumb coating:
approximately 12 cup of flour
approximately 1 / 2 cup of coconut flakes
approximately 1 / 2 cup of breadcrumbs
1-2 egg whites
Preparation:
- Add the coconut flakes and the breadcrumbs, 1 part to 1, to a small bowl and mix the ingredients.
- Add the fl our to a separate bowl.
- Separate the yolk from the egg white and add the egg white to another small bowl.
- First roll the shrimps in the flour, then dip them in the egg white and finish by rolling them in the coconut breadcrumb coating.
Breaded chicken wings and drumsticks
Ingredients:
2 chicken drumsticks or chicken wings
approximately 12 cup of bread crumbs for breading
| 1 | egg | white | |
| 2 | TBSP | paprika | powder |
| 1 | garlic | clove | |
| 1 | TBSP | sea | salt |
| 1 | TBSP | rosemary |
Preparation:
- Peel the garlic and press it through the garlic press.
- Mix the garlic, paprika powder, salt, rosemary and breadcrumbs.
- Separate the egg white and add it to a separate bowl.
- Dip the drumsticks or the chicken wings in the egg white and then roll them in the breadcrumb coating.
Breaded chicken breast strips
Ingredients:
2 chicken breast fillets
1-2 egg whites
approximately 12 cup of flour for breading
approximately 12 cup of breadcrumbs for breading
% TBSP salt
1/2 TBSP pepper
Preparation:
- Place the egg white, flour and breadcrumbs in three separate small bowls.
- Cut each of the chicken breast fillets into strips of equal size.
- Spice the fillet strips with salt and pepper.
- Roll the chicken breast fillet strips in flour, then dip them in the egg white and then bread the chicken breast strips with breadcrumbs.
Codfish fillet with a herb garlic crust
Ingredients:
approximately 100 gr. codfish fillet
1-2 egg whites
1 garlic clove
approximately 1 TBSP chopped basil
approximately 1 TBSP paprika powder
Sea salt, pepper to taste
approximately 12 cup breadcrumbs for breading
Preparation:
- Peel the garlic and press it through the garlic press.
- Mix the garlic, other spices and breadcrumbs in a bowl.
- Separate the egg white and add it to a separate bowl.
- Dip the codfish fillet in the egg white and then bread it with the garlic-herb breadcrumb coating.
Zucchini sticks
Ingredients:
1 zucchini
2 eggs
1 / 2 cup fl our for breading
12 cup breadcrumbs for breading
Preparation:
- Cut the zucchini into small sticks.
- Whisk the eggs.
- Place the eggs, flour and breadcrumbs in separate small bowls.
- Coat the zucchini sticks in the flour, then dip them in the egg and bread them.
Apple turnovers
Ingredients:
1-2 apples
1 roll of flaky pastry from the chilled section
50 g brown sugar
2 TBSP flour
1-2 TBSP lemon juice
Cinnamon to taste
Preparation:
- Peel the apples, remove the core and cut them into small pieces.
- Mix the apple pieces, flour, sugar and lemon juice and add cinnamon to taste.
- Roll out the flaky pastry and divide into dough squares with approx. 10cm sides.
- Spread a tablespoon of the filling on each of the dough squares.
- Coat the edge of the dough with a small amount of water and fold over into triangles. Firmly push down on the dough edge.
Cleaning, Care and Storage

PLEASE NOTE!
Before commencing the cleaning, note the "Safety Instructions" chapter!
Do not spray cleaning agents directly onto the device.
- Do not use any toxic, corrosive or abrasive cleaning agents or scouring sponges to clean the device. These can damage the surface.
- Remove the drawer (5) with the basket insert (8) from the device.
- Slide the cover on the basket insert handle (6) forwards, press the release button (7) and pull the basket insert up out of the drawer by the handle.
- If you have not already done so, empty the basket insert and the drawer.
- Clean the drawer and the basket insert with warm water and a mild detergent. In the case of stubborn dirt, we recommend soaking the drawer and the basket insert in warm water and detergent beforehand.
- Clean the housing (1), the inside of the drawer compartment and the heating elements if necessary with a damp cloth and mild detergent.
- Allow all parts to dry completely before the device is stored away.
- Check the mains cable regularly for any damage.
- Store the device and all accessories in a dry, clean, frost-free place that is protected from direct sunlight and cannot be accessed by children or animals.
Troubleshooting
If the device does not work properly, first check whether you are able to rectify the problem yourself. If the problem cannot be solved with the steps that are listed, contact the customer service department.

Do not attempt to repair a electrical device yourself!
| Problem Possible cause | Fix | |
| The device does not work. / Nothing is shown on the display (10). | The mains plug is not inserted correctly in the socket. | Correct the fi t of the mains plug. |
| The socket is defective. | Try another socket. | |
| No mains voltage is present. | Check the fuse of the mains connection. | |
| The fi eld(20) has not been pressed. | Use the fi eld(20) to switch on the device (see the “Operation” chapter | “Operating Elements and Functions”). | |
| The display is defective. | Contact our customer service department. | |
| Problem Possible cause Fix | ||
| The fuse in the fuse box is triggered. | Too many devices connected to the same circuit. | Reduce the number of devices in the circuit. |
| The drawer (5) with the basket insert (8) cannot be inserted into the device. | The basket insert is overflled. | Fill the basket insert no more than 2/3 full with food. |
| The food has not been evenly cooked or is not fully cooked. | The food was not cut up into pieces of equal size. | Make sure that all of the pieces of food which you cut up small are of roughly the same size. |
| The basket insert is overflied. | Fill the basket insert no more than 2/3 full with food. | |
| The pieces of food have not been separated well enough. | With some food (e. g. chips, potato wedges etc.) it is advisable to mix the food around from time to time to obtain an even cooking result (see the “Tips” chapter). | |
| The selected temperature is too low. | Increase the temperature. | |
| The cooking time is too short. | Increase the cooking time. | |
| The food is burnt. | The selected temperature is too high. | Reduce the temperature. |
| The cooking time is too long. | Reduce the cooking time. | |
| During use, an unpleasant smell is detected. | The device is being used for the first time. | A slight odour and / or smoke may develop due to coating residues that may still be present (see the “Before Initial Use” chapter). The smell should disappear once the device has been used several times. |
| The device is dirty. | Follow the instructions in the “Cleaning, Care and Storage” chapter. | |
Technical Data
Article numbers: 02365 (black / copper)
02383 (black / berry)
02783 (black / mint)
02793 (black / grey)
02799 (black / vanilla)
02819 (black / rose)
Model number: LQ-2502B
Voltage supply: 220 - 240V 50 / 60Hz
Power: 1300 - 1500 W
Temperature range: 80 - 200^
Timer: up to 60 min.
Protection class: I
ID instruction manual: Z 02365_02383_02783_02793_02799_02819 M DS V4.1 0219

Disposal

Dispose of the packaging material in an environmentally friendly manner so that it can be recycled.
This device is governed by the European Directive 2012/19/EU on waste electrical and electronic equipment (WEEE). Do not dispose of this device as normal domestic waste, but rather in an environmentally friendly manner via an officially approved waste disposal company.
Customer Service / Importer:
DS Direct GmbH
Am Heisterbusch 1, 19258 Gallin, Germany
Tel.: +49 38851 314650 (Calls to German landlines are subject to charges. The cost varies depending on the service provider.)
All rights reserved.
Inhalt
Attention, surfaces chaudes!
Chere cliente, cher client,
Z 02365_02383_02783_02793_02799_02819 M DS V4.1 0219
Mise au rebut

WAARSCHUWING - Brandgevaar
ID handleiding: Z 02365_02383_02783_02793_02799_02819 M DS V4.1 0219

Afvoeren