
SC29M1F - Monitor SCHNEIDER - Free user manual and instructions
Find the device manual for free SC29M1F SCHNEIDER in PDF.
| Product Type | Monitor |
| Brand | SCHNEIDER |
| Model | SC29M1F |
| Screen Size | 29 inches |
| Aspect Ratio | 21:9 |
| Maximum Resolution | 2560 x 1080 @ 75 Hz (DP/HDMI) |
| Panel Type | ADS |
| Brightness | 300 cd/m² (typ) |
| Contrast Ratio | 100:1 (static) |
| Response Time | 6 ms |
| Viewing Angle | 178° horizontal / 178° vertical |
| Wall Mount | VESA 100 x 100 mm |
| Connectors | 1x DP, 2x HDMI, 1x audio output |
| Power Supply | DC 12 V, 3.0 A (power adapter included) |
| Power Consumption | 36 W max (via adapter) |
| Dimensions with Stand | 688.6 x 534.3 x 218.9 mm |
| Net Weight | 5.68 kg |
| Special Features | Low Blue Light, Flicker-Free, Adaptive-Sync, Overdrive, Game/RTS/FPS/Film/Text modes |
| Package Contents | Monitor, stand, adapter, DP cable, wall mount screws, user manual |
| Cleaning | Use a dry or slightly damp cloth, never use solvents |
| Safety | Do not open the housing, unplug before cleaning, avoid moisture and heat sources |
| Operating Temperature | 0 to 40 °C, humidity 20 to 80% RH |
Frequently Asked Questions - SC29M1F SCHNEIDER
User questions about SC29M1F SCHNEIDER
0 question about this device. Answer the ones you know or ask your own.
Ask a new question about this device
Download the instructions for your Monitor in PDF format for free! Find your manual SC29M1F - SCHNEIDER and take your electronic device back in hand. On this page are published all the documents necessary for the use of your device. SC29M1F by SCHNEIDER.
USER MANUAL SC29M1F SCHNEIDER
| Synchronisation standard | DP HDMI | |
| 1152 x 864 @ 75 Hz | ✓ ✓ | |
| 1280 x 720 @ 60 Hz | ✓ ✓ | |
| 1280 x 960 @ 60 Hz | ✓ ✓ | |
| 1280 x 1024 @ 60 Hz | ✓ | ✓ |
| 1440 x 900 @ 60 Hz | ✓ ✓ | |
| 1600 x 1200 @ 60 Hz | ✓ ✓ | |
| 1680 x 1050 @ 60 Hz | ✓ ✓ | |
| 1920 x 1080 @ 60 Hz | ✓ ✓ | |
| Synchronisation détaillée | DP HDMI | |
| 1920 x 1080 @ 75 Hz | √ √ | |
| 2560 x 1080 @ 75 Hz | √ √ | |
| 2560 x 1080 @ 60 Hz | √ | √ |
- Excessive sound pressure from earphones and headphones can cause hearing loss.
- Please keep the monitor away from direct sunlight, very strong bright lights and other sources of heat. Prolonged exposure to these environments can cause discoloration and damage to the monitor.
- Remove any objects that may fall into the vents or prevent proper cooling of the monitor's electronics.
- Do not block the vents of the housing.
- When positioning the monitor, make sure the plug of the power cord and electrical outlet are easily accessible.
- If you turn off the monitor by
unplugging the power cable or DC power cord, wait 5 seconds before connecting the power cable or DC power cord for normal operation.
- Use only the bundled DC adapter to power the monitor.
- If the power cable is damaged, it must be replaced by the manufacturer or a qualified after-sales service to avoid a hazard.
-
Excessive use of the monitor can cause visual discomfort, it is best to take shorter breaks more often on your workstation than longer breaks and less often; for example a break of 5-10 minutes after 50-60 minutes. Screen continuous use is probably better than a 15 minutes break every two hours.
-
Try to protect your eyes from eyestrain when using the display for a constant period:
-
Looking something at varying distances from one centered on the screen for a long time.
-
Voluntarily blinking often while you work.
-
Closing and gently rolling your eyes to relax.
-
Repositioning your screen height and the appropriate angle according to your size.
-
Adjusting the brightness and contrast at the appropriate level.
-
Adjusting the lighting environment identical to the brightness of your screen, avoiding fluorescent lighting and surfaces that do not reflect
too much light.
-
Consulting a doctor if your symptoms persist.
-
Unplug the monitor if you need to clean it with a damp cloth. The screen may be wiped with a dry cloth when it is off. However, never use organic solvents, such as liquids containing alcohol or ammonia to clean your monitor.
-
To avoid the risk of shock or permanent damage to the set, do not expose the monitor to dust, rain, water or in environments with high humidity.
-
If your monitor gets wet, wipe it with dry cloth as soon as possible.
-
If a foreign substance or water gets in your monitor, please immediately turn off and unplug the power cord. Then, remove the foreign substance or water, and send it to the maintenance center.
- Do not store or use the monitor in locations exposed to heat, direct sunlight or extreme cold.
- To maintain the best performance of your monitor and use it for a longer period, please use the monitor in a location that is within the following temperature and humidity ranges:
Temperature: 0 - 40^ CHumidity: 20 - 80% RH
WARNING: Do not place the monitor in the rain, in a damp environment and do not open the monitor case to avoid shock, electrical hazards and / or mechanical hazard.
-
Before cleaning, always unplug your monitor. It is advisable to use a dry or slightly damp cloth to clean your monitor. However, a dry cloth is the safest. If using a damp cloth, wait until the monitor is completely dry before reconnecting it.
-
Do not use liquid and / or alcohol- based cleaners or ammonia to clean your monitor.
-
This monitor has ventilation openings at the back of the unit. Do not block these openings to prevent the monitor from overheating.
-
Avoid placing it near heat sources such as portable monitor radiators or heating ducts, as this may damage your monitor.
- Do not spray cleaner and / or liquid of any kind either directly on the monitor screen or on another part of the monitor.
- Do not insert anything into the monitor, especially in the ventilation openings.
- Always make sure that your monitor is placed on a flat surface and secure to prevent it from falling and being damaged.
- Unplug your monitor if you are not going to use it for an extended period.
-
Do not place heavy objects on the monitor or the monitor cables.
-
Do not disassemble or remove monitor elements. Disassembly or alteration etc. Not done (e) by an approved technician can damage the monitor and / or lead to possible exposure to the high-voltage electricity, which can cause serious injury or death.
- Never try to open the monitor cabinet. The dangerous high voltages inside the monitor may result in serious physical injury.
- The socket-outlet shall be installed near the equipment and shall be easily accessible.

HIGH DEFINITION MULTIMEDIA INTERFACE
The terms HDMI and HDMI High-Definition Multimedia Interface, and the HDMI Logo are trademarks or registered trademarks of HDMI Licensing Administrator, Inc. in the United States and other countries.
Office Monitor
Section 2: Box contents
Monitor x1
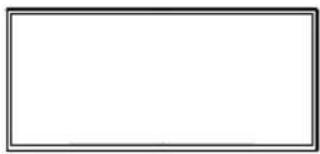
M4x9mm Hexagon bolts x4 (for wall mounting)
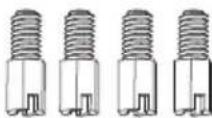
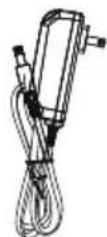
DP Cable x1 Power Adapter x 1
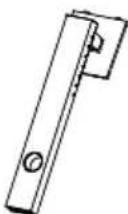
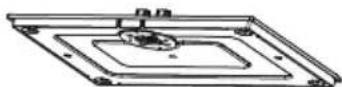
Stand - Upright Section x1 Stand - Base x1 User Manual x1
Section 3: Product Overview
3.1 - Monitor Buttons
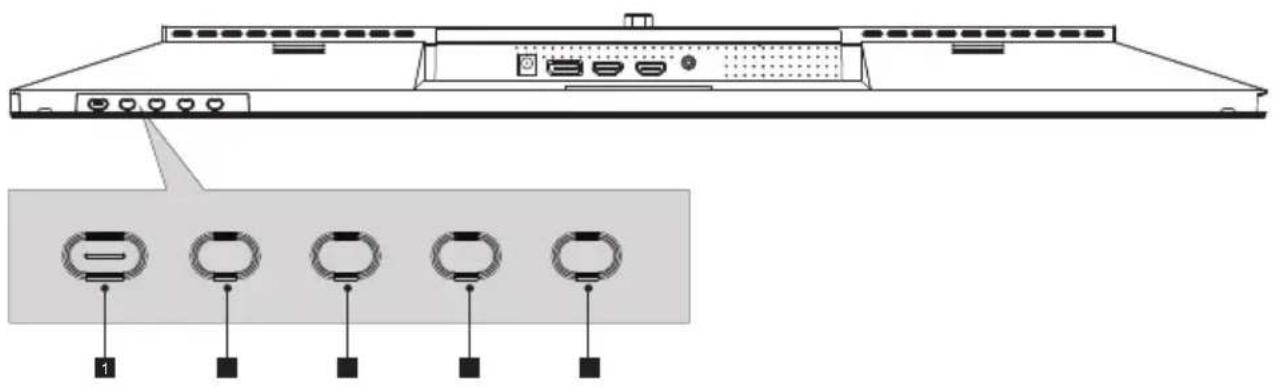
Power Button: Press to turn the monitor on/off.
2 E Exit Button: Press to exit.
3 Up Button: Press to move up in the menus.
4 Down Button: Press to move down in the menus.
M Menu Button: Press to display the OSD menu or enter sub-menus.
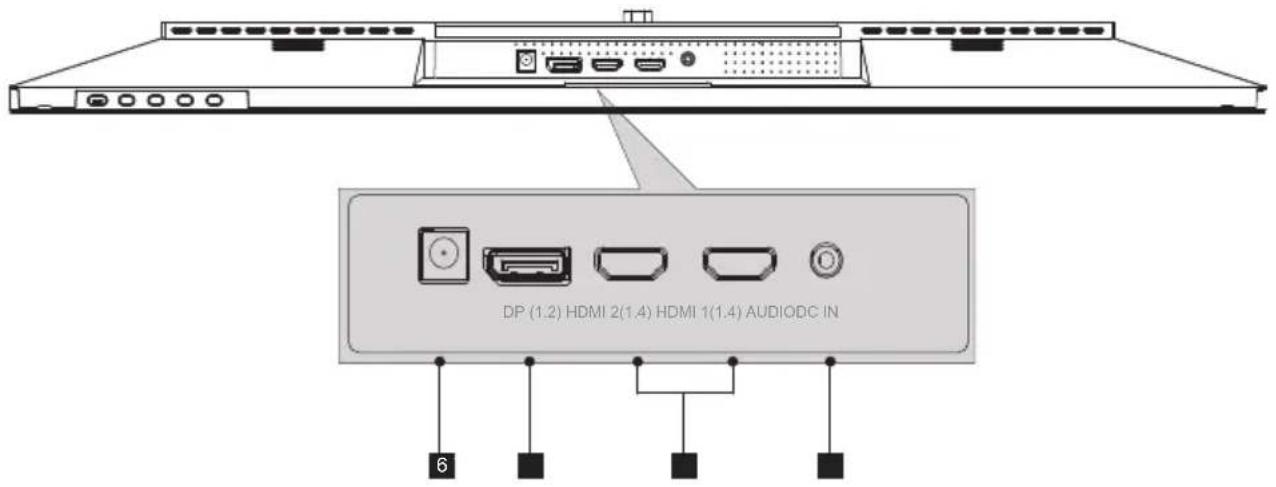
3.2 - Monitor Ports
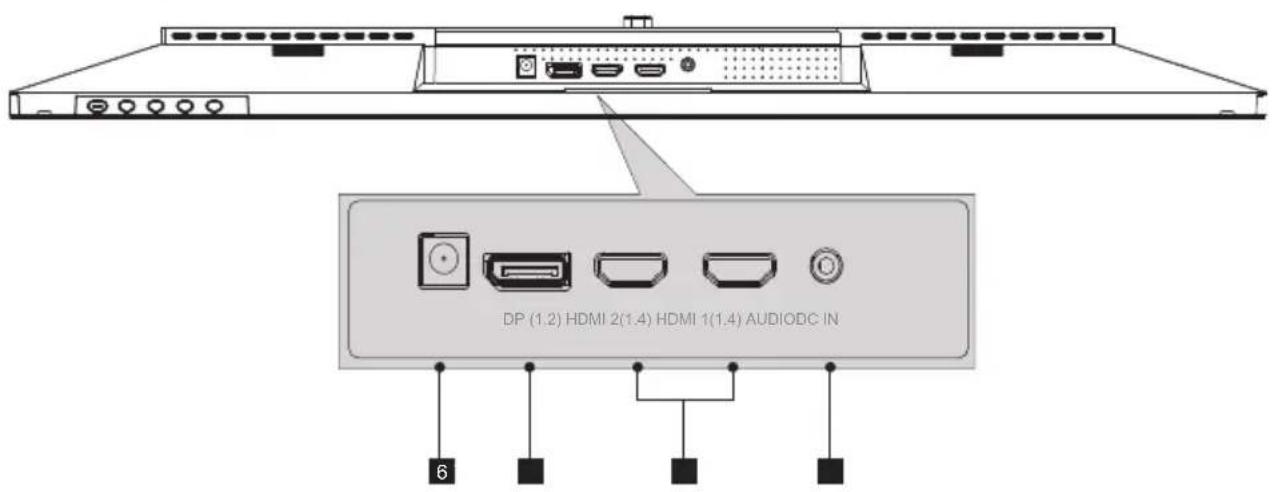
6 Power Connector: Insert the power cable to supply power to the monitor.
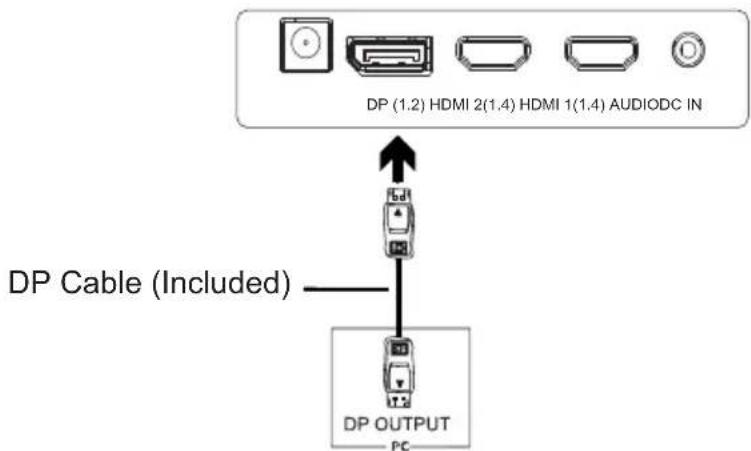
7 DP Connectors: Insert one end of the DP cable into the computer's DP output and connect the other end to the monitor's DP port.
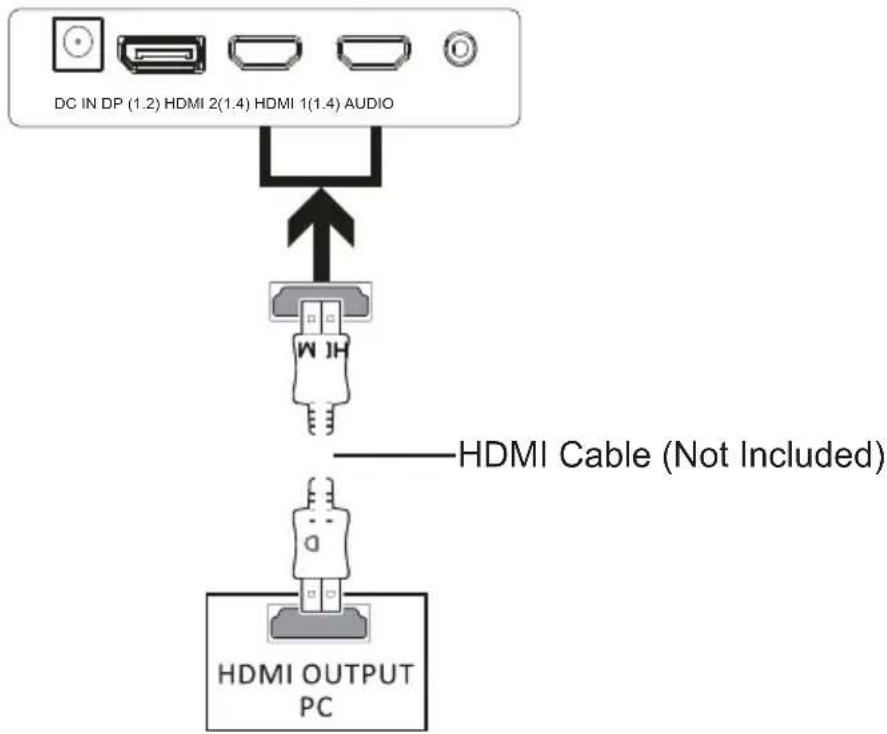
8 HDMI Input: Insert one end of the HDMI cable into the computer's HDMI output and connect the other end to the monitor's HDMI port.
9 Audio Output: Insert the audio cable for output of audio signals.
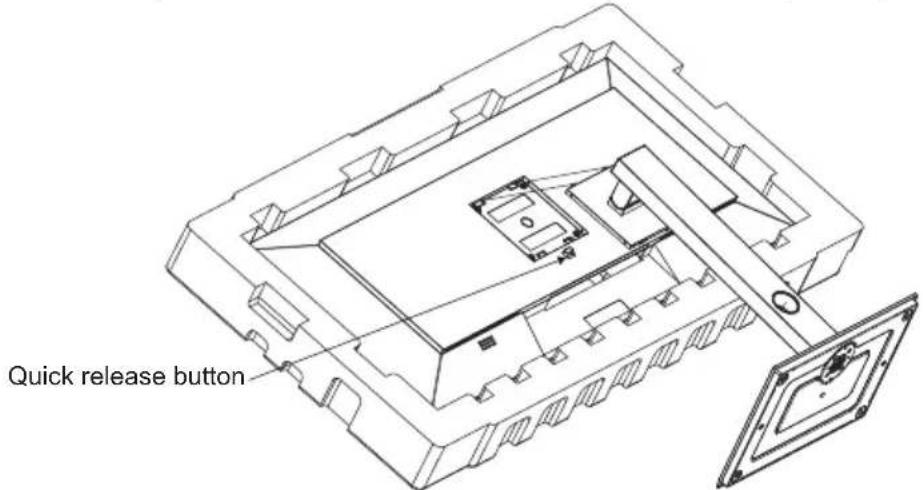
Section 4: base installation

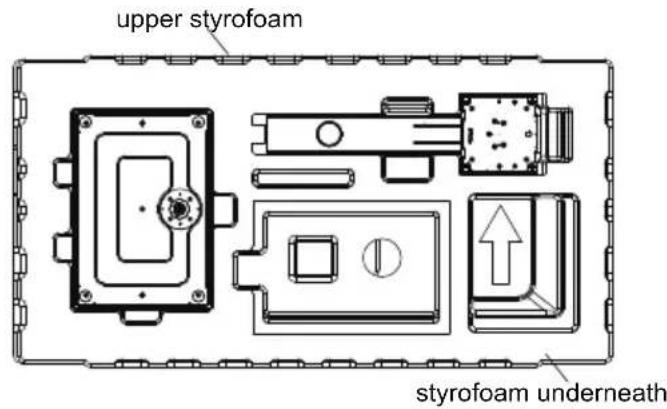
Keep the foam underneath the monitor before attaching the stand.
- Open the carton package, take out the upper and lower covers of styrofoam and lay them flat on the table.
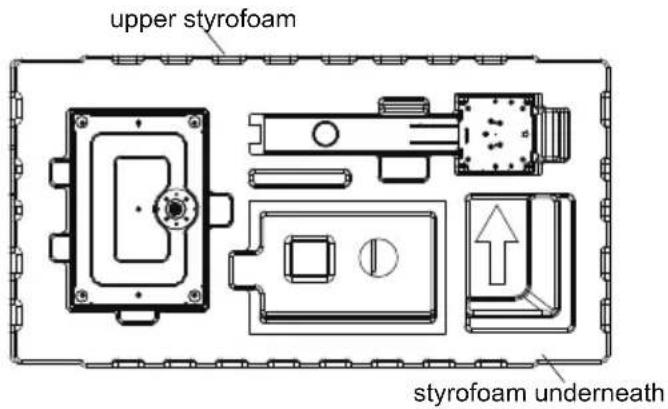
- Take down the upper cover of styrofoam, take out the protection bag and then put the monitor into the original lower cover of Baolong.
- Take out the bracket and base, and lock them with one M6 * L8 hand screw.
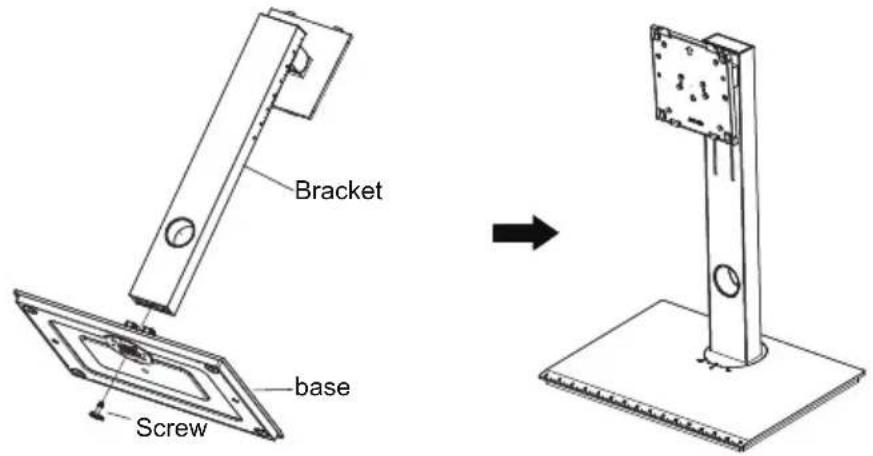
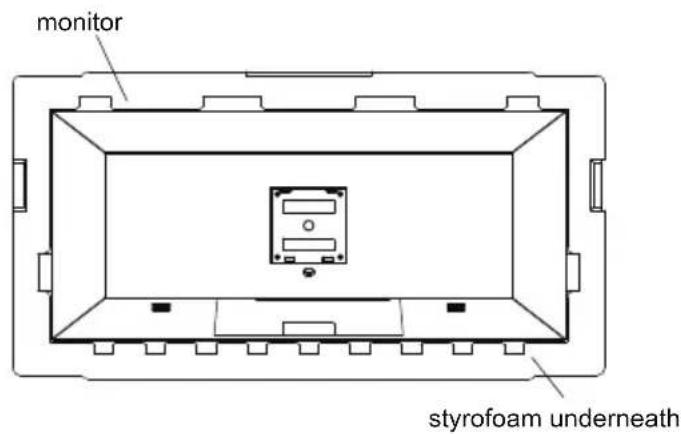
4.. Insert the hook at the front end of the rotating shaft of the lifting bracket into the bayon of the rear shell obliquely, and gently press the tail end in the direction perpendicular to the surface of the rear shell, so that the lock catch of the lifting bracket can be buckled to the quick release button of the rear shell. At the same time, the quick release button has rebound action, which means that the tail end has been clamped in place.
5.. Hold the support shaft by hand and erect the machin
Note: do not hold the screen directly with your hands during the process of erecting the machine to prevent the screen from breaking.
Section 5: Wall Mount
This monitor only includes screws which may be used when attaching the monitor to a VESA 100^*100mm type mount. No VESA mount or mounting accessory is included.
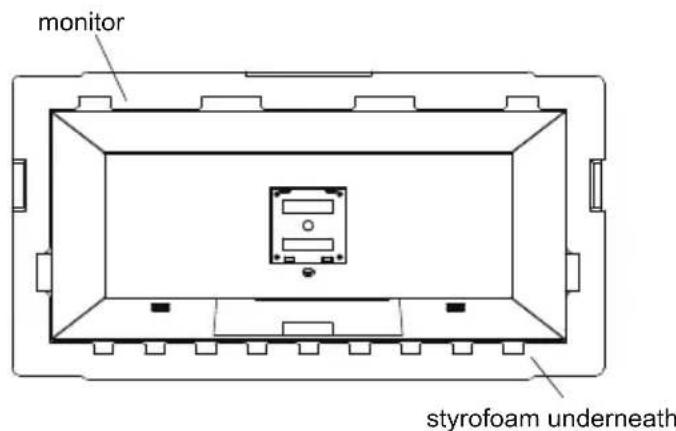
1.. Open the carton package, take out the upper and lower covers of styrofoam and lay th flat on the table.
- Take down the upper cover of styrofoam, take out the protection bag and then put the monitor into the original lower cover of Baolong.
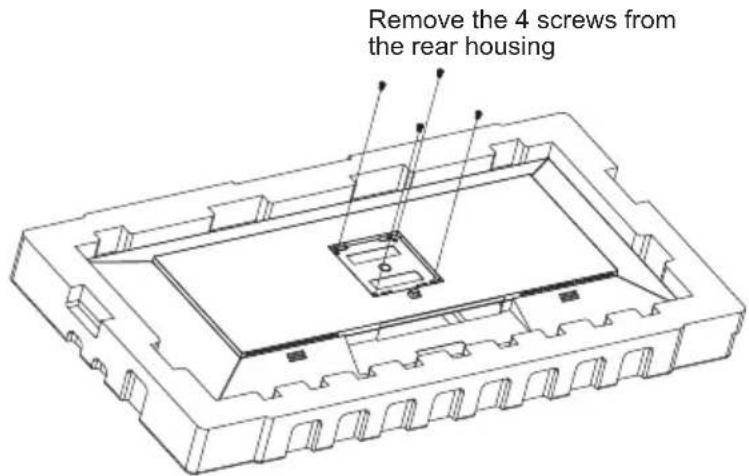
3.. Remove the 4 screws (M4*9) from the rear shell of the attachment. Remove the screw and display the screen without leaving the styrofoam to prevent broken screens.
4.. From the attachment, find out 4 hexagon studs with a height of 10mm , lock them in t M4 thread holes of the back shell sink, and lock them with a screwdriver.
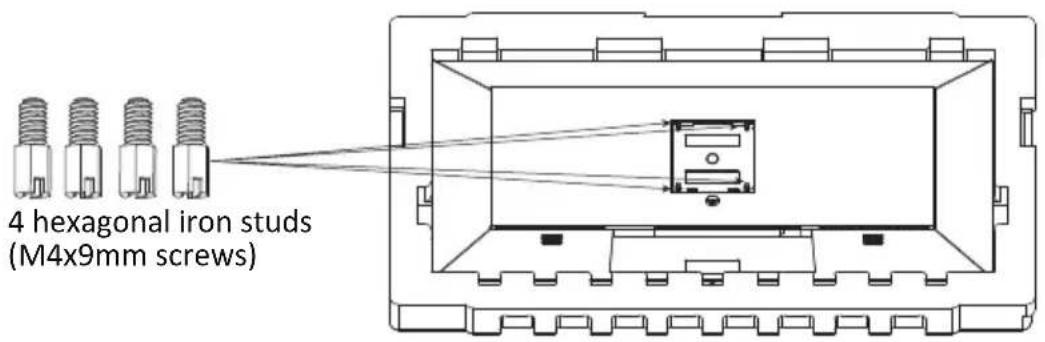
5.. Do not pinch the screen directly with your hands during the process of padlocking t machine to prevent the screen from breaking.

Section 6: Connectivity Options
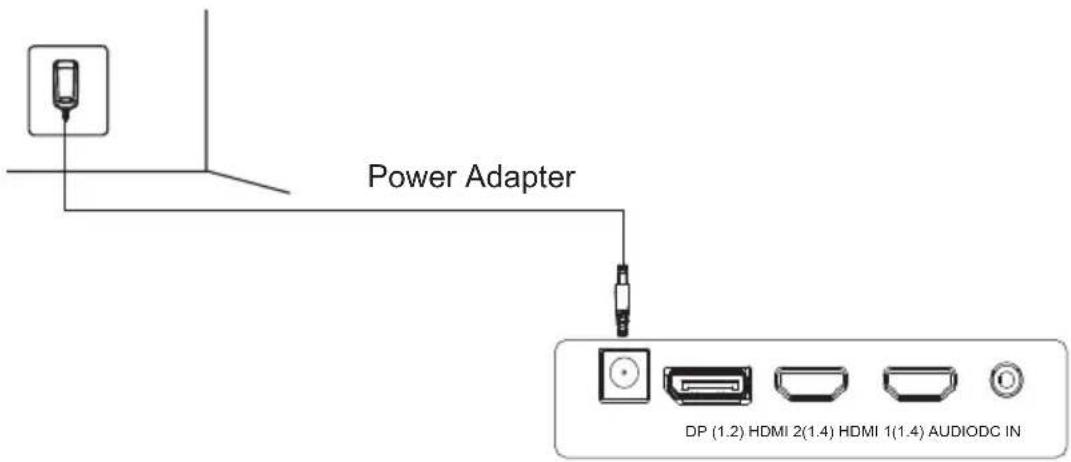
6.1 - Connecting the Power Cable
Connect the included power cable to the power connector, and then plug the other end into an wall outlet.
6.2 - Connecting Your Earphones
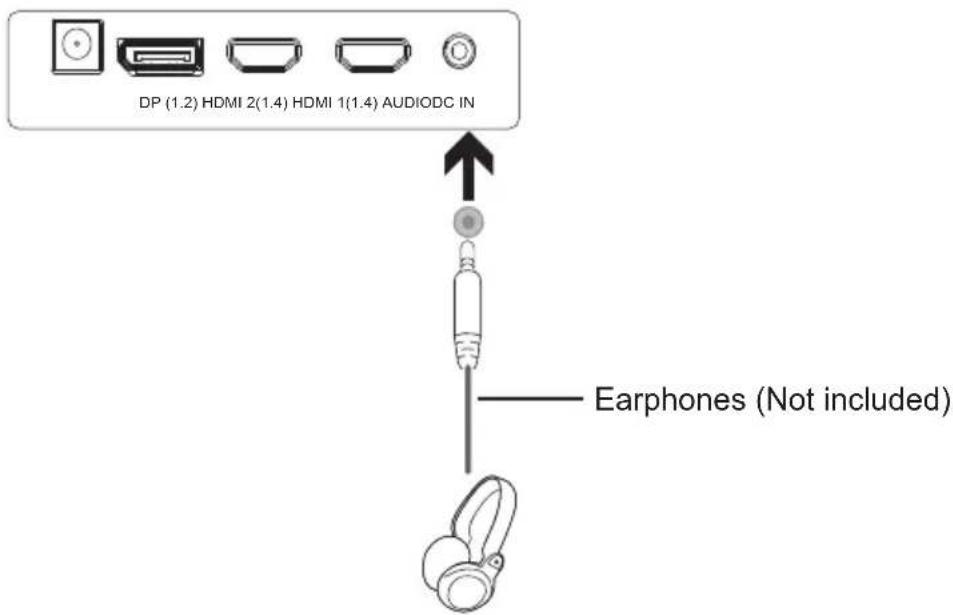
Plug in your earphones to receive audio signals from your monitor. If your earphones are connected to the monitor and audio devices are connected to your computer at the same time, the audio devices will not produce sound. Earphones and other audio devices not included.
6.3 - DP Connectivity
In order for the monitor to receive DP signals from the computer, use the DP cable to connect the monitor to the computer
6.4 - HDMI Connectivity
In order for the monitor to receive HDMI signals from the computer, use a HDMI cable to connect the monitor to the computer.
Section 7: Basic Operation
1.. Insert one end of the DP cable into your PC's graphics card. An HDMI cable may also be used. HDMI cable is not included.
2.. Connect the other end of the cable to the corresponding connector on your monito

- Connect the power cable to your monitor then connect the other end to your power source. It is recommended that you use a surge protector with adequate voltage if a wall outlet cannot be reached directly.
- Locate the power button on the monitor and press it to turn the monitor on.
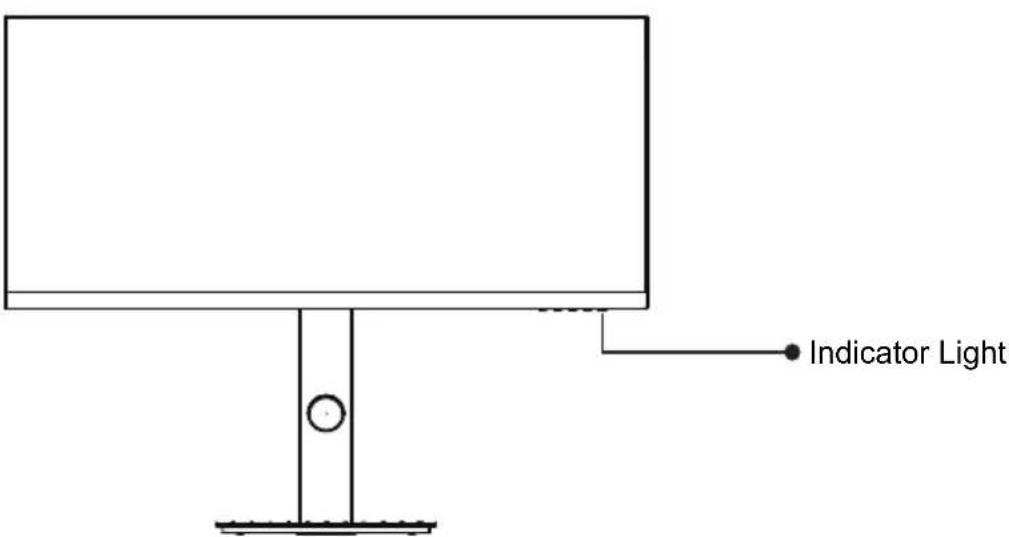
Section 8: Indicator Light
The blue light indicates that the power is on and the monitor is working normally. If the red light is always on, it means that there is no video source, no horizontal or vertical signal or low voltage is detected. Make sure your computer is turned on and all video cables are fully plugged in and / or connected.
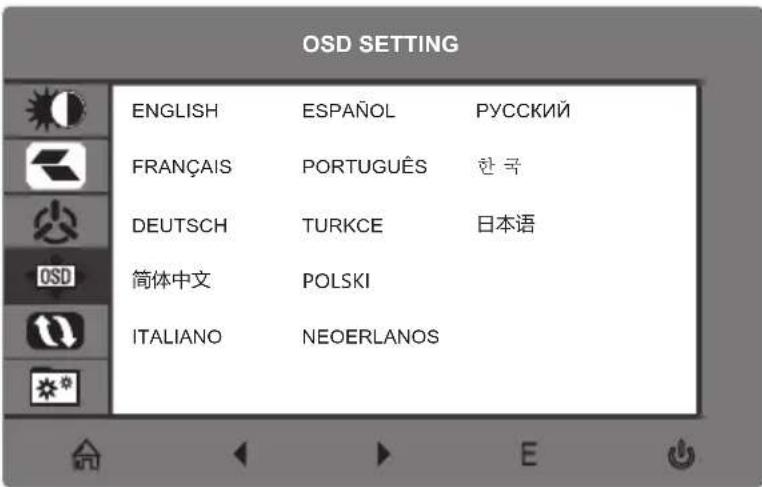
LANGUAGE SETTING
- Press any one of the buttons (M, , E, ) to activate the navigation window.

When using the monitor for the first time, settings will automatically adjust to optimal settings according to your computer's configuration.

- Press M to enter the OSD screen. Press to choose LANGUAGE.
- Press M to select your language.
Section 9: OSD
The On-Screen Display (OSD) Menu may be used to adjust your monitor's settings and appears on screen after turning on the monitor and pressing the M button.

When using the monitor for the first time, settings will automatically adjust to optimal settings according to your computer's configuration.
- Press any one of the buttons (M, , , E, ) to activate the navigation window.

- Press M to enter the OSD screen.
-
Press to browse functions.
-
Highlight the desired function and then press M to enter the sub-menu.
- Press or to browse sub-menus then press M to highlight the desired function.
- Press or to highlight an option and then press M to confirm the settings and exit the current screen.
- Press E to exit the current screen.
10.1-OSD Menu Functions
| Main Menu | Sub-Menu | Otions Description | |
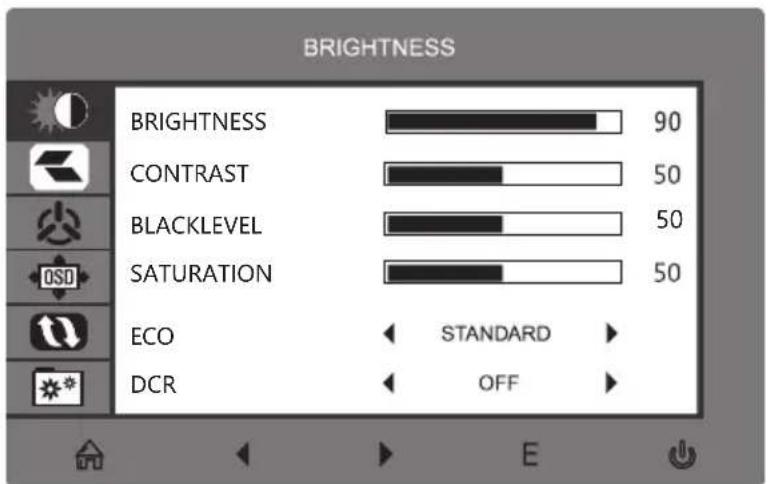
| BRIGHTNESS | Brightness 0-100 | Adjust display brightness | |
| Contrast | 0-100 | Adjust display contrast | |
| Blacklevel | 0-100 | Adjust display blacklevel | |
| Saturation | 0-100 | Adjust display saturation | |
| ECO | Standard, Game, RTS , FPS, Movie, Text | Set visual mode | |
| DCR | On Turn On DCR function | ||
| Off Turn Off DCR function | |||
| IMAGE | Aspect | Wide, Auto, 4:3 Set aspect ratio | |
| COLOR TEMP. | Color temp. | Warm, User, Cool, | Adjust color temperature |
| Red | 0-100 | Customize RGB components | |
| Green | 0-100 | ||
| Blue | 0-100 | ||
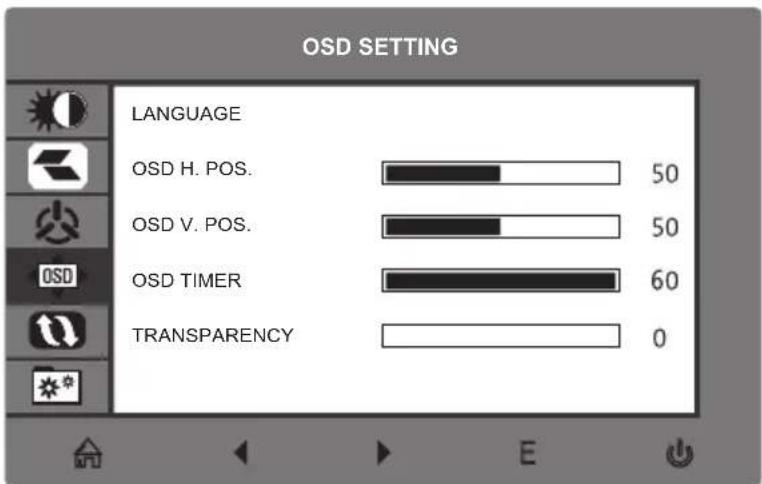
| OSG SETTING | Language | English, Espanol, Pucckn, Francais, French, Portugues, Deutsch, Turkce, 简体中文, Polski, Italiano, 日本语, Netherlands | Set OSD language |
| OSD H. POS. | 0-100 | Adjust the OSD horizontal position | |
| OSD V. POS. | 0-100 | Adjust the OSD Vertical position | |
| OSD Timer | 0~60 | Set how long the OSD remains open after non-use | |
| Transparency | 0-100 | Set the OSD overall transparency | |
| RESET Reset | N/A | Reset monitor configurations | |
| MISC | Signal source | DP1, HDMI1,HDMI2 | Display the input signal |
| Volume | 0-100 | Adjust audio volume | |
| Low blue ray | 0-100 | Set blue light filtering level | |
| Adaptive-Sync | On, Off | Turn the FreeSync function on/off | |
| Over Driver | High, Middle, Low, Off | Set the Overdriver function | |
Section 12: Information
12.1 - Specifications
| Element Detail | |
| Model Number SC29-M1F | |
| Screen size 29 | |
| Format 21:9 | |
| Brightness 300cd / m² (typ) | |
| Panel type ADS | |
| Resolution DP 1.2: 2560x | 1080@75Hz HDMI 1.4: 2560X1080@75Hz |
| Refresh rate 75Hz | |
| Response time 6ms | |
| Viewing Angle | 178°(H)/178°(V) |
| Contrast Ratio 1000:1 | |
| VESA Wall Mount | 100 x 100 mm |
| Color Support | 16.7 m |
| Adaptive-Sync | YES |
| Ports | DP * 1, HDMI * 2 |
| Power | DC 12V---3.0A |
| Audio | YES |
| Speakers | NO |
| Audio output | YES |
| Accessories | |
| Adapter | YES |
| DP cable | YES |
| Additional features | |
| Low blue light YES | |
| No flicker | YES |
| Dimensions | |
| Dimensions with stand together | 688.6*534.3*218.9mm |
| Dimensions of all footless | 688.6*315.4*50.3mm |
| Net weight | 5.68kg |
| Gross weight | 8.33kg |
SUPPORTED TIMING LIST
| Established Timing | DP HDMI | |
| 720 x 400 @70Hz | ✓ | ✓ |
| 640 x 480 @60Hz | ✓ | ✓ |
| 800 x 600 @60Hz | ✓ | ✓ |
| 1024 x 768 @60Hz | ✓ | ✓ |
| 1024 x 768 @75Hz | ✓ | ✓ |
| 1028 x 1027 @ 5Hz | ✓ | ✓ |
| 1280 x 1024 @75Hz | ✓ | ✓ |
| Standard Timing | DP HDMI | |
| 1152x 864 @75Hz | ✓ | ✓ |
| 1280 x 720 @60Hz | ✓ | ✓ |
| 1280 x 960 @60Hz | ✓ | ✓ |
| 1280 x 1024 @60Hz | ✓ | ✓ |
| 1440 x 900 @60Hz | ✓ | ✓ |
| 1600x 1200 @60Hz | ✓ | ✓ |
| 1680 x 1050 @60Hz | ✓ | ✓ |
| 1920 x 1080 @60Hz | ✓ | ✓ |
| Detailed Timing | DP HDMI | |
| 1920 x 1080 @75Hz | ✓ | ✓ |
| 2560 x 1080 @75Hz | ✓ | ✓ |
| 2560 x 1080 @60Hz | ✓ | ✓ |
12.2 - Compatibility resolutions for HDMI / DP
The requirements below are the minimum for your monitor. These requirements are recommended to properly use all the features of the monitor and ensure a high-quality image.
minimum requirements
Operating system: Windows 7 / Windows® 8/64-bit Windows 10 (latest service pack) or higher Processor (CPU): Intel® Core™ i5 or AMD Phenom™ II X3 or higher
Graphics Card: NVIDIA GeForce GTX 950 or AMD Radeon™ R9 380 or higher Memory: 6 GB RAM
All trademarks or trade names registered property of their respective owners.
DISPOSAL OF THE DEVICE
The logo on the product means that the recycling of this product falls under Directive 2012/19 / EU of 4 July 2012 concerning the electronic waste (WEEE).
The presence of hazardous substances in electrical and electronic equipment can have potential consequences on the
environment and human health in the reprocessing cycle of this product.
- Therefore, at the end of its life, this product should not be disposed with other non-recycled waste.
- As an end user, your role is of paramount importance in the reuse cycles, recycling and other forms of recovery of the electrical and electronic equipment. Local authorities and resellers have set special procedures to collect and recycle this product.
- You have an obligation to use the collection systems of waste set up by your local authorities.
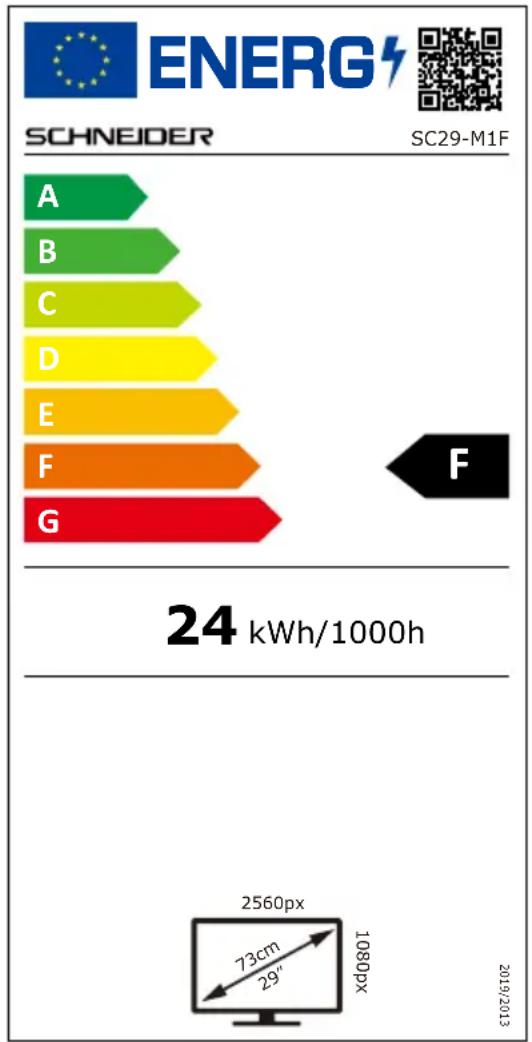
Product Information sheet according to EU Regulation No.2019/2013 Energy labeling for Electronic Display & Television can be found onbelow URL or QR code indicated on Energy label URL: https://leprel.ec.europa.eu/qrl787566.

Information for external power supplies for Commission Regulation 2019/1782/EU
| Value | Unit | |
| Model identification | GQ36-120300-AG | |
| Manufacturer's name or trade mark | Dong Guan City GangQi Electronic Co., Ltd | |
| Input voltage | 100-240 | V |
| Input AC frequency | 50/60 | Hz |
| Output voltage | 12.0 | V |
| Output current | 3.0 | A |
| Output power | 36.0 | W |
| Average active efficiency | 88.58 | % |
| Efficiency at low load (10%) | 86.97 | % |
| No-load power consumption | 0.083 | W |
3.2 - Monitoranschlüsse
- Office Monitor
- Section 2: Box contents
- Section 3: Product Overview
- - Monitor Buttons
- - Monitor Ports
- Section 4: base installation
- Section 5: Wall Mount
- Section 6: Connectivity Options
- - Connecting the Power Cable
- - Connecting Your Earphones
- - DP Connectivity
- - HDMI Connectivity
- Section 7: Basic Operation
- Section 8: Indicator Light
- LANGUAGE SETTING
- Section 9: OSD
- Section 12: Information
- SUPPORTED TIMING LIST
- - Compatibility resolutions for HDMI / DP
- minimum requirements
- DISPOSAL OF THE DEVICE
- Information for external power supplies for Commission Regulation 2019/1782/EU
- - Monitoranschlüsse
Brand : SCHNEIDER
Model : SC29M1F
Category : Monitor