the Adjusta Grill & Press SGR250 - Grill plate SAGE - Free user manual and instructions
Find the device manual for free the Adjusta Grill & Press SGR250 SAGE in PDF.
User questions about the Adjusta Grill & Press SGR250 SAGE
0 question about this device. Answer the ones you know or ask your own.
Ask a new question about this device
Download the instructions for your Grill plate in PDF format for free! Find your manual the Adjusta Grill & Press SGR250 - SAGE and take your electronic device back in hand. On this page are published all the documents necessary for the use of your device. the Adjusta Grill & Press SGR250 by SAGE.
USER MANUAL the Adjusta Grill & Press SGR250 SAGE
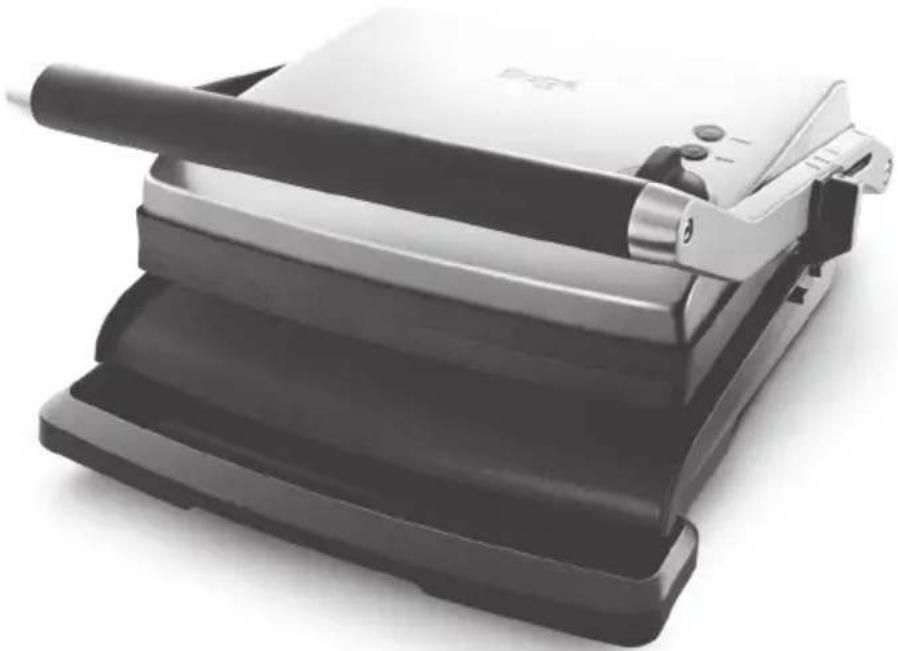
the Adjusta Grill & Press™
BGR250/SGR250

natural_image
Stacked black and silver flatbread press with a roll of paper (no visible text or symbols)
ENUSER GUIDE

FRGUIDE UTILISATEUR

ITMANUALE UTENTE

PTMANUAL DO UTILIZADOR
DEHANDBUCH
NLHANDLEIDING
ESGUÍA DEL USUARIO
PLINSTRUKCJA OBSŁUGI
2 Sage® Recommends Safety First
4 Getting To Know Your New Appliance
5 Operating Your New Appliance
7 Care & Cleaning
8 Guarantee
SAGE® RECOMMENDS SAFETY FIRST
At Sage® we are very safety conscious. We design and manufacture appliances with your safety foremost in mind. In addition, we ask that you exercise a degree of care when using any electrical appliance and adhere to the following precautions.
IMPORTANT SAFEGUARDS
READ ALL INSTRUCTIONS BEFORE USE AND SAVE FOR FUTURE REFERENCE
- A downloadable version of this document is also available at sageappliances.com
- Before using the first time ensure your electricity supply is the same as shown on the label on the underside of the appliance.
-
Remove and safely discard any packaging materials before first use.
-
The appliance is for household use only. Do not use the appliance for anything other than its intended use. Do not use in moving vehicles or boats. Do not use outdoors. Misuse may cause injury.
- Fully unwind the power cord before operating.
- Position the appliance on a stable, heat resistant, level, dry surface away from the edge and do not operate on or near a heat source such as a hot plate, oven or gas hob.
- Do not let the power cord hang over the edge of a bench or table, touch hot surfaces or become knotted.
- Position the appliance at least 20cm from walls or heat/steam sensitive materials and provide adequate space above and on all sides for air circulation.
- Ensure the power cord does not become trapped between the upper and lower hot plates of the appliance during use or storage.
- Do not leave the appliance unattended when in use.
- The appliance is not intended to be operated by the means of an external timer or separate remote control system
- Do not place anything on top of the grill when lid is closed, when in use and when stored.
SAGE® RECOMMENDS SAFETY FIRST
The appliance is marked with a HOT surface symbol. The lid and other surfaces will be hot when the appliance is operating and for some time after use. To prevent burns always use insulated oven mitts or use handles or knobs where appropriate.
- Always ensure the appliance is turned OFF, unplugged at the power outlet and has been allowed to cool before cleaning, moving or storing.
- Do not use the appliance if the power cord, plug, or appliance becomes damaged in any way. If damaged or maintenance other than cleaning is required, please contact Sage Customer Service or go to sageappliances.com
- Any maintenance other than cleaning should be performed by an authorised Sage® service centre.
• Children shall not play with the appliance. - The appliance can be used by children aged 8 or older and persons with reduced physical, sensory or mental capabilities or a lack of experience and knowledge, only if they have been given supervision or instruction concerning use
of the appliance in a safe way and understand the hazards involved.
- Cleaning of the appliance should not be carried out by children unless they are 8 years or older and supervised.
- The appliance and its cord should be kept out of reach of children aged 8 years and younger.
- The installation of a residual current safety switch is recommended to provide additional safety when using all electrical appliances. Safety switches with a rated operating current not more than 30mA are recommended. Consult an electrician for professional advice.

The symbol shown indicates that this appliance should not be disposed of in normal household waste. It should be taken to a local authority waste collection centre designated for this purpose or to a dealer providing this service. For more information, please contact your local council office.

To protect against electric shock, do not immerse the power plug, cord or appliance in water or any liquid.
SAVE THESE INSTRUCTIONS
text_image
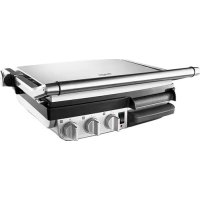
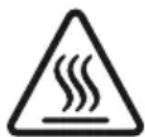
A H I J K B C L
text_image
DFG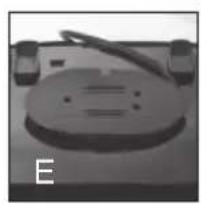
natural_image
Close-up of a mechanical component with a curved surface and a cable, labeled 'E' in the corner (no readable text or symbols on the object itself)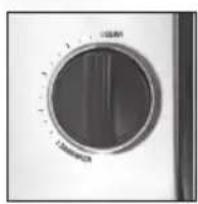
natural_image
Close-up of a circular industrial fan dial with a black interior, no visible text or symbols
natural_image
Black metal hand tool with textured handle and circular end (no text or symbols)A. 2200 Watt element
B. Floating hinged top plate
C. Durable non-stick cooking plates
D. Angle adjust non-slip feet
E. Cord storage
F. Variable temperature control dial
G. Cleaning spatula
H. POWER and READY lights
I. Adjustable height control
J. Locking storage clip
K. Heavy duty die cast arms
L. Removable drip tray
OPERATING YOUR NEW APPLIANCE
BEFORE FIRST USE
Remove and safely discard any packaging material or promotional labels before using your grill for the first time. Check that the cooking plates are clean and free of dust. If necessary, wipe over with a soft damp cloth. Dry thoroughly.
NOTE
When using the grill for the first time you may notice a fine smoke haze. This is caused by the heating of some of the components. There is no need for concern.
TO USE AS A GRILL
- Insert the power plug into a 220–240V power outlet and turn the power ON. The red POWER light will illuminate.
- Turn the variable temperature control to SEAR for fast heat up. Allow the grill to pre-heat with the top cooking plate in the closed position until the green READY light illuminates.
- When the grill has preheated, place the foods to be cooked onto the bottom cooking plate. Always place foods towards the rear of the bottom cooking plate.
- Close the top cooking plate. The top cooking plate has a floating hinge that is designed to evenly press down on food. The top plate must be fully lowered to achieve grill marks on the selected foods.

natural_image
Close-up of a white industrial machine control panel with rotary knob (no visible text or symbols)- Grilling times will depend on the food being cooked.
- Once food is cooked remove food with the help of a plastic or wooden spatula.
NOTE
Always allow the grill to pre-heat until the green READY light illuminates.
TO USE AS A SANDWICH PRESS
- Insert the power plug into a 220–240V power outlet and turn the power ON. The red POWER light will illuminate.
- Turn the variable temperature control to SANDWICH setting. Allow the grill to preheat with the top cooking plate in the closed position until the green READY light illuminates.
- When the sandwich press has pre-heated, place the sandwich onto the bottom cooking plate. Always place sandwiches towards the rear of the bottom cooking plate.
- Close the top cooking plate. The top plate must be fully lowered to cook sandwiches.
- Toasting should take approximately 5–8 minutes. Exact toasting time will be a matter of taste. It will also depend on the type of bread and type of filling used.
- Once food is cooked remove food with the help of a plastic or wooden spatula.
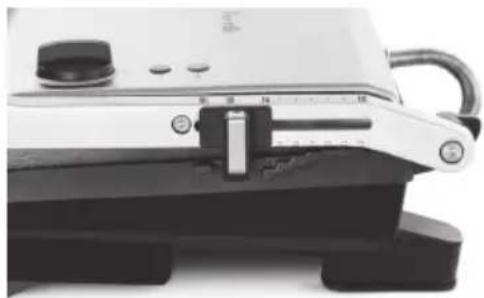
USING THE ADJUSTABLE GRILLING HEIGHT CONTROL FEATURE
Adjustable height control feature allows you to fix the top plate to a range of positions above the bottom plate. This allows your grill to be used to grill delicate ingredients such as fish, hamburger buns and open sandwiches without squashing.
- Turn the variable temperature control to SEAR or SANDWICH setting and allow the grill to pre-heat until the green READY light illuminates.
- Place food to be grilled or your sandwich to be melted on the bottom plate.
- Move the adjustable height control clip on the right hand side of the grill to the desired height.
natural_image
Close-up of a kitchen grater with handle and control knob (no visible text or symbols)- Slowly lower the top plate until it rests on the adjustable height control clip.
- The top plate will radiate the desired heat to lightly grill foods or melt ingredients such as cheese. Grilling and toasting times will be a matter of taste.
USING THE ANGLE ADJUST NON-SLIP FEET
Your grill features unique extendable feet which are designed to level the bottom plate when cooking foods such as sausages. This ensures the sausages do not roll off the hotplate but still drain the maximum amount of fat while cooking.
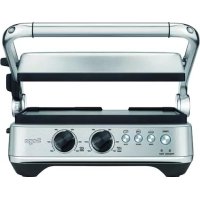
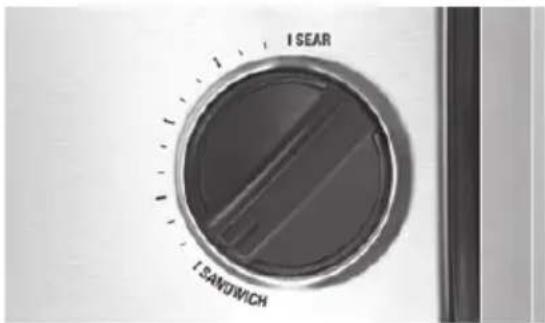
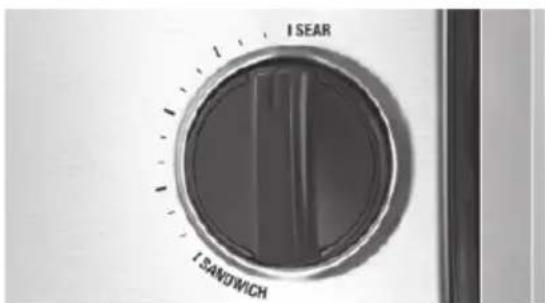
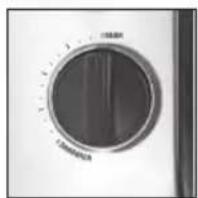
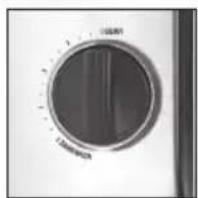
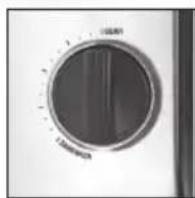
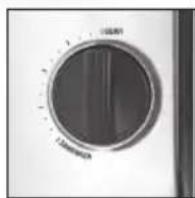
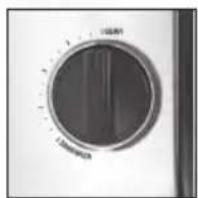
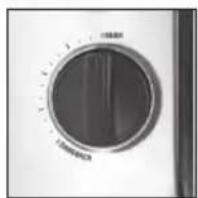
VARIABLE TEMPERATURE CONTROL DIAL
The grill features a variable temperature control dial. With the dial set on SEAR the temperature is correctly suited to grill meats or other foods.
text_image
I SEAR I SANOWICHWith the dial set on SANDWICH the temperature is correctly suited to toasting sandwiches. The variable temperature control dial allows you to select a setting suited to the foods which are being cooked.
text_image
I SEAR I SANDWICHCARE & CLEANING
Before cleaning, switch the power off at the power outlet and then remove the power plug. Allow your grill to cool before cleaning. The grill is easier to clean when slightly warm.
Always clean your grill after each use to prevent a build up of baked-on foods.
Wipe cooking plates with a soft cloth to remove food residue. For baked on food residue squeeze some warm water mixed with detergent over the food residue then clean with a non abrasive plastic scouring pad.
CLEANING THE DRIP TRAY
Remove and empty the drip tray after each use and wash the tray in warm, soapy water. Alternatively the drip tray can be cleaned in the dishwasher.
DURABLE NON-STICK COATING
Cooking on a non-stick surface minimises the need for oil, food does not stick and cleaning is easier. Any discolouration that may occur will not affect the cooking performance. When cleaning the non-stick coating, do not use metal (or other abrasive) scourers. Wash with warm soapy water. Remove stubborn residue with a non abrasive plastic scouring pad or nylon washing brush.
STORAGE
To store your grill:
- Switch off the grill and unplug power cord from the power outlet.
- Allow the grill to fully cool.
- Slide the height control clip towards the front handle to the LOCK position so that the top and bottom cooking plates are locked together.
- Click the removable drip tray into place.
- Wrap the power cord in the cord storage area below the grill.
- Store on a flat, dry level surface. Can be stored vertically.
2 YEAR LIMITED GUARANTEE
Sage Appliances guarantees this product for domestic use in specified territories for 2 years from the date of purchase against defects caused by faulty workmanship and materials. During this guarantee period Sage Appliances will repair, replace, or refund any defective product (at the sole discretion of Sage Appliances).
All legal warranty rights under applicable national legislation will be respected and will not be impaired by our guarantee. For full terms and conditions on the guarantee, as well as instructions on how to make a claim, please visit www.sageappliances.com.
the Adjusta Grill & Press™

natural_image
Stacked black and silver flatbread press with a roll of paper (no visible text or symbols)DEHANDBUCH
Sage®
INHALTE
text_image
A H I B C J K L
text_image
DFG

natural_image
Close-up of a white industrial fan or blender with control knob and rotary dial (no visible text or symbols)natural_image
Close-up of a kitchen grater with handle and control knob (no visible text or symbols)text_image
I SEAR I BANOWICHnatural_image
Close-up of a kitchen rotary dial with 'I SEAR' and 'I SANDWICH' labels (no additional text or symbols)PFLEGE & REINIGUNG
the Adjusta Grill & Press™

natural_image
Stacked black and silver flatbread press with a roll of paper (no visible text or symbols)FRGUIDE UTILISATEUR
Sage®
TABLE DES MATIÈRES
text_image
A H I B C J K L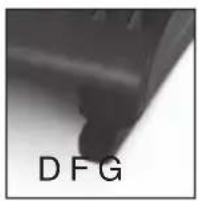
text_image
DFG

natural_image
Close-up of a kitchen appliance control panel with rotary knob (no visible text or symbols)natural_image
Close-up of a kitchen grater with handle and control knob (no visible text or symbols)text_image
I SEAR I SANDWICHtext_image
I SEAR I SANDWICHENTRETIEN ET NETTOYAGE
the Adjusta Grill & Press™

natural_image
Stacked black and silver flatbread press with a roll of paper (no visible text or symbols)NLHANDLEIDING
Sage®
INHOUD
text_image
A H I B C J K L
text_image
DFG

natural_image
Close-up of a white industrial machine control panel with rotary knob (no visible text or symbols)natural_image
Close-up of a kitchen grater with handle and control knob (no visible text or symbols)text_image
I SEAR I SANDWICHnatural_image
Close-up of a kitchen rotary dial with 'I SEAR' and 'I SANDWICH' labels (no additional text or symbols)ONDERHOUD EN REINIGING
the Adjusta Grill & Press™

natural_image
Stacked black and silver flatbread press with a roll of paper (no visible text or symbols)ITMANUALE UTENTE
Sage®
SOMMARIO
text_image
A H I J K B C L
text_image
DFG

natural_image
Close-up of a white kitchen appliance control panel with rotary knob (no visible text or symbols)natural_image
Close-up of a kitchen grater with handle and control knob (no visible text or symbols)text_image
I SEAR I SANOWICHtext_image
I SEAR I SANDWICHthe Adjusta Grill & Press™

natural_image
Stacked flat-coil grater with black and silver casing, no visible text or symbolsESGUÍA DEL USUARIO
Sage®
ÍNDICE
text_image
A H I J K B C L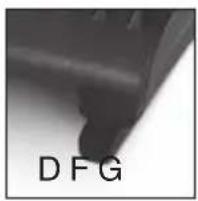
text_image
DFG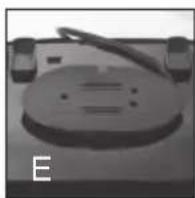


natural_image
Close-up of a white kitchen appliance with a black rotary knob and control buttons (no visible text or symbols)natural_image
Close-up of a kitchen grater with handle and control knob (no visible text or symbols)text_image
I SEAR I SANDWICHtext_image
I SEAR I SANDWICHCUIDADO Y LIMPIEZA
the Adjusta Grill & Press™

natural_image
Stacked black and silver flatbread press with a roll of paper (no visible text or symbols)PTMANUAL DO UTILIZADOR
Sage®
ÍNDICE
text_image
A H I J K B C L
text_image
DFG

natural_image
Close-up of a white kitchen appliance control panel with rotary knob and buttons (no visible text or symbols)natural_image
Close-up of a kitchen grater with handle and control knob (no visible text or symbols)text_image
I SEAR I SANDWICHnatural_image
Close-up of a kitchen rotary dial with 'I SEAR' and 'LANDWICH' labels (no additional text or symbols)the Adjusta Grill & Press™
natural_image
Stacked black and silver flatbread press with a roll of paper (no visible text or symbols)PLINSTRUKCJA OBSŁUGI
Sage®
text_image
A H I J K B C L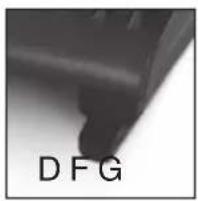
text_image
DFG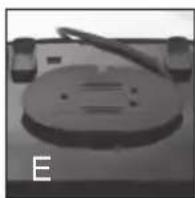

natural_image
Close-up of a white industrial fan or control panel with three rotary buttons and a dial (no visible text or symbols)natural_image
Close-up of a kitchen grater with handle and control knob (no visible text or symbols)text_image
I SEAR I SANDWICHtext_image
I SEAR I SANDWICHKONSERWACJA I CZYSZCZENIE
BRG Appliances Limited
Unit 3.2, Power Road Studios,
114 Power Road, London, W4 5PY
Freephone (UK Landline): 0808 178 1650
Mobile Calls (National Rate): 0333 0142 970
DEU
Sage Appliances France SAS
www.sageappliances.com
Registered in England & Wales No. 8223512
Registered in Germany No. HRB 81309 (AG Düsseldorf)
Registered in France No. 879 449 866 RCS
EN Due to continued product improvement, the products illustrated or photographed in this document may vary slightly from the actual product.
Copyright BRG Appliances 2023