
Perfect Prep Day & Night - Bottle warmer Tommee Tippee - Free user manual and instructions
Find the device manual for free Perfect Prep Day & Night Tommee Tippee in PDF.

| Product Type | Bottle warmer with milk preparation |
| Brand | Tommee Tippee |
| Model | Perfect Prep Day & Night |
| Power Supply | 220-240 V, 50-60 Hz (power adapter included) |
| Power | Approximately 1300 W (estimate) |
| Water Tank Capacity | Approximately 1 liter (estimate) |
| Main Functions | Bottle preparation with hot water jet (>70°C), antibacterial filtration, volume adjustment in mL or oz |
| Filter | Tommee Tippee antibacterial water filter (replaceable) |
| Included Accessories | 1 bottle 150 mL with slow flow teat, storage cap, 1 water filter |
| Screen | Digital display with button navigation (back, select, next) |
| Available Settings | Volume, cleaning, descaling, unit (mL/oz), new filter insertion, drain, language |
| Maintenance and Cleaning | Recommended cleaning every 4 weeks or after prolonged non-use; descaling with white vinegar |
| Safety | Do not immerse, do not touch hot surfaces, use on a flat heat-resistant surface, adjustable cord with winder |
| Material | BPA-free plastic (estimate) |
| Dimensions (approx.) | 30 x 20 x 35 cm (estimate) |
| Weight (approx.) | 2.5 kg (estimate) |
| Spare Parts and Repairability | Replacement filters available; repair by qualified personnel only |
| General Information | Household use only, do not use outdoors, online product registration recommended |
Frequently Asked Questions - Perfect Prep Day & Night Tommee Tippee
User questions about Perfect Prep Day & Night Tommee Tippee
0 question about this device. Answer the ones you know or ask your own.
Ask a new question about this device
Download the instructions for your Bottle warmer in PDF format for free! Find your manual Perfect Prep Day & Night - Tommee Tippee and take your electronic device back in hand. On this page are published all the documents necessary for the use of your device. Perfect Prep Day & Night by Tommee Tippee.
USER MANUAL Perfect Prep Day & Night Tommee Tippee
Keep this instruction sheet for future reference as it includes important information. These instructions can also be found at www.tommeetippee.com
This appliance is intended for household use only.
Do not use outdoors.
Before plugging in the Perfect Prep for the first time, ensure that the voltage is compatible with your electricity supply by checking the label on the base of the unit.
Ensure water has been added to the unit before switching the unit on.
Do not immerse in water. To protect against fire, electric shock and injury to persons, do not immerse cord, plugs or other parts of the unit in water or other liquid.
Misuse of the product may result in the risk of fire, electric shock and/or personal injury. This appliance shall not be used by children. Keep the appliance and its cord out of reach of children.
Appliances can be used by persons with reduced physical,
sensory or mental capabilities or lack of experience and knowledge if they have been given supervision or instruction concerning use of the appliance in a safe way and understand the hazards involved.
Children shall not play with the appliance.
User maintenance, other than cleaning, descaling and filter replacement is not required for this product. Cleaning and user maintenance shall not be done by children.
Do not touch hot surfaces. When in use the Perfect Prep contains hot water and steam. Keep hands away from dispensing spout as it can cause burns and scalds. Use in a well-ventilated area.
Do not operate any appliance with a damaged cord or plug or after the appliance malfunctions or has been damaged in any manner. If the supply cord is damaged it must be changed by a qualified person in order to avoid a hazard. If the damage is from new the unit must be returned to the manufacturer.
If within a retail warranty period this product should be exchanged at place of purchase. The manufacturer will then be made aware.
Any questions? Visit our website www.tommeetippee.com
Always use on a flat heat resistant surface. Do not move appliance when in use. Do not let the cord hang over edge of kitchen work surface or touch hot surfaces. The product has been fitted with a cord wind on the rear of the unit to allow you to adjust the length of the cord safely. It is recommended that the cord be kept as short as possible.
Do not use any accessories other than those supplied with this appliance.
FOR DOMESTIC USE ONLY - NOT INTENDED FOR COMMERCIAL USE
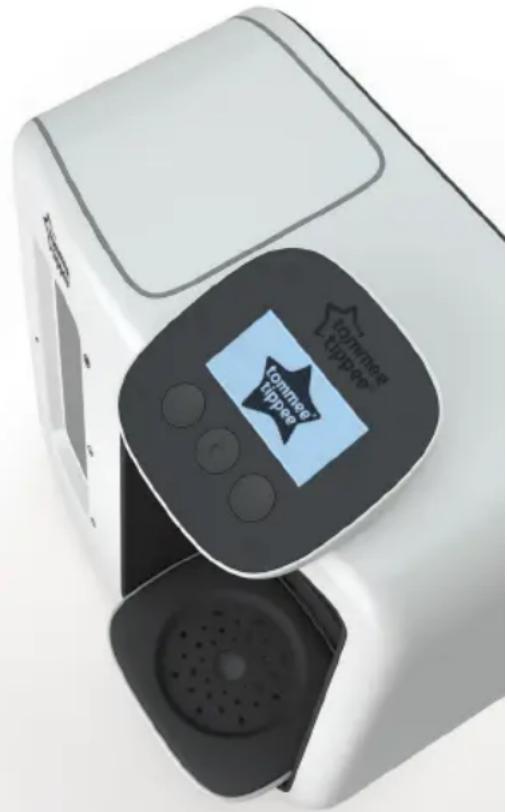
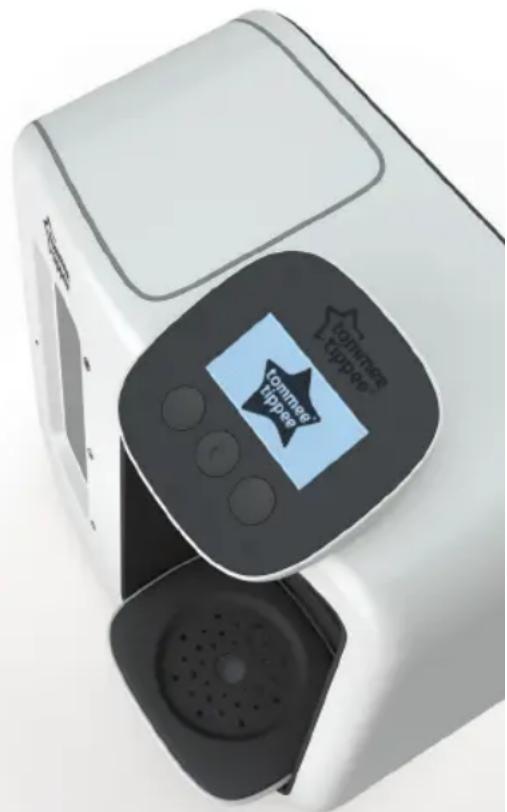
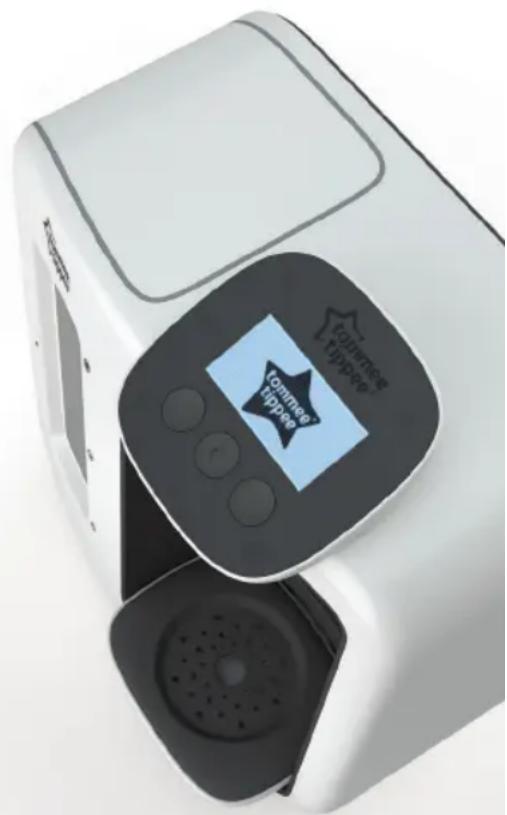
GETTING TO KNOW YOUR PERFECT PREP MACHINE
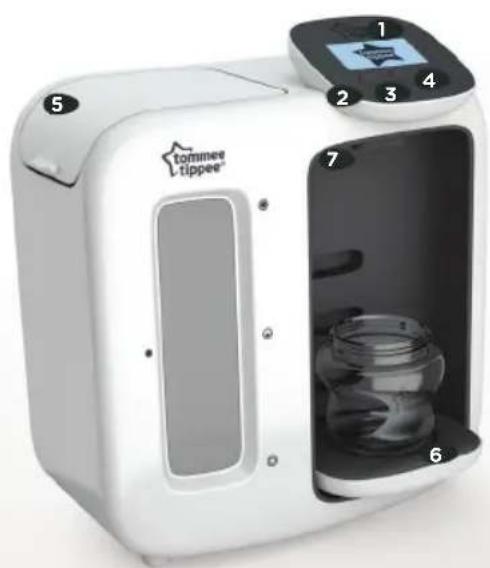
1 Screen
Back button
3 Select button
4 Forward button
5 Water hopper
6 Bottle stand
Dispenser outlet
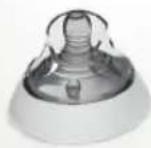
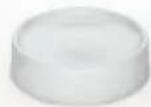
Included inside: 1x 150ml bottle with slow flow teat, 1 x anti-bacterial water filter, milk storage lid
INSTRUCTIONS FOR USE SET UP:
- Power on your perfect prep by pressing the middle button.
When you plug your unit in for the first time you will see this:

- Press and hold the right button for 3 seconds, then release (a gear icon will appear).
- Press the middle button to enter settings.
- Scroll through with left or right to find the preferred language and confirm by pressing the middle button.
- Before you use your Perfect Prep for the first time, you need to run a cleaning cycle and fit your filter.
- Press the select button and then follow the directions on your screen.
- Once you've fitted your filter, the unit will warn you that the tank is empty and that you need to add water.
Use cold tap water. - It can take up to 10 minutes for the water to filter through into the base of the unit.
- Once enough water has filtered through, the tank empty warning light will go off and your system is ready to use.
TIP: The select button can be pressed at any time during the cleaning phase to pause the water pumping through.
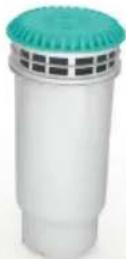
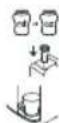
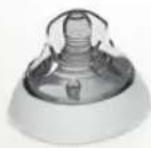
PRIMING YOUR FILTER
- Only ever handle the filter by holding it by the blue cap.
- Remove the filter from packaging.
- Remove the sticker from the top of the filter.
- Fill a bowl with cold tap water.
- Submerge the filter in water and gently agitate until the bubbles stop.
- Your filter is now ready to fit into the water hopper.
PRODUCT SETTINGS MENU
- Press and hold the forward button for 3 seconds, then release. This gear icon will appear
To scroll through the settings use the back and forward buttons. -
Press the select button to enter a particular setting.
-
Settings:
Adjust volume

ml or floz
Clean unit

Fit new filter
Descale unit

Empty unit
MAKING A FEED
- Turn machine on by pressing the select button.
- Select the feed size you require using the forward and back buttons and follow the directions on the screen.
REPLACING YOUR FILTER
Replacement filters are available from Tommee Tippee Perfect Prep stockists.
Do not use other brands of filter in your machine. Even if they fit, they may not remove the same level of bacteria. Using this machine without a Tommee Tippee water filter could put your child's health at risk.
- Enter settings menu and scroll across to 'Fit new filter'.
- Press select button and then follow the directions on your screen.
PERIODIC CLEANING
You should clean your machine:
Before first use then on a 4-weekly basis.
If your machine hasn't been used for 1-week.
- When replacing your filter.
It is advisable to regularly clean the external machine surfaces with a clean cloth (preferably with an antibacterial solution), including the dispenser spout.
- Enter settings menu, then scroll across to 'Clean unit'.
- Press the select button and then follow the directions on your screen.
DESCALING
The screen will notify you when you need to descale your machine.
The descending process will remove deposits of calcium and other minerals in the system that may affect its performance.
- Enter settings menu and scroll across to 'Descale unit'.
- Press select button and then follow the directions on your screen.
The descending process can take up to 30 minutes, fortunately you won't need to do this very often.
We recommend using food grade white/clear vinegar to descale your machine when required.
EMPTYING YOUR UNIT
- If you want to drain your machine of water enter the settings menu and scroll across to 'Empty unit'.
- Press select button and follow the directions on your screen.
FAQs
Where is the best place to keep my Perfect Prep?
The Perfect Prep should be kept in a cool, dry location, avoiding direct sunlight and kept away from warm appliances. This is recommended to avoid the tank temperature getting too warm.
What does the hot shot do?
The hot shot helps to dissolve the formula powder quickly and easily, it also kills bacteria which may be present in the formula itself. The water dispensed in the hot shot is at a temperature of over 70^ .
How often do I need to change the filter?
On average the filter should last around 3 months, however this depends on the frequency of use and what size bottles you are preparing.
Why do I have to use a Tommee Tippee filter?
Most standard water filters do not include an anti-bacterial filtration membrane, so even if they fit in your machine, they will NOT remove the same level of bacteria.
Why do I need to submerge the filter before first use?
Submerging primes the filter before use, ensuring that any air bubbles or loose particles within the filter are removed prior to use.
How long can I leave unused water in the tank?
Water is a food stuff. We recommend using it within 1-2 days.
Dos and Don'ts
It is essential that good hygiene practices are observed in the use and maintenance of your Perfect Prep machine.
Dos
Ensure your hands and all surfaces that come in to contact with the machine and its components (including filter) are clean.
Before first use clean the machine following the set up steps on the screen.
Keep the machine away from direct sunlight.
Only use cold tap water during regular use.
Keep the outside of the machine clean.
Be careful when handling hot water.
Always adjust the height of the bottle stand so the bottle neck is close to the dispensing spout. This is to maintain the temperature of the water and to avoid any splashes.
- Keep well clear of the dispensing spout as the unit produces steam and very hot water.
For your child's safety always check the food temperature before feeding.
DON'TS
X Do not allow the water tank to be contaminated. The inside of the machine should be cleaned by following the cleaning process in this leaflet.
X Do not clean with solvents or harsh chemicals.
X The machine is intended for use in a kitchen. It is not suitable for use in a nursery.
X Do not use hot water other than during cleaning cycles. If water in the tank is lower than 5^ or higher than 28^ , the machine will not operate. If this happens, either change the water or allow the water to cool and restart.
X Do not pour boiling water over the water filter.
X When topping up the hopper, do not fill beyond the max icon.
X Be careful not to spill any water on the outside of the machine.
X Do not remove the back panel from the machine.
INFORMATION ON THE
DISPOSAL FOR WASTE
ELECTRICAL & ELECTRONIC
EQUIPMENT (WEEE)

This symbol on the products and accompanying documents means that used electrical and electronic products should not be mixed with general household waste.
For proper disposal for treatment, recovery and recycling, please take these products to designated collection points where they will be accepted on a free of charge basis. In some countries you may be able to return your products to your local retailer upon the purchase of a new product.
Disposing of this product correctly will help you save valuable resources and prevent any possible effects on human health and the environment, which could otherwise arise from inappropriate waste handling.
Please contact your local authority for further details of your nearest collection point for WEEE. Penalties may be applicable for the incorrect disposal of this product in accordance with national legislation.
The product is fitted with a BS 1363 mains plug containing a 5A fuse. If it ever becomes necessary to replace the fuse, only use fuses that are marked BS 1362, and rated at 5A. In the unlikely event that this plug is not suitable for the sockets in your home, it should be removed and a suitable plug fitted as follows: The wires of the mains lead are coloured in accordance with the following code:
As these colours may not correspond with the coloured markings sometimes used to identify the terminals in the plug, connect as follows. The wire coloured GREEN AND YELLOW must be connected to the terminal marked E or by the earth symbol or coloured GREEN or GREEN AND YELLOW. The wire coloured BLUE must be connected to the terminal marked N or coloured BLACK. The wire coloured BROWN must be connected to the terminal marked L or coloured RED. If you are in any doubt about how to wire a plug or replace a fuse safely, consult a qualified electrician.
Don't forget to register your Perfect Prep machine.
For details of how to do this, go to tommeetippee.co.uk/product-registration
FR MISES EN GARDE IMPORTANTES!
Ensure water has been added to the unit before switching the unit on.
tommeetippee.co.uk/product-registration
DE
www.tommeetippee.co.uk/product-registration

DK VIGTIGE ADVARSLER
1x 150ml bottle with slow flow teat,
1 x anti-bacterial water filter,
Milk storage lid,


VAD DU SKA GÖRA OCH INTE SKA GORA
ELEKTRONISKA PRODUKTER (WEEE)
Let us know what you think
We'd love to hear what you think our products. Share your photos, reviews and tell us about your experiences on our social channels.

tommeetippee.com
Mayborn (UK) Limited, Balliol Business Park, Newcastle upon Tyne, NE12 8EW, UK
TOMMEE TIPEE. Copyright © 2021
Patented: EP2948032B1
All intellectual property is owned or used under licence by Mayborn (UK) Limited and/or its affiliates Made in China.
423746 18040321_3