N252024HUSHK - Network connection panel Tripp Lite - Free user manual and instructions
Find the device manual for free N252024HUSHK Tripp Lite in PDF.

| Product Type | Network Patch Panel |
| Brand | Tripp Lite |
| Model | N252024HUSHK |
| Number of Ports | 24 |
| Connector Type | IDC Krone, Cat6 |
| Wiring Type | STP (Shielded) |
| Rack Height | 0.5 U |
| Housing Material | Steel |
| Color | Black |
| Width | 19 inches (482.6 mm) |
| Depth | Approximately 100 mm |
| Weight | Approximately 0.7 kg |
| Power | None (Passive) |
| Main Features | High-density wiring, integrated cable management, grounding |
| Installation Method | Impact tool for IDC, nylon cable ties |
| Warranty | Limited Lifetime Warranty |
| Care and Cleaning | Wipe with a dry, non-abrasive cloth |
| Safety | Grounding lug to attach to rack frame |
| Spare Parts and Repairability | No spare parts available; replacement under warranty |
Frequently Asked Questions - N252024HUSHK Tripp Lite
User questions about N252024HUSHK Tripp Lite
0 question about this device. Answer the ones you know or ask your own.
Ask a new question about this device
Download the instructions for your Network connection panel in PDF format for free! Find your manual N252024HUSHK - Tripp Lite and take your electronic device back in hand. On this page are published all the documents necessary for the use of your device. N252024HUSHK by Tripp Lite.
USER MANUAL N252024HUSHK Tripp Lite
24-Port Cat6 Krone IDC STP High-Density 0.5U Patch Panel
Model: N252-024-HU-SHK
Español 8 • Français 15 • Русский 22
PROTECT YOUR INVESTMENT!
Register your product for quicker service and ultimate peace of mind. You could also win an ISOBAR6ULTRA surge protector—a \$100 value!
www.tripplite.com/warranty

text_image
TRIPP·LITE
Manufacturing Excellence.
1111 W. 35th Street, Chicago, IL 60609 USA • www.tripplite.com/support
Copyright © 2018 Tripp Lite. All rights reserved.
Installation
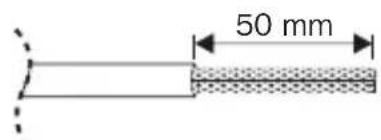
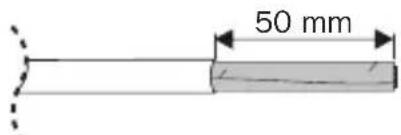
1 Prepare Cables.
S/FTP Cable
text_image
50 mmRemove approximately 50 mm of cable sheath.

natural_image
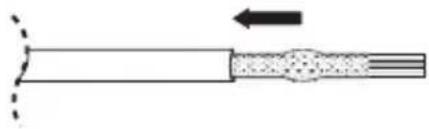
Pure diagram of a cable or wire with no text, numbers, or symbolsRoll the exposed braid back along the cable sheath.
text_image
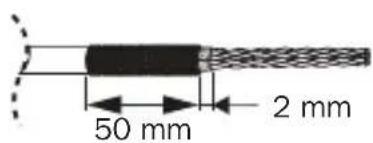
50 mm 2 mmWhere a foil screen is present, remove approximately 2 mm of the exposed length.

natural_image
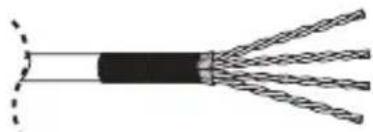
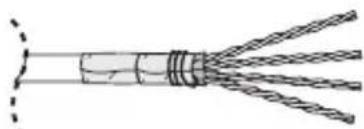
Cross-sectional diagram of a multi-core cable with twisted insulation (no text or labels)Separate the conductors.
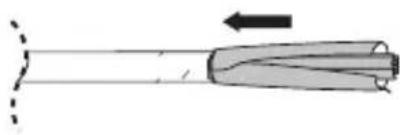
F/FTP Cable
text_image
50 mmRemove approximately 50 mm of cable sheath.

natural_image
Diagram of a mechanical tool or drill bit with an arrow indicating direction (no text or symbols present)Roll the exposed foil back along the cable sheath.
text_image
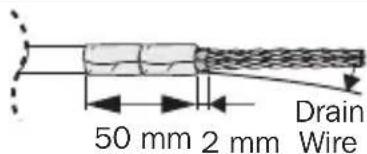
50 mm 2 mm Drain WireWhere a foil screen is present, remove approximately 2 mm of the exposed length.

natural_image
Cross-sectional diagram of a multi-core cable with twisted insulation (no text or labels)Wrap the drain wire at least twice around the foil. Separate the conductors.
Installation
2 Seat each wire into the IDC slots according to the color scheme map. Punch down with a proper impact tool.
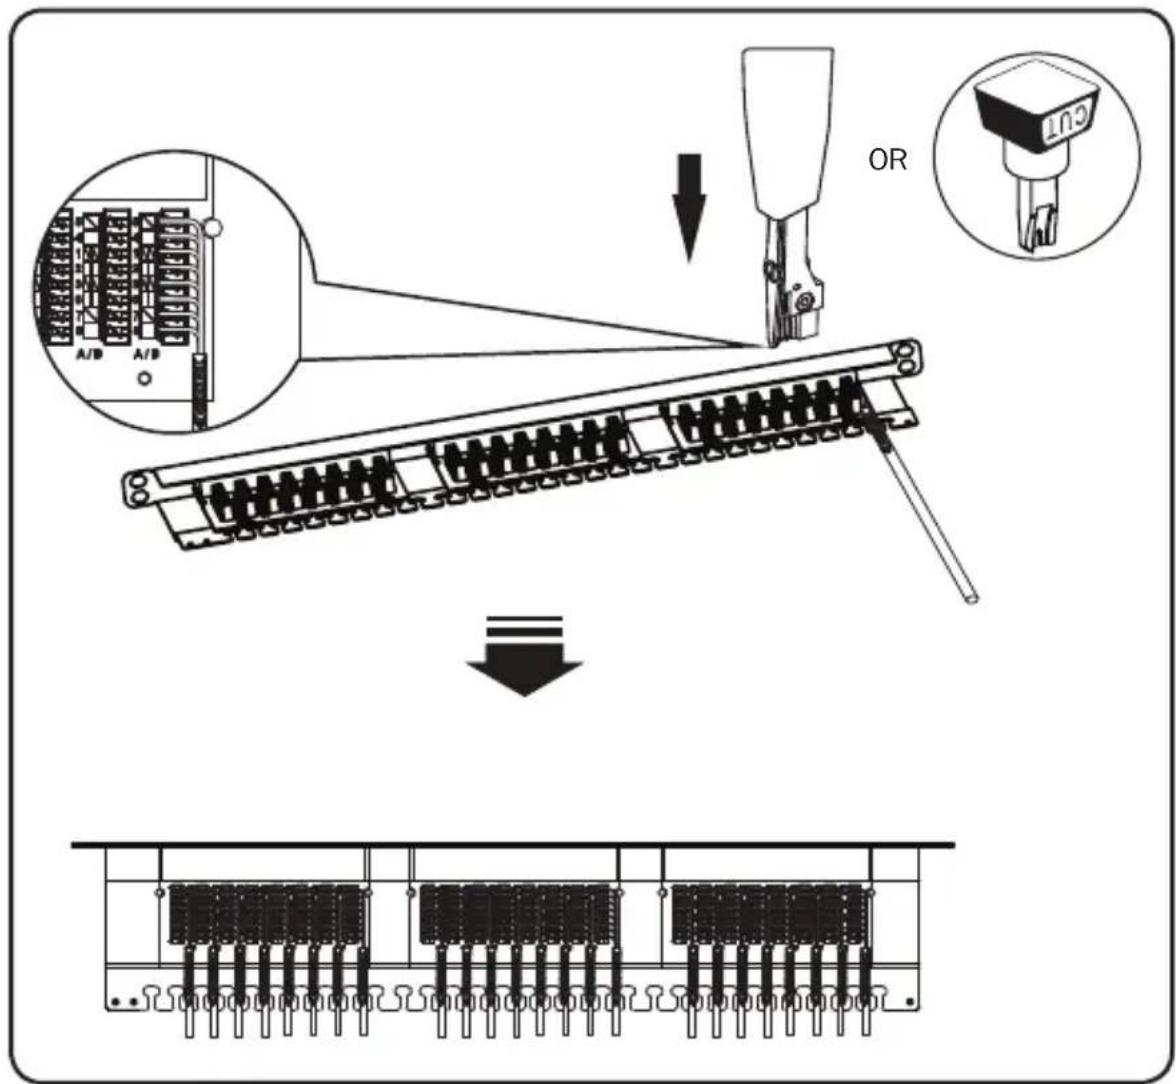
text_image
Diagram illustrating the process of a microcontroller or connector assembly, showing pinning and disassembly steps with labeled components.Installation
3 Use nylon cable ties to secure the bulk cables to the cable manager.
Cut off all excess straps.
Note: Do not over-tighten the cables.
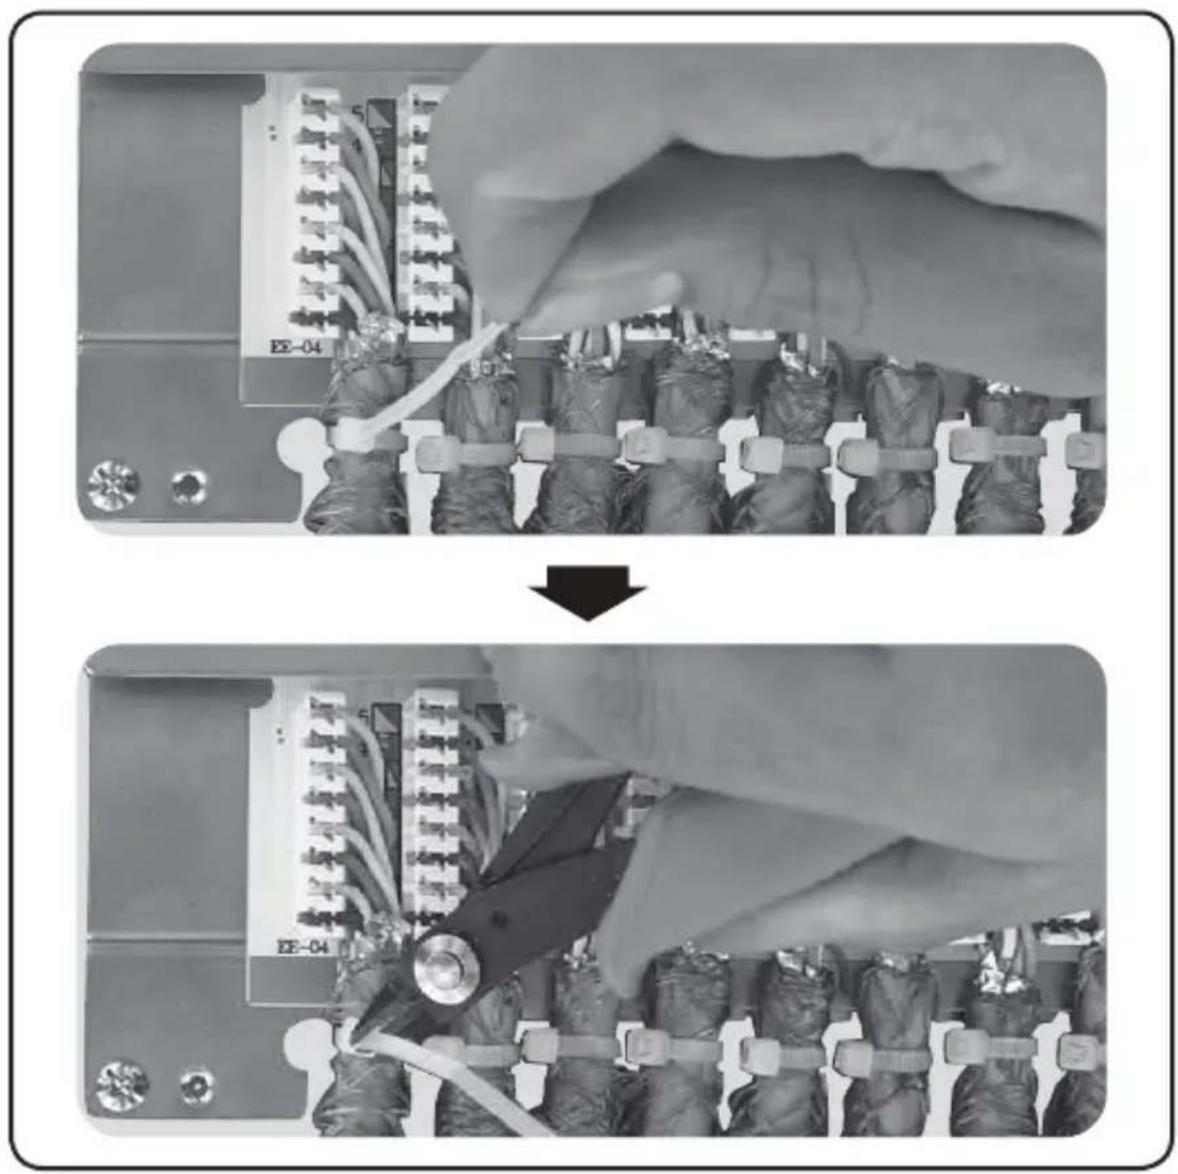
natural_image
Two-panel black-and-white photo showing a military equipment installation with soldiers and equipment, one being lowered (no visible text or symbols)Installation
4 Close the top of the panel and secure by tightening the side screws.
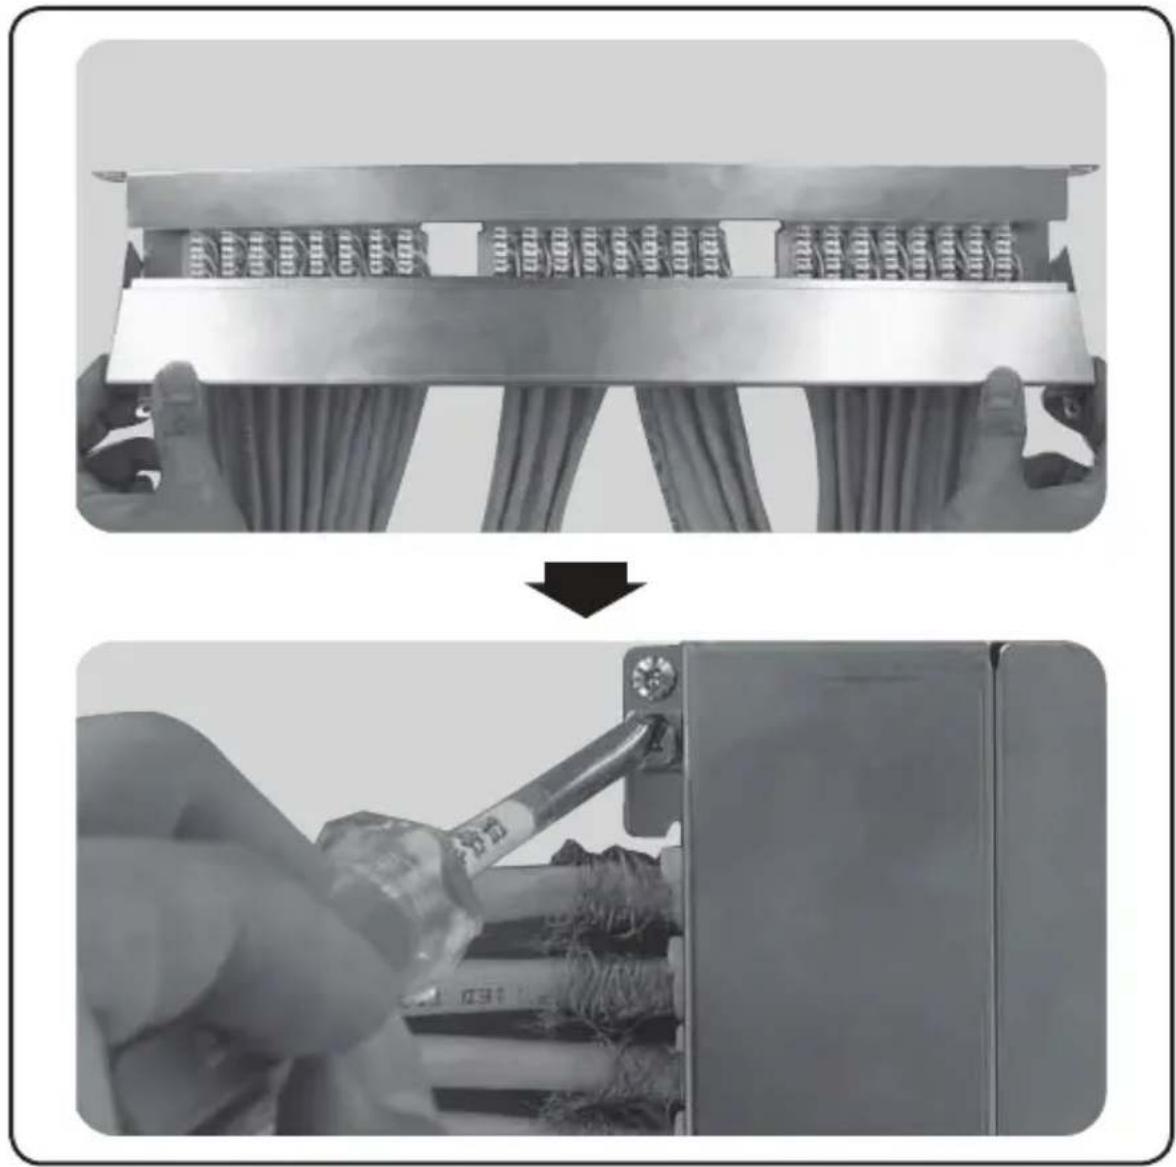
natural_image
Two-step installation of a mechanical component: top shows hand holding a slide, bottom shows hands using a screwdriver to install a component (no text or symbols visible)Installation
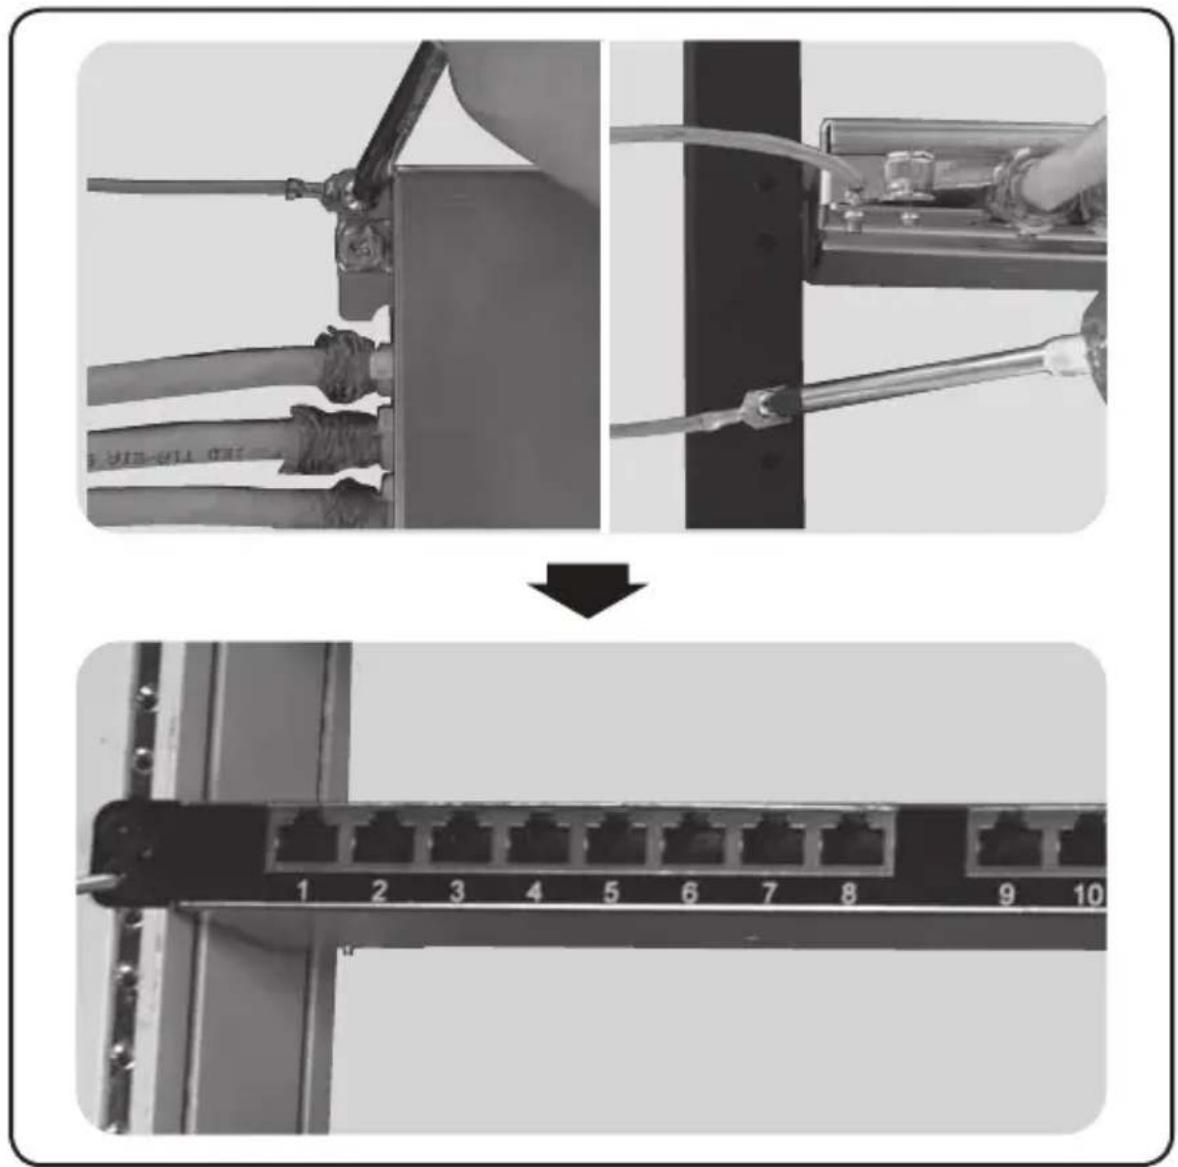
5 Attach the panel's grounding lug to a rack or cabinet.
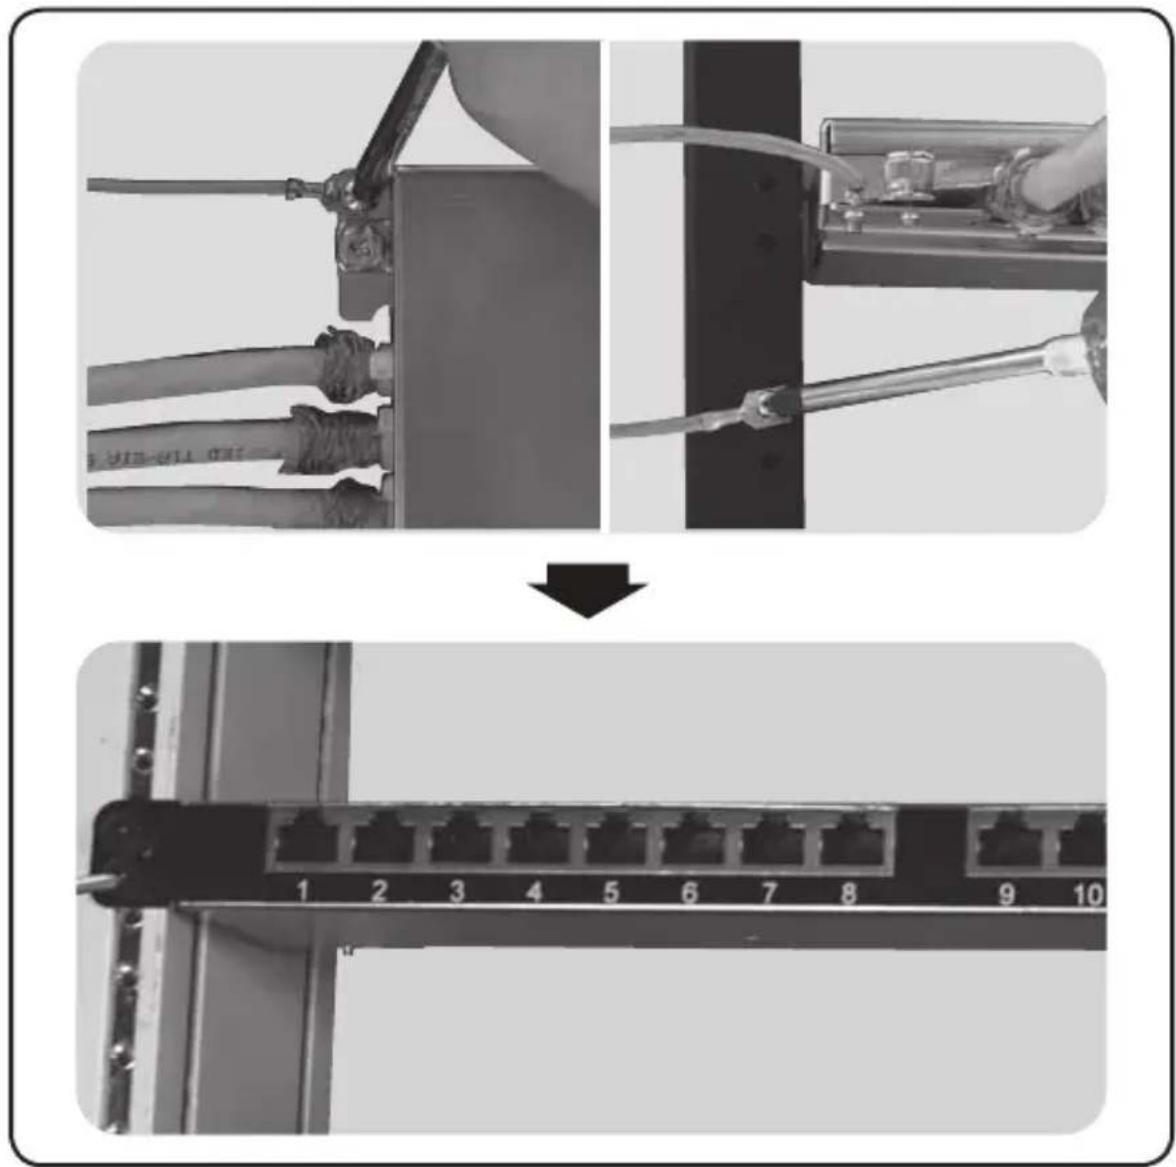
natural_image
Two-step diagram showing cable installation and network connection (no text or symbols)Warranty and Product Registration
Lifetime Limited Warranty
Tripp Lite warrants its products to be free from defects in materials and workmanship for life. Tripp Lite's obligation under this warranty is limited to repairing or replacing (at its sole option) any such defective products. To obtain service under this warranty, you must obtain a Returned Material Authorization (RMA) number from Tripp Lite or an authorized Tripp Lite service center. Products must be returned to Tripp Lite or an authorized Tripp Lite service center with transportation charges prepaid and must be accompanied by a brief description of the problem encountered and proof of date and place of purchase. This warranty does not apply to equipment, which has been damaged by accident, negligence or misapplication or has been altered or modified in any way.
EXCEPT AS PROVIDED HEREIN, Tripp Lite MAKES NO WARRANTIES, EXPRESS OR IMPLIED, INCLUDING WARRANTIES OF MERCHANTABILITY AND FITNESS FOR A PARTICULAR PURPOSE. Some states do not permit limitation or exclusion of implied warranties; therefore, the aforesaid limitation(s) or exclusion(s) may not apply to the purchaser.
EXCEPT AS PROVIDED ABOVE, IN NO EVENT WILL Tripp Lite BE LIABLE FOR DIRECT, INDIRECT, SPECIAL, INCIDENTAL OR CONSEQUENTIAL DAMAGES ARISING OUT OF THE USE OF THIS PRODUCT, EVEN IF ADVISED OF THE POSSIBILITY OF SUCH DAMAGE. Specifically, Tripp Lite is not liable for any costs, such as lost profits or revenue, loss of equipment, loss of use of equipment, loss of software, loss of data, costs of substitutes, claims by third parties, or otherwise.
Product Registration
Visit www.tripplite.com/warranty today to register your new Tripp Lite product. You'll be automatically entered into a drawing for a chance to win a FREE Tripp Lite product!*
* No purchase necessary. Void where prohibited. Some restrictions apply. See website for details.
Tripp Lite has a policy of continuous improvement. Specifications are subject to change without notice.

text_image
TRIPP·LITE
Manufacturing Excellence.
1111 W. 35th Street, Chicago, IL 60609 USA • www.tripplite.com/support
Guía de Instalación
1111 W. 35th Street, Chicago, IL 60609 EE UU • www.tripplite.com/support
natural_image
Pure diagram of a cable or wire with internal components and an arrow indicating direction (no text or symbols)natural_image
Cross-sectional diagram of a multi-core cable with twisted insulation (no text or labels)natural_image
Diagram of a mechanical tool or drill bit with an arrow indicating direction (no text or symbols present)natural_image
Cross-sectional diagram of a cable with internal components and directional arrows indicating length (no text or symbols)natural_image
Cross-sectional diagram of a multi-core cable with visible twisted insulation (no text or labels)text_image
Technical diagram illustrating the process of a microcontroller or connector assembly, showing pinning and disassembly steps.Instalación
natural_image
Two-panel black-and-white photo showing a military equipment installation with soldiers and equipment, one being lowered (no visible text or symbols)11
Instalación
natural_image
Two-step installation of a mechanical component: top shows a cable tab with clamps, bottom shows a hand using a tool to install a box (no text or symbols visible)Instalación
5 Conecte la terminal de tierra del panel a un rack o gabinete.
text_image
Diagram showing cable installation process with pipe connection and network switch, including a close-up of cable assembly.Garantía
1111 W. 35th Street, Chicago, IL 60609 EE UU • www.tripplite.com/support
1111 W. 35th Street, Chicago, IL 60609 USA • www.tripplite.com/support
natural_image
Pure diagram of a cable or wire with no text, numbers, or symbolsnatural_image
Cross-sectional diagram of a cable with twisted insulation and exposed insulation (no text or symbols)natural_image
Diagram of a mechanical tool or drill bit with an arrow indicating direction (no text or symbols present)natural_image
Cross-sectional diagram of a multi-core cable with twisted insulation (no text or labels)text_image
Diagram illustrating the process of a microcontroller or connector assembly, showing pinning and disassembly steps with labeled components.Installation
natural_image
Two-panel black-and-white photo showing a military equipment installation with soldiers and equipment, one being lowered (no visible text or symbols)Installation
natural_image
Two-step installation of a mechanical device: top shows a cable tab with clamps, bottom shows a hand using a tool to install components (no text or symbols visible)Installation
text_image
Diagram showing cable installation process with pipe connection and network switch, including a close-up of cable assembly.Garantie
1111 W. 35th Street, Chicago, IL 60609 USA • www.tripplite.com/support
1111 W. 35th Street, Chicago, IL 60609 USA • www.tripplite.com/support
natural_image
Pure diagram of a cable or wire with no text, numbers, or symbolsnatural_image
Cross-sectional diagram of a multi-core cable with twisted insulation (no text or labels)natural_image
Diagram of a mechanical tool or drill bit with an arrow indicating direction (no text or symbols present)natural_image
Cross-sectional diagram of a multi-core cable with twisted insulation (no text or labels)natural_image
Two-panel black-and-white photo showing a military equipment installation with soldiers and equipment, one being lowered (no visible text or symbols)Установка
natural_image
Two-step installation of a mechanical device: top shows a cable tab with clamps, bottom shows a hand using a screwdriver to install a box (no text or symbols visible)Установка
natural_image
Two-step diagram showing cable installation and network connection (no text or symbols)1111 W. 35th Street, Chicago, IL 60609 USA • www.tripplite.com/support