SmartRack SR2POST16HD - Wardrobe Tripp Lite - Free user manual and instructions
Find the device manual for free SmartRack SR2POST16HD Tripp Lite in PDF.

| Product type | Compact 2-post rack |
| Brand | Tripp Lite |
| Model | SmartRack SR2POST16HD |
| Maximum load capacity | 158.8 kg (350 lb) |
| Standard width | 48.3 cm (19 inches) |
| Height | 16U (approx. 73.3 cm) |
| Material | Steel |
| Color | Black |
| Installation type | Floor-standing, with rubber feet |
| Floor anchoring | Front and rear mounting brackets (anchors not included) |
| Included accessories | Rubber feet (x4), M5 and M6 screws, support bar |
| Optional accessories | PDU, cable managers (sold separately) |
| Safety instructions | Install heaviest equipment at bottom, installation by qualified personnel, stabilize before installing equipment |
| Maintenance | Clean with a dry cloth |
Frequently Asked Questions - SmartRack SR2POST16HD Tripp Lite
User questions about SmartRack SR2POST16HD Tripp Lite
0 question about this device. Answer the ones you know or ask your own.
Ask a new question about this device
Download the instructions for your Wardrobe in PDF format for free! Find your manual SmartRack SR2POST16HD - Tripp Lite and take your electronic device back in hand. On this page are published all the documents necessary for the use of your device. SmartRack SR2POST16HD by Tripp Lite.
USER MANUAL SmartRack SR2POST16HD Tripp Lite
Register your product today and be automatically entered to win an ISOBAR® surge protector in our monthly drawing!

triplite.com/warranty


Manufacturing Excellence.
Important Safety Instructions

SAVE THESE INSTRUCTIONS
Maximum load rating: 350 lb.
Always install heavier equipment in the lower part of the rack
- Installation is to be performed only by qualified service personnel
Parts List

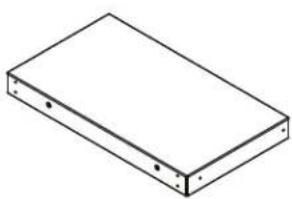
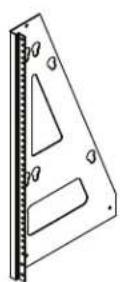
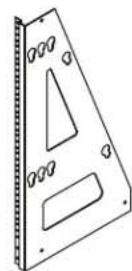
Base, x1 Left Upright
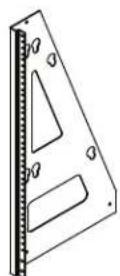
Bracket, x1
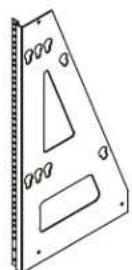
Right Upright
Bracket, x1
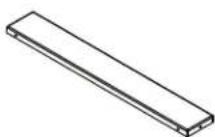
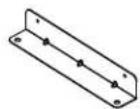
Securement Bracket, x2
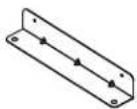
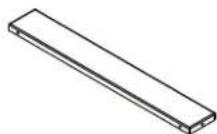
Support Bar, x1 M5 x 12 mm Screws, x16
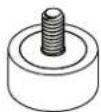
Rubber Feet, x4
Assembly
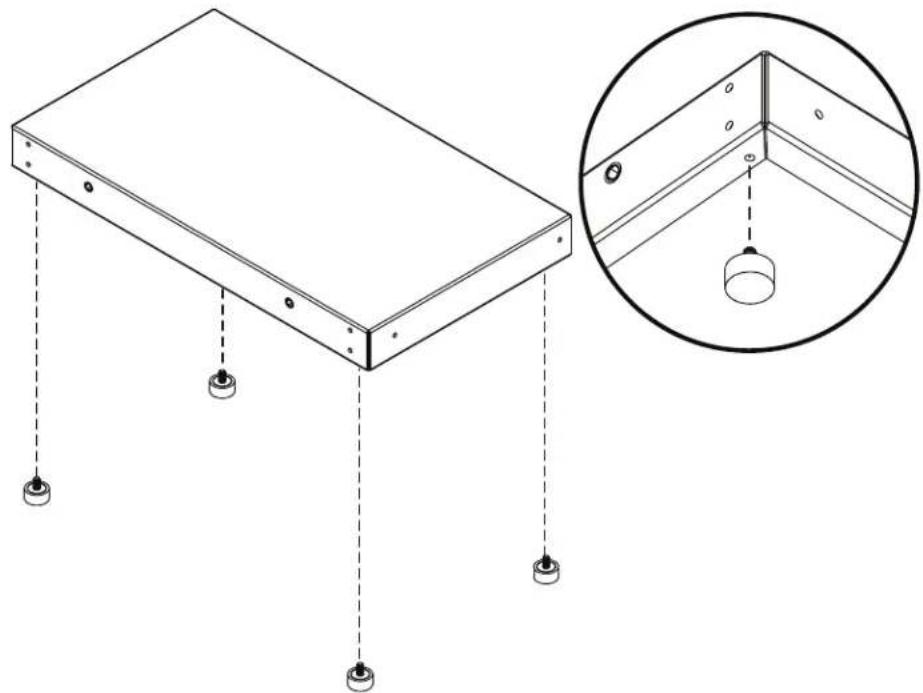
1 Screw the four rubber feet into the corners on the underside of the base.
Assembly
2 Attach the right upright bracket to the base using four of the M5 screws.
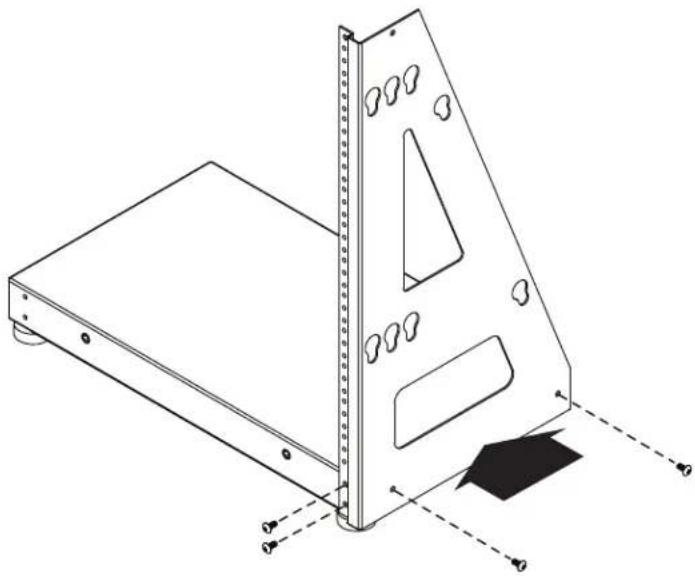
3 Attach the left upright bracket to the base using four of the M5 screws.
Assembly
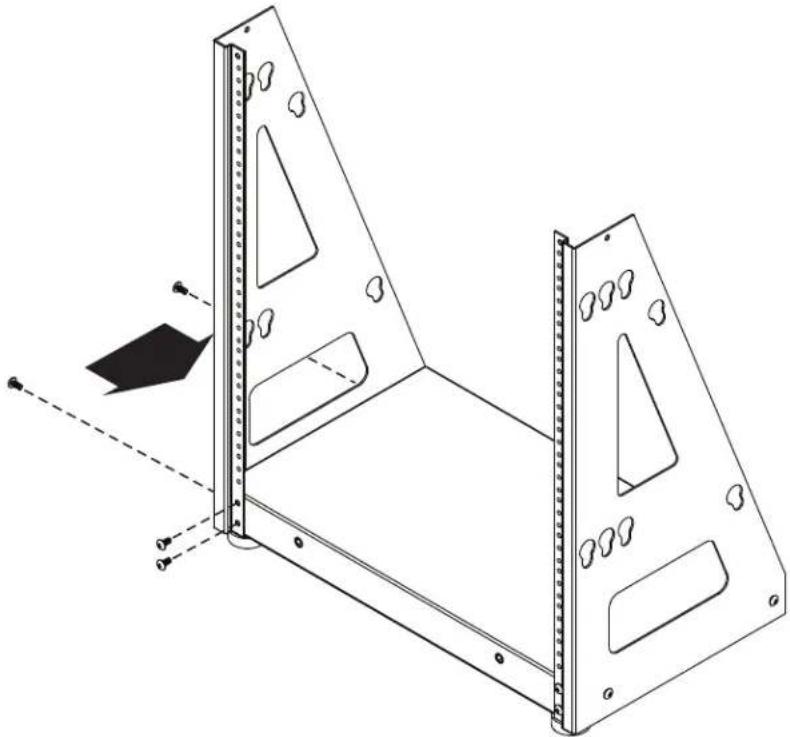
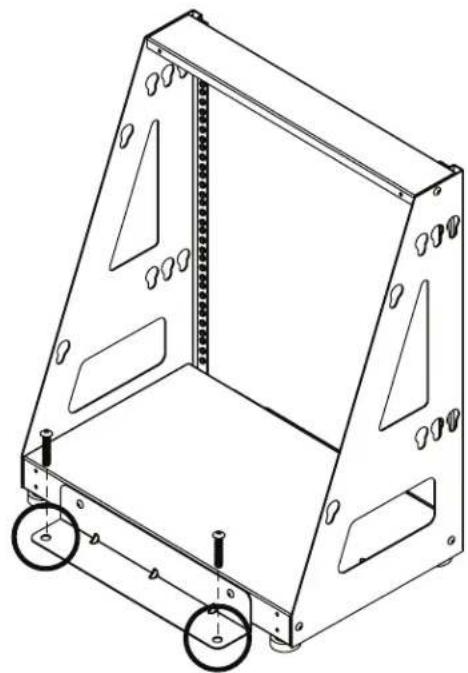
4 Attach the securement brackets to the front and back of the rack using the provided M6 screws.

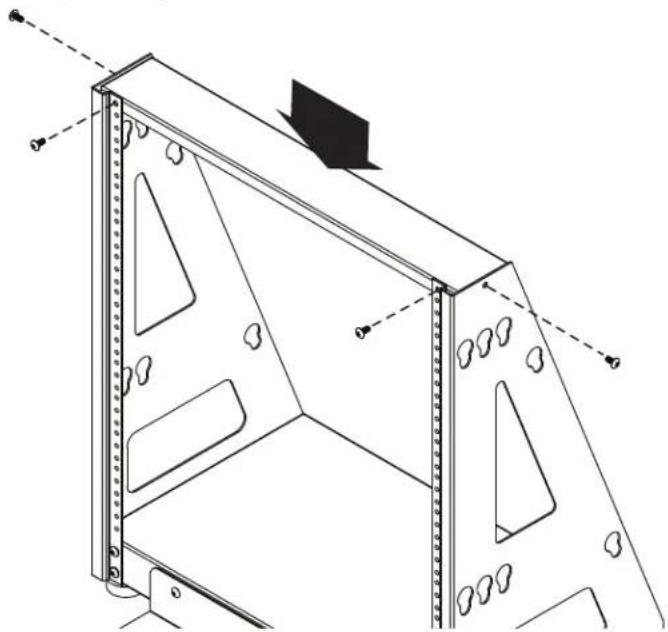
5 Attach the support bar to the uprights using four of the M5 screws.
Enclosure Installation

Caution! Read All Instructions andWarnings Before Installation!

WARNING: Until the rack enclosure has been properly installed and stabilized, the enclosure is prone to tipping and could cause property damage and/or personal injury. Do not attempt to install equipment without first stabilizing the enclosure.
- Installation is to be performed only by qualified service personnel.
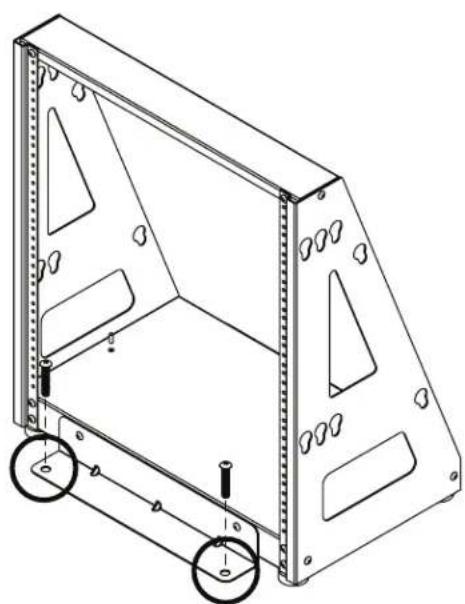
- Install the enclosure in a structurally sound area with a level floor that is able to bear the weight of the enclosure, all equipment that will be installed in the enclosure and any other enclosures and/or equipment that will be installed nearby.
- Install the cabinet securely to the building structure with user-supplied anchors and both the front and rear securement brackets provided, as in the following diagram.
- Be sure to select proper anchors for securement to the building, according to your installation.
Front Securement Rear Securement
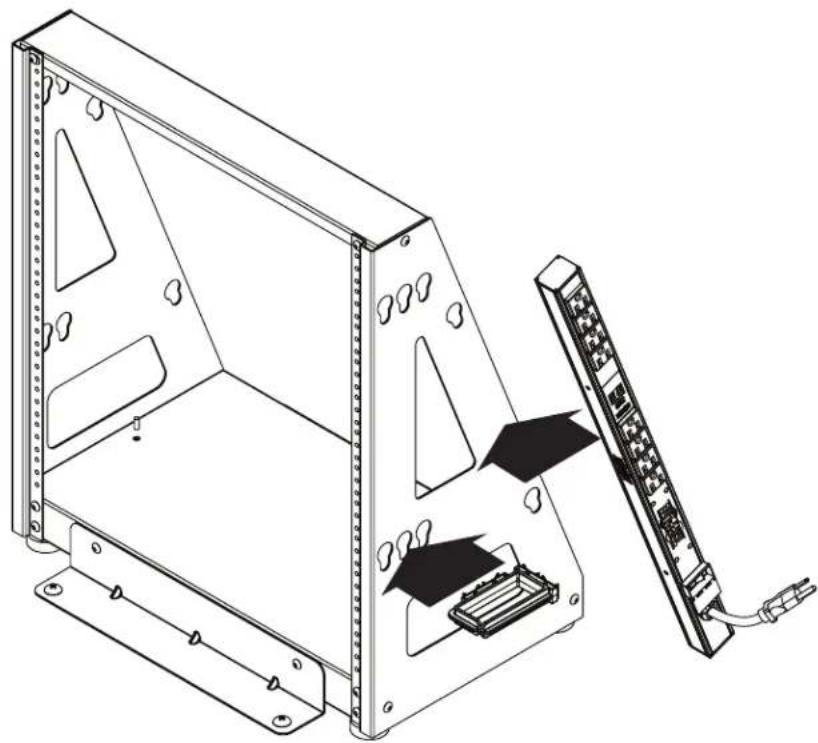
Add Accessories
Mount standard 19" rack equipment and accessories such as PDUs and cable managers (sold separately).
Tripp Lite has a policy of continuous improvement. Specifications are subject to change without notice. Photos and illustrations may differ slightly from actual products.


Manufacturing Excellence.
1111 W. 35th Street, Chicago, IL 60609 USA · tripplite.com/support
Guía de Instalación
1111 W. 35th Street, Chicago, IL 60609 USA • triplite.com/support
1111 W. 35th Street, Chicago, IL 60609, EE UU • triplite.com/support
20-12-102 9K-3CAA_RsB
1111 W. 35th Street, Chicago, IL 60609 USA • triplite.com/support
Base, x1 Support vertical gauche, x1
Support vertical droit, x1
Barre de support, x1
Support de fixation, x2

Vis M5 x 12 mm, x16