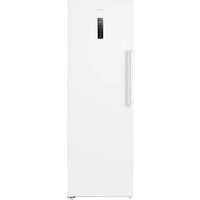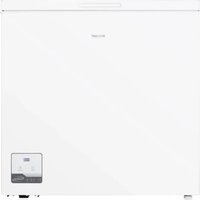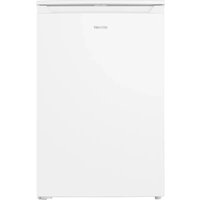
VPMVR50 - Freezer Veripart - Free user manual and instructions
Find the device manual for free VPMVR50 Veripart in PDF.


User questions about VPMVR50 Veripart
0 question about this device. Answer the ones you know or ask your own.
Ask a new question about this device
Download the instructions for your Freezer in PDF format for free! Find your manual VPMVR50 - Veripart and take your electronic device back in hand. On this page are published all the documents necessary for the use of your device. VPMVR50 by Veripart.
USER MANUAL VPMVR50 Veripart
text_image
veripart Type: VPMVR50 Climate classification SN/N/ST/T Electric shock classification: Class I Voltage: 220-240V Frequency: 50Hz Rated current: 0.6A Total input power: 42W Energy Consumption of E16 0.242kWh/24h Energy Consumption of E32 0.484kWh/24h Total storage volume: 31L Freezer storage volume: 31L Refrigerant: R600a/24g Net weight: 16Kg Temperature rise time: 12h Product code: 895868 Serial Number: Made In China Diagram of Circuit Principles plug thermostat overload protector compressor Veripart is a registered trademark. Weena 664, 3012CN, Rotterdam The NetherlandsINHOUDSOPGAVE
VOORWOORD
4
- VEILIGHEID 6
- PRODUCTEIGENSCHAPPEN 11
- INSTALLATIE 12
- GEBRUIK 18
- ONDERHOUD EN REINIGING 24
- STORINGEN OPLOSSEN 27
- BUITEN GEBRUIK STELLEN 30
- VEILIG AFVOEREN 31
VOORWOORD
Over dit document
1.1 VEILIGHEIDSWAARSCHUWINGEN EN -VOORSCHRIFTEN

!WAARSCHUWING!
text_image
Technical diagram of a portable air vent with numbered components for identification- Plank
- Thermostaat knop
- Waterreservoir
- Verstelbare poten
natural_image
Simple line drawing of a vertical container with a black checkmark symbol on the side (no text or labels)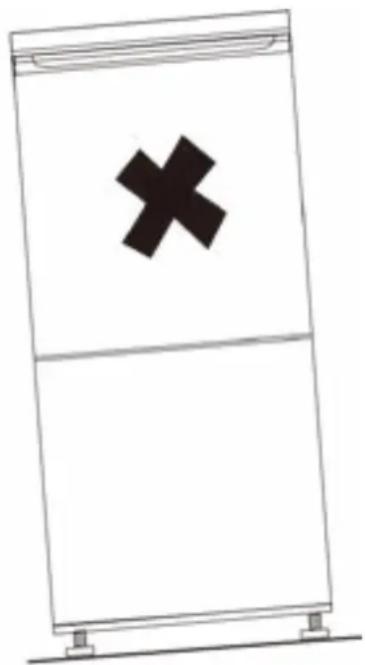
natural_image
Simple line drawing of a cabinet with a black 'X' symbol on the front panel (no text or labels)text_image
MAX 1 Refrigerator 5 MIN Freezer4.1 OPSLAG VAN VOEDSEL
flowchart
graph TD
    A["Step ①: Initial block"] --> B["Step ②: Top-down block"]
    B --> C["Step ③: Reversible curved arrow"]
    C --> D["Step ④: Lower panel with horizontal lines"]
    D --> E["Step ⑤: Reversible curved arrow"]
    E --> F["Step ⑥: Lower panel with downward arrow"]
    F --> G["Step ⑦: Reversible curved arrow"]
5. ONDERHOUD EN REINIGING

Waarschuwing!
text_image
Creative Commons recycling symbol with recycling icon and crossed-out trash bin- SAFETY: 37
- PRODUCT FEATURES 42
- INSTALLATION 43
- USE 49
- MAINTENANCE AND CLEANING 55
- TROUBLESHOOTING 58
- TAKING OUT OF SERVICE 61
- SAFE DISPOSAL
62
FOREWORD
About this document
- This manual contains all information for the correct, efficient and safe use of the appliance.
- This manual is intended for the end user and/or buyer of this appliance.
- Make sure you have read and understood the instructions in this manual completely before installing or using the appliance. Keep this document for future use as long as you use and/or own the appliance.
- Coolblue B.V. cannot in any way be held liable for material or immaterial damage to you or to others, the appliance, your other belongings or belongings of others caused by not following the instructions in this manual.
- The warnings and safety instructions in this manual do not cover all possible circumstances and situations.
- If you contact our customer service, make sure you have the model number ready. The information can be found on the type plate or on the front of this manual.
Original instructions
This manual was originally written in Dutch. All other languages are translated documents. In the case of translation errors, the Dutch version is leading.
Symbols used
| SYMBOL DESCRIPTION | ||
 | DANGER! | Fire hazard and/or flammable materials |
 | WARNING! | Indicates a dangerous situation which, if not avoided, may result in serious immaterial damage to you or others. |
 | CAUTION! | Indicates a dangerous situation which, if not avoided, may result in slight immaterial damage to you or others. |
 | ATTENTION! | Indicates a situation related to material damage. |
| [T8SZ] | NOTE | Indicates useful additional information. |
Copyright
The data depicted in this manual, including texts, photographs, graphic drawings, trademarks, (trade) names and logos, are the property of Coolblue B.V. and are protected by copyright, trademark law and/or any other intellectual property right, unless these data belong to a third party. You are never allowed to reproduce, transfer, distribute, store or make the contents of the manual available to third parties, in whole or in part, without the prior written consent of Coolblue B.V. and/or the third party to whom the data belong.

NOTE
- You can also find the latest version of this manual online, at www.coolblue.nl if you search for the article number.
Veripart contact details
Veripart is a registered brand of Coolblue B.V.
Customer service can be reached at:
https://www.coolblue.nl/en/customer-service
1. SAFETY:
1.1 SAFETY WARNINGS AND REGULATIONS

!WARNING!
- Keep the vents in the appliance housing open in both freestanding and built-in fridges.
- Do not use mechanical devices, electrical appliances (such as a hairdryer or heater) or other means to defrost your freezer.
- Ensure that no components of the cooling circuit are damaged during transport and installation of the appliance (only in cases where the cooling circuit is freely accessible).
- Do not place electrical appliances in the food storage compartments of the freezer (such as ice cream machines) unless they are of a type expressly declared suitable by the manufacturer.
- When positioning the appliance, ensure that the power cable is not stuck or damaged.
- Do not use an extension lead or socket for this appliance.

CAUTION!
- Packaging with flammable gases or liquids may leak at low temperatures, do not store flammable gases or liquids in the appliance.
- Do not store containers containing flammable materials, propellant or explosive substances such as aerosols, refill cartridges for fire extinguishers, etc. in the appliance.
- Do not place carbonated or sparkling drinks in the freezer compartment.
- Do not remove objects from the freezer compartment if your hands are wet/damp as this may cause grazes or frostbite.
- If you want to avoid forming a combustible gas-air mixture in the event of a leak in the cooling circuit, consider the size of the space in which the appliance is located and the amount of freezerrant used.
- It is dangerous for people other than authorised technicians to carry out maintenance or repairs with cover plates removed. To avoid the risk of electric shocks, do not attempt to repair this appliance yourself.
- This appliance may be used by children from eight years of age and above and by persons with reduced physical, sensory or mental capabilities or lack of experience and knowledge, provided that they are under supervision or have been trained in the safe use of the appliance and that they understand the associated dangers.
! ATTENTION!
- This appliance is intended for domestic use and similar applications such as:
- staff kitchens in shops, offices and other work environments;
- farms and guests in hotels, motels, B&B and other residential environments;
- catering and similar non-retail applications.
- It is dangerous to change the characteristics or specifications of the appliance or to try to modify this product in any way.
- Food storage times recommended by the food manufacturer must be observed.
- Never pull the power cable to disconnect the plug from the socket. Always hold the plug firmly and pull it straight out of the socket.
1.2 SAFETY INSTRUCTIONS: INSTALLATION

DANGER!
Risk of fire / flammable materials.
! CAUTION!
- The appliance is heavy. Take care when handling and wear protective gloves and closed footwear.
- It is dangerous for persons other than authorised service technicians to carry out maintenance on electrical components (plug, power cable, compressor, etc.) or to carry out repairs with the cover plates removed. To avoid the risk of electric shocks, do not attempt to repair this appliance yourself.
- If you detect any damage to the appliance or the power cable, do not connect the appliance but contact the service department (see contact details on page 43).
- The power cable must be attached behind the appliance and must not be exposed or loose.
- Make sure that the power cable of the installed appliance is always easily accessible.
- This appliance requires a standard 220-240V 50Hz socket with 2-pole earthing. The power cable of this appliance is equipped with a 2-pole plug suitable for standard wall sockets with earthing to minimise the risk of electric shocks.
- On first installation (or after turning the door) wait at least four hours before connecting the appliance to the power. This allows the oil to flow back into the compressor.
- Ensure that air can circulate around the appliance.
- Pull the plug out of the socket before carrying out any actions on the appliance (e.g. turning the door).
- Incorrect use of the earthed plug may cause an electric shock.
• This appliance is not intended for use as a built-in freezer. -
The correct operation of the appliance can only be guaranteed if the specified temperature range is respected. If, as a result of another installation, the correct ventilation requirements are not met, the appliance
-
will function correctly, but energy consumption may increase slightly.
- This appliance is not suitable for use with an inverter.
- Do not install the appliance near radiators, stoves, ovens or hobs.
- Do not install the appliance in direct sunlight.
- Do not install this appliance in spaces that are too damp or too cold.
- Do not expose the appliance to rain.
- The total volume of the space in which the appliance is installed divided by the amount of freezerrant of the appliance must not be less than 8 g/m ^3 . The amount of freezerrant contained in the appliance can be found on the type plate.
- The lamp supplied with this appliance is only for use in this appliance and is not intended for other applications.
- The appliance may not operate optimally if it is in a place where the ambient temperature is below the minimum or above the maximum of the temperature range for which the appliance is designed for a longer period of time. Please refer to the “Climate Range” table below.
Climate Range
The information about the climate range of the appliance is stated on the type plate. It indicates at which ambient temperature (or room temperature) the operation of the appliance is optimal (correct).
This type of freezer has climate range SN, N, T, ST.
| CLIMATE RANGE PERMISSIBLE AMBIENT TEMPERATURE | |
| SN From +10°C to +32°C | |
| N From +16°C to +32°C | |
| ST | From +16°C to +38°C |
| T | From +16°C to +43°C |
1.3 SAFETY INSTRUCTIONS: USE
! CAUTION!
Observe the following instructions to avoid food contamination:
- When the door is open for a long time, the temperature in the compartments of the appliance can rise considerably.
- Clean surfaces that may come into contact with food and accessible drainage systems regularly.
- Store raw meat and fish in suitable containers in the appliance so that they do not come into contact with or drip on other foods.
- If the appliance remains empty for a long time, switch it off, clean and dry it and leave the door open to prevent mould forming in the appliance.
2. PRODUCT FEATURES
• Electronic temperature control
- Reversible door
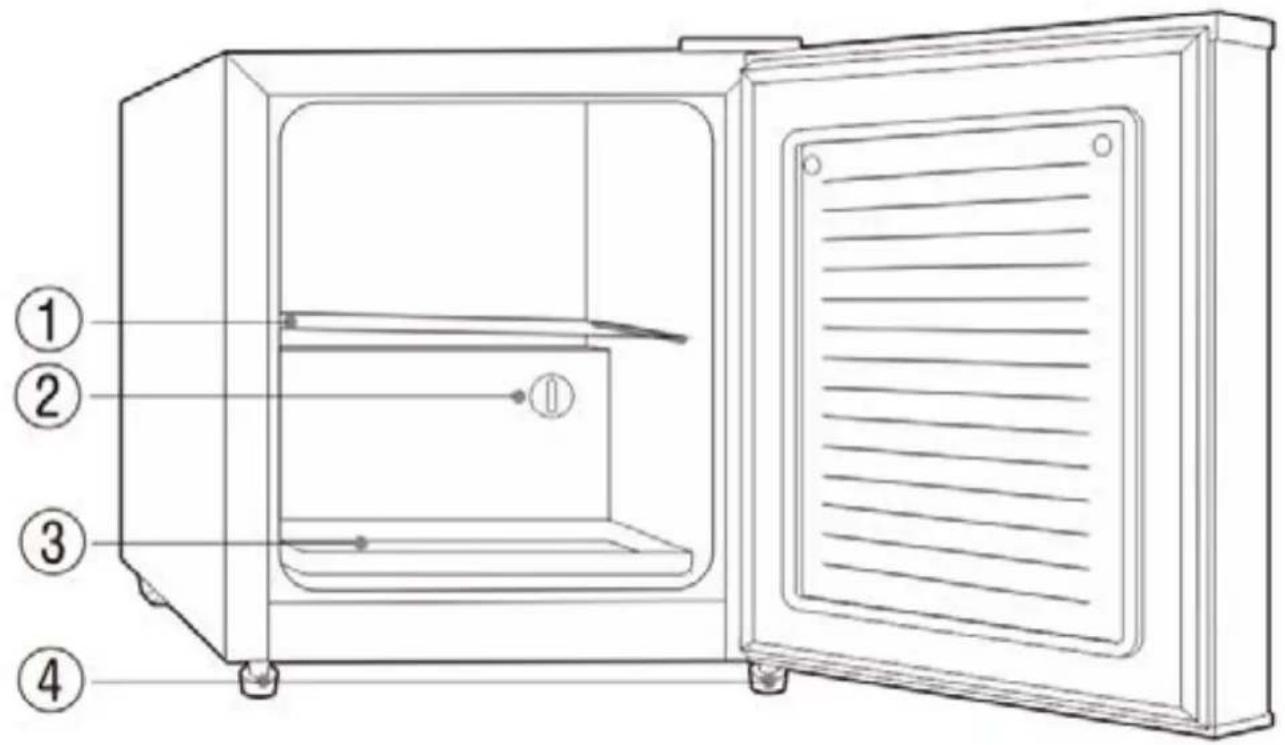
text_image
Technical diagram of a portable air vent with numbered components for identification- Shelf
- Thermostat Knob
- Water pan
- Adjustable Feet
Due to technological innovation, the descriptions of the product in this manual may not be completely consistent with your freezer.
Does not contain freon
The freon-free freezerrant (R600a) and the environmentally friendly foam insulation (cyclopentane) used for the appliance do not affect the ozone layer and have a very small impact on global warming.
Guarantee
This appliance comes with a guarantee period of two years after purchase. For more information on guarantee conditions, please visit www.coolblue.nl/en/customer-service. In any case, you must have the purchase order with purchase and/or delivery date in order to be able to claim the guarantee.
Spare parts
Spare parts for this appliance are available. To order or find out more, visit www.coolblue.nl/en/customer-service
Technical data and energy label
The technical data is indicated on the type plate on the inside of the appliance and on the energy label (both also printed on page 2). The QR code on the energy label provided with the appliance provides a web link to the information related to the appliance performance in the EU EPREL database. Keep the energy label for reference together with the user manual and any other documents provided with this appliance. It is also possible to find the same information in EPREL via the link https://eprel.ec.europa.eu and the model name and product number that can be found on the type plate of the appliance.
See link www.theenergylabel.eu for detailed information on the energy label.
| VERIPART CONTACT DETAILS | |
| Address: | Weena 664, 3012 CN, Rotterdam |
| Website https://www.coolblue.nl/en/customer-service | |
3. INSTALLATION
Location
1. Ventilation
The position you select for the freezer installation should be well-ventilated and cool. Do not locate the freezer near a heat source such as a cooker or boiler, and avoid situating it in direct sunlight, thus guaranteeing the freezing effect while saving energy consumption. Do not put the freezer in a damp place, in order to prevent the freezer from rusting and leaking electricity. The area of the total space of the room in which the freezer is installed, when divided by the freezerrant charge amount of the freezer, should not be less than 8 g/ M ^3 .

Note!
- The amount of freezerrant contained in the freezer can be found on the rating label.
2. Heat dissipation space
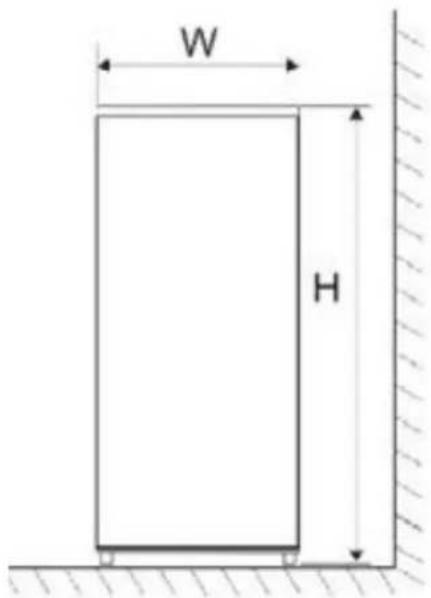
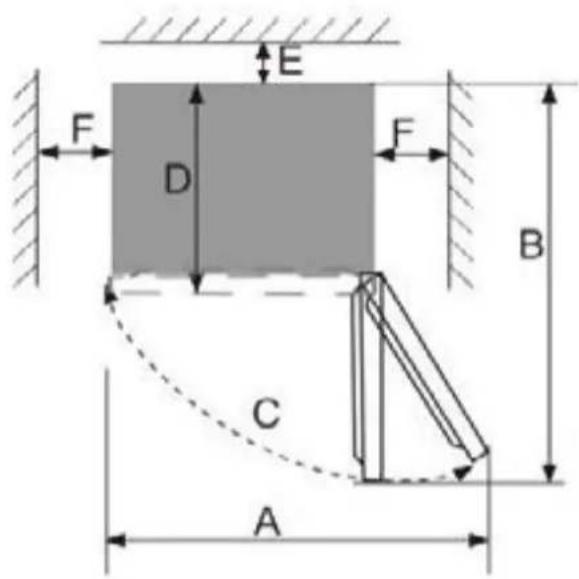
When working, the freezer gives off heat to its surroundings. Therefore, at least 30mm of free space should be left on the top, more than 100mm on both sides, and more than 50mm at the back of the freezer.
3. Level ground
Place the freezer on a flat, solid floor to keep it stable and to avoid excessive vibration and noise. When the freezer is placed on carpet, a straw mat or polyvinyl chloride, the solid backing plates should be applied underneath the freezer, so as to prevent colour changes due to heat dissipation.
text_image
W HFig. 1
text_image
E F D F B C AFig. 2
| W D H A B C(°) E F | |||||||
| 474 447 | 496 800 87 | 75 130±5 50 | 100 | ||||
Dimensions in mm.

Note!
•Figure 1 and, Figure 2 only illustrate the space requirements in a schematic diagram.

Warning!
- Unobstructed ventilation must be maintained around the appliance.
Before installing the appliance, carefully review the safety information (section 1).
1. Unpack
Remove the packaging materials and dispose of them properly. Check that the appliance is not damaged. Do not connect the appliance if it is damaged. Report any damage immediately to the salesperson via customer service. In that case, keep the packaging.
2. Wait
Wait four hours before connecting the appliance so the oil can flow back to the compressor.
3. Clean
Clean the interior and all internal accessories with lukewarm water and some neutral soap before first use to remove the typical smell of a brand new appliance. Dry everything carefully.! Do not use solvents or abrasive powders; these will damage the coating
4. Location
The location where you place your appliance should be well ventilated and the air should not be too warm. Do not place the appliance near a heat source, such as a stove or boiler, and avoid direct sunlight, so that as to guarantee the cooling effect and save on energy consumption. Do not place the appliance in a damp place so that it cannot rust and there is no leakage current.
5. Heat dissipation area
During operation, the appliance emits heat to the environment. Therefore there must be at least 5 cm clearance on the top, at least 5 cm on both sides and at least 5 cm on the back of the fridge.
6. Installation of the appliance
- This appliance is not intended for use as a built-in freezer.
- Use the front adjuster to level the appliance. If the appliance is not level, it may affect the performance of the gasket seal or even lead to a failure of your appliance.
- It must be possible to disconnect the appliance from the mains power supply. The plug must therefore be easily accessible after installation.
- Place the appliance on a firm and flat surface (floor) so that it is stable, otherwise vibrations and noise may occur. When placing the freezer on floor coverings such as carpets, straw mats or polyvinyl chloride (PVC), place a solid sheet or cover under the freezer to prevent colour change due to heat dissipation.
- Before plugging in the power cable, check that the voltage and frequency of the type plate match your power supply network. The appliance must be earthed. The power cable is supplied with a contact for this purpose. If the socket is not earthed, connect the appliance to a separate earth according to current regulations and consult a qualified electrician.
7. Levelling the appliance
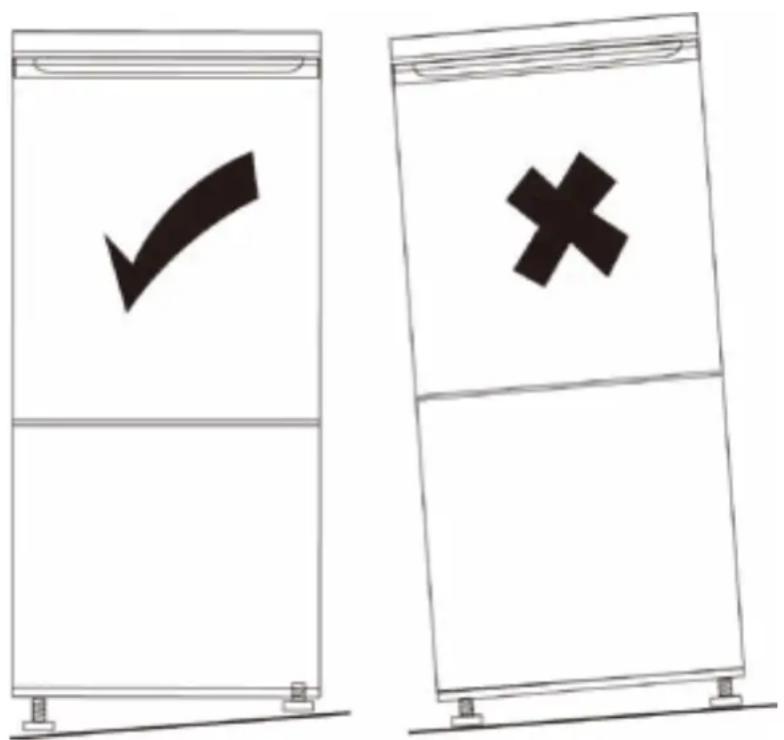
text_image
Diagram showing two labeled storage or storage units with checkmark and cross symbols, likely indicating status indicators.Preparation for use
1. Standing time
After the freezer is properly installed and well cleaned, do not switch it on immediately. Wait to switch the freezer on only after more than 1 hour, so as to ensure its normal operation.
2. Cleaning
Confirm the accessory parts inside the freezer and wipe the inside with a soft cloth.
3. Power-on
Insert the plug into the socket to start the compressor. After 1 hour, open the freezer door. If the temperature inside the freezer compartment has dropped noticeably, the freezing system is working normally.
4. Storage of food
After the freezer has been running for a period of time, the internal temperature of the freezer will be automatically controlled according to the user's chosen temperature setting. After the freezer is fully cooled, you may load it with food, which usually needs 2\~3 hours to cool completely. In summer, when the outside temperature is high, it takes more than 4 hours for food to be fully cooled (Try to open the freezer door as little as possible before the internal temperature cools down).

Warning!
- If the freezer is installed, make sure to check whether the ground wire and leakage circuit breaker are normal. If vibration noises are produced due to the freezer contacting the wall or if the wall gets blackened by air convection around the compressor, move the freezer away from the wall.
4. USE
Temperature control:
The temperature of the appliance can be adjusted by turning the thermostat knob.
- Freezer temperature range: MIN about -15 °C MAX about -24 °C
- Internal temperature of the appliance can vary based on ambient temperature, the quantity of items stored and how frequently the door is opened.
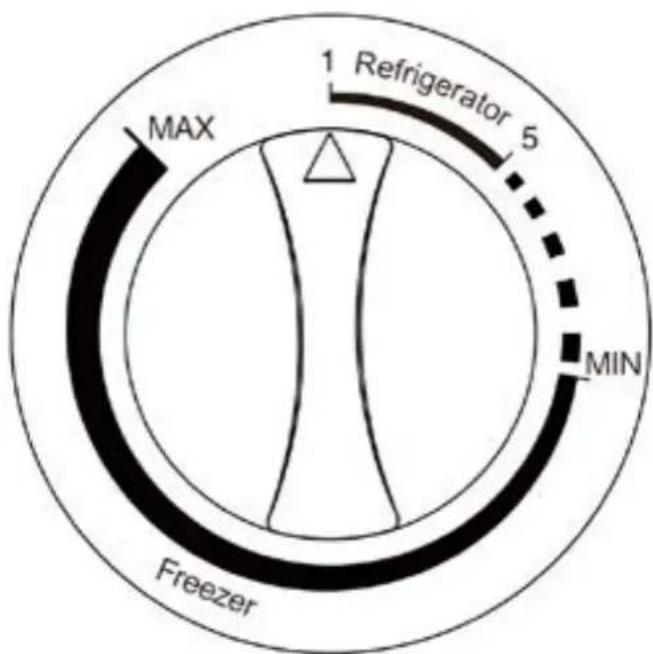
text_image
MAX 1 Refrigerator 5 MIN Freezer4.1 INSTRUCTIONS FOR FOOD STORAGE
Precautions for use
- The appliance might not operate consistently (there is possibility of defrosting or temperature becoming too warm in the frozen food compartment) if situated for an extended period of time below the cold limit of the temperature range for which the freezerrating appliance is designed.
- The information about the climate type of the appliance is provided on the rating label.
- The internal temperature can be affected by such factors as the location of the freezing appliance, the ambient temperature, and how frequently the door is opened. If necessary, the setting of any temperature control device might have to be adjusted to allow for these factors.
- Effervescent drinks should not be stored in the freezer compartment or the low-temperature compartment, and some products, such as water ices, should not be consumed too cold.
Do not put too much or very heavy food inside the freezer. Leave enough space between food items: if they are too close, the cold air flow will be blocked, thus affecting the freeze-ration effect. Do not store an excessive amount of heavy items, to avoid the shelf from being crushed. When storing the food, keep it away from the inner wall. Also, do not place water-rich foods too close to the rear of the fridge, lest they get frozen to the inner wall.
Use of the frozen food storage compartment
The freezer temperature is set at -18^ , and it is advisable to store food requiring long-term preservation in the freezer compartment, although the storage duration indicated on the food packaging should be adhered to.
The freezer drawers are used to store food that needs to be frozen. Fish and meat in large blocks should be cut into small pieces and packed into freezer bags before being evenly distributed inside the freezer drawers.
- Allow hot food to cool down to room temperature before putting it in the freezer compartment.
- Do not put sealed glass containers or cans full of liquid in the freezer compartment, so as to avoid bursting or distortion due to expansion after the liquid freezes.
- Divide food into appropriately small portions.
- It is best to wrap food up before freezing it, and the materials used for wrapping should be dry, to prevent the freezer bags from freezing together. Foods should be packed in or covered with suitable materials that are firm, tasteless, impervious to air and water, non-toxic and pollution-free, to avoid cross-contamination and the transfer of odours.
Tips for shopping for frozen food
- When you are buying frozen food, look at the Storage Guidelines on the packaging. You will be able to store each item of frozen food for the period shown against the star rating. This is usually the period stated as "Best before", found on the front of the packaging.
- Check the temperature of the frozen food cabinet in the shop where you buy frozen food.
- Make sure the frozen food package is in perfect condition.
- Always buy frozen products last on your shopping trip or visit to the supermarket.
- Try to keep frozen items together whilst shopping and on the journey home, as this will help to keep the food cooler.
- Don't buy frozen food unless you can freeze it straight away. Special insulated bags can be bought from most supermarkets and hardware shops. These keep the frozen foods cold longer.
- For some foods, thawing before cooking is unnecessary. Vegetables and pasta can be added directly to boiling water or steamed. Frozen sauces and soups can be put into a saucepan and heated gently until thawed.
- Use quality food and handle it as little as possible. When food is frozen in small quantities, it will take less time for it to freeze and thaw.
- Estimate the amount of food that needs to be frozen. When freezing large amounts of fresh food, adjust the temperature control knob to the low mode to lower the freezer temperature so, food can be frozen quickly and retain its freshness.
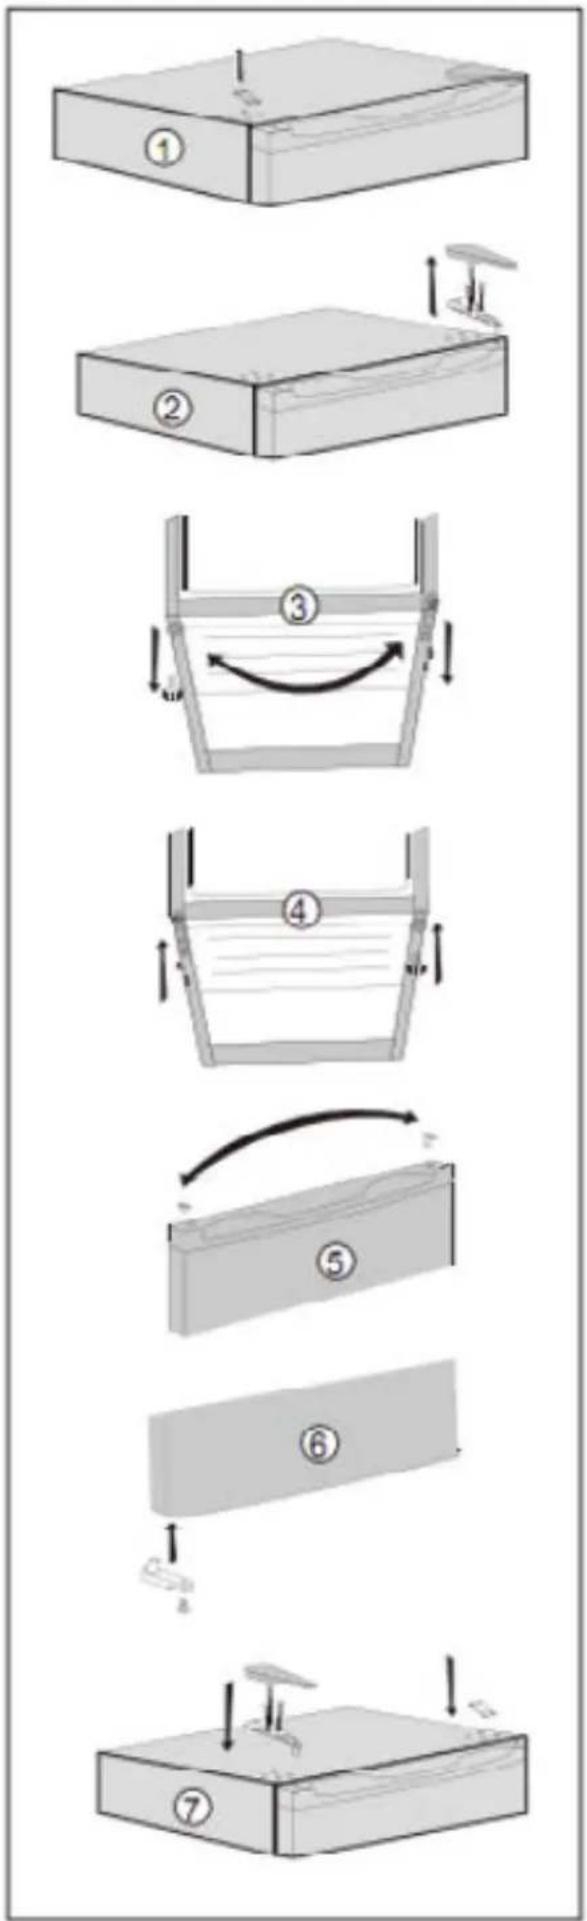
4.2 DOOR REVERSAL INSTRUCTIONS
If the appliance is placed on it's back or side for any length of time during this process, it must be allowed to reman upright for 6 hours before plugging it in to avoid damage to the internal components.
- Remove the plastic hole cover located on the top left side of the freezer as shown in Fig. 1
- Remove the upper hinge cover and the upper hinge on the right side of the freezer, as shown in Fig. 2
- Remove the door from the lower hinge pin by pulling it gently upwards. Remove the lower hinge bracket on the right side of the unit and remove the leveling foot on the left side. Reverse their position as shown in Fig. 3
- Reverse the bolt on the lower hinge. Install the lower hinge on the left side of the freezer. Install the adjustable foot on the right side of the freezer as shown in Fig. 4
- Move the door bushing to the left and the plastic hole cover to the right as shown in Fig. 5
- Remove the door stop from the lower right side of the freezer door. Install the door stop on the lower left side of the freezer door as shown in Fig 6.
- Install the upper hinge and hinge cover on the left side of the unit. Place the plastic hole covers in the holes on the right side of the top of the freezer to cover the screw holes as shown in Fig.7

Note!
- When installing the door, ensure that the top of the door is level with the top of the cabinet. If the door is not level, the rubber gasket will not make a good seal with the cabinet which can cause the appliance to malfunction.
flowchart
graph TD
    A["Step 1: Box with internal structure"] --> B["Step 2: Top-down fold"]
    B --> C["Step 3: Folded fold with curved arrow"]
    C --> D["Step 4: Folded fold with horizontal band"]
    D --> E["Step 5: Folded fold with curved arrow"]
    E --> F["Step 6: Folded fold with horizontal band"]
    F --> G["Step 7: Folded fold with vertical supports"]
5. MAINTENANCE AND CLEANING
⚠ Warning!
- Before cleaning, unplug the power plug first. Do not plug it in or unplug it with wet hands, because there is a risk of electric shock and injury. Do not spill water directly on the freezer, to avoid rust, electricity leakage and accidents. Do not insert your hands into the bottom of the freezer, as you might be scratched by sharp metal corners.
Internal cleaning and external cleaning
Food residue in the freezer is liable to produce bad odours, so the freezer must be cleaned regularly. The fresh food compartment is usually cleaned once a month.
Clean off any dust that has accumulated on the rear panel and side plates of the freezer often.
After using detergent, be sure to rinse with clean water, and then wipe it dry.
Carefully wipe dry the door gasket and clean the groove using, for example, a wooden chopstick wrapped in cotton wool. After cleaning, attach the four corners of the door gasket first, and then embed it segment by segment into the door groove.
⚠ Warning!
- Do not use a hard bristle brush, steel wire brush, detergent, soap powder, alkaline detergent, benzene, gasoline, acid, hot water or other corrosive or soluble materials to clean the cabinet surface, door gasket, plastic decorative parts, etc., so as to avoid damage.
Interruption of power supply or failure of the system:
- See to frozen foods if the freezer will not be run for an extended time (such as interruption of power supply or failure of the freeze-rating system).
- Try to open the freezer door as little as possible. In this way food can remain safe and fresh for hours, even in hot weather.
-
If you receive a power outage notice in advance:
-
Adjust the thermostat knob to the high mode an hour in advance, so that food is fully frozen (do not store new food during this time!). Restore the temperature mode to the original setting when the power supply returns to normal.
-
You can also make a block of ice using a watertight container and put it in the upper part of the freezer, so as to extend the storage time of the food inside.

Note!
- Once the freezer is in use, it is better to use it continuously; and under normal circumstances. Do not frequently stop or start its use, so as not to affect the service life.
Defrosting
After a period of use, a thin layer of frost will form on the freezer compartment's inner wall (or evaporator) surface, which may affect freezing if the frost layer exceeds 5mm in thickness. In such cases, gently scrape the frost off using an ice scraper rather than any sharp, metal implements. Frost should be scraped off every 3 months or so, but if the normal use of drawers and normal access to food are affected by frost build-up, make sure to remove the frost in a timely manner.
Follow the steps below to remove frost build-up:
- Remove any frozen food, shut off the mains power supply, open the freezer door, and gently scrape any frost from the inner wall using an ice scraper. To speed up the thawing process, you can place a bowl of hot water inside the freezer, and once the iced-over frost becomes loose, use an ice scraper to scrape it off and remove it.
- After defrosting, clean the inside of the freezer and switch on the power supply.
Safety-check after maintenance
• Is the power cord broken or damaged?
- Is the power plug firmly inserted into the socket?
• Is the power plug abnormally overheat?

Note!
- Electric shocks and fires may result if the power cord or plug is damaged or covered with dust. If there is any abnormality, please unplug the appliance and contact the vendor.
6. TROUBLESHOOTING
You can solve some problems easily yourself using the table below. Caution!

ATTENTION!
- Before solving the problem, switch off the power supply.
- If the following descriptions do not solve your problem, please contact our customer service: www.coolblue.nl/en/customer-service
- Only a qualified electrician or authorised person may solve the faults not contained in this manual. Repairs carried out by unauthorised persons may cause injury and/or serious damage to persons and property.
PROBLEM POSSIBLE CAUSE SOLUTIONS
| The appliance does not cool at all | - The temperature control knob is positioned wrong.- The plug is not inserted properly.- There is no voltage on the socket.- The fuse is blown or defective.- Where is the device installed? Is it located on a balcony, in a garage, storage room or other place where the ambient temperature is less than 10°C? | - Switch the thermostat to another position.- Insert the plug properly.- Open the door and check if lamp is on. If the lamp is off, there may be no voltage on the socket. Have the socket repaired by an electrician.- Check the fuse and replace if necessary.- Install the appliance in a protected location where the ambient temperature is higher than 10°C. If the appliance is installed in a room with too low a temperature, the internal cooling system may not operate correctly. |
| The door does not open easily. | - You tried to open the door immediately after closing. | - Wait a few seconds between closing and re-opening the door. |
| Water runs over the back of the appliance | - During the automatic defrosting process, icing thaws against the back wall. | - Wipe up the water with a soft cloth. |
| PROBLEM POSSIBLE CAUSE SOLUTIONS | ||
| Water enters the appliance | - Products prevent water from entering the water collection container.- The water collection channel is blocked. | - Ensure products do not touch the back wall.- Clean the water collection channel. |
| There is too much condensation on the back wall of the appliance. | - The door has been opened too often.- The door is not completely closed- The stored food was not packed. | - Only open the door if necessary.- Make sure the door is completely closed.- Pack food in suitable material before putting it in the appliance. |
| There is water on the floor. | - The defrost water collection channel is not connected to the evaporator container above the compressor. | - Secure the defrost water collection channel to the evaporator container. |
| The appliance freezes or cools too much. | - The temperature is set too cold or the appliance is in the coldest position. | - Temporarily set the temperature control knob to a warmer position. |
| The temperature in the appliance is too low/high. | - The temperature is not set correctly.- The door is not closed properly.- The temperature of the food is too high.- Many products are stored at the same time.- The door has been opened too often. | - Set a higher/lower temperature.- Find the cause of the door not closing properly, remove or move possible obstacles.- Allow the food to cool to room temperature before preserving.- Preserve fewer products at the same time.- Only open the door if necessary. |
| Strange smell in the appliance | - There is spoiled food in the appliance.- The appliance is not clean.- Food with a strong smell is present in the appliance. | - Throw away spoiled food.- Clean the appliance.- Pack food with a strong smell. |
| There is too much frost and ice. | - The door is not closed properly.- The door gasket is deformed or dirty.- The products are not packed correctly.- The temperature is set incorrectly.- The appliance is fully loaded and set to the lowest temperature.- The set temperature in the appliance is too low and the ambient temperature is too high. | - Find the cause of the door not closing properly, remove or move possible obstacles.- As a result, the door does not close properly. Clean the seal and repair the deformation. If necessary, replace the seal, contact customer service.- Pack the products better.- Please refer to Section 4.- Set a higher temperature. Please refer to Section 4. Set a higher temperature. Please refer to Section 4. |
| The compressor works continuously. | - The temperature is set incorrectly.- Many products are placed at the same time.- The room temperature is too high.- The food placed in the appliance was too hot.- The door is not closed properly. | - Please refer to Section 4.- Wait a few hours and then check the temperature again.- Please refer to Section 4.- Allow food to cool to room temperature before storing.- See the previous section. |
| The lamp does not work. | - The lamp is broken.- The lamp is in the standby position. | - Please contact our customer service.- Close and open the door. |
| The side panels are hot. | - This is normal. The heat exchanger components are on the side. | |
Contact the service centre if the fault occurs again.
7. TAKING OUT OF SERVICE
Switching off and storage
If the appliance will not be used for several months, first switch it off and then pull the plug out of the socket.
- Make sure the appliance is completely thawed.
- Clean the inside thoroughly and wipe dry. To prevent the formation of odours and moulds, leave the door open: block it.
- Clean the door gasket groove with soap and water and wipe everything dry with a soft cloth.
- Do not use a hard brush, steel brush, detergent, soap powder, alkaline detergent, benzene, gasoline, acids, hot water or other corrosive or soluble substances to clean the appliance.
- Store the cleaned appliance in a dry, ventilated place, away from a heat source. Make sure the appliance is on a level surface and do not place heavy objects on top.
- The appliance in storage must not be accessible to children playing.
8. SAFE DISPOSAL
! CAUTION!
Waste processing
- Freezerrants and the cyclopentane foam used for the appliance are flammable. When the appliance is disposed of, it must therefore be kept away from sources of fire and collected or returned to a qualified waste processing company.
- The appliance may not under any circumstances be incinerated to prevent damage to the environment or other damage.
- R-600a is used as a freezerrant in this appliance. Therefore, please contact local authorities regarding the safe disposal of this appliance.
text_image
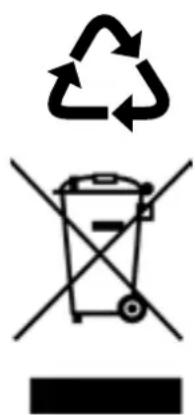
Creative Commons recycling symbol with recycling icon and crossed-out trash binThe materials used in this appliance marked with this symbol are recyclable. This marking indicates that this product should not be disposed of via household waste throughout the EU. In order to prevent damage to the environment or human health as a result of uncontrolled waste, it must be processed responsibly so that raw materials can be reused sustainably. Use the existing collection systems or contact the shop where you purchased the product if you want to dispose of the used product. There, the product is recycled in an environmentally friendly way.
- Old cooling appliances still have value. Responsible disposal ensures that valuable raw materials can be recycled. Of course, the appliance may not be disposed of with (domestic) residual waste, but it must be collected or returned to the environmental station of your municipal waste processing company.
- The freezerrants and insulation materials used in your appliance require special care. When draining, ensure that the pipes on the back of the appliance are not damaged.
- Avoid damaging the cooling unit, especially the heat exchanger.
- Information on how to dispose of old appliances and packaging correctly can be found at your local municipal waste processing company.
Veripart is a registered trademark of Coolblue B.V.
Weena 664
3012CN Rotterdam
The Netherlands
Made in China
MANUEL D'UTILISATION
CONGÉLATEUR

VPMKK50

veripart
TABLE DES MATIÈRES
AVANT-PROPOS 66
- SÉCURITÉ 68
- CARACTÉRISTIQUES DU PRODUIT 73
3.INSTALLATION 74 - ENTRETIEN ET NETTOYAGE 86
- DÉPANNAGE 89
- MISE HORS SERVICE 92
- ÉVACUATION SÉCURISÉE 93
AVANT-PROPOS
text_image
Technical diagram of a portable air conditioner unit with numbered components labeled 1 to 4text_image
Diagram showing two labeled panels with checkmarks and an 'X' symbol, likely indicating approval or cancellation.text_image
MAX 1 Refrigerator 5 MIN Freezer4.1 INSTRUCTIONS POUR LA CONSERVATION DES ALIMENTS
flowchart
graph TD
    A["Step ①: Top block"] --> B["Step ②: Left block"]
    B --> C["Step ③: Inlet/arrowed frame with curved arrow indicating motion"]
    C --> D["Step ④: Left side of frame"]
    D --> E["Step ⑤: Left side of frame"]
    E --> F["Step ⑥: Right side of frame"]
    F --> G["Step ⑦: Bottom box with upward arrow and downward arrow"]
5. ENTRETIEN ET NETTOYAGE