859435 - Scale CAS - Free user manual and instructions
Find the device manual for free 859435 CAS in PDF.
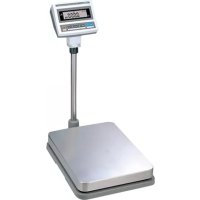
| Product type | Multi-function platform scale |
| Brand | CAS |
| Model | DB-II (ref. 859435) |
| Maximum capacity | 60 kg / 150 kg / 300 kg depending on version |
| Increments (d) | 0.02 kg / 0.05 kg / 0.1 kg depending on version |
| Internal resolution | 1/120,000 to 1/150,000 |
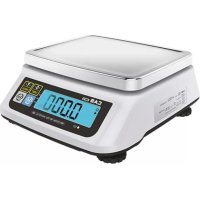
| Display | 6-digit LCD with backlight |
| Platform dimensions | 420 x 510 mm (small model) or 500 x 600 mm (large model) |
| Power supply | DC 9V / 12V / 24V adapter depending on version; built-in rechargeable battery |
| Battery life | Approximately 100 h (alkaline, backlight off) to 45 h (lead) |
| Interface | RS-232C for printer or PC |
| Main functions | Weighing, taring, parts counting, percentage weighing, Hold function, weight accumulation, HI/OK/LO comparison, printing |
| Weighing modes | kg, lb, oz |
| Operating temperature | -10 °C to 40 °C |
| Built-in spirit level | Yes, with adjustable feet |
| Care and cleaning | Wipe with a soft cloth, do not use solvents; avoid moisture |
| Safety | Do not exceed max load, do not immerse, use the supplied adapter |
| Spare parts and repairability | Contact an authorized CAS distributor |
| General information | 67-page user manual available for download |
Frequently Asked Questions - 859435 CAS
User questions about 859435 CAS
0 question about this device. Answer the ones you know or ask your own.
Ask a new question about this device
Download the instructions for your Scale in PDF format for free! Find your manual 859435 - CAS and take your electronic device back in hand. On this page are published all the documents necessary for the use of your device. 859435 by CAS.
USER MANUAL 859435 CAS
(M) Overschakelen van mode: kg => pcs => % => Weeglimiet on/off => Tellimiet On/off => kg
| Model DB-II 60kg DB-II 150kg DB-II 300kg | ||
| Range of Lack 10g ≤ Lack ≤ 5g 20g ≤ Lack ≤ 10g | 50g ≤ Lack ≤ 25g | |
| Range of Low 5 g ≤ Low 10g ≤ Low 25g ≤ Low |
Industrial Weighing Solution
DS-II Series
OWNER'S MANUAL
*859.415
*859.425
*859.435
CONTENTS
PRECAUTIONS 4
6 ECAFERP
NAMES AND FUNCTIONS 6
8 SNOITAREPO
- General Weighing 8
- Weighing with Tare 8
- Counting Mode 9
- Percent Weighing Mode 10
- Hold Function 11
- Cumulative Weight Sum 11
- Weight Comparison Function(HI/OK/LOW) 13
- Print Out 15
- Battery Charge 16
SETUP MODE 17
- How to Go to Setup Mode 17
- Setup Mode Table 17
- How to Enter Date 18
- How to Enter Time 19
- How to Enter Label Caption 20
ERROR MESSAGES 21
SERIAL INTERFACE 21
SNOITACEPS 22
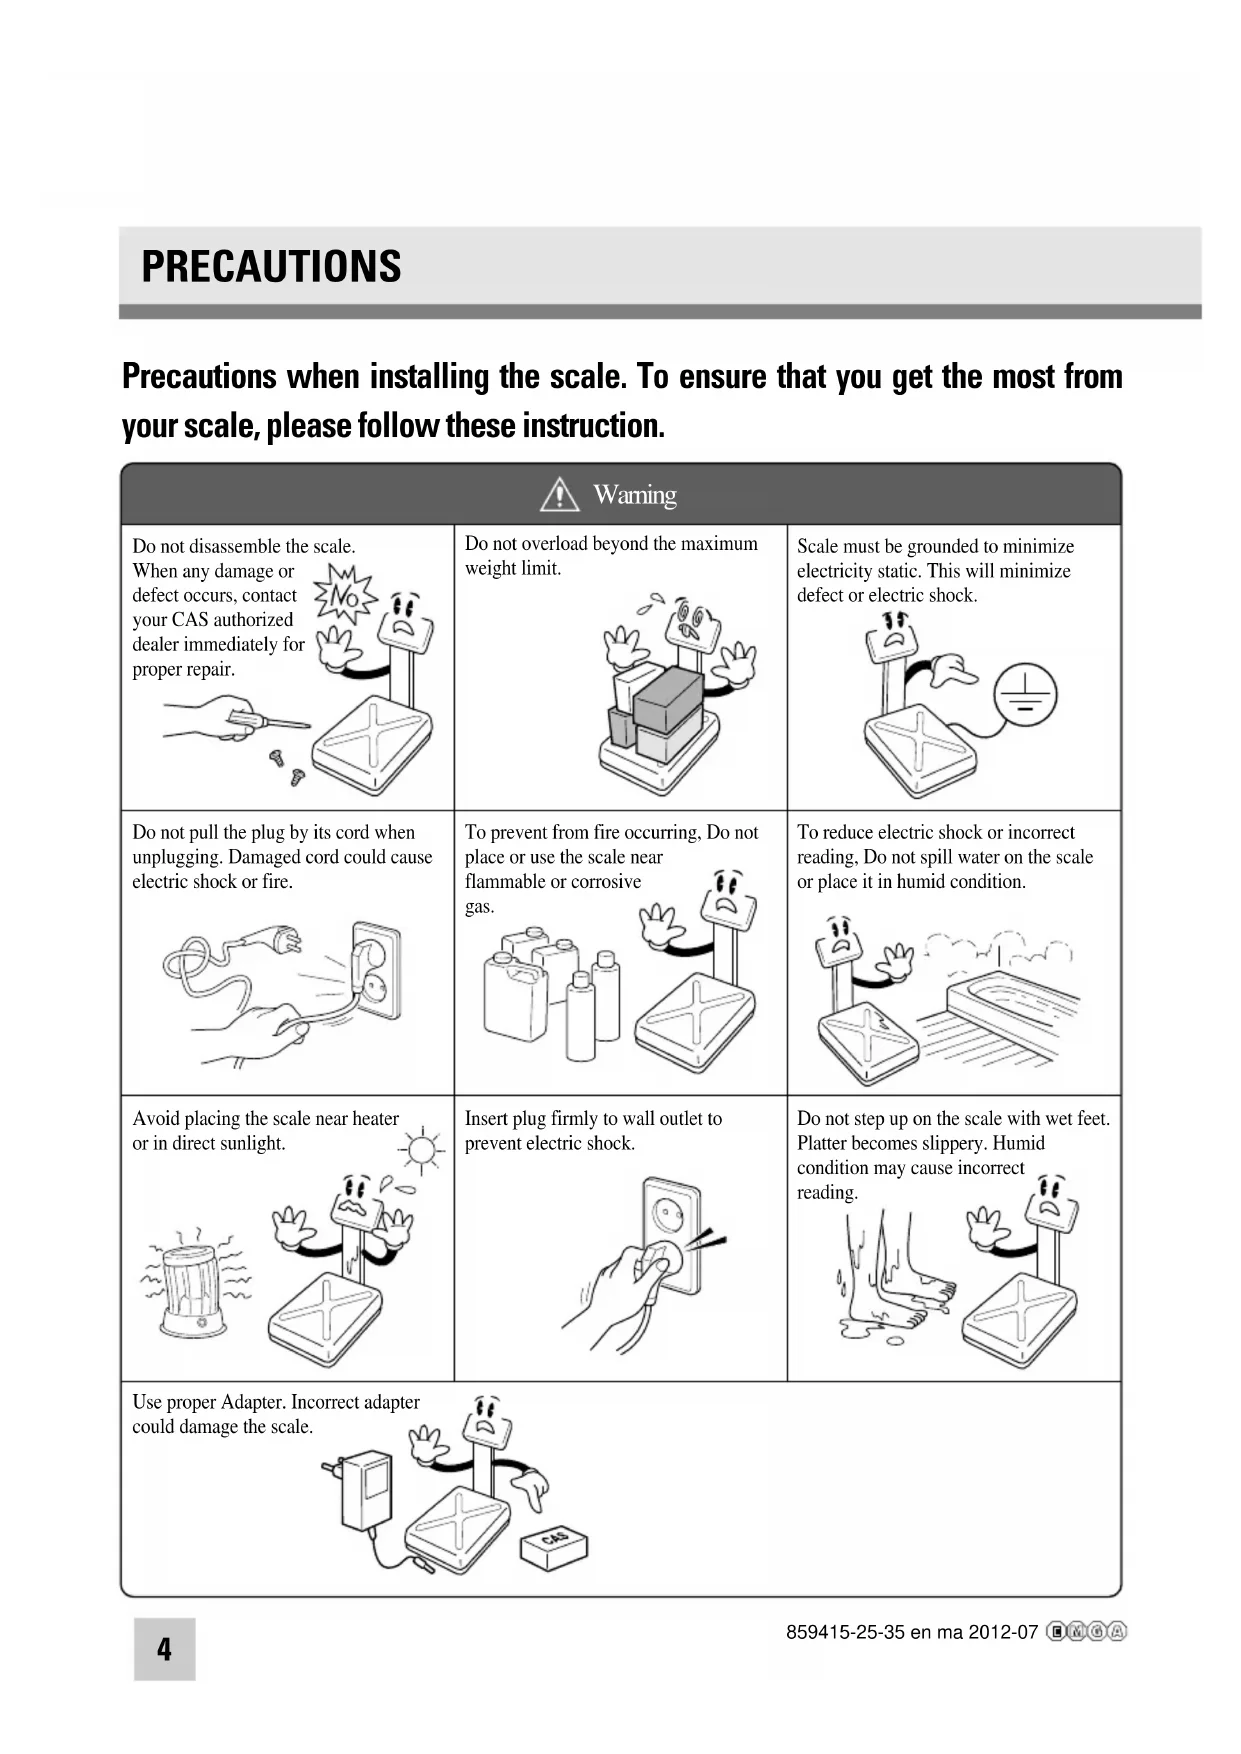
Precautions when installing the scale. To ensure that you get the most from your scale, please follow these instruction.
| Warning | ||
Do not disassemble the scale. Wh def yot dea pro 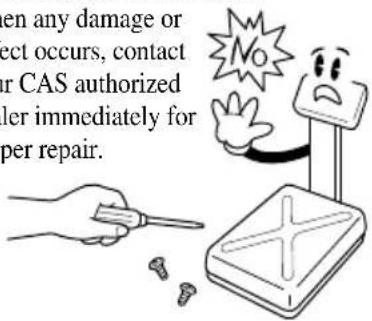 | Do not overload beyond the maximum weight limit. 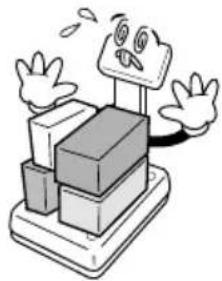 | Scale must be grounded to minimize electricity static. This will minimize defect or electric shock. 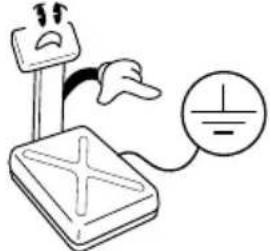 |
Do not pull the plug by its cord when unplugging. Damaged cord could cause electric shock or fire. 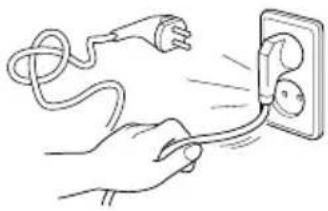 | To prevent from fire occurring, Do not place or use the scale near flammable or corrosive gas.  | To reduce electric shock or incorrect reading, Do not spill water on the scale or place it in humid condition.  |
Avoid placing the scale near heater or in direct sunlight.  | Insert plug firmly to wall outlet to prevent electric shock.  | Do not step up on the scale with wet feet. Platter becomes slippery. Humid condition may cause incorrect read  |
Use proper Adapter. Inc could damage the scale. 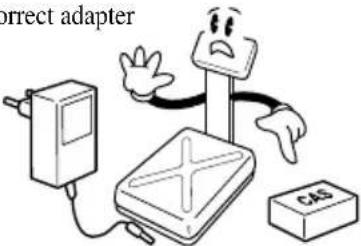 | ||
Make sure to plug your scale into the proper power outlet. For maximum performance, plug into a power outlet 30 minutes before the usage for warm up.
| Attention | ||
For consistent and accurate reading, maintain periodical check by your CAS authorized dealer. | Avoid sudden shock to the scale. Internal mechanism could be damaged. | Grab on the bottom of the scale when moving. Do not hold by the platter. |
Take the battery out when scale is not in use for long time. Leakage from the batteries is hazardous.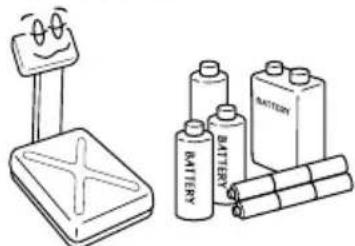 | Place the scale on firm and temperature consistent environment. | By adjusting 4 corners of the scale, set the scale even using the built in scale leveling indicator.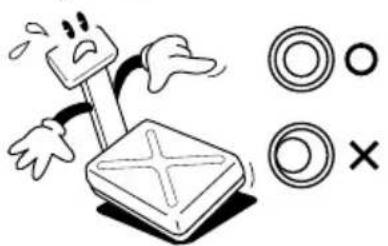 |
Keep the scale away from other electromagnetic generating devices.This may interfere with accurate reading. | ||
PREFACE
Thank you for purchasing our CAS DB-Ⅱ series.
These series have been designed with CAS reliability, under rigid quality control and with outstanding performance. Your specialty departments can enjoy these high quality reliable CAS products.
We believe that your needs will be satisfied and you will have reliability.
This manual will help you with proper operation and care of the DB-Ⅱ series.
Please keep this handy for future reference.
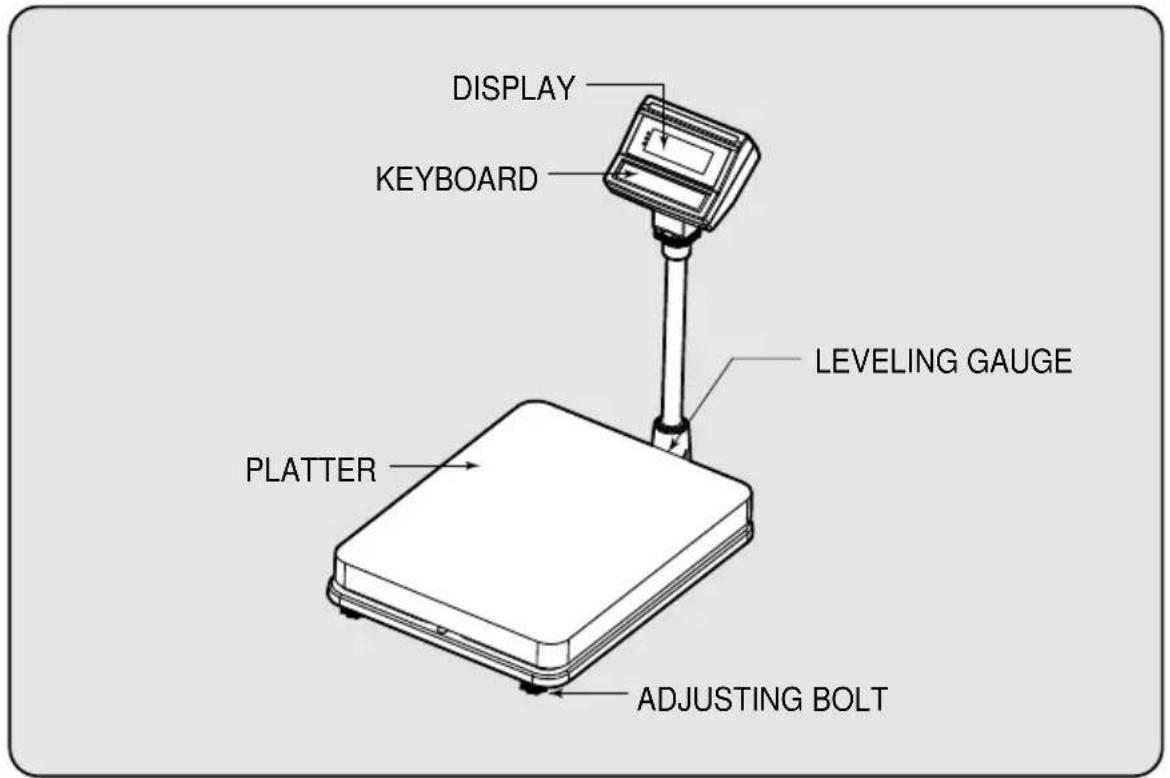
NAMES AND FUNCTIONS
OVERALL VIEW
DISPLAY AND KEYBOARD
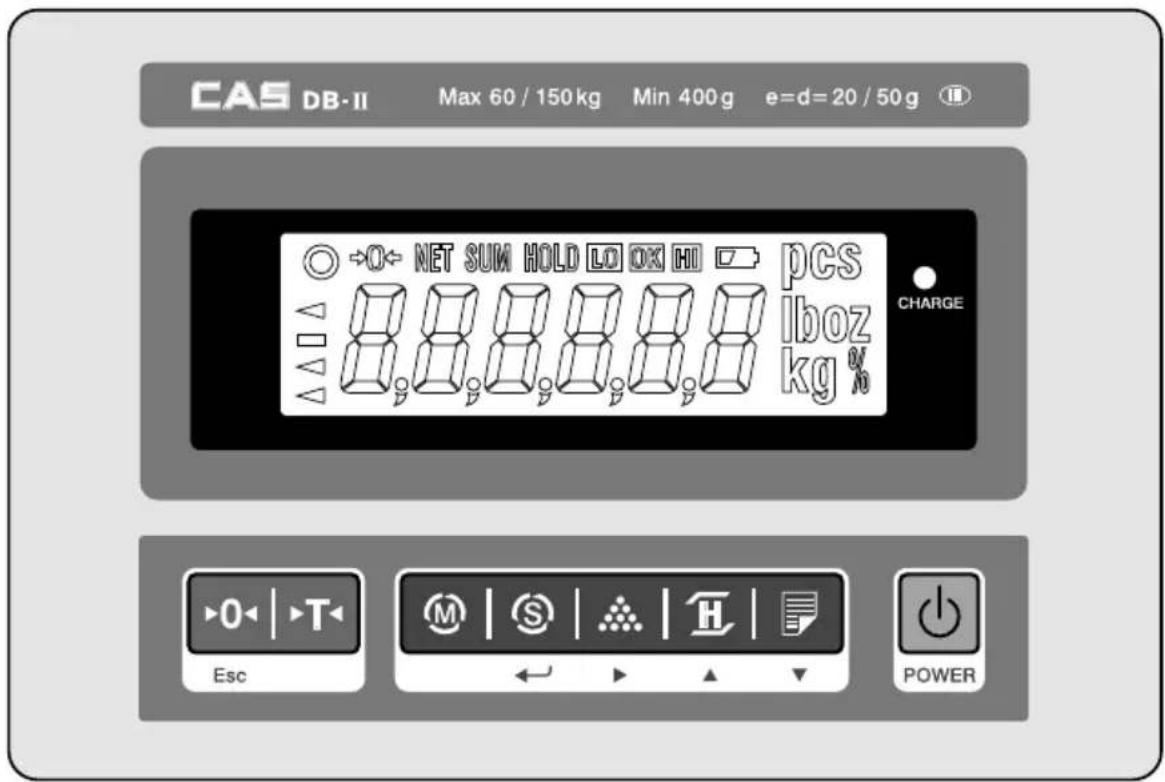
■ KEY FUNCTIONS
| DESCRIPTIONSKEYS | |
 Esc Esc | Used to set the zero point to 0.00.Used as an ESC key in Setup Mode. |
 | Used to enter a tare weight and used to cancel a tare weight. |
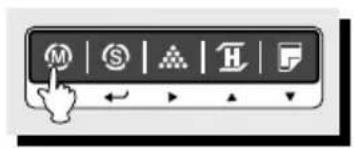
 | Used to convert the mode as below.[kg] → [pcs] [%] [WEIGHT LIMIT ON/OFF] →[COUNT LIMIT ON/OFF] [kg] |
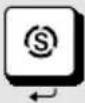 | Used as an ENTER key. |
 | Used to calculate a unit weight of a sample.[▶Used to enter next digit. |
 | Used to display average weight.[▲Used to have number up. |
 | PRINT key.Back light is turned On or Off by pressing PRINT key for 3 seconds.[▼] Used to have number down. |
 | Used to turn ON or OFF the power. |
OPERATIONS
1. General Weighing
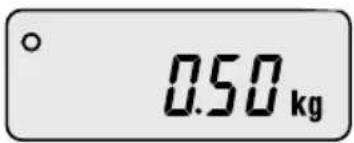
■ The display indicates if the scale is at zero or if there is a tare entered into the scale by way of a ZERO and NET.
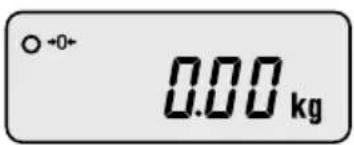
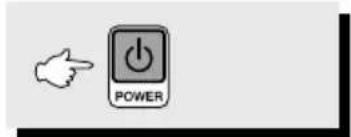
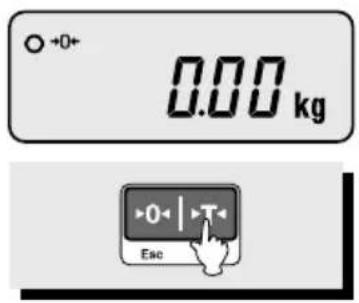
①Turn on the power. The display shows 0.00. Make sure that STABLE and ZERO lamps are on.

natural_image
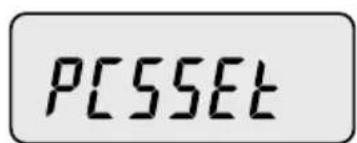
Hand cursor clicking a button with playback controls (no text or symbols visible)② When the display is not zero though there is nothing on the platter, press the ZERO key.
natural_image
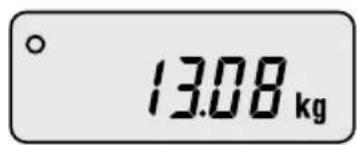
Simple line drawing of a box placed on a flat base (no text or symbols)③Place an item on the platter. When the STABLE lamp is on, read the weight.
2. Weighing with Tare
■ Tare is the weight of container being used for a commodity. The TARE key subtracts the weight of the container.
natural_image
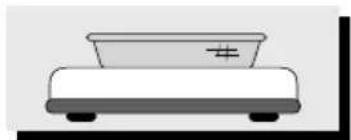
Simple line drawing of a table with a plate and legs (no text or symbols)① Place the container on the platter.

② Press the TARE key, NET lamp is on.

natural_image
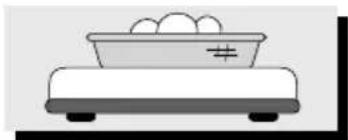
Simple line drawing of a balance scale with eggs on top (no text or symbols)③Place an item in the container.
④To release the TARE function, remove an item and container from the platter and press the TARE key.
3. Counting Mode
■ If you want to count parts, first you have to set sample size.
or


natural_image
Simple black L-shaped line on white background (no text or symbols)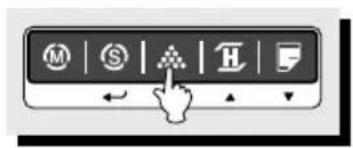
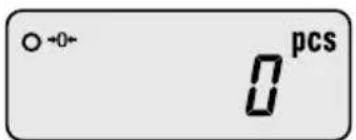
①Press the MODE key until the display shows "PCSSET". Make sure that PCS lamp is on. If you have set sample size before, the display shows "0".
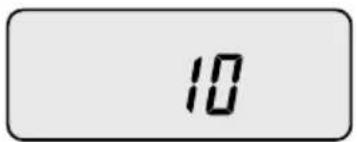
②Press the SAMPLE key, then the display shows "10".
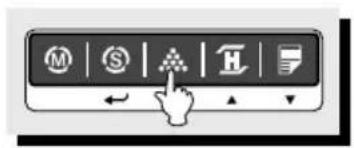
③ If you want to increase sample size, press the SAMPLE key. The display shows 10, 20, 30, 40, 50, 100, 150 and 200 every time pressing the SAMPLE key.
natural_image
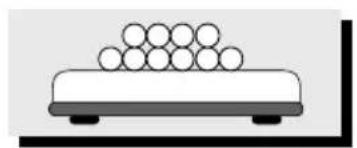
Simple line drawing of a table with stacked circles on top (no text or symbols)④ If you set sample size to 10, place 10 samples on the platter.
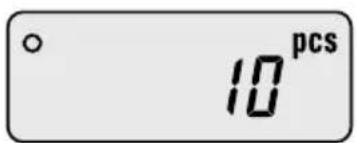
⑤ Press the SET key. The display shows unit weight and then shows the number of samples. If the display shows “LACK”, the counting result may not correct. (LCD version: Lack of Unit lamp is On) If the display shows “LO”, it is impossible to count samples because the unit weight is too small. (Refer to Table 1)
| Model DB-II 60kg | DB-II 150kg DB-II 300kg | — | — |
| Range of Lack 10g Lack | 1g 20gLack 1g 50g Lack | 1g ≤ ≤ | ≤ ≤ |
| Range of Low 1g Low | 1g Low 1g Low | ≤ | ≤ |
| WEIGHT | COUNT | ||
| WELCOME TO CAS[DB-2] CAS2000-00-00 00:00:00 | WELCOME TO CAS[DB-2] CAS2000-00-00 00:00:00 | ||
| Weight : | 0.000 kg | Weight : | 40.200 kg |
| U/Weight : | 0.80400 kg | ||
| - WEIGHT LIMIT SET VALUE -Limit(H): | 40.000 kg | Quantity : | 50 pcs |
| Limit(L): | 30.000 kg | - COUNT LIMIT SET VALUE - | |
| WELCOME TO CAS[DB-2] CAS2000-00-00 00:00:00 | →Label CaptionDate/Time | |
| Weight : | 40.180 kg | |
| Weight : | 40.200 kg | |
| Weight : | 40.200 kg | |
| Weight : | 40.200 kg | |
| Weight : | 40.200 kg | |
| Weight : | 40.200 kg | |
| Weight : | -40.200 kg | →- means that you cancel the weight right before this weight. |
| Weight : | 40.200 kg | |
| Weight : | 40.200 kg | |
| Weight : | 40.200 kg | |
| Total : | 401.980 kg | →Cumulative weight sum |
| Count : | 10 times | →Aggregate times |
8-2. Auto print
①To use auto print function, you have to set printer menu to "Pr AUt" in setup mode. Refer to Setup Mode Table on page 17. ②If the weight is stable, it is printed out automatically.9. Battery Charge
■ Warning massage is shown when the battery voltage is very low. (☐) ■ At this time, charge the battery. (a charging battery only) ■ The display will show a red lamp and the battery will begin a fast charge automatically. ■ After an electric charging is completed, the red lamp turns into a green color. When the displayed lamp is not red, confirm the AC adapter is correctly connected. Install the batteries in the battery holder orienting the plus(+) and minus(-) ends as indicated on the holder. ▶ Use only the AC adapter which comes with the scale. Other AC adapter may cause damage.SETUP MODE
1. How to Go to Setup Mode
Make sure that power is OFF. While pressing the PRINT key, press the POWER key. The display shows “U SET”. You can select each menu by pressing the MODE key and change the setting by pressing the HOLD or PRINT key. If you press SET key, you will save current setting and finish this mode. To finish this mode without saving, press the ZERO key.2. Setup Mode Table
※ Italic Bold: Default Setting| MENU | DISPLAY | DESCRIPTIONS |
| Buzzer | “b on” You | can hear buzzer. |
| “b oFF” You | cannot hear buzzer. | |
| Printer | “Pr oFF” Do not use printer. | |
| “Pr kEy” Manual print. | ||
| “Pr AUt” Auto print when the scale is stable. | ||
| “Pr CMd” For future. | ||
| Backlight | “bL oFF” Do not use back-light. | |
| “bL on” Use | back-light. | |
| “br 5” Back-light is on 5 seconds. | ||
| “bL 10” Back-light is on 10 seconds. | ||
| Auto Power Off | “AP oFF” Do not use Auto Power Off function. | |
| “AP 10” | Power turns to be off automatically when the scale is not in operation over for 10 minutes. | |
| “AP 30” | Power turns to be off automatically when the scale is not in operation over for 30 minutes. | |
| “AP 60” | Power turns to be off automatically when the scale is not in operation over for 60 minutes. | |
| Baud Rate | “br 48” 4,800 bps | |
| “br 96” 9,600 bps | ||
| “br 192” 19,200 bps | ||
| “br 384” 38,400 bps | ||
| Weight Limit | “ WL M0 ” HIGH Limit Weight LOW Limit- You will hear buzzer. | |
| “ WL M1 ” | HIGH Limit ≤ Weight, Weight LOW Limit- You will hear buzzer. | |
| “ WL M2 ” Weight ≤ LOW Limit - You will hear buzzer. | ||
| “ WL M3 ” HIGH Limit ≤ Weight - You will hear buzzer. | ||
| Count Limit | “ CL M0 ” | HIGH Limit ≥ Counting result LOW Limit- You will hear buzzer. |
| “ CL M1 ” | HIGH Limit Counting result,Counting result LOW Limit - You will hear buzzer. | |
| “ CL M2 ” Counting result ≤ LOW Limit - You will hear buzzer. | ||
| “ CL M3 ” HIGH Limit ≤ Counting result - You will hear buzzer. | ||
| Date | “ dy on ” Print out date/day. | |
| “ dy off ” Do not print out date / day. | ||
| Time | “ ti on ” Print out time. | |
| “ ti off ” Do not print out time. | ||
| Label | “ LA off ” Do not print out label caption. | |
| “ LA on ” Print out label caption. | ||
| Default | “ dF no ” Default setting is released. | |
| “ dF YES ” Everything is setup in default. | ||
3. How to Enter Date
   ① Press the MODE key until the display shows "dy ON". It means that date is printed out. ② If you do not want to print out date, press the HOLD() key.   ③ Press the SAMPLE() key, the display shows "00,00,00".   ④ Press the HOLD() ▲ PRINT()▼key to have number up or down. To enter next digit, press the SAMPLE()▼key.   ⑤Press the SET key to save. "dysave" is shown on the display and then the display shows a day of the week.   ⑥ You can change the day by pressing the HOLD() or PRINT() key. If you set up a day of the week wrong, "Wk err" is shown on the display.   ⑦Press the SET key to save. "Wksave" is shown on the display. ⑧ If you do not want to save, press the ZERO key.4. How to Enter Time
  ①Press the MODE key until the display shows "ti ON". It means that time is printed out.   ②If you do not want to print out time, press the HOLD() key.  natural_image
Blank white rectangle with a black corner border (no text or symbols)5. How to Enter Label Caption
     natural_image
Blank white rectangle with black border (no text or symbols)| ERROR | REASONS | SOLUTIONS |
| Err 1 | An error of the initial ZERO range | 1. Make sure the platter is empty.2. Make sure there is a platter on the scale. |
| Err 10 | Failure of analog module | Call your CAS dealer |
| Err 11 | An error of EEPROM | Call your CAS dealer |
| Err 12 | Condition codes are broken | Call your CAS dealer |
SPECIFICATIONS
LCD Version| MODEL | DBIC-60 DBII -150 DBII 300 | = | |
| CAPACITY | 30kg/0.01kg60kg/0.02kg 150kg | 60kg/0.02kg0.05kg 300 kg / 0.1kg | 150kg/0.05kg |
| INTERNAL RESOLUTION | 1/120,000 1 / 150 | 000 1 / 150,000 | |
| EXTERNAL RESOLUTION | 1/3,000 1/3,000 | 1/3,000 | |
| DISPLAY | LCD 6 DIGIT | ||
| DISPLAY LAMP | STABLE, ZERO, HOLD, NET, HI/OK/LO,%, PCS, SUM, kg, Low Battery | ||
| INTERFACE | RS-232C(Printer) | ||
| POWER SOURCE | DC 9V AdaptorAlkaline Battery : Approx. 100hours(Backlight is off)DC 12V 850mA Adaptor(Ni-cd)Approx. 50hours(Backlight is off)DC 24V 1A Adaptor(Pb)Approx. 45hours(Backlight is off) | ||
| TEMPERATURE RANGE | -10°C 40°C | ||
| PLATTER SIZE (mm) | 420(W) 510(D) 110(H) | 500(W) 600(D) 120(H) | |
| PRODUCT SIZE (mm) | 420(W) 635(D) 765(H) | 500(W) 725(D) 765(H) | |
Modèle DS-II
MANUEL D'UTILISATION \*859.415 \*859.425 \*859.435 TABLE DES MATIERES
PRECAUTIONS......4 AVANT-PROPOS....6 DESIGNATIONS ET FONCTIONS....6 OPERATIONS......8 1. Pesage simple 8 2. Pesage avec tare 8 3. Mode comptage 9 4. Mode calcul de pourcentage 10 5. Fonction verrouillage 11 6. Ajouter des poids cumulés 11 7. Fonction comparaison de poids (HI/OK/LOW) 13 8. Impression 16 9. Fonction réglage de l'unité 17 10. Charger la batterie 17 MODE REGLAGE (SETUP)....18 1. Passer en mode réglage 18 2. Tableau du mode réglage 18 3. Entrer la date 19 4. Entrer l'heure 20 5. Entrer un sous-titre sur l'étiquette 21 MESSAGES D'ERREUR....22 INTERFACE SERIE....22 CARACTERISTIQUES TECHNIQUES......23PRECAUTIONS
Précautions à prendre lors de l'installation de la balance. Afin de tirer le meilleur profit de votre balance, veuillez suivre les instructions ci-après.| Attention | ||
Ne pas démonter la balance. En cas de dommage ou de défaut, contactez vite votre distributeur CAS agréé en vue d'une réparation appropriée.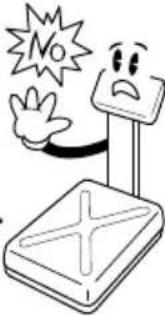 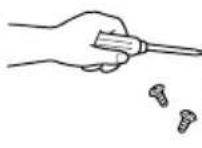 | Ne pas dépasser la charge maximale autorisée.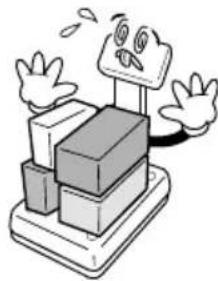 | La balance doit être mise à la terre pour réduire au maximum l'électricité statique, et afin de minimiser les défauts et les risques 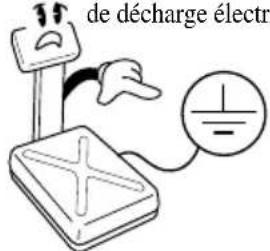 |
Ne tirez pas la prise par le cordon lorsque vous la débranchez : risque de décharge électrique ou d'incendie.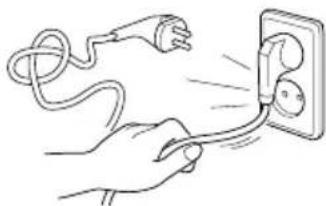 | Afin d'éviter tout risque d'incendie, évitez de placer ou d'utiliser la balance près de gaz inflammables ou c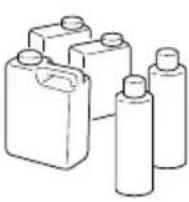 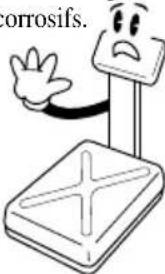 | Afin d'éviter les décharges et de fausser les relevés, évitez de renverser de l'eau sur la balance et les environnements humides.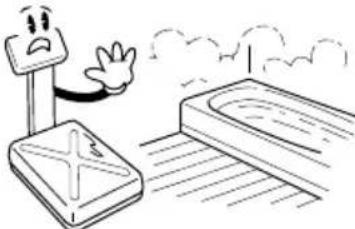 |
Evitez de placer la balance près d'un radiateur et de l'exposer au soleil.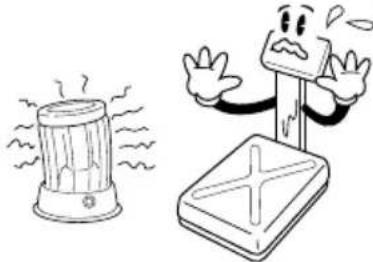 | Branchez fermement la prise afin d'éviter les risques de décharge électrique.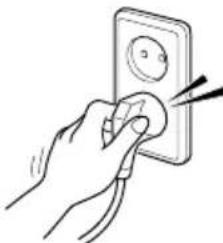 | Ne marchez pas sur la balance les pieds mouillés pour éviter de glisser. Un environnement humide risquerait de fausser les relevés.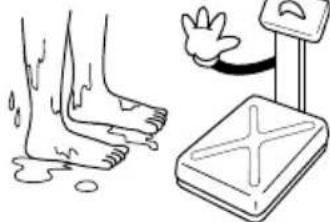 |
Attention : un adaptateur pourrait endommager la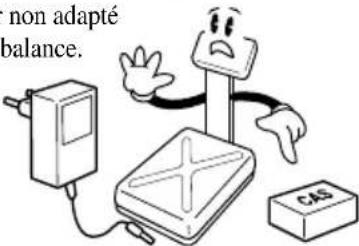 | ||
Assurez-vous de raccorder votre balance à une prise adaptée. Pour des résultats optimaux, branchez-la 30 minutes avant de l'utiliser.
| ⚠ Attention | ||
Pour des relevés fidèles et précis, faites effectuer des contrôles périodiques à votre distri 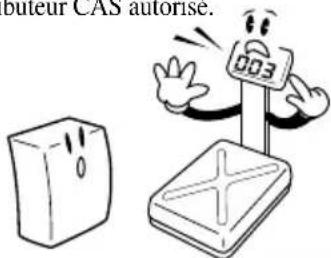 | Evitez tout choc brusque. Cela risquerait d'endommager le mécanisme interne.  | Tenez la balance par le fond lorsque vous la déplacez. Ne la tenez pas par le plateau.  |
Retirez la batterie en cas de non-utilisation prolongée. Toute fuite des batteries est potentiellement dangereuse. 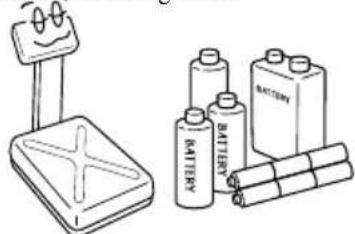 | Placez la balance sur une surface stable où la température est constante.  | En ajustant les 4 coins de la balance, assurez-vous qu'elle est bien à plat à l'aide du niveau incorporé. 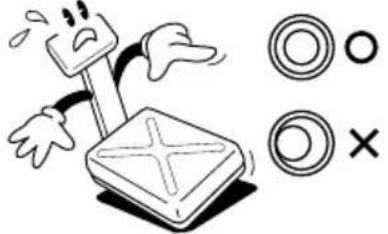 |
Eloignez la balance d'autres appareils électromagnétique d'altérer la précisi  | ||
AVANT-PROPOS
Merci d'avoir acheté notre modèle CAS DB-II. Ces produits CAS sont fiables. Ils ont été conçus sous les contrôles qualité les plus stricts et offrent des performances exceptionnelles. Vos services spécialisés profiteront du haut niveau de fiabilité de ces produits CAS. Nous sommes certains que ce produit répondra à vos besoins et vous offrira la fiabilité souhaitée. Ce manuel vous aidera à utiliser et entretenir correctement le modèle DB-II. Conservez-le soigneusement afin de pouvoir vous y reporter ultérieurement.DESIGNATIONS ET FONCTIONS
APERCU GENERAL  AFFICHAGE ET CLAVIER  ■ FONCTIONS PRINCIPALES| TOUCHES | DESCRIPTIONS | |
 | Définir le point zéro sur 0.00.Sert de touche ESC en mode réglage. | |
| Esc | ||
 | Entrer ou annuler le poids de la tare. | |
 | Changer de mode.[kg] [pcs] [%][LIMITE*DE POIDS ON/OFF] [LIMITE DE COMPTAGE ON/OFF] → [CHANGEMENT D'UNITE] [kg] | |
 | Sert de touche ENTREE. | |
 | Calculer le poids unitaire d'un échantillon.[▶]Entrer le chiffre suivant. | |
 | Afficher le poids moyen.[▲]Augmenter un chiffre. | |
| TOUCHES | DESCRIPTIONS |
 | Touche IMPRIMER. Maintenir cette touche enfoncée pendant 3 secondes pour activer/désactiver le rétroéclairage.[ ]Descendre d'un chiffre. |
 | Allumer/éteindre la balance. |
OPERATIONS
1.Pesage simple
■ L'affichage indique si la balance est sur zéro ou si une tare est entrée par ZERO et NET.   ① Mettre sous tension. L'affichage indique 0.00. Assurez-vous que les DEL STABLE et ZERO sont allumées.   ② Si l'affichage n'indique pas zéro bien qu'il n'y ait rien sur le plateau, appuyer sur la touche ZERO.  natural_image
Simple line drawing of a rectangular box placed on a flat base (no text or symbols)2.Pesage avec tare
■ La tare est le poids d'un récipient utilisé pour un objet. La touche TARE soustrait le poids du récipient.  natural_image
Simple line drawing of a table with a cup and wheels (no text or symbols)natural_image
Simple line drawing of a balance scale with eggs on top (no text or symbols)3.Mode comptage
■ Pour connaître le nombre d'éléments, définir tout d'abord la valeur de l'échantillon.       ① Appuyer sur MODE jusqu'à ce que l'affichage indique PCSSET. S'assurer que la DEL PCS est allumée. Si vous avez défini au préalable la valeur de l'échantillon, l'affichage indique "0". ② Appuyer sur la touche SAMPLE. L'affichage indique "10".   ③ Pour augmenter la valeur d'un échantillon, appuyer sur SAMPLE. L'affichage indique 10, 20, 30, 40, 50, 100, 150 et 200 lorsque vous appuyez sur la touche SAMPLE.  natural_image
Simple line drawing of a table with a stack of round objects on top (no text or symbols)| Modèle DB-II 60kg DB-II 150kg DB-II 300kg | |||
| Plage de manque | 10 g ≤Manque ≤1g | 20 g ≤Manque ≤1 g | 50 g ≤ Manque ≤ 1g |
| Plage de niveau bas | 1g ≤ Bas | 1g ≤ Bas | 1g ≤ Bas |
natural_image
Simple line drawing of a rectangular object with a cross mark on top, placed on a flat base (no text or symbols)4. Mode calcul de pourcentage
■ Le poids s'affiche sous forme de pourcentage de l'échantillon de référence.  or    natural_image
Simple geometric shape: a black right-angle corner on a light gray background (no text or symbols)5.Fonction verrouillage (HOLD)
① Placer un article sur le plateau et appuyer sur la touche HOLD.   ①"HOLD" s'affiche. Le poids moyen s'affiche. ■ Pour débloquer la fonction HOLD, appuyer sur la touche HOLD ou retirer l'article du plateau. ※ Si la balance estime que le poids de l'échantillon varie au-dessus de 1/4 du poids, le verrouillage sera automatiquement déclenché.6.Ajouter des poids cumulés
Cette fonction indique les temps et les poids cumulés en ajoutant la valeur de plusieurs pesées consécutives. Les informations sont stockées y compris lorsque l'appareil est éteint. Cette fonction est disponible uniquement en mode pesage.   natural_image
Simple line drawing of a rectangular object with a cross symbol on top, placed on a base (no text or symbols)natural_image
Blank white rectangle with black border (no text or symbols)natural_image
Blank white rectangle with a black corner border (no text or symbols)7. Fonction comparaison de poids (HI/OK/LOW)
7-1. Comparer des poids
      ① Appuyer sur MODE jusqu'à ce que "WL OFF" s'affiche. ② Appuyer sur HOLD pour activer cette fonction; Cela signifie que la fonction de l'affichage indique "WL ON". limitation de poids est désactivée. ③ Appuyer sur SET pour régler la valeur minimale ; l'affichage indique "L000.00".       ④ Appuyer sur HOLD(▲ou PRINT(▼) pour augmenter ou baisser le chiffre. Pour entrer le chiffre suivant, appuyer sur SAMPLE ( ▶). ⑤ Appuyer sur SET pour définir la valeur max. ; l'affichage indique "H000.00". ⑥ Appuyer sur HOLD ( ▲) ou PRINT(▼) pour augmenter ou baisser le chiffre. Pour entrer le chiffre suivant, appuyer sur SAMPLE ( ▶).  ⑦ Appuyer sur SET ; l'affichage indique "WL ON". ⑧ Si la limite MIN/MAX est mal réglée, "WL ERR" s'affiche et il faut alors la régler à nouveau. Par exemple : MIN=100,00kg MAX=90,00kg — La limite max. est inférieure à la limite min. ⑨ Appuyer sur MODE pour passer en mode pesage. ⑩ Supposons que la limite max. soit définie à 70kg et la limite min. à 30kg. Dans ce cas, OK s'allume si le est de 40kg ; c'est la lampe HI qui s'allume si le poids est de 80kg et pour un poids de 20kg, c'est la lan LO qui s'allume. Un bip sonore retentit comme défini en mode réglage utilisateur. (Cf. le tableau du mode réglage à la page 18)     7-2. Fonction comparaison de comptage
      ① Appuyer sur MODE jusqu'à ce que "CL OFF" s'affiche. Cela signifie que la fonction comparaison de comptage est désactivée. ② Appuyer sur HOLD ( ▲) pour activer cette fonction ; l'affichage indique "CL ON". ③Appuyer sur SET ; l'affichage indique "L00000".       ④ Appuyer sur HOLD (▲) ou PRINT(▼) pour augmenter ou baisser le chiffre. Pour entrer le chiffre suivant, appuyer sur SAMPLE (▶). ⑤ Appuyer sur SET ; l'affichage indique "H00000". ⑥ Appuyer sur HOLD ( ▲) ou PRINT ( ▼ pour augmenter ou baisser le chiffre. Pour entrer le chiffre suivant, appuyer sur SAMPLE ( ▶).  ⑦ Appuyer sur SET ; l'affichage indique "CL ON". ⑧ Si la limite MIN/MAX est mal réglée, "CL ERR" s'affiche. Elle devra être réglée à nouveau. Par exemple : MIN=00100, MAX=00090 ou MIN=00100, MAX=00100 ⑨ Appuyer sur MODE pour passer en mode pesage. ⑩ Supposons que la limite max. soit définie à 200 et la limite min. à 80. Dans ce cas, OK s'allume si le poids est de 120, la lampe Hl s'allume lorsque le poids est de 220 et si le poids est de 60, la lampe LO s'allume. Un bip sonore retentit comme défini en mode réglage utilisateur. (Cf. le tableau du mode réglage à la page 18)     8.Impression
8-1. Impression manuelle
■ Pour imprimer des données, appuyer sur la touche PRINT. La fonction d'impression pe réglée en fonction de vos besoins spécifiques. Cf. le tableau du mode réglage à la page Format d'échantillon :| - Fonction pesage - | - Fonction comptage- | ||
| ======== POIDS ======== | ======== COMPTAGE ======== | ||
| BIENVENUE A CAS[DB-2] CAS2000-00-00 00:00:00 | BIENVENUE A CAS[DB-2] CAS2000-00-00 00:00:00 | ||
| Poids : | 0.000 kg | Poids : | 40.200 kg |
| Poids unit . : | 0.80400 kg | ||
| - VALEUR LIMITE DE POIDS - | Quantité : | 50 pcs | |
| Limite (M) : | 40.000 kg | - VALEUR LIMITE DE COMPTAGE - | |
| Limite (m) : | 30.000 kg | Limite (M) : | 2000 pcs |
| Limite (m) : | 1000 pcs | ||
| BIENVENUE A CAS[DB-2] CAS 2000-00-00 00:00:00 | →EtiquetteDate/Heure | |
| Poids : | 40.180 kg | |
| Poids : | 40.200 kg | |
| Poids : | 40.200 kg | |
| Poids : | 40.200 kg | |
| Poids : | 40.200 kg | |
| Poids : | 40.200 kg | |
| Poids : | -40.200 kg | →-signifie que vous annulez le poids juste avant celui-ci |
| Poids : | 40.200 kg | |
| Poids : | 40.200 kg | |
| Poids : | 40.200 kg | |
| Total : | 401.980 kg | →Somme de poids cumulés |
| Comptage : 10 fois | →Temps combinés | |
8-2. Impression automatique
9.Fonction réglage de l'unité
     natural_image
Simple black L-shaped line on white background (no text or symbols)10. Charger la batterie
■ Un message d'alerte s'affiche lorsque la tension de la batterie est très faible (☐). ■ Il convient alors de recharger la batterie (batterie rechargeable uniquement). ■ Une lumière rouge apparaît sur l'affichage et la batterie entame automatiquement un processus de charge rapide. ■ Une fois le processus de charge terminé, la lampe rouge devient verte. ▶ Si la lampe n'est pas rouge, s'assurer que l'adaptateur secteur est correctement branché. Placer les batteries dans le support prévu à cet effet en respectant les polarités(+) et (-) comme indiqué au niveau du support. ▶ Utiliser exclusivement l'adaptateur secteur fourni avec la balance. Tout autre adaptateur risquerait d'endommager le système.MODE REGLAGE (SETUP)
1. Comment passer en mode réglage
S'assurer que l'appareil est hors tension. Tout en appuyant sur la touche PRINT, presser la touche POWER. L'affichage indique "U SEt". Vous pouvez sélectionner chaque menu en appuyant sur MODE et changer le réglage en appuyant sur HOLD ou PRINT. Appuyer su SET pour sauvegarder le réglage en cours et quitter ce mode. Pour quitter ce mode sans sauvegarder, appuyer sur la touche ZERO.2.Tableau du mode réglage
※Gras italique: Réglage par défaut| MENU AFFICHAGE DESCRIPTIONS | ||
| Sonnerie | “b on” Vous entendez le signal sonore. | |
| “b oFF” | Aucun signal sonore. | |
| Imprimante | “Pr oFF” | Ne pas utiliser l'imprimante. |
| “Pr kEy” | Impression manuelle. | |
| “Pr AUt” | Impression automatique lorsque la balance est stable. | |
| “Pr CMd” | Pour plus tard. | |
| Rétro-éclairage | “bL oFF” | Ne pas utiliser le rétroéclairage. |
| “bL on” Utiliser le rétroéclairage. | ||
| “br 5” Lérétroéclairage s'allume 5 secondes. | ||
| “bL 10” Lérétroéclairage s'allume 10 secondes. | ||
| Mise hors tension automatique | “AP oFF” | Ne pas utiliser la fonction éteindre automatiquement. |
| “AP 10” | L'appareil s'éteint automatiquement lorsque la balance ne fonctionne pas pendant plus de 10 minutes. | |
| “AP 30” | L'appareil s'éteint automatiquement lorsque la balance ne fonctionne pas pendant plus de 30 minutes. | |
| “AP 60” | L'appareil s'éteint automatiquement lorsque la balance ne fonctionne pas pendant plus de 60 minutes. | |
| Taux de transmission | “br 48” 4,800 bps | |
| “br 96” 9,600 bps | ||
| “br 192” 19,200 bps | ||
| “br 384” 38,400 bps | ||
| Limite de poids | “ WL M0 ” Limite MAX Poids Limite MIN - Signal sonore. | |
| “ WL M1 ” | Limite MAX ≤ Poids ≤ Limite MIN- Signal sonore. | |
| “ WL M2 ” Poids Limite MIN - Signal sonore. | ||
| “ WL M3 ” Limite MAX Poids - Signal sonore. | ||
| Limite de comptage | “ CL M0 ” | Limite MAX ≥ Résultat du comptage ≥ Limite MIN- Signal sonore. |
| “ CL M1 ” | Limite MAX ≤ Résultat du comptage,Résultat du comptage ≤ Limite MIN - Signal sonore. | |
| “ CL M2 ” | Résultat du comptage Limite MIN - Signal sonore. | |
| “ CL M3 ” Limite MAX Résultat du comptage - Signal sonore. | ||
| Date | “ dy on ” Imprimer la date/le jour. | |
| “ dy oFF ” | Ne pas imprimer la date/le jour. | |
| Heure | “ ti on ” | Imprimer l'heure. |
| “ ti oFF ” Ne pas imprimer l'heure. | ||
| Etiquette | “ LA off ” | Ne pas imprimer l'étiquette. |
| “ LA on ” | Imprimer l'étiquette. | |
| Défaut | “ dF no ” | Le réglage par défaut est déclenché. |
| “ dF YES ” Tout est réglé par défaut. | ||
3. Entrer la date
   ① Appuyer sur MODE jusqu'à ce que "dy ON" s'affiche. Cela signifie que la date s'imprime. ②Pour ne pas imprimer la date, appuyer sur HOLD ( ▲).       ③ Appuyer sur SAMPLE (▶), l'affichage indique "00,00,00". ④ Appuyer sur HOLD ( ▲) ou PRINT( ) pour augmenter ou baisser le chiffre. Pour entrer le chiffre suivant, appuyer sur SAMPLE ( ▶). ⑤ Appuyer sur SET pour sauvegardel "dysave" s'affiche. L'affichage indique ensuite un jour de la semaine.     ⑥ Pour changer le jour, appuyer appuyer sur HOLD ( ▲) ou PRINT( ) Si un jour de la semaine est mal réglé, l'affichage indique "Wk err". ⑦ Appuyer sur SET pour sauvegarder. L'affichage indique "Wksave". ⑧Pour ne pas sauvegarder, appuyer sur la touche ZERO.4. Entrer l'heure
     natural_image
Pure geometric shape with black and white edges (no text or symbols)5. Entrer un sous-titre sur l'étiquette
     natural_image
Simple black L-shaped line on white background (no text or symbols)| ERREUR | MOTIF | SOLUTIONS |
| Err 1 | Erreur de plage de ZERO initiale | 1. S'assurer que le plateau est vide.2. S'assurer qu'il y a un plateau sur la balance. |
| Err 10 | Défaut du module analogique | Contactez votre distributeur CAS |
| Err 11 | Erreur de EEPROM | Contactez votre distributeur CAS |
| Err 12 | Codes de condition cassés | Contactez votre distributeur CAS |
CARACTERISTIQUES TECHNIQUES
Version LCD| MODELE | DBII-150 | DBII-300 | DBII-600 |
| CAPACITE | 30kg/0.01kg60kg/0.02kg 150kg | 60kg/0.02kg/0.05kg 300kg/0.1kg | 150kg/0.05kg |
| 60lb/0.02lb 150lb150lb/0.005lb 300lb | 0.05lb 300lb/0.1lb0.1lb 600lb/0.2lb | ||
| RESOLUTION INTERNE | 1/120,000 1/150 | 000 1/150,000 | |
| RESOLUTION EXTERNE | 1/3,000 1/3,000 | 1/3,000 | |
| AFFICHAGE | LCD 6 CHIFFRES | ||
| VOYANT | STABLE, ZERO, HOLD, NET, HI/OK/LO,%, PCS, SUM, kg, lb, oz, Batterie faible | ||
| INTERFACE | RS-232C (Imprimante) | ||
| SOURCE D'ALIMENTATION | Adaptateur CC 9VBatterie alcaline: env. 100h (rétroéclairage éteint)Adaptateur CC 12V 850mA (Ni-cd)Env. 50h (rétroéclairage éteint)Adaptateur CC 24V 1A (Pb)Env. 45h (rétroéclairage éteint) | ||
| PLAGE DE TEMPERATURE | -10°C 40°C | ||
| TAILLE DU PLATEAU (mm) | 420(I) 510(p) | 110(h) | 500(I) ×600(p) ×120(h) |
| TAILLE DU PRODUIT (mm) | 420(I) 635(p) | 765(h) | 500(I) ×725(p)×765(h) |
OWNER'S MANUAL
DB-II SERIE
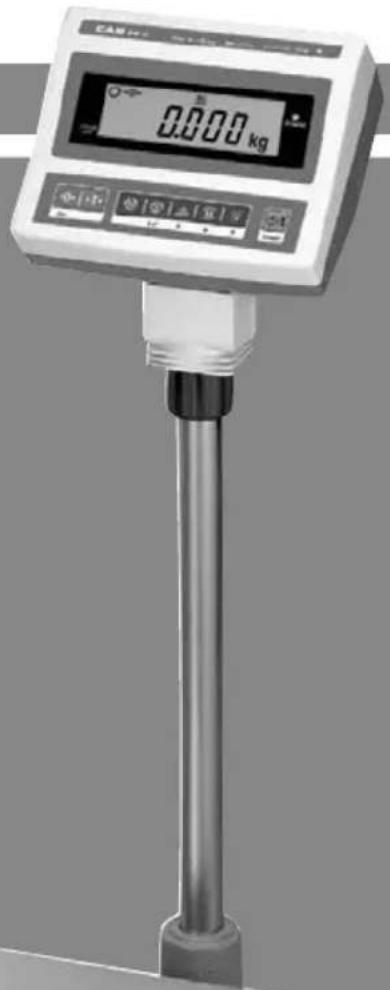
Multifunktions-Plattformwaage natural_image
Line drawing of a portable electronic device with control panel and buttons (no text or symbols)Funktionen 2
1. Aufbau der Waage 2 2. Laden des Akkus.... 3 3. Belegung der Tasten.... 3 4. Einschalten der Waage 3 5. Austarieren der Verkaufsverpackung 4 6. Manuelle Nullführung der Waage....4 7. Wiegen von ändernden Gewichten („Tierwägung“) ..... 4 8. Zählmodus....5 9. Prozentuales Wiegen 5 10. Gewichte aufaddieren 6 11. Gewichtsvergleich 6 11-1. Wie man Gewichte vergleicht....6 11-2. Zählvergleich....7 12. Drucken 8 12-1. Manueller Druck....8 12-2. Automatischer Druck....9 1. Einstellungsmenü aufrufen....10 2. Menü....10 3. Datum eingeben....11 4. Uhrzeit eingeben 12 5. Belegüberschrift eingeben....12Benutzereinstellungen....10
Fehlermeldungen....13
Funktionen
Diese Anleitung soll Ihnen einen schnellen Einstieg in die Funktionen der CAS-DB-2 vermitteln. Außerdem kann sie als schnelle Referenz im täglichen Umgang mit der Waage dienen.1. Aufbau der Waage
 - Öffnen Sie vorsichtig die Verpackung der Waage, da die Anzeige mit der Waage durch ein Wägezellenkabel miteinander verbunden sind. • Drehen Sie am Gewinde (Post knob) direkt unter dem Indikator um ihn festzuschrauben. - Ziehen Sie vorsichtig das Kabel aus dem Stativ und stecken Sie das Stativ sicher in die Stativhalterung (siehe Fig. 1). - Befestigen Sie das Stativ mit zwei Schrauben. In das obere Loch sollte eine längere Schraube eingesetzt werden (siehe Fig. 1). • Schieben Sie nun das Kabel zurück in das Stativ (siehe Fig. 2, 3). - Sollte die Waage nicht eben stehen, befestigen Sie bitte die 4 Füsse an der Unterseite der Waage und richten Sie die Waage mit Hilfe der Wasserwaage (Leveling Gauge) eben aus.Bedienungsanleitung DB-II
Version: 0.12. Laden des Akkus
Wenn der Akku zu schwach wird, wird eine Warnleuchte auf dem Display angezeigt (). Spätestens zu diesem Zeitpunkt sollten Sie den Akku laden. Auf dem Display leuchtet eine rote Kontrolllampe auf und der Schnellladevorgang wird gestartet. Benutzen Sie nur das Netzkabel das mit der Waage ausgeliefert wurde. Andere Netzstecker könnten Schäden an der Waage verursachen!3. Belegung der Tasten
| Tasten | Beschreibung |
 | Den Nullpunkt wieder auf 0.00 setzen.Im Setup-Modus die ESC-Taste. |
 | Tara-Wert setzen und löschen |
 | Wechseln der Modi in folgender Reihenfolge:[kg] ⇒ [pcs] ⇒ [%] ⇒ [Gewichtslimit an/aus] ⇒ [Zähllimit an/aus] ⇒ [kg] |
 | Bestätigungstaste |
 | Das Stückgewicht eines Referenz-Musters ermitteln[▶] Zur nächsten Ziffer |
 | Durchschnittsgewicht ermitteln[▲] eine Ziffer höher |
 | DruckenDas Rücklicht wird an- oder ausgeschaltet wenn die Taste für 3 Sekunden gedrückt wird[▼] eine Ziffer niedriger |
 | Taste zum Ein- und Ausschalten |
4. Einschalten der Waage
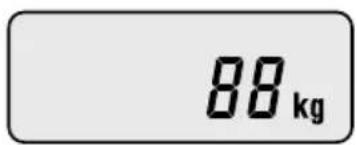
\- Betätigen Sie auf der Tastatur die goldene 🔊-Taste Die Waage beginnt mit einem Selbsttest. Wenn dieser abgeschlossen ist, erscheint das Null-Gewicht in der Anzeige und die Waage ist betriebsbereit.Bedienungsanleitung DB-II
Version: 0.15. Austarieren der Verkaufsverpackung
\- Stellen Sie die leere Verpackung auf die Waage. \- Betätigen Sie die -Taste (Tara). \- Die Gewichtsanzeige zeigt daraufhin 0.00kg, auf dem Display erscheint das Wort „Net“, welches signalisiert, dass ein Tara-Wert gesetzt ist. Ausserdem weist dieses Wort daraufhin, dass in der Anzeige das Nettogewicht (ohne die austarierte Verpackung) angezeigt wird. \- Nehmen Sie nun die Verpackung von der Waage und befüllen diese mit der Ware; während die Wägeplatte leer ist, zeigt die Waage das austarierte Gewicht negativ an. \- Um das Tara wieder zu löschen, betätigen Sie bei leerer Plattform die -Taste (Tara) erneut. Das Wort „Net“ auf dem Display wird gelöscht.6. Manuelle Nullführung der Waage
Um im laufenden Betrieb kleine Abweichungen vom Nullgewicht bei unbelasteter Waage auszugleichen, drücken Sie die -Taste. Der Nullpunkt wird damit neu gesetzt.7. Wiegen von ändernden Gewichten („Tierwägung“)
Um eine ändernde Last (z.B. lebendiges Tier) zu wiegen: \- Platzieren Sie die Last bitte auf der Wägeplatte. \- Drücken Sie dann die 📄-Taste (Hold). \- In der Anzeige blinkt das Wort „HOLD“ für einige Sekunden. Die Waage berechnet in dieser Zeit das tatsächliche Gewicht. \- Bei erfolgreicher Berechnung wird das Gewicht angezeigt und das Wort „HOLD“ über dem Gewicht signalisiert, dass es sich um das berechnete Gewicht handelt. Um die HOLD-Funktion zu verlassen, entfernen Sie entweder das Gewicht von der Plattform oder betätigen die HOLD-Taste erneut. Variiert das Gewicht über ¼ des wahrscheinlichen Gewichts, schaltet sich die Waage allein in den HOLD-Modus.8. Zählmodus
Möchten Sie aufgrund des Gewichts die Stückzahl ermitteln, müssen Sie erst ein Stückgewicht ermitteln. - Drücken Sie die Modus-Taste bis im Display „PCSSET“ zu lesen ist. Kontrollieren Sie, dass das Kürzel „pcs“ im Display erschienen ist. Haben Sie schon einmal ein Stückgewicht erfasst, zeigt das Display „0“. - Drücken Sie die Referenz-Taste 📄. Auf der Anzeige erscheint „10“. - Möchten Sie die Größe der zu erfassenden Anzahl erhöhen, betätigen Sie Stückzahl-Taste bis die gewünschte Menge erreicht ist. Die einzelnen Werte sind 10, 20, 30, 40, 50, 100, 150 und 200. - Wenn Sie die Stückzahl auf 10 eingestellt haben, platzieren Sie 10 Referenz-Muster auf der Plattform. - Betätigen Sie die Bestätigungstaste 📄. Auf der Anzeige erscheint nun das Gewicht der Einheit und anschließend die Anzahl Zeigt das Display „LACK“ ist das Ergebnis des Wiegens nicht korrekt. (LCD Ausgabe: „Lack of Unit“ Kontrollanzeige erscheint auf dem Display). Erscheint „LO“ auf dem Display, ist es unmöglich die Referenzen zu zählen, da deren Gewicht zu gering ist. - Legen Sie die Teile auf die Plattform und das Display zeigt Ihnen die Anzahl der Waren. Auch im Zählmodus können Sie die Tara-Funktion nutzen.9. Prozentuales Wiegen
Das Gewicht wird prozentual vom Referenzwert ausgegeben. - Drücken Sie die Modus-Taste 📂 bis im Display „PERSEt“ zu lesen ist. Auf der Anzeige erscheint das Prozent-Symbol. Haben Sie schon einmal ein Referenzgewicht erfasst, zeigt das Display „0.0“. - Möchten Sie einen Behälter benutzen, drücken Sie die Tara-Taste (siehe zu Beginn der Anleitung). - Stellen Sie das Referenzgewicht auf die Waage und drücken die Referenz-Taste. In der Anzeige erscheint „100.0“. Stellen Sie sicher, dass das Referenzgewicht größer als 3% der Maximallast der Waage ist. Sollte es geringer sein, erscheint auf dem Display „LO“. In dem Fall erhöhen Sie das Gewicht der Referenz und betätigen die Referenz-Taste. - Plazieren Sie den Gegenstand auf der Plattform und das Gewicht wird als Prozentsatz zur Referenz angezeigt.10. Gewichte aufaddieren
Mit der Additionsfunktion können Sie das Gewicht und die Anzahl mehrerer Wägungen addieren. Selbst wenn die Waage abgeschaltet ist, behält sie die Daten. Diese Funktion ist nur im Wiege-Modus verfügbar. - Legen Sie den zu wiegenden Gegenstand auf die Plattform der Waage. - Um dies Gewicht zu addieren betätigen Sie die Referenz-Taste 📄 und stellen sicher, dass „SUM“ in der Anzeige erscheint. \- Durch mehrmaliges drücken der Bestätigungstaste können Sie sich als Zwischensummen das Gesamtgewicht aus dem Speicher und die Anzahl der Additionsvorgänge anzeigen lassen. \- Um das zuletzt hinzugefügte Gewicht wieder abzuziehen, drücken Sie die Bestätigungstaste um das Gesamtgewicht aus dem Speicher und die Anzahl der Additionsvorgänge anzuzeigen und betätigen anschließend die Referenz-Taste. In der Anzeige erscheint „S SUB“. \- Um das kumulative Gewicht zu löschen, drücken Sie die Bestätigungstaste um das Gesamtgewicht anzuzeigen und drücken anschließend die -Taste. \- Um das Gesamtgewicht zu drucken, betätigen Sie die Bestätigungstaste um das Gesamtgewicht aus dem Speicher und die Anzahl der Additionsvorgänge anzuzeigen und drücken danach die Drucken Taste.11. Gewichtsvergleich
11-1. Wie man Gewichte vergleicht
\- Drücken Sie die Modus-Taste bis im Display „WL OFF“ erscheint. Das bedeutet, dass das Gewichtslimit deaktiviert wurde. \- Um das Gewichtslimit zu aktivieren, halten Sie die HOLD-Taste 📄 gedrückt, bis im Display „WL ON“ erscheint. \- Um den Tiefstwert einzugeben, drücken Sie die Bestätigungstaste 📋. Im Display wird „L000.00“ angezeigt.Bedienungsanleitung DB-II
Version: 0.1 \- Durch drücken der Tasten HOLD [▲] oder Drucken [▼] wird die Ziffer eingestellt. Um zur nächsten Ziffer rechts zu gelangen, drücken Sie die Referenz-Taste [▶]. \- Durch drücken der Einstellungstaste gelangen Sie zur Eingabe des Höchstwertes. „H000.00“ erscheint in der Anzeige. Das Einstellen des Wertes erfolgt ebenso wie beim niedrigen Wert. \- Durch drücken der Bestätigungstaste werden Ihre Einstellungen übernommen und im Display erscheint „WL ON“ \- Sollten Sie die Grenzwerte für Hoch und Niedrig falsch eingestellt haben (z.B. LOW = 100.00 kg, HIGH = 90.00 kg ⇔ der Höchstwert ist niedriger als der Tiefstwert) erscheint die Fehlermeldung „WL ERR“ und sie müssen die Einstellungen erneut vornehmen. \- Betätigen Sie die Modus-Taste 📂 um in den Wiege-Modus zu gelangen. \- Beispiel: Der Höchstwert wurde auf 70kg und der Tiefstwert auf 30kg festgesetzt. Beträgt das Gewicht auf der Waage nun 40kg, erscheint „OK“ auf der Anzeige. Die Anzeige „HI“ wird eingeblendet, wenn das Gewicht 80kg beträgt, ebenso erscheint „LO“ wenn das Gewicht nur 20kg ist. Wenn es in den Benutzereinstellungen (siehe Tabelle im Abschnitt „Benutzereinstellungen“) eingestellt wurde, ist ein Signalton zu hören.11-2. Zählvergleich
\- Drücken Sie die Modus-Taste 📂 bis im Display „CL OFF“ erscheint. Das bedeutet, dass das Zähllimit deaktiviert wurde. \- Um das Zähllimit zu aktivieren, halten Sie die HOLD-Taste 📄 gedrückt, bis im Display „CL ON“ erscheint. \- Um den Tiefstwert einzugeben, drücken Sie die Bestätigungstaste 📋. Im Display wird „L00000“ angezeigt. \- Durch drücken der Tasten HOLD [▲] oder Drucken [▼] wird die Ziffer eingestellt. Um zur nächsten Ziffer rechts zu gelangen, drücken Sie die Referenz-Taste [▶]. \- Durch drücken der Einstellungstaste gelangen Sie zur Eingabe des Höchstwertes. „H00000“ erscheint in der Anzeige. Das Einstellen des Wertes erfolgt ebenso wie beim Tiefstwert. \- Durch drücken der Bestätigungstaste werden Ihre Einstellungen übernommen und im Display erscheint „CL ON“Bedienungsanleitung DB-II
Version: 0.1 - Sollten Sie die Grenzwerte für Hoch und Niedrig falsch eingestellt haben (z.B. LOW = 00100, HIGH = 00090 kg ⇔ der Höchstwert ist niedriger als der Tiefstwert) erscheint die Fehlermeldung „CL ERR“ und sie müssen die Einstellungen erneut vornehmen. - Betätigen Sie die Modus-Taste 📂 um in den Wiege-Modus zu gelangen. - Beispiel: Der Höchstwert wurde auf 200 und der Tiefstwert auf 80 festgesetzt. Beträgt die Stückzahl auf der Waage nun 120, erscheint „OK“ auf der Anzeige. Die Anzeige „HI“ wird eingeblendet, wenn die Stückzahl 220 beträgt, ebenso erscheint „LO“ wenn die Anzahl nur 60 ist. Wenn es in den Benutzereinstellungen (siehe Tabelle im Abschnitt „Benutzereinstellungen“) eingestellt wurde, ist ein Signalton zu hören.12. Drucken
12-1. Manueller Druck
Sie können Daten jederzeit durch drücken der Druck-Taste ausdrucken. Den Ausdruck können Sie in den Benutzereinstellungen Ihren Bedürfnissen anpassen. Näheres dazu entnehmen Sie bitte der Tabelle auf der nächsten Seite. Wiegemodus| WEIGHT |
| WELCOME TO CAS[DB-2] CAS2000-00-00 00:00:00 |
| - WEIGHT LIMIT SET VALUE - | |
| Limit (H): | 40.000 kg |
| Limit (L): | 30.000 kg |
| = = = = = = = = = = = = = = = = = = = = = = = = = = = = = = = = = = = = = = = = = = = = = = = = = = = = = = = = = = = = = = = = = = = = = = = = = = = = = = = = = = = = = = = = = = = = = = = = = = = = = |
| WELCOME TO CAS[DB-2] CAS 2000-00-00 00:00:00 |
| U/Weight : | 0.80400 kg |
| Quantity : | 50 pcs |
| Limit (H): | 2000 pcs |
| Limit (L): | 1000 pcs |
Bedienungsanleitung DB-II
Version: 0.1  - Jede Zeile wird durch drücken der Taste Referenz △ Ausgedruckt. - Das Gesamtgewicht wird durch betätigen der Druck-Taste 📋 nach der Summierung gedruckt. Falls Sie die Gesamtzahl der Transaktionen drucken möchten, drücken Sie die Bestätigungstaste  und Druck-Taste 12-2. Automatischer Druck
Um den automatischen Druck zu aktivieren müssen Sie im Druckermenü der Benutzereinstellungen (siehe nächste Seite) die Funktion „Pr Aut“ aktivieren. Sobald das Gewicht stabil ist, wird es automatisch ausgedruckt.Bedienungsanleitung DB-II
Version: 0.1Benutzereinstellungen
1. Einstellungsmenü aufrufen
Stellen Sie sicher, dass die Waage ausgeschaltet ist. Halten Sie nun während des Einschaltens die Druck-Taste gedrückt. In der Anzeige erscheint „U SET“. Durch betätigen der Modus-Taste navigieren Sie durch die einzelnen Menüpunkte, Einstellungen werden durch drücken der Hold oder Druck-Taste vorgenommen. Mit der Bestätigungstaste werden die Einstellungen gespeichert und das Einstellungsmenü verlassen. Möchten Sie das Menü ohne speichern verlassen, drücken Sie die NULL-Taste. 2. Menü| Menü | Anzeige | Beschreibung |
| Buzzer | "b on" | Signalton an |
| "b oFF" | Signalton aus | |
| Printer | "Pr oFF" | Drucker aus |
| "Pr kEy" | Manuelles drucken | |
| "Pr Aut" | Automatischer Druck | |
| "Pr CMd" | Für zukünftiges | |
| Backlight | "bL oFF" | Hinteres Licht aus |
| "bL on" | Hinteres Licht dauerhaft an | |
| "bL 10" | Hinteres Licht für 10 Sek. an | |
| "bL 30" | Hinteres Licht für 30 Sek. an | |
| Auto Power off | "AP oFF" | Abschaltautomatik deaktiviert |
| "AP 10" | Abschaltautomatik nach 10 Min. | |
| "AP 30" | Abschaltautomatik nach 30 Min. | |
| "AP 60" | Abschaltautomatik nach 60 Min. | |
| Baud Rate | "br 48" | 4,800 bps |
| "br 96" | 9,600 bps | |
| "br 192" | 19,200 bps | |
| "br 384" | 38,400 bps |
Bedienungsanleitung DB-II
Version: 0.1| Menü | Anzeige | Beschreibung |
| Weight Limit | "WL M0" | Signalton bei Gewicht im festgesetzten Rahmen |
| "WL M1" | Signalton wenn das Gewicht den Höchstwert über- bzw. den Tiefstwert unterschreitet | |
| "WL M2" | Signalton wenn das Gewicht unter dem Tiefstwert ist | |
| "WL M3" | Signalton wenn das Gewicht über dem Höchstwert ist | |
| Count Limit | "CL M0" | Signalton bei Anzahl im festgesetzten Rahmen |
| "CL M1" | Signalton wenn die Anzahl den Höchstwert über- bzw. den Tiefstwert unterschreitet | |
| "CL M2" | Signalton wenn die Anzahl unter dem Tiefstwert ist | |
| "CL M3" | Signalton wenn die Anzahl über dem Höchstwert ist | |
| Date | "dy on" | Datum drucken |
| "dy oFF" | Datum nicht drucken | |
| Time | "ti on" | Uhrzeit drucken |
| "ti oFF" | Uhrzeit nicht drucken | |
| Label | "LA off" | Belegüberschrift nicht drucken |
| "LA on" | Belegüberschrift drucken | |
| Default | "dF no" | Benutzereinstellungen nutzen |
| "dF YES" | Standardeinstellungen nutzen |