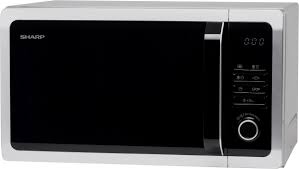
R343S - Microwaves SHARP - Free user manual and instructions
Find the device manual for free R343S SHARP in PDF.


| Product type | Solo microwave |
| Brand and model | SHARP R343S |
| Supply voltage | 230 V, 50 Hz, single phase |
| Recommended fuse/circuit breaker | 10 A |
| Power consumption (microwave) | 1450 W |
| Output power (microwave) | 900 W (IEC 60705) |
| Standby consumption | Less than 1.0 W |
| Microwave frequency | 2450 MHz (Group 2 / Class B) |
| External dimensions (W x H x D) | 513 x 306 x 429 mm |
| Cavity dimensions (W x H x D) | 330 x 208 x 369 mm |
| Oven capacity | 25 liters |
| Turntable diameter | 315 mm |
| Net weight | Approximately 13.8 kg |
| Interior lighting | 25 W / 230 V~ |
| Microwave power levels | 5 levels (P100, P80, P50, P30, P10) |
| Main functions | Manual cooking, weight/time defrost, auto menu, clock, timer, sequential cooking (2 stages), +30 sec, child lock, Eco mode |
| Supplied accessories | Turntable, turntable support, drive |
| Safety | Door locks, automatic stop when door is opened, overload protection |
| Maintenance and cleaning | Clean with a damp cloth and mild soap; do not use abrasive products; clean the waveguide regularly |
| Spare parts and repairability | Contact an authorized Sharp service center for any repairs; do not attempt to repair yourself |
| General information | Household use only; do not install in a cabinet; at least 30 cm free space above |
Frequently Asked Questions - R343S SHARP
User questions about R343S SHARP
0 question about this device. Answer the ones you know or ask your own.
Ask a new question about this device
Download the instructions for your Microwaves in PDF format for free! Find your manual R343S - SHARP and take your electronic device back in hand. On this page are published all the documents necessary for the use of your device. R343S by SHARP.
USER MANUAL R343S SHARP
This operation manual contains important information which you should read carefully before using your microwave oven. Important: There may be a serious risk to health if this operation manual is not followed or if the oven is modified so that it operates with the door open.
SE
DK
NO
FI
GB

ANDERE HANDIGE FUNCTIONS. 18-19
ONTDOOEN OP GEWICHT-FUNCTIE 19
ONTDOOEN OP TUID-FUNCTIE 20
AUTO MENU-FUNCTIE 20
AUTO MENU-TABEL 21-22
ANDERE HANDIGE FUNCTIONS

1. ETAPPE KOKEN
OPTØNING EFTER TID 20
AUTO MENU-FUNKTION 20
AUTO MENU-OVERSIGT 21-22
OVNFAST PORCELAENGEGNEDE BEHOLDERE 23
PLEJE OG RENGØRING 24
SERVICEADRESSER
SPECifikATIONER

For at undgå risiko for brand
MANUEL TILBEREDNING/MANUEL OPTØNING
MANUELL TILBEREDNING / MANUELL TINING
TINING I HENHOLD TIL VEKT
MUUT HELPOT TOIMINNOT. 18-19
SULATUKSEN PAINOTOIMINTO 19
SULATUKSEN AIKATOIMINTO 20
AUTOM. VALIKKO -TOIMINTO 20
AUTOM. VALIKKOKAAVIO 21-22
SOVELTUVAT KEITTOASTIAT 23
HOITO JA PUHDISTUS 24
HUOLTO-OSoitTEITA
TEKNISET TIEDOT

MIKROAALLOILLA KYPSENNYS
MANUALINEN KYPSENNYS/ MANUALINEN SULATUS
Attention: Your product is marked with this symbol. It means that used electrical and electronic products should not be mixed with general household waste. There is a separate collection system for these products.
A. Information on Disposal for Users (private households)
1. In the European Union
Attention: If you want to dispose of this equipment, please do not use the ordinary dust bin!
Used electrical and electronic equipment must be treated separately and in accordance with legislation that requires proper treatment, recovery and recycling of used electrical and electronic equipment.
Following the implementation by members states private households within the EU states may return their used electrical and electronic equipment to designated collection facilities free of charge*.
In some countries* your local retailer may also take back your old product free of charge if you purchase a similar new one.
*) Please contact your local authority for further details. If your used electrical or electronic equipment has batteries or accumulators, please dispose of these separately beforehand according to local requirements.
By disposing of this product correctly you will help ensure that the waste undergoes the necessary treatment, recovery and recycling and thus prevent potential negative effects on the environment and human health which could otherwise arise due to inappropriate waste handling.
2. In other Countries outside the EU
If you wish to discard this product, please contact your local authorities and ask for the correct method of disposal.
For Switzerland: Used electrical or electronic equipment can be returned free of charge to the dealer, even if you don't purchase a new product. Further collection facilities are listed on the homepage of www.swico.ch or www.sens.ch.
B. Information on Disposal for Business Users.
1. In the European Union
If the product is used for business purposes and you want to discard it:
Please contact your SHARP dealer who will inform you about the take-back of the product. You might be charged for the costs arising from take-back and recycling. Small products (and small amounts) might be taken back by your local collection facilities.
For Spain: Please contact the established collection system or your local authority for take-back of your used products.
2. In other Countries outside the EU
If you wish to discard of this product, please contact your local authorities and ask for the correct method of disposal.
INFORMATION ON CORRECT DISPOSAL. 1
CONTENTS 2
SPECIFICATIONS 2
OVEN AND ACCESSORIES 3
CONTROL PANEL 4
IMPORTANT SAFETY INSTRUCTIONS 5-12
INSTALLATION 13-14
BEFORE OPERATION 15
SETTING THE CLOCK. 15
KITCHEN TIMER FUNCTION 15
OTHER CONVENIENT FUNCTIONS 18-19
WEIGHT DEFROST FUNCTION 19
TIME DEFROST FUNCTION 20
AUTO MENU FUNCTION 20
AUTO MENU CHART 21-22
SUITABLE OVENWARE 23
CARE AND CLEANING 24
SERVICE ADDRESSES
SPECIFICATIONS

| Model name: | R-343 |
| AC Line Voltage | : 230V~, 50Hz single phase |
| Distribution line fuse/circuit breaker | : 10A |
| AC Power required: Microwave | : 1450W |
| Output power: Microwave | : 900W (IEC 60705) |
| Off Mode (Energy Save Mode) | : less than 1.0W |
| Microwave Frequency | : 2450MHz*(Group 2/Class B) |
| Outside Dimensions (W) x (H) x (D)** mm | : 513 x 306 x 429 |
| Cavity Dimensions (W) x (H) x (D)*** mm | : 330 x 208 x 369 |
| Oven Capacity | : 25 litres*** |
| Turntable | : Ø 315mm |
| Weight | : approx. 13.8kg |
| Oven lamp | : 25W/230V~ |
- This product fulfils the requirement of the European standard EN55011.
In conformity with this standard, this product is classified as group 2 class B equipment.
Group 2 means that the equipment intentionally generates radio-frequency energy in the form of electromagnetic radiation for the heat treatment of food.
Class B equipment means that the equipment is suitable to be used in domestic establishments.
** The depth does not include the door opening handle.
*** Internal capacity is calculated by measuring maximum width, depth and height. Actual capacity for holding food is less.
AS PART OF A POLICY OF CONTINUOUS IMPROVEMENT, WE RESERVE THE RIGHT TO ALTER DESIGN AND SPECIFICATIONS WITHOUT NOTICE.
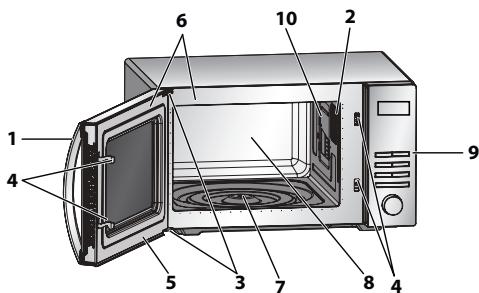
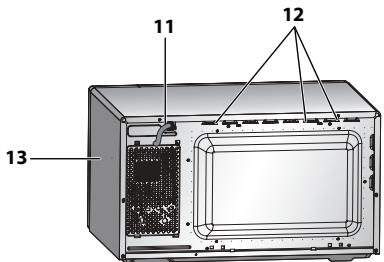
OVEN
- Door handle
- Oven lamp
- Door hinges
- Door safety latches
- Door
- Door seals and sealing surfaces
- Turntable motor shaft
- Oven cavity
- Control panel
- Waveguide cover (DO NOT REMOVE)
- Power supply cord
- Ventilation openings
- Outer cabinet
ACCESSIONS:
Check to make sure the following accessories are provided:
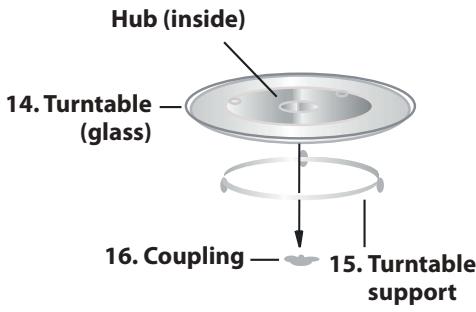
(14) Turntable (15) Turntable support (16) Coupling
- Place the coupling into the turntable motor shaft and then place the turntable support in the centre of the oven floor so that it can freely rotate around the coupling. Place the turntable onto the turntable support so that it locates firmly into the coupling.
- To avoid turntable damage, ensure dishes and containers are lifted clear of the turntable rim when removing them from the oven.
NOTE: When you order accessories, please mention two items: part name and model name to your dealer or SHARP authorised service agent.
NOTES:
- The waveguide cover is fragile. Care should be taken when cleaning inside the oven to ensure that it is not damaged.
- Always operate the oven with the turntable and turntable support fitted correctly. This promotes thorough, even cooking. A badly fitted turntable may rattle, may not rotate properly and could cause damage to the oven.
- Place all food and containers of food on the turntable for cooking.
- The turntable rotates clockwise or anti-clockwise. The rotary direction may change each time you start the oven. This does not affect cooking performance.
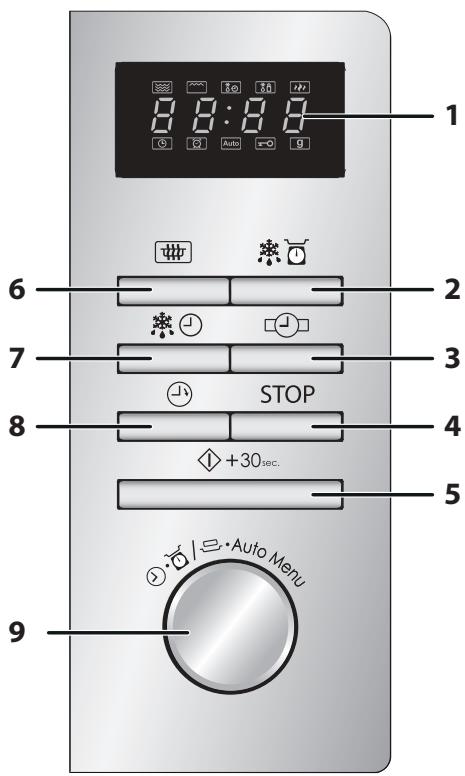
1. DIGITAL DISPLAY and INDICATORS

MICROWAVE indicator

TIME DEFROST indicator

WEIGHT DEFROST indicator

POWER LEVEL indicator

CLOCKindicator

KITCHEN TIMER indicator

AUTO MENU indicator

CHILD LOCK indicator

WEIGHTindicator
2. WEIGHT DEFROST button
3. CLOCK button
4. STOP/CLEAR button
5. START/+30sec./ENTER button
6. MICRO.POWER button
7. TIME DEFROST button
8. KITCHEN TIMER
9. ENTRY dial
Rotate to enter the cooking time, time, power level, weight and select auto menu

READ CAREFULLY AND KEEP FOR FUTURE REFERENCE
- This oven is designed to be used on a countertop only. It is not designed to be built into a kitchen unit. Do not place the oven in a cabinet.
- The oven door may become hot during cooking. Place or mount the oven so that the bottom of the oven is 85 cm or more above the floor. Keep children away from the door to prevent them burning themselves.
- Ensure there is a minimum of free space above the oven of 30~cm .
- This appliance can be used by children aged from 8 years and above and persons with reduced physical, sensory or mental capabilities or lack of experience and knowledge if they have been given supervision or instruction concerning use of the appliance in a safe way and understand the hazards involved. Children shall not play with the appliance. Cleaning and user maintenance shall not be made by children unless they are older than 8 and supervised.
- Keep the appliance and its cord out of reach of children less than 8 years.
- WARNING: Only allow children to use the oven without supervision when adequate instructions have been given so that the child is able to use the oven in a safe way and understands the hazards of improper use.
- WARNING: Accessible parts may become hot during use. Young children should be kept away.
- WARNING: If the door or door seals are damaged, the oven must not be operated until it has been repaired by a competent person.
- WARNING: Never adjust, repair or modify the oven yourself. It is hazardous for anyone other than a competent person to carry out any service or repair operation
which involves the removal of a cover which gives protection against exposure to microwave energy.
10. If the power supply cord of this appliance is damaged, it must be replaced with a special cord. The exchange must be made by an authorised SHARP service agent.
11. WARNING: Liquids and other foods must not be heated in sealed containers since they are liable to explode.
12. Microwave heating of beverages can result in delayed eruptive boiling, therefore care must be taken when handling the container.
13. Do not cook eggs in their shells, and whole hard boiled eggs should not be heated in microwave ovens since they may explode even after microwave cooking has ended. To cook or reheat eggs which have not been scrambled or mixed, pierce the yolks and the whites, or the eggs may explode. Shell and slice hard boiled eggs before reheating them in the microwave oven.
14. Utensils should be checked to ensure that they are suitable for use in the oven. See Page GB-23. Use only microwave safe containers and utensils on microwave modes.
15. The contents of feeding bottles and baby food jars must be stirred or shaken and the temperature checked before consumption, in order to avoid burns.
16. The door, outer cabinet, oven cavity, dishes, accessories and especially the grill heating elements will become very hot during operation.
17. Care should be taken to avoid touching these areas. To prevent burns, always use thick oven gloves. Before cleaning make sure they are not hot. When heating food in plastic or paper containers, keep an eye on the oven due to the possibility of ignition.
18. If smoke is emitted, switch off or unplug the appliance and keep the door closed in order to stifle any flames.
- Clean the oven at regular intervals and remove any food deposits.
- Failure to maintain the oven in a clean condition could lead to deterioration of the surface that could adversely affect the life of the appliance and possibly result in a hazardous situation.
- Do not use harsh abrasive cleaners or sharp metal scrapers to clean the glass on the oven door since they can scratch the surface, which may result in shattering of the glass.
- Steam cleaner is not to be used.
- See instructions for cleaning door seals, cavities and adjacent parts on page GB-24.
-
This appliance is intended to be used in household and similar applications such as:
-
staff kitchen areas in shops, offices and other working environments;
- by clients in hotels, motels and other residential type environments;
-farm houses; -
bed and breakfast type environments.
-
WARNING: The appliance and its accessible parts become hot during use. Care should be taken to avoid touching heating elements. Children less than 8 years of age shall be kept away unless continuously supervised.
- During use the appliance becomes hot. Care should be taken to avoid touching heating elements inside the oven.
- Accessible parts may become hot during use. Young children should be kept away.
To avoid the danger of fire
- The microwave oven should not be left unattended during operation. Power levels that are too high,
or cooking times that are too long, may overheat foods resulting in a fire.
- The electrical outlet must be readily accessible so that the unit can be unplugged easily in an emergency.
- The AC power supply must be 230 ~V 50 ~Hz , with a 10A distribution line fuse, or a 10A distribution circuit breaker.
- A separate circuit serving only this appliance should be provided.
- Do not place the oven in areas where heat is generated. For example, close to a conventional oven.
- Do not install the oven in an area of high humidity or where moisture may collect.
- Do not store or use the oven outdoors.
- Clean the waveguide cover, the oven cavity, the turntable and turntable support after use. These must be dry and free from grease. Built-up grease may overheat and begin to smoke or catch fire.
- Do not place flammable materials near the oven or ventilation openings.
- Do not block the ventilation openings.
- Remove all metallic seals, wire twists, etc., from food and food packages. Arcing on metallic surfaces may cause a fire.
- Do not use the microwave oven to heat oil for deep frying. The temperature cannot be controlled and the oil may catch fire.
- To make popcorn, use only special microwave popcorn makers.
- Do not store food or any other items inside the oven.
- Check the settings after you start the oven to ensure the oven is operating as desired.
- To avoid overheating and fire, special care must be taken when cooking or reheating foods with a high sugar or fat content, for example, sausage rolls, pies or Christ-
mas pudding.
- See the corresponding hints in the operation manual.
To avoid the possibility of injury
1. WARNING:
Do not operate the oven if it is damaged or malfunctioning. Check the following before use:
a) The door; make sure the door closes properly and ensure it is not misaligned or warped.
b) The hinges and safety door latches; check to make sure they are not broken or loose.
c) The door seals and sealing surfaces; ensure that they have not been damaged.
d) Inside the oven cavity or on the door; make sure there are no dents.
e) The power supply cord and plug; ensure that they are not damaged.
- Do not operate the oven with the door open or alter the door safety latches in any way.
- Do not operate the oven if there is an object between the door seals and sealing surfaces.
- Do not allow grease or dirt to build up on the door seals and adjacent parts. Clean the oven at regular intervals and remove any food deposits. Follow the instructions for "Care and Cleaning" on page GB-24.
- Individuals with PACEMAKERS should check with their doctor or the manufacturer of the pacemaker for precautions regarding microwave ovens.
To avoid the possibility of electric shock
- Under no circumstances should you remove the outer cabinet.
-
Never spill or insert any objects into the door lock openings or ventilation openings. In the event of a spill, turn off and unplug the oven immediately, and call an authorised SHARP service agent.
-
Do not immerse the power supply cord or plug in water or any other liquid.
- Do not let the power supply cord hang over the edge of a table or work surface.
- Keep the power supply cord away from heated surfaces, including the rear of the oven.
- Do not attempt to replace the oven lamp yourself or allow anyone who is not an electrician authorised by SHARP to do so. If the oven lamp fails, please consult your dealer or an authorised SHARP service agent.
To avoid the possibility of explosion and sudden boiling:
- Never use sealed containers. Remove seals and lids before use. Sealed containers can explode due to a build up of pressure even after the oven has been turned off.
- Take care when microwaving liquids. Use a wide mouthed container to allow bubbles to escape.
Never heat liquids in narrow necked containers such as baby bottles, as this may result in the contents erupting from the container when heated and cause burns.
To prevent sudden eruption of boiling liquid and possible scalding:
- Do not use excessive amount of time.
- Stir liquid prior to heating/reheating.
- It is advisable to insert a glass rod or similar utensil (not metal) into the liquid whilst reheating.
-
Let liquid stand for at least 20 seconds in the oven at the end of cooking time to prevent delayed eruptive boiling.
-
Pierce the skin of such foods as potatoes, sausages and fruit before cooking, or they may explode.
To avoid the possibility of burns
- Use pot holders or oven gloves when removing food
from the oven to prevent burns.
- Always open containers, popcorn makers, oven cooking bags, etc., away from the face and hands to avoid steam burns and eruption of boiling.
- To avoid burns, always test food temperature and stir before serving and pay special attention to the temperature of food and drink given to babies, children or the elderly. Temperature of the container is not a true indication of the temperature of the food or drink; always check the food temperature.
- Always stand back from the oven door when opening it to avoid burns from escaping steam and heat.
- Slice stuffed baked foods after heating to release steam and avoid burns.
To avoid misuse by children
- Do not lean or swing on the oven door.
- Children should be taught all important safety instructions: use of pot holders, careful removal of food coverings; paying special attention to packaging (e.g. self-heating materials) designed to make food crisp, as they may be extra hot.
Other warnings
- Never modify the oven in any way.
- Do not move the oven while it is in operation.
- This oven is for home food preparation only and may only be used for cooking food. It is not suitable for commercial or laboratory use.
To promote trouble free use of your oven and avoid damage
- Never operate the oven when it is empty except where recommended in the operation manual. Doing so may damage the oven.
- When using a browning dish or self-heating material, always place a heat-resistant insulator such as a porcelain
plate under it to prevent damage to the turntable and turntable support due to heat stress. The preheating time specified in the dish's instructions must not be exceeded.
- Do not use metal utensils, which reflect microwaves and may cause electrical arcing. Use only the turntable and the turntable support designed for this oven. Do not operate the oven without the turntable.
- Do not place anything on the outer cabinet during operation.
NOTE:
If you are unsure how to connect your oven, please consult an authorised, qualified electrician. Neither the manufacturer nor the dealer can accept any liability for damage to the oven or personal injury resulting from failure to observe the correct electrical connection procedure. Water vapour or drops may occasionally form on the oven walls or around the door seals and sealing surfaces. This is a normal occurrence and is not an indication of microwave leakage or a malfunction.
BUILT-IN KIT
No built-in kit is available for this oven.
This oven is designed to be used on a countertop only.
- Remove all packing materials from the inside of the oven cavity and remove any protective film found on the microwave oven cabinet surface. Check the oven carefully for any signs of damage.
- Place the oven on a secure, level surface, strong enough to take the oven weight, plus the heaviest item likely to be cooked in the oven. Do not place the oven in a cabinet.
-
Select a level surface that provides enough open space for the intake and/or outlet vents. The rear surface of appliance shall be placed against a wall.
-
A minimum space of 20cm is required between the oven and any adjacent walls.
- Leave a minimum space of 30cm above the oven.
- Do not remove the feet from the bottom of the oven.
- Blocking the intake and/or outlet openings can damage the oven.
- Place the oven as far away from radios and TV as possible. Operation of the microwave oven may cause interference to your radio or TV reception.
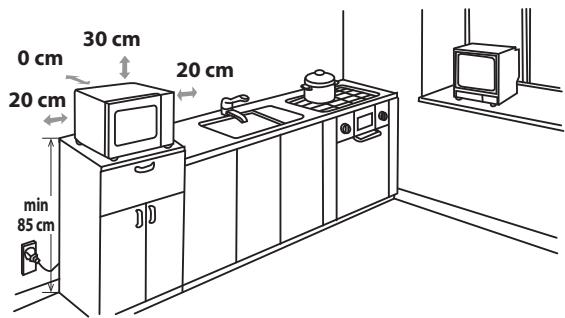
- The oven door may become hot during cooking. Place or mount the oven so that the bottom of the oven is 85 ~cm or more above the floor. Keep children away from the door to prevent them burning themselves.
- Securely connect the plug of the oven to a standard earthed (grounded) household electrical outlet.
WARNING: Do not place the oven where heat, moisture or high humidity are generated, (for example, near or above a conventional oven) or near combustible materials (for example, curtains).
Do not block or obstruct air vent openings.
Do not place objects on top of the oven.
ELECTRICAL CONNECTION
- Do not allow water to come into contact with the power supply cord or plug.
- Insert the plug properly into the socket.
- Do not connect other appliances to the same socket using an adaptor plug.
- If the power supply cord is damaged, it must be replaced by a Sharp approved service facility or a similarly qualified person to avoid a hazard.
- When removing the plug from the socket always grip the plug, never the cord as this may damage the power supply cord and the connections inside the plug.
- If the plug fitted to your oven is a rewireable type and in the event of the socket outlet in your home not being compatible with the plug supplied, remove the plug properly (do not cut off).
- If the plug fitted to your oven is a non-rewirable type and in the event of the socket outlet in your home not being compatible with the plug supplied, cut-off the mains plug.
Plug in the oven. The oven display will display: "0:00", an audible signal will sound once.
This model has a clock function and the oven uses less than 1.0W in stand by mode.
To set the clock, see below.
SETTING THE CLOCK
Your oven has a 24 hour clock feature.
- Press the CLOCK button twice. The hour figure will flash and the clock indicator will illuminate.
- Rotate the ENTRY dial until the correct hour is displayed, the input time should be within 0-23.
- Press the CLOCK button, the minute figure will flash.
- Set the minutes. Rotate the ENTRY dial until the correct minutes are displayed, the input time should be within 0-59.
- Press the CLOCK button to start the clock. The icon ":" of the digital time will be flashing on the display and the clock indicator will disappear.
NOTES:
- If the clock is set, when cooking is complete, the display will show the correct time of day. If the clock has not been set, the display will show "0:00".
- To check the time of day during a cooking process, press CLOCK button and the LED will display the time of day for 2-3 seconds. This does not affect the cooking process.
- If in the process of setting the clock, the STOP/CLEAR button is pressed, the oven will revert back to the former setting.
- If the electrical power supply to your microwave oven is interrupted, the display will intermittently show "0:00" after the power is reinstated. If this occurs during cooking, the programme will be erased. As will the time of day.
KITCHEN TIMER FUNCTION
You can use the kitchen timer function in instances where microwave cooking is not involved for example to time boiled eggs cooked on conventional hob or to monitor the standing time for cooked/defrosted food.
Example:
To set the timer for 5 minutes.
- Press
KITCHEN TIMER
button once.
- Rotate ENTRY
dial to select
time.
- Press the
START/+30sec./
ENTER key to
start the timer.
- Check the display.
(The display
will count down
through the
programmed time.)
When the timer arrives at 0:00, an audible signal will sound 5 times and the LED will then display the time of day.
You can enter any time up to 95 minutes. To cancel the KITCHEN TIMER whilst counting down, simply press the STOP/CLEAR button.
NOTE: The KITCHEN TIMER function cannot be used whilst cooking.
Your oven has 5 power levels. To select the levels, follow the instruction below.
| To set the power level | LED Display | Microwave Power |
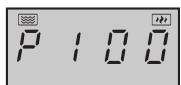
| Press the MICRO. POWER button once, P100 will be displayed and at the same time the microwave indicator and high heat indicator will illuminate on the display. Press MICRO. POWER or rotate the ENTER dial to change the power level until the display indicates the desired level. Press the START/+30sec./ENTER button to confirm the setting, enter the cooking time and then press the START/+30sec./ENTER button again to start the oven. To check the power level during cooking, press the MICRO. POWER button, the current power level will be displayed for 4 seconds. The oven will continue to count down although the display will show the power level. | P100 | HIGH = 100% |
| P80 | MEDIUM HIGH = 80% | |
| P50 | MEDIUM = 50% | |
| P30 | MEDIUM LOW = 30% | |
| P10 | LOW = 10% |
Generally the following recommendations apply:
P100 - (HIGH output = 900W) used for fast cooking or reheating e.g. for casseroles, hot beverages, vegetables etc.
P80 - (MEDIUM HIGH output = 720W) used for longer cooking of dense foods such as roast joints, meat loaf and plated meals, also for sensitive dishes such as sponge cakes. At this reduced setting, the food will cook evenly without over cooking at the sides.
P50 - (MEDIUM output = 450W) for dense foods which require a long cooking time when cooked conventionally, e.g. beef casserole, it is advisable to use this power setting to ensure the meat will be tender.
P30 - (MEDIUM LOW output = 270W) Defrost setting to defrost, select this power setting, to ensure that the dish defrosts evenly. This setting is also ideal for simmering rice, pasta, dumplings and cooking egg custard.
P10 - (LOW output = 90W) For gentle defrosting, e.g. cream gateaux or pastry.
Opening the door:
To open the oven door, pull the door handle.
Starting the oven:
Depending on the food type and the required end results, either place food into a suitable container, then place the container onto the turntable, alternatively place foods directly onto the turntable. Close the door and press the START/+30sec./ENTER button after selecting the desired cooking mode.
Once the cooking programme has been set if the START/+30sec./ENTER button is not pressed in 1 minute, the setting will be cancelled.
The START/+30sec./ENTER button must be pressed to continue cooking if the door is opened during cooking. An audible signal will sound once when pressing the button, if inefficiently pressed there will be no sound.
Use the STOP/CLEAR button to:
- Erase a mistake during programming.
- Stop the oven temporarily during cooking.
- Cancel a programme during cooking, press the STOP/CLEAR button twice.
- To set and to cancel the child lock (refer to page GB-19).
Automatically lamp off function:
When the microwave oven is powered on, if opening the door the oven lamp will be turned off automatically after 1 minute.
MICROWAVE COOKING
Your oven can be programmed for up to 95 minutes (95:00).
The input unit of cooking (defrosting) time varies from 5 seconds to 95 minutes. It depends on the total length of the cooking (defrosting) time as shown on the table.
| Cooking Time | Increasing Unit |
| 0-1 minute | 5 seconds |
| 1-5 minutes | 10 seconds |
| 5-10 minutes | 30 seconds |
| 10-30 minutes | 1 minute |
| 30-95 minutes | 5 minutes |
MANUAL COOKING/MANUAL DEFROSTING
- Enter the cooking time and use the microwave power levels P100 to P10 to cook or defrost (refer to page GB-16).
- Stir or turn the food, where possible, 2 - 3 times during cooking.
After cooking, cover the food and leave to stand, where recommended. - After defrosting, cover the food in foil and leave to stand until thoroughly defrosted.
Example:
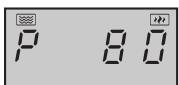
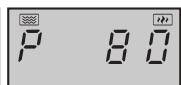
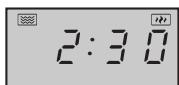
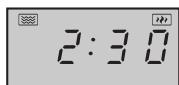
To cook for 2 minutes and 30 seconds on P80 (80%) microwave power.
- Press the
MICRO.
POWER
button.
P100 will be displayed.
- Rotate the
ENTRY dial to select the power level for P80.

- Press the
START/
+30sec./ENTER
button to confirm the setting.
- Enter the
cooking time by rotating
ENTRY dial.

- Press the START/
+30sec./ENTER button to start cooking. (The
display will count down through the programmed cooking time.)
NOTE:
- When the oven starts, the oven lamp will illuminate and the turntable will rotate clockwise or anticlockwise.
- If the door is opened during cooking/defrosting to stir or turn over food, the cooking time on the display will stop automatically. The cooking/defrosting time starts to count down again when the door is closed and the START/+30sec./ENTER button is pressed.
- When cooking/defrosting is complete, the time of day will reappear on the display, if the clock has been set.
- If you wish to know the power level during cooking, press the MICRO. POWER button. The current power level will displayed for 3 seconds.
OTHER CONVENIENT FUNCTIONS

1. SEQUENCE COOKING
This function allows you to cook using up to 2 different stages which can include manual cooking times, time defrost as well as a weight defrost function. Once programmed there is no need to interfere with the cooking operation as the oven will automatically move onto the next stage. An audible signal will sound once after the first stage. If the defrost function is needed within sequence cooking - please note that this should always be the first stage of sequence cooking.
NOTE: AUTO MENU cannot be set as one of the multiple sequences.
Example: If you want to cook food for 20 minutes on P100 microwave power and then for 5 minutes with P80 microwave power. The steps are as follows:
-
- Press the MICRO.POWER button, P100 will appear in the LED display.
-
- Press the START/+30sec./ENTER button once to confirm the setting.
-
- Enter the cooking time by rotating the ENTRY dial until the display shows "20:00" minutes.
-
- Press the MICRO.POWER button, P100 will appear in the LED display.
-
- Press the MICRO. POWER button twice or rotate the ENTRY dial to select the microwave power to P80.
-
- Press the START/+30sec./ENTER button once more to confirm the setting.
-
- Enter the cooking time by rotating the ENTRY dial until the display shows "5:00" minutes.
-
- Press the START/+30sec./ENTER button to start cooking.
2. +30sec FUNCTION (Auto minute)
Direct start
You can directly start cooking on P100 microwave power level for 30 seconds by pressing the START/+30sec./ENTER button. The cooking process will start immediately and each time the button is pressed this will increase the cooking time by 30 sec.
NOTE: The cooking time may be extended to a maximum of 95 minutes.
3. CHILD LOCK:
Use to prevent unsupervised operation of the oven by children.
a. To set the CHILD LOCK:
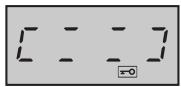
In the stand-by mode, press STOP/CLEAR button for 3 seconds. There will be a long beep denoting entering the children-lock state and the indicator will illuminate together with the current clock time. If the clock has not been set the display status will be as follows:
b. To cancel the CHILD LOCK:
In the stand-by mode, press STOP/CLEAR button for 3 seconds. There will be a long "beep" denoting that the lock is released.
- ECO Mode:
In standby mode, press the "STOP" button once, the LED display will be off and microwave oven enter to ECO mode. Any operation can light the LED display again, and the microwave oven will return to standby mode.
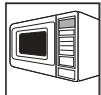
WEIGHT DEFROST FUNCTION
WEIGHT DEFROST
The microwave oven is pre-programmed with a timer and power levels so that foods such as pork, beef and chicken can be easily defrosted. The weight range for this is from 100g – 2000g in 100g steps.
Follow the example below for details on how to operate this function.
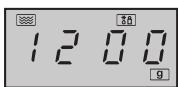
Example: To defrost a meat joint weighing 1.2Kg using WEIGHT DEFROST.
Place the meat in a flan dish or alternatively on a microwave oven defrost rack on the turntable.
-
Press the WEIGHT DEFROST button once.
-
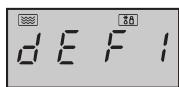
Enter the desired weight by rotating the ENTRY dial until the display shows:
-
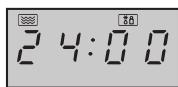
Press the START/+30sec./ ENTER button to start defrosting. (The display will count down through defrosting time)
NOTE:
- Frozen foods are defrosted from -18^ C .
- Before freezing foods, ensure food is fresh and of good quality.
- If necessary, shield small areas of meat or poultry with flat pieces of aluminium foil. This will prevent the areas from becoming warm during defrosting. Ensure the foil does not touch the oven walls.
- Food weight should be rounded up to the nearest 100g, for example, 650g to 700g.
- After defrosting an audible signal will sound five times and the LED will then display time of day, if the clock has been set. If the clock has not been set, the display will only show "0:00" when defrosting is complete.
TIME DEFROST
This function quickly defrosts food while enabling you to choose a suitable defrost period, depending on the food type. Follow the example below for details on how to operate this function. The time range is 0:05 – 95:00.
Example: To defrost food for 10 minutes.
-
Press the TIME DEFROST button.
-
Enter the cooking time by rotating the ENTRY dial until the display shows: 10:00
-
Press the START/+30sec./ ENTER button to start defrosting. (The display will count down through defrosting time)
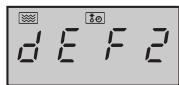
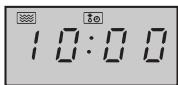
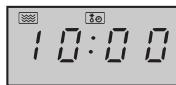
Notes for Time Defrost:
- The preset microwave power level can not be changed.
- Before freezing foods, ensure food is fresh and of good quality.
- If necessary, shield small areas of meat or poultry with flat pieces of aluminium foil. This will prevent the areas from becoming warm during defrosting. Ensure the foil does not touch the oven walls.
- After defrosting an audible signal will sound five times and the LED will then display the time of day, if the clock has been set. If the clock has not been set, the display will only show "0:00" when defrosting is complete.
AUTO MENU FUNCTION

The AUTO MENU programmes automatically calculates the correct cooking mode and cooking time of foods (details on page GB-21). Follow the example below for guidance on how to operate this function.
Example: To cook fish with a weight of 250g by using the AUTO MENU function.
- Rotate the ENTRY dial to select the desired auto menu.

-
Press the START/+30sec./ ENTER button to confirm the setting.
-
Enter the desired weight by rotating the ENTRY dial.

- Press the START/ +30sec./ENTER button to start cooking.
(The display will count down through the programmed cooking time.)
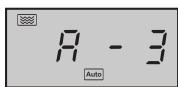
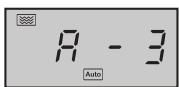
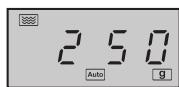
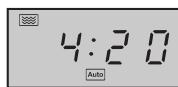
NOTES:
- The weight or quantity of food can be input by rotating the ENTRY dial until the desired weight/quantity ('g' or ml) illuminates on the display. Enter the weight of the food only. Do not include the weight of the container.
- For food weighing more or less than the weights/quantities given in the AUTO MENU chart on page GB-21 cook by manual operation.
| Auto Menu | Display | Cooking method | Weight/portion/ utensils | Procedure |
| Reheat dinner plate (pre-cooked food e.g. meat, vegetable and garnishes) | A-1 | 100% Micro | 200g, 400g, 600g (initial temp. 5°C) Plate and vented microwave cling film or suitable lid | Put the pre-cooked food on a plate. Use vented microwave cling film or a suitable lid to cover the plate. Place the plate in the centre of the turntable. Stir after cooking. |
| Fresh vegeta-bles e.g. cauliflower, carrots, broccoli, fennel, leek, pepper, cour-gettes etc. | A-2 | 100% Micro | 200g, 300g, 400g (initial temp 20°C) Bowl and lid | Cut, chop or slice fresh vegeta-bles into evenly sized pieces. Place the fresh vegetables in a suitable container. Place on the turntable. Add the required amount of water (1 tbsp per 100g). Cover with a lid. Stir after cooking and let the food stand for approx. 2 minutes. |
| Fish (fish fillet) | A-3 | 80% Micro | 250g, 350g, 450g (initial temp. 20°C) Flan dish and vented micro-wave cling film or suitable lid | Place in a single layer in a fl an dish. Use vented microwave cling film or a suitable lid to cover. |
| Meat (boneless meat e.g. beef, lamb, pork or poultry) | A-4 | 100% Micro | 250g, 350g, 450g (initial temp 20°C) Flan dish and vented micro-wave cling film or suitable lid | Cut the meat into small strips and place it in a flan dish. Use vented microwave cling film or a suitable lid to cover the flan dish. Place the flan dish in the centre of the turntable. |
| Pasta (dried pasta e.g. Fussili, Farfalle, Rigatoni) | A-5 | 80% Micro | Pasta Water 50g 450 ml 100g 800 ml (initial temp. for the water: 20°C) large wide bowl | Place pasta in an appropriate sized bowl and add the water. Do not cover. Place the bowl in the centre of the turntable. After cooking, stir well and stand for 2 minutes before draining. |
| Boiled pota-oes & Jacket potatoes | A-6 | 100% Micro | 200g, 400g 600g (initial temp. 20°C) bowl and lid | Boiled potatoes: Peel the pota-oes and cut them into similar sized pieces. Place the potatoes into a bowl. Add 1 tbsp water per 100g, add a little salt and cover the bowl with a lid. After cooking, allow to stand for approx. 2 minutes before serving. Jacket potatoes: choose potatoes of similar size and wash them, then place the potatoes onto the glass turnta-ble. After cooking, allow to stand for approx. 5 minutes before serving. |
| Chilled pizza | A-7 | 100% Micro | 200g, 400g (initial temp. 5°C) plate | Place the pizza on a plate in the centre of the turntable. Do not cover. |
| Soup | A-8 | 80% Micro | 200 ml, 400 ml (initial temp. 5°C) Cups (200 ml per cup) | Place the cups on the turntable and stir after cooking. |
| Beverage | A-9 | 100% Micro | 1 (cup) 120ml 2 (cups) 240ml 3 (cups) 360ml (initial temp. 5°C) | Place the cup(s) on the turntable and stir after heating. |
| Popcorn | A-10 | 100% Micro | 0.05kg, 0.1kg | Place the popcorn bag directly on the turntable (Please see the note below: 'Important Information About Microwave Popcorn Feature') |
NOTES:
- The final temperature will vary according to the initial food temperature. Check food is piping hot after cooking. If necessary, you can extend the cooking manually.
- The results when using auto cook depend on variances such as the shape and size of the food and your personal preference as regards cooking results. If you are not satisfied with the programmed result, please adjust the cooking time to match your requirement.
To cook/defrost food in a microwave oven, the microwave energy must be able to pass through the container to penetrate the food. Therefore it is important to choose suitable cookware.
Round/oval dishes are preferable to square/oblong ones, as the food in the corners tends to overcook. A variety of cookware can be used as listed below.
| Cookware | Microwave Safe | Comments |
| Aluminium foil Foil containers | ✓ / × | Small pieces of aluminium foil can be used to shield food from overheating. Keep foil at least 2cm from the oven walls, as arcing may occur. Foil containers are not recommended unless specified by the manufacturer, e.g. Microfoil®, follow instructions carefully. |
| Browning dishes | ✓ | Always follow the manufacturers instructions. Do not exceed the heating time given. Be very careful as these dishes become very hot. |
| China and ceramics | ✓ / × | Porcelain, pottery, glazed earthenware and bone china are usually suitable, except for those with metallic decoration. |
| Glassware e.g. Pyrex® | ✓ | Care should be taken if using fine glassware as it can break or crack if heated suddenly. |
| Metal | × | It is not recommended to use metal cookware as it will arc, which can lead to fire. |
| Plastic/Polystyrene e.g fast food containers | ✓ | Care must be taken as some containers warp, melt or discolour at high temperatures. |
| Cling film | ✓ | It should not touch the food and must be pierced to let the steam escape. |
| Freezer/Roasting bags | ✓ | Must be pierced to let steam escape. Ensure bags are suitable for microwave use. Do not use plastic or metal ties, as they may melt or catch fire due to the metal ‘arcing’. |
| Paper – plates, cups and kitchen paper | ✓ | Only use for warming or to absorb moisture. Care must be taken as overheating may cause fire. |
| Straw and wooden containers | ✓ | Always monitor the oven when using these materials as overheating may cause fire. |
| Recycled paper and newspaper | × | May contain extracts of metal which will cause ‘arcing’ and may lead to fire. |

WARNING:
When heating food in plastic or paper containers, monitor the oven due to the possibility of ignition.
CAUTION: DO NOT USE COMMERCIAL OVEN CLEANERS, STEAM CLEANERS, ABRASIVE, HARSH CLEANERS, ANY THAT CONTAIN SODIUM HYDROXIDE OR SCOURING PADS ON ANY PART OF YOUR MICROWAVE OVEN.
CLEAN THE OVEN AT REGULAR INTERVALS AND REMOVE ANY FOOD DEPOSITS - Keep the oven clean, or the oven could lead to a deterioration of the surface. This could adversely affect the life of the appliance and possibly result in a hazardous situation.
Oven exterior
The outside of your oven can be cleaned easily with mild soap and water. Make sure the soap is wiped off with a moist cloth, and dry the exterior with a soft towel.
Control panel
Open the door before cleaning to deactivate the control panel. Care should be taken in cleaning the control panel. Use a cloth damp with water only, gently wipe the panel until it becomes clean.
Avoid using excessive amounts of water. Do not use any sort of chemical or abrasive cleaner.
Oven Interior
-
For cleaning, wipe any splatters or spills with a soft damp cloth or sponge after each use while the oven is still warm. For heavier spills, use a mild soap and wipe several times with a damp cloth until all residues are removed. Do not remove the waveguide cover.
-
Make sure that mild soap or water does not penetrate the small vents in the walls which may cause damage to the oven.
-
Do not use spray cleaners on the oven interior.
Keep the waveguide cover clean at all times.
The waveguide cover is constructed from a fragile material and should be cleaned with care (follow the cleaning instructions above).
NOTE: Excessive soaking may cause disintegration of the waveguide cover.
The waveguide cover is a consumable part and without regular cleaning, will need to be replaced.
Turntable and Turntable support
Remove the turntable and turntable support from the oven.
Wash the turntable and turntable support in mild soapy water. Dry with a soft cloth. Both the turntable and the turntable support are dishwasher safe.
Door
To remove all traces of dirt, regularly clean both sides of the door, the door seals and adjacent parts with a soft, damp cloth. Do not use harsh abrasive cleaners or sharp metal scrapers to clean the glass oven door since they can scratch the surface, which may result in shattering of the glass.
NOTE: A steam cleaner should not be used.
Cleaning tip - For easier cleaning of your oven:
Place half a lemon in a bowl, add 300ml (1/2 pint) water and heat on 100% for 10 -12 minutes.
Wipe the oven clean using a soft, dry cloth.
IMPORTANT:
- If you cook food for more than the standard time (see chart below) using the same cooking mode, the oven's safety mechanisms automatically activate. The microwave power level will be reduced.
| Cooking Mode | Standard time |
| Microwave 100 P | 30 minutes |
KUNDEN-SERVICE • ONDERHOUDSADRESSEN • ADRESSES DES SAV • CENTRI DI ASSISTENZA • DIRECCIONES DE SERVICIO
www.sharphomeappliances.com
SHARP
Gedruckt in China
Impreso en China
Imprimé en Chine
Stampato in Cina
Gedrukt in China
Tryckt i Kina
Trykt i Kina
Trykt i Kina
Painetti Kiinassa
Printed in China