MYQG0302 - Garage door automation LIFT-MASTER - Free user manual and instructions
Find the device manual for free MYQG0302 LIFT-MASTER in PDF.

User questions about MYQG0302 LIFT-MASTER
0 question about this device. Answer the ones you know or ask your own.
Ask a new question about this device
Download the instructions for your Garage door automation in PDF format for free! Find your manual MYQG0302 - LIFT-MASTER and take your electronic device back in hand. On this page are published all the documents necessary for the use of your device. MYQG0302 by LIFT-MASTER.
USER MANUAL MYQG0302 LIFT-MASTER
To reduce the risk of SEVERE INJURY to persons:
- DO NOT enable the MyQ ^ Smart Garage ^TM Hub if operating either one-piece or swinging doors. To be enabled ONLY on a sectional door.

WARNING: This product can expose you to chemicals including lead, which are known to the State of California to cause cancer or birth defects or other reproductive harm. For more information go to www.P65Warnings.ca.gov

text_image
STOPRead instructions thoroughly BEFORE beginning.
If using this product with residential door openers, this product must be used only with door openers manufactured after 1993 that utilize photoelectric sensors. The photoelectric sensors are always located on or near the bottom of the door track.
BEFORE YOU START, YOU MUST HAVE...
natural_image
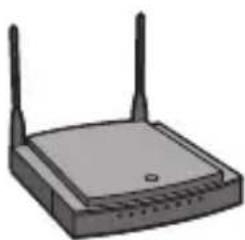
Illustration of a wireless router with two antennas (no text or symbols)A router with 2.4GHz Wi-Fi®
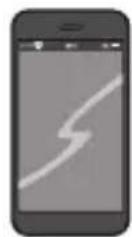
Mobile device connected to your home Wi-Fi network
natural_image
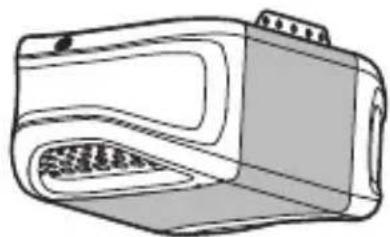
Line drawing of a portable electronic device with a grid-patterned front panel (no text or symbols)Compatible garage door opener
To see a list of compatible garage door openers go to: www.LiftMaster.com/MyQCompatibility
NOTE: Additional door sensors sold separately.
Tools Needed: Drill, 5/32" Drill Bit, Screwdriver, Ladder
FOR SECURITY SYSTEM OR HOME AUTOMATION SETUP
MyQ® Smart Garage™ Hub works with a variety of home security and home automation apps.
Visit: www.LiftMaster.com/WorkswithMyQ for more details.
INSTALL
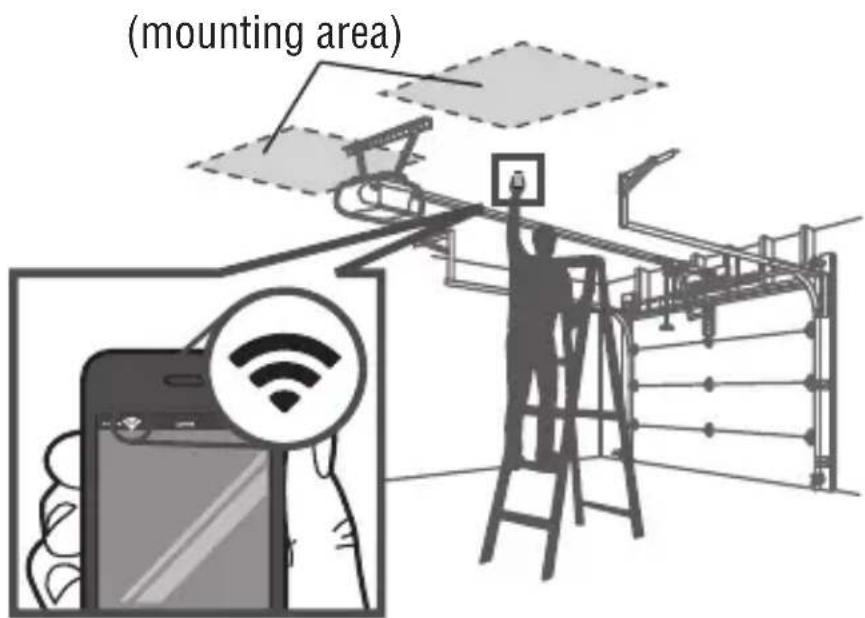
1. Check your Wi-Fi
- Check the Wi-Fi signal in the garage, where the Wi-Fi Hub will be mounted.
• Make sure you have two or more Wi-Fi bars.
NOTE: If there are signal strength issues, please visit https://www.liftmaster.com/wifi supportvideos for instructional videos.
text_image
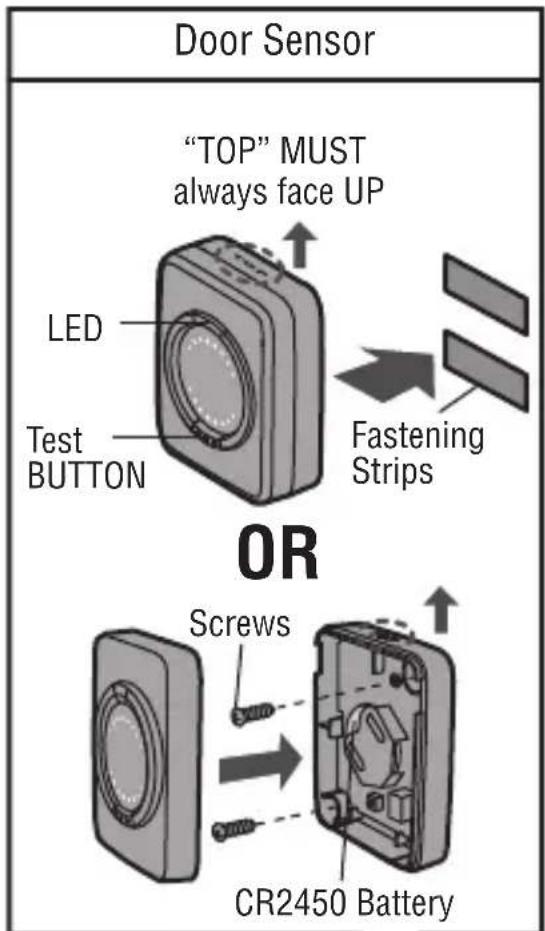
(mounting area)2. Install the Door Sensor
- Remove the pull tab from the sensor to activate the battery.
• Install the door sensor on the top panel of the garage door using the fastening strips or provided hardware.
TIP: Test your door sensor every 6 months or if the MyQ system is not working as expected.
- Press the test BUTTON on the door sensor, the LED on the door sensor should fl ash and the Wi-Fi Hub should beep.
- Perform this test 6 times. If the LED doesn't flash or the Wi-Fi Hub doesn't beep each time, replace the battery in the door sensor with a CR2450 battery.
text_image
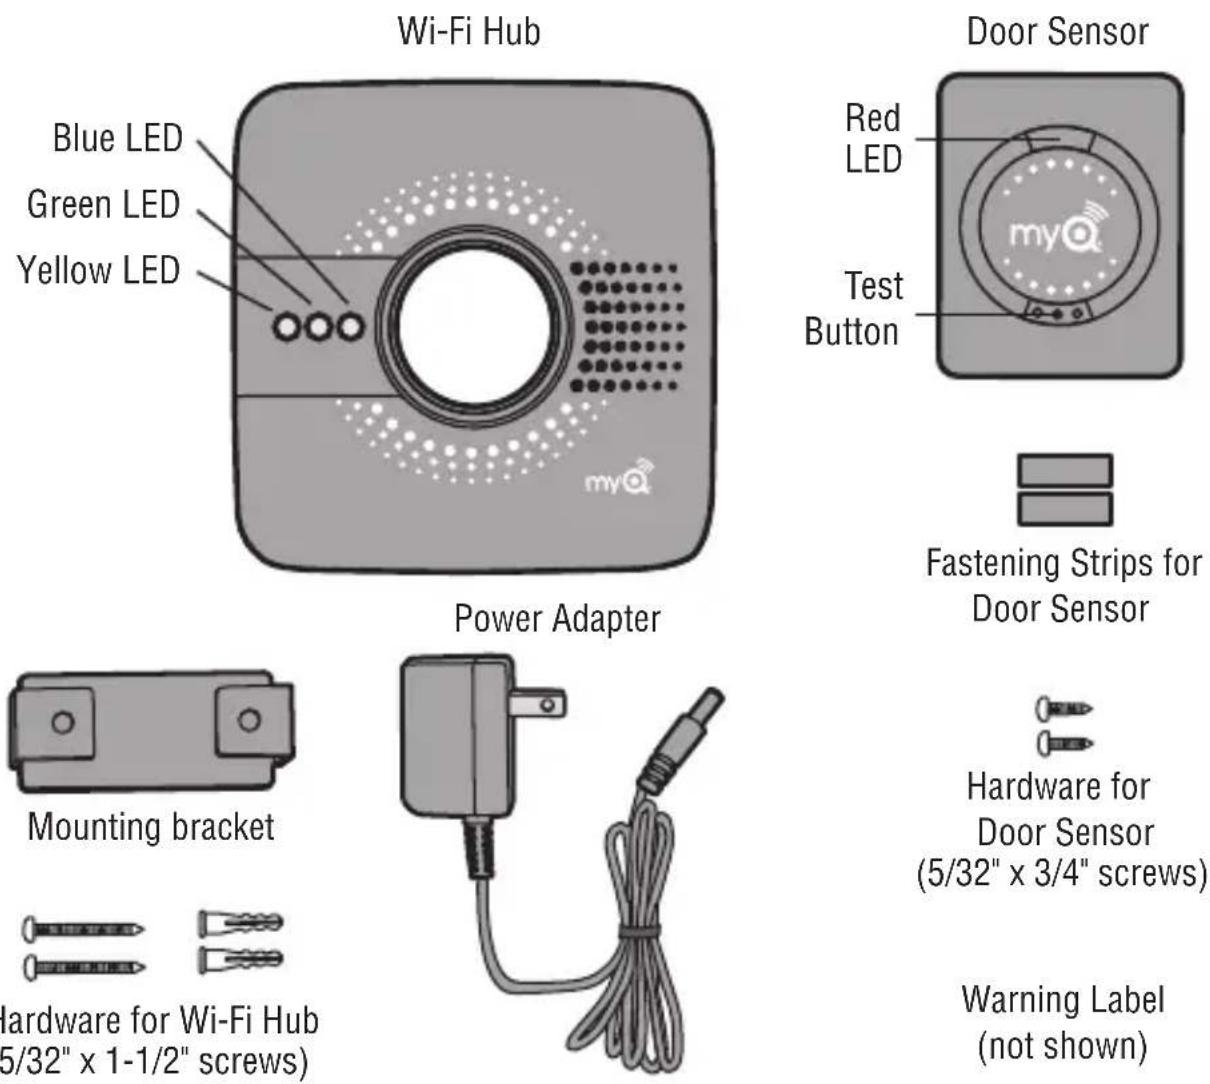
Door Sensor "TOP" MUST always face UP LED Test BUTTON Fastening Strips OR Screws CR2450 Battery
natural_image
Technical line drawing of a mechanical assembly with no visible text or symbolsINSTALL
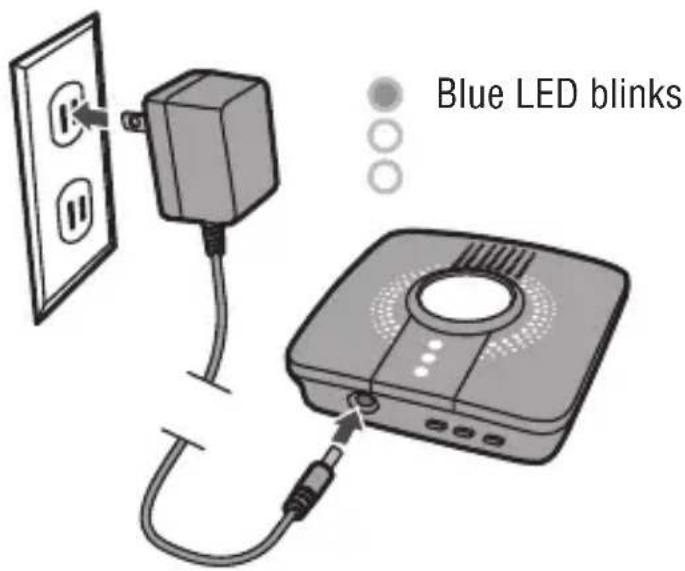
3. Power Up the Wi-Fi Hub
• Find a convenient location in the garage and power the Wi-Fi Hub by plugging it in. The blue LED will start blinking.
text_image
Blue LED blinks4. LiftMaster MyQ® app
- Download the LiftMaster MyQ® app or open the app if it is already installed.
• Create or sign-in to your account and follow the in-app instructions.

text_image
Download App myQ5. Install the Wi-Fi Hub
- After successfully completing all of the steps in the LiftMaster MyQ ^ app, install the Wi-Fi Hub on the ceiling, near the garage door opener.
- Plug it in and make sure the green LED turns on solid.
- Wi-Fi Hub light MUST be visible if you're standing in the doorway of the garage.
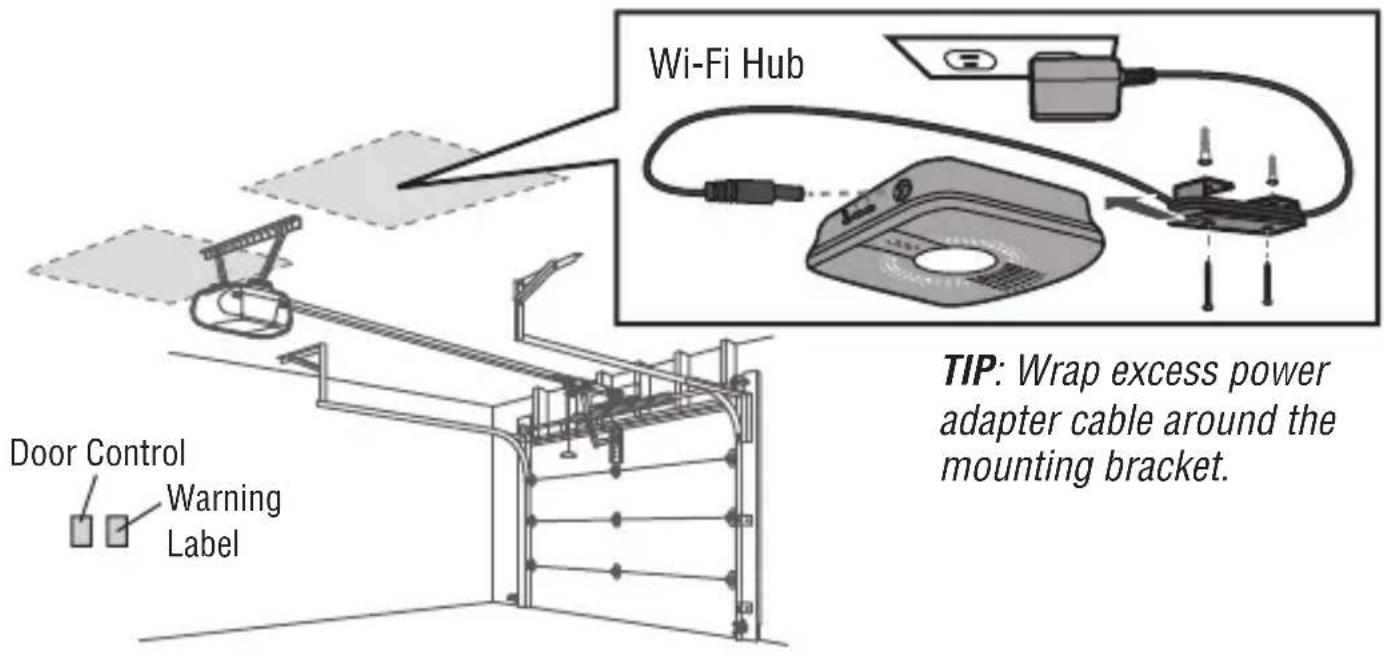
text_image
Wi-Fi Hub TIP: Wrap excess power adapter cable around the mounting bracket. Door Control Warning Label6. Apply Warning Label
- Attach the warning label to the wall next to the door control.
Need Help?
Go to: www.LiftMaster.com/MyQSupport
One Year Limited Warranty
LiftMaster ^® warrants to the first consumer purchaser of this product that it is free from defect in materials and/or workmanship for a period of 1 year from the date of purchase.
Software Agreement
Use of this product and the software embedded within the product is subject to the copyright notices, terms, and conditions available at: http://www.myLiftMaster.com/agreement
NOTICE: This device complies with Part 15 of the FCC rules and Industry Canada's license-exempt RSSs.
Operation is subject to the following two conditions: (1) this device may not cause harmful interference, and (2) this device must accept any interference received, including interference that may cause undesired operation.
Any changes or modifications not expressly approved by the party responsible for compliance could void the user's authority to operate the equipment.
This device must be installed to ensure a minimum 20 cm (8 in.) distance is maintained between users/bystanders and device.
This device has been tested and found to comply with the limits for a Class B digital device, pursuant to part 15 of the FCC rules and Industry Canada ICES standard. These limits are designed to provide reasonable protection against harmful interference in a residential installation. This equipment generates, uses and can radiate radio frequency energy and, if not installed and used in accordance with the instructions, may cause harmful interference to radio communications. However, there is no guarantee that interference will not occur in a particular installation. If this equipment does cause harmful interference to radio or television reception, which can be determined by turning the equipment off and on, the user is encouraged to try to correct the interference by one or more of the following measures:
- Reorient or relocate the receiving antenna.
- Increase the separation between the equipment and receiver.
- Connect the equipment into an outlet on a circuit different from that to which the receiver is connected.
- Consult the dealer or an experienced radio/TV technician for help.
Wi-Fi ^® is a registered trademark of Wi-Fi Alliance.

821LMB
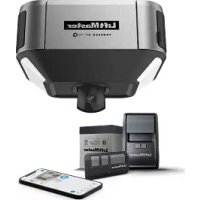
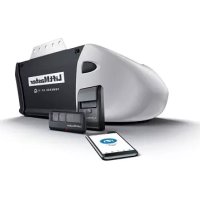
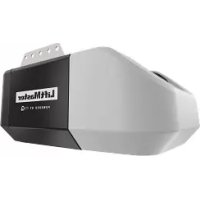
SMART GARAGE™ Hub
natural_image
Illustration of a wireless router with two antennas (no text or symbols)natural_image
Line drawing of a microwave oven with a tray and lid (no text or symbols)natural_image
Technical line drawing of a mechanical assembly with no visible text or symbolsnatural_image
Illustration of a wireless router with two antennas (no text or symbols)Un router con Wi-Fi® de 2.4 GHz
natural_image
Line drawing of a portable electronic device with a scroll wheel and ventilation slots (no text or symbols)natural_image
Simple diagram of a rectangular object with two circular holes, no text or symbols present.natural_image
Illustration of a gray electric power adapter connected to a coiled cable (no text or symbols)natural_image
Technical line drawing of a mechanical assembly with no visible text or symbolsVisite: www.LiftMaster.com/MyQSupport