Aroma 800 TSA4008 - Coffee machine Teesa - Free user manual and instructions
Find the device manual for free Aroma 800 TSA4008 Teesa in PDF.
| Product type | Filter coffee machine |
| Brand | Teesa |
| Model | Aroma 800 TSA4008 |
| Power | 800 W |
| Carafe capacity | 1.25 L (about 10 cups) |
| Dimensions (L × W × H) | 25 × 20 × 30 cm |
| Weight | 1.5 kg |
| Power supply | 220-240 V, 50/60 Hz |
| Automatic shut-off function | Yes, after 2 hours |
| Keep warm function | Yes, hot plate |
| Water tank | Removable with markings |
| Permanent filter | Yes, reusable |
| Coffee type | Ground coffee |
| Water level indicator | Yes, transparent |
| Maintenance and cleaning | Clean the tank and filter regularly; descale every 2 months |
| Safety | Automatic shut-off; non-slip surface; overheat protection |
| Spare parts | Carafe, permanent filter available online |
| Repairability | Repairability index not communicated |
| General information | Suitable for domestic use; do not use without water |
Frequently Asked Questions - Aroma 800 TSA4008 Teesa
User questions about Aroma 800 TSA4008 Teesa
0 question about this device. Answer the ones you know or ask your own.
Ask a new question about this device
Download the instructions for your Coffee machine in PDF format for free! Find your manual Aroma 800 TSA4008 - Teesa and take your electronic device back in hand. On this page are published all the documents necessary for the use of your device. Aroma 800 TSA4008 by Teesa.
USER MANUAL Aroma 800 TSA4008 Teesa
Automatic coffee machine with grinder

TSA4008
Návod k obsluze
Bedienungsanleitung
Owner's manual
natural_image
3D cutaway view of a mechanical device showing internal components and housing (no text or symbols visible)Thank you for purchasing TEESA appliance. Read this instruction manual and keep it for future reference. Producer does not take responsibility for damages caused by inappropriate handling and use of the product.
SAFETY INSTRUCTIONS
In order to reduce the risk of injuries or damages, follow basic safety precautions applied when using any electrical device, including the following:
- Read the entire instruction manual before you start installation and assembly and keep it for future reference. Keep the manual for future reference.
- Before connecting the device to power supply socket, make sure the voltage indicated on the device corresponds to the voltage in the power supply socket.
- Appliance for household use only.
- Clean and store this appliance in accordance to instructions listed in "Cleaning" section.
- ALWAYS turn off the device and disconnect it from the mains supply:
• if it's not operating correctly
- if there's an uncommon voice when using
• before disassembling the device
- before cleaning
- when not in use
-
When you disconnect the power cord of the device, grasp and pull the plug, not the cord/cable.
-
Do not turn on the device if the water tank is empty.
- Danger of scalding! Never direct the jet of hot steam or water towards yourself or other people!
- To operate the coffee machine always use handles or knobs.
- Do not touch the coffee machine when it is working as this brings the risk of burning
- When hot water is being generated from the nozzles keep your body at the distance from the coffee machine to prevent scorch.
- Keep the device out of the reach of children.
- This appliance may be used by children who are above 8 years old and by persons with reduced physical, sensory or mental capabilities, or lack of experience and knowledge, if they are supervised and guided by a person who is responsible for their safety in a cautious manner for all the safety precautions being understood and followed. Children should be supervised to ensure that they do not play with the appliance. Children should not perform cleaning and servicing of the device unsupervised.
- Fixed power cable may only be replaced in an authorized service point.
- Keep the device and its cord/cable away from heat, water, moisture, sharp edges and any other factor which may damage the appliance or its cord.
- Make sure the power cord does not touch any hot or sharp elements.
- Do not use the product for purposes different from displayed in this operating manual.
- Do not place the appliance in water or any liquid; nor handle/use it with wet or moist hands.
- Do not leave the appliance unattended when it's working.
- Producer of this product is not responsible for damages caused by inappropriate handling and using of the device.
EN
reesa
teesa
- ALWAYS disconnect the product form the power mains when it is not in use.
- DO NOT use this device if the cord or the plug is damaged, or the appliance is broken.
- Do not attempt to repair this device yourself. Only authorized and qualified personnel may repair this device. Never disassemble this device.
- Use only authorized accessories.
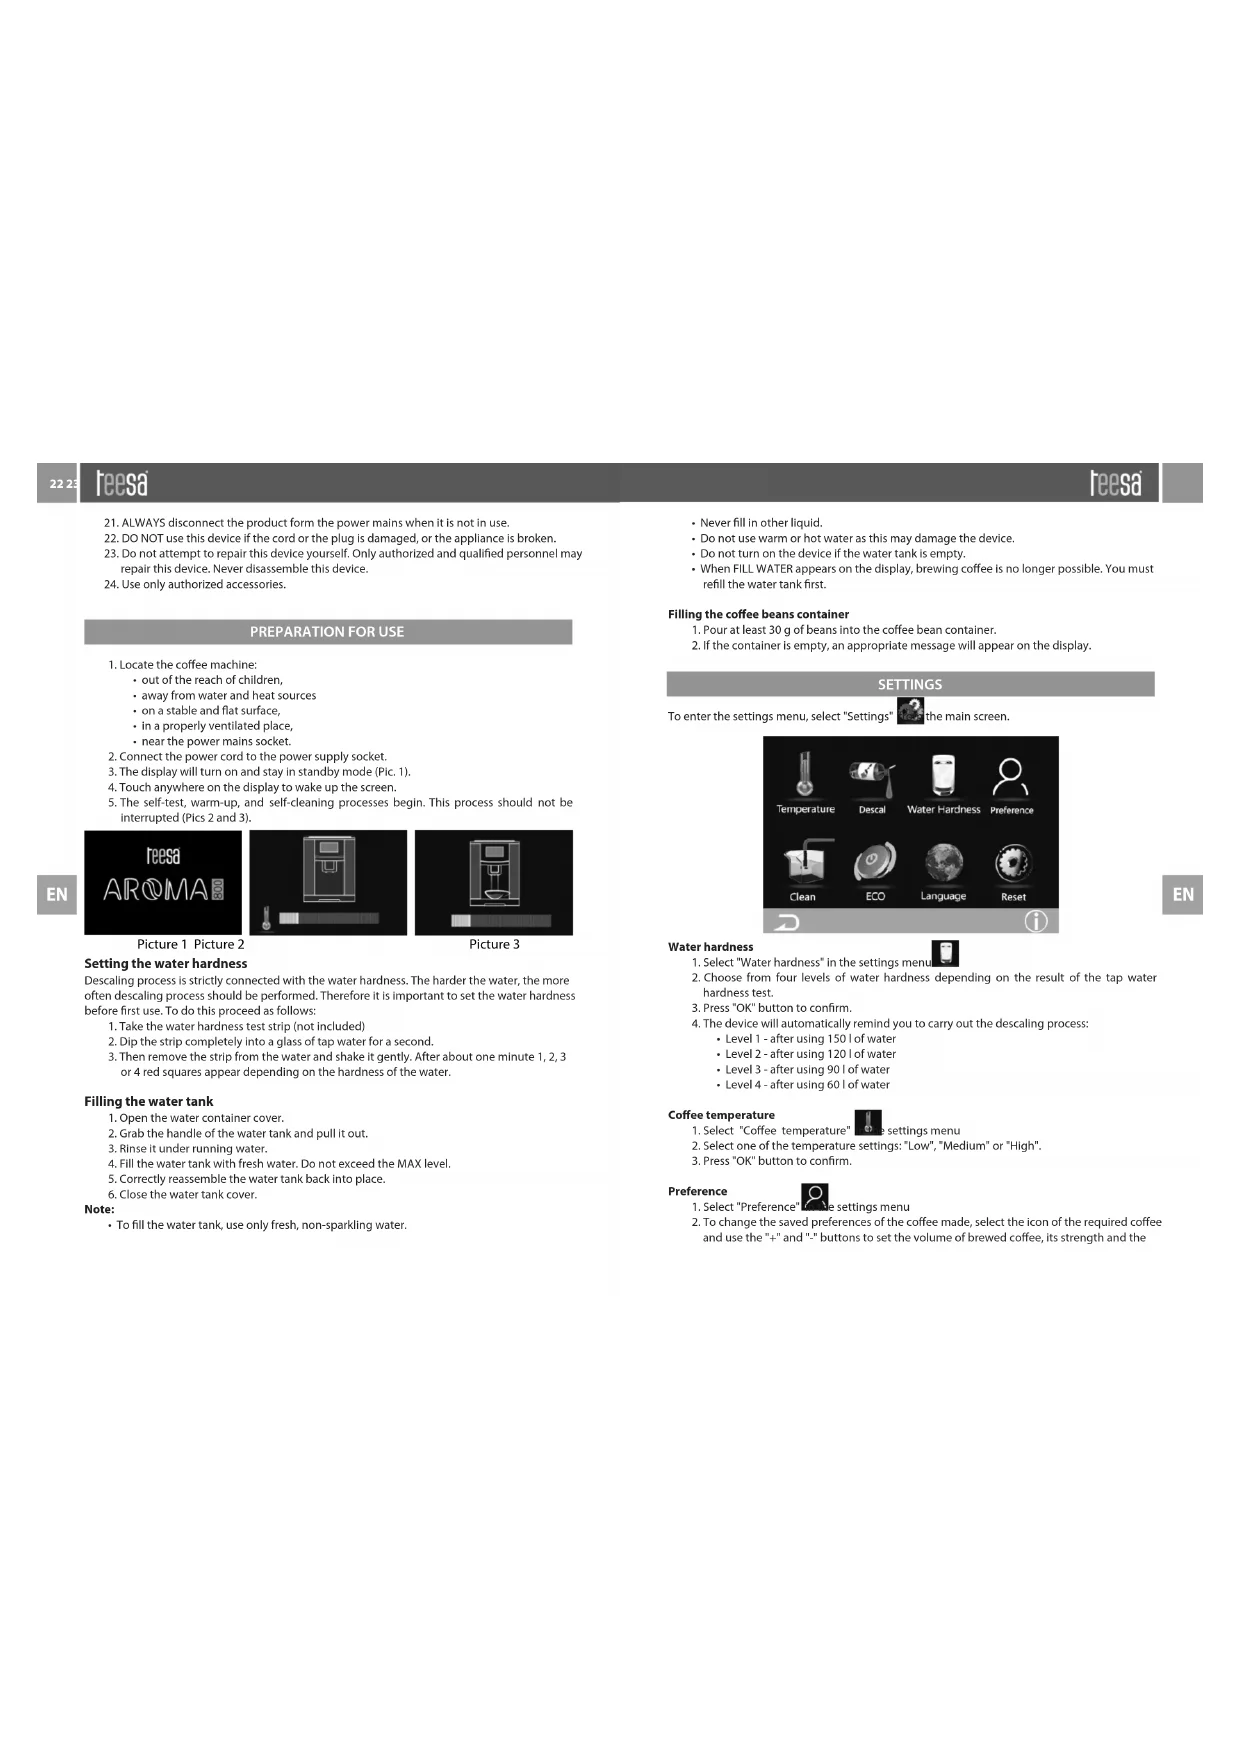
PREPARATION FOR USE
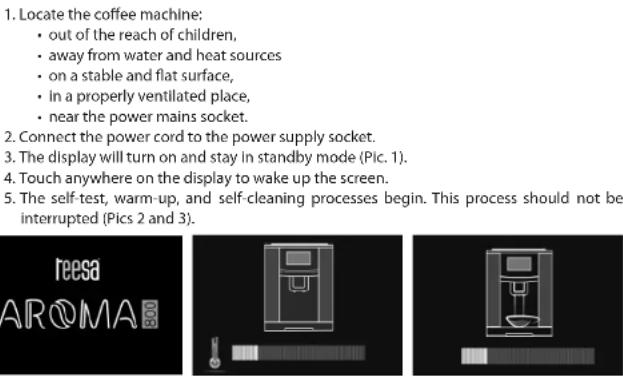
Picture 1 Picture 2
Picture 3
Setting the water hardness
Descaling process is strictly connected with the water hardness. The harder the water, the more often descaling process should be performed. Therefore it is important to set the water hardness before first use. To do this proceed as follows:
- Take the water hardness test strip (not included)
- Dip the strip completely into a glass of tap water for a second.
- Then remove the strip from the water and shake it gently. After about one minute 1, 2, 3 or 4 red squares appear depending on the hardness of the water.
Filling the water tank
- Open the water container cover.
- Grab the handle of the water tank and pull it out.
- Rinse it under running water.
- Fill the water tank with fresh water. Do not exceed the MAX level.
- Correctly reassemble the water tank back into place.
- Close the water tank cover.
Note:
• To fill the water tank, use only fresh, non-sparkling water.
- Never fill in other liquid.
- Do not use warm or hot water as this may damage the device.
- Do not turn on the device if the water tank is empty.
- When FILL WATER appears on the display, brewing coffee is no longer possible. You must refill the water tank first.
Filling the coffee beans container
- Pour at least 30 g of beans into the coffee bean container.
- If the container is empty, an appropriate message will appear on the display.
SETTINGS
To enter the settings menu, select "Settings" in the main screen.

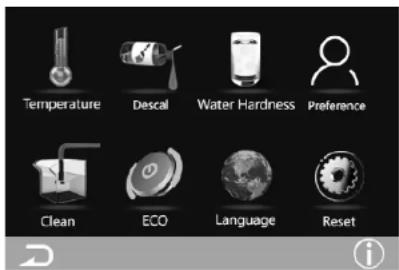
Water hardness
- Select "Water hardness" in the settings menu
- Choose from four levels of water hardness depending on the result of the tap water hardness test.
- Press "OK" button to confirm.
- The device will automatically remind you to carry out the descaling process:
Level 1 - after using 150 l of water
• Level 2 - after using 120 l of water
• Level 3 - after using 90 l of water
• Level 4 - after using 60 l of water
Coffee temperature
- Select "Coffee temperature" in the settings menu
- Select one of the temperature settings: "Low", "Medium" or "High".
- Press "OK" button to confirm.
Preference
- Select "Preference" in the settings menu
- To change the saved preferences of the coffee made, select the icon of the required coffee and use the "+" and "-" buttons to set the volume of brewed coffee, its strength and the
24 25 Owner's manual Owner's manual
reesa
time of frothing the milk.
- In the "Water" option, the amount of water is selected in hot water mode.
- In the "Milk" option, the amount of milk is selected in hot milk mode.
Descale
- Add descaling agent for coffee machines to the water container according to the detergent manufacturer's recommendations.
- If the water container is not full, refill it with water.

-
Select "Descale" in the settings menu.
-
The water pump will run for 30 seconds, then will pause for 3 minutes and restart the pump for 30 seconds. The device will perform 11 such cycles.
-
After finishing work, pour out the contents of the water container and refill it with clean water, then press the "OK" button
-
The device will clean the remaining elements and will stop working after pumping about 1 liter of water.
Clean

- Select "Clean" settings menu.
- Connect the rubber tube to the opening of the milk frother and insert the other end into a vessel with clean water.
- Press "OK" button to start process.
Eco Time
EN

- Select "Eco Time" in the settings menu.
- Select the time after which the device, which is not being used, enters the sleep state.
- Confirm with "OK" button.
Language
- Select "Language" in the settings menu.
- Choose the language and confirm with "OK" button.
Factory reset
- Select "Factory reset" [icon] set settings menu.
- Confirm reset with "OK" button.
Cup counter
- In the settings menu, press the button located in the lower right corner of the screen.
Fan settings
- Select "FAN" in the settings menu.
- Select "ON" or "OFF" option.
Note: It is recommended that you set this feature to On. This is helpful in removing excess water vapor from the device.
Grinding level of beans
- To set the grinding level of beans, use the knob next to the coffee beans insertion hole.
- If anti-clockwise adjusted, the powder size will be fine and coffee taste stronger.
- If clockwise adjusted, the powder size will be coarse and coffee taste weak.
COFFEE PREPARATION
- Place a cup under the coffee outlet.
- Connect one end of the rubber tube to the milk frother.
- Place a container with milk next to the coffee machine and insert the other end of the rubber tube into it.
- On the screen, select the desired coffee, its strength, amount and time of frothing the milk.
- Confirm with "OK" button.
- The coffee-making process can be interrupted by touching the X button on the screen.
- The coffee-making process can be interrupted by touching yellow coffee icon on the screen.
Coffee powder brew function
- The device has the function of preparing pre-ground coffee.
- To activate this mode, press the "Powder" button on the main screen.
- Pour one spoon of ground coffee into the hole next to the coffee beans.
- Select desired coffee on the main screen and confirm with "OK" button.
CLEANING
- It is recommended to rinse the water container at least once a day.
- Brewing unit should be cleaned at least once a week using dry cloth.
• The milk frother tube should be cleaned after each use. - Dump container and drip tray should be cleaned at least one a week.
- If the machine is not used for a long time, it is recommended to clean all elements so as to leave the machine clean.
-
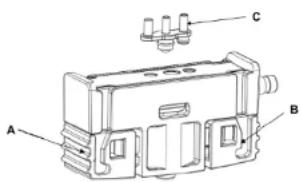
Milk frother cleaning:
-
Press Part A and Part B to disassemble the milk frother system from the coffee machine.
- Remove Part C from the milk frother
- Use running water to remove the remaining milk inside
- Place Part C back into the milk frother. Remember to properly match it with the holes in the frother.