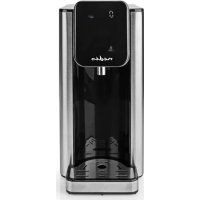
KAWD300FBK - Kettle NEDIS - Free user manual and instructions
Find the device manual for free KAWD300FBK NEDIS in PDF.



| Product type | Hot water dispenser (kettle) |
| Brand | Nedis |
| Model | KAWD300FBK |
| Dimensions (L x W x H) | 150 x 250 x 310 mm |
| Weight | 3 kg |
| Power supply | 220-240 V~ / 50-60 Hz, 2200-2600 W |
| Standby power consumption | 0.7 W |
| Water capacity | 0.5 to 2.7 L |
| Display | LCD screen with temperature, volume and function indicators |
| Temperature setting | Manual from 45 to 100 °C, presets for milk (40 °C) and tea/coffee (92 °C) |
| Volume setting | Custom from 100 to 400 ml or continuous dispensing (000) |
| Safety lock | Automatic touch screen lock after 10 seconds, unlock by long press |
| Visual indicators | Water shortage (A21), descaling required (A20), lock active |
| Stop function | Manual stop via on/off button, automatic stop in case of water shortage |
| Included parts | Pouring spout, drip tray, recovery tray, removable filter, filter box |
| Material | Plastic and stainless steel |
| Cleaning and maintenance | Descaling with white vinegar, filter cleaning by soaking, exterior wiping with damp cloth |
| Repairability | Reset possible via dedicated hole, user-replaceable filter, technical repair for error codes |
| Intended use | Indoor domestic use, instant hot water dispensing |
| Minimum user age | 8 years under supervision, 14 years without supervision |
Frequently Asked Questions - KAWD300FBK NEDIS
User questions about KAWD300FBK NEDIS
0 question about this device. Answer the ones you know or ask your own.
Ask a new question about this device
Download the instructions for your Kettle in PDF format for free! Find your manual KAWD300FBK - NEDIS and take your electronic device back in hand. On this page are published all the documents necessary for the use of your device. KAWD300FBK by NEDIS.
USER MANUAL KAWD300FBK NEDIS
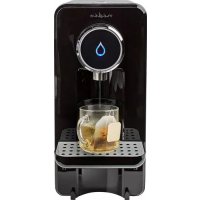
hot water within 8 seconds
KAWD300FBK
natural_image
Line drawing of a modern water dispenser with control panel and door (no text or symbols)EN Quick start guide 4
DE Kurzanleitung 10
flowchart
graph TD
    A["15"] --> B["1"]
    B --> C["Car"]
    C --> D["Control Panel"]
    D --> E["Back of water"]
    F["16"] --> G["1"]
    G --> H["Car"]
    H --> I["Load"]
    I --> J["Drive"]
    K["17"] --> L["Melt"]
    L --> M["Drive"]
    N["18"] --> O["Look"]
    O --> P["VOLTAGE"]
    Q["19"] --> R["On/Ont"]
    S["20"] --> T["21"]
    U["21"] --> V["22"]
    W["22"] --> X["23"]
    Y["23"] --> Z["24"]
Hot Water Dispenser KAWD300FBK
For more information see the extended manual online: ned.is/kawd300fbk
Intended use
The Nedis KAWD300FBK is a hot water dispenser for instant boiling water.
The product is intended for indoor use only.
The product is not intended for professional use.
Any modification of the product may have consequences for safety, warranty and proper functioning.
This product is intended for use in household environments for typical housekeeping functions that may also be used by non-expert users for typical housekeeping functions, such as: shops, offices other similar working environments, farm houses, by clients in hotels, motels and other residential type environments and/or in bed and breakfast type environments.
This product can be used by children aged from 8 years and above and persons with reduced physical, sensory or mental capabilities or lack of experience and knowledge if they have been given supervision or instruction concerning use of the product in a safe way and understand the hazards involved. Children shall not play with the product. Cleaning and user maintenance shall not be done by children without supervision.
Specifications
| Product Hot Water Dispenser | |
| Article number KAWD300FBK | |
| Dimensions (d x w x h) 150 x 250 x 310 mm | |
| Weight 3 kg | |
| Power supply 220 - 240 VAC / 50/60 Hz | |
| Power consumption 2200 - 2600 W | |
| Standby power 0.7 W | |
| Water quantity 0.5 - 2.7 L | |
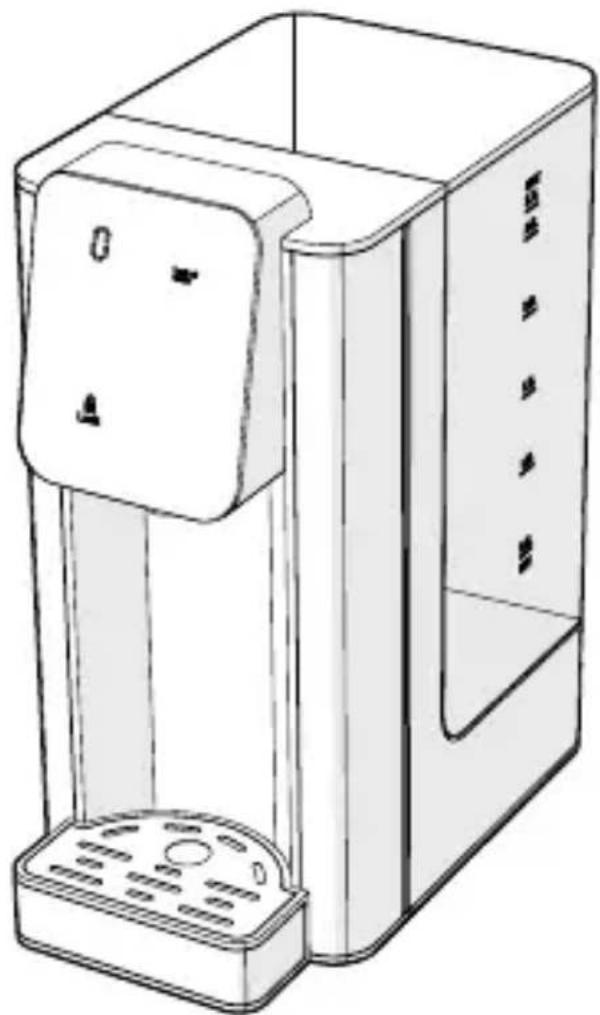
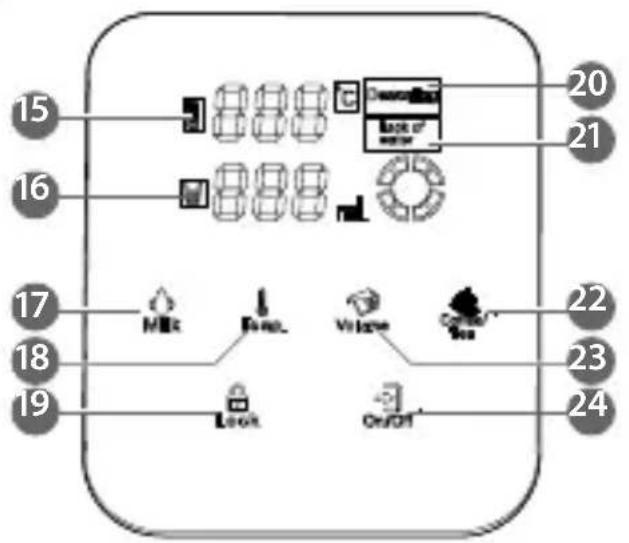
Main parts (image A)
| 1 | Reset hole | 13 | Filter (optional) |
| 2 | LCD display | 14 | Filter box |
| 3 | Spout | 15 | Temperature indicator |
| 4 | Drip plate | 16 | Volume indicator |
| 5 | Drip tray | 17 | Water temperature for milk |
| 6 | Top lid | 18 | Setting the temperature manually |
| 7 | Water tank | 19 | Touchscreen control lock |
| 8 | Water level indicator | 20 | Descale indicator |
| 9 | Power cable | 21 | Lack of water indicator |
| 10 | Drainage stopper | 22 | Water temperature for coffee or tea |
| 11 | Bottom cover | 23 | Custom dispense volume |
| 12 | Reset key | 24 | On / off button |
Safety instructions
WARNING
- Ensure you have fully read and understood the instructions in this document before you install or use the product. Keep this document for future reference.
- Only use the product as described in this document.
- Do not use the product if a part is damaged or defective. Replace a damaged or defective product immediately.
- Do not drop the product and avoid bumping.
- This product may only be serviced by a qualified technician for maintenance to reduce the risk of electric shock.
- Unplug the product from the power source and other equipment if problems occur.
- Do not use the product to heat anything other than water.
- Do not use the product if the surface is cracked.
- Place the product on a stable and flat surface.
- Ensure no water enters the power outlet.
- Connect to a grounded outlet only.
- Do not unplug the charger by pulling on the cable. Always grasp the plug and pull.
-
Do not let the power cable touch hot surfaces.
-
Do not expose the product to direct sunlight, naked flames or heat.
- Never immerse the product in water or place it in a dishwasher.
- Do not remove the top lid while the brewing cycle is in progress.
- Unplug the product when not in use and before cleaning.
- Unplug the product from the power source before service and when replacing parts.
- Children of less than 8 years should be kept away unless continuously supervised.
- Usage by children should be supervised at all times.
- This product is not a toy. Never allow children or pets to play with this product.
- Do not move the product during operation.
- The temperature of accessible surfaces may be high when the product is operating.
- Do not touch the hot parts of the product directly.
- Do not fill the water tank below the "min" indicator.
- Do not fill the water tank above the "max" indicator.
Before first use
- Clean the product with a damp cloth.
- Place the product on a stable and flat surface.
- Connect the power cable A 9 to a power outlet.
When you first use this product, perform two full cycles to clean the inside of the product.
Filling the water tank
- Remove the top lid A 6 from the water tank A 7.
- Fill A 7 to the "max" on the water level indicator A8.
Do not fill the water tank above the "max" on A8.
Do not fill the water tank below the "min" on A8.
Do not spill any water on the product.
- Place A 6 back on A7.
Tapping hot water
Do not remove A 6 while hot water is dispensed.
- Place a glass under the spout A 3.
- Select the preferred temperature and volume settings.
- Tap the on / off button A 24.
Hot water flows from A 3 until the set volume has been dispensed. - Press A 24 to manually stop the cycle.
Emptying the drip plate
- Place one hand on A 6 to stabilize the product.
- Lift up the drip tray A 5 with the other hand.
- Remove the drip plate A 4.
- Empty A 5.
- Place A 4 back on A 5.
- Place A 5 back on the product.
Touchscreen controls
| Temperature indicatorA15 | Displays the current and the set temperature.When the display shows “000”, unheated water is dispensed. |
| Volume indicator A16 | Displays the current and the set volume.When the display shows “000”, the water flows continuously until A24 is pressed. |
| Water temperature for milk A17 | Dispense water at 40 °C. This temperature is especially suited for powdered milk. |
| Setting the temperature manually A18 | Tap A18 to set the desired temperature between 45 and 100 °C and 000. |
| Touchscreen control lockA19 | After 10 seconds the LCD display will be automatically locked.-Tap and hold A19 for 3 - 5 seconds to unlock the product.-Tap A19 once to lock the product. |
| Descale indicator A20 | Descale the product as soon as possible when A20 lights up. |
| Lack of water indicator A21 | Fill A7 if A21 lights up |
| Water temperature for coffee or tea A22 | Dispense water at 92 °C. This temperature is especially suited for tea or instant coffee. |
| Custom dispense volume A23 | Tap A23 to set the desired volume between 100 and 400 ml and 000. |
| On / off button A24 | Tap A24 to start or stop the function setting. |
Replacing the filter
- Remove A 6.
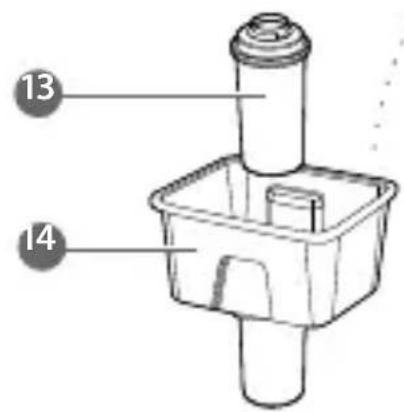
- Take out the filter box A 14 including the filter A 13.
- Clean the new A 13 you want to use
Immerse the filter vertically for 15 minutes.
Rinse the filter under water for 15-20 seconds.
-
Place the new A 13 into A 14.
-
Place A 14 into A 7 on the original filter place of the product.
Recalibrating the volume and temperature
-
Place a water container underneath A 3.
-
Tap and hold A 18 for 3 seconds.
A15 shows "AUT".
A16 shows "000".
- Tap A 24.
The machine recalibrates the volume and temperature.
During the process water is dispensed through A 3. After 4-5 minutes the machine automatically exits the calibration mode.
Resetting the product
-Place the reset key A 12 into the reset hole A 1. The machine automatically exits the reset mode.
Descaling the product
- Remove A 6.
- Fill A 7 with 1000 ml of white vinegar.
- Add water to the max.
- Place A 6 back on A 7.
- Tap and hold A 23 for 3 seconds.
- Remove A 6.
- Fill A ⑦ with clean water to the max.
- Place 6 back on A7.
-
Tap and hold A 23 for 3 seconds.
-
Repeat step 6 - 9 until the odor of vinegar has been flushed away.
Display error codes
| E0 PC board problem | 1. Unplug the product from the power source.2. Contact a qualified technician for service/repair. |
| E4 or E5 Temperature sensor or water inlet problem | 1. Unplug the product from the power source.2. Contact a qualified technician for service/repair. |
| E7 Lack of water | Fill A7. |
Heißwasserspender KAWD300FBK
- hot water within 8 seconds
- Hot Water Dispenser KAWD300FBK
- Intended use
- Main parts (image A)
- Safety instructions
- WARNING
- Before first use
- Filling the water tank
- Tapping hot water
- Emptying the drip plate
- Replacing the filter
- Recalibrating the volume and temperature
- Resetting the product
- Descaling the product
- Display error codes
- Heißwasserspender KAWD300FBK
Brand : NEDIS
Model : KAWD300FBK
Category : Kettle