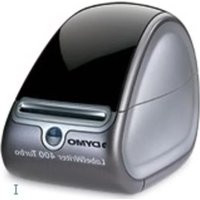
LabelWriter 400 Duo - Printer DYMO - Free user manual and instructions
Find the device manual for free LabelWriter 400 Duo DYMO in PDF.

User questions about LabelWriter 400 Duo DYMO
0 question about this device. Answer the ones you know or ask your own.
Ask a new question about this device
Download the instructions for your Printer in PDF format for free! Find your manual LabelWriter 400 Duo - DYMO and take your electronic device back in hand. On this page are published all the documents necessary for the use of your device. LabelWriter 400 Duo by DYMO.
USER MANUAL LabelWriter 400 Duo DYMO
natural_image
Exterior view of a DYSMO LabelWriter Duo brand air mask (no additional text or symbols visible)Follow these steps to install the LabelWriter printer and print your first label.
1. Unpacking your LabelWriter Printer
NOTE Do not plug the printer into your computer until asked to do so during the software installation.
1 Unpack your printer and save the packing materials.
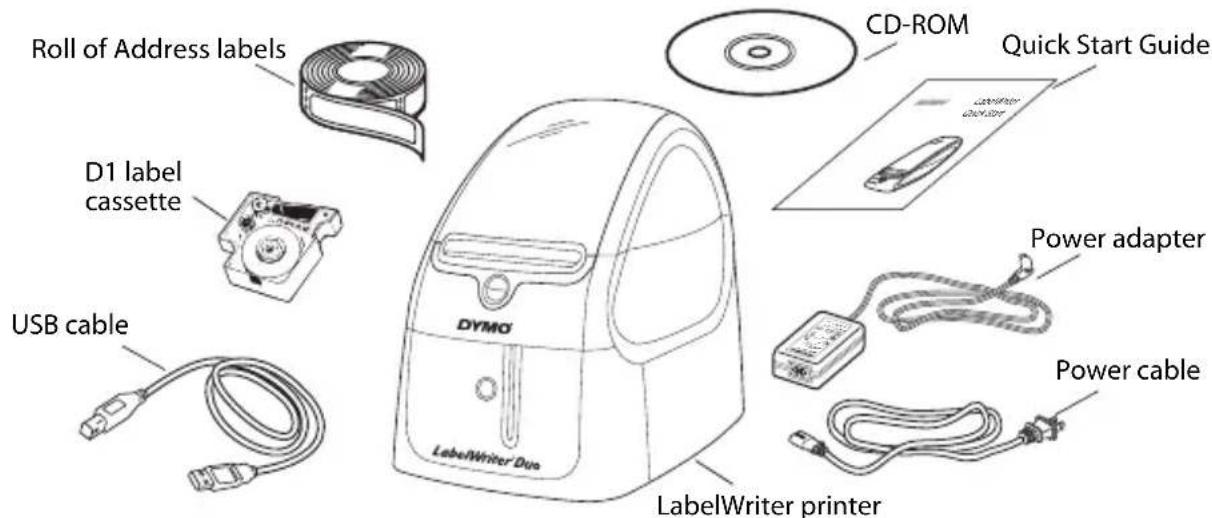
2 Make sure you have all the items shown in Figure 1. (Labels included in the package may vary.)
text_image
Roll of Address labels CD-ROM Quick Start Guide D1 label cassette USB cable DYMO LabelWriter Duo LabelWriter printer Power adapter Power cableFigure 1
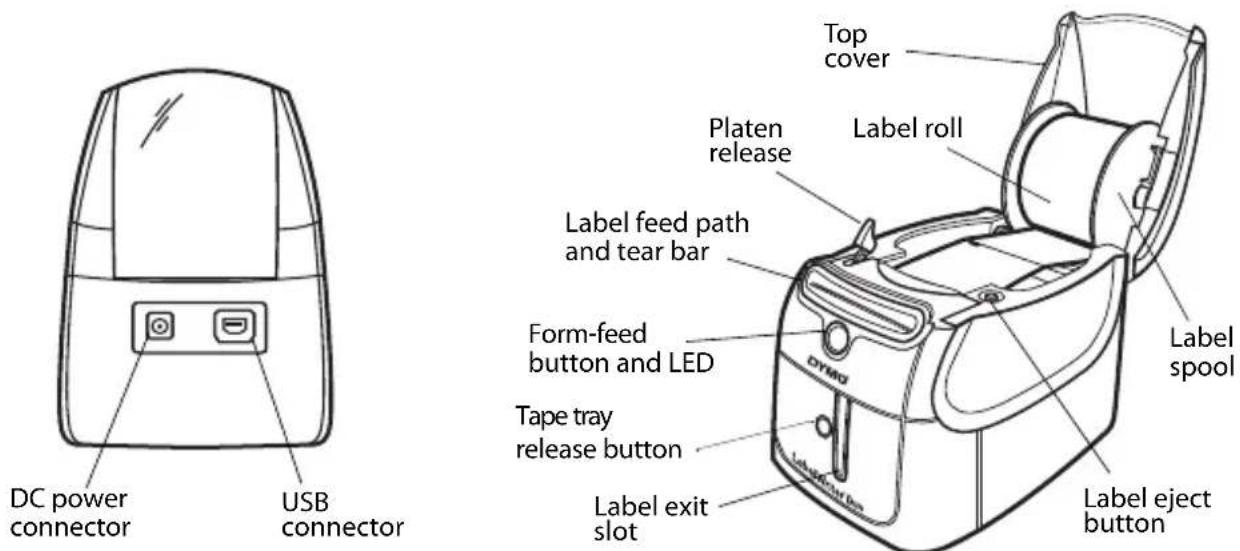
Become familiar with the printer's major components. See Figure 2.
text_image
DC power connector USB connector Top cover Platen release Label roll Label feed path and tear bar Form-feed button and LED Tape tray release button Label exit slot DYMO Label spool Label eject buttonFigure 2
LabelWriter Printer Features
Your LabelWriter printer is a direct thermal printer and does not use ink or toner. Instead, the printer uses heat from a thermal print head to print on specially treated labels. Labels are the only supplies you will ever need to buy.
The form-feed button on the front of the printer is used to advance a single label. The label eject button is used to remove labels from the printer when changing rolls. The tape tray release button opens the tape tray to insert or remove a label cassette.
The LED status light allows you to visually determine the current state of the printer:
- Solid blue - power is on and the printer is ready.
- Flashing blue - labels are not loaded properly or label spool is empty.
2. Installing the Software
NOTE Do not connect the printer to your computer until instructed to do so during the software installation.
To install the software on a Windows system
1 Insert the LabelWriter CD into your CD-ROM drive. After a few seconds, the installation screen appears.
If the installation screen does not appear:
a. Click Start, then Run on the Windows taskbar. The Run dialog box appears.
b. Enter D:\install.exe (where D is the letter assigned to the CD-ROM drive) and click OK.
2 Select the language version you wish to install and follow the instructions.
To install the software on a Mac OS system
1 Insert the DYMO LabelWriter CD into the CD-ROM drive.
After a few seconds, the DYMO Label Software Installer icon appears. See Figure 3.
Figure 3
2 Double-click the Installer icon and follow the instructions.
If you do not see your printer in the printer list when the installation is complete, refer to the ReadMe file for instructions on how to add the printer.
3. Connecting your LabelWriter Printer
NOTE Do not connect the printer to your computer until instructed to do so during the software installation.
To connect the power
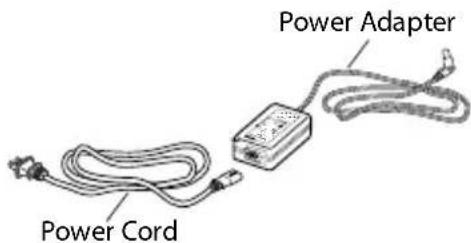
1 Plug the power cord into the power adapter. See Figure 4.
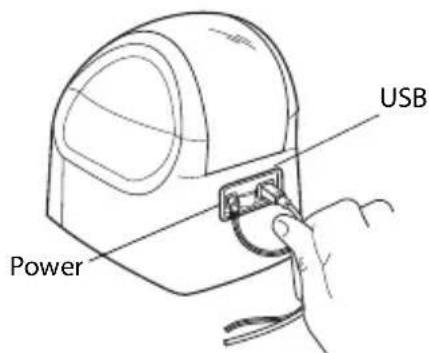
2 Plug the power adapter into the power connector on the back of the printer. See Figure 5.
3 Plug the other end of the power cord into a power outlet.
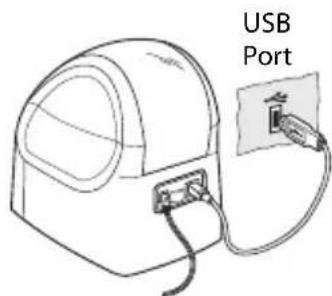
4 Plug the USB cable into the USB port on the back of the printer. See Figure 5.
NOTE DO NOT CONNECT the other end of the USB cable to your computer until asked to do so during the software installation.
5 When prompted by the software installer, plug the USB cable into a USB port.
text_image
Power Cord Power AdapterFigure 4
text_image
Power USBFigure 5
text_image
USB PortFigure 6
4. Loading Labels
The LabelWriter Duo printer prints two types of labels: die-cut paper labels (such as Address or Shipping labels) and D1 label cassettes.
To load die-cut labels
1 Press the form-feed button to eject the labels that protected the printer during shipment.
2 Open the top cover and remove any packing material inside the label compartment.
3 Remove the label spool from inside the cover.
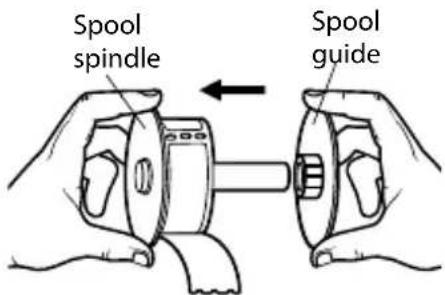
4 Hold the spool spindle in your left hand and place the label roll on the spindle so that the labels feed from underneath and the left edge of the label roll is flush against the side of the spool. See Figure 7.
5 Place the spool guide onto the right side of the spool and press the guide tightly against the side of the
text_image
Spool spindle Spool guideFigure 7
text_image
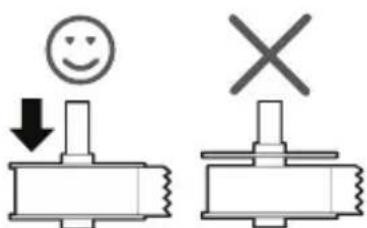
Diagram showing two mechanical components with smiley face and cross symbol, indicating correct and incorrect states.Figure 8
label roll, leaving no gap between the roll and the spool. See Figure 8.
NOTE The label roll must fit snugly against both sides of the label spool, with no gaps, to avoid drifting as the labels feed through the printer.
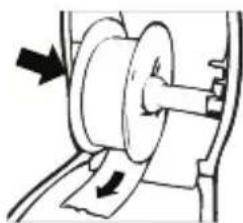
6 Insert the label spool into the slot in the printer cover with the labels extending from underneath the roll. See Figure 9.
natural_image
Mechanical diagram showing a pulley and rotating shaft assembly (no text or symbols)Figure 9
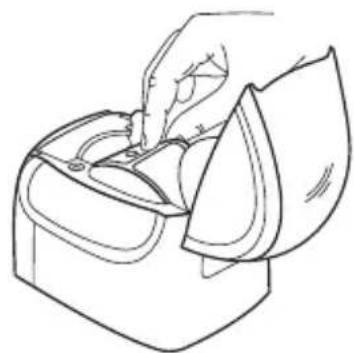
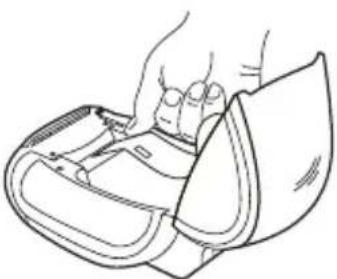
7 Align the left edge of the label with the left edge of the label feed slot and insert the label into the slot. See Figure 10.
The printer feeds the labels, stopping at the beginning of the first label. If the printer does not feed the labels, make sure the first label is fully inserted and then press the form-feed button.
8 Close the top cover.
To load the D1 label cassette
1 Press the button on the front of the printer to open the label cassette tray.
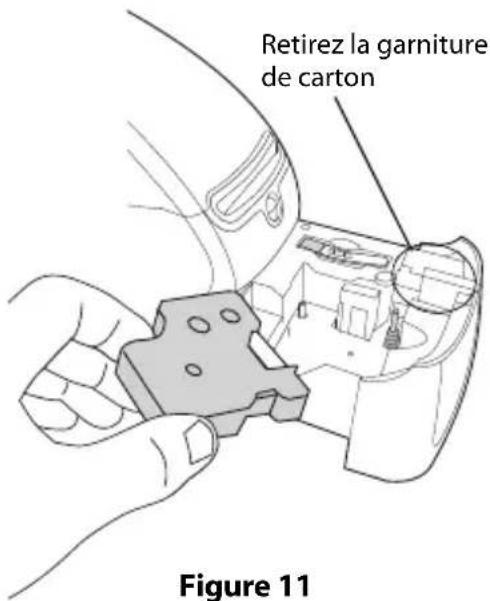
NOTE The first time you use the printer, remove the protective cardboard insert from the label exit slot. See Figure 11.
2 Make sure the label and ribbon are taut across the mouth of the cassette and that the label passes between the guideposts. If necessary, turn the spool clockwise to tighten the ribbon.
natural_image
Line drawing of a hand pressing down on a mechanical component (no text or symbols)Figure 10
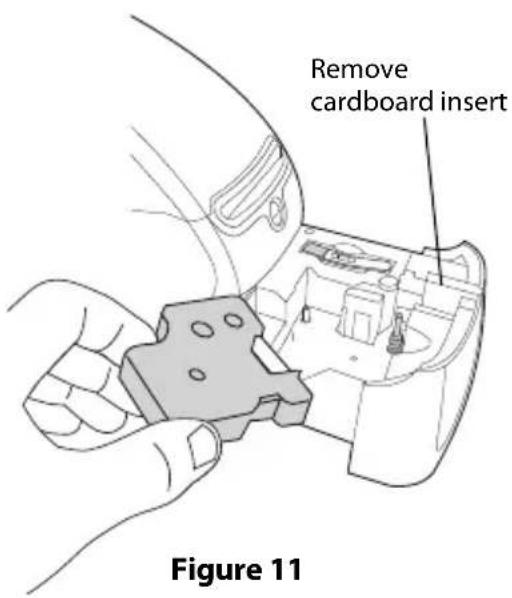
text_image
Remove cardboard insert Figure 113 Insert the cassette and press firmly until it clicks into place. Make sure label and ribbon are positioned correctly. See Figure 12.
4 Press the button to close the label cassette tray. You are now ready to print your first label.
5. Printing your First Label
To print an address label
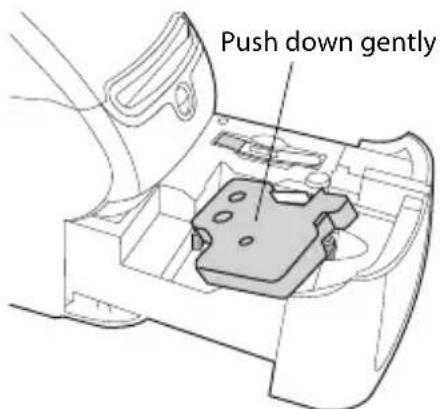
text_image
Push down gentlyFigure 12
1 Start DYMO Label Software by doing one of the following:
- For Windows, click Start, then Programs>DYMO Label>DYMO Label.
- For Macintosh, double-click in the DYMO Label folder.
The first time you open the application, you are asked to register the software. Registering the software ensures that you will be informed of any software updates. You are also asked to enter your default return address.
2 At the main window, click once on the address label and type an address.
3 Select a font setting that you like from the Formatting toolbar.
4 Click to print the label.
To print a D1 plastic label
1 Click to display the Tape Editor.
2 Make sure that the Tape Width selection matches the size of the tape cassette loaded in the tape tray.
3 Type some text on the label.
4 Select a font and a style setting from the Formatting toolbar.
5 Click to print the label.
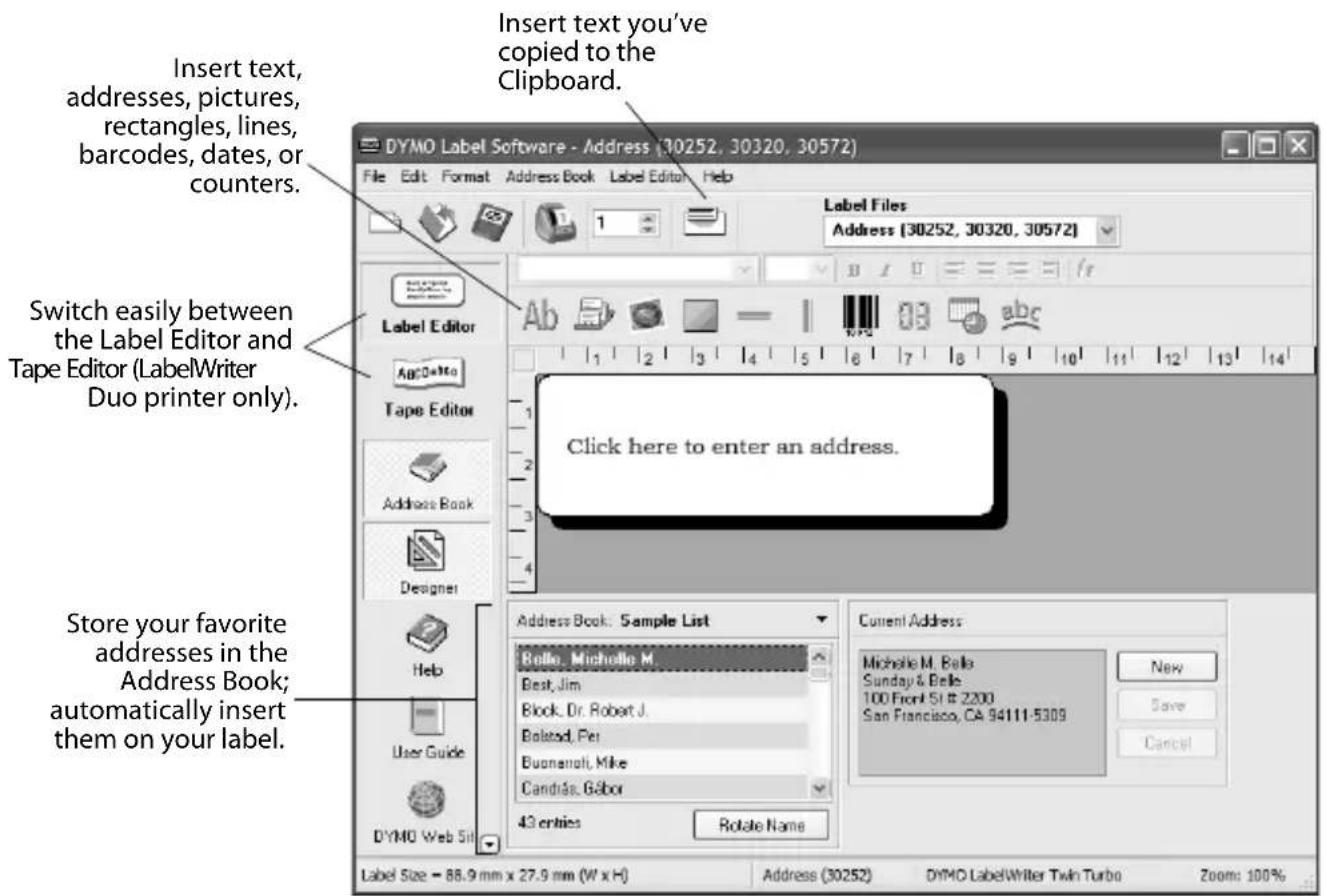
Figure 13 highlights some of the major features available in DYMO Label Software.
text_image
Insert text, addresses, pictures, rectangles, lines, barcodes, dates, or counters. Insert text you've copied to the Clipboard. DYMO Label Software - Address (30252, 30320, 30572) File Edit Format Address Book Label Editor Help Label Files Address (30252, 30320, 30572) Label Editor Ab abc Switch easily between the Label Editor and Tape Editor (LabelWriter Duo printer only). Address Book Designer Click here to enter an address. Store your favorite addresses in the Address Book; automatically insert them on your label. Address Book: Sample List Bello, Michelle M. Best, Jim Block, Dr. Robert J. Balstad, Per Buonamoli, Mike Candás, Gábor 43 entries Rotate Name DYSMO Web Site User Guide Label Size = 88.9 mm x 27.9 mm (W x H) Address (30252) DYMO LabelWriter Twin Turbo Zoom: 100%Figure 13
For complete details on using the software, refer to the DYMO Label Software User Guide, located on the DYMO LabelWriter CD-ROM, and the online Help.
LabelWriter: Duo
DYMO Label
Software Installer
Figure 3
text_image
Diagram showing two mechanical components with smiley face and cross symbol, indicating correct and incorrect states.Figure 8
natural_image
Mechanical diagram showing a pulley and rotating components with directional arrows (no text or labels)Figure 9
natural_image
Line drawing of a hand holding a blood pressure monitor (no text or symbols)Figure 10
text_image
Retirez la garniture de carton Figure 11text_image
Conector USB CorrienteFigure 5
text_image
Diagram showing two mechanical components with smiley face and cross symbol, indicating correct and incorrect states.Figure 8
natural_image
Mechanical diagram showing a pulley and rotating shaft assembly with directional arrows (no text or labels)Figure 9
natural_image
Line drawing of a hand holding a blood pressure monitor (no text or symbols)Figure 10
text_image
Diagram showing two mechanical or electrical component states: a smiley face with downward arrow and a cross symbol, likely indicating correct or incorrect conditions.Figura 8
natural_image
Mechanical diagram showing a pulley and rope mechanism with directional arrows (no text or labels)Figura 9

natural_image
Line drawing of a hand holding a bag with a leaf being inserted (no text or symbols)Figura 10
For Troubleshooting or Customer Service, visit www.dymo.com.