
BEWPI 120 - Air-conditioner BEKO - Free user manual and instructions
Find the device manual for free BEWPI 120 BEKO in PDF.

User questions about BEWPI 120 BEKO
0 question about this device. Answer the ones you know or ask your own.
Ask a new question about this device
Download the instructions for your Air-conditioner in PDF format for free! Find your manual BEWPI 120 - BEKO and take your electronic device back in hand. On this page are published all the documents necessary for the use of your device. BEWPI 120 by BEKO.
USER MANUAL BEWPI 120 BEKO
Split-type room air conditioner
User Manual
natural_image
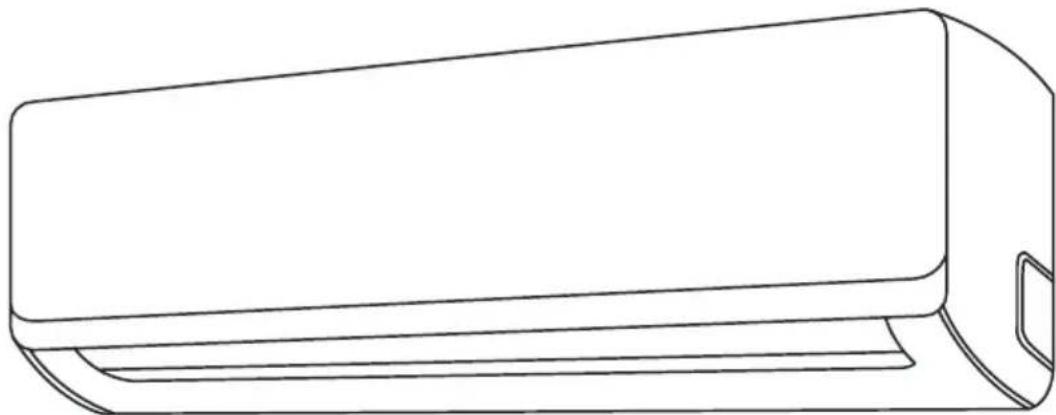
Line drawing of a rectangular air conditioner unit (no text or symbols)BEWPI 090 | BEWPI 091 | BEWPI 120 | BEWPI 121
BEWPI 180 | BEWPI 181 | BEWPI 240 | BEWPI 241
EN | FR | IT | ES | PT
Please read this user manual first!
Dear Customer,
Thank you for preferring a Beko product. We hope that you get the best results from your product which has been manufactured with high quality and state-of-the-art technology. Therefore, please read this entire user manual and all other accompanying documents carefully before using the product and keep it as a reference for future use. If you handover the product to someone else, give the user manual as well. Follow all warnings and information in the user manual.
Meanings of the symbols
Following symbols are used in the various section of this manual:

Important information or useful hints about usage.
Warning for hazardous situations with regard to life and property.
This symbol shows that the operation manual should be read carefully.
This symbol shows that a service personnel should be handling this equipment with reference to the installation manual.
This symbol shows that information is available such as the operating manual or installation manual.
natural_image
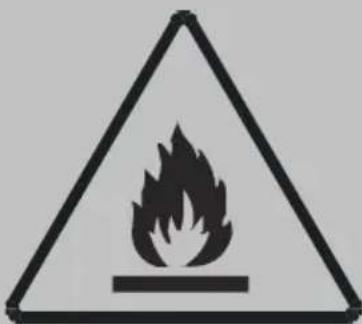
Warning symbol of a flame inside a triangle (no text or numbers)Risk of fire/flammable materials
This symbol shows that this appliance used a flammable refrigerant. If the refriaerant is leaked and exposed to an external ignition source, there is a risk of fire. (For the unit adopts R32/R290 Refrigerant only)

This product has been produced in environmentally friendly, modern facilities
CONTENTS
1 Safety instructions 4
2 Unit specifications and features 7
2.1 Unit parts 7
2.2 Achieving optimal performance 8
2.3 Inverter split type....8
2.4 Fixed-speed type 9
2.5 Other features....9
3 Manual operation (without remote) 14
3.1 How to operate your unit without the remote control 14
4 Care and maintenance 15
4.1 Cleaning your indoor unit 15
4.2 Cleaning your air filter 15
4.3 Air filter reminders (optional)....17
4.3.1 Air filter cleaning reminder 17
4.3.2 Air filter replacement reminder 17
4.4 Maintenance - long periods of non-use 18
4.5 Maintenance - pre-season inspection....19
5 Troubleshooting 20
5.1 Common issues 20
5.2 Troubleshooting 22
6 European disposal guidelines 24
7 Installation instructions 25
7.1 F-Gas instruction....25
8 Specification 26
1 Safety instructions
WARNING:
Servicing shall only be performed as recommended by the equipment manufacturer. Maintenance and repair requiring the assistance of other skilled personnel shall be carried out under the supervision of the person competent in the use of flammable refrigerants. For more details, please refer to the “Information on servicing” on “INSTALLATION MANUAL” (This is only required for the unit adopts R32/R290 Refrigerant)
Read safety precautions before installation Incorrect installation due to ignoring instructions can cause serious damage or injury.
The seriousness of potential damage or injuries is classified as Warning.
Warning
- This appliance can be used by children aged from 8 years and above and persons with reduced physical, sensory or mental capabilities or lack of experience and knowledge if they have been given supervision or instruction concerning use of the appliance in a safe way and understand the hazards involved. Children shall not play with the appliance. Cleaning and user maintenance shall not be made by children without supervision.
Installation warnings
- Ask an authorized dealer to install this air conditioner. Inappropriate installation may cause water leakage, electric shock, or fire.
- All repairs, maintenance and relocation of this unit must be performed by an authorized service technician. Inappropriate repairs can lead to serious injury or product failure.
1 Safety instructions
Warnings for product use
- If an abnormal situation arises (like a burning smell), immediately turn off the unit and pull the power plug. Call your dealer for instructions to avoid electric shock, fire or injury.
- Do not insert fingers, rods or other objects into the air inlet or outlet. This may cause injury, since the fan may be rotating at high speeds.
- Do not use flammable sprays such as hair spray, lacquer or paint near the unit. This may cause fire or combustion.
- Do not operate the air conditioner in places near or around combustible gases. Emitted gas may collect around the unit and cause explosion.
- Do not operate the air conditioner in a wet room (e.g., bathroom or laundry room). This can cause electrical shock and cause the product to deteriorate.
- Do not expose your body directly to cool air for a prolonged period of time.
Electrical warnings
- Only use the specified power cord. If the power cord is damaged, it must be replaced by the manufacturer or certified service agent.
- Keep power plug clean. Remove any dust or grime that accumulates on or around the plug. Dirty plugs can cause fire or electric shock.
- Do not pull power cord to unplug unit. Hold the plug firmly and pull it from the outlet. Pulling directly on the cord can damage it, which can lead to fire or electric shock.
1 Safety instructions
- Do not use an extension cord, manually extend the power cord, or connect other appliances to the same outlet as the air conditioner. Poor electrical connections, poor insulation, and insufficient voltage can cause fire.
Cleaning and maintenance warnings
- Turn off the device and pull the plug before cleaning. Failure to do so can cause electrical shock.
- Do not clean the air conditioner with excessive amounts of water.
- Do not clean the air conditioner with combustible cleaning agents. Combustible cleaning agents can cause fire or deformation.
Warning
- If the air conditioner is used together with burners or other heating devices, thoroughly ventilate the room to avoid oxygen deficiency.
- Turn off the air conditioner and unplug the unit if you are not going to use it for a long time.
- Turn off and unplug the unit during storms.
- Make sure that water condensation can drain unhindered from the unit.
- Do not operate the air conditioner with wet hands. This may cause electric shock.
- Do not use device for any other purpose than its intended use.
- Do not climb onto or place objects on top of the outdoor unit.
- Do not allow the air conditioner to operate for long periods of time with doors or windows open, or if the humidity is very high.
2 Unit specifications and features
2.1 Unit parts
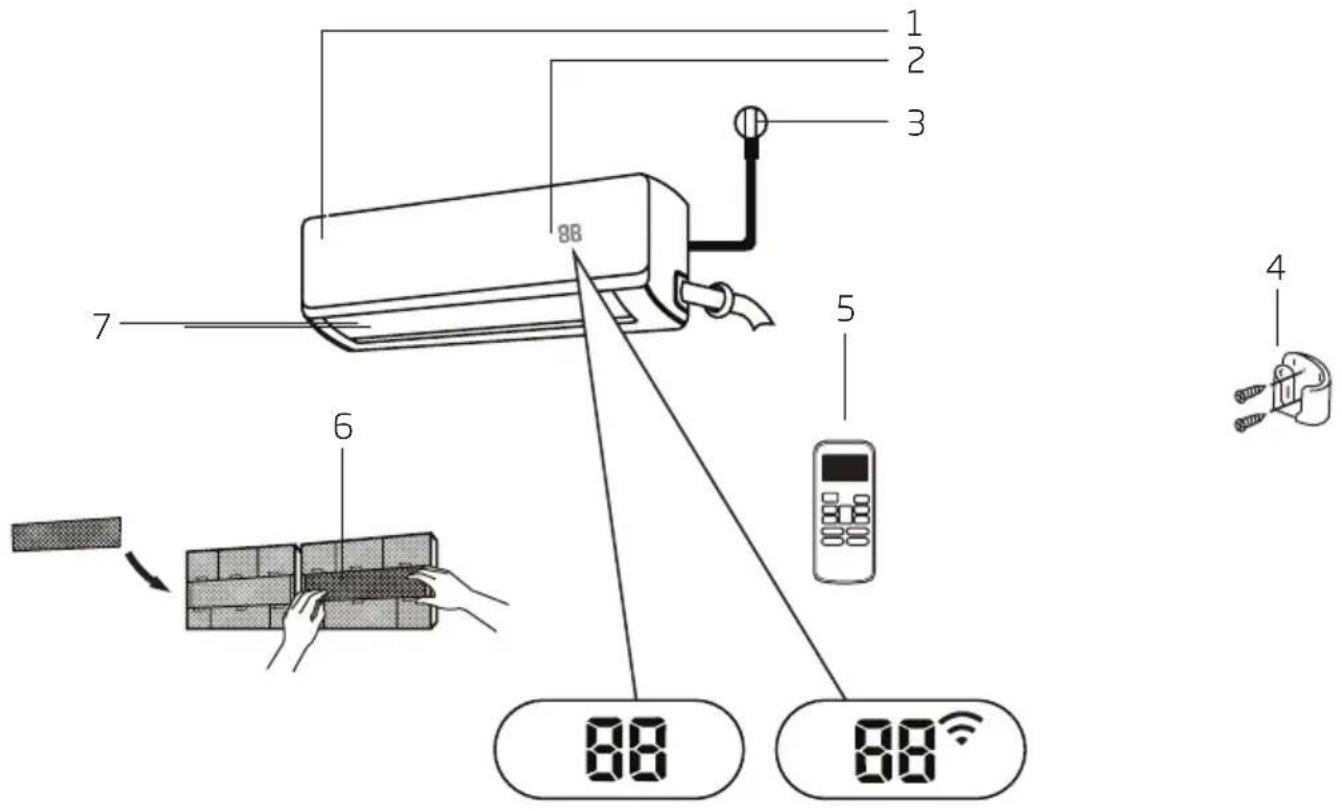
- Front Panel
- Display window
- Power Cable (Some Units)
- Remote control Holder (Some Units)
- Remote Control
- Functional Filter (On Front of Main Filter - Some Units)
- Louver
Display code meanings
"00 for 3 seconds when:
- TIMER ON is set
- FRESH, SWING, TURBO, SILENCE or SOLAR PV ECO features are turned on
"06 for 3 seconds when:
- TIMER OFF is sett
- FRESH, SWING, TURBO, SILENCE or SOLAR PV ECO features are turned off
“ when anti-cold air feature is turned on
" when defrosting
"56 when unit is self-cleaning
"FR when freeze protection is turned on
2 Unit specifications and features
"when wireless Control feature is activated (some units)"
"When ECO function(optional) is activated, the "illuminates gradually one by one as -- -- E CO --set temperature--E... in one second interval.
In Fan mode, the unit will display the room temperature.
In other modes, the unit will display your temperature setting.

Note: A guide on using the infrared remote is not included in this literature package.
2.2 Achieving optimal performance
Optimal performance for the COOL, HEAT, and DRY modes can be achieved in the following temperature ranges. When your air conditioner is used outside of these ranges, certain safety protection features will activate and cause the unit to perform less than optimally.
2.3 Inverter split type
| COOL mode HEAT mode DRY mode | |||
| Room temperature 17°C | -32°C(63°F - 90°F) | 0°C - 30°C(32°F - 86°F) | 10°C - 32°C(50°F - 90°F) |
| Outdoor temperature | 0°C - 50°C(32°F - 122°F) | -15°C - 30°C(5°F - 86°F) | 0°C - 50°C(32°F - 122°F) |
| -15°C - 50°C(5°F - 122°F)(For models with low temp. cooling systems.) | |||
| 0°C - 60°C(32°F - 140°F)(For special tropical models) | 0°C - 60°C(32°F - 140°F)(For special tropical models) | ||
For outdoor units with auxiliary electric heater
When outside temperature is below 0^ C ( 32^ F), we strongly recommend keeping the unit plugged in at all time to ensure smooth ongoing performance.
2 Unit specifications and features
2.4 Fixed-speed type
| COOL mode HEAT mode DRY mode | |||
| Room temperature | 17° - 32°C (63° - 90°F) 0° - 30°C(32° - 86°F) | 10° - 32°C (50° - 90°F) | |
| Outdoor temperature | 18° - 43°C (64° - 109°F) | -7° - 24°C(19° - 75°F) | 11° - 43°C (52° - 109°F) |
| -7° - 43°C (19° - 109°F)(For models with low-temp cooling systems) | 18° - 43°C (64° - 109°F) | ||
| 18° - 54°C (64° - 129°F)(For special tropical models) | 18° - 54°C (64° - 129°F)(For special tropical models) | ||
To further optimize the performance of your unit, do the following:
- Keep doors and windows closed.
- Limit energy usage by using TIMER ON and TIMER OFF functions.
- Do not block air inlets or outlets.
- Regularly inspect and clean air filters.
For a detailed explanation of each function, refer to the Remote Control Manual.
2.5 Other features
- Auto-restart
If the unit loses power, it will automatically restart with the prior settings once power has been restored.
- Anti-mildew (some units)
When turning off the unit from COOL, AUTO (COOL), or DRY modes, the air conditioner will continue operate at very low power to dry up condensed water and prevent mildew growth.
- Wireless control (some units)
Wireless control allows you to control your air conditioner using your mobile phone and a Wireless connection.
- Louver angle memory (some units)
When turning on your unit, the louver will automatically resume its former angle.
• Refrigerant leakage detection (some units)
The indoor unit will automatically display "EC" when it detects refrigerant leakage.
For a detailed explanation of your unit's advanced functionality (such as TURBO mode and its self-cleaning functions), refer to the Remote Control Manual.
2 Unit specifications and features

Note:
Illustrations in this manual are for explanatory purposes. The actual shape of your indoor unit may be slightly different. The actual shape shall prevail.
- Setting angle of air flow
Setting vertical angle of air flow
While the unit is on, use the SWING/DIRECT button to set the direction (vertical angle) of airflow.
- Press the SWING/DIRECT button once to activate the louver. Each time you press the button, it will adjust the louver by 6°. Press the button until the direction you prefer is reached.
- To make the louver swing up and down continuously, press and hold the SWING/DIRECT button for 3 seconds. Press it again to stop the automatic function.
Setting horizontal angle of air flow
The horizontal angle of the airflow must be set manually. Grip the deflector rod (See Fig.B) and manually adjust it to your preferred direction.
For some units, the horizontal angle of the airflow can be set by remote control, please refer to the Remote Control Manual.

Note on louver angles:
When using COOL or DRY mode, do not set louver at too vertical an angle for long periods of time. This can cause water to condense on the louver blade, which will drop on your floor or furnishings. (See Fig.A)
When using COOL or HEAT mode, setting the louver at too vertical an angle can reduce the performance of the unit due to restricted air flow.
Do not move louver by hand. This will cause the louver to become out of sync. If this occurs, turn off the unit and unplug it for a few seconds, then restart the unit. This will reset the louver.
2 Unit specifications and features
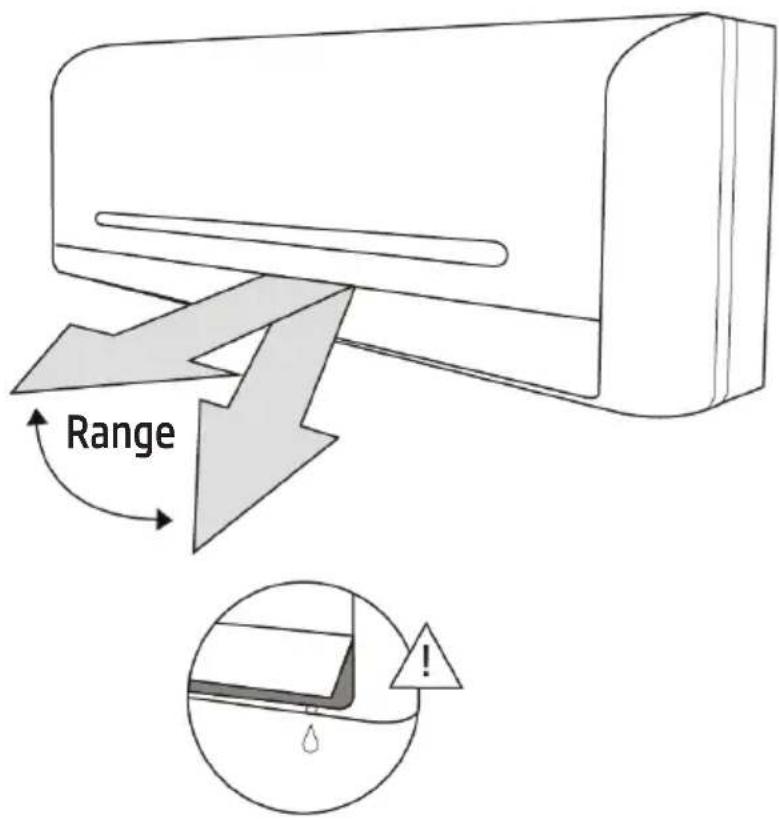
Fig. A
Warning
Do not keep louver at too vertical an angle for long periods of time. This can cause water condensation to drip on yur furnishings.

Warning
Do not put your fingers in or near the blower and suction side of the unit. The high-speed fan inside the unit may cause injury.
2 Unit specifications and features
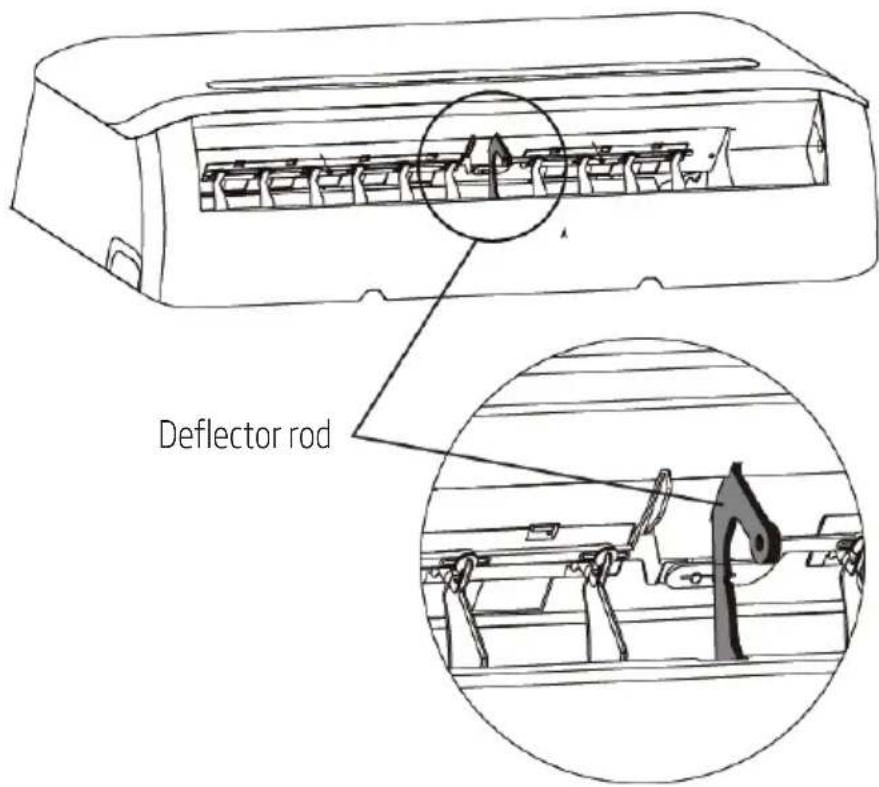
Fig. B
2 Unit specifications and features
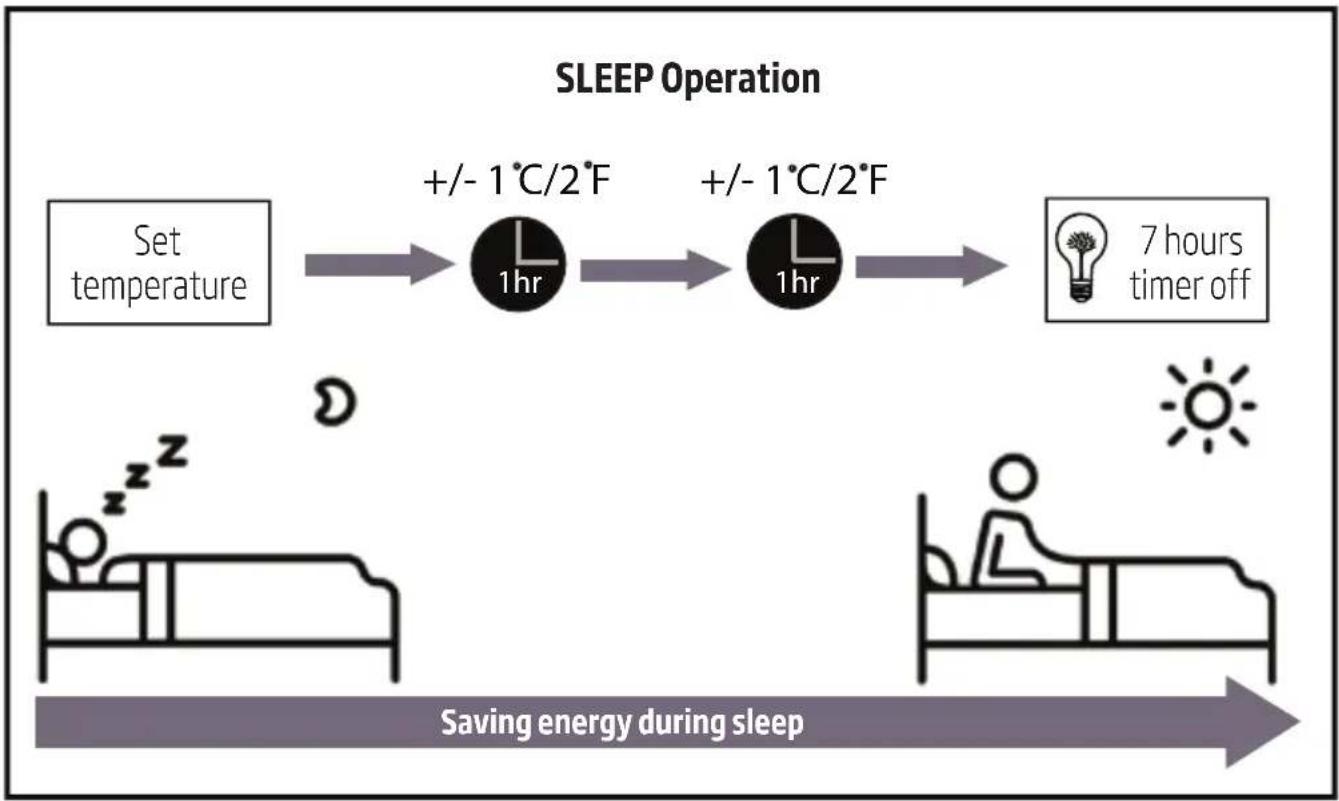
- Sleep operation
The SLEEP function is used to decrease energy use while you sleep (and don't need the same temperature settings to stay comfortable). This function can only be activated via remote control.
Press the SLEEP button when you are ready to go to sleep. When in COOL mode, the unit will increase the temperature by 1^ C ( 2^ F) after 1 hour, and will increase an additional 1^ C ( 2^ F) after another hour. When in HEAT mode, the unit will decrease the temperature by 1^ C ( 2^ F) after 1 hour, and will decrease an additional 1^ C ( 2^ F) after another hour.
It will hold the new temperature for 5 hours, then the unit will turn off automatically.

Note: The SLEEP function is not available in FAN or DRY mode.
flowchart
graph LR
    A["Set temperature"] --> B["+/- 1°C/2°F"]
    B --> C["+/- 1°C/2°F"]
    C --> D["7 hours timer off"]
    D --> E["Saving energy during sleep"]
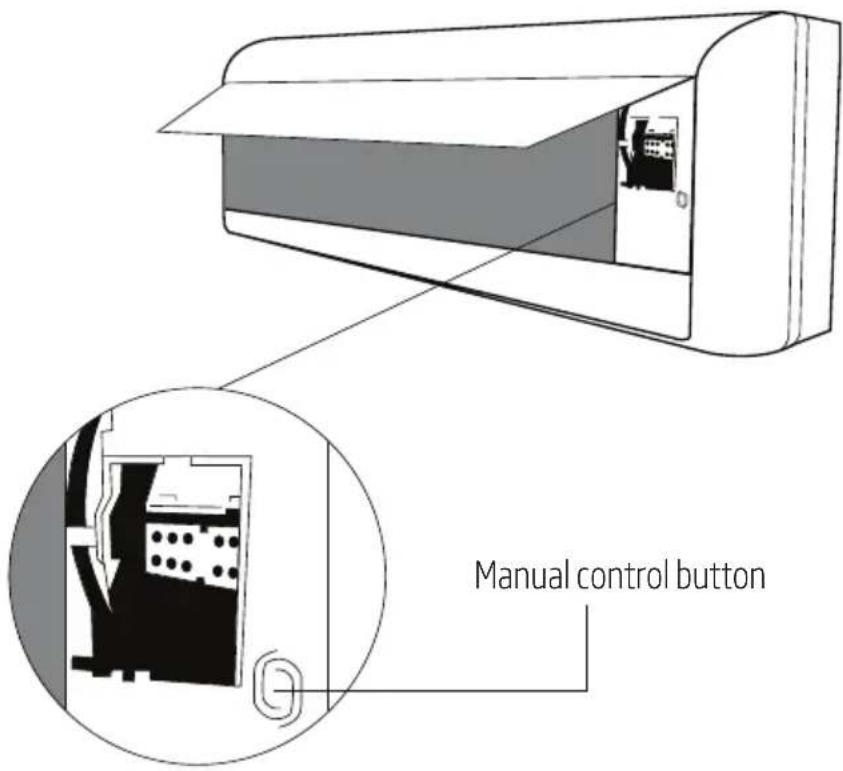
B Manual operation (without remote)
3.1 How to operate your unit without the remote control
In the event that your remote control fails to work, your unit can be operated manually with the MANUAL CONTROL button located on the indoor unit. Note that manual operation is not a long-term solution, and that operating the unit with your remote control is strongly recommended.
Before manual operation
Unit must be turned off before manual operation.
To operate your unit manually:
- Open the front panel of the indoor unit.
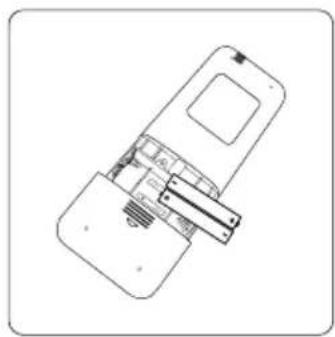
- Locate the MANUAL CONTROL button on the right-hand side of the unit.
- Press the MANUAL CONTROL button one time to activate FORCED AUTO mode.
- Press the MANUAL CONTROL button again to activate FORCED COOLING mode.
- Press the MANUAL CONTROL button a third time to turn the unit off.
- Close the front panel.

Warning
The manual button is intended for testing purposes and emergency operation only. Please do not use this function unless the remote is lost and it is absolutely necessary. To restore regular operation, use the remote control to activate the unit.
4 Care and maintenance
4.1 Cleaning your indoor unit

Before cleaning or maintenance
Always turn off your air conditioner system and disconnect its power supply before cleaning or maintenance.

Warning
Only use a soft, dry cloth to wipe the unit clean. If the unit is especially dirty, you can use a cloth soaked in warm water to wipe it clean.
- Do not use chemicals or chemically treated cloths to clean the unit.
- Do not use benzene, paint thinner, polishing powder or other solvents to clean the unit. They can cause the plastic surface to crack or deform.
- Do not use water hotter than 40^ (104°F) to clean the front panel. This can cause the panel to deform or become discolored.
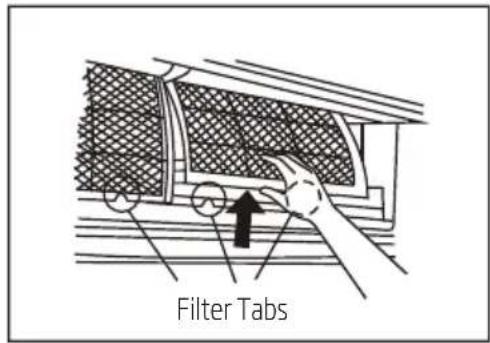
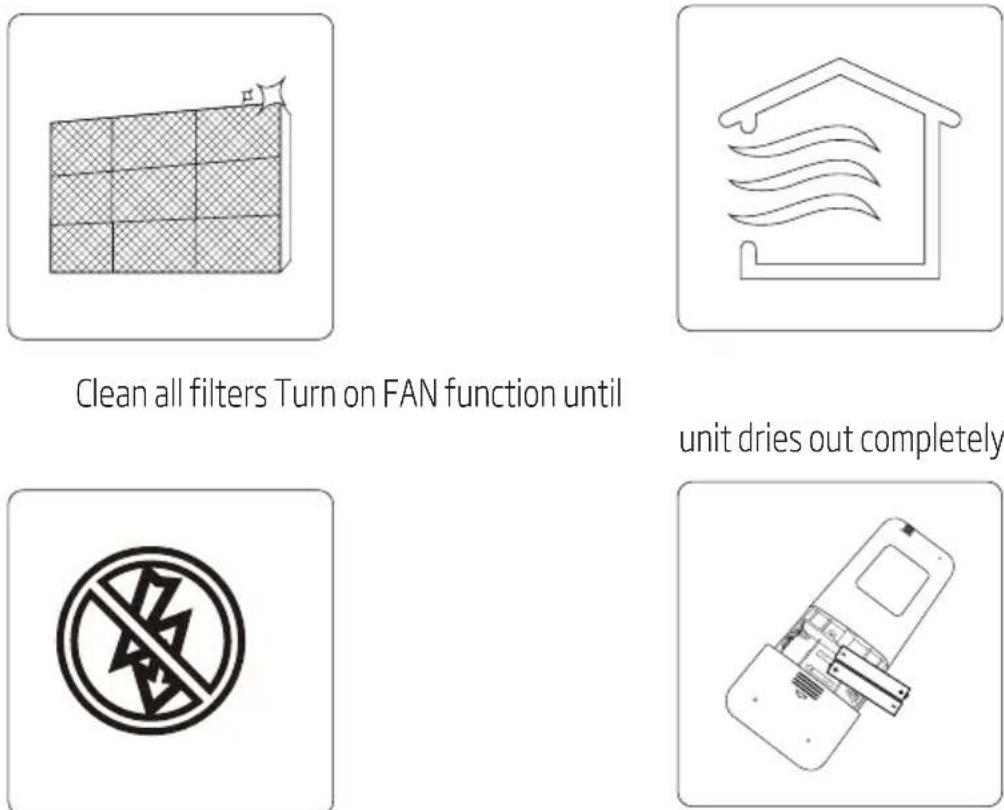
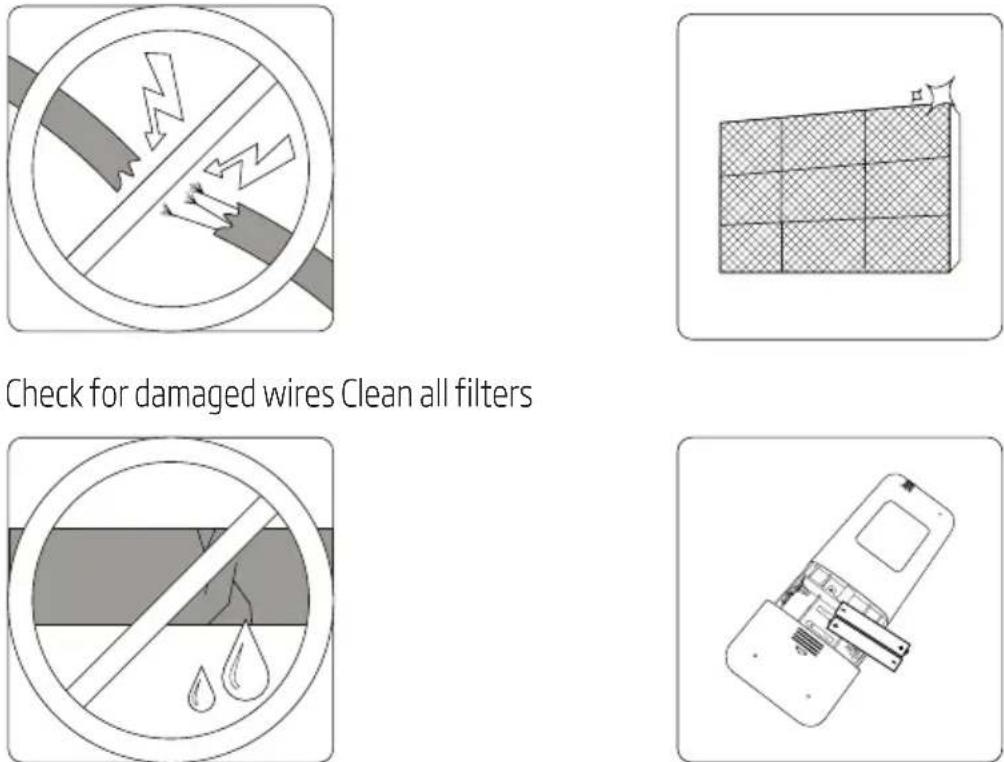
4.2 Cleaning your air filter
A clogged air conditioner can reduce the cooling efficiency of your unit, and can also be bad for your health. Make sure to clean the filter once every two weeks.
- Lift the front panel of the indoor unit.
- Grip the tab on the end of the filter, lift it up, then pull it towards yourself.
- Now pull the filter out.
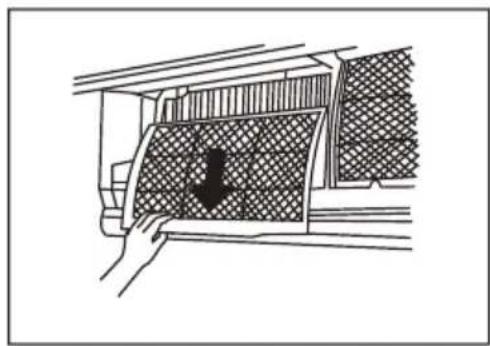
- If your filter has a small air freshening filter, unclip it from the larger filter. Clean this air freshening filter with a hand-held vacuum.
- Clean the large air filter with warm, soapy water. Be sure to use a mild detergent.
- Rinse the filter with fresh water, then shake off excess water.
- Dry it in a cool, dry place, and refrain from exposing it to direct sunlight.
- When dry, re-clip the air freshening filter to the larger filter, then slide it back into the indoor unit.
- Close the front panel of the indoor unit.
4 Care and maintenance
natural_image
Diagram showing a hand pressing down a car's side panel with a black arrow indicating the motion (no text or symbols present)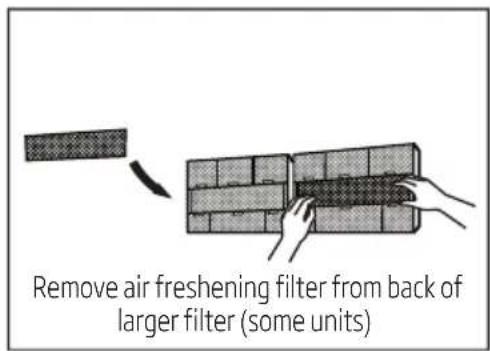
natural_image
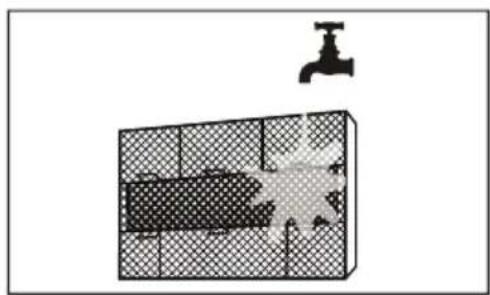
Diagram showing a water tank with a faucet above it, no text or symbols present
Warning
Do not touch air freshening (Plasma) filter for at least 10 minutes after turning off the unit.
4 Care and maintenance

Warning
- Before changing the filter or cleaning, turn off the unit and disconnect its power supply.
- When removing filter, do not touch metal parts in the unit. The sharp metal edges can cut you.
- Do not use water to clean the inside of the indoor unit. This can destroy insulation and cause electrical shock.
- Do not expose filter to direct sunlight when drying. This can shrink the filter.
4.3 Air filter reminders (optional)
4.3.1 Air filter cleaning reminder
After 240 hours of use, the display window on the indoor unit will flash "CL." This is a reminder to clean your filter. After 15 seconds, the unit will revert to its previous display.
To reset the reminder, press the LED button on your remote control 4 times, or press the MANUAL CONTROL button 3 times. If you don't reset the reminder, the "CL" indicator will flash again when you restart the unit.
4.3.2 Air filter replacement reminder
After 2,880 hours of use, the display window on the indoor unit will flash "nF." This is a reminder to replace your filter. After 15 seconds, the unit will revert to its previous display.
To reset the reminder, press the LED button on your remote control 4 times, or press the MANUAL CONTROL button 3 times. If you don't reset the reminder, the "nF" indicator will flash again when you restart the unit.

Warning
- Any maintenance and cleaning of outdoor unit should be performed by an authorized dealer or licensed service provider.
- Any unit repairs should be performed by authorized dealer or licensed service provider.
4 Care and maintenance
4.4 Maintenance - long periods of non-use
If you plan not to use your air conditioner for an extended period of time, do the following:
Turn off the unit and disconnect the power Remove batteries from remote control
4 Care and maintenance
4.5 Maintenance - pre-season inspection
After long periods of non-use, or before periods of frequent use, do the following:
Check for leaks Replace batteries
natural_image
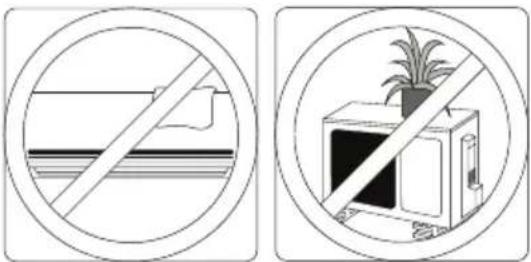
Two circular diagrams showing a crossed-out window and a potted plant inside a room (no text or symbols)Make sure nothing is blocking all air inlets and outlets
5 Troubleshooting

Safety precautions
If ANY of the following conditions occurs, turn off your unit immediately!
• The power cord is damaged or abnormally warm
- You smell a burning odor
• The unit emits loud or abnormal sounds
- A power fuse blows or the circuit breaker frequently trips
• Water or other objects fall into or out of the unit
Do not attempt to fix these yourself! Contact authorized service provider immediately!
5.1 Common issues
The following problems are not a malfunction and in most situations will not require repairs.
| Issue Possible causes | |
| Unit does not turn on when pressing ON/OFF button | The Unit has a 3-minute protection feature that prevents the unit from overloading. The unit cannot be restarted within three minutes of being turned off. |
| The unit changes from COOL/HEAT mode to FAN mode | The unit may change its setting to prevent frost from forming on the unit. Once the temperature increases, the unit will start operating in the previously selected mode again. |
| The set temperature has been reached, at which point the unit turns off the compressor. The unit will continue operating when the temperature fluctuates again. | |
| The indoor unit emits white mist | In humid regions, a large temperature difference between the room's air and the conditioned air can cause white mist. |
| Both the indoor and outdoor units emit white mist | When the unit restarts in HEAT mode after defrosting, white mist may be emitted due to moisture generated from the defrosting process. |
| The indoor unit makes noises | A rushing air sound may occur when the louver resets its position. |
| A squeaking sound may occur after running the unit in HEAT mode due to expansion and contraction of the unit's plastic parts. | |
5 Troubleshooting
| Issue Possible causes | |
| Both the indoor unit and outdoor unit make noises | Low hissing sound during operation: This is normal and is caused by refrigerant gas flowing through both indoor and outdoor units. |
| Low hissing sound when the system starts, has just stopped running, or is defrosting: This noise is normal and is caused by the refrigerant gas stopping or changing direction. | |
| Squeaking sound: Normal expansion and contraction of plastic and metal parts caused by temperature changes during operation can cause squeaking noises. | |
| The outdoor unit makes noises | The unit will make different sounds based on its current operating mode. |
| Dust is emitted from either the indoor or outdoor unit | The unit may accumulate dust during extended periods of non-use, which will be emitted when the unit is turned on.This can be mitigated by covering the unit during long periods of inactivity. |
| The unit emits a bad odor | The unit may absorb odors from the environment (such as furniture, cooking, cigarettes, etc.) which will be emitted during operations. |
| The unit's filters have become moldy and should be cleaned. | |
| The fan of the outdoor unit does not operate | During operation, the fan speed is controlled to optimize product operation. |
| Operation is erratic, unpredictable, or unit is unresponsive | Interference from cell phone towers and remote boosters may cause the unit to malfunction.In this case, try the following:Disconnect the power, then reconnect.Press ON/OFF button on remote control to restart operation. |

Note: If problem persists, contact a local dealer or your nearest customer service center. Provide them with a detailed description of the unit malfunction as well as your model number.
5 Troubleshooting
5.2 Troubleshooting
When troubles occur, please check the following points before contacting a repair company.
| Problem Possible causes solution | ||
| Poor cooling performance | Temperature setting may be higher than ambient room temperature | Lower the temperature setting |
| The heat exchanger on the indoor or outdoor unit is dirty | Clean the affected heat exchanger | |
| The air filter is dirty | Remove the filter and clean it according to instructions | |
| The air inlet or outlet of either unit is blocked | Turn the unit off, remove the obstruction and turn it back on | |
| Doors and windows are open | Make sure that all doors and windows are closed while operating the unit | |
| Excessive heat is generated by sunlight | Close windows and curtains during periods of high heat or bright sunshine | |
| Too many sources of heat in the room (people, computers, electronics, etc.) | Reduce amount of heat sources | |
| Low refrigerant due to leak or long-term use | Check for leaks, re-seal if necessary and top off refrigerant | |
| SILENCE function is activated (optional function) | SILENCE function can lower product performance by reducing operating frequency. Turn off SILENCE function. | |
| The unit is not working | Power failure Wait for the power to be restored | |
| The power is turned off Turn on the power | ||
| The fuse is burned out Replace the fuse | ||
| Remote control batteries are dead Replace batteries | ||
| The Unit's 3-minute protection has been activated | Wait three minutes after restarting the unit | |
| Timer is activated Turn timer off | ||
5 Troubleshooting
| Problem Possible causes solution | ||
| The unit starts and stops frequently | There's too much or too little refrigerant in the system | Check for leaks and recharge the system with refrigerant. |
| Incompressible gas or moisture has entered the system. | Evacuate and recharge the system with refrigerant | |
| The compressor is broken Replace the compressor | the compressor | |
| The voltage is too high or too low | Install a manostat to regulate the voltage | |
| Poor heating performance | The outdoor temperature is extremtly low | Use auxiliary heating device |
| Cold air is entering through doors and windows | Make sure that all doors and windows are closed during use | |
| Low refrigerant due to leak or long-term use | Check for leaks, re-seal if necessary and top off refrigerant | |
| Indicator lamps continue flashing | The unit may stop operation or continue to run safely. If the indicator lamps continue to flash or error codes appear, wait for about 10 minutes. The problem may resolve itself.If not, disconnect the power, then connect it again. Turn the unit on.If the problem persists, disconnect the power and contact your nearest customer service center. | |
| Error code appears in the window display of indoor unit:• E0, E1, E2...• P1, P2, P3...• F1, F2, F3... | ||

Note: If your problem persists after performing the checks and diagnostics above, turn off your unit immediately and contact an authorized service center.
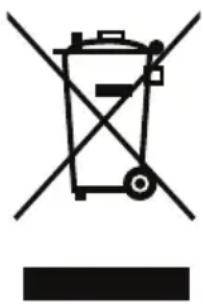
6 European disposal guidelines
This appliance contains refrigerant and other potentially hazardous materials. When disposing of this appliance, the law requires special collection and treatment. Do not dispose of this product as household waste or unsorted municipal waste.
When disposing of this appliance, you have the following options:
- Dispose of the appliance at designated municipal electronic waste collection facility.
- When buying a new appliance, the retailer will take back the old appliance free of charge.
- The manufacturer will take back the old appliance free of charge.
- Sell the appliance to certified scrap metal dealers.

Special notice
Disposing of this appliance in the forest or other natural surroundings endangers your health and is bad for the environment. Hazardous substances may leak into the ground water and enter the food chain.
natural_image
Symbol of a trash bin crossed out by two crossed lines, with no text or labels present.This symbol indicates that this product shall not be disposed with other household wastes at the end of its service life. Used device must be returned to official collection point for recycling of electrical and electronic devices. To find these collection systems please contact to your local authorities or retailer where the product was purchased. Each household performs important role in recovering and recycling of old appliance. Appropriate disposal of used appliance helps prevent potential negative consequences for the environment and human health.
7 Installation instructions
7.1 F-Gas instruction
This product contains fluorinated greenhouse gases covered by the Kyoto protocol.
The fluorinated greenhouse gases are contained in hermetically sealed equipment.
Installs, services, maintains, repairs, checks for leaks or decommissions equipment and product recycling should be carried out by natural persons that hold relevant certificates.
If the system has a leakage detection system installed, leakage checks should be performed at least every 12 months, make sure system operate properly.
If product must be performed leakage checks, it should specify Inspection cycle, establish and save records of leakage checks.

Note: For hermetically sealed equipment, portable air conditioner, window air conditioner and dehumidifier, if CO_2 equivalent of fluorinated greenhouse gases is less than 10 tonnes, it should not perform leakage checks.
| Model No. | BEWPI 090/ BEWPI 120/ BEWPI 091 BEWPI 121 | BEWPI 180/ BEWPI 240/ BEWPI 181 BEWPI 241 | ||
| Total refrigerant amount (g) | 700 | 800 | 1250 | 1600 |
| Climate class | T1 | T1 | T1 | T1 |
| Heating type | Heat Pump | Heat Pump | Heat Pump | Heat Pump |
| Main performance | ||||
| Cooling capacity (Btu/h) | 9212 (Pdesign C) | 11940 (Pdesign C) | 17401 (Pdesign C) | 23884 (Pdesign C) |
| Cooling capacity (W) | 2700 (Pdesign C) | 3500 (Pdesign C) | 5100 (Pdesign C) | 7000 (Pdesign C) |
| Heating capacity (Btu/h) | 8188 (Pdesign H) | 8871 (Pdesign H) | 13648 (Pdesign H) | 17060 (Pdesign H) |
| Heating capacity (W) | 2400 (Pdesign H) | 2600 (Pdesign H) | 4000 (Pdesign H) | 5000 (Pdesign H) |
| SEER/AEER/Weight EER (W/W) | 7.1 (SEER, EU) | 7.1 (SEER, EU) | 6.4 (SEER, EU) | 6.4 (SEER, EU) |
| SCOP/ACOP/Weight EER (W/W) | 4.0 (SCOP, EU) | 4.1 (SCOP, EU) | 4.0 (SCOP, EU) | 4.0 (SCOP, EU) |
| Voltage/Frequency (V/Hz) | 220-240V~50Hz, 1Ph | 220-240V~50Hz, 1Ph | 220-240V~50Hz, 1Ph | 220-240V~50Hz, 1Ph |
| Rated power input (W) | 2075 | 2200 | 2550 | 3600 |
| Rated current input (A) | 9.5 | 10 | 11.5 | 16 |
| High pressure pipe diameter (mm) | ∅6.35 (1/4") ∅6.35 (1/4") ∅6.35 (1/4") ∅9.52 (3/8") | |||
| Low pressuer pipe diameter (mm) | ∅9.52 (3/8") ∅9.52 (3/8") ∅12.7 (1/2") ∅15.9 (5/8") | |||
| Logistics data | ||||
| Indoor unit (WxHxD) mm | 752x291x218 | 832x297x223 | 994x319x251 | 1119x336x259 |
| Outdoor unit (WxHxD) mm | 770x300x555 | 770x300x555 | 800x300x554 | 845x363x702 |
| Indoor unit net weight (kg) | 8.5 | 9.5 | 12 | 15 |
| Outdoor unit net weight (kg) | 27 | 27 | 38 | 52 |
| Importer in PolandImporter W PolsceBeko S.A.ul. Puławska 366 02-819Warszawawww.beko.pl | Importer in Czech RepublicDovozce do České republikyBEKO S.A., organizační složka Bucharova 1423/6, Praha 13 - Nové Butovice,158 00www.bekocr.cz | Importer in SlovakiaDovozca na SlovenskoBEKO Slovakia s.r.o. Suchémýto 1 811 03 Bratislavawww.bekosk.sk | Importer in EstoniaImportija EestiBeko S.A. TănavPuławska 366 02-819 Varssavi (Poola) | |||
| Importer in GermanyBeko Deutschland GmbHThomas-Edison-Platz 3 63263Neu-Isenburg | Importer in UKBEKO Plc, Beko House, 1 Greenhill Crescent, Watford, Herts, WD18 8QU | KSA ImporterAL BABTAIN TRADING CO. P.O.Box# 181, Riyadh 11411-KSA+966-11-4744788 | Importer in FranceBEKO France / Immeuble Stadium 266,Avenue du Président Wilson 93218La Plaine Saint-Denis Cedex | |||
| Importer in SpainBEKO ELECTRONICSESPANA S.L.C/ Provenza388 1° Piso/08025 Barcelona | Importer for MaltaETV LTD119/120Archbishop StreetVALLETTA MALTA | Importer in LatviaImportētāja LatvijāBeko S.A.Ielas Puławska 366 02-819Varšava (Polija) | Importer in LithuaniaImportuotojas LietuvojeBeko S.A.Gatvé Puławska 366 02-819Varšuva (Lenkija) | |||
| Importer in AustriaELEKTRA BREGENZ AGPFARRGASSE 77 VIENNA post code 1230 | Importer in SwitzerlandGrundig Nordic ABIsafjordsgatan 39B16440K'sta SWEDEN | Importer in HungaryHauser Magyarorszag imited Baross utca89 PC: 2040Budaörs/Hungary | Importer in SloveniaBIG BANG, D.O.O.Šmartinska cesta 152PC: 1000Ljubljana/Slovenia | Importer in ItalyBEKO ITALY SRLViale Del Ghisallo,20/I-20151 Milano (MI) | ||
| Importer in RomaniaARCTIC S.A.Str.13 Decembrie, nr.210 Čaęști,135200, Româniawww.arctic.ro | Importer in BeneluxSchaliënhoevedreefB -2800Mechelen - Belgium | Importer in GreecePAR. SEITANIDIS S.A.Polistilo, P.O. Box:1402Kavala, 64003 | Importer in BulgariaVideolux LTD/PO Box2109/2109 Sofia | Importer in CroatiaE PLUS dooZA Unutarnju/GOSPODARSKA 16c/10225 GORNJI STUPNIK/ZAGREP | ||
| Importer in Russia Импортер на территории РФ: ООО «БЕКО», 601021, Россия, Владимирская область,Киржачский район, деревня Федоровское, улица Сельская, 49Бесплатная линия сервисного обслуживания и информационной поддержки по установке и эксплуатации(только для звонков по России) 8-800-200-23-56Изготовитель: Arcelik A.Ş. Турция, Karaagac caddesi No: 2-6 Istanbul 34445 Sutluce, Istanbul | ||||||
| Виробник: «Arçelik A.Ş» Karaağaç Caddesi No: 2-6, Sütlüce, 34445 İstanbul, Turkey, «Arçelik A.Ş», м. Стамбул,Сютлюдже, вул. Караагач No 2-6, 34445, ТуреччинаІмпортер на території України:ТОВ «Беко Україна», адреса: 03150, м. Київ, вул. Антоновича, буд. 72, тел/факс.: 0-800-500-4-3-2 Термін служби 3 роки | ||||||
| Manufactured by Arcelik A.S. Karaagac Cd. No: 2-6 34445 Sutluce, Beyoglu, Istanbul, Turkey | ||||||
Manufactured by Arcelik A.S. Karaagac Cd. No:2-6 34445 Sutluce, Beyoglu, Istanbul, Turkey
natural_image
Warning symbol of a flame inside a triangle (no text or numbers)natural_image
Diagram of a car interior showing a hand pressing down the window with a black arrow indicating direction (no text or symbols)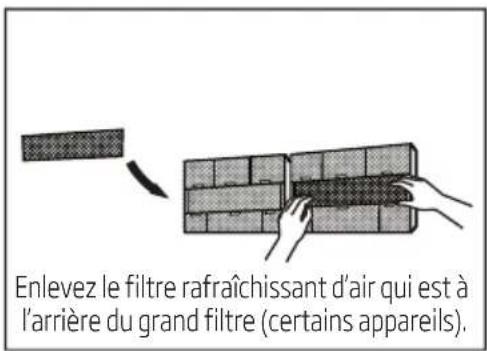
natural_image
Diagram showing a water tank with a faucet above it, no text or symbols present
Avertissement
natural_image
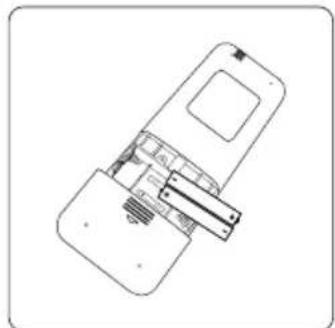
Technical line drawing of a mechanical device with internal components (no text or symbols)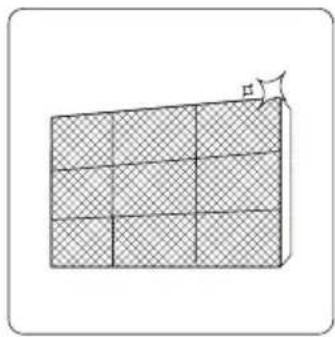
natural_image
3D diagram of a rectangular block with grid pattern and an arrow pointing to the top-right corner (no text or symbols)natural_image
Prohibition sign with diagonal line and droplet symbols (no text)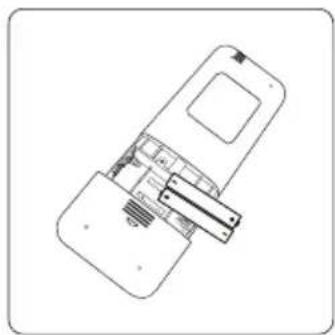
natural_image
Technical line drawing of a mechanical device with internal components (no text or symbols)natural_image
Symbol of a crossed-out road sign with a flag, enclosed in a circle (no text or numbers present)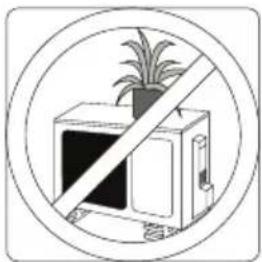
natural_image
Symbolic illustration of a microwave oven with a potted plant inside, crossed by a diagonal line (no text or symbols)natural_image
Symbol of a trash bin with crossed lines indicating no waste or discharge (no text or labels)natural_image
Warning sign depicting a flame inside a triangle (no text or symbols)natural_image
Diagram showing a hand pressing down a car's side panel with a black arrow indicating the motion (no text or symbols present)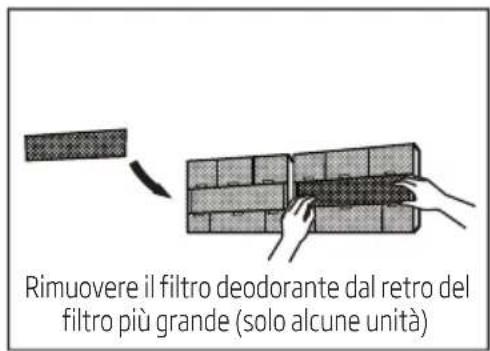
natural_image
Diagram showing a water tank with a faucet above it, no text or symbols present
Attenzione

natural_image
Technical line drawing of a mechanical device with internal components (no text or symbols)
natural_image
3D diagram of a rectangular block with grid pattern and an arrow pointing to the top-right corner (no text or symbols)natural_image
Prohibition sign with diagonal line and droplet symbols (no text)
natural_image
Technical line drawing of a device with internal components (no text or symbols)natural_image
Simple line drawing of a crossed-out road sign with no text or symbols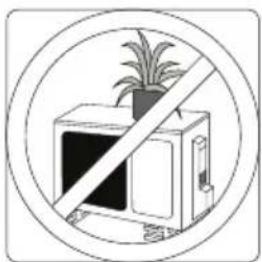
natural_image
Prohibition sign showing a crossed-out kitchen appliance with a potted plant (no text or symbols)natural_image
Symbol of a trash bin crossed with no text or labels, representing waste sorting or disposal (no text present)natural_image
Warning sign depicting a flame inside a triangle (no text or symbols)natural_image
Diagram showing a hand pressing down a car's side panel with a black arrow indicating the motion (no text or symbols present)
natural_image
Diagram showing a water tank with a faucet above it, no text or symbols present
Advertencia
natural_image
Technical line drawing of a mechanical device with internal components (no text or symbols)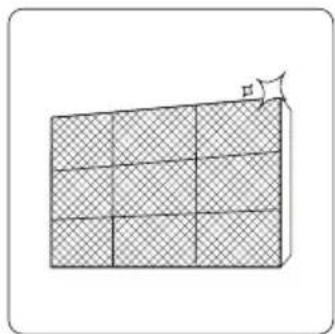
natural_image
3D diagram of a rectangular block with grid pattern and an arrow pointing to the top-right corner (no text or symbols)natural_image
Prohibition sign with diagonal line and water droplet symbols (no text)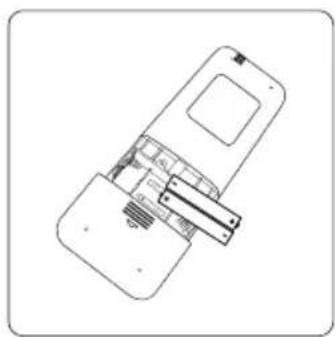
natural_image
Technical line drawing of a device with internal components (no text or symbols)natural_image
Simple line drawing of a cross over a river with no text or symbols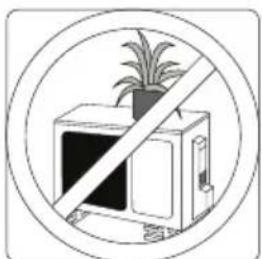
natural_image
Prohibition sign showing a crossed-out kitchen appliance with a potted plant (no text or symbols)natural_image
Symbol of a trash bin crossed with a diagonal line, no text or numbers presentnatural_image
Warning sign depicting a flame inside a triangle (no text or symbols)Fig. B
natural_image
Diagram showing a hand pressing down a car's side panel with a black arrow indicating the motion (no text or symbols present)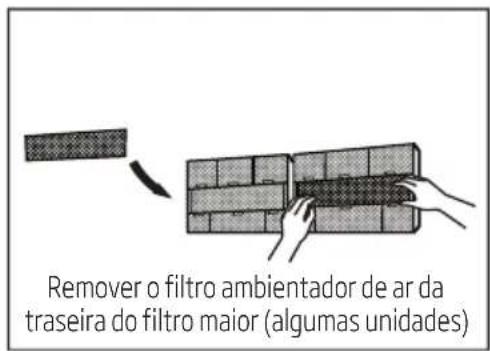
natural_image
Diagram showing a water tank with a faucet above it, no text or symbols present
Advertência
