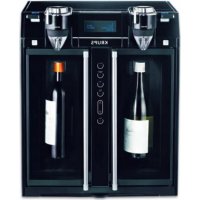
Wine Dispenser JC2008 - Drink dispenser KRUPS - Free user manual and instructions
Find the device manual for free Wine Dispenser JC2008 KRUPS in PDF.


User questions about Wine Dispenser JC2008 KRUPS
0 question about this device. Answer the ones you know or ask your own.
Ask a new question about this device
Download the instructions for your Drink dispenser in PDF format for free! Find your manual Wine Dispenser JC2008 - KRUPS and take your electronic device back in hand. On this page are published all the documents necessary for the use of your device. Wine Dispenser JC2008 by KRUPS.
USER MANUAL Wine Dispenser JC2008 KRUPS
PRODUCT DESCRIPTION. p. 10
TECHNICAL SPECIFICATIONS .p. 10
BEFORE USE. p. 11
CHILD SAFETY .11
FIRE PREVENTION . p. 11
USING THE WINE DISPENSER. p. 11
SET UP. 11
FIRST CLEANING .p. 11
INSTALLING OR REPLACING WINE BOTTLES . 12
PRESERVING THE WINE . 13
SELECTING THE TEMPERATURE 13
DISPENSING THE WINE . 14
AERATING THE WINE . 15
TURNING ON/OFF ONE CHAMBER. 15
LIGHT . 15
MAINTENANCE . 16
CLEANING THE APPLIANCE. p. 16
STORING THE APPLIANCE. p. 17
REPAIRS . 17
TROUBLESHOOTING . p. 17
ELIMINATION. 20
KRUPS MANUFACTURER'S WARRANTY. p. 20
IMPORTANT SAFEGUARDS
To reduce the risk of fire, electric shock and/or injury to persons, basic safety precautions should always be followed when using electrical appliances, including the following:
1. READ ALL INSTRUCTIONS BEFORE USING THE WINE DISPenser.
- To protect against electric shock, do not immerse the power cord, power plug or wine dispenser in water or in any other liquid.
- Do not operate the product with a damaged power cord or power plug or after the appliance malfunctions or has been damaged in any manner.
- The use of accessory attachments other than the manufacturer's brand products may cause hazards or injury.
5 Do not use the wine dispenser outdoors. - Do not let the power cord hang near the edge of a table or cabinet or across a doorway. Do not allow the cord or the appliance to rest on or near hot surfaces such as a hot gas or electric burner or a heated oven.
- Do not place the wine dispenser in direct sunlight or close to any heat source.
- To disconnect the wine dispenser, turn OFF the main power switch located at the back of the unit. Then remove the power plug from the wall outlet. Disconnect the wine dispenser when not in use, before user servicing and cleaning.
- Place the appliance on a hard, flat, stable level surface.
- Avoid contact with any moving parts.
- The wine dispenser is designed for household use only.
- Do not use this product for anything other than its intended use. It should only be used with wine. No other liquids should be used. Liquids with pulp, sugar or syrup will clog the system. Additionally, do not use with champagne or other sparkling wines. The system will remove the bubbles in the champagne and ruin your beverage. The wine dispenser is designed to be used with still wine only. Do not use the machine with any other kind of liquids especially with sparkling liquids and wine or hot beverages.
- WARNING: If you are under 21, it is illegal for you to make or consume beer or wine in the United States.
DANGER: Risk of child entrapment. Before you throw away you appliance:
- Take off the doors.
- Leave the shelves in place so that children may not easily climb insid
GOVERNMENT WARNING:
(1) According to the Surgeon General, women should not drink alcoholic beverages during pregnancy because of the risk of birth defects.
(2) Consumption of alcoholic beverages impairs your ability to drive a car or operate machinery, and may cause health problems.
14. Risk of electric shock. Do not attempt to open the back of the unit. Do not try to access internal part of the unit
15. Extra caution must be used when lifting or moving this product. It is very heavy. It is recommended that two people lift and/or move the product.
16. Use extreme care and supervision when setting up and using the product around children. Place the wine dispenser in a stable location to ensure that it will not fall and cause injury.
17. Never move the machine with a connected bottle.
18. Do not use the machine if the glass door is damaged.
19. Always use the machine in the vertical position.
20. The machine is not intended to be used outdoor.
21. Do not try to over actuate any of the machine components. The different components (door, dispensing head,...) are designed to move properly with only a gentle action from the user. Do not try to force on any component to actuate it. If high force is required, it could be an indication of the machine not functioning properly. Do not place the machine in direct sunlight or close to any heat source.
- 22. Do not pour any liquid over the machine.
- 23. Do not spill any liquid to the rear vents (inside the chamber).
- 24. Do not open the glass door beyond 90 degree.
- 25. Do not immerse the machine in water.
Save these instructions
Special Cord Set Instruction
- An appropriate-size power cord is provided to reduce the hazards resulting from a person or pet becoming entangled in or tripping over a longer cord.
- An extension cord may be purchased and used if care is exercised in its use.
- If an extension cord is used, the marked electrical rating of the extension cord must be at least as great as the electrical rating of the Wine dispenser. Extension cord shall be a grounding type 3-wire cord. The complete extended cord must be arranged so that it does not hang near the edge of a table or cabinet, across a doorway or allow it to come in contact with hot surfaces.
- The Wine dispenser has a grounded three-prong electrical plug. It must be plugged only into a properly grounded three-prong outlet. Do not modify the plug in any way.
- Always place your wine dispenser in a cool location, not directly adjacent to heat registers or radiators.
- Your wine dispenser should not be placed where it would be exposed to direct sunlight, as the sun will affect the time it takes to chill the bottles and could compromise the chilling effectiveness of the unit.
Note the need to access a 120V power outlet. - For maximum stability, choose a level and secure location within your home.
- Avoid placing the unit in hallways, tight passages or high traffic areas.
- DO NOT place the wine dispenser tight into a corner or tightly up against a wall. Allow at least 3 inches of space around the product for optimum performance.
- Since wine drinkers will be gathering around the system, consider any accidental spills that may occur on carpet, furniture or accessories in the area.
- The machine is not compatible with plastic bottles. The unit is designed to fit traditional glass wine bottles with a cork top. The machine is not compatible with screw cap bottles.
PRODUCT DESCRIPTION
1 Dispensing head
2 Wine chamber door
3 Wine chamber handle
4 Wine dispensing lever
5 Unlocking button
6 CONTROL PANEL
a Manual preservation mode
b Chamber selection
c Manual Temperature selection
d Preset wine type for temperature setting
e UP and DOWN buttons
f Chamber light switch
7 Wine aeration control
8 Wine chamber main switch
9 Wine outlet
10 Retractable drip tray
11 Machine main switch
12 Power cord and plug
13 Air inlet filter
14 Display
15 Check valve
16 LOCKING PISTON
g Air tank
h Connection
i Handle
j Stainless tube
K Rubber tube
I Mesh filter
17 Stand off parts
TECHNICAL SPECIFICATIONS
| Voltage 120 VAC 60 Hz | |
| Power 170 W | |
| Material Plastic / Stainless Steel | |
| Dimensions (I x h x p) 19.7" * 16.5" * 11" (500 * 420 * 280 mm) | |
| Weight 35,3 lbs / 16 Kg | |
| Power cord 63 " (1.6 m) +/- 2" (+/- 5 cm) | |
| Functioning conditions | 80 % relative humidity min : 54°F/12 °C, max : 86°F/30 °C |
| Capacity 2 bottles : 1 in each chamber | |
| Temperature range within the chambers 45°F/7°C to 68°F/20°C | |
| Type of bottles to be used | Compatible with different bottle heights up to 13.2" (330mm) in height. Compatible with different bottle diameters up to 3.48" (87mm). |
- The wine dispenser does not contain any refrigerant such as those used in compressor type refrigeration systems as it uses a thermoelectric technology for cooling the wine chambers.
BEFORE USE
Child safety
■Make sure that children cannot play with the appliance nor the removable parts like the dispensing cartridge.
■Do not leave the materials used to pack the appliance within children's reach.
Fire prevention
In the event of a fire, use carbon dioxide (CO2) extinguishers.
■Do not use water or powder extinguishers.
USING THE WINE DISPENSER
Set up
Install the appliance in an upright position in a safe place, where it cannot be overturned or at risk of injuring anyone.
To ensure that the Wine Dispenser works correctly and efficiently, please follow the recommendations below:
- Place it on a perfectly level and stable surface.
- Choose a clean, well-lit area with an easily accessible electric socket.
- Keep the appliance at a minimum distance (30"/75cm) from the stove.
- Keep the appliance at a minimum distance (4"/10cm) from the walls, with the help of the 2 stand offs included in the pack. To assemble the stand offs, align them onto the fixing holes of the back cover and rotate them clockwise (1-2)
- Do not place the appliance on very hot surfaces or near open flames, as these may damage the machine.
■ After selecting an appropriate location within your home and safely placing the wine dispenser, follow the steps below to set up your appliance:
- Plug the unit into a 120V power outlet.
- Switch the main power button located on the back of the unit to "ON".
- After the unit is switched on, you will hear the chambers beginning their cooling cycle and go to the wine preservation mode. If there are no bottles in place, the preservation cycle will stop automatically after several seconds.
- The two chilling chambers are factory preset to a temperature of 50^ / 10^ .
- You can select the temperature for each chamber (see "Selecting the temperature").
First cleaning
Before using the wine dispenser for the first time, it is recommended that you rinse each of the locking piston assemblies (see maintenance section).
They are fully submersible and can be washed by hand (DO NOT PUT IN DISHWASHER).
■Before using the wine dispenser for the first time, it is recommended that you rinse the machine internal circuit by (see maintenance section):
Placing a wine bottle full of fresh water in each chilling chamber.
Dispense the whole bottle of water using the dispensing lever (see below dispensing the wine).
Soap and cleaning agents can affect the wine taste. So, it is possible, and recommended, to clean the locking piston assemblies and the machine internal circuit with just a thorough hot water flush. Rinse until you see water run clear. Dry with a soft cloth, paper towel or allow for the locking piston to air-dry.
■Never immerse the appliance in water!
INSTALLING OR REPLACING WINE BOTTLES
It is recommended to insert the locking piston into the wine bottle in the kitchen.
To insert the locking piston into the wine bottle, follow the directions below:
■Open the door of the cooling chamber you would like to use.
Press the unlocking button located on the dispensing head (3).
The dispensing head will be open automatically and will stay at an angle (around 45^
■Push the dispensing head a bit further (around 70^ ) (4).
In case the wine chamber does not contain any bottle, hold the locking piston at its base and pull it out gently from the machine (5). The piston should come off the machine entirely.
If a bottle is already inserted, pull out the bottle and the locking piston by holding firmly to the base of the locking piston. Once the bottle and locking piston are out of the unit, remove the piston from the bottle by opening its side handle. The handle should be in a horizontal position to allow the piston to be safely removed from the bottle.
■Always rinse the locking piston and the machine internal parts thoroughly between each new bottle insertions to preserve the wine taste (refer to the maintenance section, "Cleaning the appliance" when replacing the bottle).
- To insert the locking piston into the wine bottle, open the side handle located on the cap and ensure it stays in a horizontal position.
Uncork the wine bottle and insert the locking piston into the bottle, keeping the side handle in its horizontal position (6).
- To safely position the locking piston into the bottle after it has been inserted in the bottle, push the plastic cap side handle downward to secure the locking piston tightly inside the wine bottle (7).
■IMPORTANT: to ensure that the locking piston is secured and in place, gently pull on the locking piston cap. The cap should stay in place and attached to the bottle. If the cap comes loose, please follow the locking piston bottle insertion instructions above.
■While supporting the wine bottle from the bottom, take the bottle with the locking piston safely secured to the top of your bottle to your wine dispenser.
■Open the cooling chamber door and "plug" the locking piston into the top of the cooling chamber by pushing it all the way in until it reaches its final position, continuing to support the wine bottle from the bottom (8). The wine bottle should be held up through the locking piston and its bottom will not rest at the base of the cooling chamber if inserted properly.
■Reposition the dispensing head to its functioning position by pushing it down. A clicking noise will be indicative of the proper closure of the dispensing head (9-10).
Close the cooling chamber door.
■ After the bottle is installed and the door is closed, the LED lighting will blink. This indicates that the machine is entering its wine preservation process, removing oxygen from the bottle using a vacuum pump.
The LED lighting will stop blinking and will remain lit once the wine has reached its optimal preservation stage.
PRESERVING THE WINE
The machine includes a system that creates a vaccum inside the wine bottles to preserve the wine from oxydation.
-
When inserting a bottle inside the wine chamber, the machine will automatically trigger the wine preservation cycle. The LED lighthing will blink until the preservation process is completed.
Each time wine is dispensed, the air vaccum inside the bottle will be interrupted.
■To re-engage the wine preservation process, the following two options are available: -
Automatic Preservation:, the machine will remove oxygen from the bottle and starts the preservation process 30 min after the last glass was dispensed.
-
Manual Preservation:
-
Press the manual preservation button.
- The preservation mode will then begin.
The unique vacuum technology can preserve white wine for approximately 5 to 7 days and and red wine for 7 to 10 days.
SELECTING THE TEMPERATURE
The amount of time needed for the wine dispenser to chill the wine to the desired temperature will depend on the type of environment the machine is in, the ambient room temperature and the final set temperature.
The wine dispenser allows you to select manually the preferred and recommended wine temperature, ranging from 45^ / 7^ to 68^ / 20^ depending on the type of wine being used.
■You can set the desired temperature manually or choose one of the twenty wine type preset temperatures provided.
■Press the chamber selection button to select the left or right chamber. On the screen, an arrow will indicate the selected chamber.
To set a desired temperature manually:
- Press the "Temp" button.
- Adjust the temperature using the UP and DOWN buttons to increase or decrease the temperature. Temperature levels range from 45^ / 7^ to 68^ / 20^ .
- Press the "Temp" button again to validate the setting.
To use a preset temperature:
- Press the "Wine Type" button.
- Select among the 20 different types of pre-set wine using the UP and DOWN buttons.
- Press the "Wine Type" button again to validate the setting.
Wine type recommended preset temperatures
| Wine type deg F deg C | ||
| BORDEAUX 64 18 | ||
| CABERNET SAUVIGNON 64 18 | ||
| CHABLIS 48 9 | ||
| CHARDONNAY 50 10 | ||
| CHIANTI 59 15 | ||
| CHINON 57 14 | ||
| MADEIRA 57 14 | ||
| MERLOT 55 13 | ||
| PINOT GRIGIO | 45 7 | |
| PINOT NOIR | 50 10 | |
| RED BURGUNDY | 63 17 | |
| RED ZINFANDEL | 64 18 | |
| RHONE | 64 18 | |
| RIESLING | 46 8 | |
| RIOJA | 61 16 | |
| SAUVIGNON BLANC | 45 7 | |
| SEMILLON | 50 10 | |
| SHIRAZ | 64 18 | |
| WHITE BURGUNDY | 52 11 | |
| WHITE ZINFANDEL | 50 10 |
Wine to be enjoyed at a temperatue below 52F / 11^ , can be pre-chilled in a household refrigerator to speed up the cooling process before pouring the first glass.
Indicative chilling time according to temperature setting
The below mentioned chilling times are indicative ones for an ambient temperature around 70F/ 21^ and a wine starting temperature of around 70F/ 21^ .
| Temperature setting | Chilling time (Hours) |
| 7°C (45°F) | 18 |
| 10°C (50°F) | 8 |
| 13°C (55°F) | 5 |
| 18°C (65°F) | 3 |
dispensing the wine
■Bring a wine glass to the wine dispenser and position it underneath the wine dispensing head.
- Push down the wine dispensing lever and maintain it in its lower position until the desired wine quantity is poured in the glass (11).
The pump noise is normal and is indicative that the unit is functioning properly while dispensing wine.
■ Release the wine dispensing lever. The lever will return to its original resting position automatically.
- Do not immediately pull back the glass as there may be wine dripping after the lever is released. Please wait for 5 seconds before pulling back the glass after releasing the dispensing lever.
AERATING THE WINE
The machine is equipped with a dedicated wine aerating feature that allows for the wine to be aerated prior to being dispensed.
This process will automatically reproduce the manual aeration obtained while using a decanter.
Aerating the wine will maximize the wine exposure to surrounding air, allowing the wine's aromas to open up thus enhancing the overall tasting experience.
To aerate the wine:
Turn the aeration handle to the "ON" position before dispensing the wine (12).
■Follow the wine dispensing instructions above to pour a glass of wine.
During the aeration process, it is normal to see some air bubbles in the wine flow which demonstrate proper wine aeration.
To stop the wine aeration process:
■Turn the aeration handle to the "OFF" position before dispensing the wine.
TURNING ON/OFF ONE CHAMBER
The machine features 2 wine chambers, allowing to have two different wine bottles opened at the same time.
If using one chamber only, the empty chamber can be switched off by pressing the chamber main switch off (13).
To switch the chamber on again, press the main chamber switch (13).
A white light inside the main chamber switch indicates whether the chamber is turned ON or OFF.
LIGHT
Each wine chamber is equipped with 2 LED lights to help you identify the bottle inside the chamber.
To turn on the light in the chambers :
- Press the light button to switch the light on.
To turn off the light in the chambers :
- Press the light button to switch off the light.
MAINTENANCE
Cleaning the appliance
EXTERIOR AND CHAMBER CLEANING
- Use a slightly damp cloth to clean the exterior panels of the wine dispenser.
AVOID using abrasive cleaner, abrasive sponge or cleaning pad as they may scratch and damage the exterior panels of the wine dispenser. - Use a slightly damp cloth to clean the control panel and buttons. Liquids should never be poured or sprayed near the control panel.
- Use a household glass cleaner to clean the glass door.
- Use a slightly damp cloth to clean the chilling chamber and rear panel.
- Use a slightly damp cloth to clean the drip tray.
- Clean the air filter located at the back of the wine dispenser by rinsing it with clean warm water (15). Use a slightly damp cloth to dry it or let air-dry. Once clean, insert it back in the machine.
dispensing cartridge cleaning
- Turn off the wine aeration handle. Remove the wine outlet (unscrew it and pull it downward gently) and clean it by rinsing it with clean warm water. Use a slightly damp cloth to dry it or let air-dry.
- Remove the check valves from the dispensing head (14). Clean the check valves by rinsing them with clean warm water (15). Use a slightly damp cloth to dry them or let air-dry. REMEMBER to re-insert the check valves back in place once cleaned (the machine may malfunction if the check valves are not re-installed properly).
- Re-insert the wine outlet back in place.
CLEANING OF THE LOCKING PISTON
The locking piston is fully submersible and can be safely cleaned with water.
Soap can noticeably affect the flavors of fine wine, which is why most wine connoisseurs give their glasses a hot water rinse.
The locking piston is NOT DISHWASHER SAFE AND SHOULD NOT BE PUT IN THE DISHWASHER to be cleaned.
-
Rinsing the locking piston is recommended between each bottle of wine, especially when changing from one type of wine to another. This prevents cross contamination of wine flavor between different types of wine.
-
Lift the locking handle located on top of the piston and remove it from the empty bottle. There may be residual wine in the black tube. Rinse the locking piston carefully using warm water.
-
There is a filter located at the bottom of the black color tube attached to the the locking piston. The filter is used to keep any sediment that may be at the bottom of the wine bottle from clogging the system. When cleaning the locking piston, be sure to run water through this filter to clear any sediment that may remain.
-
Dry the locking piston with a soft cloth, paper towel or let it air-dry. Allow the locking piston to dry completely before next use to ensure that no water residues dilute the taste of the next bottle of wine to be used.
INTERNAL CIRCUIT CLEANING
-
Rinse 2 empty wine bottles with clean warm water.
-
Fill the 2 empty wine bottles with clean water (DO NOT USE soap water as this may affect the flavor of wine).
- Insert the locking pistons into the 2 wine bottles (with clean water) (16).
- Insert the 2 locking pistons (with 2 wine bottles) into the wine dispenser cooling chambers (17).
- Prepare a container to hold the water.
- Turn on the wine dispenser.
- Run the normal dispensing process with the clean warm water so as to let the water clean the tubes inside the wine dispenser (18).
- Stop the dispensing process until all the water is poured out from the bottles inserted in the wine dispenser.
Storing the appliance
- When the appliance is not to be used for a long period of time, turn the main switch off and pull out the plug.
■Before storing the appliance, rinse the system with fresh water and let it dry open.
■Store the appliance in a dry place out of children's reach.
■Protect it from dust and dirt.
Repairs
Should a breakdown, fault or suspected fault occur after the appliance has been accidentally dropped, immediately pull out the plug.
■Never operate a faulty appliance.
■All servicing and repairs must be carried out by an authorized service center.
■The manufacturer will not be liable for any injury or damage to persons and/or property caused by the appliance malfunctioning should repairs not be performed by an authorized service center.
TROUBLESHOOTING
| Problem Recommended Steps | |
| Power 1. The wine dispenser does not turn on. 2. The wine dispenser turns on but an individual chamber is not working. 3. Blue light is flashing. | - Ensure the wine dispenser is plugged into the outlet. - Ensure that the outlet has power. - Ensure the main power button is “ON”. - Ensure the individual chamber power buttons is “ON”. (13) - Ensure there is proper voltage supply. - Ensure the individual chamber power buttons is “ON”. (13) - Open and close the glass door to reset. - Remove the locking piston assembly and wash it thoroughly and then replace. |
| LCD Display 4. Nothing is displayed on the LCD Display. 5. Malfunction on LCD Display | - Ensure that the main power button is on and there is power to the machine. - Re-start the wine dispenser by pressing the main power switch at the back of the machine. |
| Control panel 6. Buttons on the control panel are not illuminated. | - Re-start the wine dispenser by pressing the main power switch at the back of the machine. - Ensure that the main power button is on and there is power to the machine. |
| Preservation and Dispensing 7. Wine does not pour when the dispensing button is pressed. | - Ensure that the wine bottle is installed correctly onto the locking piston assembly (6-7). - Ensure that the Locking piston assembly (with wine bottle) is securely engaged into the chilling chamber (8-9). - Ensure that the check valve is installed onto the cartridge head properly and is securely tightened. - Wine will not dispense if the chamber or another chamber is actively in the preservation mode: i. Wait for the preservation cycle to be completed within the chamber in which that function is in-process, or ii. Cancel the preservation process by pressing the “Preserve” button on the control panel. |
| 8. A wine bottle is securely installed but preservation mode is not working. | - If a wine bottle is installed securely, the light should be blue. If no light is illuminated, neither the preservation mode nor dispensing mode is active. - Open the glass door and ensure the bottle is installed correctly onto the locking piston assembly and that the locking piston assembly is engaged into the chilling chamber. Close the door and the machine should reset. - Ensure the check valve is tightened onto the cartridge head. If you have reinstalled the check valve, reset the preservation mode by opening and closing the door after you have reinstalled the check valve. Preservation should begin and the blue light should illuminate. |
| 9. Wine is dispensing slowly. | - Ensure that the wine bottle is installed correctly onto the locking piston assembly Ensure it is securely engaged into the chilling chamber. - Ensure that the check valve is installed onto the cartridge head properly and is securely tightened. - Clean the bottle tube and the check valve by running clean water through the system or following the cleaning instructions. Dry all parts and reinstall. - Replace the check valve and reset the chilling chamber function by opening and closing the door. |
| 10. The check valve drips. - Ensure that the check valve is installed onto the cartridge head properly and is securely tightened. - Clean the check valve (14-15). - Replace the check valve and reset the chilling chamber function by opening and closing the door. | |
| 11. There are bubbles moving from the bottle tube into the bottle of wine. | - Ensure that the check valve is securely tightened to the cartridge head. - Clean the cartridge head by running water-cleaning procedures and recheck the seal. |
| 12. The wine bottle will not securely install onto the locking piston assembly. | - Ensure correct type of bottle(s) is/are used. The cartridge is not suitable for screw top bottle(s) unless a specially fitted accessory (i.e. screw top head) is used. The screw top accessory is sold separately. - Ensure that the locking piston handle is in an open position, which enables you to insert the bottle tube into the bottle and install the bottle securely onto the locking piston assembly (5). - Press the locking piston handle in a closed position to ensure it is attached to the bottle (6). |
| Chilling 13. The temperature inside the cooling chamber is not as cold as expected. | - Ensure the glass door has been closed properly to prevent leakage of cool air from the chilling chamber. - Ensure the expected wine temperature setting was set properly through the control panel of the machine. - Ensure the air filter from the back side of the machine is clean and free of dirt sticks on the filter. |
| Noise 14. Noise from machine. | - The humming sound coming from the cooling fan is continuous and to be expected when the machine is left on. - The sound comes from the pump when it vacuums the air inside the wine bottle after dispensing the wine. |
| Clogging 15. Clogged situations happened by wine residue or after prolonged use. | - Ensure the filters/valves are cleaned regularly. - Ensure the wine dispensing system is cleaned between each bottle of wine. - Ensure no hard water and improper cleaning/rinsing agents are used during the cleaning process. - There could be water inside the air tubing system linked to the use of beverages not fit to use with the machine. Ensure that there is no hot water (other than for rinsing), carbonated or sparkling liquids used in the machine. |
| Spillage 16. Liquid (such as water condensation or wine) on the countertop. | - Ensure the drip tray is in place. - Wait an additional 5 s before removing your glass from the dispensing head. |
ELIMINATION
The symbol on the appliance or packaging indicates that this product can never be treated as household waste. It must therefore be sent to a waste collection center for the recycling of electrical and electronic equipment. By taking your appliance to a proper collection center and disposing of your appliances correctly at the end of their life, you are helping preserve our natural resources and are preventing harmful consequences for the environment and public health. For more information on the waste collection points contact an approved service center or your dealer.
Important: Your appliance contains valuable materials which can be recovered or recycled.
Let's all help protect the environment!
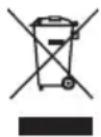
① Your appliance contains many recyclable materials that can be recovered or recycled.
Leave it at a local civic waste collection point.
KRUPS MANUFACTURER's WARRANTY

:www.krups.com
With a strong commitment to the environment, most of Krups products are repairable during and after the warranty period. Before returning any defective products to the point of purchase, please call Krups consumer service directly at the phone number below for repair options.
Your help to sustain the environment is appreciated!
The Warranty
This product is guaranteed by Krups for a period of 2 years against any manufacturing defect in materials or workmanship, starting from the initial date of purchase.
The manufacturer's warranty by Krups is an extra benefit which does not affect consumer's Statutory Rights.
The Krups warranty covers all costs related to restoring the proven defective product so that it conforms to its original specifications, through the repair or replacement of any defective part and the necessary labor. At Krups's choice, a replacement product may be provided instead of repairing a defective product. Krups's sole obligation and your exclusive resolution under this warranty are limited to such repair or replacement.
Conditions & Exclusions
The Krups warranty only applies within USA, Canada & Mexico, and is valid only on presentation of a proof of purchase. The product can be taken directly in person to an authorized service centre or must be adequately packaged and returned, by recorded delivery (or equivalent method of postage), to a Krups authorized service centre. Full address details for each country's authorized service centre are listed on the Krups website (www.krups.com) or by calling the appropriate telephone number listed below to request the appropriate postal address.
Krups shall not be obliged to repair or replace any product which is not accompanied by a valid proof of purchase.
This warranty will not cover any damage which could occur as a result of misuse, negligence, failure to follow Krups instructions, use on current or voltage other than as stamped on the product, or a modification or unauthorized repair of the product. It also does not cover normal tear and wear, maintenance or replacement of consumable parts, and the following:
- using the wrong type of water
- scaling (any de-scaling must be carried out according to the instructions for use);
-ingress of water, dust or insects into the product;
-mechanical damages, overloading
-damages or bad results due to wrong voltage or frequency
-accidents including fire, flood, lightning, etc
-professional or commercial use
-damage to any glass or porcelain ware in the product
This warranty does not apply to any product that has been tampered with, or to damages incurred through improper use and care, faulty packaging by the owner or mishandling by any carrier.
The Krups manufacturer's warranty applies only for products purchased and used in USA, Canada & Mexico. Where a product purchased in one country and then used in another one:
a) The Krups guarantee duration is the one in the country of usage of the product, even if the product was purchased in another listed country with different guarantee duration.
b) The Krups guarantee does not apply in case of non conformity of the purchased product with the local standards, such as voltage, frequency, power plugs, or other local technical specifications
c) The repair process for products purchased outside the country of use may require a longer time if the product is not locally sold by Krups
d) In cases where the product is not repairable in the new country, the Krups guarantee is limited to a replacement by a similar product or an alternative product at similar cost, where possible.
Consumer Statutory Rights
This Krups manufacturer's warranty does not affect the statutory rights a consumer may have or those rights that cannot be excluded or limited, nor rights against the retailer from which the consumer purchased the product. This warranty gives a consumer specific legal rights, and the consumer may also have other legal rights which vary from State to State or Country to Country or Province to Province. The consumer may assert any such rights at his sole discretion.
Additional information
Accessories, Consumables and end-user replaceable parts can be purchased, if locally available, as described in Krups internet site.
| CANADA | GROUPE SEB CANADA345 Passmore AvenueToronto, ONM1V 3N8 | MEXICO1800 112 | Groupe SEB MEXICO S.A. de C.V.Goldsmith 38 Desp.401 Col. PolancoDelegation MiguelHildalgo11 560 Mexico D.F.MEXICO | U.S.A. | GROUPE SEB USA2121 Eden RoadMillville, NJ 08332 |
| 1-800-418-3325 | 3325 800-526-5377 |
SOMMAIRE
MISES EN GARDE IMPORTANTES. 7
DESCRIPTION DU PRODUIT . 10
CHARACTERISTIQUES TECHNIQUES. p. 10
AVANT LA PREMIÈRE UTILISATION . 11
SECURITE DES ENFANTS . 11
PREVENTION DES INCENDIE . 11
UTILISER LE DISTRIBUTEUR DE VIN. 11
INSTALLATION .p. 11
PREMIER NETTOYAGE .p. 11
INSTALLER OU REMPLACER LES Bouteilles DE VIN . 12
CONSERVATION DU VIN. p. 13
SELECTION DE LA TEMPERATURE 13
SERVICE DU VIN. p. 14
AERATION DU VIN. p. 15
UTILISER UNE SEULE CHAMBRE. p. 15
ÉCLAIRAGE 15
ENTRETIEN p. 16
NETTOYER L'APPAREIL . 16
RANGER L'APPAREIL .p. 17
RERARATIONS . 17
TROUBLESHOOTING p. 17
DEPANNAGE .p. 20
ÉLIMINATION 20
GARANTIE KRUPS* .p. 20
