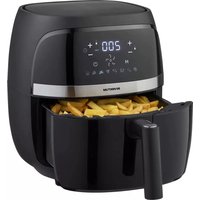
GF601HLDB - Deep fryer INVENTUM - Free user manual and instructions
Find the device manual for free GF601HLDB INVENTUM in PDF.

User questions about GF601HLDB INVENTUM
0 question about this device. Answer the ones you know or ask your own.
Ask a new question about this device
Download the instructions for your Deep fryer in PDF format for free! Find your manual GF601HLDB - INVENTUM and take your electronic device back in hand. On this page are published all the documents necessary for the use of your device. GF601HLDB by INVENTUM.
USER MANUAL GF601HLDB INVENTUM
1. safety instructions page 10
7. cleaning and maintenance page 15
8. breakdowns and solutions page 16
general terms and conditions of service and warranty page 33
- Carefully and fully read the instruction manual prior to using the appliance and carefully store the manual for future reference.
- Caution! Avoid contact with hot surfaces within the appliance, when it is switched on.
- Never cover the air inlet and outlet openings when using the appliance.
- Always place the ingredients to be fried in the pan, toprevent them from making contact with the heating elements.
- Never fill the appliance with oil, this could cause a fire hazard.
Never submerge the appliance, cord or plug in water.
- Only use this appliance for the purposes described in the instruction manual.
- Only connect the appliance to alternate current, to an earthed wall socket, with a mains voltage that corresponds with the information provided on the information plate of the appliance.
- Keep the appliance out of reach of children. Children do not see the dangers associated with handling electrical appliances. Therefore, never allow children to operate electrical appliances without supervision. Keep the appliance and cord out of reach of children younger than 8 years of age.
- The appliance can be used by children of 8 years and older and persons with a limited physical, sensory or mental capacity or lack of experience or knowledge, provided they use the appliance under supervision or have been instructed about its safe use and understand the hazards involved.
- Children must not play with the appliance.
- The appliance must not be cleaned or maintained by children, unless this is done under supervision.
- Do not use the appliance if the plug, cord or appliance are damaged, or if the appliance no longer functions properly or if it is damaged in any other way. If this is the case, consult the retailer or our maintenance service. Never replace the plug or English safety instructions1English • 11 cord yourself. Repairs to electrical appliances should only be performed by skilled persons.
- Incorrect repairs could cause considerable hazards for the user. Never use the appliance with parts that are not recommended or supplied by the manufacturer.
- Never bend the power cord sharply or allow it to run across hotparts.
- Connect the appliance only to an earthed socket. Always check that the plug is properly inserted in the socket.
- Do not pull the cord and/or appliance to remove the plug fromthe wall socket. Never touch the appliance with wet or moist hands.
- Never connect the appliance to an external timer or a separate remote control system, in order to prevent hazardous situations.
- Never place the appliance near appliances that give off heat, such as ovens, gas cookers, hotplates, etc. Keep the appliance away from walls or other objects that may catch fire, such as curtains, towels (cotton or paper, etc.).
- Place the appliance on a sturdy, flat surface and make sure there is enough space around it for sufficient ventilation. Aminimum space of 10 cm is required between the appliance and the walls. Place nothing on top of the appliance.
- Do not leave the appliance unattended when it is in operation.
- Caution! A lot of steam is released via the outlet openings during hot air frying. Keep your hands and face away from the steam coming out of the outlet openings. Watch out for the steam, when removing the pan.
- After use, the interior is very hot. Therefore avoid contact with the interior.
- Always make sure the appliance is placed on an even, flat surface and is only used indoors.
- This appliance is intended to be used in household and similar applications such as: - staff kitchen areas in shops, offices and other working environments; - farm houses; - by clients in hotels, motels and other residential type environments; - bed and breakfast type environments.
- If the appliance is not being used or is being cleaned, switch off12 • English the appliance and remove the plug from the socket.
- Allow the appliance to cool down for 30 minutes before storing or cleaning it.
Ensure that the ingredients being prepared in the appliance come out golden-brown and not dark or brown. Remove burntparts.
- In case of a breakdown, do not make repairs yourself; a blown safety device in the appliance could indicate a defect that cannot be resolved by removing or replacing this safety device. Only original parts should ever be used.
- This appliance is only suitable for household use. When the appliance is used for any other use than intended, no claims for compensation can be made in case of any defects and thewarranty is invalidated.
- If you decide to cease using the appliance due to adefect, we recommend cutting off the cord after removing the plug from the wall socket. Take the appliance to the waste processing department concerned of your municipality. electromagnetic fields (EMF) This appliance complies with all requirements relating to electromagnetic fields (EMF).English • 13
5. Timer indicator led
6. Temperature indicator led
7 8 to 14 Menu selection indicator leds prior to first use
Before using the appliance for the first time, proceed as follows: Carefully unpack your appliance and remove all packag- ing material and possible promotional stickers. Keep the packaging (plastic bags and cardboard) out of reach of children. Afterunpacking the appliance, carefully check it for external damage that may have occurred during transport. Placetheap- pliance on a sturdy, flat and heat-resistant surface. The control keys are touch controls. Carefully touch the controls with a finger to activate them. At each touch of a touch control, you can hear a sound signal. STAND
When the plug is inserted in the socket, a sound signal can be heard. The stand-by key lights up. The appliance automatically switches to stand-by mode when:
- inserting the plug in the socket;
- no keys are touched for 1 minute;
- the time set on the timer has passed;
- pressing the on/off key while the appliance is working. SWITCHING ON
OFF Switch the appliance on or off by pressing the ON/OFF key for a few seconds. [4]. The appliance will only function when the basket is in the appliance correctly. When "END" is shown on the display, the timer counts down 20 seconds once more. During that time, the fan continues to run to cool the appliance. After that, a sound signal can be heard. Hold down the on/off key for 2 seconds in order to switch the appliance fully off. The leds go out, the fan stops.
Check the voltage. The appliance will only work safely on alternate current with a voltage that is indicated on the information plate of the appliance. Only insert the plug of the appliance into a earthed socket The heating element has been provided with a protective layer. Switch on the appliance and allow it to operate at maximum level without food for 10 minutes. In this14 • Deutsch way, the protective layer around the heating element is burned off perfectly. A little bit of smoke may be created during this action. Therefore ensure sufficient ventilation. When the protective layer has disappeared, switch off the appliance. Remove the plug from the socket and clean the insert grille and basket before you actually start using the appliance. Wash the insert grille and basket with soapy water or in the dishwasher. The inside and outside of the appliance itself can be wiped with a soft, damp cloth. The appliance works with hot air. This means that you should never use oil, other liquids or frying fat for preparing food.
- Place the appliance on a sturdy, flat and heat-resistant surface.
- Place the insert grille in the basket.
- Place the basket in the appliance. CAUTION! If the basket is not placed correctly, the appliance will not function. Do not fill the basket with oil or other liquids. Do not place anything on top of the appliance. Do not cover air inlet or outlet openings. Covered air openings will disrupt the air circulation and will have a negative effect on the frying result.
SETTING TEMPERATURE AND TIME
Press and turn the menu selection knob [3] on the control panel to set a higher or lower temperature. The temperature changes in steps of5 °C. Press and turn the menu selection knob [3] on the control panel to set a longer or shorter time. The time changes in steps of 1 minute. touchscreen control
1. To begin. Plug in the Air Fryer. All the buttons on the display will turn on and off. The red power button will stay lit, indicating the unit is active.
buton. It will turn green (menu mode) to denote that the unit is on. As a default, the display screen will alternate between 200°C and 22 min. All buttons and icons will light up.
3. Rotate the knob will cycle through each of the cooking presets in sequence.
4. If you want to adjust the temperature, press
and display shows cooking temperature. Adjust temp. by rotate the knob.
5. If you want to adjust the time, press
and display shows cooking time. Adjust temp. by rotate the knob.
7. While cooking, however if you need to pause the Air Fryer press the “START/PAUSE”
button. The “START/PAUSE” button will flash until cooking resumes. Press the “START/PAUSE” button again to resume cooking. 8. While cooking, you can also pull the basket out and the unit will turn off and will resume function when the basket is inserted back into place. NOTE: lf the basket is not placed securely back within 5 minutes, all buttons andicons will turn off and the unit will power off. 9. When cooking time is complete, the unit will beep once and the display will show “END”. The fan will continue to run for 20 seconds to cool down and return to the standby mode. If you want to stop Cooking, please hold down the POWER button for 3 seconds shake food function
Shaking food is recommended for even cooking around the food surface. NOTE: If the Air Fryer is powered on and there is no action within 5 minutes, the unit will automatically return to off mode. Time and temperature settings of the automatic menus Steak Poultry Shrimps Fish Pizza Fries Pastry Temperature Time 180 °C 15 min 200 °C 25 min 180 °C 8 min 160 °C 15 min 175 °C 8 min 200 °C 22 min 175 °C 10 min Weight min-max grammes 100-550 100-550 100-550 100-550 100-550 100-550 100-550English • 15 tips
- Smaller ingredients usually require a slightly shorter cooking time.
- A larger amount of ingredients only requires a little more time, and a smaller amount requires a little less cooking time.
- Shaking smaller ingredients several times during the cooking time results in a better and more even end result.
- Do not cook extremely fat ingredients such as sausages in the hot air fryer.
- Snacks that can be cooked in the oven, can also be cooked in the hot air fryer.
- The optimum amount for preparing crispy fries is 1000 grammes. The maximum amount is 1500 grammes.
- If necessary use an oil spray to lightly oil the ingredients and make them even more crispy.
- Use ready-made dough for a fast and simple preparation of filled snacks. Ready-made dough also cooks faster than home-made dough.
- Place a baking tin or oven dish in the basket if you want to make a cake or quiche, or if you want to cook delicate or filled ingredients.
- The hot air fryer can also be used to reheat ingredients. For this, set the temperature to 150°C for 10 minutes.
- Add 3 minutes to the cooking time if the hot air fryer is still cold.
- As the turbo hot air technology immediately reheats the air in the appliance, briefly removing the basket from the hot airfryer does not have an effect on the end result. As ingredients can differ in origin, size, shape and brand, Tomado is not able to provide the optimum setting. clean and maintenance
Clean the appliance as follows after each use. Allow the appliance to cool down before cleaning it. After frying, the metal interior is hot. Do not touch the interior immediately after frying. When cleaning the basket and insert grille, do not use metal kitchenware or abrasive agents, as these could damage theanti-stick coating. Remove the plug from the socket and allow the appliance to cool down fully before cleaning it. Instruction: cooling goes quicker if the basket and insert grille are removed from the appliance. Clean the exterior of the appliance with a damp cloth. Clean the basket and insert grille with hot water containing a little washing-up liquid and a sponge. You can also wash thebasket and insert grille in the dishwasher. Instruction: stubborn dirt can be removed by filling the basket with hot water and a little bit of washing-up liquid and allowing itto soak for 10 minutes. Clean the interior of the appliance with a damp soft sponge that you have first soaked in hot water and squeezed out. Remove any food residues from the heating element using a soft washing-up brush. Be careful with washing-up liquid. This could be left behind on the heating element and give a foreign taste to the ingredients. Never submerge the appliance, cord or plug in water or other liquids. Caution! As a result of shaking the pan, the screws could loosen a little after a period of time. Regularly check this and properly tighten the screws. Before storing the appliance, allow it to cool down fully and remove the plug from the socket. Check that all components are clean and dry. Store the appliance in a clean and dry location.16 • English breakdowns and solutions
Failure Possible cause Solution The appliance does not function. The plug is not in the socket. Insert the plug in an earthed socket. The basket is not properly placed in the appliance. Properly slide the basket in the appliance. The timer is not set Set the timer with the [+] or [-] key on the rights side ofthe control panel The ingredients are not cooked. There are too many ingredients in the basket. Place smaller amounts of ingredients in the basket. Smaller portions can be fried more evenly. The set temperature is too low. Set the appliance to a higher temperature. The cooking time is too short. Set a longer time. The ingredients are not fried evenly. Some ingredients must be shaken halfway the cooking time. Shake ingredients lying on top of one another (such as fries) halfway the cooking time. Fried snacks are not crispy when they come out of the appliance. The snacks are not suitable for a hot air fryer and should be fried in an oil fryer. Use oven snacks or cover the snacks with a little oil for amore crispy result. It is not possible to slide the basket in the appliance properly. The basket is overfilled. Do not fill the basket above the maximum, but observe the recommended amounts. The insert grille is not properly placed in the basket. Place the insert grill in the basket with the correct sideup. There is white smoke coming from the appliance. You are cooking fatty ingredients. When fatty ingredients are being cooked in the appliance, it is possible that a lot of fat drips in the basket. This fat causes white smoke and the basket can become hotter than normal. This does not have an effect on the appliance or on the end result. The basket still contains fat residues from a previous preparation. Clean the basket after every use. Fat residues that become hot can cause white smoke. Fresh fries do not come out of the appliance evenly fried. The type of potato is not suitable. Use fresh potatoes that are a little floury when cooked. The fries have not been properly rinsed prior to frying. Properly rinse the cut fries to remove starch. Fresh fries are not crispy when they come out of the appliance. The amount of oil and water in the fries determines how crispy they can be. Dab the fries properly dry before adding oil. Cut the fries more finely for a crispier result. Add a little more oil for a crispier result. Energy consumption Product information for power consumption and maximum time to reach applicable low power mode Standby mode 0,5 W The maximum time needed for the microwave oven to automatically reach the applicable low power mode or condition. 20 minutesDeutsch • 17
1. Customers enjoy a 5-year full manufacturer’s warranty on all Inventum products.
2. Within this period, a defective product or part, which makes normal functioning of the product or part impossible, will always be repaired free of charge or, if repair is not possible and/or does not provide a solution, replaced (by the same or equivalent product). The assessment of this lies with Inventum. 3. In order to make a claim under the 5-year Inventum warranty you must, within two months after discovering the fault or defect, either return the product to the shop where you bought it, or contact the Inventum customer service department by using the form at www.inventum.eu/service.
4. The warranty period starts from the date stated on the product's original sales receipt.
5. To invoke the warranty, you must always send a copy of the original proof of purchase with the service request and
present the original proof of purchase to the service technician.
6. The 5-year warranty applies only to normal domestic use of Inventum products within the Netherlands.
Warranty exclusions 1. The 5-year Inventum guarantee does not apply in case of: normal wear and tear, consumables, improper use, insufficient or incorrect maintenance, incorrect and/or inexpert assembly and installation of the appliance, repairs by unauthorised third parties, business or commercial use, missing serial number, damage caused by an external cause. This enumeration is not exhaustive.
2. B-choice products and products that have been built-in in a showroom are not covered by the 5-year Inventum warranty.
All optical damage such as dents, scratches and slight traces of use are excluded from any warranty. Reporting malfunctions on Inventum products
1. Faults or defects on Inventum products can be reported by using the service request form on the website
www.inventum.eu/service or through the seller of the product.
2. A copy of the original proof of purchase must be included with the request.
3. Inventum's service department determines whether the product will be repaired or replaced, based on the request and
the sales receipt. Important to know
- Products sent without prior notification will not be accepted. Further to the notification you will be informed by Inventum whether a warranty applies and whether you must return the product.
- The replacement or repair of a defective product, or a part thereof, does not lead to an extension of the original warranty period.
- Products eligible for replacement or repair must be emptied and clean. For a detailed explanation of the warranty conditions and items excluded from them, please visit Inventum's website www.inventum.eu/algemene-voorwaarden These general warranty and service conditions apply to Inventum brand products purchased after 27 April 2022 and intended for use within the Netherlands. For Inventum products used outside the Netherlands, but within a EU Member State, the warranty rules of that country apply. Inventum provides warranty and service by a white goods technician only in the Netherlands. As a consumer, you are entitled by law to a properly working product. Does the product break down sooner than you might expect? This means that the product is not in conformity. In that case, the law offers you, the buyer, with a number of legal remedies for your protection. This legal protection is not affected by the above commercial warranty given by Inventum on Inventum products used within the Netherlands. Inventum Huishoudelijke Apparaten B.V., Meander 261, 6825 MC Arnhem, the Netherlands34 • Deutsch Allgemeine Service- und Garantiebedingungen Fünf Jahre Inventum-Garantie