
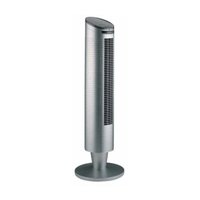
Extreme VU4510 - Fan ROWENTA - Free user manual and instructions
Find the device manual for free Extreme VU4510 ROWENTA in PDF.

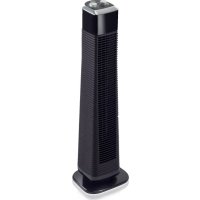
| Product type | Pedestal fan |
| Brand | Rowenta |
| Model | Extreme VU4510 |
| Power supply | 120 V ~ 60 Hz |
| Maximum power | 60 W (estimated) |
| Number of speeds | 3 (low, medium, high) |
| Timer | Up to 8 hours |
| Ventilation modes | Normal, Night, Outdoor |
| Oscillation | Yes, manual adjustment |
| Remote control | Yes, with CR2032 battery (included) |
| Outdoor use | Yes, resistant to light/moderate rain |
| Protection | GFCI integrated in plug, 5A 125V fuse |
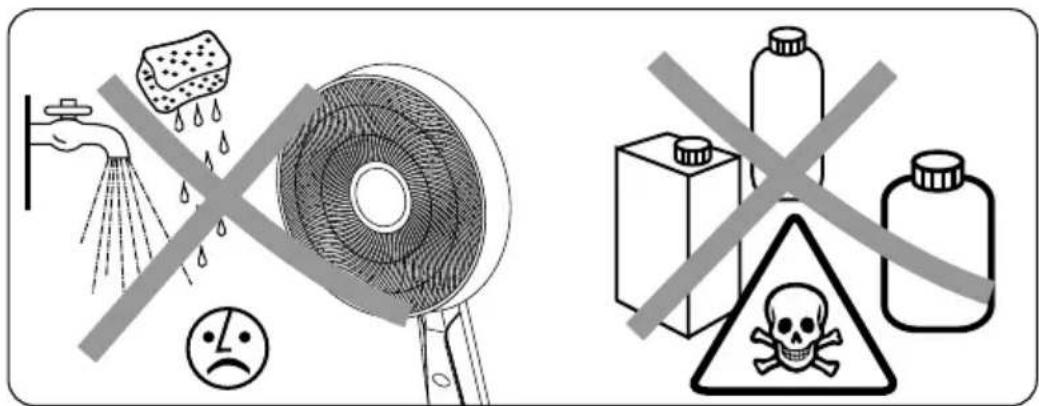
| Cleaning | Slightly damp cloth, unplug before |
| Assembly required | Yes, follow instructions |
| Dimensions (height x width x depth) | 130 x 40 x 40 cm (estimated) |
| Weight | 5 kg (estimated) |
| Color | Not specified |
| Warranty | Rowenta international warranty |
Frequently Asked Questions - Extreme VU4510 ROWENTA
User questions about Extreme VU4510 ROWENTA
0 question about this device. Answer the ones you know or ask your own.
Ask a new question about this device
Download the instructions for your Fan in PDF format for free! Find your manual Extreme VU4510 - ROWENTA and take your electronic device back in hand. On this page are published all the documents necessary for the use of your device. Extreme VU4510 by ROWENTA.
USER MANUAL Extreme VU4510 ROWENTA
natural_image
Front view of a modern electric fan with a black handle and circular blades, mounted on a stand (no visible text or symbols)Rowenta Outdoor Extreme Fan
VU451*
READ AND SAVE THESE SAFETY INSTRUCTIONS BEFORE USING THIS FAN
EN
SAFETY INSTRUCTIONS
WARNINGS
It is essential that you read these instructions carefully and comply with the following recommendations.
- For your safety, this appliance complies with the applicable standards and regulations (US standard UL 507 and Canada C22.2 No. 113, certified with cETLus mark).
- If the power cord is damaged it must be replaced by the manufacturer, the manufacturer's after-sales service department or a similarly qualified person, to avoid danger.
- Use fan only for intended use, as described in this instruction manual.
• To reduce the risk of fire or electric shock, do not use this fan with any solid-state speed control device.
- Do not use your appliance in a dusty room or a room where there is a risk of fire.
- Before using, always check the condition of the appliance, the power outlet and the power cord and plug.
- Improper installation may result in the risk of fire, electric shock or personal injury.
- The power plug must be removed from the power outlet when not in use, before cleaning, servicing, maintenance, and moving to another location.
- Do not run cord under carpeting. Do not cover cord with throw rugs, runners, or similar coverings. Do not route cord under furniture or appliances. Arrange cord away from traffic area and where it will not be tripped over.
- Do not operate any fan with a damaged cord or plug. Discard fan or return to an authorized service facility for examination and /or repair.
- Do not pull on the power cord or the appliance, even to unplug it from the wall outlet.
- Never insert objects into the appliance (e.g. needles...).
- Do not use gasoline, thinners, solvents, ammonias or other chemicals for cleaning.
- The warranty will be void in the event of damage arising from improper use.
- Do not attempt to repair or replace parts.
- This appliance is intended for domestic use only. It must therefore not be used in industrial applications.
- Do not operate the stand fan on an elevated surface, such as shelf or desktop, use only while placed on the floor.
- This appliance is not intended for use by persons (including children) with reduced physical, sensory or mental capabilities, or lack of experience and knowledge, unless they have been given supervision or instruction concerning the use of the appliance by a person responsible for their safety. Children should be supervised to ensure that they do not play with the appliance.
- This appliance may be used by children aged 8 or over, and by persons lacking appropriate knowledge and experience or whose physical, sensory or mental capacities are limited, provided that they are supervised, have received instruction in the safe use of the appliance, and are fully aware of the risks involved. Children must not be allowed to play with the appliance. Home cleaning and maintenance of the appliance must not be carried out by children unless they are aged 8 or over and are supervised. Always keep the appliance and power cord out of reach of children under 8 years.
- This product employs overload protection (fuse). A blown fuse indicates an overload or short-circuit situation. If the fuse blows, unplug the product from the outlet. Replace the fuse as per the user servicing instructions (follow product marking for proper fuse rating) and check the product. If the replacement fuse blows, a short-circuit may be present and the product should be discarded or returned to an authorized service facility for examination and/or repair.
- Warning: not suitable for use with solid-state speed controls.
• Always unplug the product from electricity prior to the beginning of any such servicing or cleaning operation.
VERY IMPORTANT
- Keep the appliance 20 inches away from any objects (curtains, walls, aerosols, etc.)
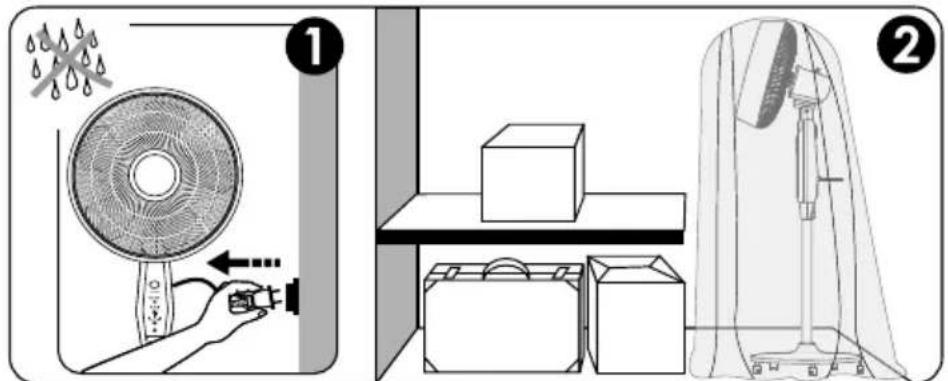
- This appliance is intended for outdoor (and indoor) use, which enables it to resist direct contact of water to some extent, but it is not entirely waterproof. It can withstand the average light rain shower but should be covered during heavy rain storms and not fully submerged in water.
- Do not touch the appliance with wet hands.
-
Before operating, please ensure that :
-
The appliance is assembled according to the manufacturer's instructions.
- The appliance is placed on a stable and firm surface
- The appliance is in a normal operating position (in an upright position on its feet).
- This appliance is able to withstand the sunlight (Ultraviolet Radiation).
FIRST USE
Before using the appliance for the first time, check that the voltage and source of power supply meet the requirements indicated on the product.
- Your appliance arrives unassembled.
It is essential to assemble it correctly. To reduce the risk of fire, electric shock, and injury to persons, this fan must be assembled according to these instructions.
- You must set and use your appliance in compliance with the standards in force in your country.
- You must set the surge protector to ON before plugging and switching on the fan.
Before switching on your appliance, ensure that :
- the appliance is completely assembled as described in the safety instructions,
- the appliance is placed on a stable, horizontal surface,
- the appliance is positioned in accordance with the instructions given in this manual.
IMPORTANT: You are advised to switch off and unplug the appliance when not in use. When storing the appliance for a longer period of time, please remove the batteries from the remote control.
IN CASE OF ANY PROBLEM
Do not disassemble the appliance yourself. A poorly repaired appliance may be dangerous for the user.
Do not use the appliance and contact an Approved Service Center if :
- your appliance has been dropped;
- your appliance or its power cord are damaged;
- your appliance no longer functions properly.
You can find a list of Approved Service Centers on the ROWENTA international warranty cards.
HELP PROTECT THE ENVIRONMENT!

Your appliance contains valuable materials which can be recovered or recycled.
Leave it at a local civic waste collection point.
If this appliance uses batteries: help us look after the environment, by not throwing away your used batteries. Instead, bring them to any one of the special battery collection points. Do not throw them away with your household waste.
These instructions can also be found on our website www.rowenta.com.
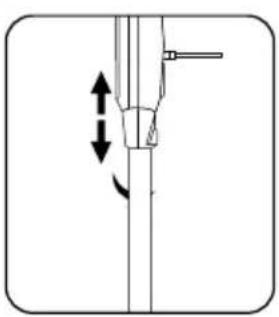
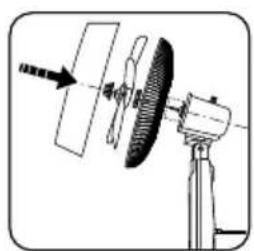
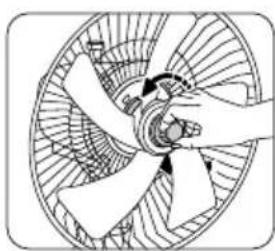
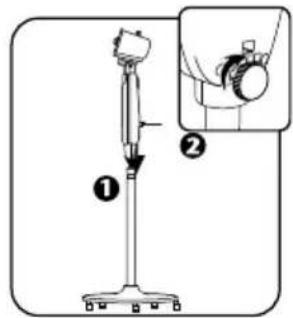
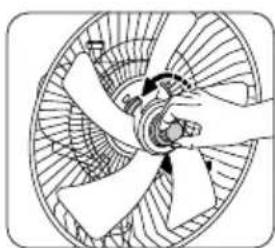
ASSEMBLING
- Your appliance arrives unassembled. For your safety, it is essential to assemble it correctly.
- You must set and use your appliance in compliance with the standards in force in your country.


natural_image
Pure mechanical diagram showing a lever and pivot point without any text or symbols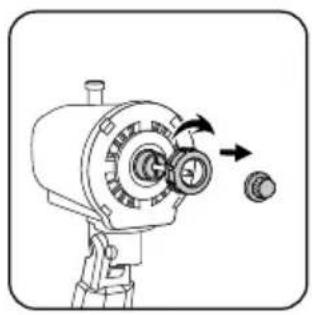
natural_image
Illustration of a mechanical device with rotating components and directional arrows (no text or symbols)
natural_image
Diagram of a mechanical device with a rotating wheel and base mount (no text or symbols)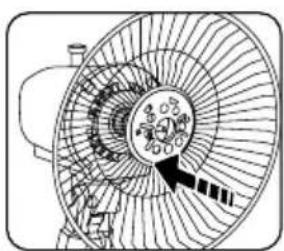
natural_image
Diagram of a fan or mechanical component with internal gear-like structure and directional arrow (no text or symbols)
natural_image
Diagram of a hand operating a fan blade with blades and central hub (no text or symbols)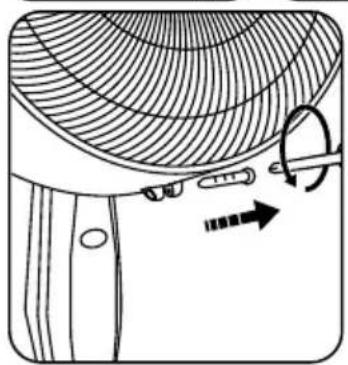
natural_image
Diagram of a garment pattern with a curved net and arrow indicating rotation (no text or symbols)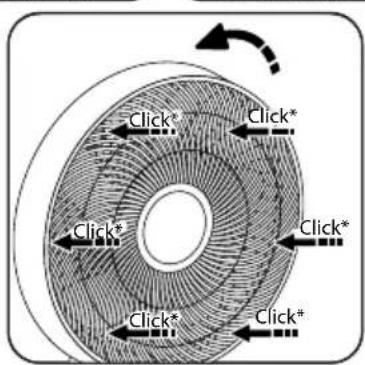
natural_image
Diagram of a mechanical component with curved internal structure and directional arrows indicating motion (no text or symbols)OPERATION
natural_image
Diagram of a fan blade with rotating blades and directional arrows indicating motion (no text or symbols)
natural_image
Illustration of a hand holding a small electronic device connected to a fan, with no visible text or symbols.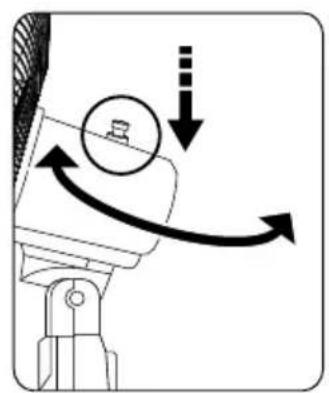
natural_image
Mechanical diagram showing a rotating component with motion arrows and a circular head (no text or symbols)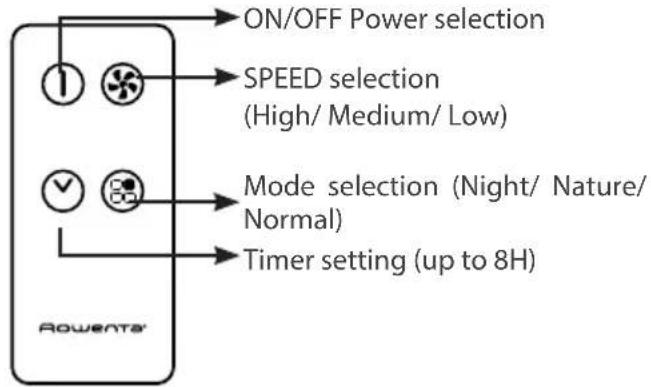
flowchart
graph TD
    A["1"] --> B["ON/OFF Power selection"]
    C["2"] --> D["SPEED selection (High/ Medium/ Low)"]
    E["3"] --> F["Mode selection (Night/ Nature/ Normal)"]
    G["4"] --> H["Timer setting (up to 8H)"]
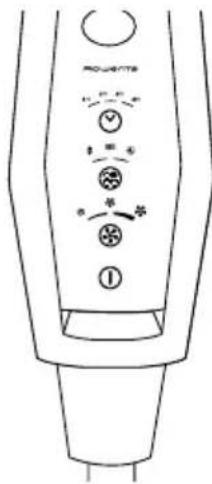

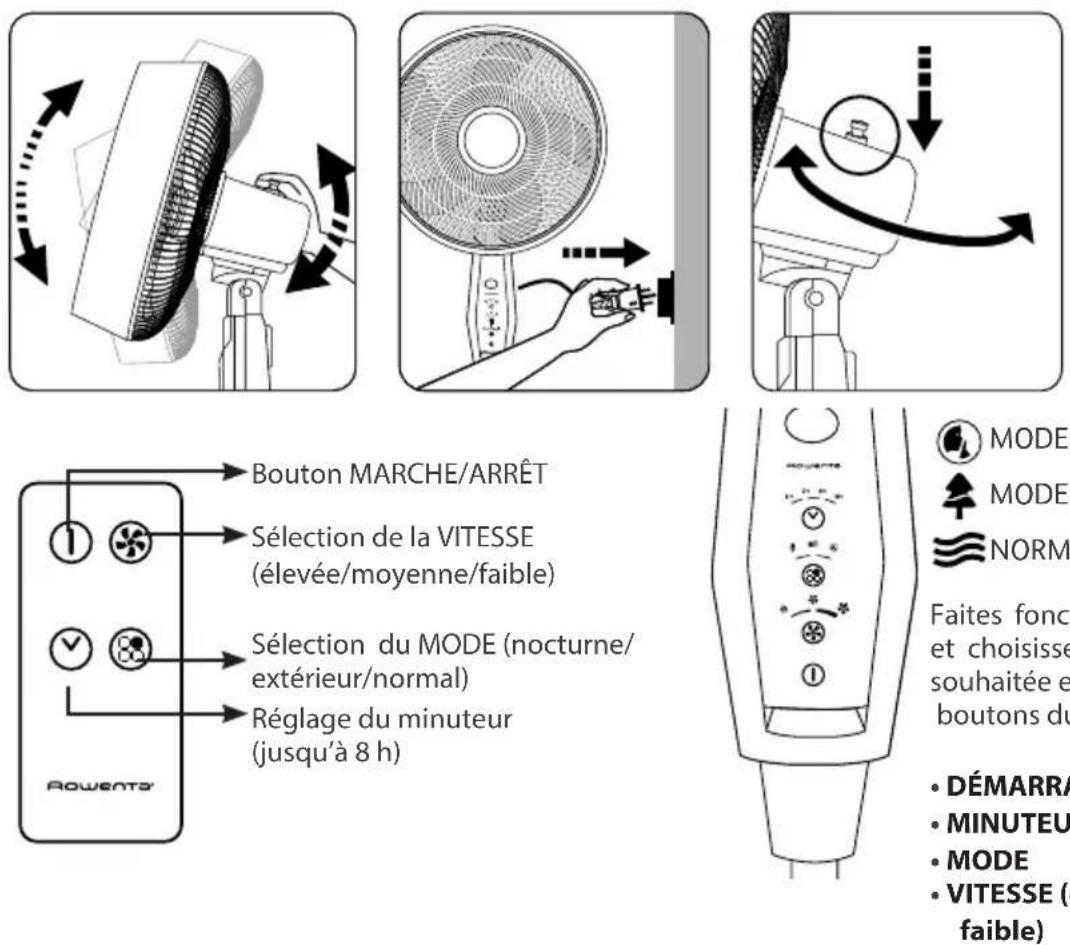
Operate the fan and choose the speed you require using the buttons on the control panel:
- START
• TIMER (up to 8H)
• MODE
• SPEED (High/ Medium/ Low)
The control panel has four buttons which are used to start your appliance and select the ventilation speed. You can select your preferred ventilation setting by pressing "MODE" button.
In OUTDOOR Mode, you can select your preferred fan speed setting by pressing the SPEED selector and choosing. (High/ Medium/ Low)
In SLEEP or NATURAL mode, the fan speed is pre-programed to provide maximum comfort.
Turn the appliance off by pressing button ① either on the control panel or the remote control.
By pressing ⬆ button, you can set a timer if needed. The LED lights will indicate the duration of the timer you are setting.
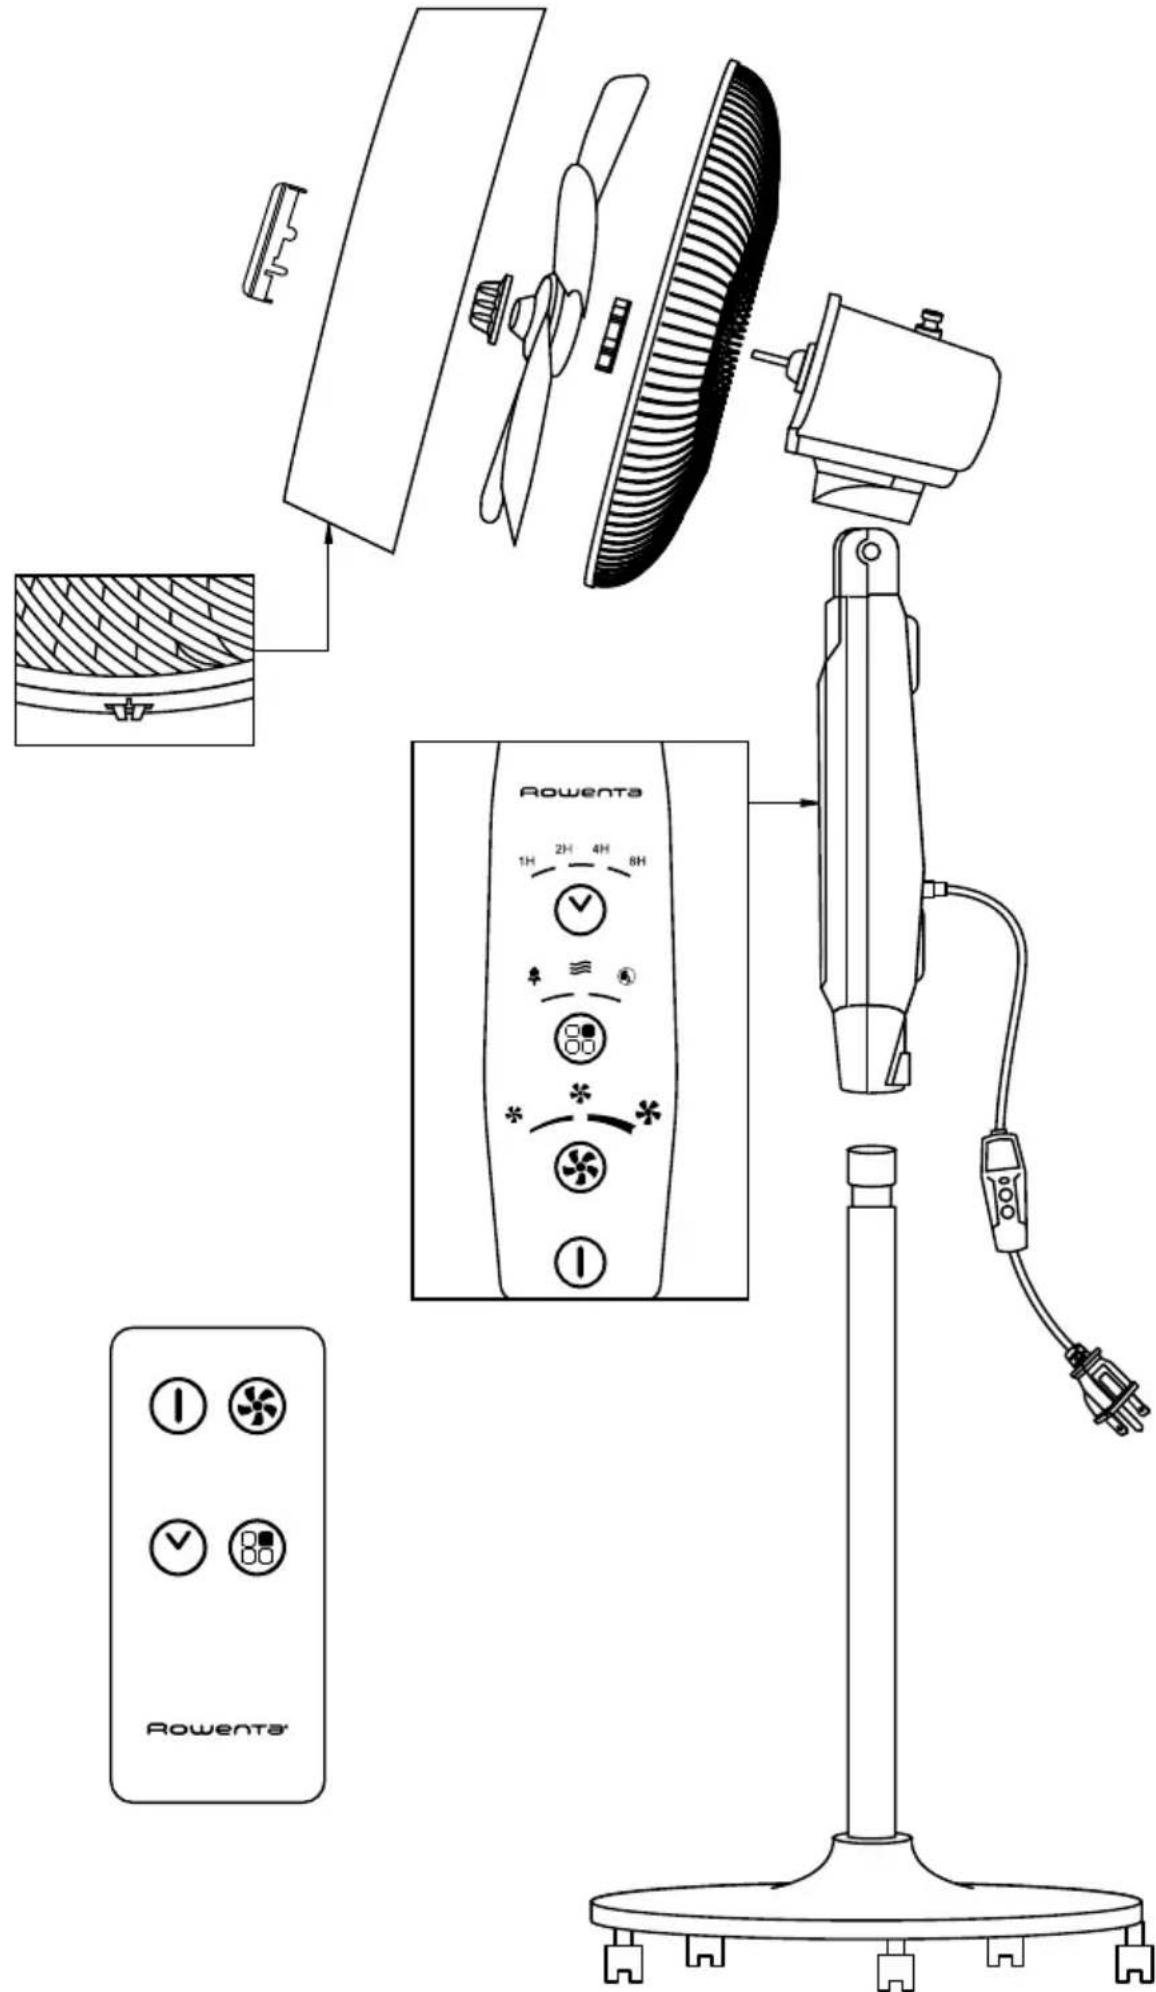
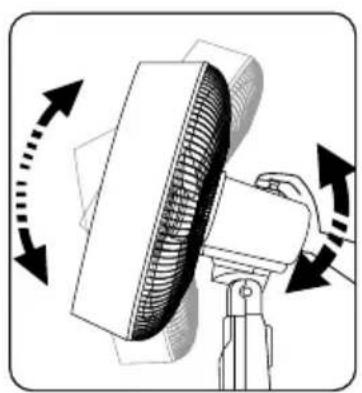
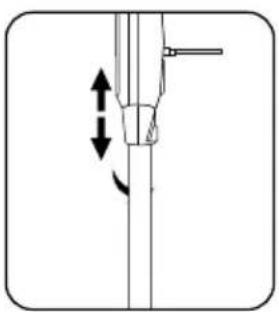
This fan has oscillating fan head which is set by a manual stopper control on the top of fan head.
IMPORTANT: You are advised to unplug the appliance when not in use.
USER SERVICING INSTRUCTIONS
Ground Fault Circuit Interrupter (GFCI) Fused Plug
This plug is a safety feature. It contains a ground fault circuit interrupter (GFCI) and a fuse that should not be removed. Discard product if the attachment plug is damaged.
To reduce the risk of fire, electric shock and personal injury, do not remove, replace, repair or tamper with the originally supplied plug.
If the fan does not function properly, it may be due to the safety device incorporated in this plug.
If the fuse fails, it is generally due to a short circuit or circuit overload. Replace the fuse as per the instructions below.
If the replacement fuse fails, immediately unplug the unit and contact Rowenta consumer services for assistance. This appliance has a polarized plug (one blade is wider than the other). To reduce the risk of electrical shock, this plug is intended to fit in a polarized outlet only one way. If the plug does not fit fully in the outlet, reverse the plug.
If it still does not fit, contact a qualified electrician. Do not attempt to defeat this safety feature.
Risk of fire. Do not replace attachment plug. Contains a safety device (fuse, AFCI, LCDI) that should not be removed. Discard product if the attachment plug is damaged.
EN
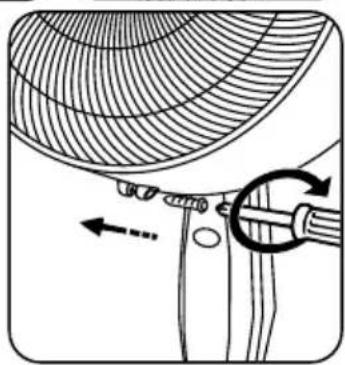
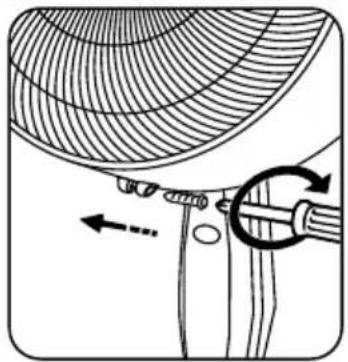
Fuse replacement: A B C D E

Grasp plug and remove from the receptacle or other outlet device. Do not unplug by pulling on cord. (A)
Open the fuse (B) by sliding the fuse cover on the top of the plug towards the blades. Remove fuse (C) carefully by gently prying out the ends of the fuse from the receptacle.
Warning! Only replace with a fuse type and rating matching what was removed from the product.
Risk of fire. Replace the fuse only with 5 Amp, 125 Volt fuse. Gently install replacement fuse back into the pins that will hold it in place. (D)
Note : If the fuse is not replaced properly, the unit will not function.
Close fuse cover (E) by sliding the fuse cover back over the fuse box in the plug until it is completely closed. Plug the fan back in and resume use.
APPLIANCE(S) WITH REMOTE CONTROL
Remote control : Insert one 3V CR2032 coin cell battery (is supplied) to the battery compartment of the remote control.
⚠ WARNING: Chemical Burn Hazard. Keep batteries away from children.
IMPORTANT: The remote control is not water resistance.
This product contains a lithium button/coin cell battery. If a new or used lithium button/coin cell battery is swallowed or enters the body, it can cause severe internal burns and can lead to death in as little as 2 hours. Always completely secure the battery compartment. If the battery compartment does not close securely, stop using the product, remove the batteries, and keep it away from children. If you think batteries might have been swallowed or placed inside any part of the body, seek immediate medical attention. Place the batteries in their compartment making sure that you put them in with the positive and negative ends the right way round as shown in the battery compartment.
IMPORTANT: You are advised to switch off and unplug the appliance when not in use. When storing the appliance for a longer period of time, please remove the battery from the remote control. a) The batteries shall be disposed of properly, including keeping them away from children; and b) Even used batteries may cause injury.
CLEANING
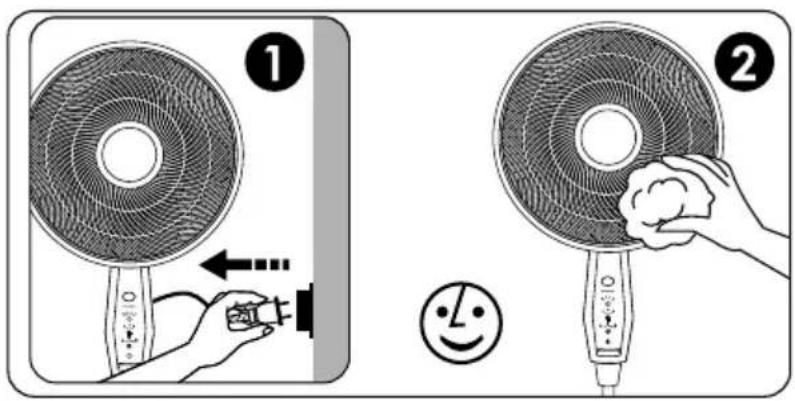
- Your appliance must be unplugged before proceeding with any form of cleaning.
- You can clean it with a slightly damp cloth.
- IMPORTANT: Never use abrasive products which might damage the appearance of your appliance.
STORAGE
- When you are not using your appliance, store it in a dry place.
LISEZ ET CONSERVEZ CES CONSIGNES DE SÉCURITÉ AVANT D'UTILISER CE VENTILATEUR
CONSIGNES DE SÉCURITÉ
FR
CONSIGNES DE SÉCURITÉ
natural_image
Simple line drawing of a mechanical device with a lever and base, no text or symbols present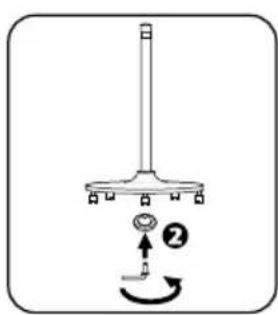
natural_image
Pure mechanical diagram showing a lever and shaft assembly without any text, numbers, or symbols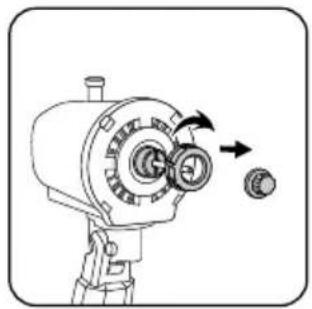
natural_image
Illustration of a mechanical device with rotating components and directional arrows (no text or symbols)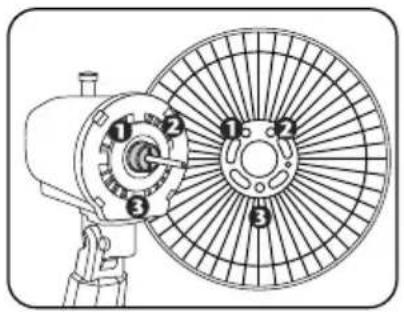
natural_image
Technical line drawing of a mechanical fan with numbered components (no text or symbols)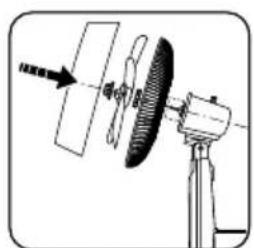
natural_image
Diagram of a mechanical device with rotating components and an arrow indicating direction (no text or symbols)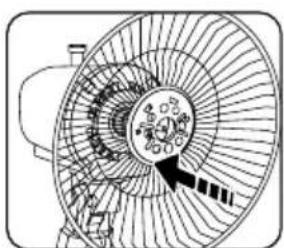
natural_image
Diagram of a fan with internal blades and a central hub, no text or symbols present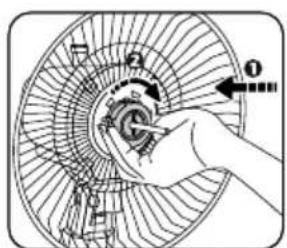
natural_image
Diagram of a hand operating a multi-blade fan with blades and central hub (no text or labels)
natural_image
Diagram of a garment sleeve with a curved fabric pattern and a tool, showing no text or symbols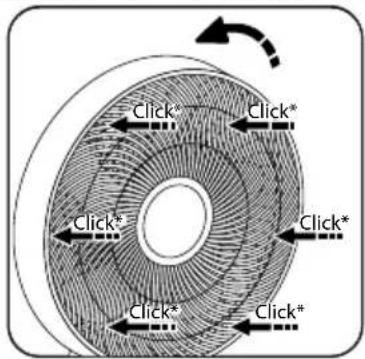
natural_image
Diagram showing a curved structure with arrows indicating direction, no text or symbols presentFONCTIONNEMENT
natural_image
Illustration of a hand holding an electrical plug with three leads (no text or symbols)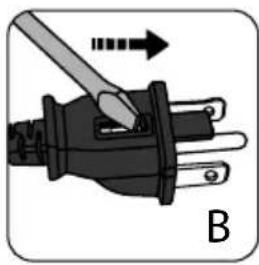
natural_image
Illustration of a plug with a screwdriver inserted, showing internal components and an arrow indicating direction (no text or symbols)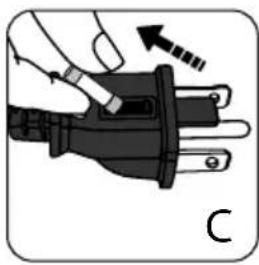
natural_image
Illustration of a hand holding an electrical plug with a screwdriver, showing a force or adjustment (no text or symbols)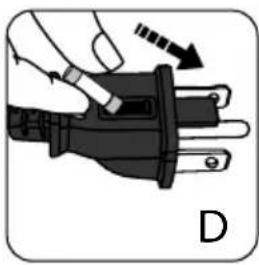
natural_image
Illustration of a hand holding an electrical plug with a tool, showing a right-hand rule (no text or symbols present)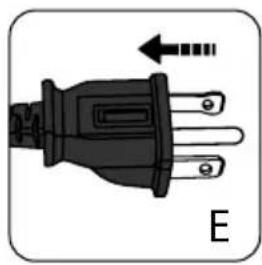
natural_image
Electrical plug with three leads and a black terminal block, labeled 'E' (no text or symbols on the plug itself)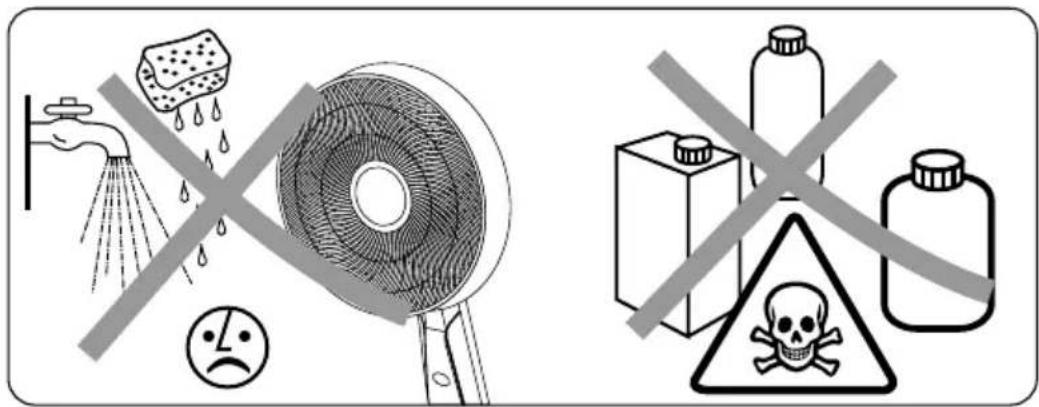
ENTREPOSAGE
- Rowenta Outdoor Extreme Fan
- READ AND SAVE THESE SAFETY INSTRUCTIONS BEFORE USING THIS FAN
- SAFETY INSTRUCTIONS
- WARNINGS
- VERY IMPORTANT
- FIRST USE
- IN CASE OF ANY PROBLEM
- HELP PROTECT THE ENVIRONMENT!
- ASSEMBLING
- OPERATION
- USER SERVICING INSTRUCTIONS
- Ground Fault Circuit Interrupter (GFCI) Fused Plug
- Fuse replacement: A B C D E
- Warning! Only replace with a fuse type and rating matching what was removed from the product.
- Note : If the fuse is not replaced properly, the unit will not function.
- APPLIANCE(S) WITH REMOTE CONTROL
- CLEANING
- STORAGE
- LISEZ ET CONSERVEZ CES CONSIGNES DE SÉCURITÉ AVANT D'UTILISER CE VENTILATEUR
- CONSIGNES DE SÉCURITÉ
- FONCTIONNEMENT
- ENTREPOSAGE
Brand : ROWENTA
Model : Extreme VU4510
Category : Fan