
GTw 190 A - Car speakers BLAUPUNKT - Free user manual and instructions
Find the device manual for free GTw 190 A BLAUPUNKT in PDF.



| Product Type | Active car speaker (subwoofer) |
| Brand | Blaupunkt |
| Model | GTw 190 A |
| Dimensions (L x W x H) | 280 x 200 x 70 mm |
| Impedance | 2 Ohms |
| RMS Power | 80 W |
| Maximum Power | 150 W |
| Frequency Response | 30 - 150 Hz |
| Sensitivity | 95 dB |
| Signal-to-Noise Ratio | >91 dB |
| Recommended Fuse | 15 A |
| Power Supply | 12 V, negative ground |
| Input Type | Speaker-level input and RCA input |
| Remote Control | Wired, included |
| Woofer | 21.5 cm x 13.5 cm |
| Amplifier | MOSFET |
| Care | Clean with a dry cloth |
| Safety | Disconnect the battery before installation; do not drill into gas, brake, or wiring lines; install in a ventilated location. |
| Package Contents | Subwoofer, wired remote control, cables, mounting accessories |
Frequently Asked Questions - GTw 190 A BLAUPUNKT
User questions about GTw 190 A BLAUPUNKT
0 question about this device. Answer the ones you know or ask your own.
Ask a new question about this device
Download the instructions for your Car speakers in PDF format for free! Find your manual GTw 190 A - BLAUPUNKT and take your electronic device back in hand. On this page are published all the documents necessary for the use of your device. GTw 190 A by BLAUPUNKT.
USER MANUAL GTw 190 A BLAUPUNKT
INSTALLATION MANUAL GTw 190 A

Enjoy it.
natural_image
Pure electrical circuit lines without any symbols
SPEZIFIKATION
- Before starting the installation make sure to disconnect the vehicle's negative (-) battery power cable. This will prevent possible electrical shock.
- When wiring this unit please use the supplied connecting cords.
DO NOT remove the fuses. The protection circuit will not work in case of an emergency - GTw 190 A installed in the passenger compartment should be securely anchored in place.
- Before drilling any mounting holes check behind where you want to drill the holes to make sure you DO NOT drill into anything such as the gas line, brake lines or electrical wiring.
- Do not install the GTw 190 A anywhere it can get wet.
- Install the GTw 190 A in a location with good ventilation. Dot not place anything on top of the GTw 190 A to prevent airflow through the unit.
- While driving keep your listening volume at a level which does not mask important outside traffic noises, such as emergency vehicles, etc.
- High sound levels may cause permanent hearing loss.
CAUTION
- This device is for 12 volt (-) negative ground. Please check your automobile to make sure it is this type.
- When routing leads and cords, secure them with cable retainers and electrician's adhesive tape or shrink tubing wherever they may touch sharp edges. Kepp all wiring away from hot surfaces or heater outlets to prevent short circuits.
- Refer to your car stereo's operation manual as well when installing speakers in your car. Note:
If low frequency noise exists in head unit, noise may be amplified by GTw 190 A.
FEATURES
- Shallow & compact design for fitting under seat or any small place
- Built-in high power MOSFET amplifier for powerful response & low distortion
- Powerful 21.5 cm x 13.5 cm woofer for rich & punchy bass
- Wire remote control included for easily adjustable bass sound
- Compatible RCA & speaker input for system application versatility
Wiring Example 1 (Speaker line input system)

flowchart
graph LR
    A["Speaker"] --> B["Speaker line input"]
    C["Car stereo"] --> B
    B --> D["Fuse"]
    D --> E["For ground"]
    E --> F["Connect firmly to a metal part of the baby. Improper grounding will cause this unit to operate abnormally."]
    F --> G["System remote control"]
    G --> H["Connection for switching output of the car radio"]
    H --> I["Switch box"]
    style A fill:#f9f,stroke:#333
    style C fill:#f9f,stroke:#333
    style D fill:#ccf,stroke:#333
    style E fill:#cfc,stroke:#333
    style F fill:#fcc,stroke:#333
    style G fill:#cff,stroke:#333
    style H fill:#ffc,stroke:#333
    style I fill:#fcc,stroke:#333
Wiring Example 2 (RCA Input system)
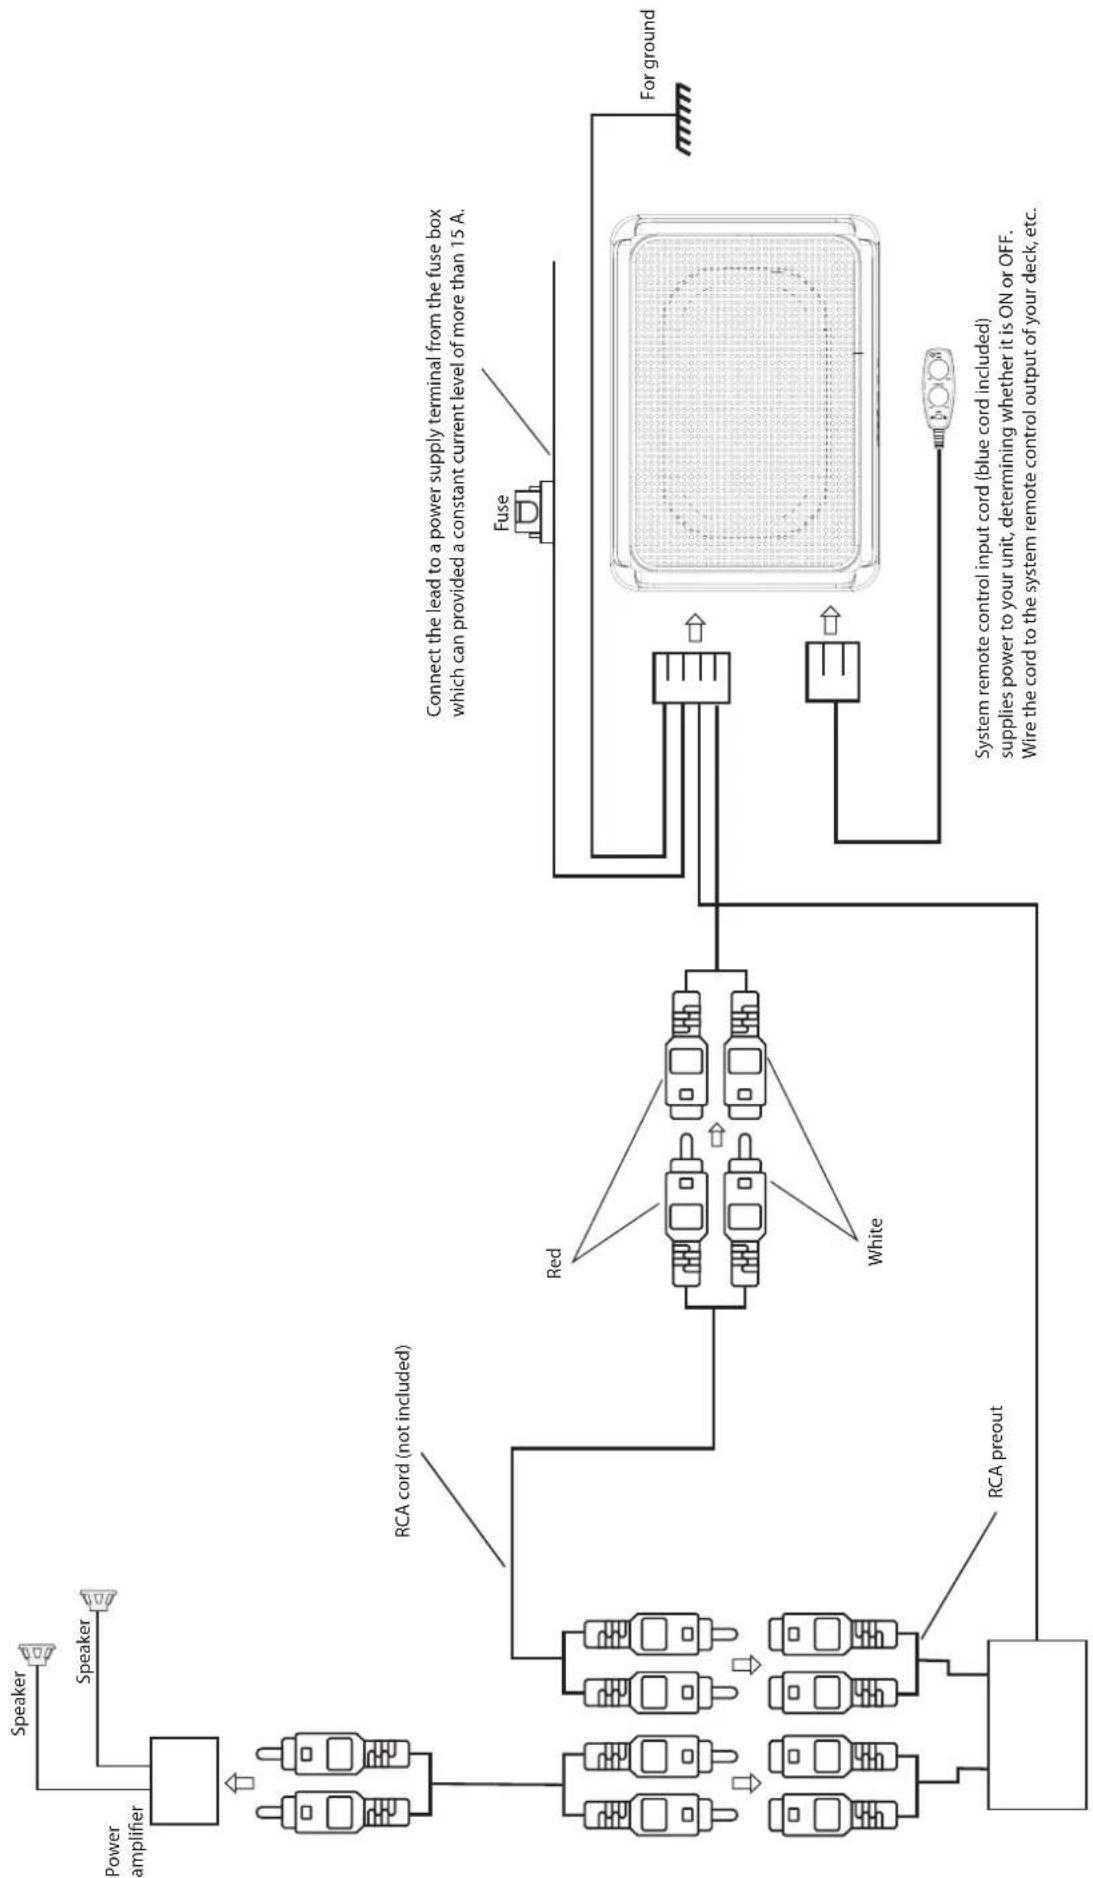
flowchart
graph TD
    A["Power amplifier"] --> B["RCA cord (not included)"]
    B --> C["Red"]
    B --> D["White"]
    C --> E["Fuse"]
    D --> E
    E --> F["For ground"]
    G["For ground"] --> H["System remote control input cord (blue cord included) supplies power to your unit, determining whether it is ON or OFF. Wire the cord to the system remote control output of your deck, etc."]
    I["RCA preout"] --> B
    J["Speaker"] --> A
    K["Speaker"] --> A
EN
CONTROLS AN THEIR USE

① Power indicator
Lights up when power is turned on.
②Gain control
Use this control to set the desired gain level.
③ Frequency control
Turn this knob to change the frequency during sound reproduction Set the knob to bass setting of your choice (continuously variable from 50 Hz to 125 Hz)
④Phase switch
Use switch to select the phase according to the system.
HOW TO INSTALL


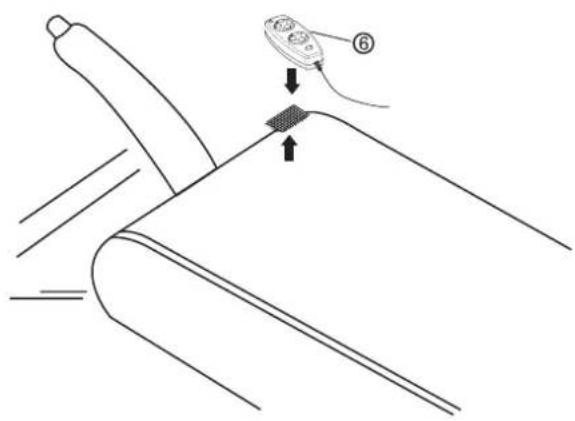

natural_image
Technical line drawing of a rectangular electronic component with labeled parts (1 and 3), no text or symbols present.PARTS INCLUDED
1 x2
2 x2 (M5 mm x 10 mm)
3 (Ø5 mm x 18 mm) x2
4 (M3 mm x 8 mm) x2
5 x1
6 x1
7
SPECIFICATION
Dimesnions: 280 x 200 x 70 mm
Nominal Impedance: 2 Ω
RMS Power: 80 W
Max. Power: 150 W
Frequency Range: 30 - 150 Hz
Sensitivity: 95 dB
Signal to noise ratio: >91 dB
Recommended fuse type: 15 A
Subject to technical changes, errors and typographical errors.

Brand : BLAUPUNKT
Model : GTw 190 A
Category : Car speakers