
ZP1 - Professional audio equipment MARANTZ - Free user manual and instructions
Find the device manual for free ZP1 MARANTZ in PDF.
| Product type | Shock mount microphone holder with handle |
| Brand | Marantz |
| Model | ZP-1 |
| Main use | Mounting, vibration isolation and transport of professional microphones |
| Box contents | ZP-1 mount, shock suspension bands, synthetic fur windscreen, user guide, safety instructions and warranty |
| Construction materials | Metal and robust plastic |
| Handle | Adjustable in angle and position along the rail for optimal balance |
| Shock suspension | Adjustable elastic bands for optimal vibration isolation |
| Locking system | Front and rear rails with quick-release locking levers |
| Shock dome | Front and rear (stop) dome, removable |
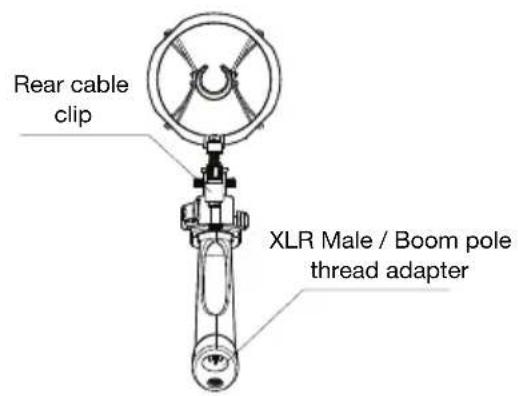
| Cable input | Male XLR with built-in cable clamp at the back of the rails |
| Adjustment of attachment points | Possible using a screwdriver to loosen the clamp screw on the suspension clip |
| Windscreen | Synthetic fur windscreen included |
| Compatibility | Standard shotgun type microphones (XLR) |
| Maintenance | Clean with a soft, dry cloth. Avoid abrasive products |
| Safety instructions | Included in the documentation. Check the stability of the mount during use |
| Repairability | Spare parts available: suspension bands, fur screen, screws, etc. Contact Marantz support |
| Warranty | Information provided with the product. Registration possible at marantzpro.com |
| Documentation | User guide available for download at notice-facile.com and marantzpro.com |
Frequently Asked Questions - ZP1 MARANTZ
User questions about ZP1 MARANTZ
0 question about this device. Answer the ones you know or ask your own.
Ask a new question about this device
Download the instructions for your Professional audio equipment in PDF format for free! Find your manual ZP1 - MARANTZ and take your electronic device back in hand. On this page are published all the documents necessary for the use of your device. ZP1 by MARANTZ.
USER MANUAL ZP1 MARANTZ
User Guide (English)
Introduction
Box Contents
ZP-1
Shock Mount Bands
Synthetic Fur Windscreen
User Guide
Safety & Warranty Manual
Support
For the latest information about this product (documentation, technical specifications, system requirements, compatibility information, etc.) and product registration, visit marantzpro.com. For additional product support, visit marantzpro.com/support.
Features
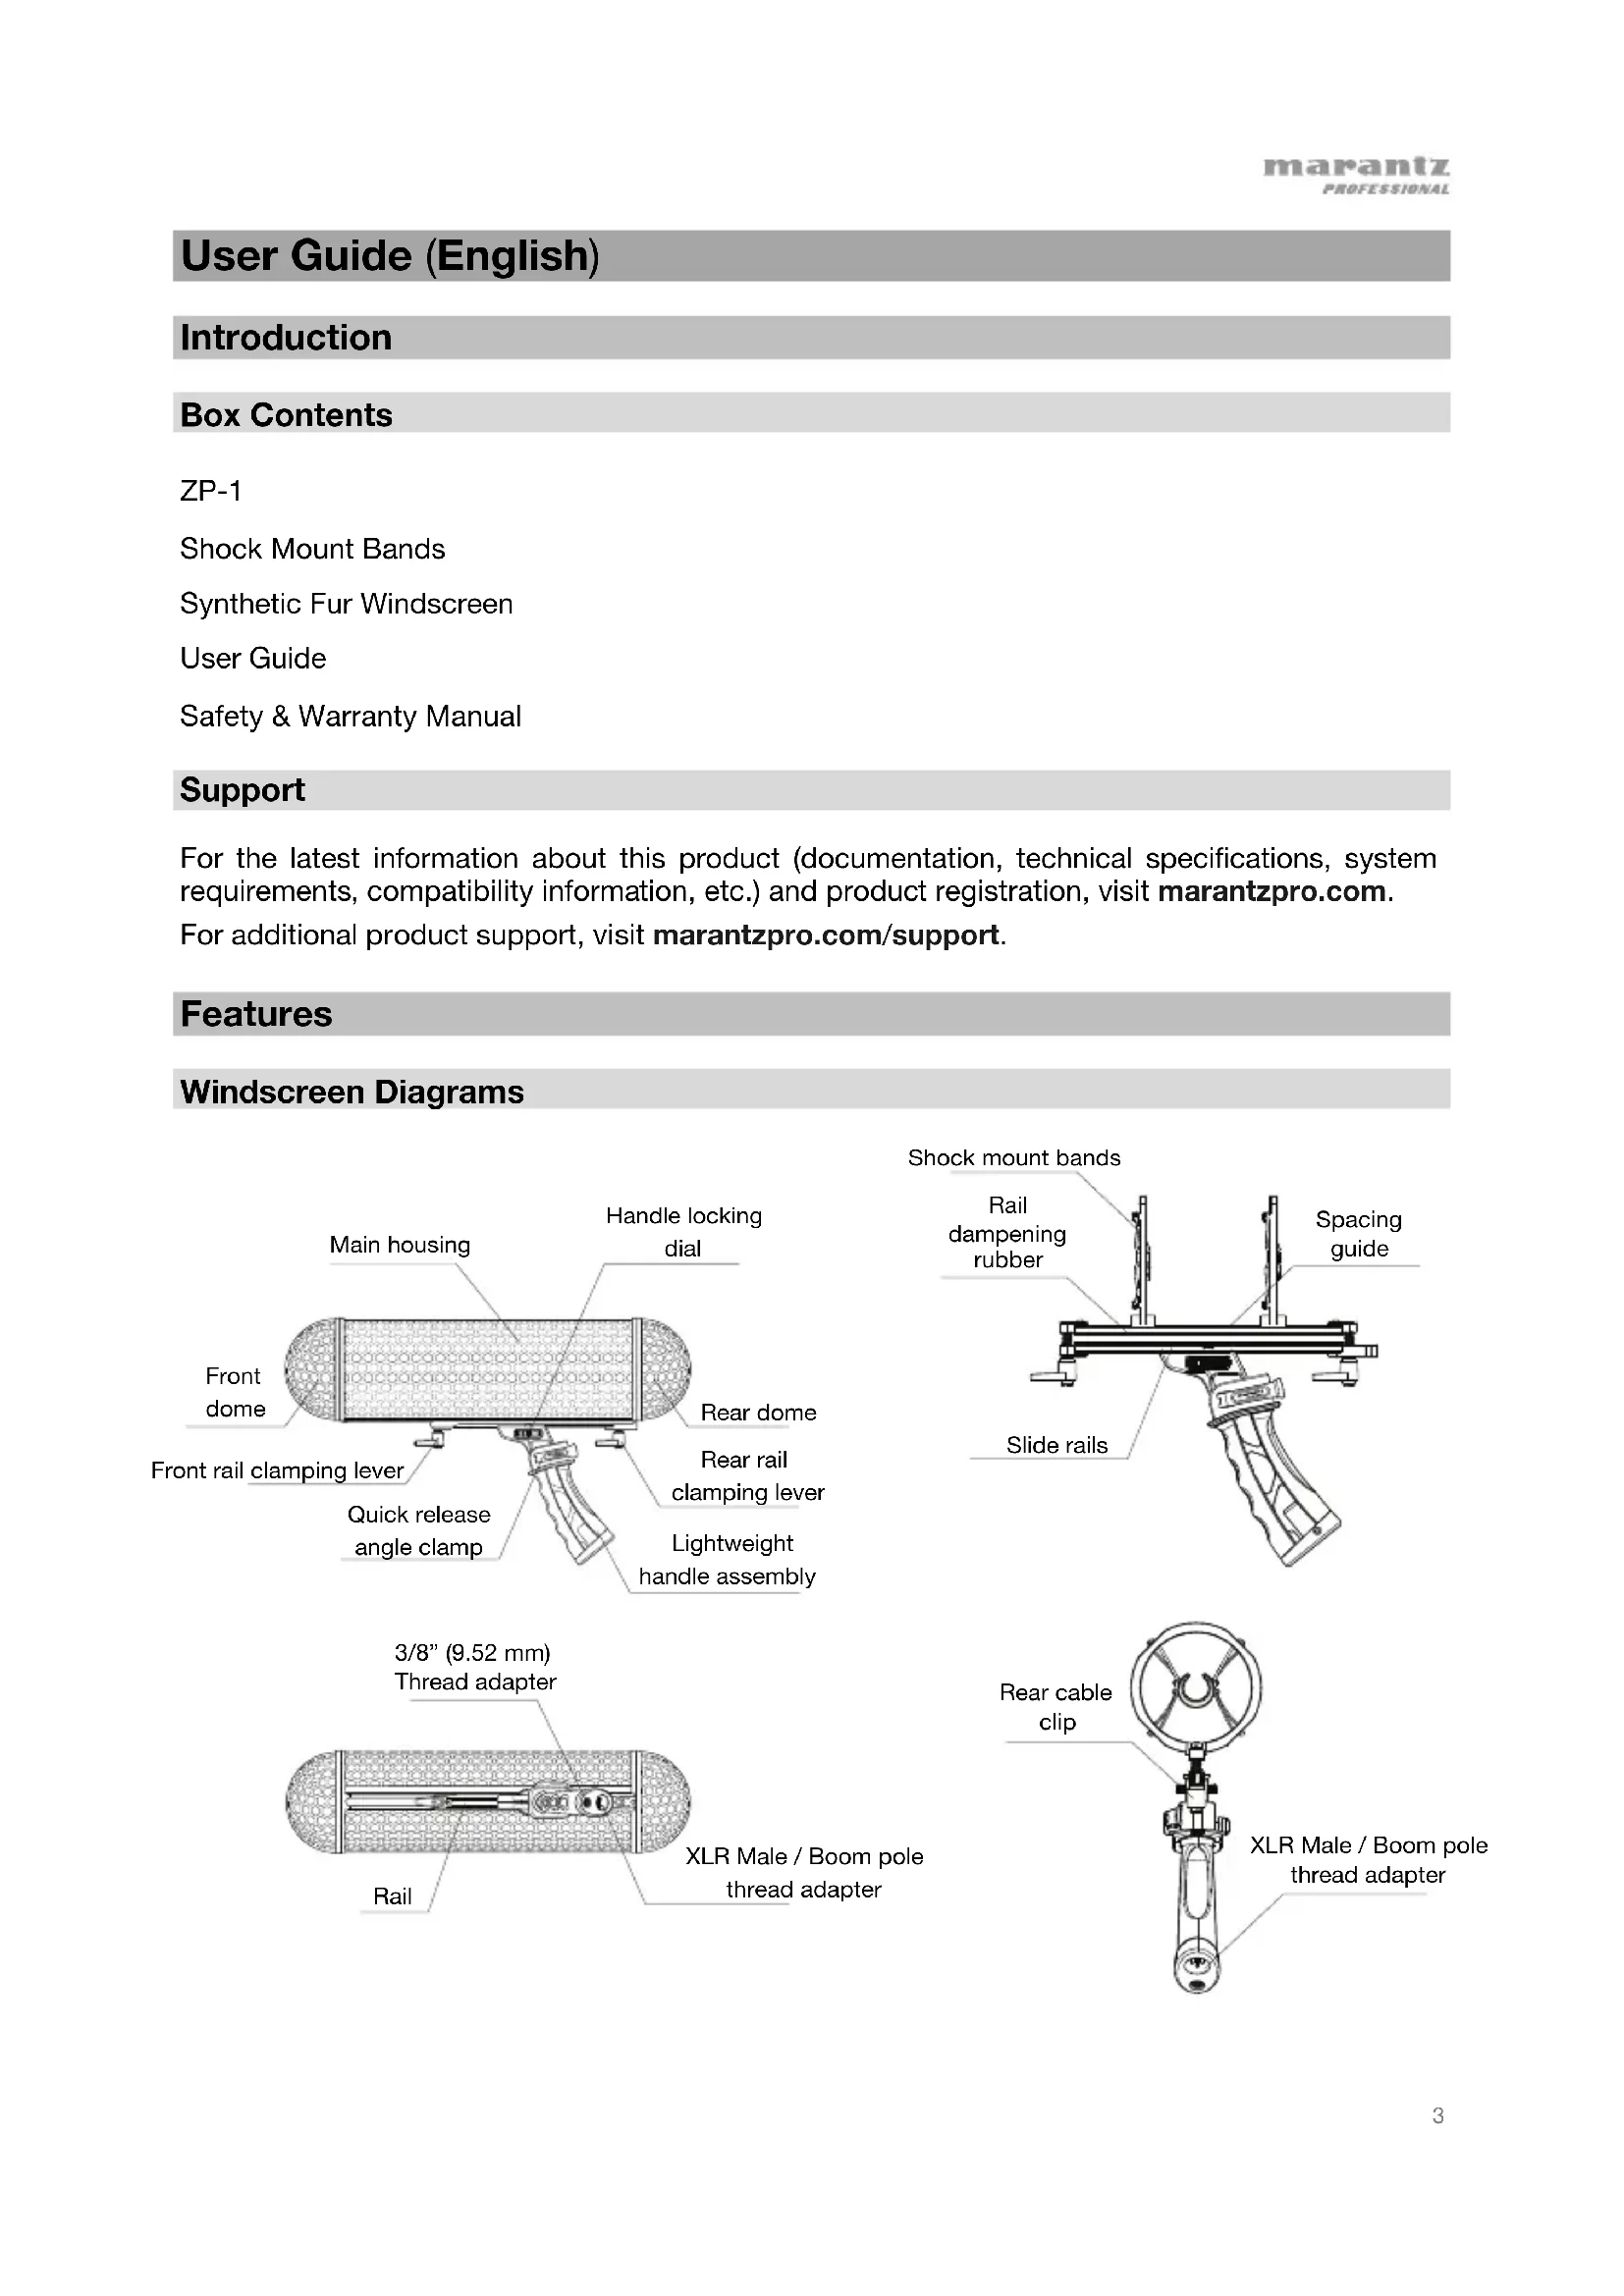
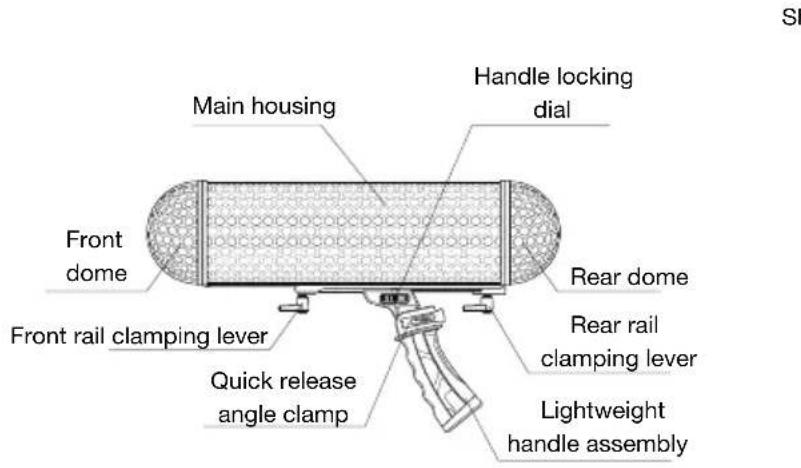
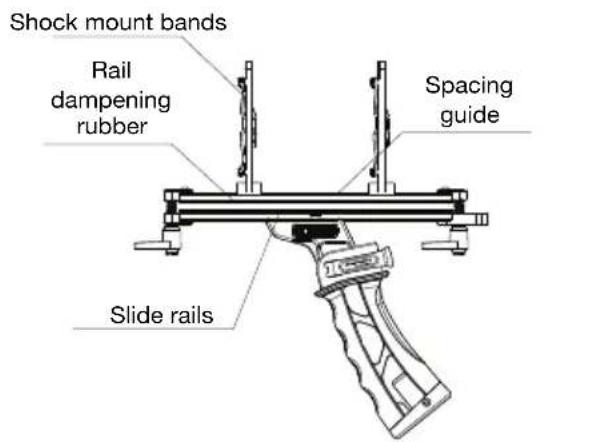
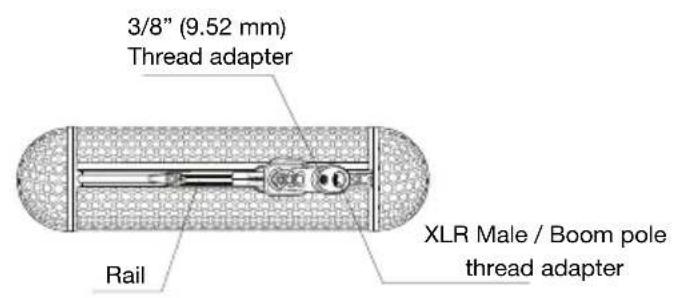
Windscreen Diagrams
Adjusting the Handle
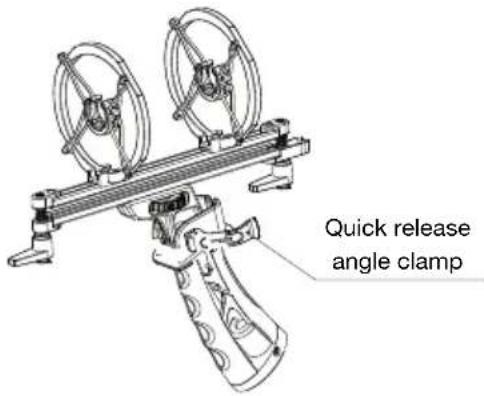
Adjust the handle angle by following the instructions below:
- Open the quick release angle clamp on the left side of the handle, and adjust the handle to the desired angle.
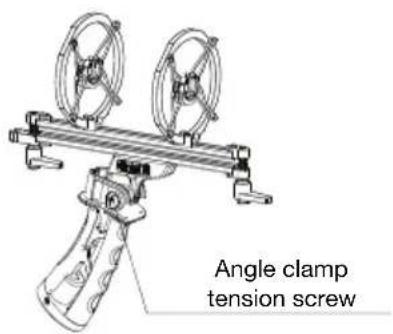
- Tighten the angle clamp tension screw on the right side of the handle to increase the tension of the quick release clamp.
- Close the angle clamp on the left side of the handle to lock it in place.
Note: Collapse the handle during transportation and storage.
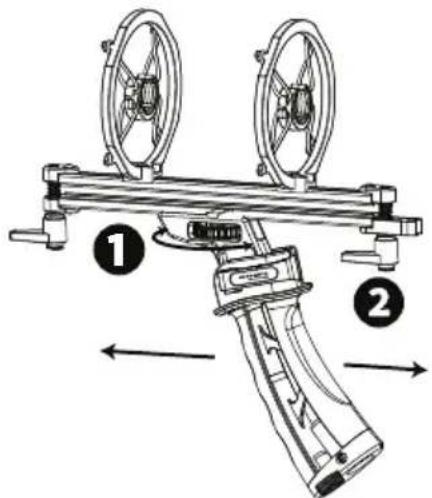
The handle can be relocated along the rails to a position that gives the best weight balance.
- To relocate the handle, first turn the handle locking dial several times to loosen the handle. Make sure to support the housing so that it does not become unstable if the locking dial is overly loosened.
- Slide the handle up or down on the rail to achieve the desired balance.
- Turn the handle locking dial clockwise to tighten.
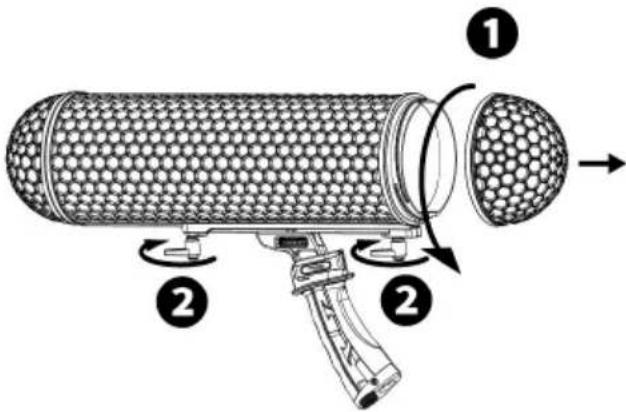
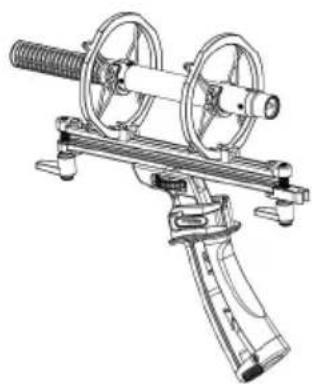
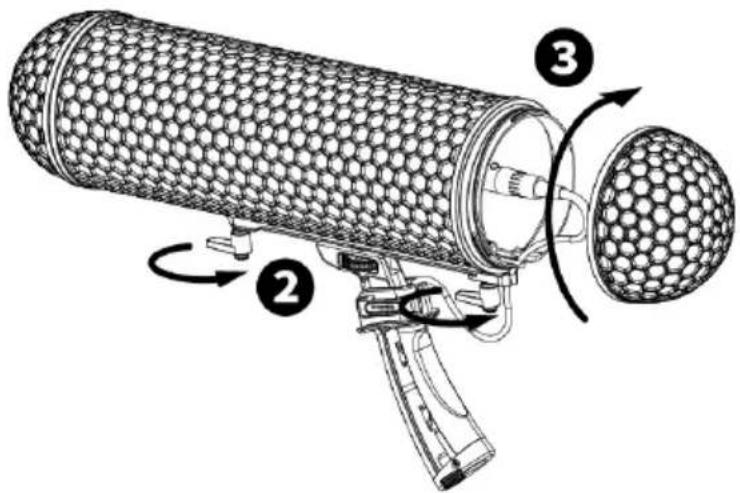
Inserting Your Microphone
- Unscrew and remove the rear dome.
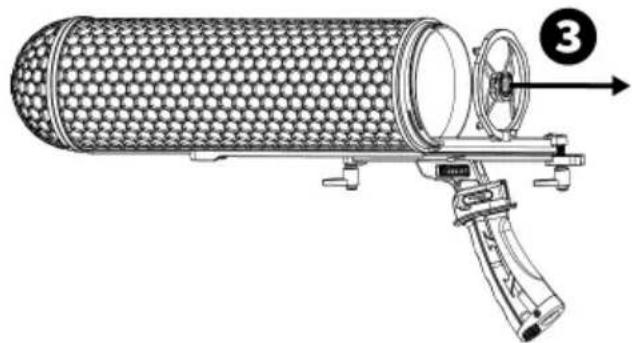
- Loosen the front and rear rail clamping levers.
- Slide the suspension body out of the main housing. To achieve optimum balance and isolation, you may need to adjust the location of the shock mount bands.
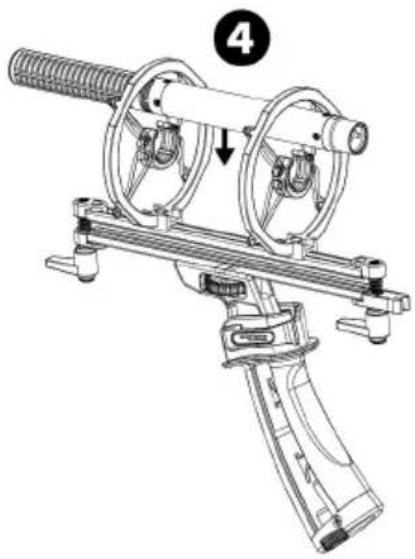
- Place your microphone above the shock mount bands and gently push the microphone body into the shock mount bands, ensuring that the microphone is secure.
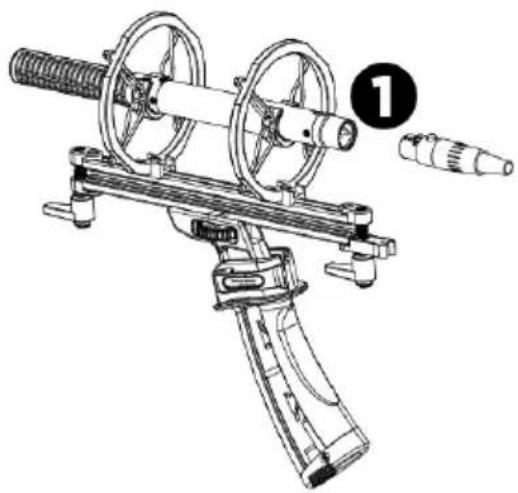
Fitting a Cable
- Plug the XLR cable into the XLR socket of your microphone, taking care to align the rails with the main housing, and slide the suspension assembly back into the main housing.
- Tighten the front and rear rail clamping levers.
- Screw the rear dome back in place.
Note: If using the pre-installed ZP-1 cable, secure the cable in place using the cable grommet at the rear of the rails, ensuring that the orientation matches the image shown. If using a cable other than the one supplied with ZP-1, secure it in place using the cable grommet, ensuring there is enough room to connect the rear dome.
Note: Connect the cable to the microphone and adjust the handle to the desired angle for use.
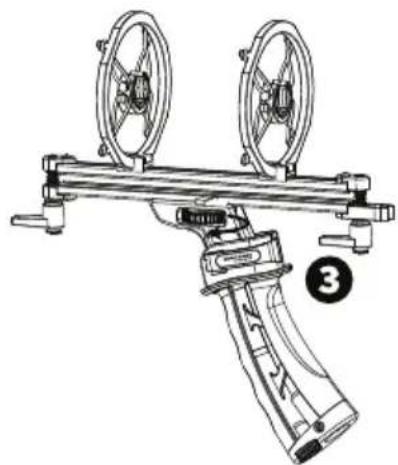
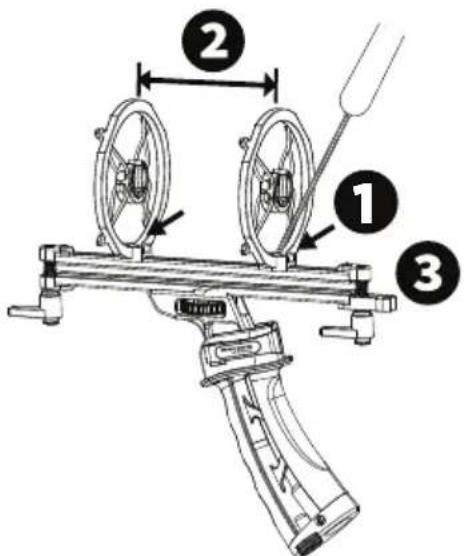
Adjusting the Suspension Mounts
Some microphones will require the shock clip to be shifted forward or backwards along rail. To adjust the position of the suspension mounts, follow the instructions below.
- Use a screwdriver to loosen the clamp screw on the shock clip.
- Hold the base of the shock clip and the rail while gently sliding the shock clip to the desired location.
- Ensure that the shock clip is centered and sitting straight up and down on the rail, then re-tighten the clamp screw.
Assistance technique
Technical Specifications
| Supported Microphone Size | Shotgun microphones: Length: 14.5" / 368 mm Diameter: 0.78"-0.88" / 20-22.5 mm |
| Dimensions (length x height) | 18.5" x 4.75" 470 x 121 mm |
| Weight | 1.32 lbs. / 0.60 kg (ZP-1) 1.63 lbs. / 0.74 kg (ZP-1 with synthetic fur windscreen) |
Specifications are subject to change without notice.
Trademarks & Licenses
Marantz is a trademark of D&M Holdings Inc., registered in the U.S. and other countries. Marantz Professional products are produced by inMusic Brands, Inc., Cumberland, RI 02864, USA.
All other product names, company names, trademarks, or trade names are those of their respective owners.
marantzpro.com

Brand : MARANTZ
Model : ZP1
Category : Professional audio equipment