DR 895 CD - Radio ALBRECHT - Free user manual and instructions
Find the device manual for free DR 895 CD ALBRECHT in PDF.
User questions about DR 895 CD ALBRECHT
0 question about this device. Answer the ones you know or ask your own.
Ask a new question about this device
Download the instructions for your Radio in PDF format for free! Find your manual DR 895 CD - ALBRECHT and take your electronic device back in hand. On this page are published all the documents necessary for the use of your device. DR 895 CD by ALBRECHT.
USER MANUAL DR 895 CD ALBRECHT
text_image
Internet radio Germany > Search > Location > Popular > Discover >
text_image
Internet radio Last listened > Station list > System settings > Main menu >text_image
Scan Stations: 15 Scanning /8 Deutsch
text_image
DAB 03:28 BBC Radio 6Music to vote for a track that missed out on the 6Music playlist
text_image
FM Scan setting Audio setting System settings > Main menu >
text_image
Bluetooth 03:28 Bluetooth Discoverable Please connect with a device to: ALBRECHT DR 895 CDtext_image
Alarm 1 Enable: Off Time: 00:00 Mode: Internet Radio Preset: Last listened Volume: 10 Save
DE
Push WPS button at the other end
Press SELECT to continue
WPS Setup

Enter PIN 98467583 at the other end
Press SELECT to continue
Setup wizard

Setup wizard completed
Press SELECT to exit
text_image
Setup wizard Start now? YES NO- First Steps ...... 27
1.1. Language 27
1.2. Package contents....27
1.3. Getting started....27
- Overview of your DR 895 CD / Key Descriptions 28
2.1. Front....28
2.2. Back 28
2.3.Key descriptions....29
2.4. Remote Control 30
2.5.Modes 31
- Internet Radio 31
3.1. Last listened....31
3.2. Station List 31
3.3.Favourites 31
3.3.1. Preset a Station.... 31
3.3.2. Recall a Stations 31
3.4. Now Playing Information 32
-
Spotify....32
-
USB MP3 Player....32
5.1. USB playback....32
5.2. Repeat/shuffle 32
5.3. Now playing information.... 32
- DAB/DAB+ Mode 33
6.1. Scanning for DAB stations 33
6.2. Station List 33
6.3. Station Order....33
6.4. Preset a Stations....33
6.5. Recall a Stations 33
6.6. Manual Tune 33
6.7. DAB Display Information 33
6.7.1. DAB+ Slideshow 33
6.8. Prune Invalid 34
6.9. Dynamic Range Control (DRC) 34
- FM Mode 34
7.1. Scanning for FM stations 34
7.2.Preset a Station 34
7.3. Recall a Station....34
7.4. Now playing information....34
7.5. Settings 35
7.5.1. Scan settings....35
7.5.2. Audio settings....35
-
Bluetooth Mode 35
-
CD Mode 35
9.1. Playback....35
9.2. Repeat/shuffle 36
9.3. CD track programming....36
9.4. MP3 / WMA CD 36
-
Aux-In Mode 36
-
Podcasts 36
- Sleep (Timer) 37
-
Alarm 37
-
System Settings....38
14.1. Equalizer 38
14.2. Network 38
14.2.1. Network Wizard....38
14.2.2. PBC WLAN Setup 39
14.2.3.View Settings....39
14.2.4. Manual Settings 39
14.2.5. Net Remote PIN Setup....39
14.2.6. Network Profile 39
14.2.7. Clear network Settings 39
14.2.8. Keep Network Connected 39
14.3.Time/Date 39
14.4. Language 39
14.5. Factory reset 40
14.6. Software Update 40
14.7. Setup Wizard....40
14.7.1.Time/Date 40
14.7.2. Auto-Update 40
14.7.3.Time Zone, Daylight Saving Time 40
14.7.4. Manual Update 40
14.8. Info 40
14.9. Privacy policy 40
14.10. Backlight....40
14.11. Output Choice 41
14.12. Standby Clock Format 41
15. UNDOK APP 41
16. Technical Specifications 42
17. Troubleshooting 43
18. Safety instructions 45
19. Warranty and Recycling Information 46
19.1.WEEE and Recycling 46
19.2. Service Address and Technical Hotline (for units sold in Germany)...... 46
1. First Steps
1.1. Language
If you would like to change the language, press and hold „MENU“ on the radio and go to „Systemeinstellungen > Sprache“ to switch to your preferred language.
1.2. Package contents
Please make sure that the following contents are included in the package:
- DR 895 CD Radio
- Power supply
- 3.5 mm audio cable
- Telescopic antenna
- F type to IEC antenna adapter
- Remote control with batteries
- User manual
1.3. Getting started
Connect the supplied telescopic antenna or an external DAB/FM antenna, as well as the power adaptor to the back of the DR 895 CD and plug it into a power socket.
Get the network environment ready for wireless WiFi: Make sure you have setup the wireless network and you have the WEP, WPA or WPA2 security password to activate the connection. You
may also use the WPS (WiFi Protected Setup) function for easy pairing between the network device and DR 895 CD. Check if the light indicators on the network device are in appropriate status.

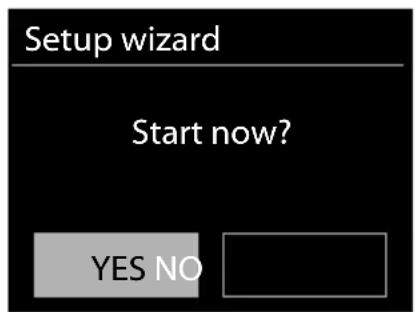
At the first time operation, system asks if you want to start the Setup Wizard. Select YES to continue the setup. You will be able to configure the date, time and network settings. Details of the Network Setup can be referred to Section „14.2. Network“. If you choose NO, the next screen asks if you would like to run the wizard again the next time the DR 895 CD is started.
Press ⏻ to enter standby mode. The time, date and any active alarm times display on the screen. After the first start the DR 895 CD will automatically connect to your network and the last played station.
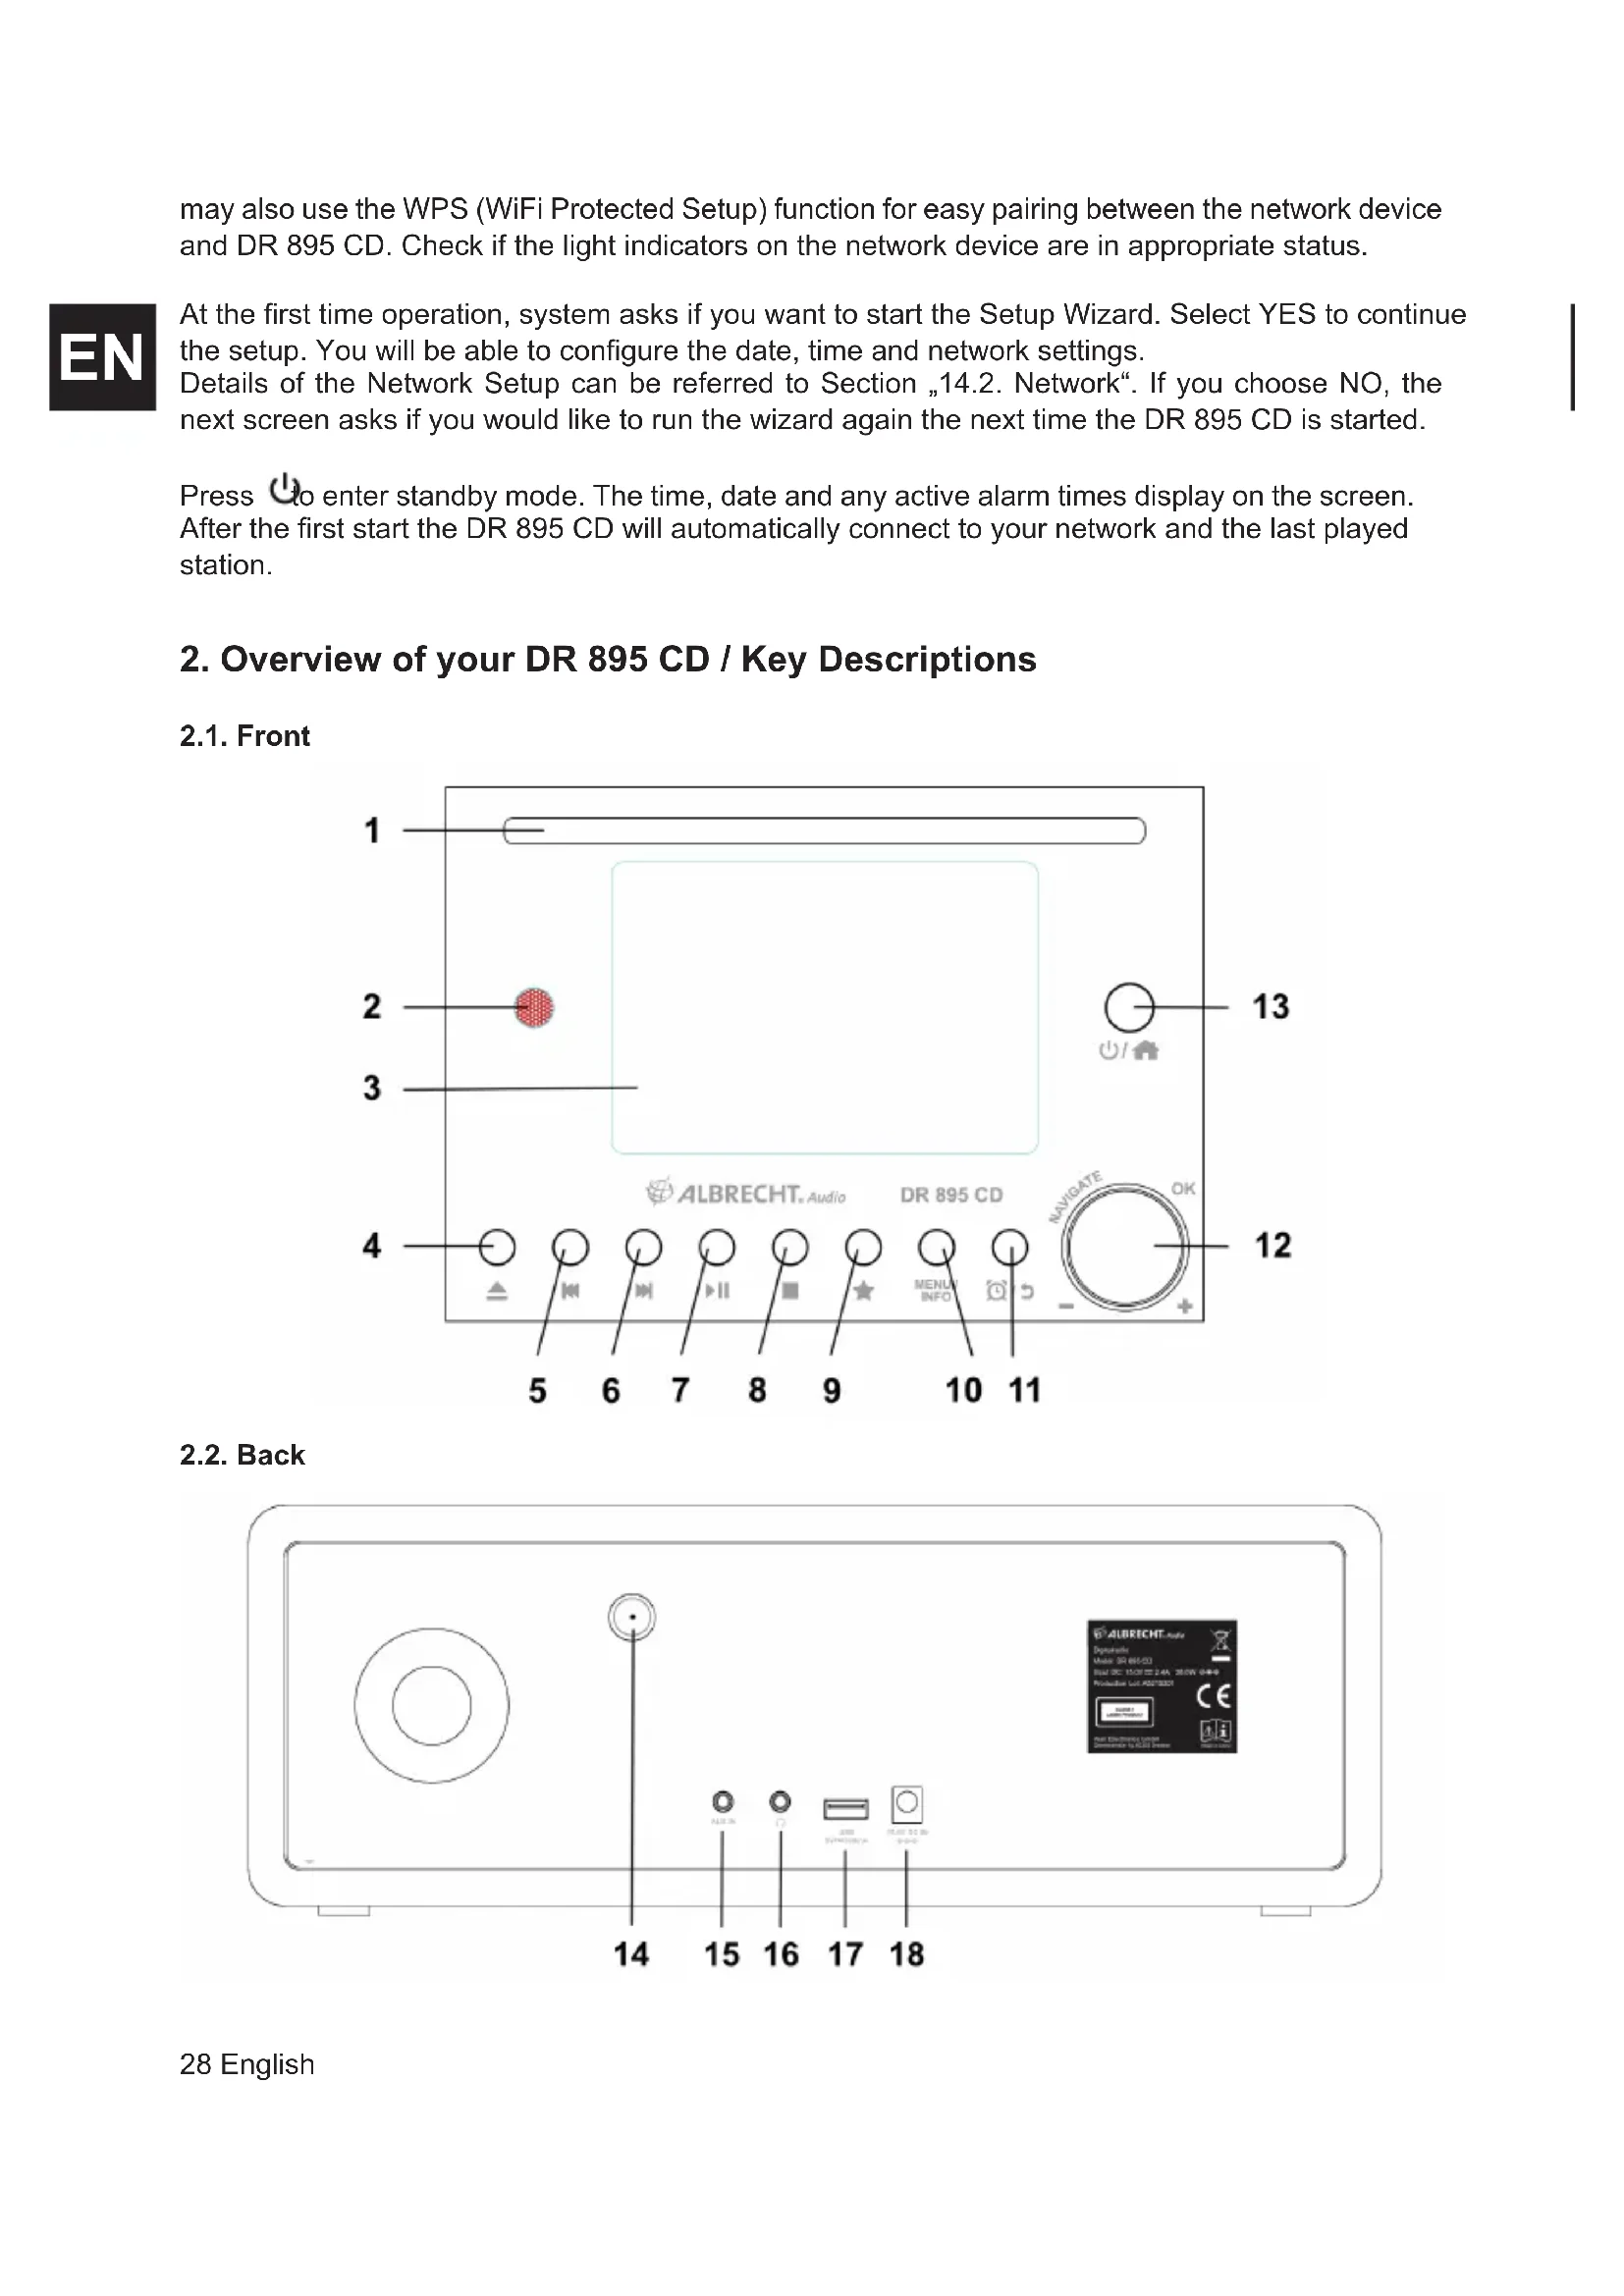
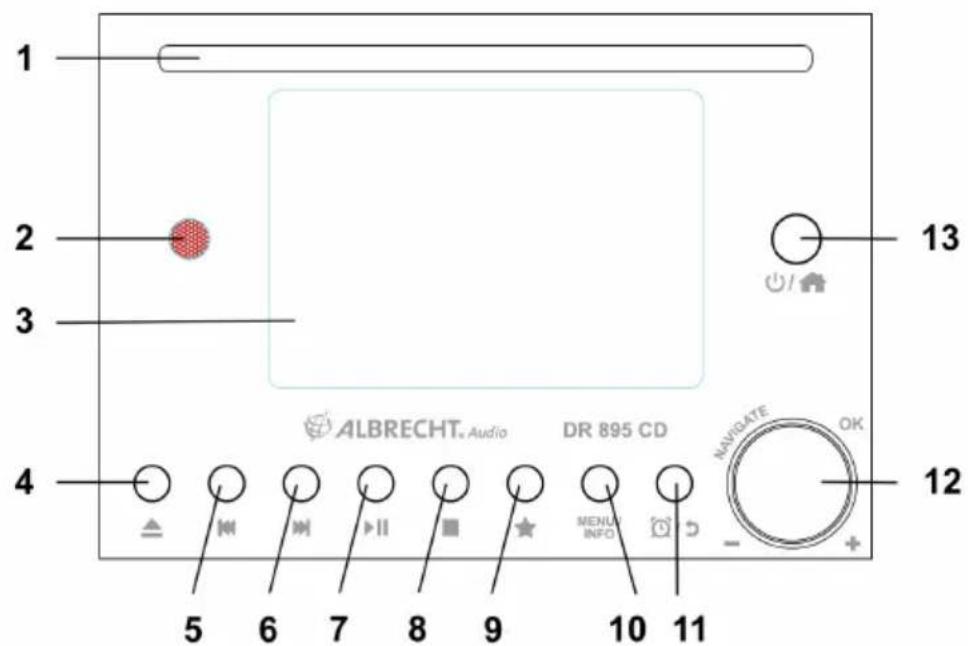
2. Overview of your DR 895 CD / Key Descriptions
2.1. Front
text_image
1 2 3 4 5 6 7 8 9 10 11 12 13 ALBRECHT Audio DR 895 CD MANUI INFO NAVIGATE OK - +2.2. Back
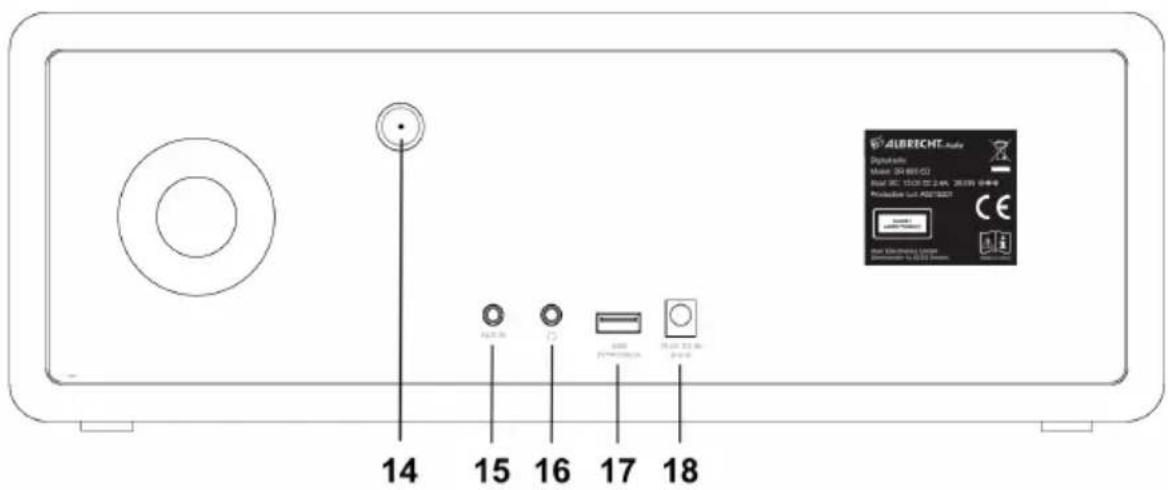
text_image
14 15 16 17 18 ALBRECHT.Auto Digitalis Model: 34-661-02 Input: 3C: 15/20 22.4K, 30.0KN, 64+0 Production Unit: AGB/T8001 © Bar Uchrechte Handel Sachinen: 19.00000000000000000000000000000000000000000000000000000000000000000000000000000000000002.3. Key descriptions
| No. | Description | Functions | |
| 1 | CD CD slot Play CD | ||
| 2 | IR receiver Receive infrared signal from remote | ||
| 3 | Display 4.0" TFT Colour Screen | ||
| 4 | Eject Open / close the CD-tray | ||
| 5 | Track back Press to play the previous trackPress and hold to fast rewind | ||
| 6 | Next Track Press to play the next trackPress and hold to fast forward | ||
| 7 | Play - Pause Press to play or pause | ||
| 8 | Stop Press to stop and return to the playlist | ||
| 9 | Favourite | Press to open the favourite listPress and hold to store a favourite | |
| 10 | Menu INFO | Mode Menu Info Button | Press long to open the mode menuPress to cycle through informations |
| 11 | Alarm / Back Open the alarm menuGo back in menus to previous sub-menu | ||
| 12 | VOLUME ◀ OK | Volume and Navigation Knob | Rotate to adjust the volumeRotate to browse the menuPress to confirm a selection (scan for next station) |
| 13 | On/standby | Home | Press long to turn the radio on or to standbyPress short to turn to home menu |
| 14 | Antenna | F-connector | For DAB / FM telescopic antenna or external antenna |
| 15 | Aux-In Aux-In jack Connect external audio sources 3.5mm | ||
| 16 | Headphone jack | Connect headphones, connecting headphones disables the speakers, except during alarm | |
| 17 | USB | USB Port | Connector for external USB audio source |
| 18 | DC-IN | DC-IN socket | Connect to power source |

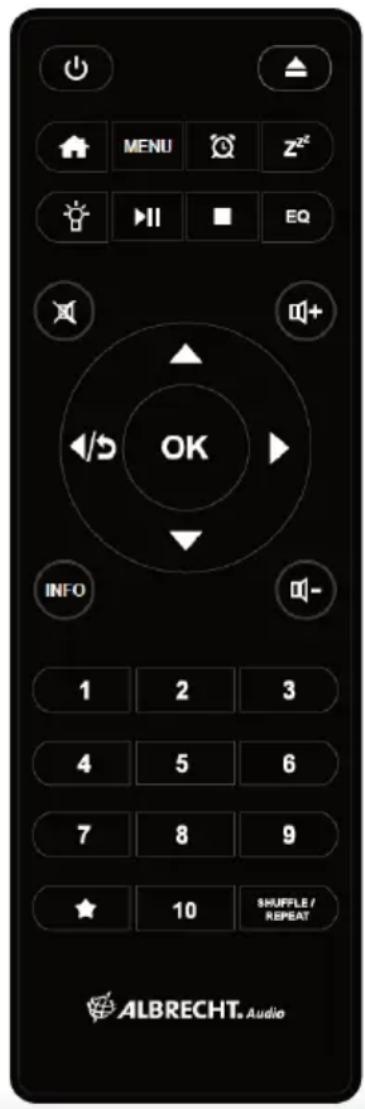
2.4. Remote Control

| On/Standby Press to switch between On and Standby | ||
| Eject Open / close the CD tray | ||
| Mode button Press to return to home menu | ||
| MENU Mode Menu Press to open mode menu | ||
| Alarm Open the alarm menu | ||
| Sleep timer Set the sleep timer | ||
| Backlight Set the display backlight | ||
| Play / Pause Press to play or pause | ||
| Stop Stop and return to the playlist | ||
| EQ Equalizer Shortcut to Equalizer | ||
| Mute To mute/unmute the sound | ||
| Volume + Increase the audio output | ||
| Up button Tune | Scroll up / DAB: Station list FM: Tune up 0.05 MHz | |
| Left-button Moves left in Menu | ||
| OK Select SCAN | To confirm your selection FM scan for next station | |
| Right-button Moves right in Menu | ||
| Tune down Down button | Scroll down / DAB: Station list FM: Tune down 0.05 MHz | |
| INFO | Info Button Press to cycle information | |
| Volume - | Decrease the audio output | |
| 1-10 | Preset Recall | Long press save preset Short press recall preset |
| Favourites | Press to open the favourite list Press long to store a favourite | |
| SHUFFLE REPEAT | Shuffle play Repeat song | Press to toggle shuffle and repeat play modes |
text_image
MENU EQ OK INFO 1 2 3 4 5 6 7 8 9 ★ 10 SHUFFLE/ REPEAT ALBRECHT. AudioTo insert AAA batteries into the battery compartment, open the cover on the backside of the remote. The correct polarity is shown in the battery compartment. Dispose used batteries according to the instructions.
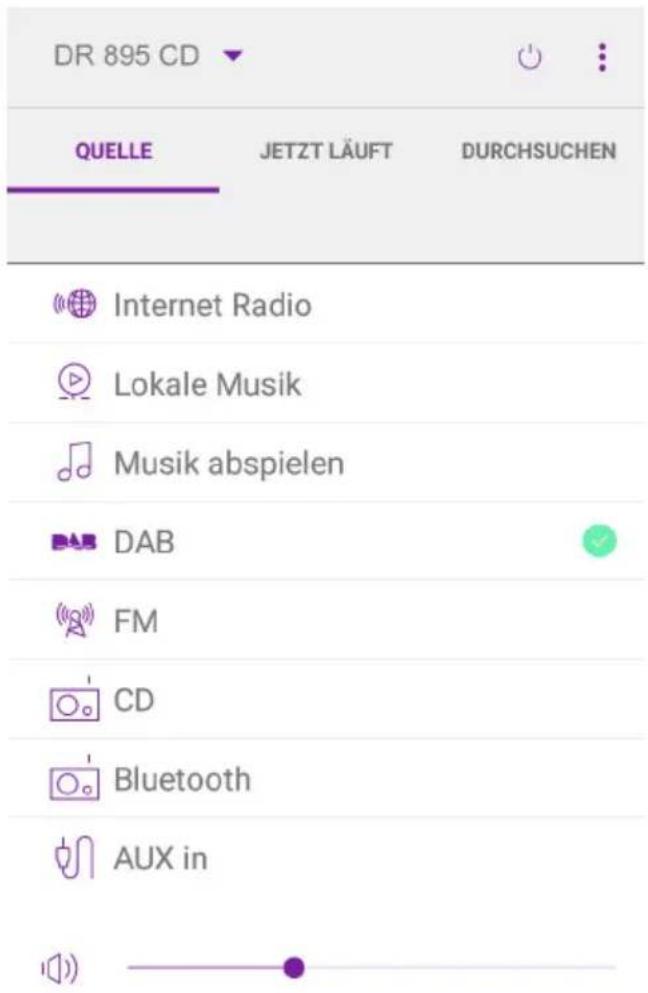
2.5. Modes
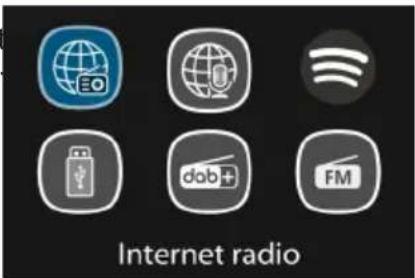
In the Main Menu, you can select the following modes: Internet Radio, Spotify, DAB+, FM, CD, Bluetooth, USB, Podcast and Aux-In.
Alternatively, press ▲ to enter Home Menu, move to the mode by rotating the navigation knob or press ▲ or ▼ on the remote control.
text_image
Internet radio
3. Internet Radio
DR 895 CD can play thousands of radio stations and podcasts from around the world through a broadband internet connection. When you select Internet Radio, DR 895 CD directly contacts the Internet Radio portal to get a list of stations. The portal also enables multiple lists of favourite stations that you can personalize To enter Internet Radio Mode, press 1, choose Internet Radio and press OK.
If you are already listening to an Internet Radio station, you can press BACK or ◀ on the remote control to quickly return to the last visited branch of the menu tree, rather than press and hold MENU to go to the first menu of Internet Radio mode. Press ▶to pause playing. Press again to play the station.
3.1. Last listened
When Internet Radio mode restarts, the last-listened station is selected. To select another recently used station, enter here to select one of the last listened stations. Most recent stations appear at the top of the list.
3.2. Station List
Internet Radio stations are organized with different categories, Location, Genre, Popular and New. You can also find the station by searching with a keyword.
3.3. Favourites
Up to 20 of your favourite stations can be saved as favourites in the DR 895 CD.
3.3.1. Preset a Station
While listening to a IR station, long press ★until the Save to
Preset menu opens. Select one of the 20 presets to save the currently playing station with OK. You can also easily store a station on a specific preset number by pressing and holding 1-10 key on the remote control.
3.3.2. Recall a Stations
Short press ★ to go to the Recall from Preset menu select the desired station and confirm with OK. A preset can also be recalled by short pressing its corresponding 1 to 10 key on the remote control. When a preset station is playing, it shows ★(1, 2, 3, etc) at the bottom of the screen.
text_image
Internet radio Germany > Search > Location > Popular > Discover >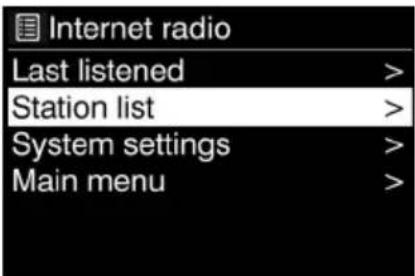
text_image
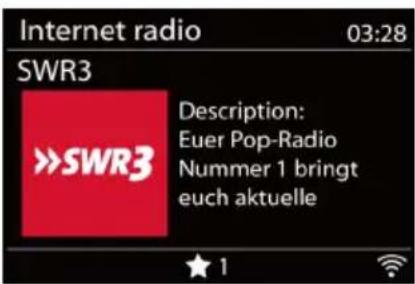
Internet radio Last listened > Station list > System settings > Main menu >3.4. Now Playing Information
While the stream is playing, the screen shows its name and description. To view further information, press INFO.
Each time you press INFO, another set of information is displayed, cycle through name/description, genre/location, reliability, codec/sampling rate, playback buffer and today's date.
4. Podcasts
DR 895 CD can play thousands of podcasts from around the world through a broadband internet connection. When you select Podcasts, DR 895 CD directly contacts the Podcast directory to get a list of programs.
To enter Podcast Mode, press 🔒, choose Podcasts and press OK.
If you are already listening to a Podcast, you can press BACK or ◀ on the remote control to quickly return to the last visited branch of the menu tree, rather than press and hold MENU to go to the first menu of the Podcast mode. Press▶to pause playing. Press again to play the Podcast.
Use the menu to choose between podcasts from different countries, current topics, recommendations or search for a specific title.
5. Spotify
Use your phone, tablet or computer as a remote control for Spotify. Go to spotify.com/connect to learn how.

text_image
Spotify®The Spotify Software is subject to third party licenses found here: https://www.spotify.com/connect/third-partylicenses
With Spotify, you have millions of songs at your disposal: your favourite artists, pre-made playlists for every mood, the latest hits, and music recommendations tailored to you.
The Spotify Connect feature lets you play and control music wirelessly on your radio. Select the music you like on your smartphone, tablet or PC and play it over the radio.
6. DAB/DAB+ Mode
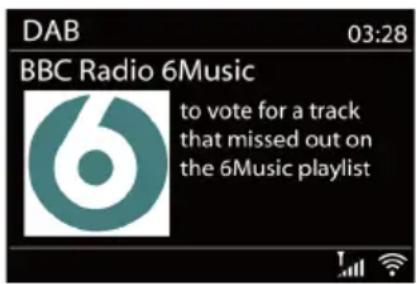
DAB radio mode receives DAB/DAB+ digital radio and displays information about the station.
To enter DAB Mode, press 🔒 to choose DAB and press OK.
For optimal performance make sure that the antenna is correctly adjusted to get the maximum signal strength and the best possible sound quality (also for FM). The icon on the bottom right corner of the display shows the strength of the DAB/DAB+ signal detected by the device.
text_image
DAB 03:28 BBC Radio 6Music to vote for a track that missed out on the 6Music playlist6.1. Scanning for DAB stations
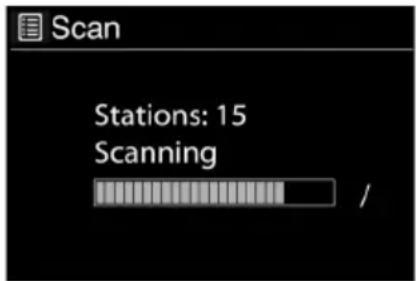
The first time you select DAB radio mode, or if the station list is empty, DR 895 CD automatically performs a full scan to search for available stations.
Once the scan is complete, the radio shows a list of available stations
text_image
Scan Stations: 15 Scanning /If you wish to do a DAB scan later again, press and hold MENU to enter the menu where you can select Scan and confirm with OK. The station list will be updated accordingly.
6.2. Station List
To change a station, press ▲/▼ on the remote control, select a station and press OK. Once selected, the station starts playing and the screen shows information about the station, track or show. Or press and hold MENU to enter the menu, then select Station List to view the list of stations already scanned. Rotating the navigation knob or press ▲/▼ on the remote control to select the station you want to listen and press OK to confirm.
6.3. Station Order
The stations can be sorted in 3 different ways: Alphanumeric, Ensemble or Valid.
Press and hold MENU to enter the menu, select and press OK to confirm.
6.4. Preset a Stations
While listening to a DAB+ station, long press ★ until the Save to Preset menu opens. Select one of the 20 presets to save the currently playing station with OK. You can also easily store a station on a specific preset number by pressing and holding 1-10 key on the remote control.
6.5. Recall a Stations
Short press ★ to go to the Recall from Preset menu select the desired station and confirm with OK. A preset can also be recalled by short pressing its corresponding 1 to 10 key on the remote control. When a preset station is playing, it shows ★1, 2, 3, etc) at the bottom of the screen.
6.6. Manual Tune
As well as the normal method of scanning and selecting stations from a list, you can also tune manually to a particular channel/frequency. To manually tune press and hold MENU to enter the menu, select Manual Tune and choose a particular channel/frequency and press OK to confirm
6.7. DAB Display Information
While the DAB radio is playing, the display shows information about the current song. To view further information, press INFO. Each time you press INFO, another set of information is displayed, cycling through DLS text, signal strength, programme type, ensemble name, channel number/frequency, signal error rate, bit rate/codec, time and date.
6.7.1. DAB+ Slideshow
Additionally DAB+ is also able to show slideshow pictures transmitted by the radio stations.
In order to switch to full screen, press OK. To minimize press OK again
6.8. Prune Invalid
Enter to remove the stations that are listed but are not available. Press and hold Menu select Prune invalid and confirm with OK.
6.9. Dynamic Range Control (DRC)
If you are listening to music with a high dynamic range in a noisy environment, you may wish to compress the audio dynamic range. This makes quiet sounds louder, and loud sounds quieter.
There are 3 levels of compression:
- DRC off - no compression. This is the default setting.
- DRC low - medium compression.
- DRC high - maximum compression.
Press and hold MENU to enter the menu, select DRC choose high, low or off and OK to confirm.
Note: the selected radio station has to support the DRC functionality.
7. FM Mode
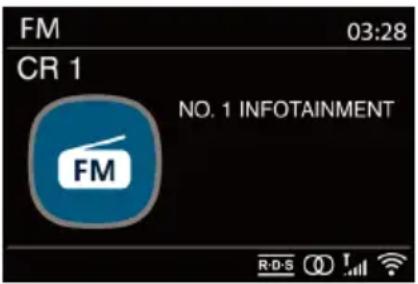
FM radio mode receives analogue radio from the FM band and displays RDS (Radio Data System) information.
To enter FM Mode, press 🔒, choose FM radio and press OK.
text_image
FM 03:28 CR 1 NO. 1 INFOTAINMENT FM R-D-S7.1. Scanning for FM stations
To search for FM station, press OK. The frequency display starts to run up/down as DR 895 CD scans the FM band. It stops when it is receiving a station. You may press ▲/▼ on the remote control to tune station manually. Each step moves 0.05MHz
7.2. Preset a Station
While listening to a FM station, long press ★ until the Save to Preset menu opens. Select one of the 20 presets to save the currently playing station with OK. You can also easily store a station on a specific preset number by pressing and holding 1-10 key on the remote control.
7.3. Recall a Station
Short press ★ to go to the Recall from Preset menu select the desired station and confirm with OK. A preset can also be recalled by short pressing its corresponding 1 to 10 key on the remote control. When a preset station is playing, it shows ★(1, 2, 3, etc) at the bottom of the screen.
7.4. Now playing information
While the stream is playing, the screen shows its frequency, or if RDS information is available, station name and any further RDS information such as programme name, track, title and contact details. If no information is available, just the frequency is shown. Each time you press INFO, another set of information is displayed, cycling through RDS text, further RDS text (station/programme type), frequency and today's date.
Stereo and RDS broadcasts are indicated with an icon at the bottom of the screen.
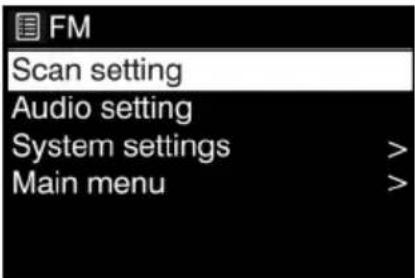
7.5. Settings
7.5.1. Scan settings
By default FM scans stop at any available station. Change the scan settings to stop only at stations with good signal strength, select YES after choosing "Strong station only?".
7.5.2. Audio settings
All stereo stations are played in stereo. For weak stations, this may result in a poor signal-to-noise ratio. To play weak stations in mono, select FM>Audio settings: "Listen in mono only".
text_image
FM Scan setting Audio setting System settings > Main menu >
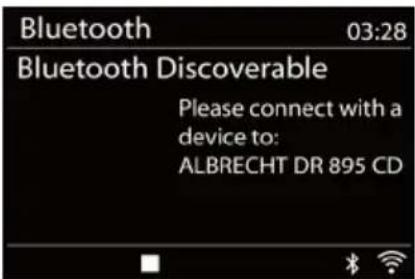
8. Bluetooth Mode
The DR 895 CD is able to connect to other Bluetooth sources and play their audio streams. Please note that the maximum Bluetooth range is about 10 meters and the radio is not able to connect to other Bluetooth headsets, but sources only, such as smartphones. To enter Bluetooth Mode, press 🏠 to choose Bluetooth and press OK.
When you select the Bluetooth mode, the device is entering the pairing mode. Turn on your smartphone/tablet/other Bluetooth
text_image
Bluetooth 03:28 Bluetooth Discoverable Please connect with a device to: ALBRECHT DR 895 CDdevice to search for the radio. The Bluetooth pairing name of the radio adapter is „DR 895 CD“. If pairing is successful, the screen will show „Connected“ and the DR 895 CD will start playing music from your device.
When DR 895 CD is waiting for pairing, there is a blinking Bluetooth icon at the bottom. If the pairing is successful, it has a "beep" sound and the Bluetooth icon becomes steady.
Control the music playback from your Bluetooth device. To unpair from DR 895 CD, press and hold MENU and choose BT disconnect or press and hold ★o unpair Bluetooth.
9. CD Mode
DR 895 CD can playback CD-DA format audio CD-R/CD-RW discs that have been finalised* upon completion of recording. It may fail to play some CD-R/CD-RW discs due to poor recording and wide variation in quality of the CD-R/CD-RW disc.
*Finalising enables a CD-R/CD-RW disc to playback on audio players. A disc which has not been finalised may have information added to it using a computer but may not always be playable.
To enter CD Mode, press 🔒, choose CD and press OK
Insert a disc with the printed side facing up. The disc will be loaded automatically. The unit will check the CD type and load its track list. The display will show 'Loading' during the CD is being read and will begin to play afterwards.
9.1. Playback
Use for to play the previous or next track, press and hold to rewind or fast forward. Press to pause the track. Press it again to resume. Press to stop the track.
To take out the CD, press ▲You can press the number key to go to the selected track.
9.2. Repeat/shuffle
Press REPEAT/SHUFFLE on the remote control to swap among normal playback, repeat one, repeat all, and shuffle.
9.3. MP3 CD
DR 895 CD is able to play CD-R and CD-RW discs containing MP3 files. It is assumed in this section that a file is equivalent to a CD track.
Playback controls are the same as „9.1. Playback“, “9.2. Repeat/Shuffle”. In addition, DR 895 CD allows to skip folders by pressing ▲ or ▼ on the remote control. The first file of the next or previous folder will be played and you can also display additional Information by pressing INFO.
A MP3 CD may not contain more than 5000 files and not more than 8 nested subfolders. MP3 files should be created with an audio sample rate of 44.1kHz (this is normal for files created from CD audio content).
MP3 data rates up to 320 KBit per second are supported. The unit will not play files which include digital rights management (DRM) protection.
When burning CD-R and CD-RW discs with audio files, various problems may arise which could lead to problems with playback. Typically such problems are caused by poor CD writing or audio encoding software, or by the hardware settings of the PC's CD writer, or by the CD being used. Should such problems arise, contact the customer services of your CD writer or software manufacturer or look in their product documentation for relevant information. When you are making audio CDs, take care to observe all legal guidelines and ensure that the copyright of third parties is not infringed.
10. USB MP3 Player
USB mode plays audio files in MP3 from a USB stick.
To enter USB Mode, press 🔗 to choose USB and press OK.
If you are already playing a music file, you can press BACK or ◀ on the remote control rather than press and hold MENU to quickly return to the last visited branch of the menu tree.
You can use ▶ or ▶ play the previous or next track, press and hold to rewind or fast forward. Press ▶ to play or pause. Press ▶ stop playback and return to the song list.
10.1. USB playback
Playback of USB content is analogous to playback of MP3 CDs as described in „9.3. MP3 CD“.
Note: The USB port is just for music playback, it supports no charging functionality.
10.2. Repeat/shuffle
You can set these options to repeat tracks or play them in random order. In order to activate Repeat or Shuffle press the corresponding button on the remote control.
10.3. Now playing information
While a track is playing, the screen shows its track and artist. There is also a progress bar with figures for elapsed and total track time. To view further information, press INFO.
Each time you press INFO, another set of information is displayed, cycling through the information: artist, album, codec/sampling rate, playback buffer and today's date.
Album cover of the track from music server is supported, while album cover from USB is unsupported.
11. Aux-In Mode
Aux-In mode plays audio from an external source such as an MP3 player. To use the Aux-In mode:
- Turn the volume low on both DR 895 CD and, if adjustable, the audio source device.
- Connect the external audio source to the Aux-In 3.5mm stereo socket on the backside.
- Press, then move to Aux-In and press OK.
- Adjust the volume of DR 895 CD (and, if necessary, the audio source device) as required.
EN
12. Sleep (Timer)
The Sleep Timer will switch the DR 895 CD into Standby mode after the selected time 15/30/45/60 minutes runs out. To set the Sleep Timer press and hold MENU, move to Main menu, select Sleep and set the time. Once the time is set, there will be a moon icon with the remaining time at the left bottom of the display.
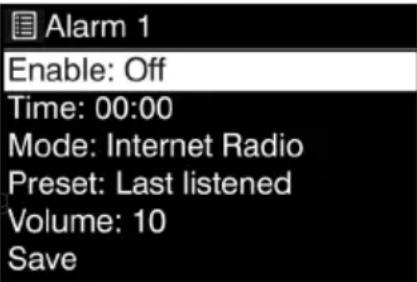
13. Alarm
There are two independent wake-up alarms with snooze functionality. Each alarm can be set to start in a particular mode. To set an Alarm press and hold MENU move to Main menu select
Alarms.
Select the alarm number (1 or 2) then configure the following parameters:
- Enable: Off, Daily, Once, Weekends or Weekdays
- Time
- Date: only if "Once" is selected
• Mode: Buzzer, Internet Radio, DAB, FM or CD
• Volume: 0-32
- Preset: Last listened or Presets of the chosen mode (not when Buzzer is selected)
text_image
Alarm 1 Enable: Off Time: 00:00 Mode: Internet Radio Preset: Last listened Volume: 10 SaveTo activate the new settings, scroll down and select Save. The screen shows active alarms with an icon at the bottom left.
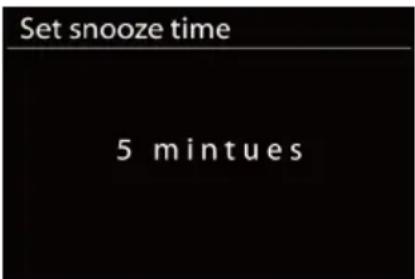
At the set time, the alarm will activate. The alarm volume starts at a very low level and increases to the selected volume over a time period of about 30 seconds. To activate Snooze, press any key on the unit or the remote control except ⏻You can change the snooze period 5/10/15/30 by pressing any key except ⏻The radio returns to standby for the set period, with the alarm icon flashing and the remaining time. Press ⏻the device or the remote control to turn the alarm off.
Note: When the selected Mode is not available the DR 895 CD falls back to Buzzer. Connecting headphones disables the speakers.
text_image
Set snooze time 5 mintues14. System Settings
To select System settings press and hold MENU move to System settings and confirm with OK.
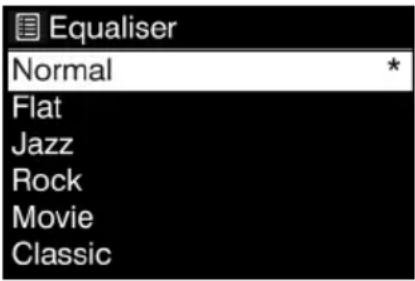
14.1. Equalizer
Several preset EQ modes are available: Normal, Flat, Jazz, Rock, Movie, Classic, Pop and News.
Also a user-defined setting is available; create your own EQ with custom bass, treble settings.
Press EQ at the remote control to open the Equalizer, every next press of EQ moves to the next EQ mode and you can hear it immediately. To confirm the EQ Mode press OK.
Default setting is Normal.
text_image
Equaliser Normal Flat Jazz Rock Movie Classic14.2. Network
14.2.1. Network Wizard
Enter to search AP SSID, then input the WEP / WPA key or choose Push Button/Pin/Skip WPS to connect to the wireless network.
1. Scanning for networks
DR 895 CD is compatible with all common network protocols and encryption methods. It searches for the available networks and lists them so you can choose your desired network.
These networks support WPS functionality which eases the connection to this network. For more information see next page.
If you network does not support WPS functionality you will be asked your network's encryption key in the next step. If it does support WPS you will be asked to choose between the WPS methods "Push button" or "PIN". Or you can skip WPS in order to enter your encryption key.
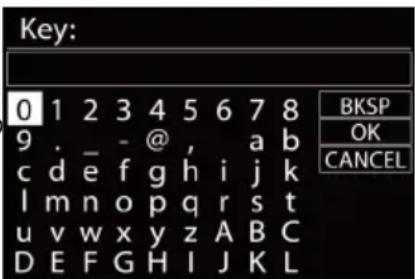
2. Standard encrypted network
To enter the network's key, use the navigation knob or direction keys on the remote control to move the cursor through the characters and press the knob or OK (SCAN) on the remote control to confirm. As each character is selected, the key is built up near the top of the display.
To select "Backspace" (BKSP), "OK" or "Cancel" with the navigation knob turn the selection to "0" and then turn the knob further backwards.
text_image
Key: 0 1 2 3 4 5 6 7 8 9 . _ - @ , a b c d e f g h i j k l m n o p q r s t u v w x y z A B C D E F G H I J K L BKSP OK CANCEL3. WPS encrypted network
WPS encrypted networks are identified by [WPS] at the start of the network name. Use one of the following methods of connection:
- Push button
DR 895 CD prompts you to press the connect button on the router. It then scans for a ready Push Button network and connects.

text_image
WPS Setup ! Push WPS button at the other end Press SELECT to continue- Pin
DR 895 CD generates an 8-digit code number which you enter into the wireless router, access point, or an external registrar.
- Skip WPS
Enter key as for a standard encrypted network. See point 2
For more information on setting up a WPS encrypted network, see your WPS router's instructions.
- Completion
DR 895 CD attempts to connect to the selected network. It will show connected if the setup is successful. If connecting fails, DR 895 CD returns to a previous screen to try again.
Press the navigation knob or OK on the remote control to quit the setup wizard.
WPS Setup

Enter PIN 98467583 at the other end
Press SELECT to continue
Setup wizard

Setup wizard completed
Press SELECT to exit
14.2.2. PBC WLAN Setup
Push Button Configuration, it is to connect the AP that supports WPS (Wi-Fi Protected Setup).
14.2.3. View Settings
View the information of current connected network: Active connection, MAC address, WLAN region, DHCP, SSID, IP address, Subnet mask, Gateway address, Primary DNS and Secondary DNS.
14.2.4. Manual Settings
Choose network connection and enable or disable DHCP (Dynamic Host Configuration Protocol)
14.2.5. Net Remote PIN Setup
Allows you to define a PIN number to be entered before being able to connect to DR 895 CD remotely over a network.)
14.2.6. Network Profile
DR 895 CD remembers the last four wireless networks it has been connected to, and automatically tries to connect to whichever one of them it can find. From here you can see the list of registered networks. You can delete unwanted networks by turning and pressing the reel or OK on the remote control then choosing YES to confirm delete.
14.2.7. Clear network Settings
To clear all network settings choose YES and confirm with OK
14.2.8. Keep Network Connected
If you choose keep network connected, the WiFi will not disconnect even when in standby mode. This way you can use the UNDOK app to wake the radio.
14.3. Time/Date
Set the time manually or auto update time format, time zone and daylight.
14.4. Language
The default language is German. Change it to your preference.
The following languages are available: English, Danish, Dutch, Finnish, French, German, Italian, Norwegian, Polish, Portuguese, Spanish, Swedish, Turkish.
14.5. Factory reset
A factory reset resets all user settings to default values, so that time and date, network configuration and presets are lost. However, the DR 895 CD's current software version is maintained.
14.6. Software Update
From time to time, software upgrades may be created with bug fixes and/or additional features. You can either check manually or set DR 895 CD to check periodically automatically (this is the default). If newer available software is detected, you will be asked if you want to go ahead with an update. If you agree, the new software is then downloaded and installed. After a software upgrade, all user settings are maintained.
NOTE: Before starting a software upgrade, ensure that DR 895 CD is plugged into a stable main power connection. Disconnecting power during an upgrade may permanently damage the unit.
14.7. Setup Wizard
14.7.1. Time/Date
Display format
Select 12 or 24 as the time format.
14.7.2. Auto-Update
The time and date can be updated manually or automatically from DAB, FM or your network. Auto-update works with data sent over DAB, FM or the Internet. The clock is only updated when in a corresponding mode, so it is best to select a mode you use regularly.
text_image
Setup wizard Start now? YES NODAB and FM use time signals broadcast with radio transmissions. Network uses a time signal sent from the Internet Radio portal when being in any network-connected mode.
14.7.3. Time Zone, Daylight Saving Time
Set your time zone. If your country uses the daylight saving time and it is in effect, turn on the Daylight saving option.
14.7.4. Manual Update
If you set "No update", the wizard prompts you to set the time and date manually. The date and time are displayed as dd-mm-yyyy (day-month-year) and hh:mm (hour:minutes).
The active value is flashing. Adjust each value with the navigate knob or ▲/▼ on the remote control. Once the value is set, press OK or ◀/▶ to continue setting the next value.
14.8. Info
View the firmware version and the radio ID.
14.9. Privacy policy
Here you will find the link for the current version of the privacy policy. Use a PC or mobile device to access the statement.
14.10. Backlight
You may change the backlight for On level to High, Medium or Low and for the Dim level to Medium or Low. Also adjust the Timeout duration after which turns the radio to Dim level after it has not been used.
15. UNDOK APP
The app is available for Android and iPhone.
UNDOK opens the following possibilities:
- Comfortable remote control of the radio within the same WiFi via your smartphone's touch screen.
For more detailed information on functions of the UNDOK app, check the manual of the app.
| Model number DR 895 CD | |
| Description Internet Radio with DAB+/ FM / BT / CD Player | |
| Display 4.0" TFT colour display | |
| Network supported IEEE 802.11b/g/n wireless (WiFi 2.4 GHz)Bluetooth (BT 4.2, Supports A2DP, AVRCP profiles) | |
| Transmission frequencies and power WiFi: 2,3995 – 2,4845 GHz; 100 mWBluetooth: 2,402 – 2,480 GHz; 1 mW | |
| Encrypted key WEP, WPA, WPA2 (PSK), WPS | |
| Supported playback formats MP3 (up to 320 kbit/s) | |
| CD Player Supports CD-ROM, CD-R, CD-RW | |
| Supported playback formats (CD) CD-DA, MP3 (up to 48kHz, 320kbps) | |
| DAB / DAB+ Band III (174.928 – 239.200 MHz) | |
| FM 87.5 - 108.0 MHz, RDS supported | |
| Power Supply Power Adaptor, DC 15.0 V | 2.4 A 36.0 W |
| Remote Control Power Supply | 2x 1.5 V AAA battery |
| Standby mode power consumption | <1.0 W |
| Networked standby mode power consumption | <3.0 W |
| Operating temperature | 0 °C - 35 °C |
| Speaker power output | 2 x 15 W RMS |
| Connections 3.5 mm headphone socket | USB port (for playback only, no charging function)3.5 mm Aux-In socket, stereoDC IN power supply socket |
| Dimensions | 350 mm(L) x 105 mm(H) x 250 mm(D) |
| Weight | 3.5 kg |
| Power Adapter (please use only the original power adaptor) | |
| Manufacturer Dongguan Green Power One Co., Ltd. | |
| Address No.26, Hongyun Street, Chonghe Village, Qingxi Town, Dongguan City, P.R, China | |
| Type GA361-1502400E | |
| Input 100 – 240 V ~ AC, 50/60 Hz, 1.5 A | |
| Output | DC 15.0 V Z4A 36.0 W ◇c◇ |
| Average Active Efficiency 89.73 % | |
| Efficiency at Low Load (10%) 88.95 % | |
| No-load Power Consumption 0.07 W | |
| Safety Class II | |

- Troubleshooting
| Error Remedy | |
| The device does not switch on. Check if the power adaptor is connected properly. | |
| System freezes | 1. Disconnect the power plug for 1 minute, then restart the device.2. If the error has then not been resolved, reset the unit to the factory setting (see chapter „14.5. Factory reset“) |
| No sound. | 1. Turn on the sound as it may be muted2. Increase the volume.3. Pull any connected headphone or speaker from the connector jack. |
| No network connection can be established. | 1. Check the WLAN function.2. Try to set an IP address at the device.3. Activate the DHCP function on the router and make the connection again at the device.4. A firewall is activated on the network – set the respective program in such a way that access is possible.5. Reboot the router |
| WiFi connection cannot be established. | 1. Check the availability of WLAN network on the router.2. Place the device closer to the router.3. Make sure the password is correct. |
| Internet station is not playing. 1. C | check the network as well as the access point and firewall.The station may not be available currently, try it again later or select another station.The link of the station is changed or the station no longer transmits – ask the provider for information.The link of manual added station is not correct, make sure it is correct and re-enter. |
| Hiss in FM mode 1. Check/move the FM antenna.2. Move the radio. | |
| No stations available / burbling / intermittent in DAB mode. | 1. Move the radio.2. Rescan local stations only (high-strength).3. Check the local DAB coverage. |
| Alarm does not work. 1. Switch on the alarm.2. Due to the volume setting, refer to the solutions of “No sound”.3. The source of alarm was set to be station but there is no network connection. Change the source of alarm or reconfigure the connection. | |
| USB driver or MP3 player is not detected. | 1. Check if the USB driver or MP3 player is plugged properly.2. Some USB hard disks need external power supply, make sure it is connected to the power.3. Not all MP3 players can be read directly on the device – use an USB drive instead. |
| All other undetermined cases. DR | 895 CD may process large amount of data after a period of operation, no matter in which mode, it will cause the system freeze or malfunction. Reboot DR 895 CD if necessary.The normal function of the product may be disturbed by strong Electro-Magnetic Interference. If so, simply reset the product to resume normal operation by following the instruction manual. In case the function could not resume, please use the product in other location.The device may malfunction when used in areas with strong radio interference. The device will work properly again once there is no more interference. |
18. Safety instructions
Please read these instructions carefully. They contain important information which will help you get the best from your product and ensure safe and correct installation and operation.
General safety information
- Keep the product and all its parts out of reach of small children.
- Do not attempt to open the product. This product does not contain any user serviceable parts. Unauthorised handling of the device may damage it and will void your warranty.
- Do not use your Radio near emergency/intensive care medical equipment; if you have a pacemaker fitted or during an electrical storm.
- To avoid possible hearing damage, do not listen to this radio at high volume levels for long periods of time. Always keep the volume within reasonable limits.
Power source
- Only use the power supply that came with the product. Using an unauthorised power supply will invalidate your guarantee and may irrecoverably damage the product.
- Disconnect your Radio from the mains power supply during thunderstorms.
- Always check that you have completely switched off your Radio, before you change or disconnect the power supply.
- Where the mains power plug or an appliance coupler is used as the disconnect device, the disconnect device shall remain readily operable.
- If the radio is not using for a long period of time, disconnect it from the power supply by unplugging the power plug. This is to avoid the risk of fire.
Moisture and water
- Keep it dry. Avoid exposure to precipitation, humidity and liquids which could all affect the product circuitry.
- Do not leave it in low temperatures as moisture can form inside the product, which may damage the circuit board.
- Do not use it in the dust environment as dust can damage the interior electronic components and lead to malfunctions in the device.
Ventilation
- If the radio is moved from a cold environment into a warmer one, do let it adapt to the new temperature before operate the device. Otherwise, it might lead to condensation and cause malfunctions in the device.
- Do not block or cover slots, holes or openings on the product by placing on soft furnishings such as carpets, rugs or beds as these are provided for functionality and/or ventilation to ensure safe operation of the product
Heat sources and flames
- Do not leave it in high temperatures as electronic devices and plastic parts may warp in heat.
- Keep it away from bright sunlight or heat sources, such as a radiator.
19. Warranty and Recycling Information
We are legally obliged to include disposal and warranty information as well as EU declaration of conformity with the use instructions in different countries for every unit. Please find this information on the following pages.
2-Year Warranty from Date of Purchase
The manufacturer/retailer guarantees this product for two years from date of purchase. This warranty includes all malfunctions caused by defective components or incorrect functions within the warranty period excluding wear and tear, such as exhausted batteries, scratches on the display, defective casing, broken antenna and defects due to external effects such as corrosion, over voltage through improper external power supply or the use of unsuitable accessories. Defects due to unintended use are also excluded from the warranty.
Please contact your local dealer for warranty claims. The dealer will repair or exchange the product or forward it to an authorized service center. You can also contact our service partner directly. Please include your proof of purchase with the product and describe the malfunction as clearly as possible.
19.1. WEEE and Recycling

The European laws do not allow any more the disposal of old or defective electric or electronic devices with the household waste. Return your product to a municipal collection point for recycling to dispose of it. This system is financed by the industry and ensures environmentally responsible disposal and the recycling of valuable raw materials.
19.2. Service Address and Technical Hotline (for units sold in Germany)
Contact our service hotline by phone +49 (0) 6103 9481 66 (regular costs for German fixed network) or e-mail at service@albrecht-midland.de
Conformity Declaration
Hereby, Alan Electronics GmbH declares that the radio equipment type DR 895 CD is in compliance with Directive 2014/53/EU. The full text of the EU declaration of conformity is available at the following internet address:
www.alan-electronics.de/download.aspx

Printing errors reserved.
Information in this user manual are subject to change without prior notice.
de station la station
text_image
Internet radio Germany > Search > Location > Popular > Discover >text_image
Scan Stations: 15 Scanning /text_image
DAB 03:28 BBC Radio 6Music to vote for a track that missed out on the 6Music playlist6.7.1. Diaporama DAB+
text_image
FM Scan setting Audio setting System settings > Main menu >8. Mode Bluetooth
text_image
Bluetooth 03:28 Bluetooth Discoverable Please connect with a device to: ALBRECHT DR 895 CD
text_image
Alarm 1 Enable: Off Time: 00:00 Mode: Internet Radio Preset: Last listened Volume: 10 Savetext_image
WPS Setup ! Push WPS button at the other end Press SELECT to continue- Pin
Enter PIN 98467583 at the other end
Press SELECT to continue
FR
4. Fin
Setup wizard completed
Press SELECT to exit
14.2.2. Configuration PBC WLAN
text_image
Setup wizard Start now? YES NOtext_image
Internet radio Germany > Search > Location > Popular > Discover >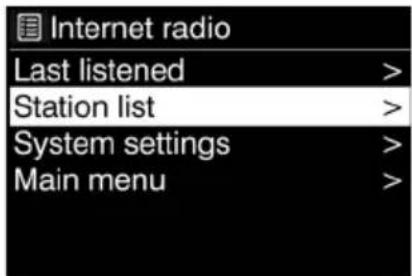
text_image
Internet radio Last listened > Station list > System settings > Main menu >text_image
Scan Stations: 15 Scanning /text_image
DAB 03:28 BBC Radio 6Music to vote for a track that missed out on the 6Music playlisttext_image
FM 03:28 CR 1 NO. 1 INFOTAINMENT FM R-D-S 0!text_image
FM Scan setting Audio setting System settings > Main menu >text_image
Bluetooth 03:28 Bluetooth Discoverable Please connect with a device to: ALBRECHT DR 895 CDtext_image
Alarm 1 Enable: Off Time: 00:00 Mode: Internet Radio Preset: Last listened Volume: 10 SaveIT
text_image
WPS Setup ! Push WPS button at the other end Press SELECT to continue WPS Setup ! Enter PIN 98467583 at the other end Press SELECT to continue
Setup wizard completed
Press SELECT to exit
IT
text_image
Setup wizard Start now? YES NOtext_image
Internet radio Germany > Search > Location > Popular > Discover >text_image
Internet radio Last listened > Station list > System settings > Main menu >text_image
Scan Stations: 15 Scanning /text_image
DAB 03:28 BBC Radio 6Music to vote for a track that missed out on the 6Music playlisttext_image
FM Scan setting Audio setting System settings > Main menu >text_image
Bluetooth 03:28 Bluetooth Discoverable Please connect with a device to: ALBRECHT DR 895 CDtext_image
Alarm 1 Enable: Off Time: 00:00 Mode: Internet Radio Preset: Last listened Volume: 10 Savetext_image
WPS Setup ! Push WPS button at the other end Press SELECT to continue- Pin
text_image
WPS Setup Enter PIN 98467583 at the other end Press SELECT to continue4. Finalización
Setup wizard completed
Press SELECT to exit