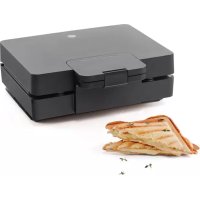
Easy Melt SAM1B1000 - Croque monsieur clip WILFA - Free user manual and instructions
Find the device manual for free Easy Melt SAM1B1000 WILFA in PDF.



| Product type | Sandwich press for croque monsieur (panini/sandwich grill) |
| Brand | Wilfa |
| Model | Easy Melt SAM1B1000 |
| Power supply | Mains, 220-240 V ~ 50/60 Hz |
| Power | Approximately 750 W (standard estimate) |
| Dimensions (L x W x H) | Approximately 28 x 22 x 10 cm (estimate) |
| Weight | Approximately 1.5 kg (estimate) |
| Plate material | Non-stick |
| Removable plates | Yes, for easy cleaning |
| Number of plates | 2 (upper and lower) |
| Indicator light | Yes, switches from red to green when ready |
| Locking latch | Yes |
| Cooking function | Grilling sandwiches, paninis, croque-monsieur |
| Care and cleaning | Plates hand washable, do not put in dishwasher; wipe appliance with a damp cloth |
| Safety | Do not immerse; hot surfaces; short cord; not recommended with extension cord |
| Spare parts and repairability | Contact Wilfa customer service; 5-year warranty |
| Warranty | 5 years (domestic use only) |
| Usage | Indoor domestic use only |
| Included accessories | Instruction manual |
Frequently Asked Questions - Easy Melt SAM1B1000 WILFA
User questions about Easy Melt SAM1B1000 WILFA
0 question about this device. Answer the ones you know or ask your own.
Ask a new question about this device
Download the instructions for your Croque monsieur clip in PDF format for free! Find your manual Easy Melt SAM1B1000 - WILFA and take your electronic device back in hand. On this page are published all the documents necessary for the use of your device. Easy Melt SAM1B1000 by WILFA.
USER MANUAL Easy Melt SAM1B1000 WILFA
natural_image
Open black plastic tray kit with two side compartments filled with cylindrical cavities (no text or symbols visible)Wilfa E ASY MELT
TOAST IRON SAM1B-1000
EN · Instruction manual
NO · Bruksanvisning
SE · Bruksanvisning
IMPORTANT SAFETY INSTRUCTIONS
- Please read this manual carefully before operation and save it for future reference.
- This appliance can be used by children aged from 8 years and above and persons with reduced physical, sensory, or mental capabilities or lack of experience and knowledge if they have been given supervision or instruction concerning use of the appliance in a safe way and understand the hazards involved. Children shall not play with the appliance. Cleaning and user maintenance shall not be made by children unless they are older than 8 and supervised.
- Keep the appliance and its cord out of reach of children aged less than 8 years.
- The outer surface may get hot when the appliance is operating
- Always use the product on a flat, stable, heat-resistant surface.
- Do not touch hot surfaces. Use the handle.
- Do not place the appliance on or near a gas or electric burner or other heated oven.
-
Do not let the cord hang over the edge of a table or counter, or touch hot surfaces, including the stove.
-
To protect against risk of electrical shock, do not immerse the cord, plug or appliance in water or other liquid.
- If the supply cord is damaged, it must be replaced by the manufacturer, its service agent or similarly qualified persons in order to avoid a hazard.
- Is there damage to the device or that it does not work, it must be serviced only by authorized personnel.
- Unplug from outlet when not in use or before cleaning the appliance.
- Do not leave the product unattended while it is in use.
- The appliance is not intended to be operated by means of an external timer or separate remote-control system.
- This product is intended for indoor, non-industrial, non-commercial, household use only. Do not use the item outdoors or for any other purpose.
EN
SPECIAL INSTRUCTIONS
- To avoid a circuit overload when using this product, do not operate another high-wattage product on the same electrical circuit.
- A short power supply cord is provided with this product. An extension cord is not recommended for use with this product, but if one must be used:
- The marked electrical rating of the cord must be at least as great as that of the product.
- Arrange the extension cord so that it does not hang where it can be tripped over or pulled unintentionally.
- Always insert both detachable plates before plugging in the unit. See page 9 on how to insert plates.
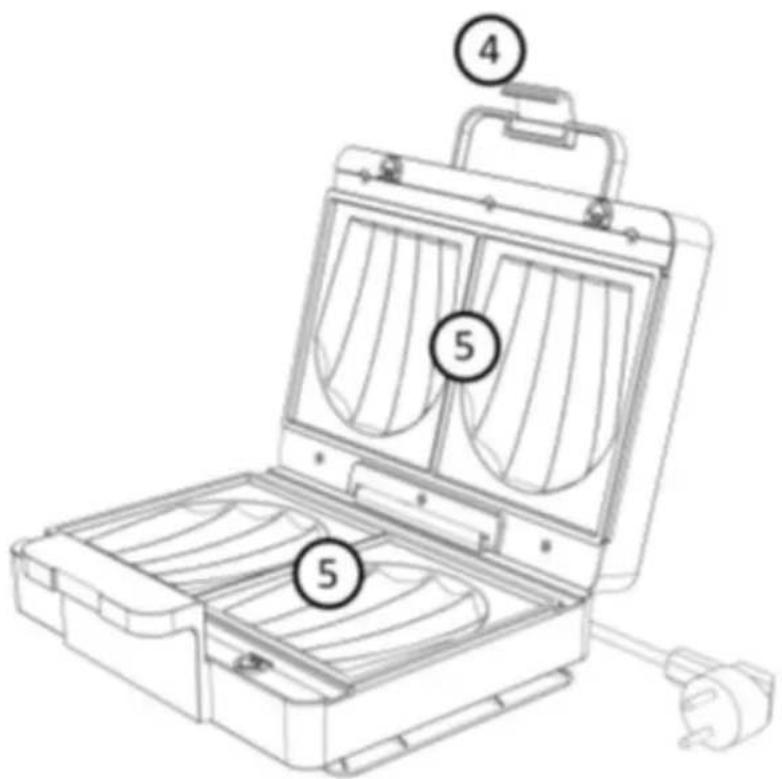
PRODUCT OVERVIEW
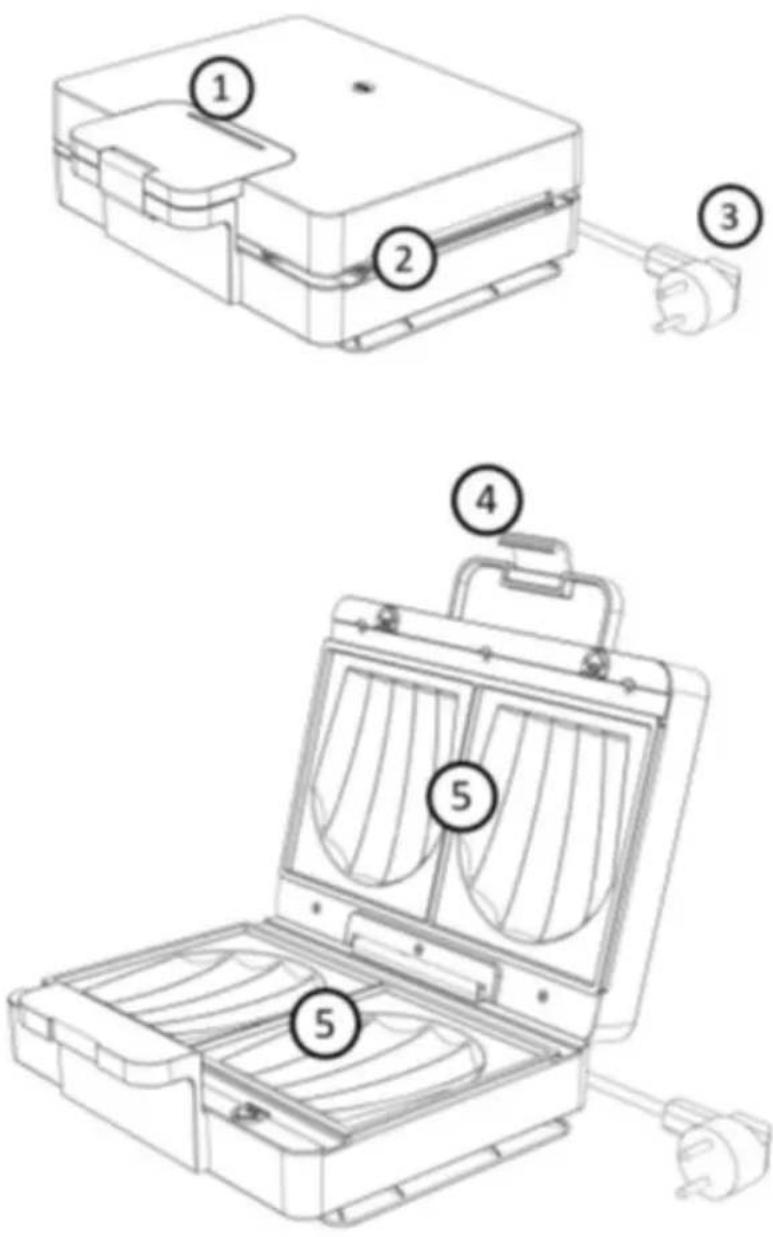
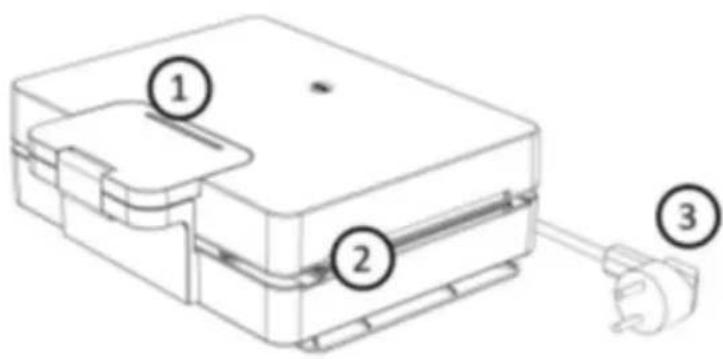
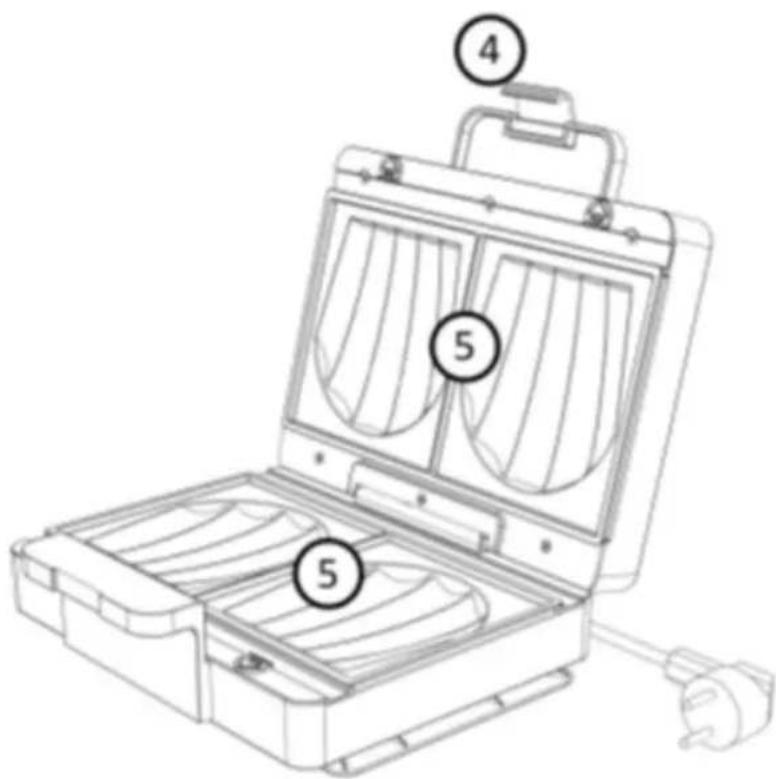
- Light indicator
- Main unit
- Power cord
- Locking latch
- Removable plates
EN
BEFORE FIRST USE
Note: During the initial use of this product, it may produce some smoke and smell. This is normal and will subside with further use.
Note: Before using this appliance for the first time, the hotplates should be cleaned with a moist cloth.
USE
Caution: Always insert both detachable plates before plugging in the unit. See page 9 on how to insert plates.
Caution: Do not use this appliance to cook or defrost frozen food. All food must be completely defrosted before cooking it with this product.
Caution: Do not use metal utensils on this product, as they will scratch and damage the plates' non-stick coating.
- Insert the plug into a standard electrical outlet. Make sure that the voltage to be used corresponds with the rated voltage of your appliance.
- Close the appliance while it heats up.
- The power indicator will light up in red. When the light shifts to green, the toast iron is ready for use.
- Release the latch to open the unit. Place sandwich on the lower plate using wooden or plastic heat-resistant utensils. Close the appliance carefully and lock the appliance. Do not shut the appliance with force. Steam may be ejected from between the hotplates.
- Once the sandwich is toasted according to your personal preference, release the latch to open the unit, then remove the toast using wooden or plastic heat-resistant utensils. If more cooking will be done at this time, close the unit to conserve heat.
- Repeat steps 3-5 until all cooking is complete.
- Turn off the product by unplugging the power cord from the electrical outlet.
- When the unit has completely cooled, remove the plates to clean, then dry.
Note: Care must be taken to ensure that fingers do not come into contact with the hotplates.
REMOVING AND INSERTING PLATES
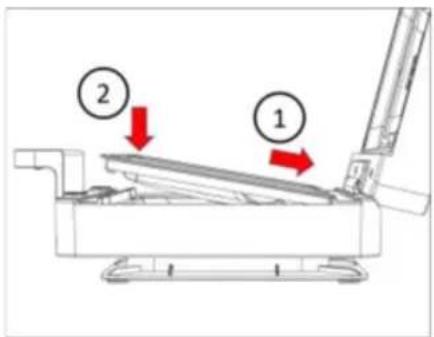
Both top and bottom plates can easily be removed for cleaning.
TO REMOVE
-
Push the two plate-locks forward simultaneously.
-
Lift out the plate.
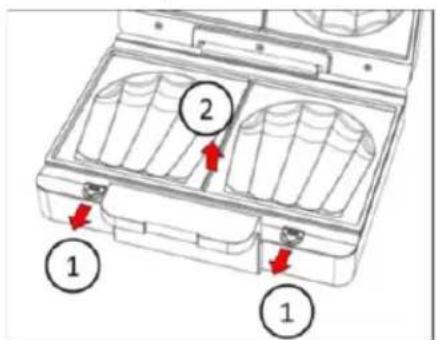
TO INSERT
-
Enter the two pins at the back of the plate into the slots in the main unit.
-
Push down at the front of the plate until both plate-locks engage.
CLEANING AND MAINTANANCE
- Before cleaning, unplug and wait for the appliance and the plates to cool down.
- Remove plates.
- Wash the plates by hand. Do not wash in dishwasher.
- Do not clean with any abrasive scouring pad or steel wool as this will damage the non-stick coating.
- Do not immerse the unit in water or any other liquid.

GUARANTEE
Wilfa issues a 5 year guarantee on this product from the day of purchase is done. The guarantee covers production failure or defects that arise during the guarantee period. Your purchase receipt works as proof towards retailer if claiming your guarantee.
The guarantee is valid only for products that are bought and used in private households. The guarantee is not valid if the product is used commercially. The guarantee is not valid if the product is misused, used by negligence, if not following instructions given by Wilfa, if modified or if unauthorized reparation is done. The guarantee is also not valid for normal wear of the product, misuse, lack of maintenance, use of wrong electrical voltage or:
• Overloading of product
- Coating
PRODUCT SPECIFICATIONS
220V\~240V\~50Hz, 1000 W
SUPPORT AND SPARE PARTS
For support please visit us at wilfa.com, and see our customer service/support page. Here you will find frequently asked questions, spare parts, tips and tricks and all our contact information.
RECYCLABILITY
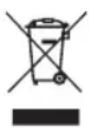
This marking indicates that this product should not be disposed with other household wastes throughout the EU. To prevent possible harm to the environment or human health from uncontrolled waste disposal, recycle it responsibly to promote the sustainable reuse of material resources. To return your used device, please use the return and collection systems or contact the retailer where the product was purchased. They can take this product for environmentally safe recycling free of charge.
NO
NO
INNHOLD
14 VIKTIG SIKKERHETSVEILEDNING
16 SPESIELLE ANVISNINGER
17 OVERSIKT OVER PRODUKTET
18 F∅R F∅RSTE GANGS BRUK
18 BRUK
19 FJERNE OG SETTE INN PLATER
19 RENGJ∅RING OG VEDLIKEHOLD
20 GARANTI
21 PRODUKTSPESIFIKASJONER
21 SUPPORT OG RESERVEDELER
21 GJENVINNING
VIKTIG SIKKERHETSVEILEDNING
OVERSIKT OVER PRODUKTET
NO
- Lysindikator
- Hovedenhet
- Strømledning
- Låsesperre
- Avtakbare plater
F∅R F∅RSTE GANGS BRUK
NO
SETTE INN
RENGJ∅RING OG VEDLIKEHOLD
SE
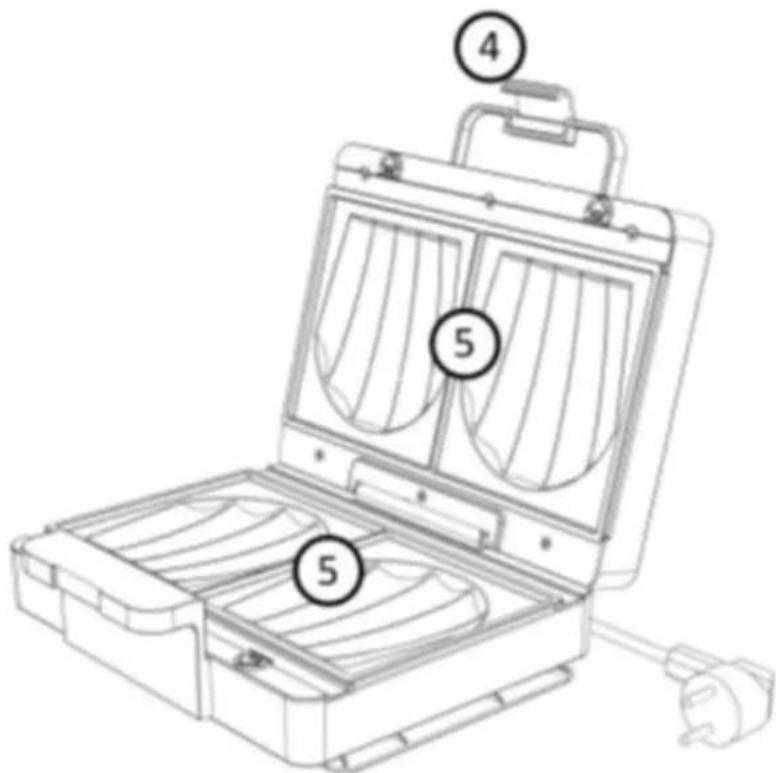
- Ljusindikator
- Basenhet
- Elkabel
- Låsspärr
- Löstagbara plattor
ISÄTTNING
RENGÖRING OCH UNDERHÅLL
DK
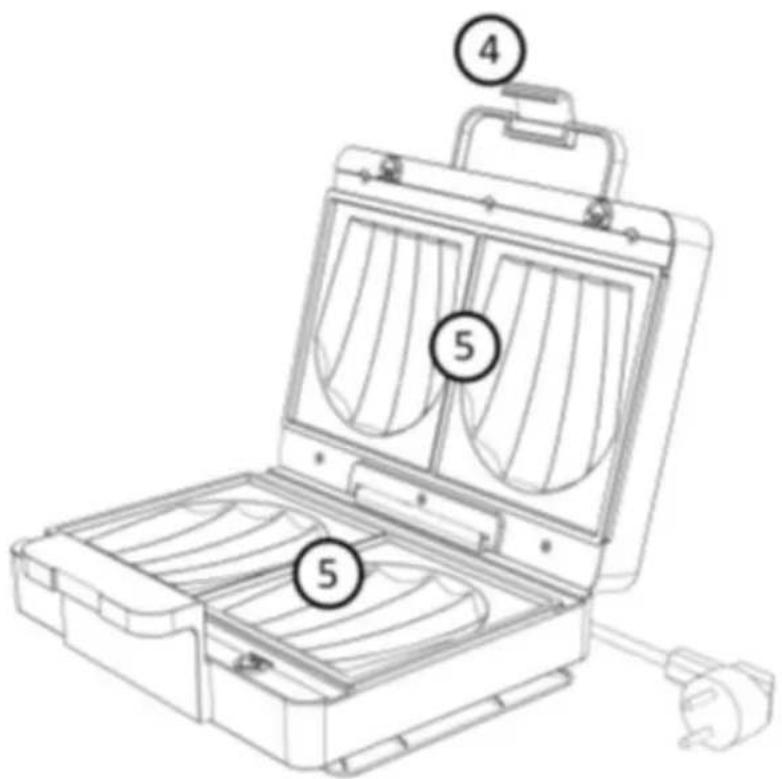
SÅDAN INDSÄETTES DE
RENG∅RING OG VEDLIGEHOLDELSE
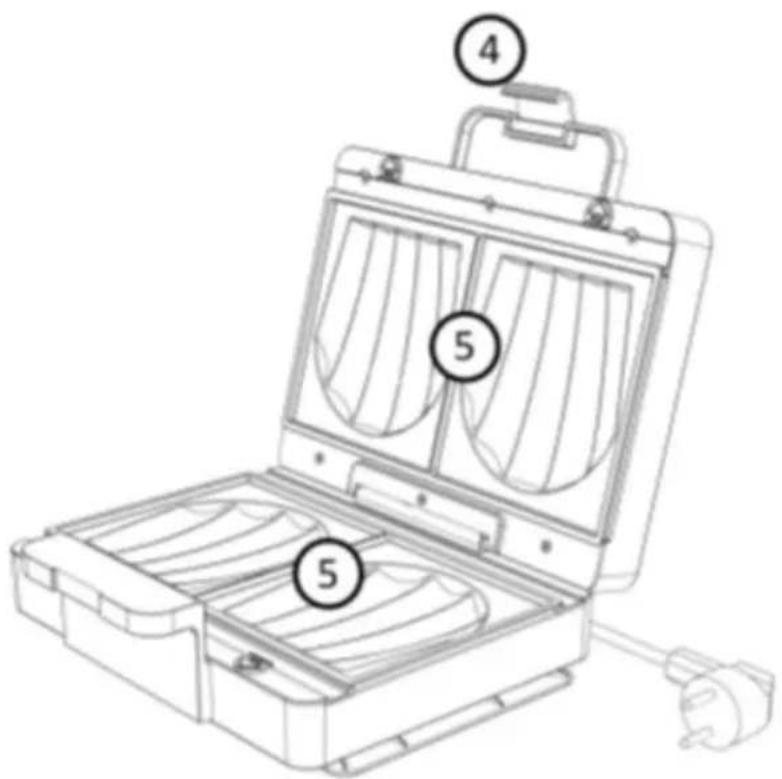
ASENTAMINEN
PUHDISTUS JA HUOLTO
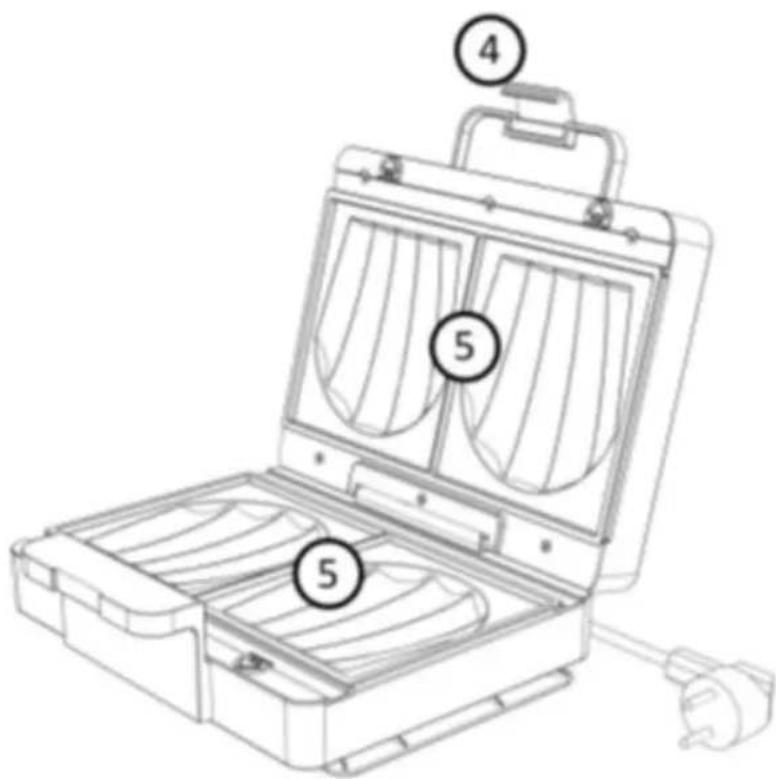
EINSETZEN
PLAATSEN
REINIGING EN ONDERHOUD
WKŁADANIE
PL
CZYSZCZENIE I KONSERWACJA
POUR LES INSÉRER
NETTOYAGE ET ENTRETIEN
CARACTÉRISTIQUES DU PRODUIT
220 V\~ 240 V\~50 Hz, 1000 W
ASSISTANCE ET PIÈCES DÉTACHÉES
PER INSERIRE
PARA INSERTARLAS
LIMPIEZA Y MANTENIMIENTO
ДЛЯ УСТАНОВКИ
SAM1B-1000_20_05
- Wilfa E ASY MELT
- IMPORTANT SAFETY INSTRUCTIONS
- EN
- SPECIAL INSTRUCTIONS
- PRODUCT OVERVIEW
- BEFORE FIRST USE
- USE
- REMOVING AND INSERTING PLATES
- TO REMOVE
- TO INSERT
- CLEANING AND MAINTANANCE
- GUARANTEE
- PRODUCT SPECIFICATIONS
- SUPPORT AND SPARE PARTS
- RECYCLABILITY
- INNHOLD
- VIKTIG SIKKERHETSVEILEDNING
- OVERSIKT OVER PRODUKTET
- F∅R F∅RSTE GANGS BRUK
- SETTE INN
- RENGJ∅RING OG VEDLIKEHOLD
- ISÄTTNING
- RENGÖRING OCH UNDERHÅLL
- SÅDAN INDSÄETTES DE
- RENG∅RING OG VEDLIGEHOLDELSE
- ASENTAMINEN
- PUHDISTUS JA HUOLTO
- EINSETZEN
- PLAATSEN
- REINIGING EN ONDERHOUD
- WKŁADANIE
- CZYSZCZENIE I KONSERWACJA
- POUR LES INSÉRER
- NETTOYAGE ET ENTRETIEN
- CARACTÉRISTIQUES DU PRODUIT
- ASSISTANCE ET PIÈCES DÉTACHÉES
- PER INSERIRE
- PARA INSERTARLAS
- LIMPIEZA Y MANTENIMIENTO
- ДЛЯ УСТАНОВКИ
Brand : WILFA
Model : Easy Melt SAM1B1000
Category : Croque monsieur clip