Prima Power Team R50FSN.2 - Vacuum Cleaner Riccar - Free user manual and instructions
Find the device manual for free Prima Power Team R50FSN.2 Riccar in PDF.
User questions about Prima Power Team R50FSN.2 Riccar
0 question about this device. Answer the ones you know or ask your own.
Ask a new question about this device
Download the instructions for your Vacuum Cleaner in PDF format for free! Find your manual Prima Power Team R50FSN.2 - Riccar and take your electronic device back in hand. On this page are published all the documents necessary for the use of your device. Prima Power Team R50FSN.2 by Riccar.
USER MANUAL Prima Power Team R50FSN.2 Riccar
natural_image
Line drawing of a vacuum cleaner with coiled tube and ventilation slots (no text or symbols)IMPORTANT SAFETY INSTRUCTIONS
When using an electrical appliance, basic precautions should always be followed, including the following:
READ ALL INSTRUCTIONS BEFORE USING THIS APPLIANCE. FOR HOUSEHOLD USE ONLY.
IMPORTANT:
IMPORTANT. The manufacturer cannot accept responsibility for damage caused when the appliance is not used according to the instructions, or for uses other than those for which it was intended.
WARNING:
To reduce the risk of fire, electric shock, damage or injury:
- Do not leave appliance when plugged in. Unplug from outlet when not in use and before servicing.
- Do not use outdoors or on wet surfaces.
- Do not allow to be used as a toy. Close attention is necessary when used by or near children.
- Use only as described in this manual. Use only manufacturer's recommended attachments.
- Do not use with a damaged cord or plug. If appliance is not working as it should, has been dropped, damaged, left outdoors, or dropped into water, return it to your Authorized Riccar Retailer for service.
- Do not pull or carry by the cord, use the cord as a handle, close a door on the cord, or pull the cord around sharp edges or corners. Do not run appliance over the cord. Keep the cord away from heated surfaces.
-
Do not unplug by pulling on the cord. To unplug, grasp the plug, not the cord.
-
Do not handle the plug or appliance with wet hands.
- Do not put any object into openings. Do not use with any opening blocked; keep free of dust, lint, hair and anything that may reduce air flow.
- Keep hair, loose clothing, fingers and all parts of the body away from openings and moving parts.
- Do not pick up anything that is burning or smoking, such as cigarettes, matches or hot ashes.
- Do not use without a vacuum bag and/or filters in place.
- Turn off all controls before unplugging.
- Use extra care when cleaning on stairs.
- Do not use to pick up flammable or combustible liquids such as gasoline or use in areas where they may be present.
- Do not attempt to service the unit while appliance is plugged in.
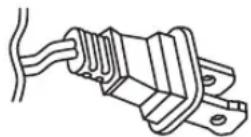
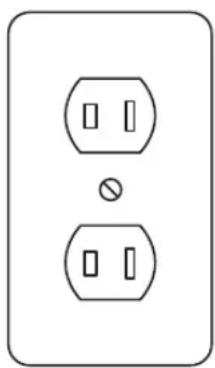
2-WIRE POLARIZED POWER CORD
To reduce the risk of electric shock, the charger is equipped with a polarized alternating current line plug (a plug having one blade wider than the other). This plug will fit into the power outlet only one way. This is a safety feature. If you are unable to insert the plug fully into the outlet, try reversing the plug. If the plug should still fail to fit, contact a qualified electrician to replace the obsolete outlet. Do not defeat the safety purpose of the polarized plug.
natural_image
Simple line drawing of two electrical socket plugs with a bulb, no text or symbols present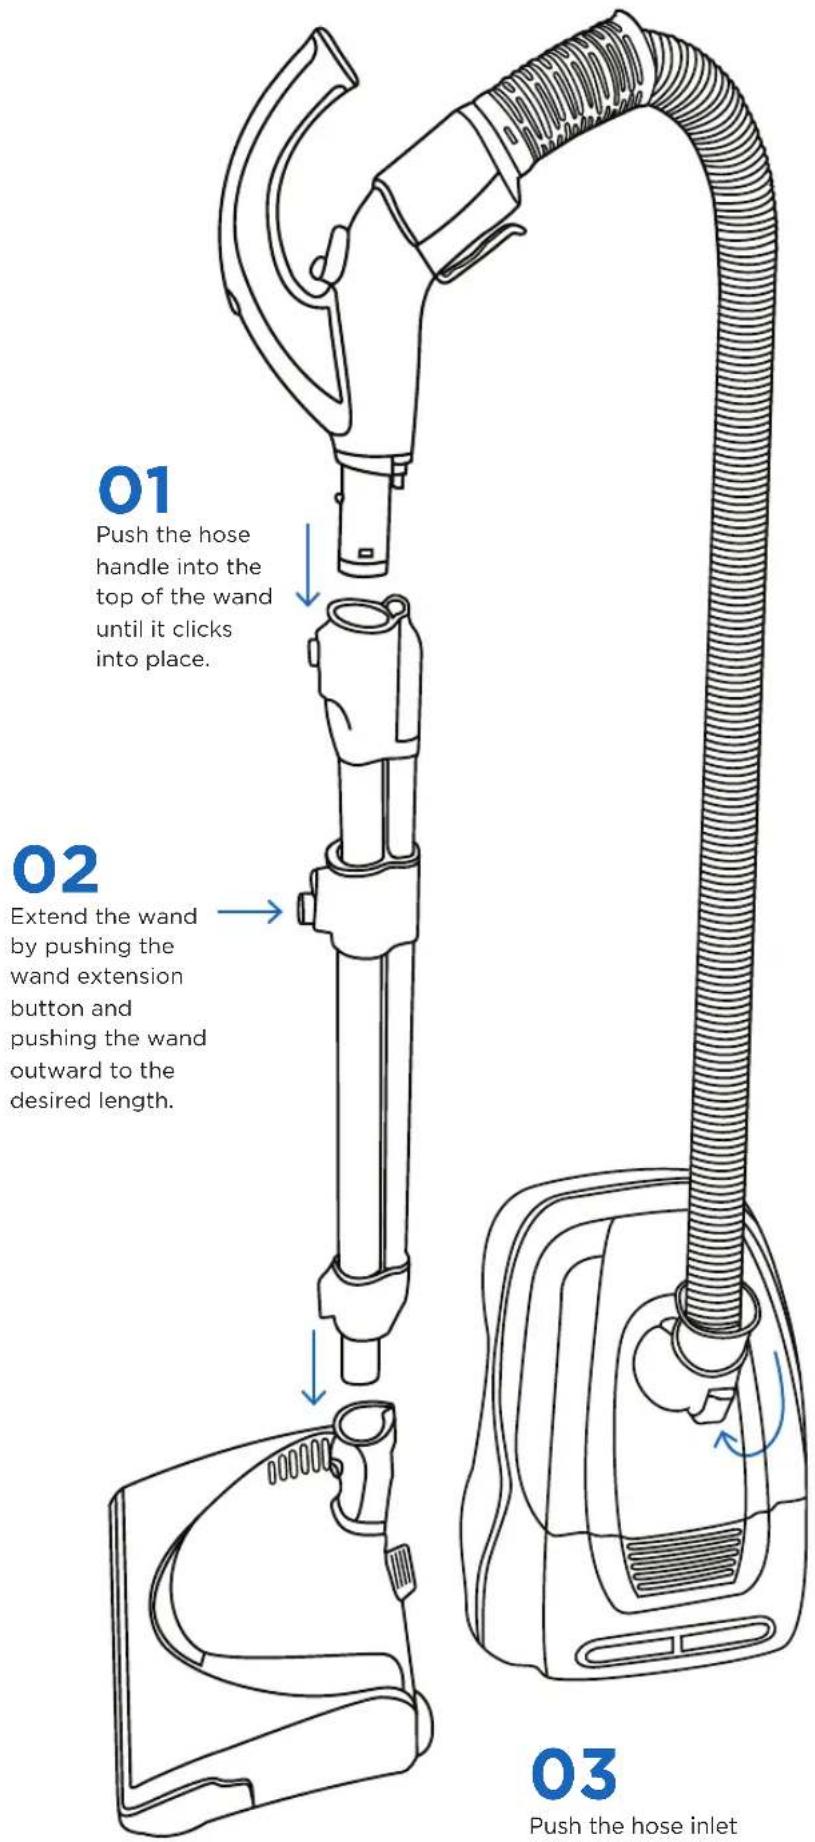
text_image
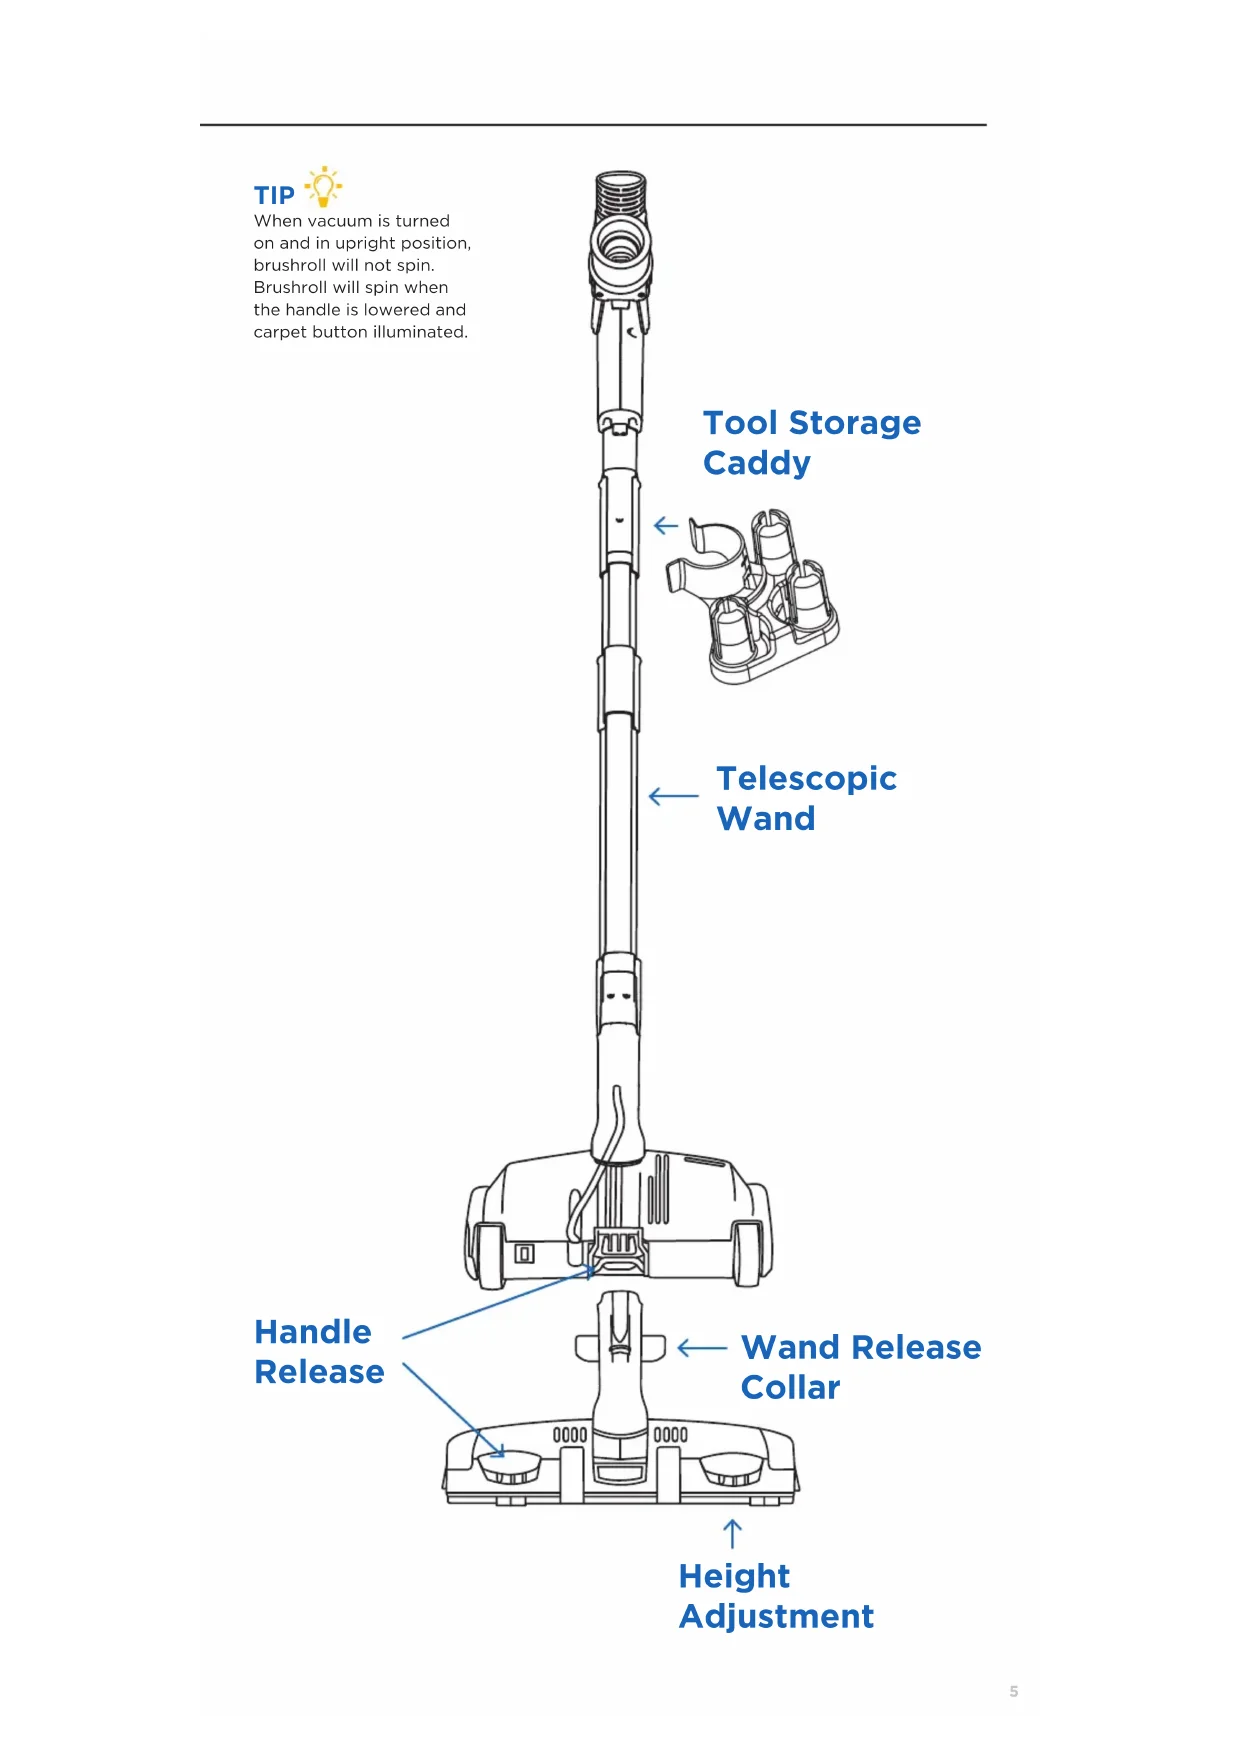
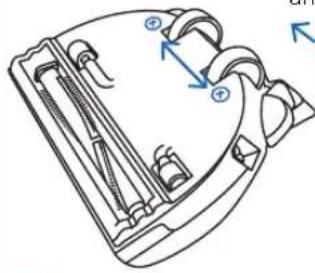
01 Push the hose handle into the top of the wand until it clicks into place. 02 Extend the wand by pushing the wand extension button and pushing the wand outward to the desired length. 03 Push the hose inlet03
Push the hose inlet into the canister body until it clicks into place.
text_image
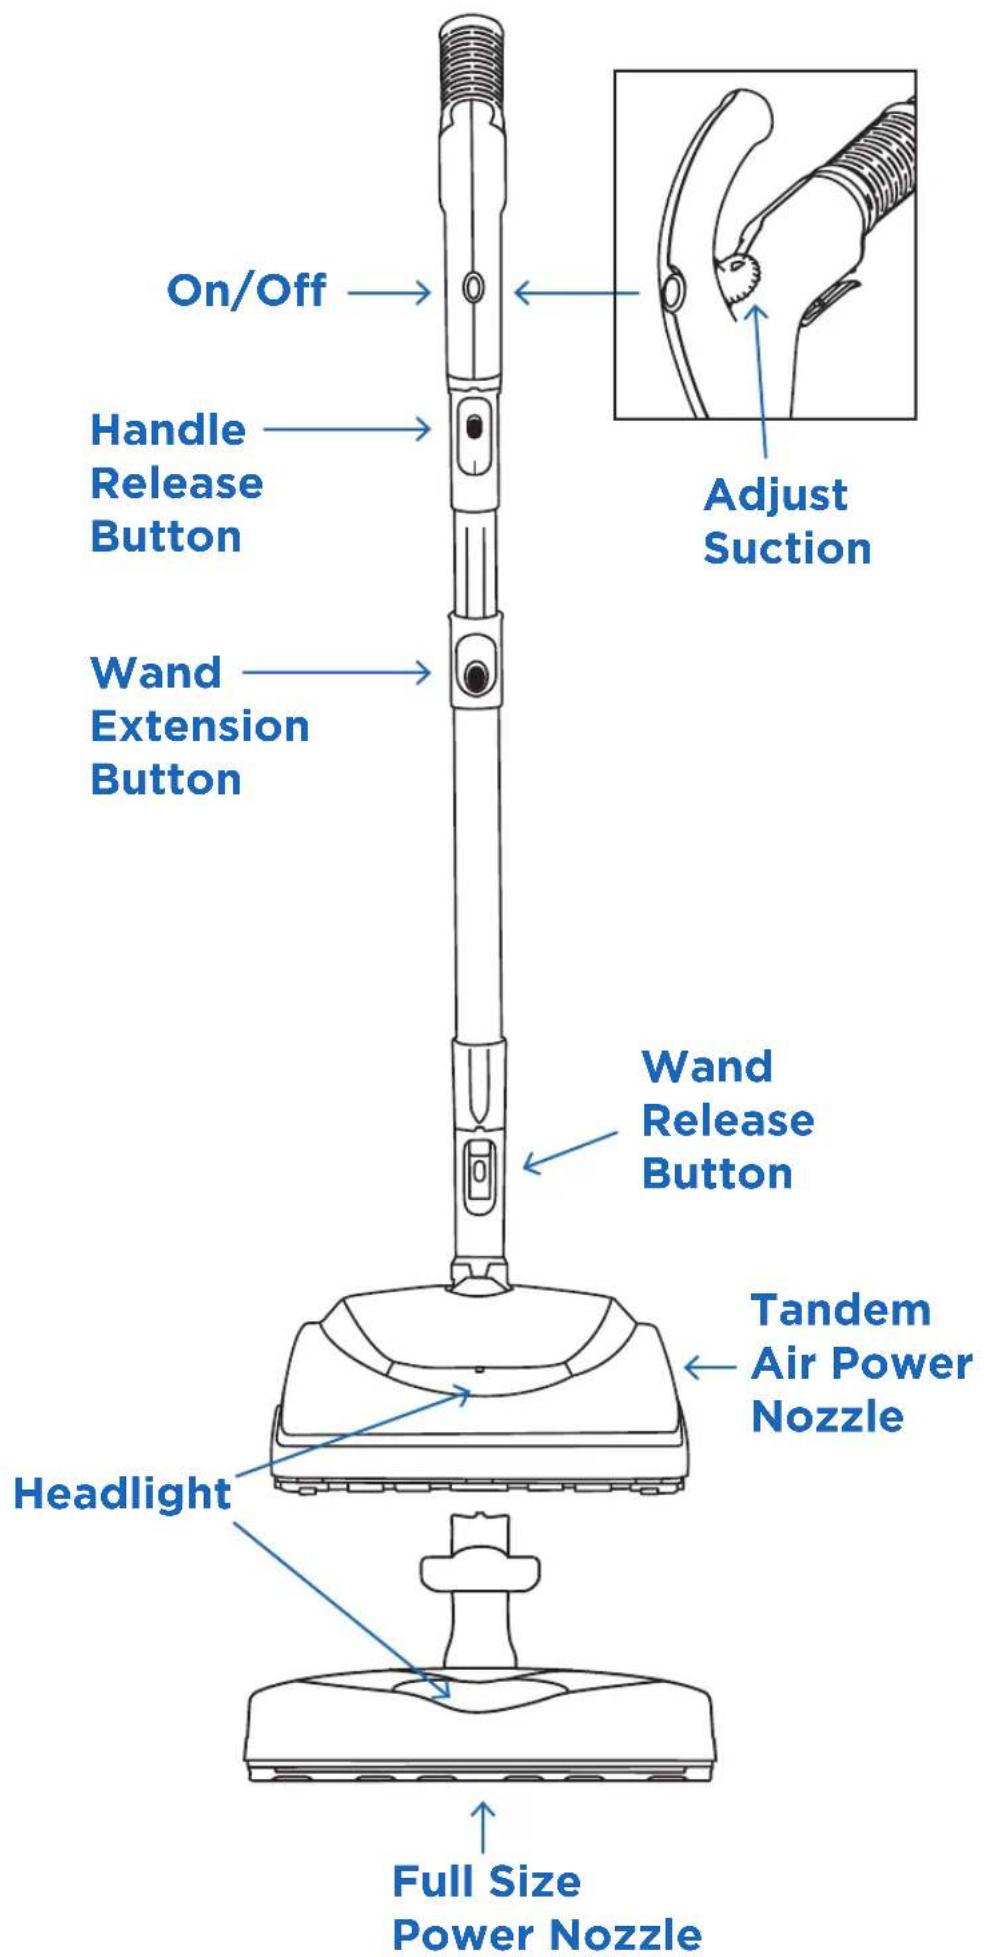
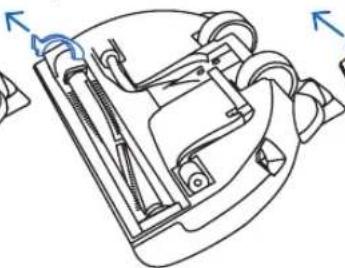
On/Off Handle Release Button Wand Extension Button Wand Release Button Headlight Full Size Power Nozzle Adjust Suction Tandem Air Power Nozzle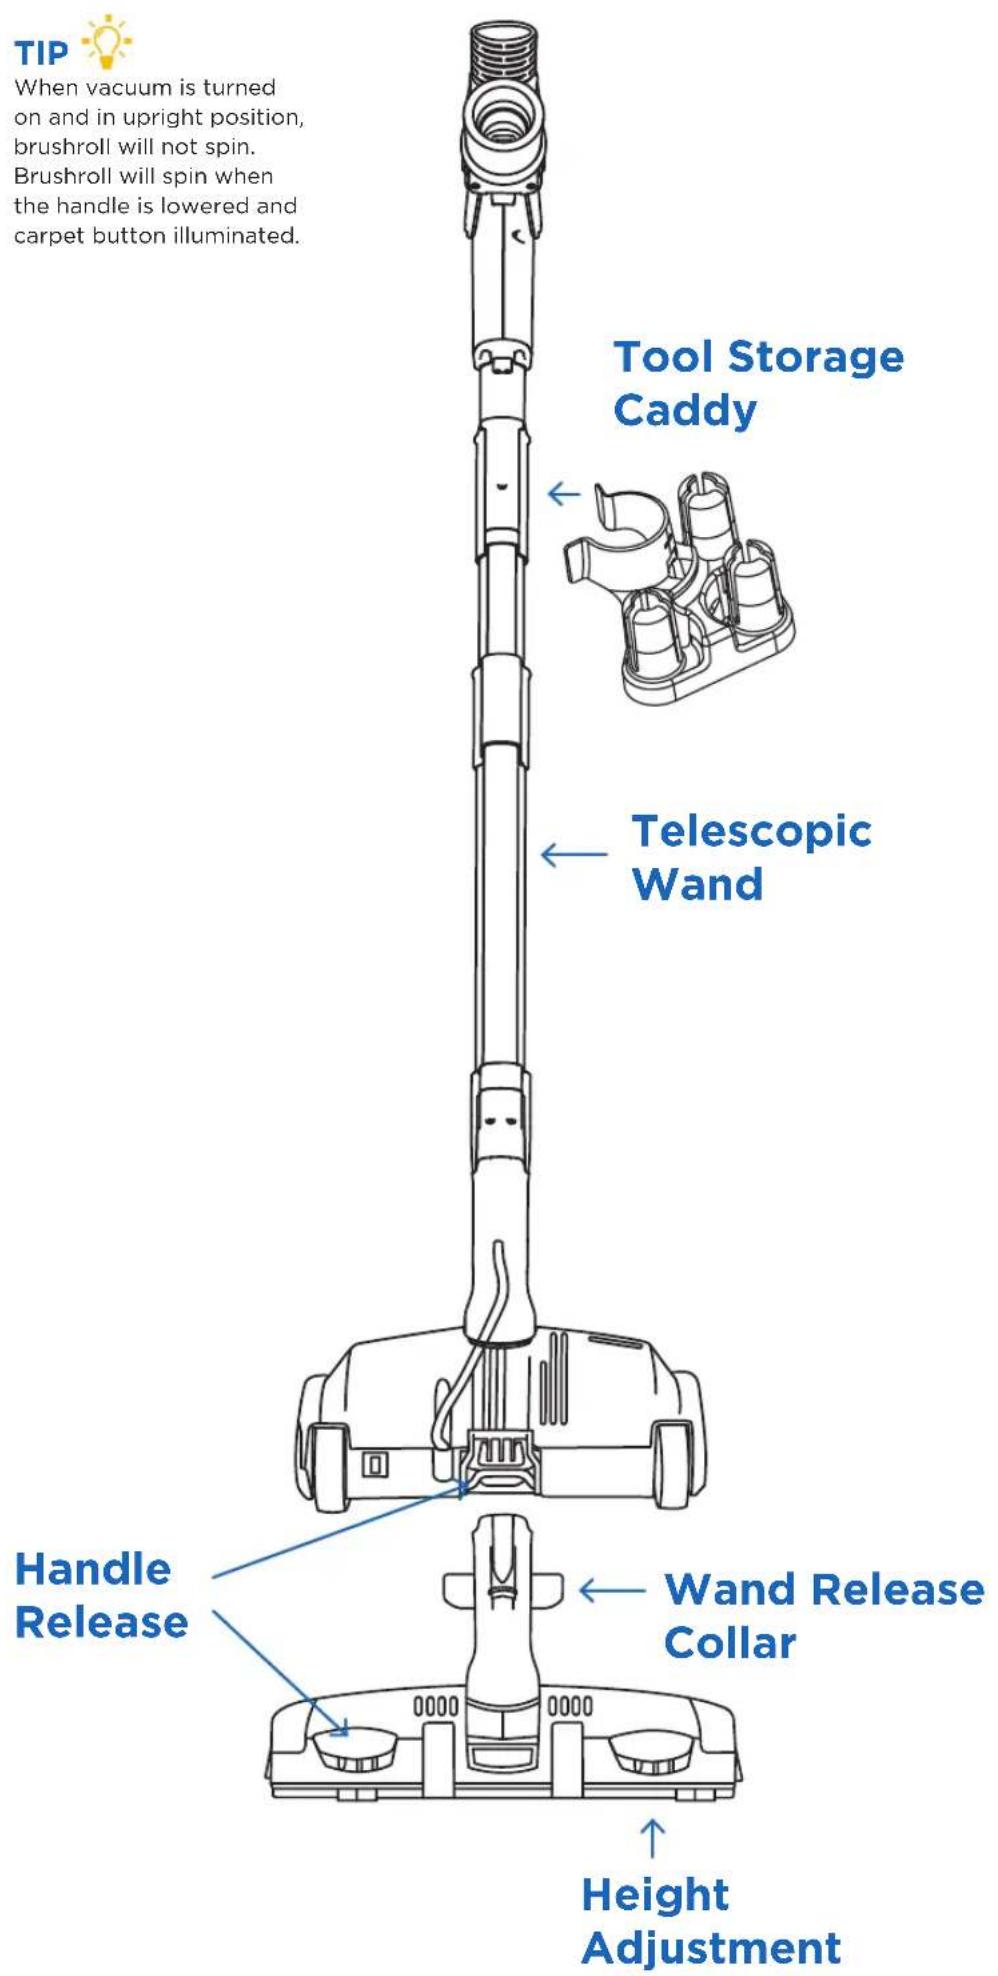
text_image
TIP When vacuum is turned on and in upright position, brushroll will not spin. Brushroll will spin when the handle is lowered and carpet button illuminated. Tool Storage Caddy Telescopic Wand Handle Release Wand Release Collar Height Adjustment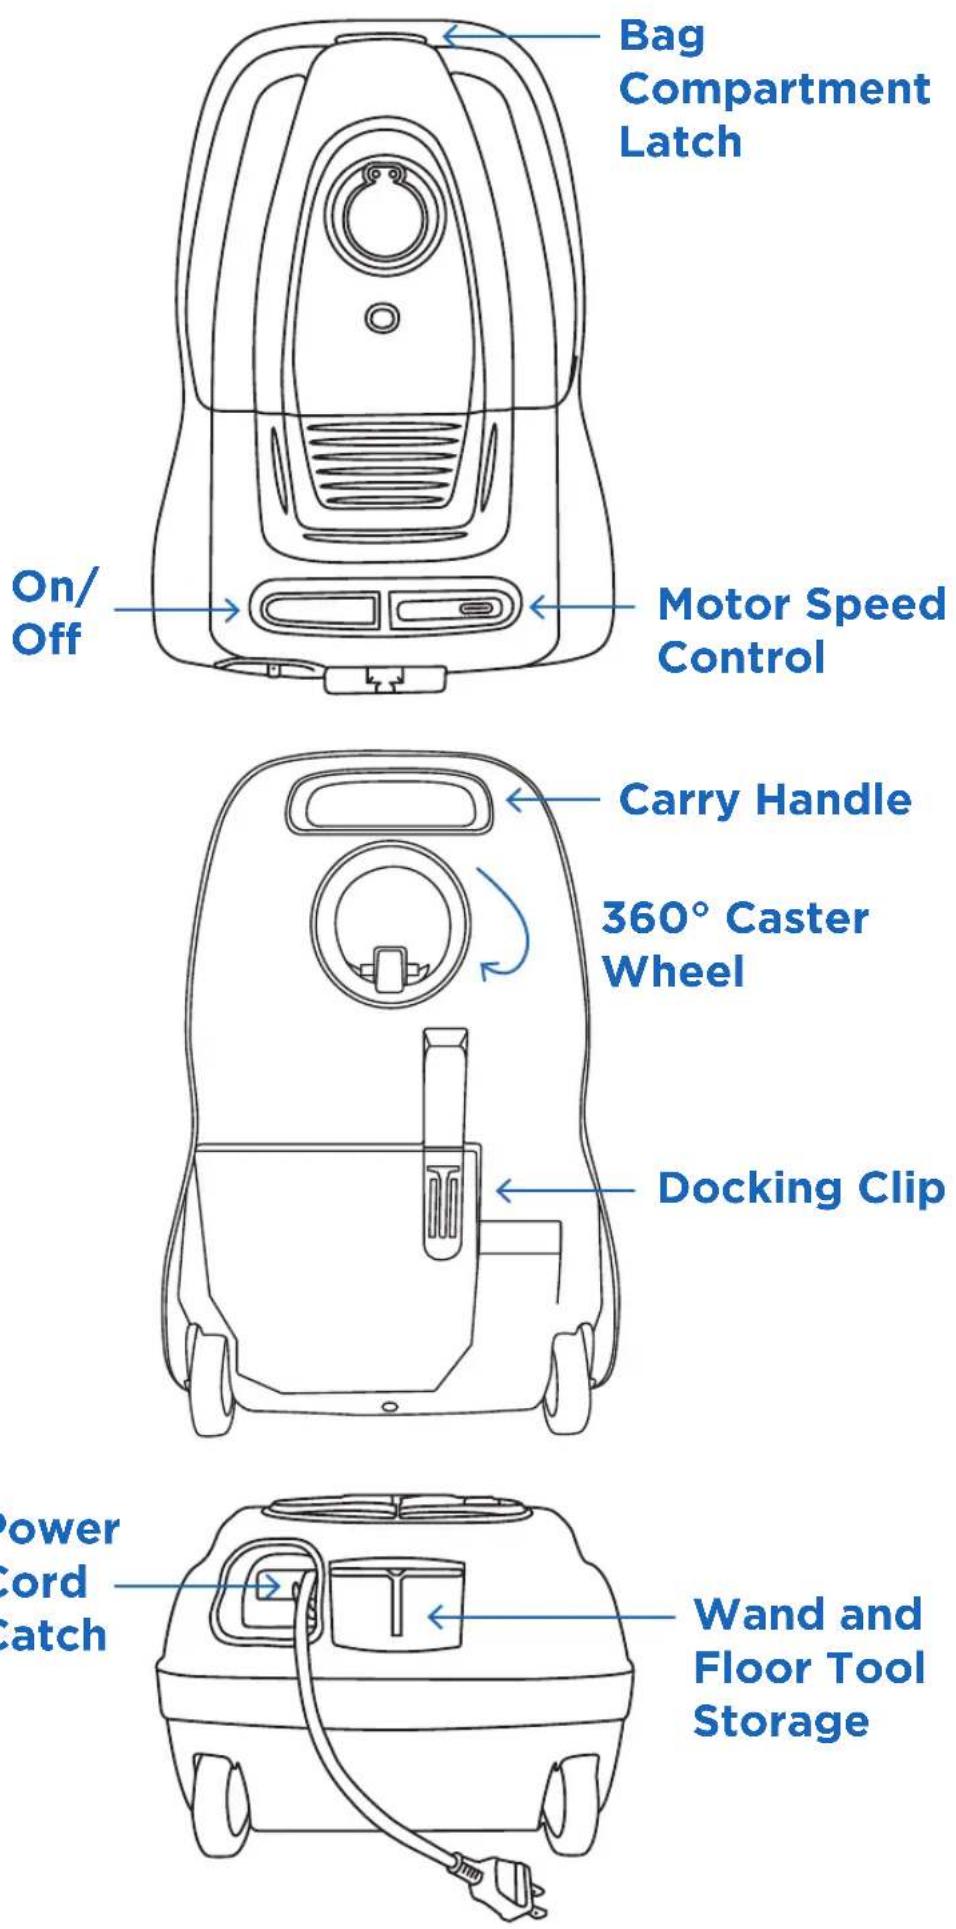
Power Cord Catch
Carpet Height Adjustment \*R50FSN only
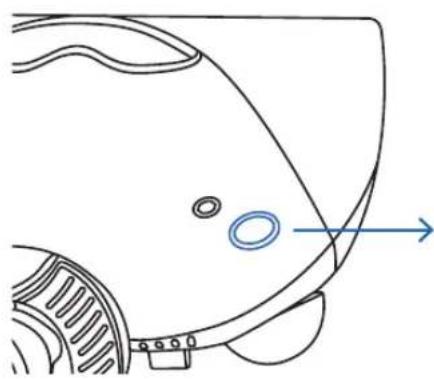
To adjust the carpet height setting of the power nozzle, press the right pedal located on the back of the power nozzle. Each press of this pedal will adjust the height to the next carpet height position.
natural_image
Line drawing of a car's head and side panel with no text or symbolsCarpet Height Adjustment

text_image
XHI ....Very plush carpet HI ....Plush carpet AUTO ....General carpet/bare floor MED ....Medium pile carpet LO ....Low pile carpet XLO ....Indoor/outdoor carpetTIP
If it becomes difficult to push the vacuum across the carpet, adjust the dial to a higher carpet setting.
Attachment Cleaning
Pet Hair Remover Tool
Ideal for removing pet hair from upholstery and vehicles.
*R50TAP only

text_image
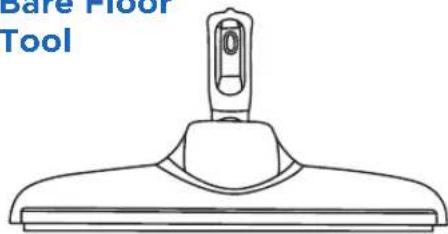
Power Tool moving pet pholstery s. onlyMicrofiber Bare Floor Tool
natural_image
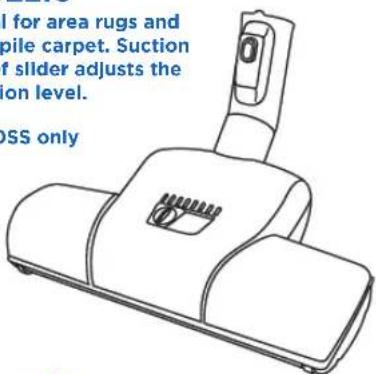
Line drawing of a simple tool with a handle and base (no text or symbols)Floor Turbo Nozzle
Ideal for area rugs and low pile carpet. Suction relief slider adjusts the suction level.
*R50SS only
text_image
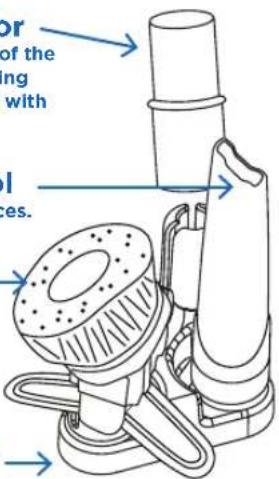
I for area rugs and pile carpet. Suction of slider adjusts the ion level. DSS onlyTool Adaptor — Attach to the end of the wand to use cleaning tools not included with this vacuum.
Crevice Tool Ideal for tight places.
2-n-1 Tool Insert wand end at top for the upholstery tool or bottom for dusting brush.
Tool Caddy
text_image
or of the ing with I res.TIP
Attach any of the cleaning tools to the end of the telescopic wand or the hose handle.
SAFETY FIRST
Unplug Vacuum before performing any maintenance on your vacuum.
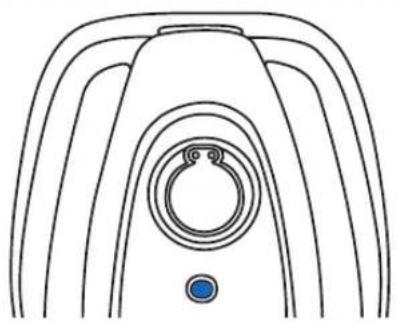
When to Change the Vacuum Bag
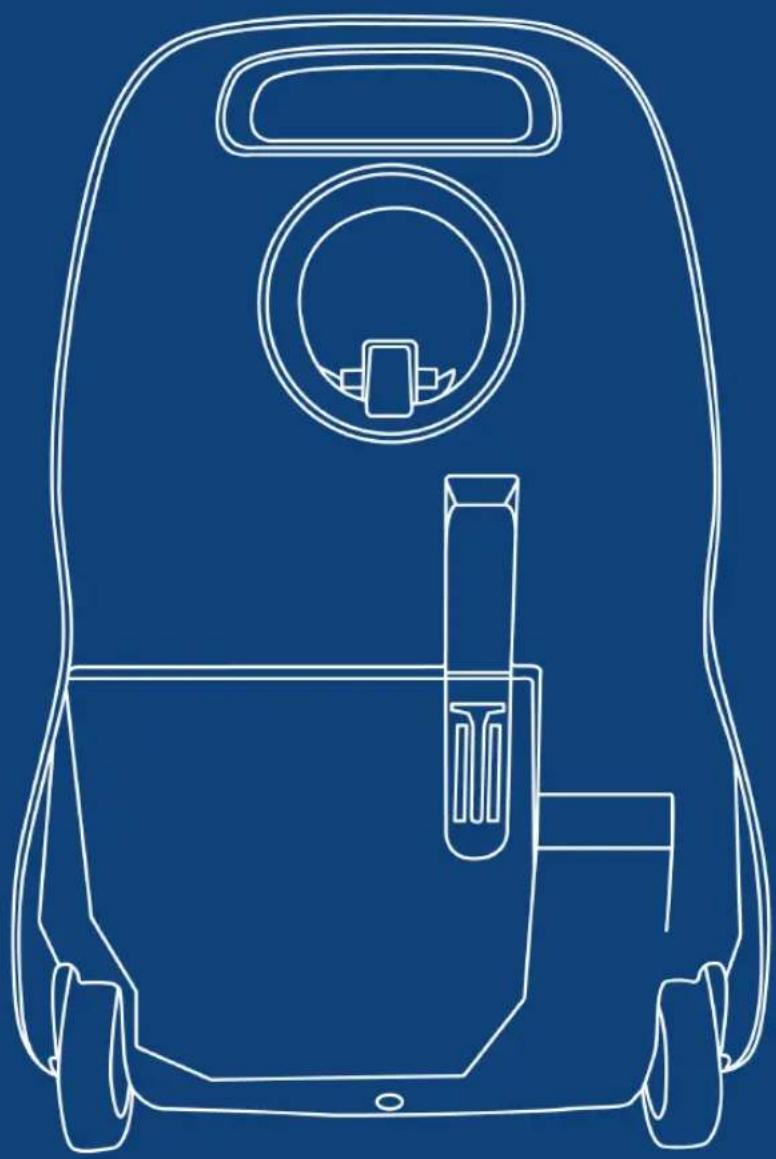
The Full Bag Indicator changes to red to show when the bag is full or when there is a clog in the vacuum. The indicator may also turn red during attachment cleaning. If the indicator changes to green when attachments are no longer in use, the vacuum bag does not need to be changed.
natural_image
Line drawing of a medical device with a circular ring and blue button (no text or symbols)Changing Bags
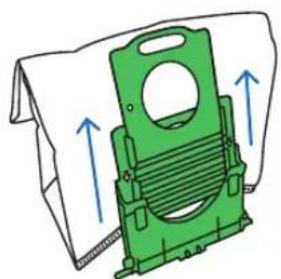
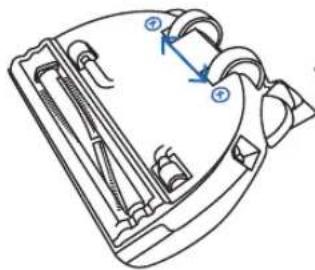
01
Open Bag Compartment
02
Pull Tab Outward
03
Seal the bag and remove
04
Insert new bag in grooves and snap into place
natural_image
Green mechanical component with blue directional arrows indicating movement or force (no text or symbols)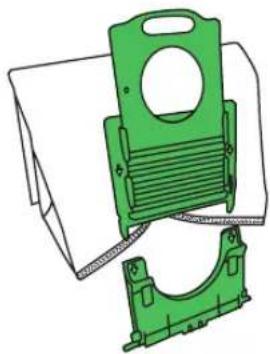
natural_image
Technical illustration of two green plastic mechanical components with mounting holes and internal channels (no text or symbols)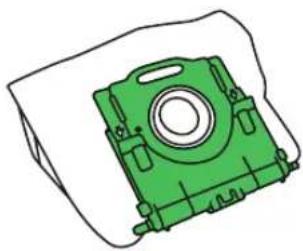
natural_image
Green mechanical component with mounting holes and central bore (no text or symbols)NOTE

The vacuum bags are disposable and intended to only be used once.
Jammed Brushroll
*R5OTAP only
01
1/4 turn
02
Remove plate
03
Lift
natural_image
Technical line drawing of a mechanical component with internal channels and mounting holes (no text or symbols)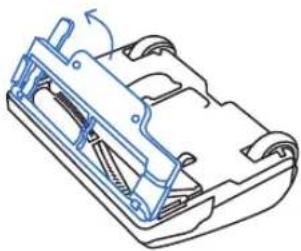
natural_image
Technical line drawing of a mechanical component with no visible text or symbols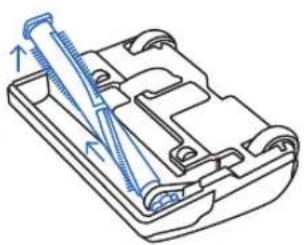
natural_image
Technical line drawing of a mechanical component with a tool inserted (no text or symbols)TIP

After freeing obstruction and red light is still on, it's likely the clog is located in the vacuum motor fan. If so, please take your vacuum to an Authorized Riccar Retailer for service.
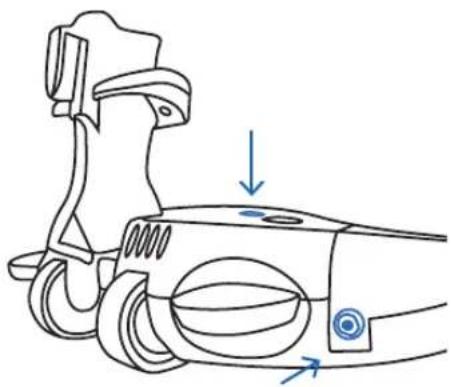
Brushroll Warning Lights
Tandem Air Power Nozzle \*Model R50TAP only
The warning indicator lights in the headlight lens will change to flashing red. Should this occur:
- Turn off vacuum and unplug cord.
- Remove object preventing brushroll from turning.
natural_image
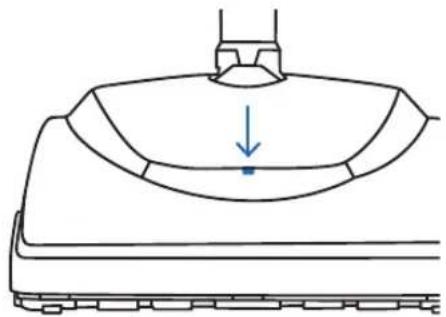
Simple line drawing of a mechanical component with a downward arrow indicating a point (no text or symbols)Full Size Power Nozzle \*Model R50FSN only
The warning indicator lights on top of the unit will turn from green to red. Should this occur:
- Turn off vacuum and unplug cord.
- Remove object preventing brushroll from turning.
- Locate the circuit breaker switch on the back of the power nozzle and reset the breaker.
natural_image
Technical line drawing of a mechanical component with arrows indicating motion or force direction (no text or symbols)Replacing the Filters
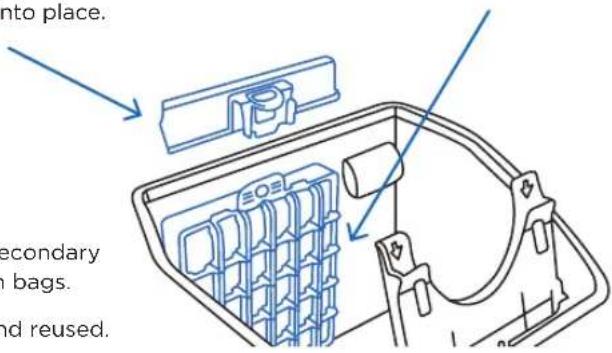
HEPA Media Filter
01
Open the bag compartment lid and locate the filter behind the vacuum bag.
02
Grasp the tab with two fingers and pull the filter out toward you.
03
Replace with a new filter by sliding the filter in and pushing down on the top of the tab until it clicks into place.
Secondary Filter
01
Open the bag compartment lid and locate the filter behind the vacuum bag.
02
Pull the filter cartridge up and out of the vacuum and discard.
03
Slide a new filter cartridge back into place and replace the bag.
text_image
into place. secondary in bags. and reused.NOTE
Replace HEPA media and secondary filters after using 12 vacuum bags.
Filters cannot be washed and reused.
SAFETY FIRST
Unplug Vacuum before performing any maintenance on your vacuum.
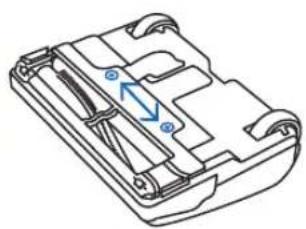
Replacing the Vacuum Belt \*R50FSN and R50TAP
01
Remove plate
natural_image
Technical line drawing of a mechanical component with internal parts and directional arrows (no text or symbols)02
Remove belt cover guard and pull out brushroll
natural_image
Technical line drawing of a mechanical device with no visible text or symbols03
Locate and discard
broken belt
natural_image
Technical line drawing of a mechanical component with no visible text or symbols04
Install new belt by placing the belt around the brushroll "belt groove"
NOTE

The belt on the Tandem Air Power Nozzle is located on the opposite side as demonstrated above.

natural_image
Technical line drawing of a mechanical component with internal parts (no text or symbols)Replacing the Bulb \*R50FSN only
01
Remove plate
02
Pull out bulb (no twisting)
03
Reinsert new bulb and place top cover back on
natural_image
Technical line drawing of a mechanical component with no visible text or symbols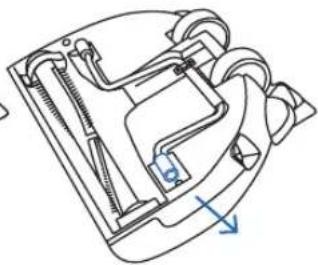
natural_image
Technical line drawing of a mechanical device with internal components and directional arrow (no text or symbols)
natural_image
Line drawing of a mechanical assembly with no visible text or symbolsTIP

To reduce the risk of electrical shock or injury from moving parts, turn the vacuum off and unplug it.
Power Cord Care
- When the vacuum is in use, hold the cord to keep from running over it.
- Avoid obstructions and do not pull the cord around sharp edges or corners.
• Always keep the cord away from heated surfaces and never close doors on it as this may cause damage to the wiring.
• To unplug, always grasp the plug, not the cord.
| PROBLEM CHECK POINT POSSIBLE SOLUTION | ||
| Suction power is weak. | Vacuum Bag | If vacuum bag is full, replace it. |
| The vacuum does not work. | Wand, Tools or Hose | If clogged or blocked, remove the object. |
| Hose Inlet | Insert it completely into canister body. | |
| Vacuum Bag | Turn off and unplug the vacuum. Check the vacuum bag and accessories and remove any blockages. | |
| Power cord doesn't retract. | PowerCord | Tug the power cord a little until it starts to retract. |
| Power cord won't pull out of the vacuum. | Power Cord | Do not pull it out by force. Contact an Authorized Riccar Retailer for further assistance. |
Any other service should be performed by an Authorized Riccar Vacuum Retailer. To locate your nearest Authorized Retailer, visit our website at Riccar.com or call 888-674-2227.
Key Replacement Parts (R50SS, R50FSN, R50TAP):
Genuine HEPA Media Vacuum Bags: RCH-6
Charcoal-Infused Odor-Fighting HEPA Media Vacuum Bags: RCHC-6
Genuine Filter Set: RF19G (HEPA media and granulated charcoal)
Genuine Belt: B350-2514 (Full Size Power Nozzle)
Microfiber Bare Floor Tool Microfiber Pad 3 Pack: MFP-3
For Best Performance
- Keep your vacuum clean and in good operating condition.
- If the cord or plug has any apparent damage, refrain from using the vacuum. Please visit an Authorized Riccar Retailer for a new cord or plug.
- Change the vacuum bag once a month or when the bag is 2/3 full to maximize cleaning performance.
- Always use genuine Riccar vacuum bags and replacement parts for maximum cleaning performance.
- Have your vacuum checked annually by your Authorized Riccar Retailer.
- Store your vacuum carefully in a dry area.
LEAVE A REVIEW
We want to hear from you!
Please let us know what you think of your new vacuum by leaving a product review on Riccar.com.

WARRANTY
Thank You for your purchase!
Register Online Today.

Riccar.com/register-warranty
For Warranty Information visit

Riccar.com/warranty-information
INSTRUCTIONS DE SÉCURITÉ IMPORTANTES
natural_image
Simple line drawing of two electrical socket plugs with a bulb above (no text or symbols)
natural_image
Line drawing of a car's head and side panel with no text or symbolsnatural_image
Technical line drawing of a mechanical device with no visible text or symbolsCONSEIL

natural_image
Line drawing of a mechanical component with concentric ridges and a central ring (no text or symbols)Remplacement du sac
01
natural_image
Green plastic mechanical component with blue directional arrows indicating movement or force (no text or symbols)
natural_image
Technical illustration of a green mechanical bracket assembly (no text or symbols)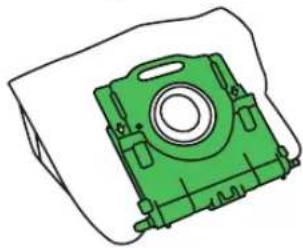
natural_image
Green mechanical component with mounting holes and central bore (no text or symbols)REMARQUE

natural_image
Technical line drawing of a mechanical component with internal channels and mounting holes (no text or symbols)
natural_image
Technical line drawing of a mechanical component with no visible text or symbols
natural_image
Technical line drawing of a mechanical component with a threaded rod inserted into a housing (no text or symbols)CONSEIL

natural_image
Simple line drawing of a mechanical component with a downward arrow indicating force or direction (no text or symbols)natural_image
Technical line drawing of a mechanical component with arrows indicating motion or force direction (no text or symbols)natural_image
Technical line drawing of a mechanical component with internal parts and mounting bracket (no text or symbols)SÉCURITÉ D'ABORD
natural_image
Technical line drawing of a mechanical component with no visible text or symbols
natural_image
Technical line drawing of a mechanical device with no visible text or symbols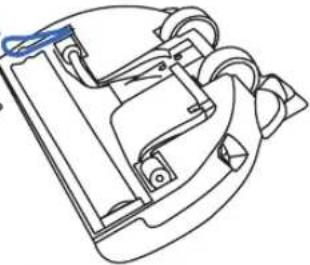
natural_image
Technical line drawing of a mechanical device with no visible text or symbolsnatural_image
Technical line drawing of a mechanical component with internal parts (no text or symbols)natural_image
Technical line drawing of a mechanical component with no visible text or symbols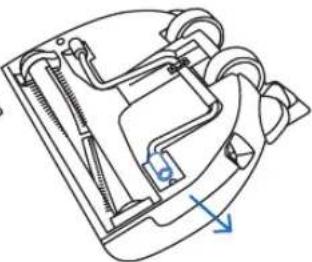
natural_image
Technical line drawing of a mechanical component with no visible text or symbols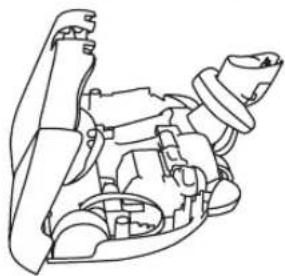
natural_image
Line drawing of a mechanical assembly with no visible text or symbolsCONSEIL
Riccar.com/register-warranty
Riccar.com/warranty-information
natural_image
Simple line drawing of two electrical socket sockets with a bulb above (no text or symbols)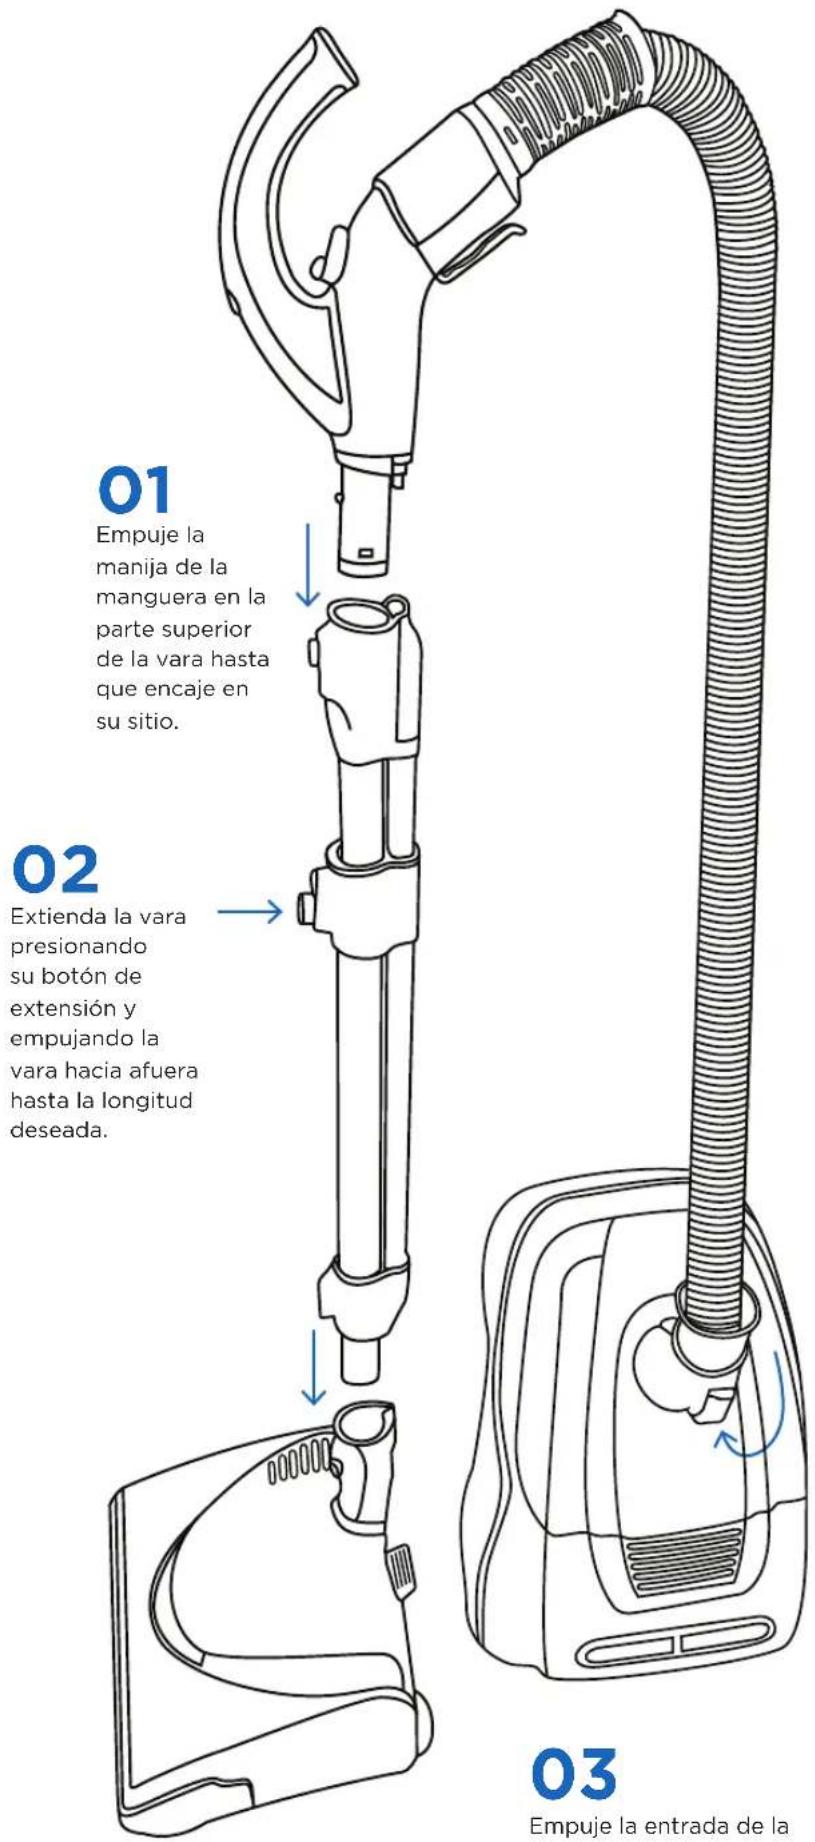
natural_image
Technical line drawing of a mechanical component with multiple cylindrical parts and a blue arrow indicating direction (no text or symbols)Vara telescópica
natural_image
Line drawing of a car's front wheel and side gear (no text or symbols)natural_image
Line drawing of a spray gun with a handle and base (no text or symbols)natural_image
Line drawing of a mechanical component with concentric ridges and a central ring (no text or symbols)natural_image
Green mechanical component with blue upward arrows indicating motion or assembly (no text or symbols)
natural_image
Illustration of two green plastic mechanical components with no visible text or symbols
natural_image
Green mechanical component with circular center and mounting holes, shown without any text or symbolsNOTA

natural_image
Technical line drawing of a mechanical housing or enclosure with internal components and mounting holes (no text or symbols)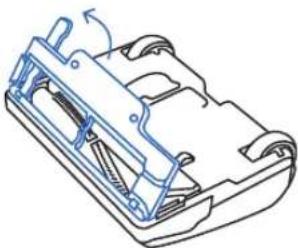
natural_image
Technical line drawing of a mechanical component with no visible text or symbols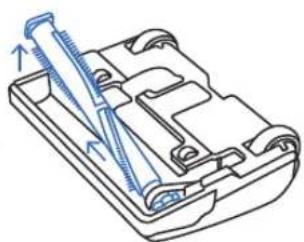
natural_image
Technical line drawing of a mechanical component with a tool inserted (no text or symbols)CONSEJO

natural_image
Simple line drawing of a mechanical component with a downward arrow indicating a point (no text or symbols)natural_image
Line drawing of a mechanical component with arrows indicating motion direction (no text or symbols)natural_image
Technical line drawing of a mechanical component with no visible text or symbols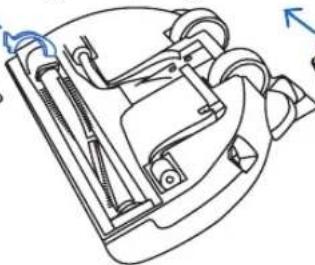
natural_image
Technical line drawing of a mechanical device with no visible text or symbols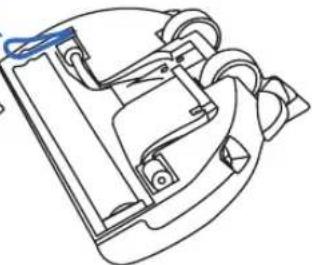
natural_image
Technical line drawing of a mechanical device with no visible text or symbolsnatural_image
Technical line drawing of a mechanical component with internal parts (no text or symbols)natural_image
Technical line drawing of a mechanical component with no visible text or symbols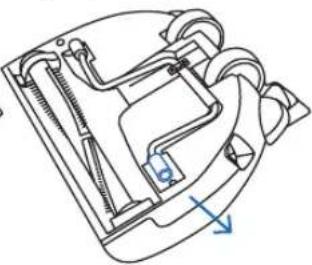
natural_image
Technical line drawing of a mechanical device with internal components and a blue arrow indicating direction (no text or symbols)
natural_image
Line drawing of a mechanical assembly with no visible text or symbolsCONSEJO

Riccar.com/register-warranty
Riccar.com/warranty-information
RICCAR®
RICCAR.COM
888-674-2227
1760 GILSINN LANE
FENTON, MO 63026