
GC628 - Steam plant PHILIPS - Free user manual and instructions
Find the device manual for free GC628 PHILIPS in PDF.
| Product type | Steam generator |
| Brand | Philips |
| Model | GC628 |
| Soleplate technology | OptimalTEMP (optimal temperature for all ironable fabrics) |
| Steam functions | Vertical steaming, steam trigger, continuous steam (steam lock with auto release after 10 min), ECO mode |
| Water tank capacity | Approx. 1.5 L (estimate – not specified) |
| Recommended water type | Tap water (50/50 mix with demineralized water for hard water) |
| Integrated ironing board | Yes, with replaceable cover, adjustable tilt, locking mechanism on masts |
| Included accessories | Protective glove, side docking station (right or left) |
| Safety | Auto shut-off after 10 min of inactivity, steam lock with auto release |
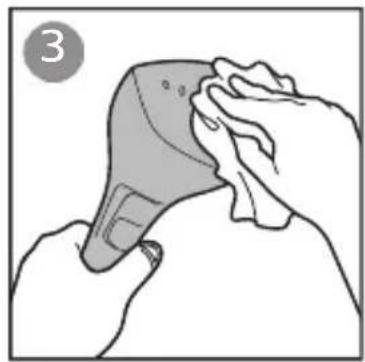
| Care and cleaning | Empty tank after each use, wipe steamer head with a damp cloth, use a mix of demineralized water/tap water to reduce limescale |
| Spare parts and repairability | Board cover, glove, tank, etc. available at Philips Authorized Service Center |
| Dimensions (approx.) | Adjustable height with masts, base with wheels (exact dimensions not provided) |
| Weight (approx.) | Approx. 5-7 kg (estimate for this type of appliance) |
Frequently Asked Questions - GC628 PHILIPS
User questions about GC628 PHILIPS
0 question about this device. Answer the ones you know or ask your own.
Ask a new question about this device
Download the instructions for your Steam plant in PDF format for free! Find your manual GC628 - PHILIPS and take your electronic device back in hand. On this page are published all the documents necessary for the use of your device. GC628 by PHILIPS.
USER MANUAL GC628 PHILIPS
natural_image
Two black electric vehicle charging station devices shown from different angles (no text or symbols visible)EN User manual
FR Mode d'emploi
راهنماي کاربر FA
دليل المستخدم AR

3

6

7

8

11

12

15
16

17

18

19

20

21

22

23

24
24

25

40

EN
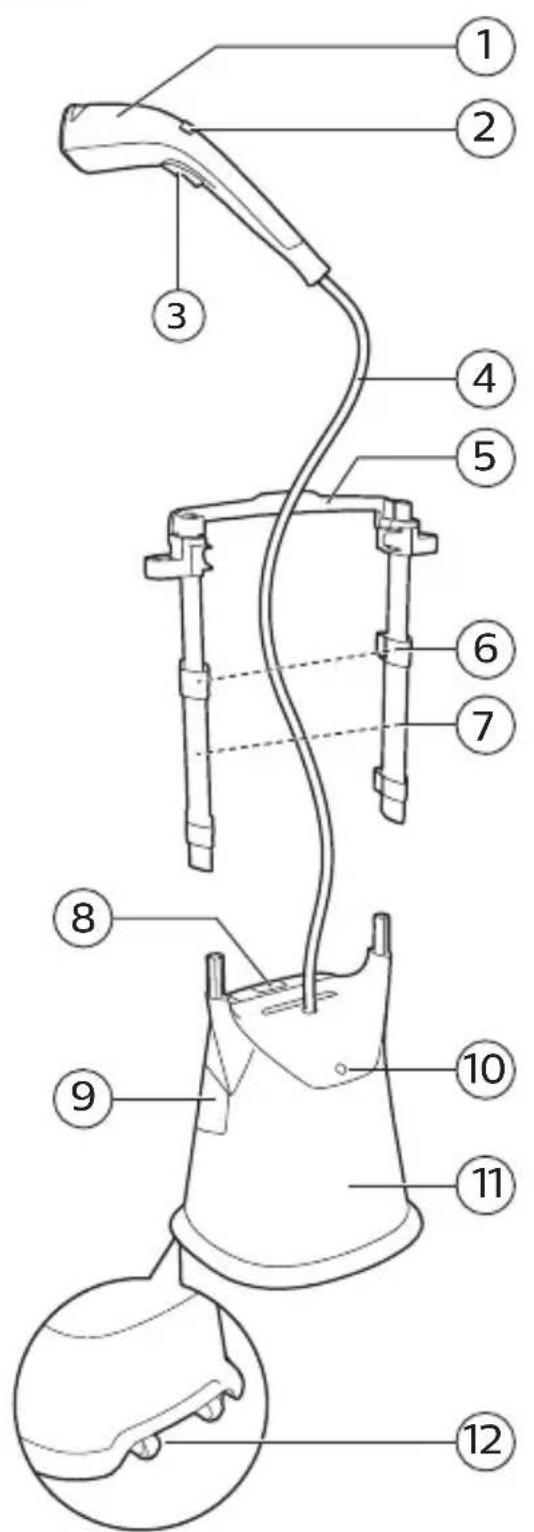
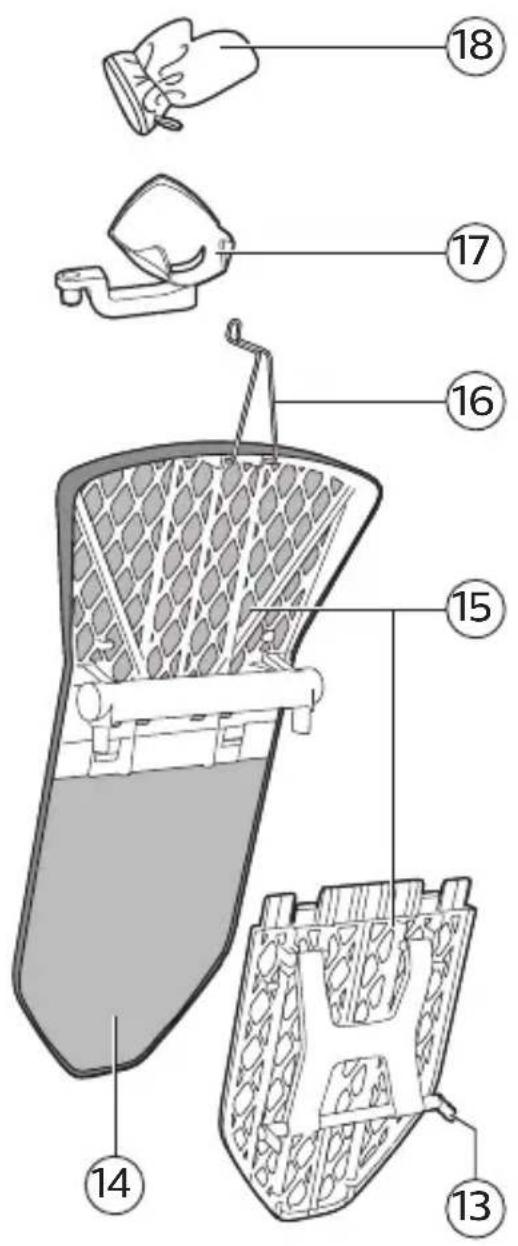
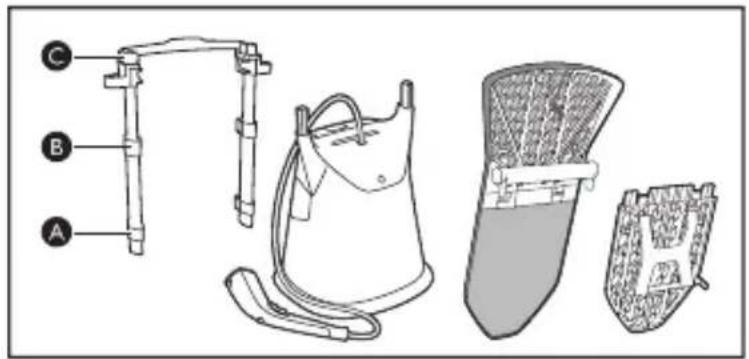
① Steamer head
② Steam selection
③ Steam trigger
④ Steam supply hose
⑤ Board tilting lever
⑥ Pole lock clip
⑦ Poles
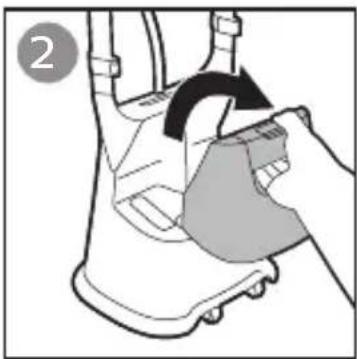
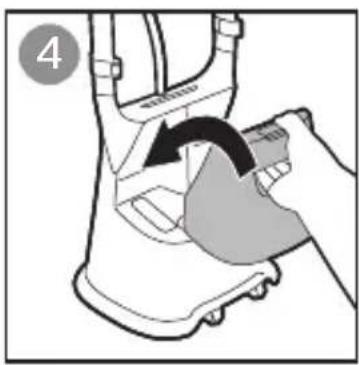
⑧ Water tank release lock
⑨ Water tank
⑩ Power button
⑪ Base
⑫ Wheels
⑬ Board lock
⑭ Board cover
⑮ Board
⑯ Hanger hook
⑰ Side docking
⑱ Glove
FR
natural_image
Illustration of a hand holding a hairdryer with a cross symbol above, no text or labels present
natural_image
Illustration of a person holding a bag with a cross mark and a medical device, no text or symbols present
natural_image
Diagram of a medical or laboratory setup with a cross mark and mechanical components (no text or symbols)
natural_image
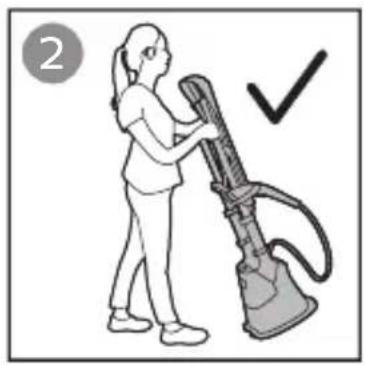
Illustration of a person standing on a bench with a cross mark, no text or symbols present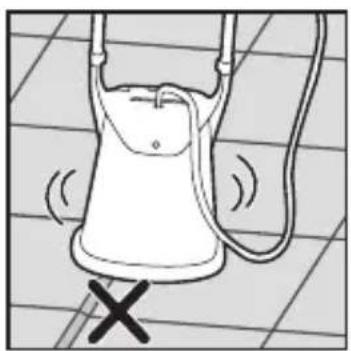
natural_image
Simple line drawing of a bucket with a handle and handles, no text or symbols present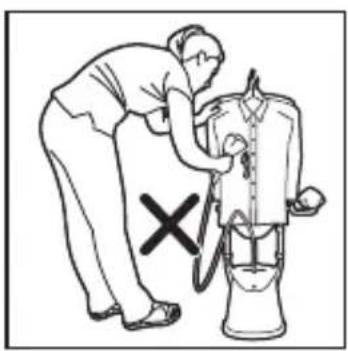
natural_image
Illustration of a person using a handheld device to adjust or install a device (no text or symbols present)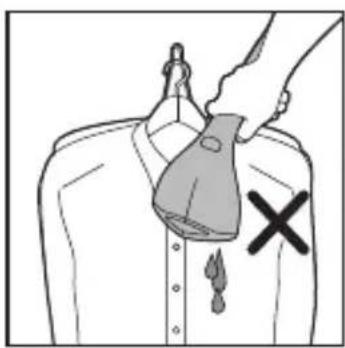
natural_image
Illustration of a hand holding a bag with a cross mark on the chest, no text or symbols present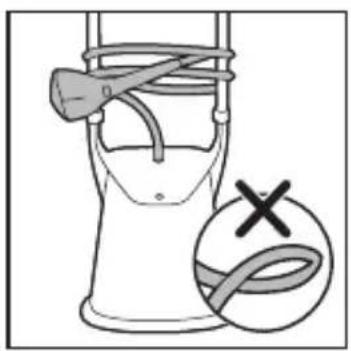
natural_image
Illustration of a bucket with a hammer and rope, plus a circular symbol with an 'X' mark (no text or labels)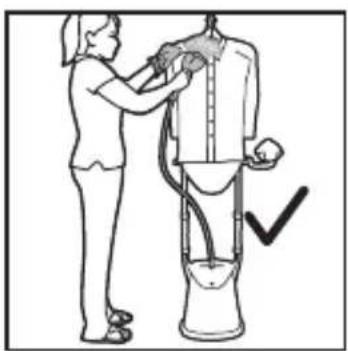
natural_image
Illustration of a person using a handheld device to clean or wash a cylindrical object (no text or symbols visible)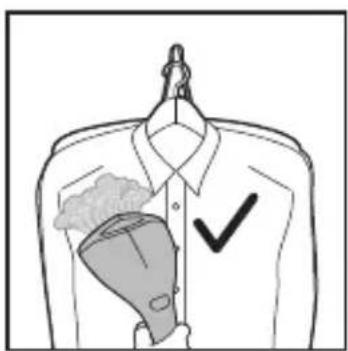

natural_image
Diagram of a mechanical component with labeled point A, showing a curved bracket and a cylindrical shaft (no text or symbols present)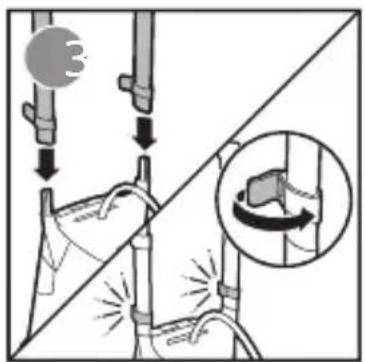
natural_image
Technical line drawing of a mechanical clamp or bracket assembly (no text or symbols)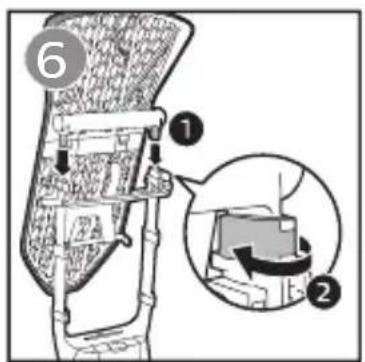
natural_image
Technical diagram of a mechanical assembly with arrows indicating forces or components (no text or symbols present)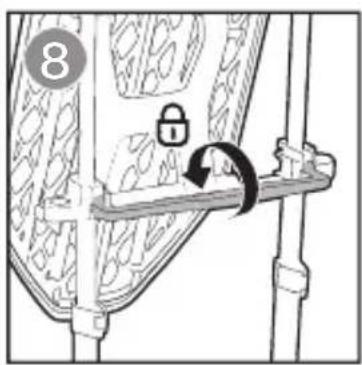
natural_image
Mechanical assembly diagram showing a bracket with a close-up inset of internal components (no text or symbols)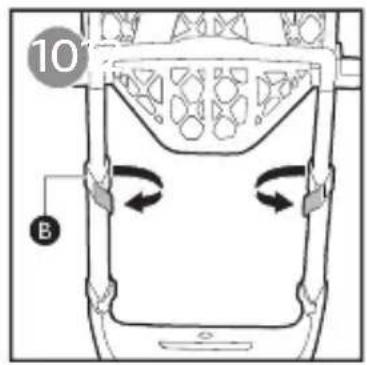
natural_image
Simple line drawing of a mechanical device with a downward arrow indicating motion (no text or symbols)
natural_image
Diagram of a mechanical component with a curved arrow indicating rotation or force direction (no text or symbols)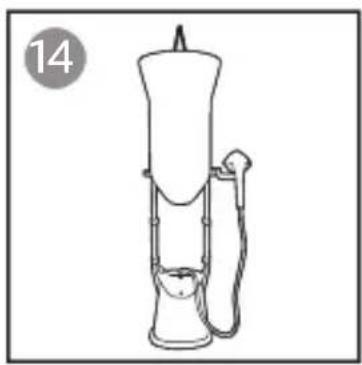
natural_image
Line drawing of a mechanical device with a cylindrical top and attached lever (no text or symbols)

natural_image
Illustration of a hand holding a shoe with a curved arrow indicating rotation (no text or symbols)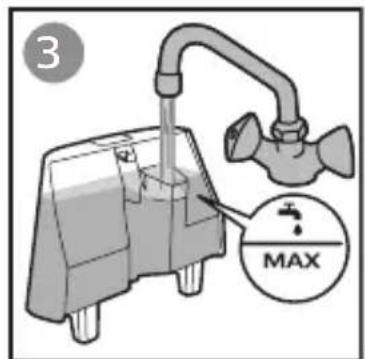
natural_image
Illustration of a hand pressing down on a mechanical component with an arrow indicating motion (no text or symbols)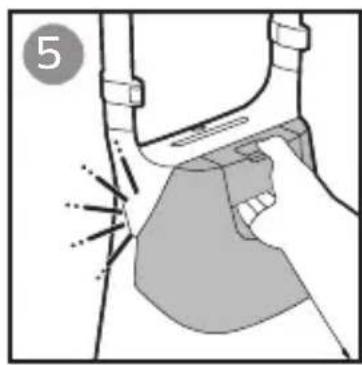
natural_image
Diagram of a mechanical component with highlighted areas and motion lines, no text or symbols presentEN Type of water to use
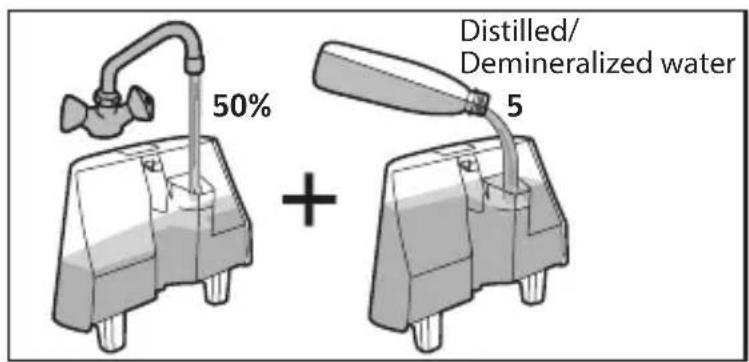
The appliance is suitable to be used with tap water. However, if you live in an area with hard water, we recommend that you mix an equal amount of tap water with distilled or demineralized water. This will prevent fast scale build up and prolong the lifetime of the appliance.
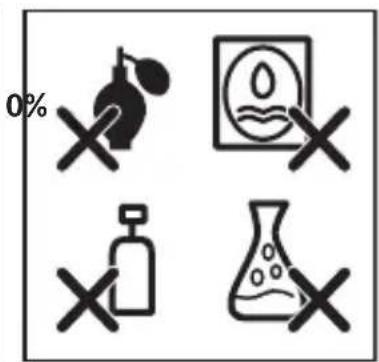
Warning: Do not use perfumed water, water from the tumble dryer, vinegar, starch, descaling agents, ironing aids, chemically descaled water or other chemicals, as they may cause water spitting, brown staining or damage to your appliance.
Note: Do not fill the water tank beyond the MAX indication.
natural_image
Simple line drawing of an electrical plug with a wire, showing an arrow pointing to the plug (no text or symbols)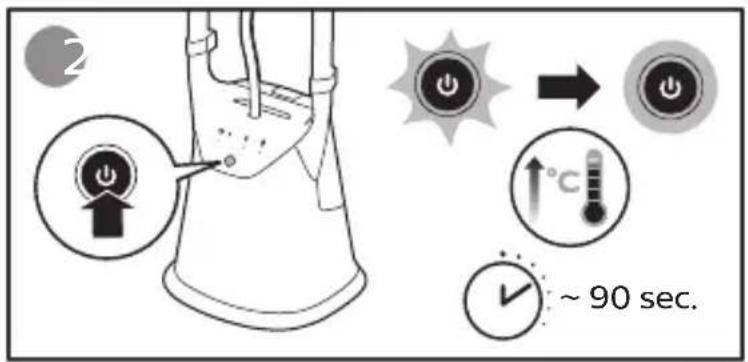
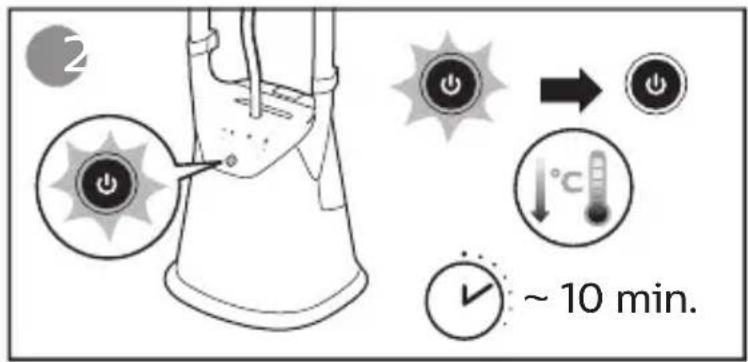
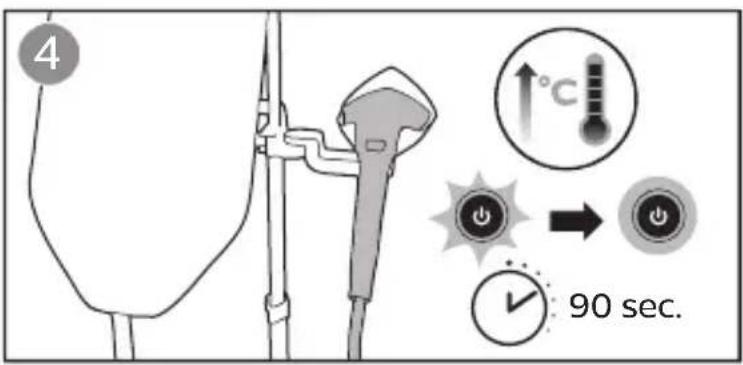
EN The power button flashes indicating that the appliance is heating up. When the appliance is ready for use after 90 seconds, the light turns steady.
By using the ECO mode (reduced amount of steam), you can save energy without compromising on the ironing result.
natural_image
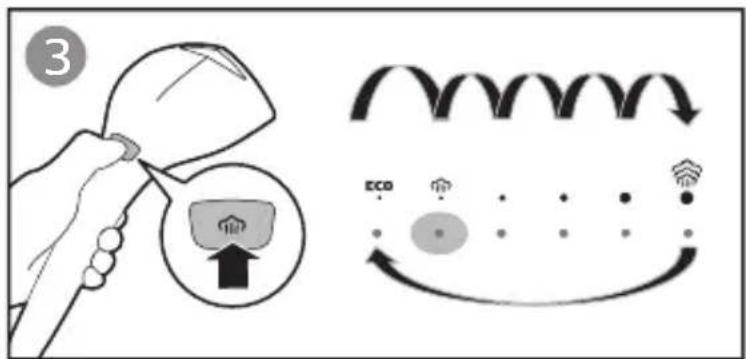
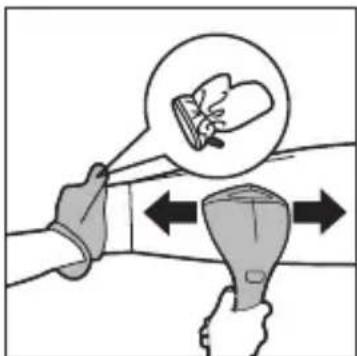
Illustration of a hand holding a small object with arrows indicating motion, no text or symbols presentEN Press and hold the steam trigger to start steaming.
Release the steam trigger for steam stop.
Double tap the steam trigger for continuous steam.
Press the steam trigger once to deactivate steam lock.
The steam lock comes with automatic release function, which can prevent continuous steaming when the appliance is left unattended.
After 10 minutes activation of steam lock, steam will stop automatically. This is normal.
Double tap on the steam trigger again and steam will be emitted continuously.
FRVerrouillagevapeur
EN This appliance comes with OptimalTEMP technology steam plate. It enables you to steam all types of ironable fabrics, in any order and without sorting your garments.
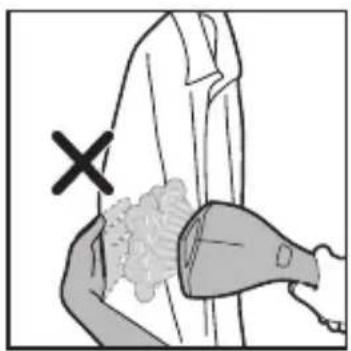
Warning: Do not steam on non-ironable fabrics.
natural_image
Line drawing of a cylindrical device with a handle and base, labeled with number 1 (no text or symbols on the device itself)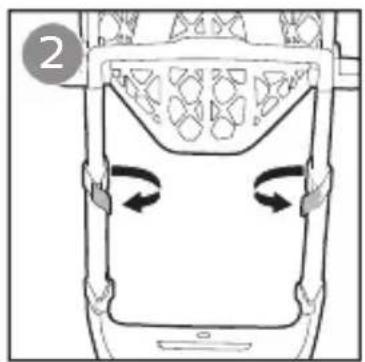
natural_image
Top-down line drawing of a car's head with arrows indicating motion or movement, no text or symbols present.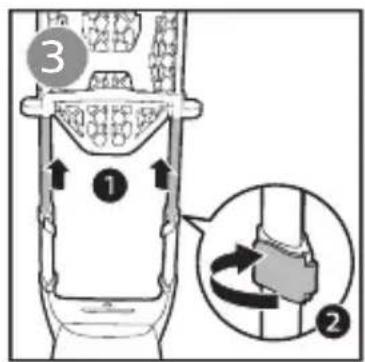
natural_image
Illustration of a hand hanging clothes with a hand pointing to a garment (no text or symbols)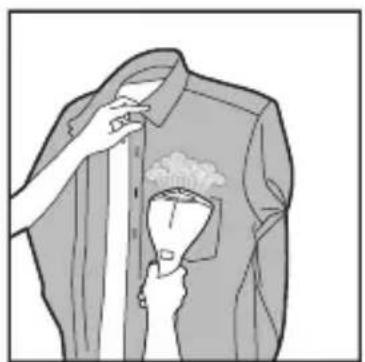
natural_image
Illustration of a person adjusting a shirt with a cup, no text or symbols present
natural_image
Diagram of a mechanical device with a lock and gear mechanism (no text or symbols)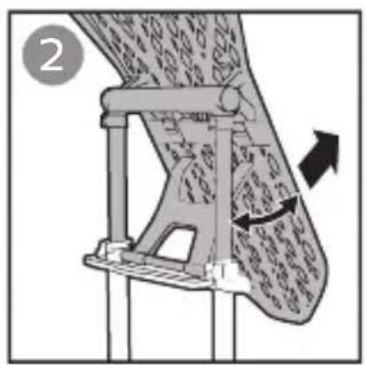
natural_image
Mechanical diagram showing a lever mechanism with directional arrows indicating motion (no text or symbols present)
natural_image
Diagram of a mechanical lock mechanism with a rotating knob, no text or symbols present
natural_image
Illustration of a person using a handheld device to clean or adjust a white object (no text or symbols visible)
natural_image
Illustration of a hand placing a small object into a device component (no text or symbols visible)

natural_image
Mechanical assembly diagram showing a lever mechanism with directional arrows (no text or symbols)
natural_image
Line drawing of a helicopter with propeller and control panel (no text or symbols)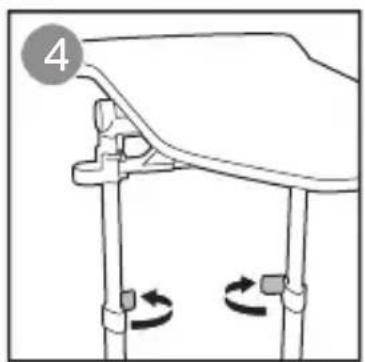
natural_image
Diagram of a mechanical assembly with rotating components and a numbered label (4), no readable text or symbols present.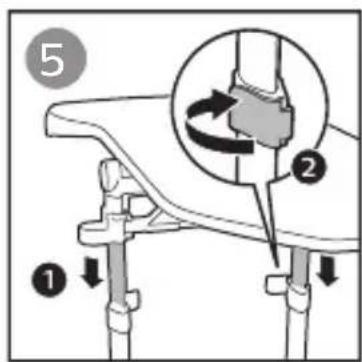
natural_image
Illustration of a person performing a medical procedure on a patient's abdomen (no text or symbols visible)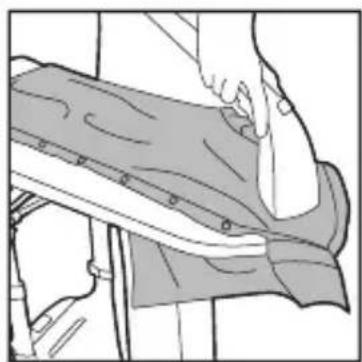
natural_image
Illustration of a person using a bandage device to adjust or install a seat (no text or symbols visible)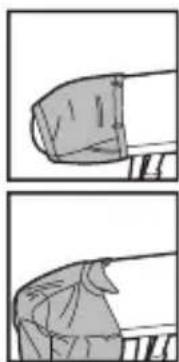
natural_image
Two-panel illustration showing a hand holding a sleeve and a garment being held, with no visible text or symbols.
natural_image
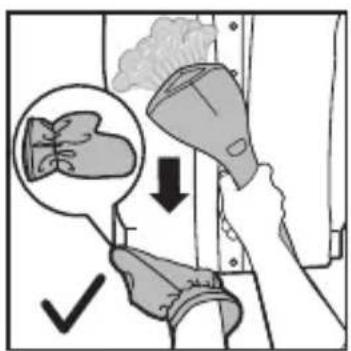
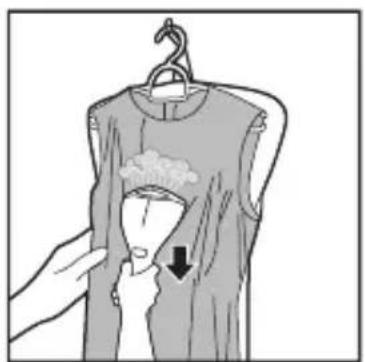
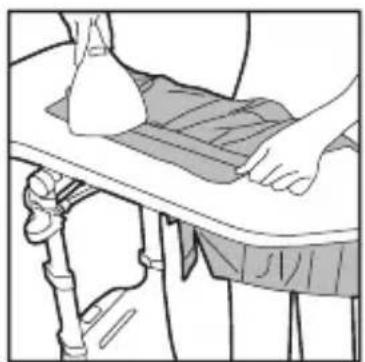
Illustration of a hand holding a tool with an inset showing a magnified view of a small object (no text or symbols present)ENPut the glove on the hand you are using to hold a garment. The glove protects your hand against the steam from the steamer head.
natural_image
Medical illustration showing a surgical procedure with an arrow indicating direction (no text or symbols present)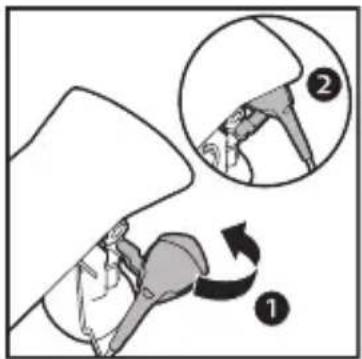
EN This side docking allows you to access steamer head conveniently without the hassle of reaching high up. You can choose to use the side docking at either the right side or left side of the device.
We recommend you to switch off your continuous steam when you are using the side docking.
Caution: Keep the steamer head away from children to avoid burning.
natural_image
Diagram showing a curved arrow interacting with a grid-patterned container (no text or symbols)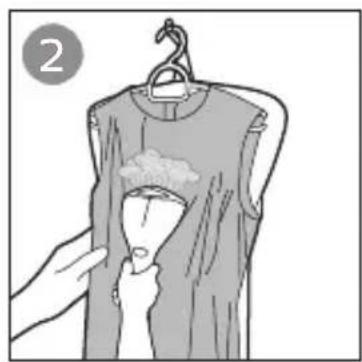
natural_image
Illustration of a hand holding a clothes rack with a cloth, no text or symbols present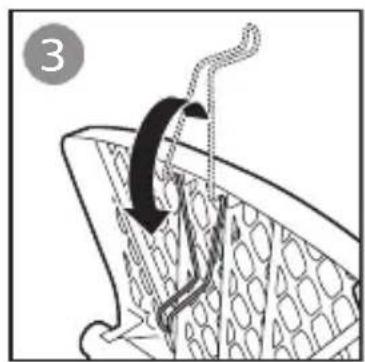
natural_image
Illustration of a hand using a tool to lift a chair or seat (no text or symbols visible)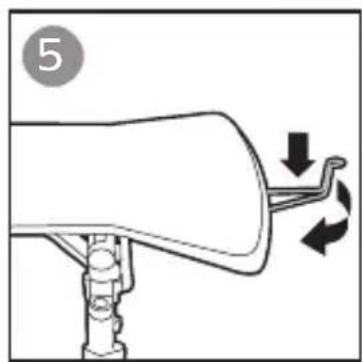
natural_image
Diagram of a mechanical device with directional arrows indicating motion (no text or symbols)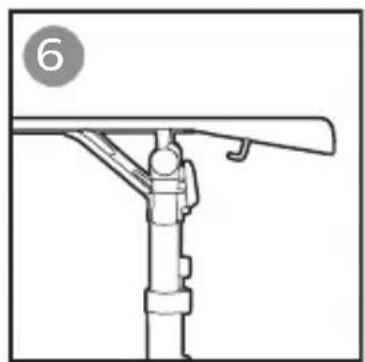
natural_image
Technical line drawing of a mechanical support structure with no visible text or symbols

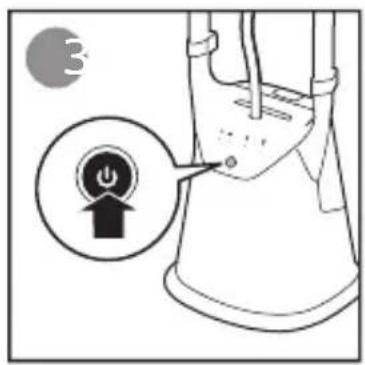
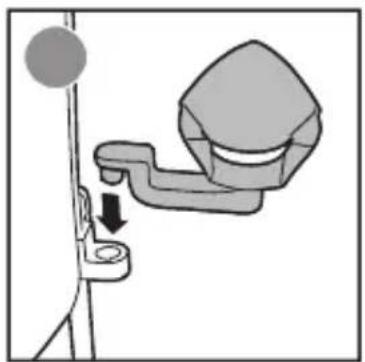
EN The appliance comes with an auto shut-off feature.
When the steamer head is placed onto the holder and the appliance has not been used for more than 10 minutes, the power button flashes and the appliance starts to cool down.
Upon leaving the appliance untouched for the next 10 minutes, it will switch off automatically.
Press the power button to let the appliance reheat.

natural_image
Illustration of hands cleaning a hair accessory (no text or symbols)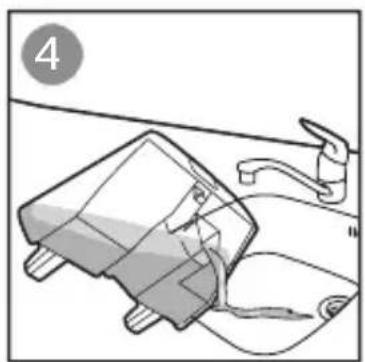
natural_image
Illustration of a kitchen sink with a bag and faucet, no text or symbols present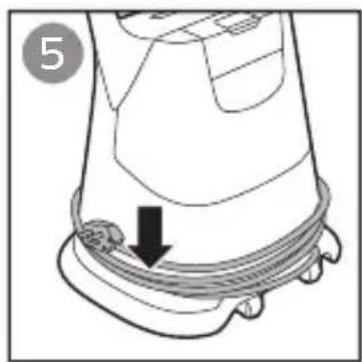
natural_image
Diagram of a vacuum cleaner with a downward arrow indicating airflow or fluid flow (no text or symbols present)
natural_image
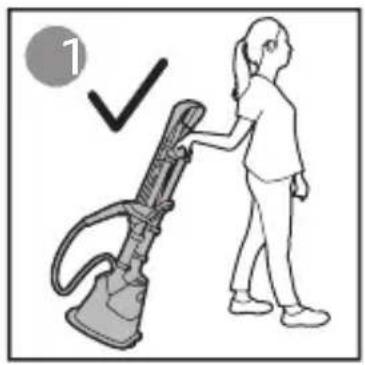
Illustration of a person using a vacuum cleaner with a checkmark (no text or symbols)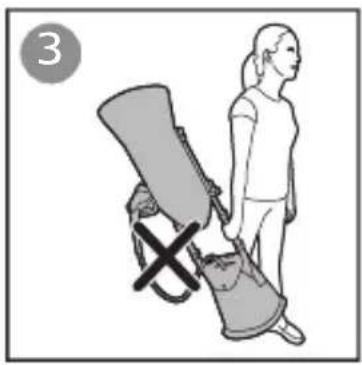
natural_image
Illustration of a person standing beside a chair with a cross symbol, no text or symbols present

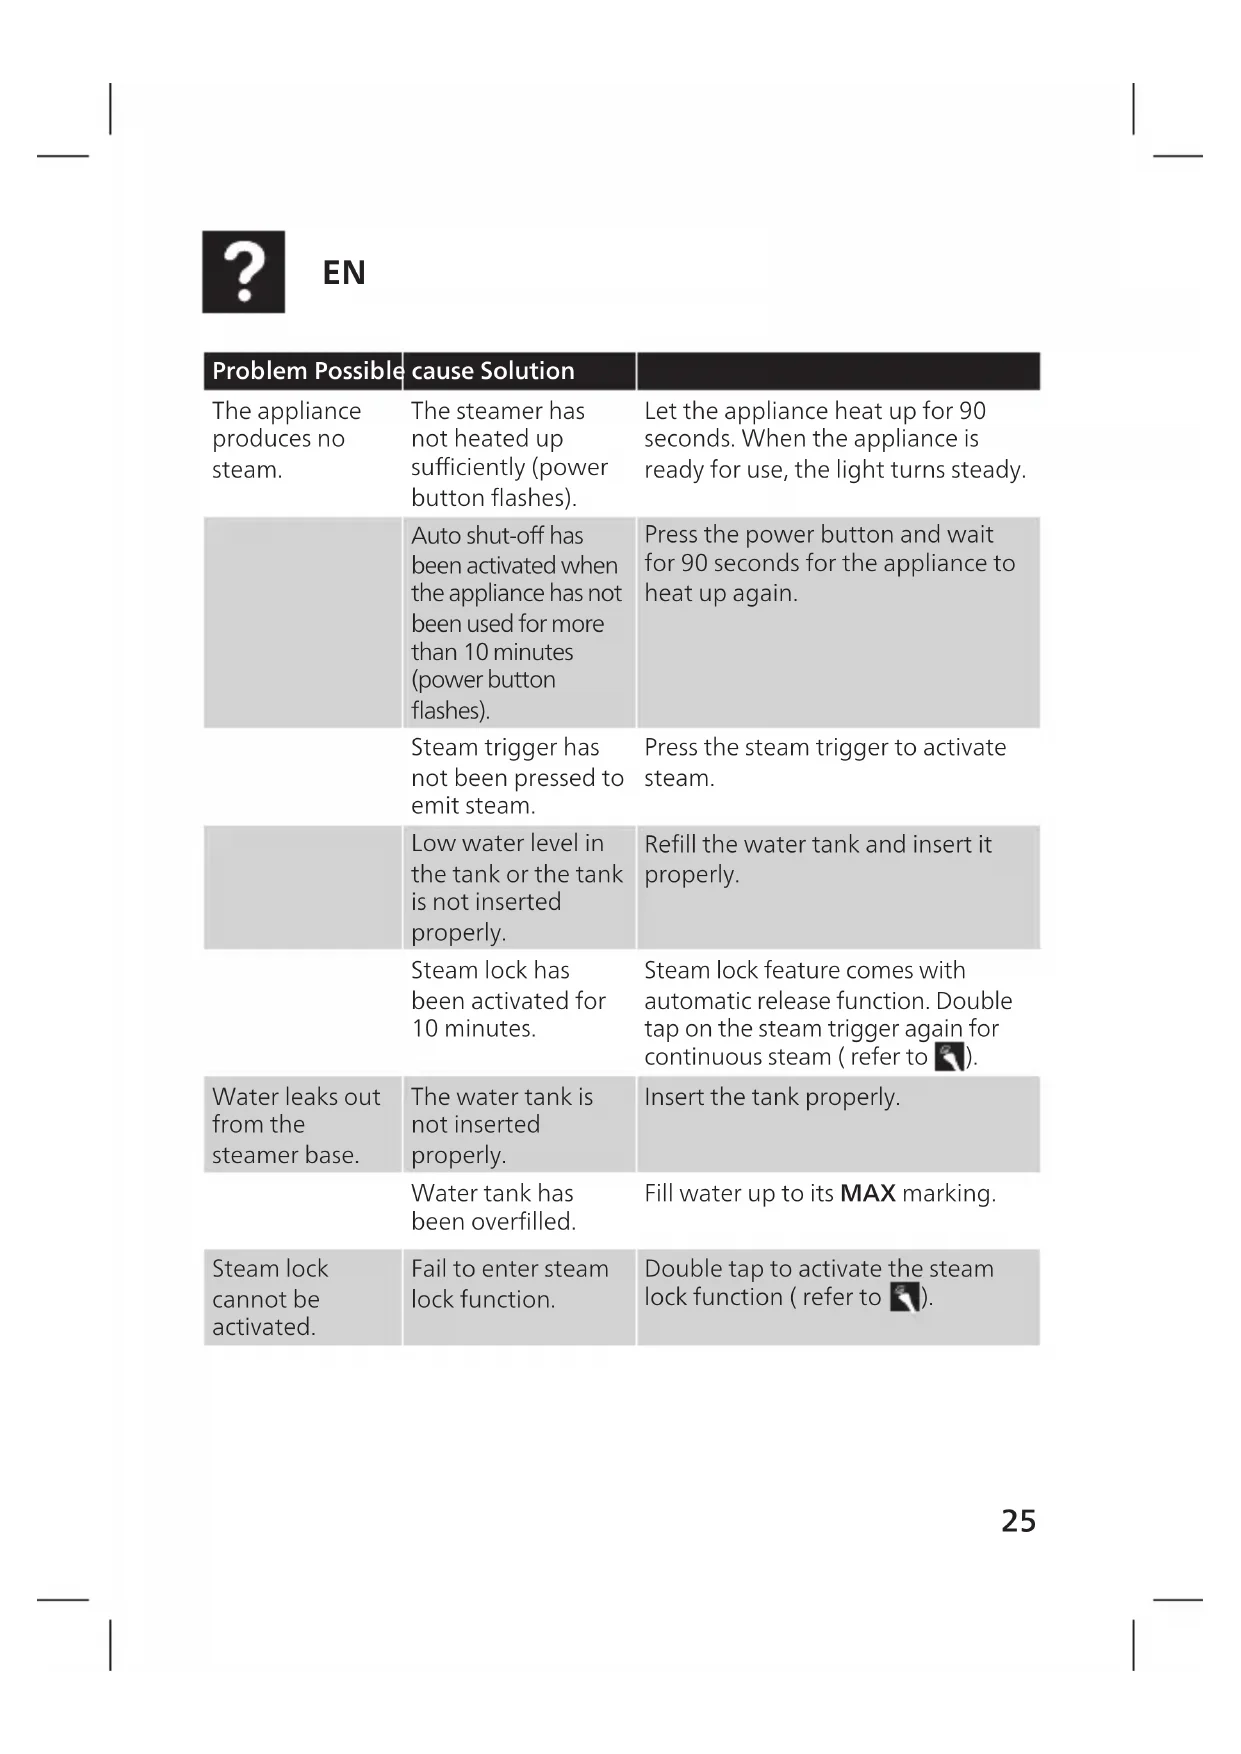
EN
| Problem Possible cause Solution | ||
| The appliance produces no steam. | The steamer has not heated up sufficiently (power button flashes). | Let the appliance heat up for 90 seconds. When the appliance is ready for use, the light turns steady. |
| Auto shut-off has been activated when the appliance has not been used for more than 10 minutes (power button flashes). | Press the power button and wait for 90 seconds for the appliance to heat up again. | |
| Steam trigger has not been pressed to emit steam. | Press the steam trigger to activate steam. | |
| Low water level in the tank or the tank is not inserted properly. | Refill the water tank and insert it properly. | |
| Steam lock has been activated for 10 minutes. | Steam lock feature comes with automatic release function. Double tap on the steam trigger again for continuous steam (refer to ). | |
| Water leaks out from the steamer base. | The water tank is not inserted properly. | Insert the tank properly. |
| Water tank has been overfilled. | Fill water up to its MAX marking. | |
| Steam lock cannot be activated. | Fail to enter steam lock function. | Double tap to activate the steam lock function (refer to ). |
| Problem Possible cause Solution | ||
| Steam does not stop automatically after placing the steamer head onto the holder. | Steam lock function is activated. | Press once to deactivate steam lock (refer to ). |
| The board cover becomes wet or there are water droplets on the garment during steaming. | Steam has condensed on the board cover after a long steaming session. | Leave it to dry before storage. Replace the board cover if it has worn out. Purchase a new board cover from a Philips Authorized Service Center. |
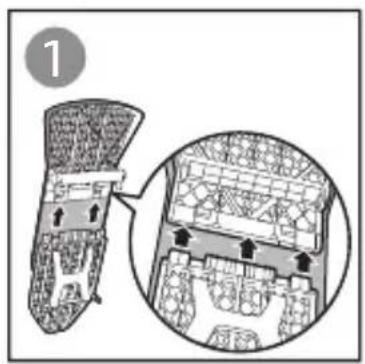
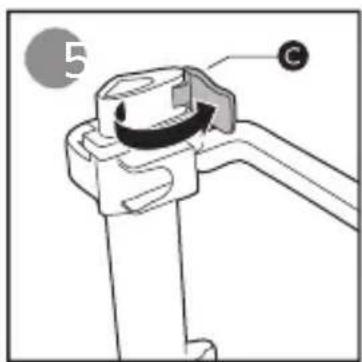
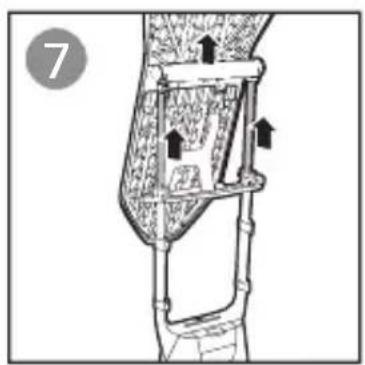
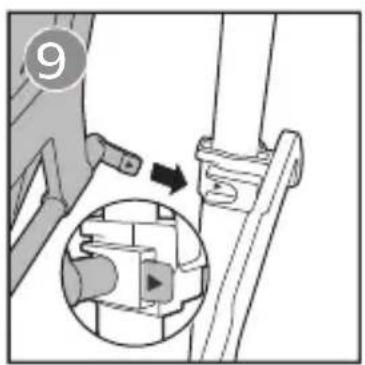
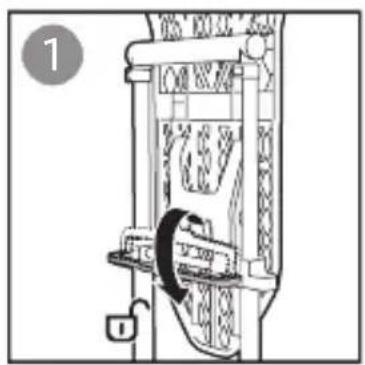
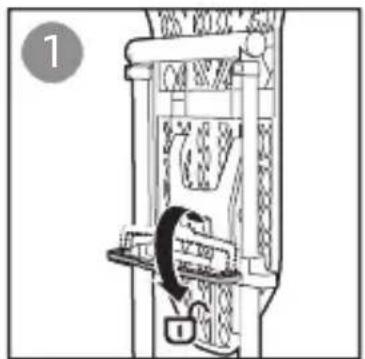
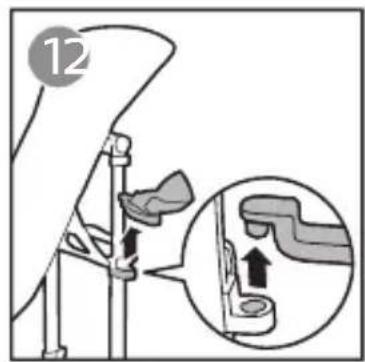
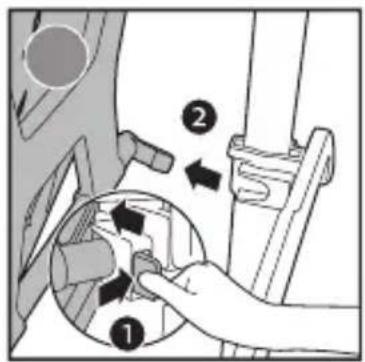
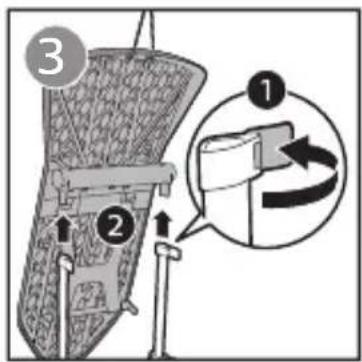
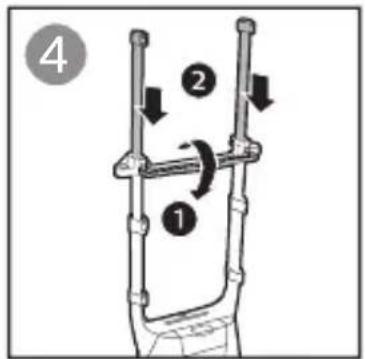
| Board is shaky during use. | The poles are not installed properly or the board is not secured onto the poles. | Refer to for correct installation. |
| The board lock is not fully inserted. | Insert the two board locks fully until you hear a “click” sound (refer to ). | |
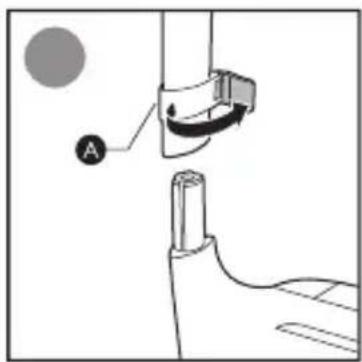
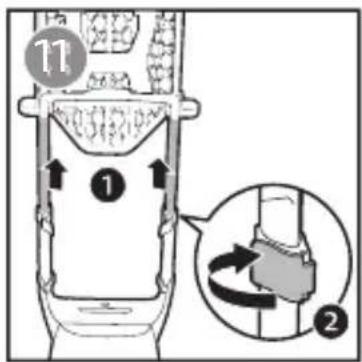
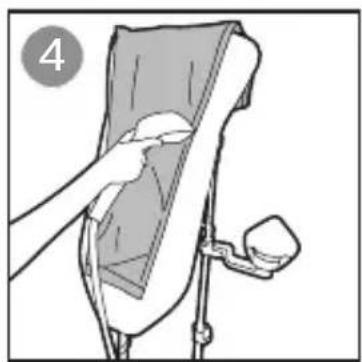
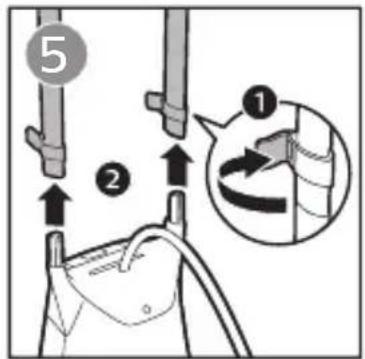
| The board is not fully secure in vertical position. | Make sure that the board tilting lever is in a locked position before attaching it to the poles (refer to ). | |
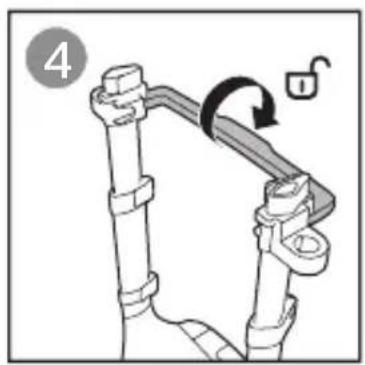
| Board cannot be tilted or be used in horizontal position. | The board lock is not locked onto the pole. | Ensure that the board lock is in a locked position (refer to ). |
| The board tilting lever has not been released. | Ensure unlocking tilting lever to allow board to be tilted to its desired position.Once a desired position is attained, lock the tilting lever to secure board. (refer to / ). | |
| Water droplets drip from the steamer head, sometimes the appliance produces a croaking sound. | Steam condenses into water in the hose and affect smooth steam flow. | Lift the steamer head to straighten the hose vertically.At the start of a steaming session, set the steam setting to be in MAX mode. Hold the steamer head away from the garment and press the steam trigger for 10 seconds to release the initial gush of water droplets. |
| Dirty water, brown stains or white flakes come out of the steamer head and stain the garment. | Chemical or additives is added into the water tank. | Never use chemical or additives with the appliance. Fill the water tank with water and allow it to steam out 1 full tank to rinse off chemical residues.For stain on garment, rinse off any stains under running water.For stain on steamer head, wipe any deposits off the steamer head with a damp cloth. |
| Depending on where you stay, the water hardness level may be high and results in fast scale builds up. | Ensure that water tank is emptied after a steaming session. It is recommended to use a combination of demineralization/ distilled water (50%) mixed with tap water (50%).At the start of a steaming session, set the steam setting to be in MAX mode. Hold the steamer head away from the garment and press the steam trigger for 10 seconds to release the initial gush of water droplets.For stain on garment, rinse off any stains under running water.For stain on steamer head, wipe any deposits off the steamer head with a damp cloth. | |

FR


Brand : PHILIPS
Model : GC628
Category : Steam plant