DIOCAMFI01 - Surveillance Camera DIO - Free user manual and instructions
Find the device manual for free DIOCAMFI01 DIO in PDF.

| Product type | Indoor IP surveillance camera |
| Video resolution | HD 1080p (1920x1080) at 25 fps |
| Sensor | 1/3-inch CMOS |
| Night vision | Yes, up to 10 meters with infrared filter |
| Digital zoom | 4x |
| Audio | Built-in speaker and microphone, sound detection |
| Wi-Fi connectivity | 802.11b/g/n, 2.4 GHz band only (does not work on 5 GHz) |
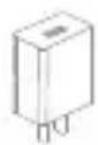
| Power supply | USB 5V / 1A adapter (included) |
| Operating temperature | -20°C to +50°C |
| Dimensions (L x W x H) | 53 x 32 x 280 mm |
| Weight | 48.8 g |
| Storage | micro-SD card (not included) for continuous or detection-based recording |
| Mobile app | DiOCam Plus (free, iOS and Android) |
| Detection functions | Motion detection (adjustable sensitivity) and sound detection |
| Sleep mode | Yes, programmable manually, by schedule or by location |
| Sharing | Possible via friend invitation with DiOCam Plus account (view only) |
| LED indicators | Red (error/waiting) and blue (OK/configuring) |
| Reset | Reset button: press 5 seconds to restore factory settings |
| Package contents | Camera, adapter, 2m USB cable, wall mount, sticker, screws, manual, temperature/humidity sensor |
| Maintenance | Clean with a soft cloth. Do not install near heat sources. |
| Safety and compliance | Compliant with RED directive 2014/53/EU. WEEE recycling required. |
Frequently Asked Questions - DIOCAMFI01 DIO
User questions about DIOCAMFI01 DIO
0 question about this device. Answer the ones you know or ask your own.
Ask a new question about this device
Download the instructions for your Surveillance Camera in PDF format for free! Find your manual DIOCAMFI01 - DIO and take your electronic device back in hand. On this page are published all the documents necessary for the use of your device. DIOCAMFI01 by DIO.
USER MANUAL DIOCAMFI01 DIO
natural_image
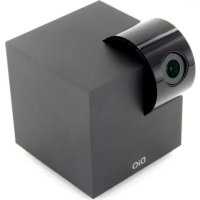
Line drawing of a handheld device with concentric circular patterns and a labeled 'DIO' component (no text or symbols beyond label)DIOCAM-FI01
Guide de démarrage rapide / Beknopte handleiding / Guía de inicio rápido Guia de instalação rápido / Kurzanleitung / Quick start guide

Caméra Wi-Fi
1×

natural_image
Line drawing of a lamp connected to a power outlet, showing wiring and three socket (no text or symbols)natural_image
Simple line drawing of a smartphone with wireless signal waves above a laptop (no text or symbols)2. Installer la caméra
text_image
Diagram showing a mechanical assembly process with three stages: mounting bracket, valve mechanism, and end cap assembly.text_image
1 2 3 4 5 Dio test MES APPARETS MESSAGES AMS OPTIONS DiQwww.getDiO.com/warranty
text_image
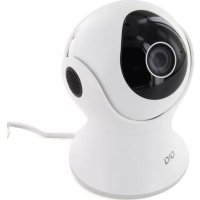
Technical diagram of a device with numbered parts, showing front and side views with labeled components.natural_image
Line drawing of a lamp connected to a power outlet, showing wiring and three socket (no text or symbols)2 Download de gratis app DiOCam Plus en maak uw account aan.

natural_image
Simple line drawing of a smartphone with wireless signal waves above a laptop (no text or symbols)2. Installeren van de camera
text_image
Diagram showing a mechanical assembly process with labeled parts and directional arrows indicating sequence.text_image
BUTAM X 100% SETTING Driver's name 056714098 Share SD card Sleep Mode Video flu Receive alarm Motion detection Sound detection Video recording setting Version 3 4 5 6 7 8 9 10 11 1 2www.getDiO.com/warranty
natural_image
Line drawing of a lamp connected to a wall-mounted power outlet (no text or symbols)natural_image
Simple line drawing of a smartphone with wireless signal waves above a laptop (no text or symbols)text_image
Diagram showing a mechanical assembly process with labeled parts and directional arrows indicating sequence.www.getDiO.com/warranty
natural_image
Line drawing of a lamp connected to a power outlet, showing wiring and three socket (no text or symbols)natural_image
Simple line drawing of a smartphone with wireless signal waves above a screen (no text or symbols)text_image
Diagram showing a mechanical assembly process with three sequential steps: mounting bracket, valve mechanism, and final assembly.text_image
B-81.AM baby cam live view 2 3 4 5 6 7 8 9 Temperature: 24°C HOMOTY/HEFH Satellitetext_image
8:41 AM X 100% GETTING Electronic name: 0567142908 Share 3D card Sleep Mode Video flip Receive alarm Motion detection Sound detection Video recording setting Versipe 3.8.6.07888883text_image
Technical diagram of a handheld device with numbered parts and labeled parts in Chinese- Kontrollleuchte
natural_image
Simple line drawing of a lamp connected to a plug and two three-pin socket (no text or symbols)text_image
DiO cam GET IT ON Google Play Download on the App Storenatural_image
Simple line drawing of a smartphone with wireless signal waves above a laptop (no text or symbols)text_image
Diagram showing a mechanical assembly process with labeled parts and directional arrows indicating sequence.text_image
056714293 Share SD card Sleep Mode Video flip Receive alarm Motion detection Sound detection Video recording setting Version 1 2 3 4 5 6 7 8 9 10 11Temperature and humidity sensor
1×
Register the guarantee
To register your guarantee, fill out the online form on
www.getDiO.com/warranty
Description of the device
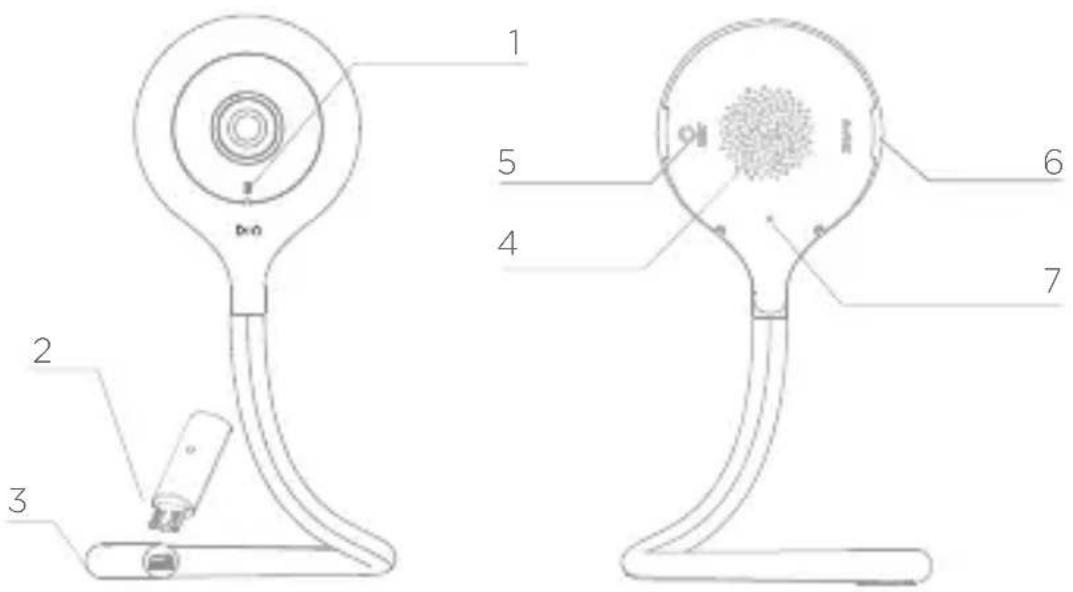
text_image
1 2 3 4 5 6 7- Indicator light
• Steady red light: camera connection problem
• Flashing red light: waiting for WiFi connection, or connecting (fast flashing)
• Steady blue light: camera operating normally
- Flashing blue light: waiting for manual configuration of WiFi, or connecting (fast flashing)
-
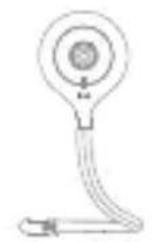
Temperature and humidity sensor
-
Electrical cable input (DC5V/1A)
-
Speaker
-
Reset button
-
Micro-SD card input for local storage (Max. 128 Gb)
-
Microphone: captures the sound for your video
1. Connecting the camera
1 Connect the camera to the mains, making sure to push the cable home. The red indicator light starts to flash. After a few seconds, you will hear a beep. This indicates that the camera can be connected to WiFi via your smartphone or tablet.

natural_image
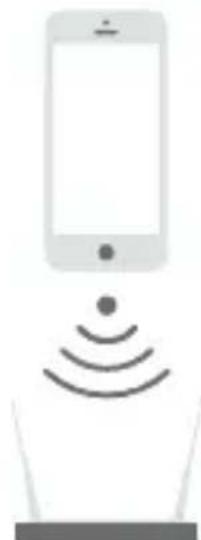
Simple line drawing of a lamp connected to a plug and two three-pin socket (no text or symbols)2 Download the free DiOCam Plus application and create your account.

3 Follow the instructions in the application to connect the camera to WiFi. Make sure your WiFi network is available. Add the camera to the application by clicking to the “+”, choose the device to add and the select the way to proceed (Scan QR code or smart configuration).
Note:
- This camera only supports 2.4GHz WI-FI network (doesn't work with 5GHz)
- Make sure that the smartphone is well connected to the right Wi-Fi network. When you have to register the SSID, make sure you put the same Wi-Fi network and the right password.
- A camera can only be added to one account. If the camera has been already added, it cannot be added on another account.
natural_image
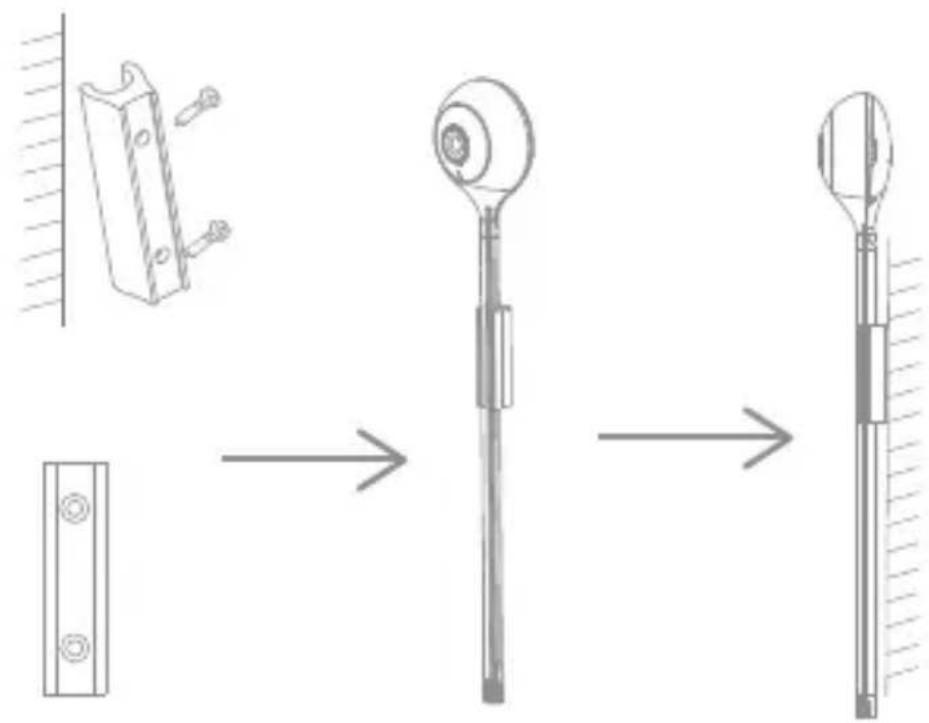
Simple line drawing of a smartphone with wireless signal waves above a laptop (no text or symbols)2. Installing the camera
1 Remove the protective tab from the lens.
2 Hang the camera on the wall:
- Secure the metal mount to the wall using the screws provided or the double-sided sticker.
- Snap the camera into the mount.
text_image
Diagram showing a mechanical assembly process with three stages: mounting bracket, valve mechanism, and final post.3 Install the camera on a horizontal support or hang it anywhere, turning the flexible stem however you like.
Warning: Do not fold the base of the stem, because it might break (the part where the removable label is located).

text_image
Stem3. Use
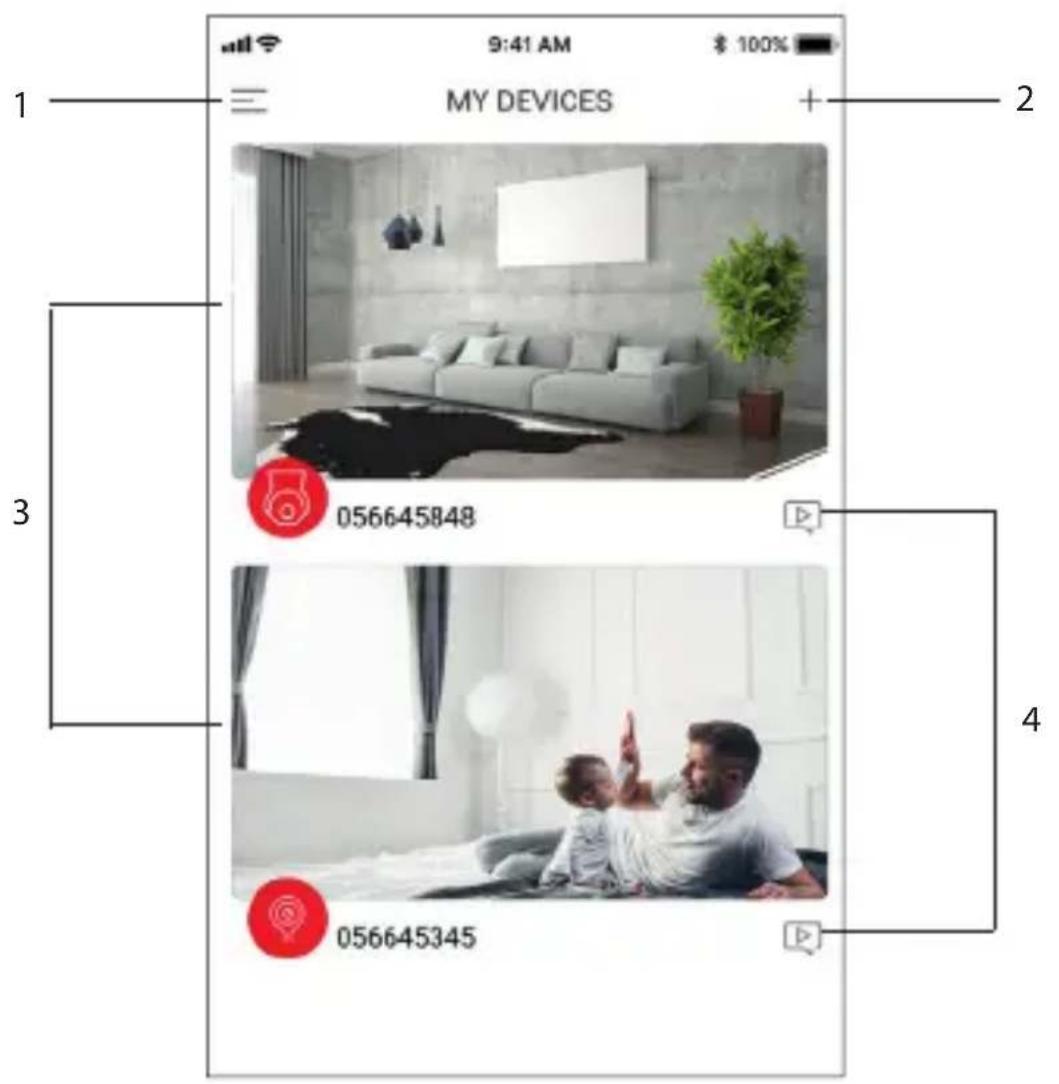
text_image
1 9:41 AM $ 100% MY DEVICES + 2 3 056645848 4 056645345- Account settings menu
- To add a new device
- Camera interface
- Access the images saved when motion or sound is detected (only if enabled)
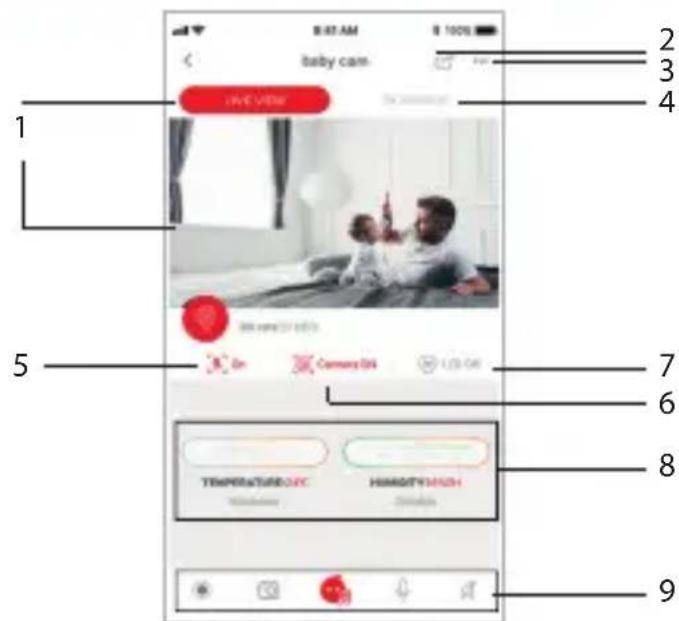
Camera interface
text_image
8:47 AM baby cam- live view 1 2 3 4 5 6 7 8 9 Temperature/UEC HIMOGTH/MCH Home Camera 01 Dial- Live view
- Share camera
To share the camera with someone else, the other person must first create their own account in the DiOCam Plus app. You must then add them as a friend.
For security reasons, guest accounts can only view (live and in playback) and receive detection alerts.
- Camera settings menu
- Playback
To record your videos, you need to install a micro-SD card in the camera.
You have then the option to record continuously or only in case of motion or sound detection. To do this, go into the settings menu.
- Motion detection on/off
- Sleep mode on/program/off
Enable Sleep mode to prevent the camera from recording.
- Switch on /or the camera LED light
- Temperature and humidity
To view the temperature and humidity of the room on your smartphone, install the supplied sensor between the camera and the power cable.
-
Manual functions:
-
Save current video (saved on your smartphone)
- Take a photo from the live video (saved on your smartphone)
- Play one of the preprogramed lullabies to interact with your child.
Warning, you must install a micro-SD card to activate this function.
- Speak
- Listen
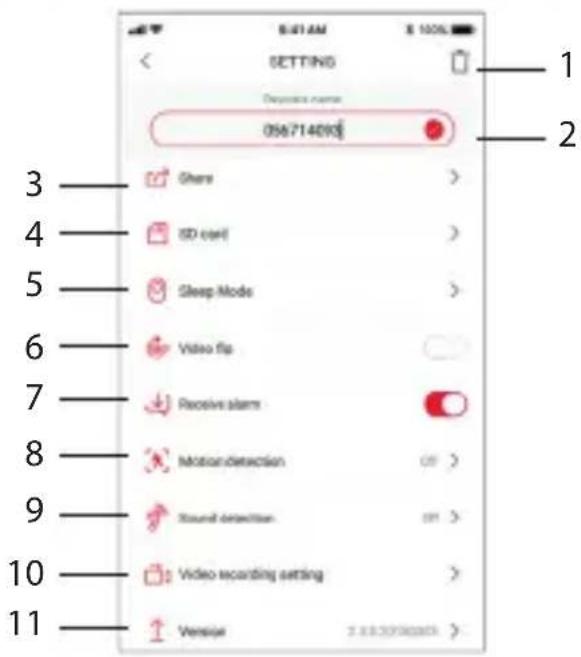
Camera settings menu
text_image
056714090 Share SD cell Sleep Mode Video flip Receive alarm Motion detection Sound detection Video recording setting Versipe- Uninstall camera from account
- Name of device
- Share
To share the camera with someone else, the other person must first create their own account in the DiOCam Plus app. You must then add them as a friend.
- Format installed micro SD card
- Sleep mode on/program/off
Enable Sleep mode to prevent the camera from recording. Private mode can be enabled manually, either by setting a time or via Locate mode, which puts the camera in Sleep mode automatically when you are at home.
- Flip the video image 180^ if the camera is installed upside down.
- Detection push notifications on/off
To receive push notifications, you must enable "DiOCam Plus" notifications in your smartphone settings.
- Motion detection on/off/sensitivity adjustment (low, medium, or high)
-
Sound detection on/off/sensitivity adjustment
-
Recording options
To record video only in case of motion or sound detection, for 1, 3, or 5 minutes.
- Camera software version
If an update is available, a small red dot appears beside the version.
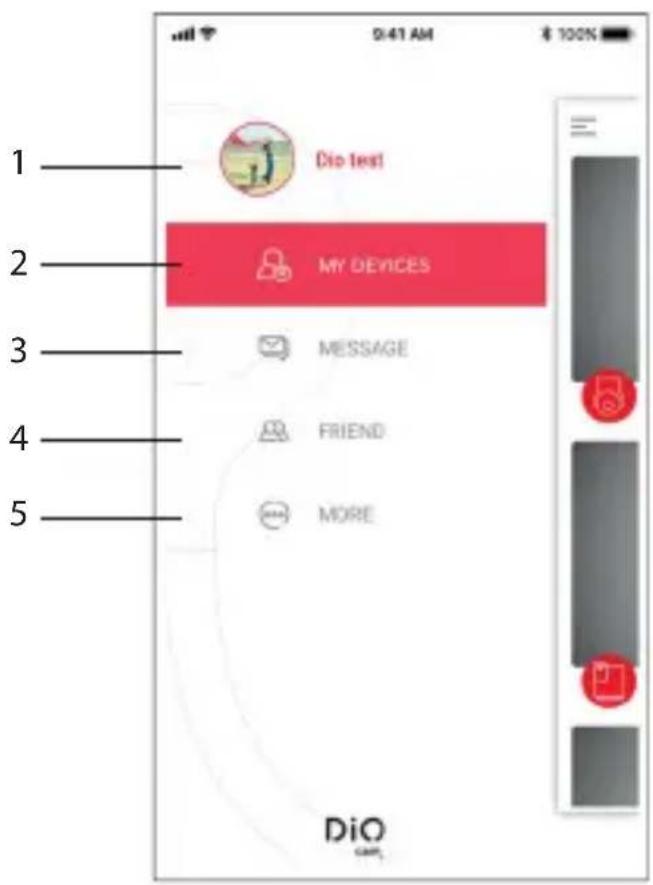
Account settings menu
text_image
1 2 3 4 5 Dio test MY DEVICES MESSAGE FRIEND MORE DiO- Manage your account. Lets you change your profile picture, nickname, or password, and log out.
- My devices: to go back to the preview screen.
- Messages: view your alerts (motion and sound detection) and friend requests.
- Friends: invite a new friend (they must have created a DiOCam Plus account), manage your device sharing, and/or delete a friend.
- Options: lets you mute notifications, browse your saved photos and videos manually, and send us your comments.
4. Resetting
To restore the camera's factory settings and set a new owner, press the camera's reset button and hold for five seconds.
5. Technical characteristics
- Video
- HD 1080p (1920x1080) / 25 fps
- CMOS 1/3" sensor
- Adjustable motion detection (low, medium, high, or off)
- Night vision up to 10 m with infrared filter
- Digital zoom x4
- Audio :
- Built-in speaker and microphone
- Sound detection
- Compatible with WiFi 802.11b /g /n - WPA /WPA2- Personal
• Frequency: WiFi 2.4 GHz
• Max. power: 35 mW EIRP - USB adaptor: 5V / 1A
- Operating temperature: -20^ to 50^
- Dimensions / weight: 53x32x280 mm / 48.8 g
6. Complete your installation
Complete your installation with DiO solutions to control your heating, your lighting, your shutters, your garden or to visualize what is happening at home with video camera.
Easy, qualitative, scalable and economical, discover all DiO connected home solutions on www.getDiO.com

Courant Continu (CC)
Recyclage
In accordance with European WEEE directives (2002/96/EC) and in relation to accumulators (2006/66/EC), any electrical or electronic device or accumulator must be collected separately by a local system specialising in the collection of such waste. Do not dispose of these products with ordinary waste. Check the regulations in force. The logo shaped like a waste bin indicates that this product must not be disposed of with household waste in any EU country. To prevent any risk to
the environment or human health due to uncontrolled scrapping, recycle the product in a responsible manner. This will promote the sustainable use of material resources. To return your used device, use the return and collection systems, or contact the original dealer. The dealer will recycle it in accordance with regulatory provisions.

Declaration of conformity
The undersigned, Chacon, declares that the WiFi equipment references: DiOCAM-FI01, DiOCAM-RI01 and DiOCAM-RE01 are in conformance with Directive 2014/53/EU.
The complete text of the EU declaration of conformity is available at the following Internet address: www.chacon.be-support-téléchargements
There might be specific requirements concerning the installation and use of a surveillance camera in your place of residence (country, municipality, city). You are responsible for finding out about local requirements and applying them accordingly.
Avertissement
- The AC adapter must be connected inside the house and in a dry room only.
- Do not install near heat sources.
- Keep the AC adapter accessible so that it can be easily disconnected if necessary.
- If you need to clean the product, use a soft cloth.
Tip:
Any material between the product and your Wi-Fi router reduces the operating distance (mainly: reinforced concrete wall, concrete wall, metal surfaces). Take this into account when determining the positioning of your camera.