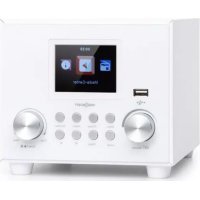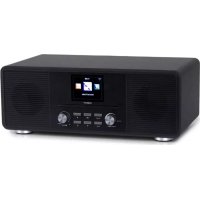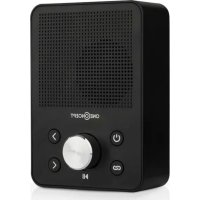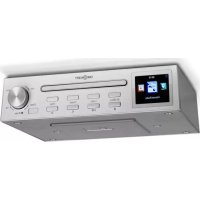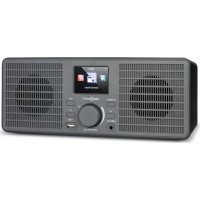
TuneUp - Alarm clock radio OneConcept - Free user manual and instructions
Find the device manual for free TuneUp OneConcept in PDF.


| Brand | OneConcept |
| Model | TuneUp |
| Category | Clock radio |
| Connectivity | Wi-Fi 802.11 b/g/n, WPS PBC |
| Wi-Fi Encryption | WEP, WPA, WPA2 (PSK), WPS |
| Max RF Power | 17 dBm (EIRP) |
| Compatible audio formats | WMA, MP3, AAC, AAC+, FLAC, WAV |
| Connectors | DC input (adapter), USB port, 3.5mm Line-Out jack |
| Power supply | Power adapter: input 100-240 V ~ 50/60 Hz, 0.2 A max; output 5 V / 1 A |
| Power consumption | 5 W (operation), < 1 W (standby) |
| Number of alarms | 3 (2 absolute alarms + 1 NAP alarm) |
| Sleep timer | 15, 30, 60, 90, 120, 150, 180 min |
| Radio favorites | Up to 250 stations |
| Display | LCD screen with brightness adjustment |
| Menu languages | French, German, English, Spanish, Italian, Dutch, Portuguese, Russian, Swedish, Norwegian, Danish, Hungarian, Czech, Slovak, Polish, Turkish, Finnish |
| Mobile app | AirMusic (available via QR code) |
| Firmware update | Via Wi-Fi (automatic notification) |
| Dimensions | Approximately 18 x 12 x 8 cm (estimated) |
| Weight | Approximately 0.5 kg (estimated) |
| Care and cleaning | Unplug before cleaning; use a soft, dry cloth; do not use liquids |
| Safety instructions | Do not expose to water, do not open, do not overload outlets, disconnect during storms |
| Spare parts and repairability | Only use manufacturer-approved parts; repairs by qualified personnel |
| General information | Item numbers: 10034902, 10034903; recycling via WEEE collection points |
Frequently Asked Questions - TuneUp OneConcept
User questions about TuneUp OneConcept
0 question about this device. Answer the ones you know or ask your own.
Ask a new question about this device
Download the instructions for your Alarm clock radio in PDF format for free! Find your manual TuneUp - OneConcept and take your electronic device back in hand. On this page are published all the documents necessary for the use of your device. TuneUp by OneConcept.
USER MANUAL TuneUp OneConcept
text_image
QR code image containing encoded data, no visible human-readable textINHALTSVERZEICHNIS
Technische Daten 4
natural_image
Symbol of a trash bin with crossed lines and a horizontal bar below (no text or numbers present)Unit 6 Riverside Business Centre
Brighton Road
Shoreham-by-Sea
BN43 6RE
United Kingdom
Congratulations on purchasing this device. Please read the following instructions carefully and follow them to prevent possible damages. We assume no liability for damage caused by disregard of the instructions and improper use. Scan the QR code to get access to the latest user manual and more product information.
text_image
QR code image containing encoded data, no visible human-readable textCONTENT
Technical Data 8
Safety Instructions 19
Product Overview 21
Installation 22
Start-up and Operation 22
Network Settings 23
USB Playback 25
Line-Out Connection 25
Settings 26
Hints on Disposal 29
Declaration of Conformity 29
TECHNICAL DATA
| Order number 10034902, 10034903 | |
| Network 802.11 b/g/n | |
| Encryption (WLAN) WEP, WPA, WPA | 2 (PSK), WPS |
| Max. transmission power 17 dBm (EIRP) | |
| Supported file types WMA, MP3 | |
| Connections | DC (power supply), USB connection, 3.5 mm line out connection |
| Power supply (power pack) 100-240 V ~ 50/60 Hz, 0.2 A max. | |
| Output power 5 V / 1 A | |
| Power consumption 5 W | |
| Power consumption (Standby) < 1 W | |
SAFETY INSTRUCTIONS
General information
- Lightning - If you are not going to use the device for a long time or if there is a storm, disconnect the plug from the electrical outlet and disconnect the device from the antenna connector. This will avoid damage to the product that may be caused by lightning or overvoltage.
- Overload - Do not overload power outlets, extension cords, or built-in power outlets, as this may result in a fire or electric shock.
- Foreign objects and liquid - Never push objects of any kind through openings in the device as they may touch dangerous voltage points or short out parts, which could result in a fire or electric shock. Never spill liquids of any kind on the device.
- Repairs and maintenance - Do not attempt to service this product yourself, as opening or removing covers will expose you to dangerous voltages or other hazards. Leave all maintenance to qualified service personnel.
- Damage requiring service - Disconnect the power plug from the outlet and consult a qualified specialist if any of the following conditions occur:
a) If the power cord or plug is damaged.
b) If liquid has been spilled or objects have fallen onto the product.
c) If the product has been exposed to rain or water.
d) If the product has been dropped or damaged.
e) If the product has a markedly reduced performance.
- Replacement parts - When replacement parts are required, make sure that the service professional who replaces the parts only uses replacement parts that have been approved by the manufacturer or that have the same characteristics as the original part. Unauthorized replacement may result in fire, electric shock or other hazards.
- Heat - Do not place the unit near heat sources such as radiators, heaters, stoves or other products (including amplifiers).
Special Instructions
- This device may be only used by children 8 years old or older and persons with limited physical, sensory and mental capabilities and / or lack of experience and knowledge, provided that they have been instructed in use of the device by a responsible person who understands the associated risks.
- Children should be supervised to ensure that they do not play with the appliance.
- Ensure children and babies do not play with plastic bags or any packaging materials.
- Mains plug/Power adaptor is used as disconnect device and it should remain readily operable during intended use.
- In order to disconnect the apparatus from the mains completely, the main plug/power adaptor should be disconnected from the mains socket outlet completely.
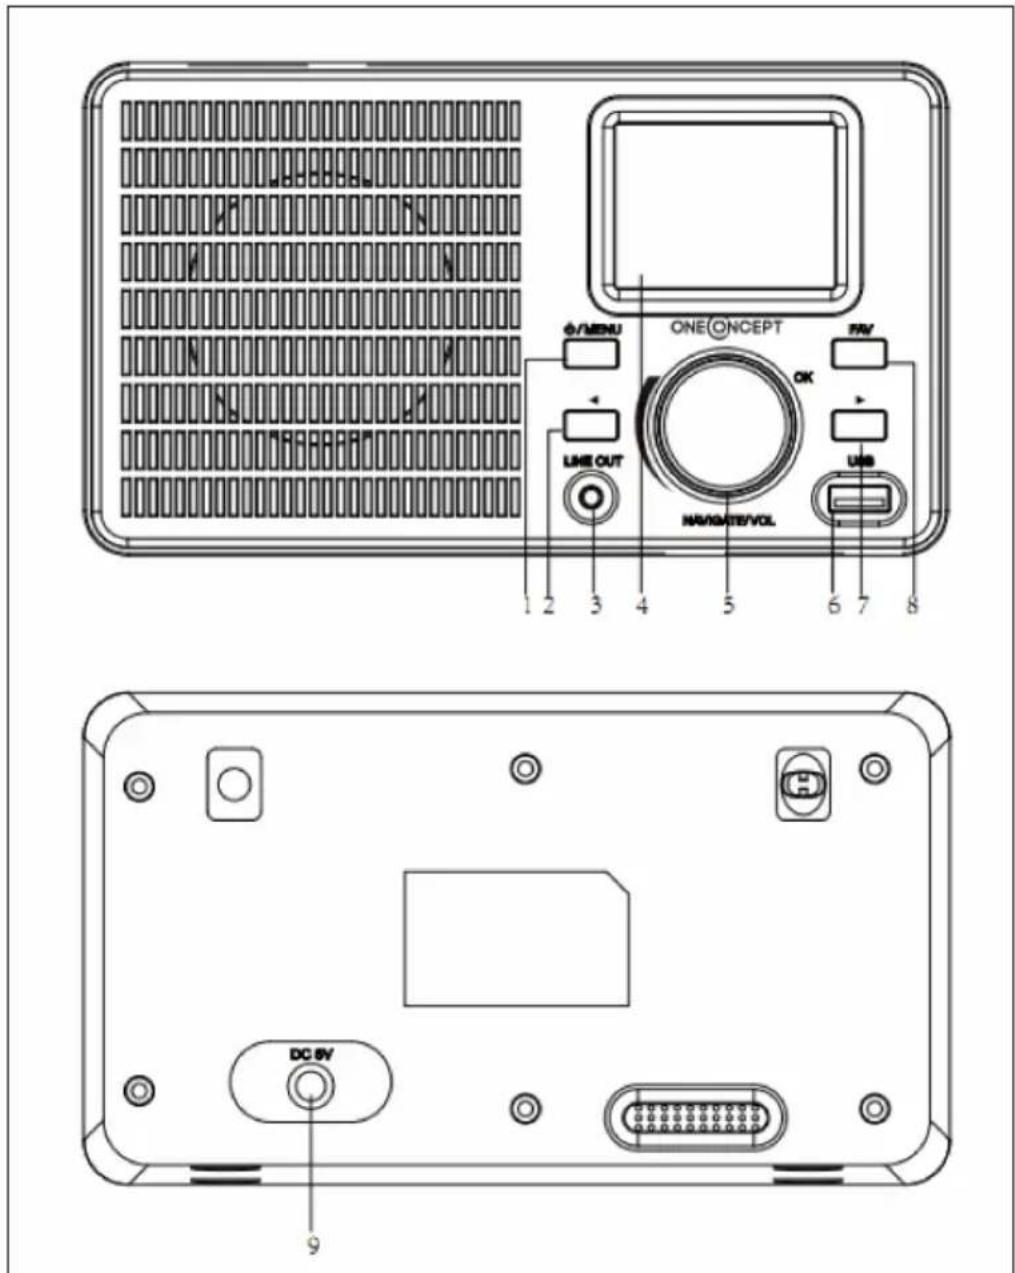
PRODUCT OVERVIEW
text_image
ONE ONCEPT FRY OK USB HANGATE/VOL LINE OUT 1 2 3 4 5 6 7 8 DC 6V 9| 1 Standby/Menu button 6 USB socket | |||
| 2 Left button 7 Right button | |||
| 3 Line-Out connection 8 Favorites button | |||
| 4 Display 9 | DC connection (power supply unit) | ||
| 5 | Navigate/Volume/Scroll(press to select) | ||
INSTALLATION
Unpack all parts of the device and remove all packing material.
Do not insert the power plug of the appliance into the power outlet until you have checked the voltage of the outlet and all connections have been made.
START-UP AND OPERATION
First use
Before use, make sure that the voltage indicated on the nameplate of the device corresponds to the voltage of the power outlet. Turn on the power using the power switch on the back of the unit. When you use the machine for the first time, it is necessary to set the language and network settings on the machine.
You can connect to the network either immediately or at a later time. Use the NAVIGATE/VOL knob to select the desired options. Press the NAVIGATE/VOL knob to confirm. If you press and hold the MENU button while the power is on, the unit will go into standby mode. If you press the button again, the unit will be turned on again.
NETWORK SETTINGS
Normal network setting
Select „Yes“ for the normal network setting: Select the AP you need with the NAVIGATE/VOL knob and confirm your selection by pressing the knob. Enter the WEP or WPA password required for the desired wireless network using the NAVIGATE/VOL knob. Press the [>] button to select the next letter/number and press the [<] button to delete incorrect entries. When you have entered the password completely, press the NAVIGATE/VOL button to confirm.
Note: The following characters can be entered on the unit:
- Numbers (from 0 - 9)
• Letters (from A (a) to Z (z)) - Special characters: DEL, @, space, !, ,, #, \$, %, &, *, ,, + and ,
WPS PBC network configuration
Select „Yes WPS“ if you want to connect to a wireless network (WPS PBC): If you are using a router with a WPS button, you can easily connect to the network using the WPS function. Open the WPS function and press the WPS button on your router within 120 seconds. Select „No“ if you do not want to connect to the network at this time.
No network setting
Select „No“ if you do not wish to establish a network connection at this time. Press and hold the MENU button to put the unit in standby mode. When the current date and time is displayed, the network connection has been successfully established. The date, time and any alarms you have set are also displayed on the screen in standby mode.
Internet radio
Put the device in standby mode and use the NAVIGATE/VOL knob in the main menu to display the various options. Press the control dial to enter the submenus or to confirm a setting. Press the [<] button to return to the previous menu. If the connection to any station is successful, the station information will be displayed on the screen. You can change the displayed information by pressing the [<] or [>] button.
My Favorites
You can save your favourite channels in a list. Up to 250 favourites, including channels and folders, can be saved. To store a station in the Favorites list, press the FAV button during station playback. If you wish, a previously saved station can be replaced with the current station. If the currently listened station has already been saved in the Favorites list, it cannot be saved again. The previously saved stations can be displayed in this menu. You can also press the FAV button to display the Favorites list. In the FAV list, select the station you want to listen to and press the NAVIGATE/VOL. button to confirm your selection.
Radio station/music
Radio stations are categorized into Global Top 20, Genre and Country/Location (Africa, Asia, Europe, Middle East, North America, Atlantic/Pacific and South America). Enter the desired location, continue with the submenu and select the station you want to listen to. You can press the NAVIGATE/VOL knob for any station on the unit to play the station directly.
Local radio stations
The stations are categorized according to the country/location where the device is used.
Alarm tones
You can choose between Birds, Lullaby, Piano, Rain, Spa, Space, Wave, White Noise, and Wave.
History
The 10 most recently listened to stations are displayed.
AirMusic App
Press the NAVIGATE/VOL button and scan the displayed QR code with your mobile device to download the app.
USB PLAYBACK
Menus are generated from the folders on the USB device. WMA/ MP3/ AAC/ AAC+/ FLAC and WAV formats are supported. FLAC supports 16 bit/ 8K \~ 48K sampling rate, 64 Kbps. Browse the folders using the NAVIGATE/ VOL.
The name of the folder and the names of the files will be displayed on the screen (not necessarily the names of the tracks). Once you have found the song you want to play back, press the NAVIGATE/VOL. knob. Note: Data transfer with a PC is not possible via the USB port of the unit.
LINE-OUT CONNECTION
You can connect the unit to external speakers via the line-out connector.
Note: The volume can then also be adjusted via the speakers.
SETTINGS
| Device The factory default name for the unit is AirMusic.You can change the name in the DLNA settings of your computer or mobile device. Use the QR code to download the AirMusic App. Information about the device and the connected network can be displayed.This information includes the MAC address. |
| Menu You can choose from "Sleep Radio" (time to auto power off), "Local Radio," "Internet Radio," "USB," "Alarm," and "Timer" and have your selection displayed on the main screen. |
| Network Wireless network setting: Enable/disable wireless network. When you enable the wireless network, the unit automatically selects the AP you need. A WEP or WPA password is required to connect the device to the wireless network. |
| Wireless network setting (WPS PBC): If you use a router with a WPS button, you can easily connect to the network using the WPS function. Open the WPS function and press the WPS button on your router within 120 seconds. The connection between the router and your device is established automatically. |
| Manual setting: You can select DHPC (with automatic IP selection) or enter the IP address manually to establish the wireless connection. If you select manual setting, the following entries must be made: SSID (name of access point), IP address, subnet mask, default gateway, preferred DNS server, alternate DNS server. |
| Network Check (Power On): Enables/disables the wireless network. When you enable the wireless network, the device automatically searches for available AP. Select the required AP. |
| Dimming Saving | energy / Switching on |
| Alarm The device | has three independent alarms. Two alarms for setting the absolute time (Alarm 1 and Alarm 2) and one alarm for setting the relative time (NAP). |
| The factory default alarm source is Internet radio. Only the same Internet radio station can be selected for Alarm 1 and Alarm 2. When the set alarm time is reached, the unit connects to the Internet if the set network is available. Depending on the availability of the network, there may therefore be a short delay of the alarm. If no network connection can be established within one minute, the alarm tone will automatically change to "Melody". | |
| The NAP alarm can be set to 5/10/20/20/30/60/60/90/120 minutes. After the set time has elapsed, the alarm tone you set will sound. | |
| Sleep timer You | can use the Sleep Timer to set the time until the unit switches off automatically. You can choose between 15, 30, 60, 90, 120, 150 and 180 minutes. Once the sleep timer is activated, the corresponding icon and the remaining minutes are displayed in the real top corner of the screen. When the time is up, the unit will automatically go into sleep mode. |
| Date and time You | You can set both 12-hour and 24-hour format. You can select from the date display YYYY/MM/DD, DD/MM/YYYY and MM/DD/YYYY. |
| Local radio settings | In Internet radio mode, you can directly access the list of local stations. You can set your location manually or activate automatic location detection. The unit then determines your location based on the IP address of your network. Press Local Station to go directly to this station list. |
| Weather You can | enable or disable weather forecasting for the standby screen. To do this, first select the temperature unit (°F or °C) and then proceed to set your location. When you have activated this setting, the standby screen alternately displays the time and the weather forecast (the display changes every 10 seconds). |
| Playback setting | Select the playback mode in the media center. You can choose from Off (no repeat or shuffle), Repeat all, Repeat one, or Shuffle. |
| Language English | German/ Español/ Français/ Portugese/Nederlands/ Italiano/ Pyccknn/ Svenska/ Norske/Dansk/ Magyar/ Cesky/ Slovensky/ Polski/ Turkce/Suomi |
| software update | If a new software version is available, your device will alert you. Before updating the software, make sure that a stable power connection is available. Unplugging the power plug from the wall outlet during the software update may damage the device. |
| Reset to factory settings | When the unit is reset to factory defaults, all settings you have made will be erased and the unit will return to the language selection. |
DISPOSAL CONSIDERATIONS
natural_image
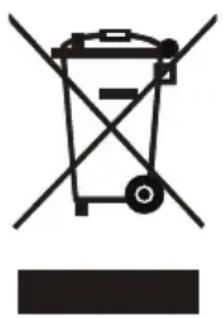
Symbol of a trash bin with crossed lines and a blank rectangular base (no text or labels)If there is a legal regulation for the disposal of electrical and electronic devices in your country, this symbol on the product or on the packaging indicates that this product must not be disposed of with household waste. Instead, it must be taken to a collection point for the recycling of electrical and electronic equipment. By disposing of it in accordance with the rules, you are protecting the environment and the health of your fellow human beings from negative consequences. For information about the recycling and disposal of this product, please contact your local authority or your household waste disposal service.
DECLARATION OF CONFORMITY

text_image
CE UK CAManufacturer:
Chal-Tec GmbH, Wallstrasse 16, 10179 Berlin, Germany.
Importer for Great Britain:
Chal-Tec UK limited Unit 6 Riverside Business Centre Brighton Road Shoreham-by-Sea BN43 6RE United Kingdom
The complete declaration of conformity of the manufacturer can be found at the following link: https://use.berlin/10034902
Estimado cliente:
text_image
QR code image containing encoded data, no visible human-readable textÍNDICE DE CONTENIDOS
Datos técnicos 32
natural_image
Symbol of a trash bin crossed with a diagonal line and a horizontal bar below (no text or labels)Unit 6 Riverside Business Centre
Brighton Road
Shoreham-by-Sea
BN43 6RE
United Kingdom
text_image
QR code image containing encoded data, no visible human-readable textSOMMAIRE
Fiche technique 46
natural_image
Symbol of a trash bin with crossed lines and a blank rectangular base (no text or labels)DÉCLARATION DE CONFORMITÉ
CE
UK
CA
Fabricant :
Chal-Tec GmbH, Wallstraße 16, 10179 Berlin, Allemagne.
Unit 6 Riverside Business Centre
Brighton Road
Shoreham-by-Sea
BN43 6RE
United Kingdom
text_image
QR code image containing encoded data, no visible human-readable textINDICE
Dati tecnici 60
natural_image
Symbol of a trash bin with crossed lines and a horizontal bar below (no text or labels)Unit 6 Riverside Business Centre
Brighton Road
Shoreham-by-Sea
BN43 6RE
United Kingdom